
Make crispy baked French fries in the oven using fresh-cut or frozen fries. High heat and simple steps make it beginner-friendly, and a rack with convection skips the flipping.
How do I bake the crispiest baked French fries—fresh or frozen?
- Keys: Bake at 425°F with convection on a rack in a single layer until deep golden and crispy.
- Frozen: Don’t thaw—bake straight from the freezer.
- Fresh-cut: Soak to remove starch, then dry very well before baking.

Summarize and save this content on:
Jump To (scroll for more)

Featured Comment by Linda:
⭐⭐⭐⭐⭐
"Dan, you da man! This is a brilliant recipe. I've made these fries four times and see no reason to use another."
❤️ Why This Method Works
- Crispy every time. High heat and good airflow make fries golden and crunchy—not limp.
- No flipping. With convection and a rack, hot air hits all sides for even browning.
- Fresh-cut or frozen. Works either way, including straight from the freezer.
- Any oven works. Convection is fastest, but a regular oven gets the same results with a little more time.
- Beginner-friendly. Simple steps and basic equipment give consistent results.
🥔 Ingredients & Options

You can use either fresh-cut or frozen fries with this method.
- Potatoes: Russet potatoes are the classic choice—starchy and crisp when baked. Peel them for best results and cut into ¼–⅜ inch fries. Yukon Golds are a good alternative with a creamier texture and don’t need peeling.
- Frozen fries: Use straight from the freezer—no thawing or soaking. Just toss with oil and bake. They may need a few extra minutes in the oven.
- Oil: A light coating of vegetable or olive oil helps the fries crisp up in the oven.
- Salt: Season before and after baking with kosher or sea salt, or use your favorite spice blend.
👨🍳 Quick Overview: How to Bake French Fries
Learn how to bake crispy oven fries—fresh or frozen—in a convection or regular oven. Use a rack for airflow—convection makes them crisp with no flipping.
1. Preheat the oven and prep the tray
✅ Pro Tip: Always fully preheat your oven before baking. Starting cold means steam, not crisp.
Preheat to 425° convection. Line a baking sheet with a rack and coat with cooking spray.

✅ Pro Tip: No rack? Use parchment paper, but flip halfway through baking.
2. Prep fresh-cut fries (skip for frozen)
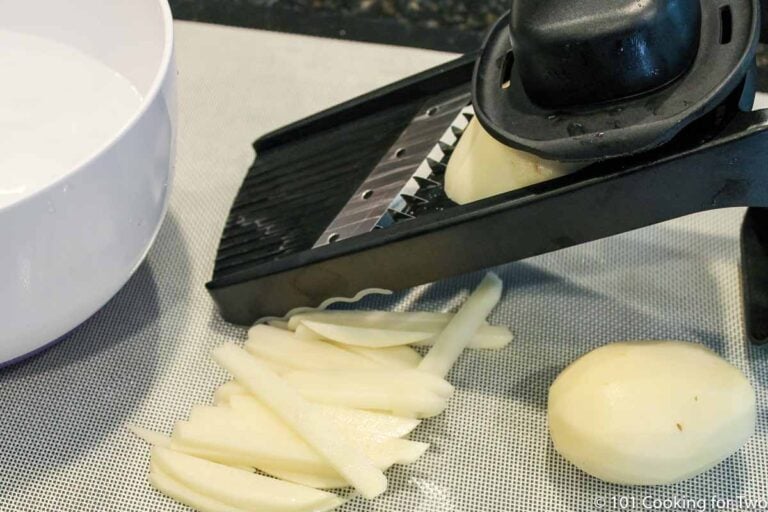
Scrub the potatoes. If using Russets, peel first. Cut into ¼ to ⅜ inch fries.
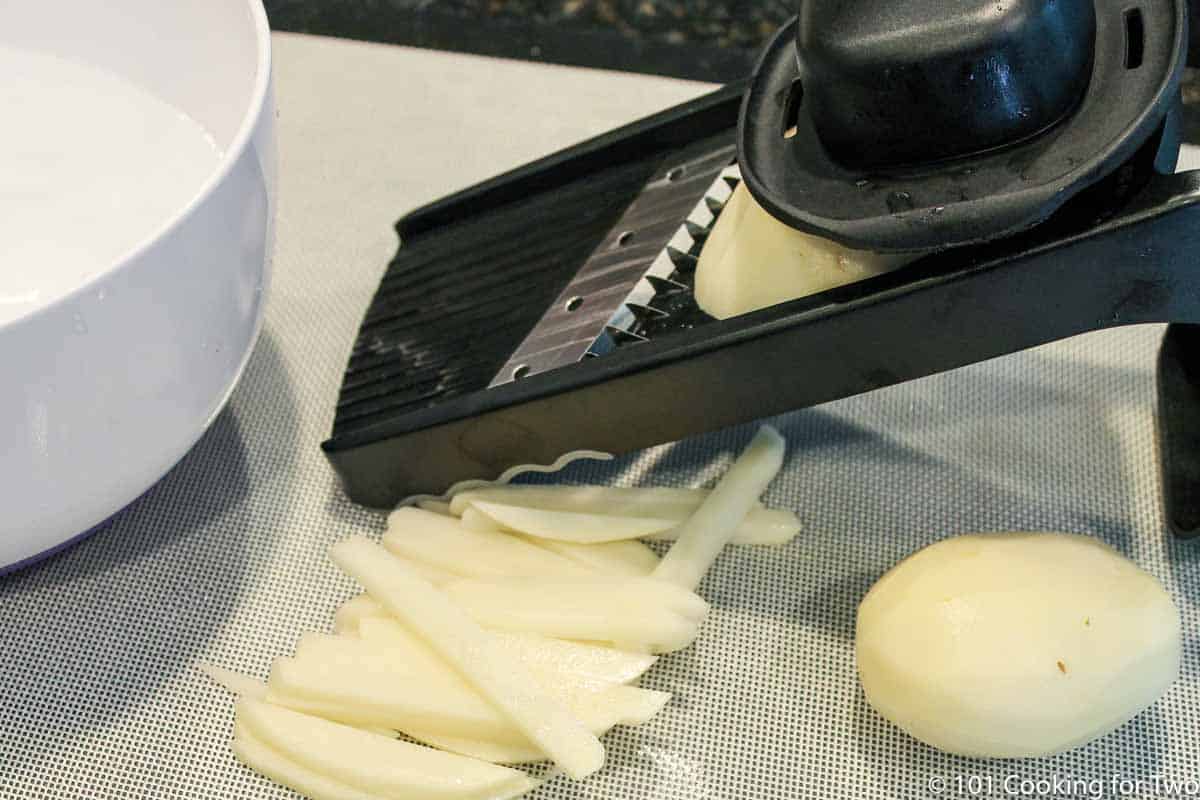
✅ Pro Tip: Use a mandoline for consistent cuts, but follow safety instructions carefully.
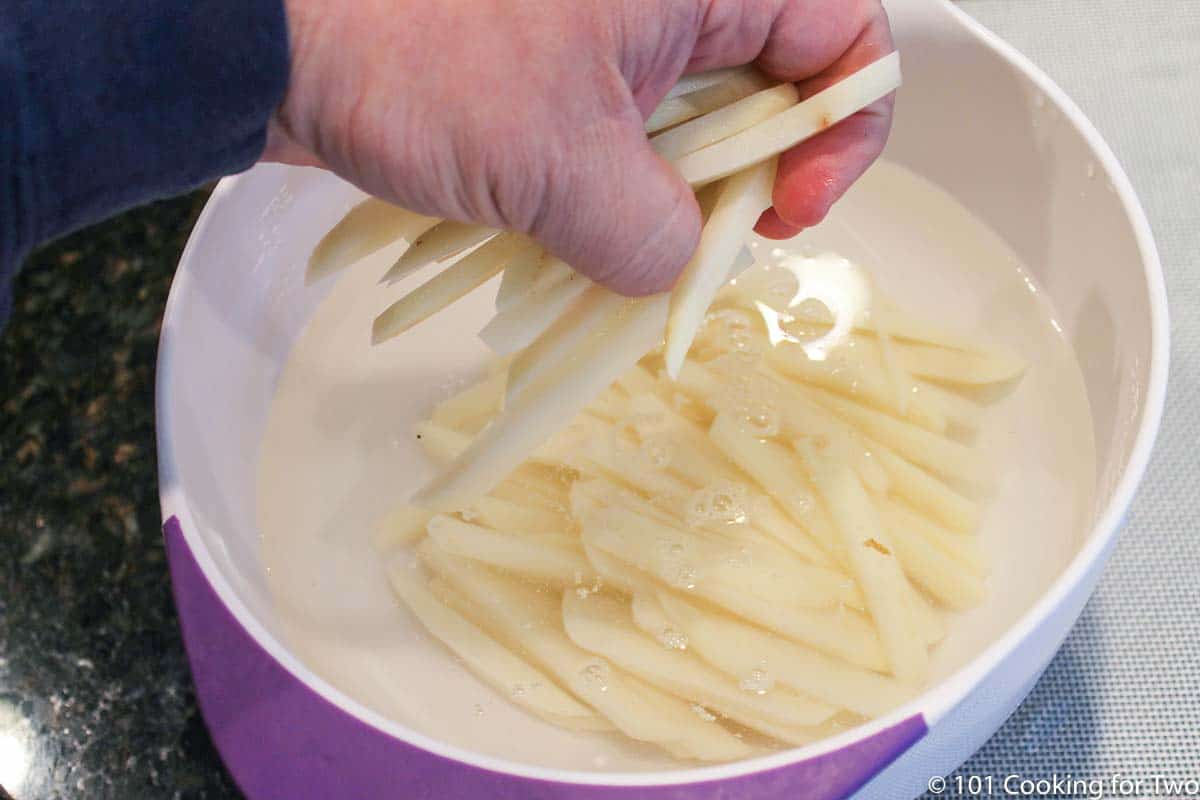
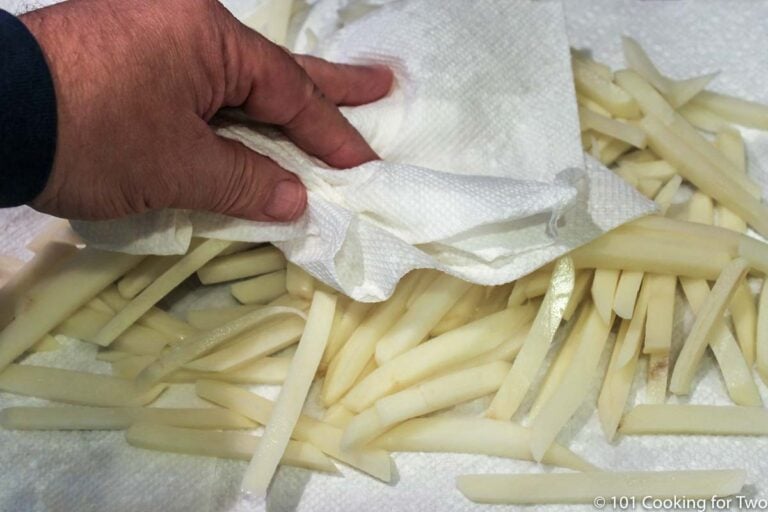
Soak in cold water for 20–30 minutes to remove excess starch, then rinse and dry thoroughly with paper towels.
3. Coat with oil
Start here for frozen fries. Do not thaw.
Coat the fries (fresh or frozen) with a light coating of oil.

✅ Pro Tip: For crispy frozen French fries in the oven, they MUST go quickly from the freezer to the oven—don’t thaw.
4. Spread and season
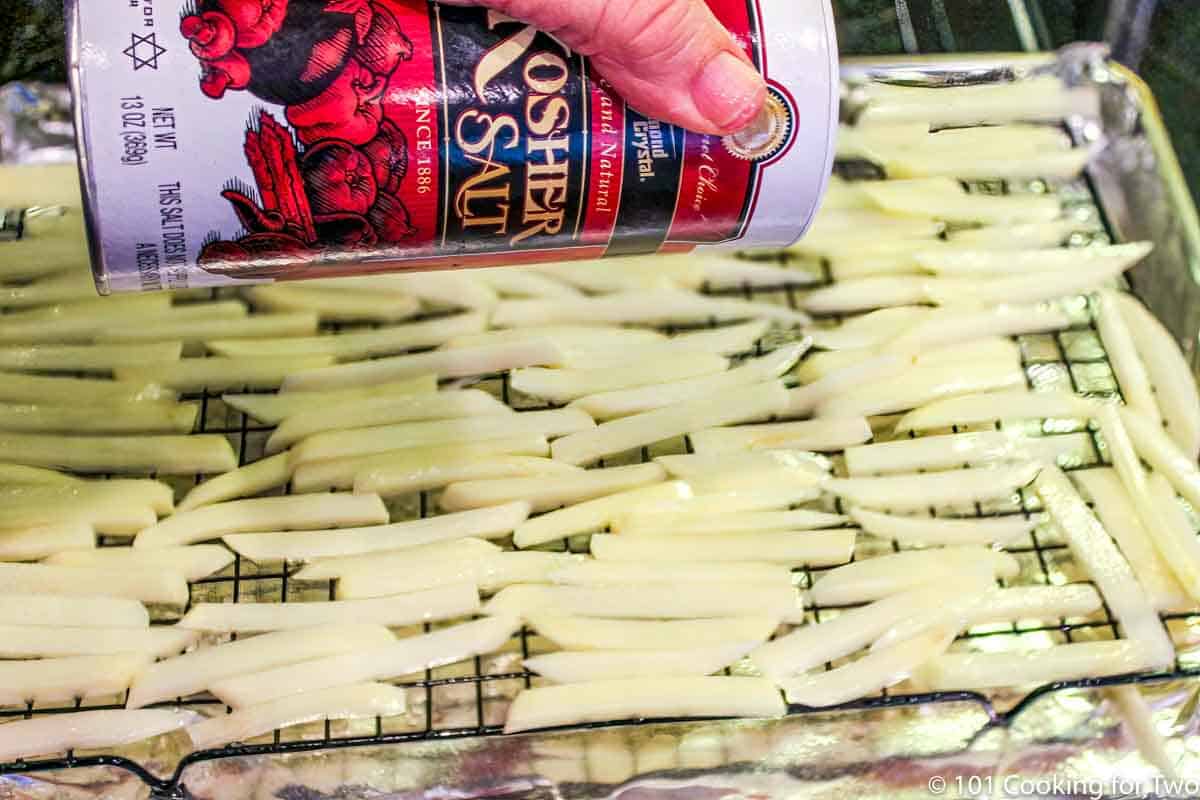
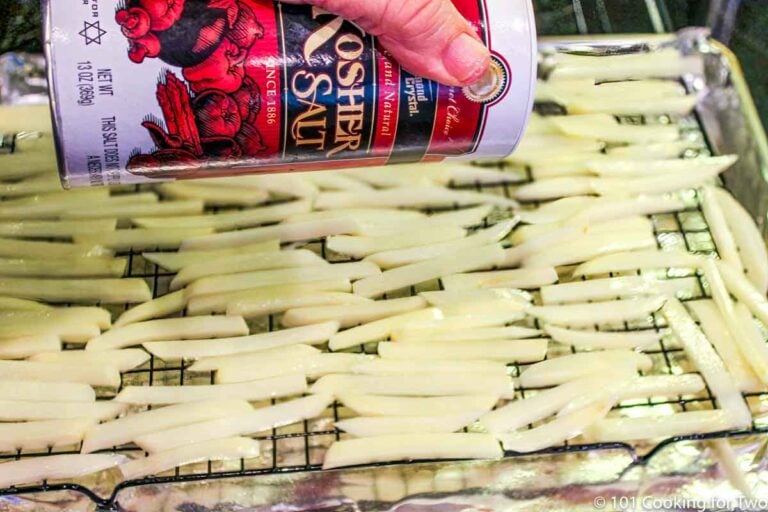
Arrange fries on the rack in a single layer. They can touch a little, but don’t overlap. Sprinkle with coarse salt.
5. Bake until crispy
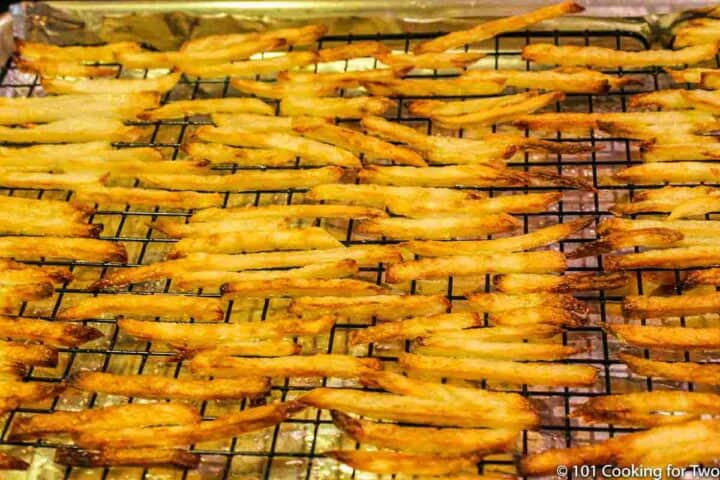
Bake at 425° convection until golden brown—about 30 minutes. Season again while hot.
✅ Pro Tip: Frozen fries will take a few minutes longer. Thicker fries may also need more time—bake until deep golden and crisp.
👇 Scroll down for the printable recipe card and complete step-by-step photo instructions—or keep reading for tips.
🌡️ Oven Temperature and Baking Time
For best results, bake at 425°F—convection is ideal, but a regular oven also works with slightly longer time.
Baking time is about 30 minutes for standard ¼–⅜ inch fries, but it may vary based on your oven and fry thickness. Frozen fries may need a few extra minutes, depending on thickness.
Save this recipe!
👍 Setup Tips for the Crispiest Fries
- Always preheat fully — convection if you have it.
- Use a rack on a baking sheet, coated with cooking spray.
- Spread fries in a single layer so air can circulate.
- With convection + rack, no flipping is needed.
- In a regular oven, a single flip may help even crisping.
🥔 Potatoes Prep Tips
- Don’t thaw frozen fries. Bake straight from the freezer until deep golden brown for the best crunch.
- Russets = crispest fries; Yukon Golds = creamier, less peeling.
- Soak fresh-cut fries 20–30 minutes to remove starch, then dry thoroughly.
- Cut evenly into ¼–⅜-inch sticks; too thin = burn, too thick = limp.
- Skip sweet potatoes — they need a different method.
🧂 Seasoning Ideas
A light sprinkle of salt is all you really need—but feel free to get creative.
- Before baking: After oiling, lightly sprinkle with kosher or sea salt. Table salt works too (even if it feels a little retro).
- After baking: Add more salt if needed, or finish with grated Parmesan, chopped herbs like parsley or chives, or a pinch of spice.
- Flavor options: Try paprika, garlic powder, chili powder, cayenne, Cajun seasoning, or ranch dressing mix.
✅ Pro Tip: Add cheese and herbs right after baking, while the fries are still hot.
🔁 How to Reheat French Fries
Microwaving may seem quick, but it turns fries soft and mushy—not crisp. You worked hard for that crunch—don’t lose it on the reheat.
- Air Fryer (Best): 375°F for 3–5 minutes until hot and crispy. Great for small batches.
- Oven Method (Best for more):
Preheat to 400°F with a baking tray inside. Once hot, spread fries in a single layer and bake for 5–8 minutes.
Pro Tip: Use a rack if you have one—it helps restore the crisp.
Avoid foil wraps or containers—they trap steam and take your fries straight back to limp.
❄️ Storage
Leftover fries can be refrigerated in an airtight container for up to 3 days. For best results, reheat using one of the methods above.
❓ FAQs
Yes. The rack lifts the fries so hot air can circulate and crisp all sides. Without it, you’ll need to flip halfway and may still get uneven results.
Fries need space to crisp. If they overlap, they’ll steam instead of brown. It’s fine if they touch slightly, but don’t stack them.
Not if you want them crispy. Soaking removes surface starch. If you skip it, fresh-cut fries may turn out soft or gummy.
Not with this method. Sweet potatoes need a different approach to crisp up in the oven.
For crispy frozen French fries in the oven, they MUST go straight from the freezer to the rack—don’t thaw.
📖 Crispy Potato Recipes
- Easiest Homemade French Fries — Stovetop version starting with cold oil
- Grilled French Fries —A smoky twist for your grilling meals
- Crispy Home Fries — Perfect for breakfast or as a dinner side
- Crispy Smashed Potatoes — So easy, so good, and fun to make
- Oven Roasted Red Potatoes — A classic, reliable side for any meal
📖The Recipe Card
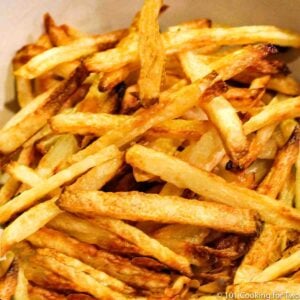
Crispy Baked French Fries – Fresh or Frozen
Ingredients
- 2 russet potatoes - about 1 pound
- 1 pound frozen French fries (as a substitute for fresh-cut)
- 1 teaspoon coarse salt - to taste
- 1 tablespoon oil
Step-by-Step Instructions
Preheat the oven and prep the tray
- Preheat oven to 425° convection.

- Line a baking sheet with foil and place a rack on top. Spray the rack with PAM cooking spray.

Prep fresh-cut fries (skip for frozen)
- Scrub the potatoes. If using Russets, peel first. Cut into ¼–⅜ inch fries. A mandoline works well—just follow safety directions.
- Soak in cold water for 20–30 minutes to remove surface starch.

- Rinse several times, then dry thoroughly with paper towels.
Coat with oil—Start here if using frozen fries (do not thaw)
- Dry the bowl, return the fries, and toss with 1 tablespoon of oil.

Spread and season
- Arrange fries on the prepared rack in a single layer. They can touch slightly, but don’t overlap. Sprinkle lightly with coarse salt.
Bake until crispy
- Bake for about 30 minutes or until golden brown and crisp. Season again while hot.

Recipe Notes
Pro Tips
- Easy to cut in half or double.
- Russet or Yukon Gold potatoes are preferred. Avoid sweet potatoes—this method doesn’t work well with them.
- Frozen fries? Start at the oiling step. Do not thaw. They may take a few extra minutes.
- Oil is required for crispy fries.
- Seasoning options are listed in the post.
- Fries can touch slightly, but don’t overlap.
- If you don’t use a rack and convection, flip halfway through and expect slightly softer results.
- Two large potatoes will fill a half sheet pan (18x13) and serve four.
Your Own Private Notes
To adjust the recipe size:
You can adjust the number of servings above; however, only the amount in the ingredient list is adjusted, not the instructions.
Nutrition Estimate (may vary)
Editors Note: Originally Published: September 23, 2012. Updated with expanded options, refreshed photos, and a table of contents to help navigation.


David says
This recipe is dead on. Crispy fries forget the others recipes do you really want to turn over fries when you don’t have to.
DrDan says
Hi David,
Welcome to the blog.
It is amazing how much a rack helps. Sometimes I think people don't think the rack matters. It does.
Thanks for the note.
Dan
Edward J Healy says
Worked great. I added 1/4 tsp garlic power & the family thought they were great.
Julie says
Finally healthy french fries!
Jerry says
Dream on. Starch, salt, and oil..... not so healthy
Corinne says
Hi! Made these tonight and they were great! Hand cut thin, soaked, dried, tossed with a little oil and st, convection baked on rack. Thanks for the recipe!
Linda says
Will this recipe work with sweet potatoes?
DrDan says
Probably, it should be about the same but maybe a bit faster. I have never done it so please check Google for some other recipes.
Dan
Neily says
Hey DrDan! I'm writing my monthly e-letter for my subscribers and was looking for a great baked fry recipe to link and came across your site. Being a registered dietitian nutritionist I never link to anyone unless I vet them well. (You passed :))
Can I just say....you're awesome! I wanted to write this comment in a more general area of your site but could not find the place, so here it is. If there's a better place, I'd be happy to put it there. Here is why I'm an immediate fan:
1) you're a retired pediatrician and love dogs and include them in your posts (I have not read enough to know if they are rescues, but if they are well, then you just hung the moon.)
2) In your $Business area you note: "If your site contains: health information of the non-traditional type, alternative medicine, or non-evidence base recommendations OR any of the popular non-scientific BS popular on the internet regarding nutrition and health, then you do not have permission to use any of my material ever. Go away. I do not want to deal with you and do not want to be associated with you." LOVE that!
3) You give away info for free - you don't have affiliate links, etc. Yes you have ads, not crazy about them but I get it. This is more than your hobby.
4) You are upfront about disclosure and transparent - that is so important (and missing in a lot of bloggers...perhaps something to add in your update on how to start a blog...)
Keep up the terrific work! -Neily
DrDan says
Hi Neily,
Welcome to the blog. It really was my hobby but it grew out of control.
Molly and Lilly are English Goldens (not rescues) and were "paid for" by Martha Stewart when I had my first good ad month, mostly from Martha. (Molly and Lilly say HI by the way)
There are a few affiliate links. There is the shop area but only a few in posts where I feel they will be helpful to the discussion. All are well-labeled.
Stick me on your email list if you can. I would be interested.
Thanks for the note.
Dan
Anne says
Maybe using convection makes all the difference here? I baked mine at 450 for about 25-30 minutes and they were golden-spotted on top and white on the underside. I think I will stick to putting them directly on a sheet, which crisps them up more. Thanks anyway.
Janice Christian says
I used a convection bake and mine came out the same way (spotted not browning) plus took about twice as long to get any reasonable amount of brown on this much less crispy.
Kathy says
I am making these tonight....I have soaked before but never used a rack so I am excited to see how they turn out
Thanks so much
Carole Knipfing says
Delicious, but as a culinary teacher at a middle school...they had delicious flavor, but took 43 minutes vs. 30.
Audrey says
These fries look yummy. But why do they need to be soaked?
DrDan says
Hi Audrey,
Yep, soaked 15-20 minutes then dried. (#2)
Dan
Reply #2... I misread your comment. The soaking removes starch which is the enemy of crispy. Likewise, the drying is important.
Sorry about that.
Dan
Allison says
Thanks for the recipe. The fries were crispy on the outside and creamy on the inside. perfect! It may be my oven, but I had to cook them for 45 minutes and I needed to rotate the tray once.
Lucy says
I made these as instructed in a conventional oven. Sliced them thin with a regular knife.
Most I baked on a rack but I had extras and I didn't want to crowd them so these I baked on a regular cookie sheet lined with aluminum foil. I stirred the ones on the cookie sheet after 20 minutes to prevent them sticking to the bottom. They were all crispy and perfect. I think the trick was not letting them touch each other so they didn't steam. I will be making these often! Lucy
DrDan says
I like the rack so I don't need to flip. It is hard not to let them touch with the flip.
Thanks for the note.
Dan
MarySue says
Made fries last night and my husband said they were delicious. I baked them in a regular oven at 450 for 20 mins on my Pampered Chef bar pan, (I didn't have a rack) turning them once and they were perfect. This recipe will be my go to for french fries.
DrDan says
Thanks for the note
The rack makes it so you don't need flip if you use convection. I would flip if no rack or no convection.
It is so nice not to have to fry something.
Dan
Georgette C. says
Wow!!! Really awesome and easy! Thank you for sharing this recipe. I am using it now and can't wait to taste them.
DrDan says
Thanks for the note. The rack makes all the difference.
Dan
Sparks8 says
Love this procedure.. As for the spicing.....ain't nuthin' better than a good EVOO
coating and a dusting of Montreal Steak Seasoning (to taste).
John E. May says
These are the most incredible french fries I have ever made! I make them often. My question is you say you use a
'mandolin' but when I look it up it states a musical instrument. I am I using the right word?
DrDan says
Hi John,
Thanks for the note. It should be mandoline not mandolin. I missed the "e". Fixed.
Dan