
Microwave corn on the cob in the husk for the fastest, cleanest way to cook sweet corn—tender, hot, and ready in minutes.
With minimal prep and simple tips, you’ll get foolproof results every time—including how to pick the best corn and cook up to 4 ears easily.
⏱️ Quick Answer: How Long to Microwave Corn on the Cob in the Husk
- Leave the husk on but trim loose silk.
- Microwave corn in the husk for about 4 minutes per ear.
- 2 ears = about 8 minutes, and so on.
- If cooking more than 4 ears, work in batches.
Jump To (scroll for more)

Featured Comment by Barbara:
⭐⭐⭐⭐⭐
"Wow! I've never even thought about microwaving my corn on the cob, but now that I know better, I'll never have to boil a big pot of water on a hot summer day!"
👍 TL;DR — Recipe Summary
What it is: A quick microwave method for cooking corn on the cob right in the husk—no boiling or shucking needed.
Why you’ll love it: A quick microwave method for cooking up to 4 ears of corn on the cob right in the husk—no shucking needed.
How to make it: Trim loose silk, microwave in the husk, then squeeze the cooked corn out hot and ready to serve.
👨🍳Quick Overview: Corn on the Cob in the Microwave
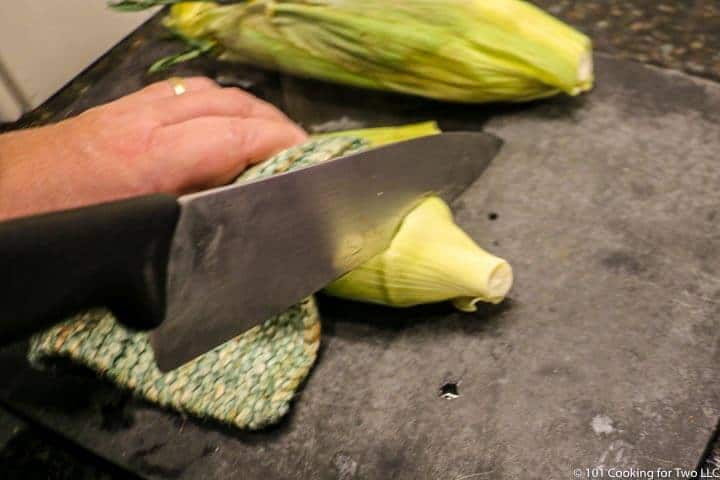
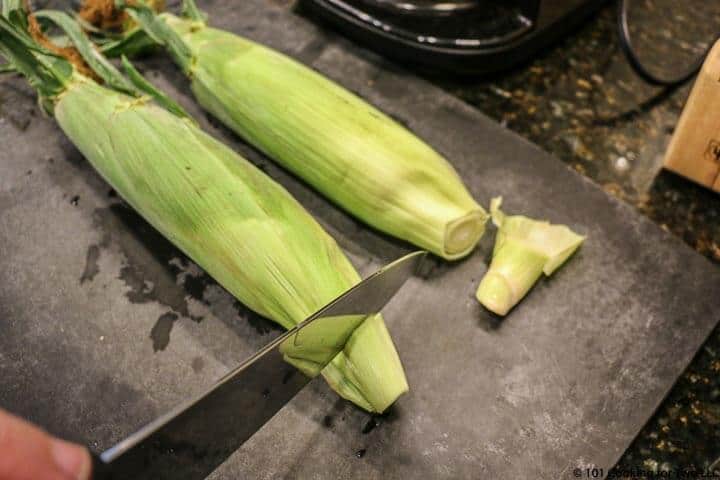
1. Prepare the corn
Trim back most of the stalk, then remove most of the silk and loose husk. Don’t expose the kernels—you want the corn fully wrapped, just neater.
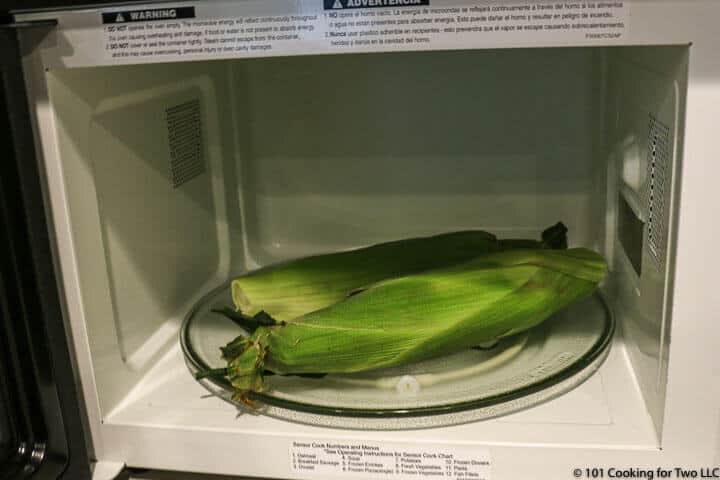
2. Microwave on high
Cook for 4 minutes per ear (8 minutes for 2 ears, and so on).
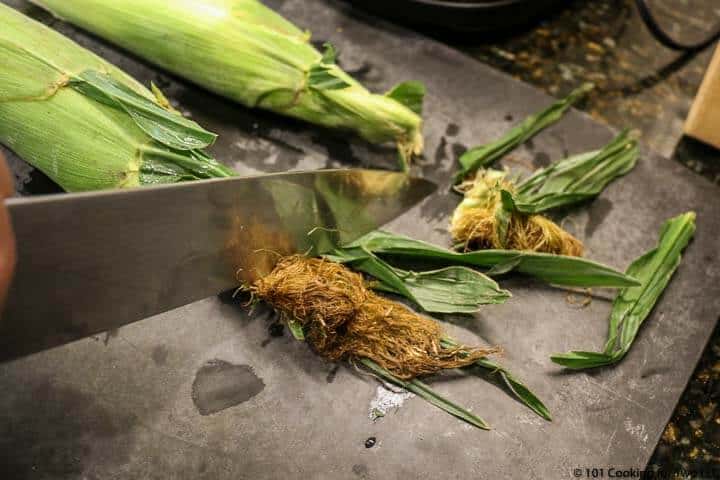
3. Cut and loosen the husk
With a sharp chef’s knife, slice off the bottom of the ear, cutting through a few rows of kernels.
Slide the knife between the corn and the husk and cut two slits about 3 to 4 inches long on opposite sides of the ear.

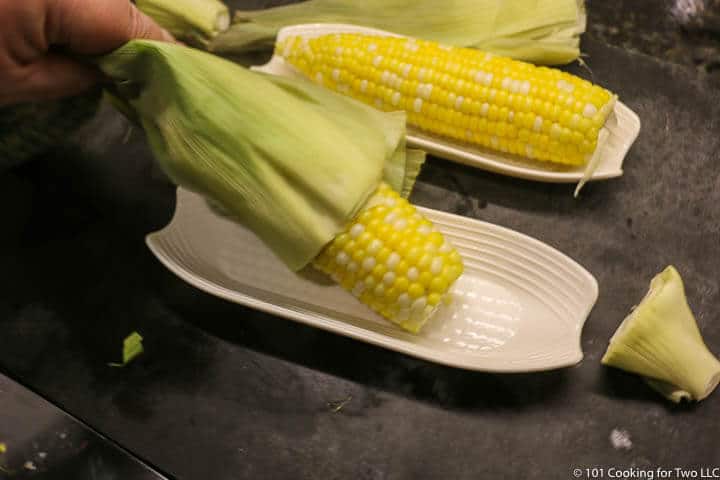
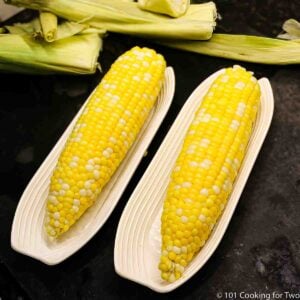
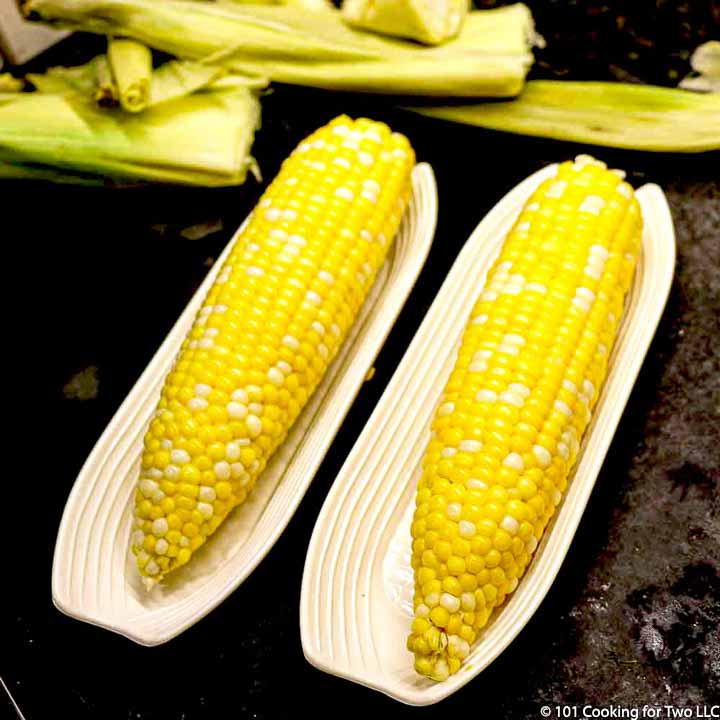
4. Squeeze and serve
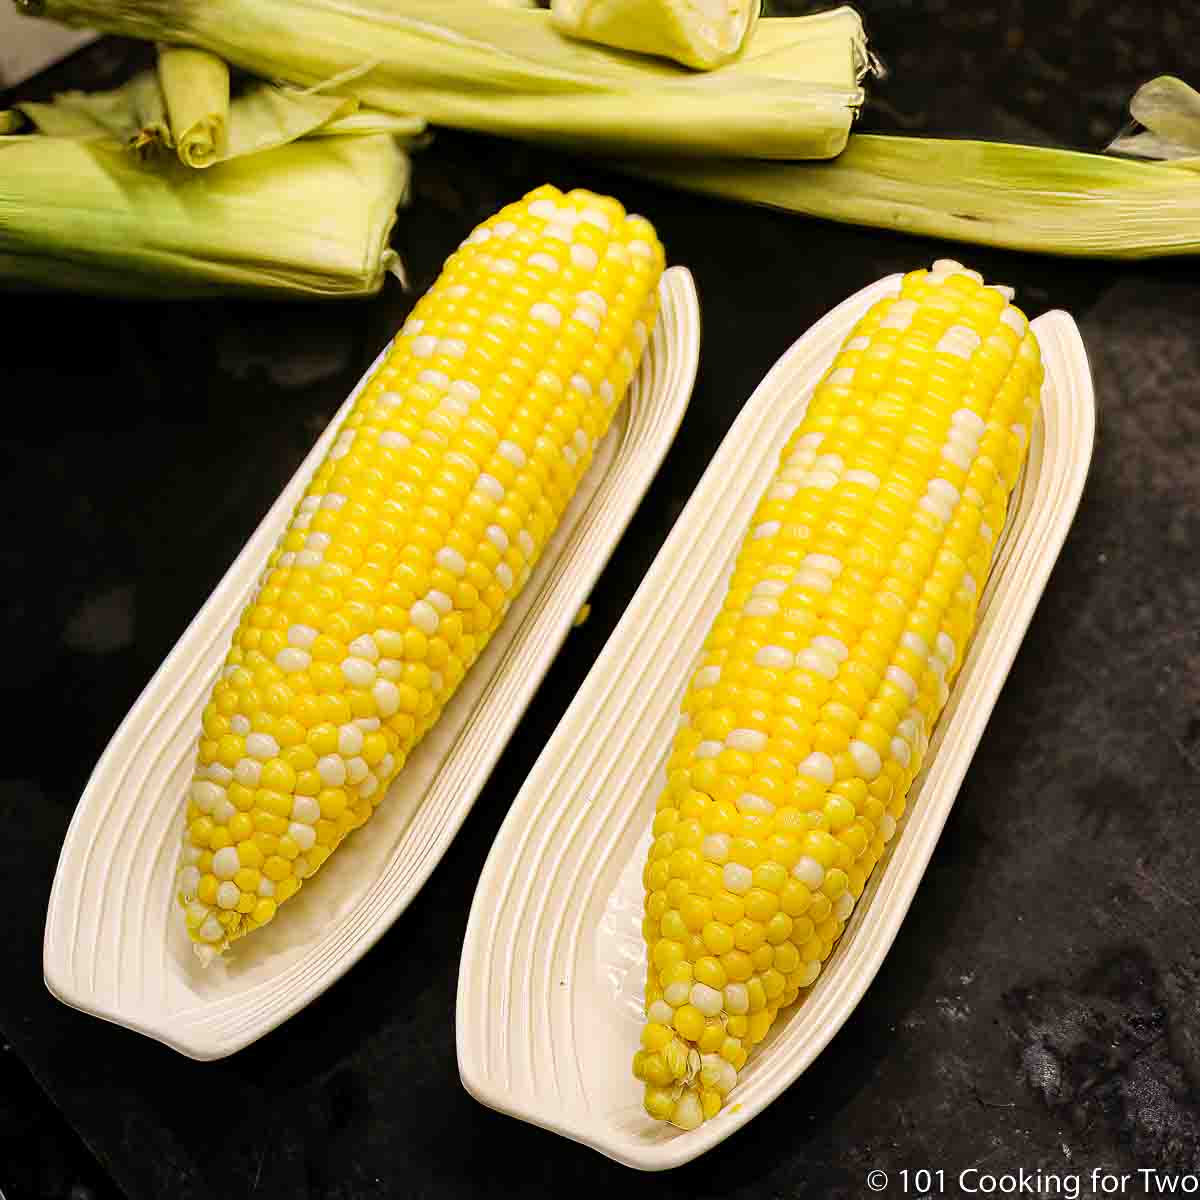
Hold the top and squeeze the corn out. The husk and silk will stay behind. Serve hot with butter, salt, and pepper to taste.
👇For complete step-by-step instructions, scroll down to the printable recipe card or keep reading for tips and serving ideas.
⏲️ How Long to Microwave Corn on the Cob in the Husk
Microwave corn on the cob in the husk for 4 minutes per ear. That’s it—easy to scale:
- 1 ear = 4 minutes
- 2 ears = 8 minutes
- 3 ears = 12 minutes
- 4 ears = 16 minutes
If you’re cooking more than 4 ears, do them in batches for the best results.
✅ Pro Tip: Microwave strength varies. If your corn isn’t steaming hot or doesn’t squeeze out easily, add 30–60 seconds more.
Save this recipe!
🌽 How to Pick the Best Corn (Without Peeking)
Want the sweetest, juiciest corn? It starts at the store—or the market. Here's how to choose the best ear without pulling back the husk.
✅ Pro Tip: Don’t peek under the husk. It may seem harmless, but it dries out the corn quickly. And if you don’t buy it, you’ve just damaged someone else’s property—and their dinner. Trust your hands and eyes instead for the best information.
Here’s what to look for:
- The tassel (that silky top) should be brown and slightly sticky—not black or dry.
- The husk should be bright green, tightly wrapped, and feel moist—not wilted or yellowing.
- Check for wormholes—tiny brown holes near the top. If you see one, keep moving.
- Feel for fullness—the kernels should be even and plump under the husk.
🛒 Freshness matters: The best corn comes from a garden or farm stand. Farmers' markets beat supermarkets most days.
✅ Pro Tip: Don’t buy too far ahead. The longer corn sits, the more it deteriorates. Store at room temperature for a day, or refrigerate for a few days to preserve the sweetness.
👨🍳 Other Easy Ways to Cook Corn on the Cob
🔸 Oven-Roasted Corn (in the husk)
- Prep the corn like you would for the microwave—trim loose husk and silk, but don’t peel.
- Place directly on the oven rack at 350°F.
- Roast for 30 minutes, leaving space between ears.
🔸 Boiled Corn (classic method)
- Remove the husk and silks.
- Drop into boiling water—no salt, or the kernels may toughen.
- Cover the pot, return to a boil, and cook for 3–5 minutes until tender.
🔸 Grilled Corn
Check out my full guide to Grilled Corn on the Cob for the details.
There are plenty of other ways to cook corn, but these three are simple, reliable, and work with whatever gear you already have.
🍽️ What to Serve With Microwave Corn
This quick corn is the perfect side for summer meals—especially anything off the grill. Pair it with grilled burgers, grilled chicken, or grilled drumsticks, and you’re set.
Want more easy sides? Try a Spinach Salad or Broccoli Salad. And if you’re in the mood for dessert, Fresh Strawberry Pie or Grilled Pineapple hits the spot.
❓FAQs
Yes. If your corn is already husked, wrap each ear in a damp paper towel to keep it from drying out, then microwave about 3–4 minutes per ear.
Not recommended. Most microwaves handle 1 to 4 ears evenly—more than that and you’ll get uneven cooking. Work in batches and wrap the cooked corn in a towel to keep warm.
Or try the oven method instead: it’s great for larger batches and keeps everything hot without the juggling.
Yep. Let it cool, then refrigerate in an airtight container for up to 3 days. Reheat in the microwave wrapped in a damp paper towel for 30–60 seconds.
📖The Recipe Card
Microwave Corn on the Cob in the Husk (Easy, No Shucking Needed)
Ingredients
- 1–4 ears Corn on the cob - unhusked
- Salt and pepper to taste
- Butter
Step-by-Step Instructions
Prepare the corn
- Start with 1 to 4 ears. Trim back the stalk—not too much, just enough to clean it up while keeping the husk intact.

- Trim off most of the silk and loose outer husk at the top, but keep the corn husk intact.
Microwave on high
- Place the ears in a single layer in the microwave. Cook on high for 4 minutes per ear (2 ears = 8 minutes, etc.).
Cut and loosen the husk
- Carefully remove with a hot pad. Using a sharp chef’s knife, cut off the bottom of the ear, including a row or two of kernels, to fully detach the husk. The husk must not have any attachment left to the bottom of the ear of corn.
- Slide the knife between the ear of corn and the husk and cut two slits opposite each other through the husk 3 inches long.
Squeeze and serve
- Squeeze the corn out of the husk. The silk will stay with the husk.
- Serve hot with salt, pepper, and butter to taste.

Recipe Notes
Pro Tips
- This technique is good for 1-4 ears of corn. If you need more, you can batch-cook them or use the oven.
- Calculate the time at 4 minutes per ear. So one ear is 4 minutes, and 3 ears would be 12 minutes.
- Use a microwave with a turntable and do not stack the ears.
- Use hot pads to handle the hot corn.
- Fresh corn can be stored at room temperature for a day or refrigerated for several days.
- The key to silk-free corn is: cut far enough into the base and make long side slits.
- The silk will come off with the husk.
Your Own Private Notes
To adjust the recipe size:
You can adjust the number of servings above; however, only the amount in the ingredient list is adjusted, not the instructions.
Nutrition Estimate (may vary)
Editor's Note: Originally published July 19, 2012. A guide to picking the best corn has been added and updated with expanded options, refreshed photos, and a table of contents to help navigation.


Elizabeth E Lijewski says
I find it very helpful to prepare corn as directed in your instructions, but soak them in water until I'm ready to cook them. Also, I cover the corn in microwave with a wet couple paper towels, and flip the corn end to end and turn over (despite the turntable operating) at the halfway point. I can usually cook three ears of corn in 7 minutes - rotating at the halfway point*. Recently I had a large party and halved each ear after cooking and placed in a crockpot on end to keep warm. My guests were very impressed with the delicious corn on the cob that stayed warm and moist for hours!
There were ZERO leftovers!
8My microwave is 950 watts
Barbara Skinner says
Wow! I've never even thought about microwaving my corn on the cob, but now that I know better I'll never have to boil a big pot of water on a hot summer day! Thank you!
KJill says
Have been cooking corn this way for a few years. Great corn flavor when cooking right in the husk, silk comes right off - so much easier than shucking first. Glad to see this here as this is really a great way to do a few ears of corn and it seems so few people know about it.
Dan Mikesell AKA DrDan says
Hi KJill
It is surprising that this is relatively unknown. I have been doing it for years. I think people remember boiling or something from childhood and just do that. But for a small amount this is great.
Thanks for the note and rating.
Dan
Dave says
I was born and raised in Norther VA. My Father grew up on a farm in Northern Iowa, which we visited for our family vacation every so often. I loved going out to the farm. Pigs, cows and some of the sweetest, tallest corn you've ever seen. One afternoon for "Supper", as a youngster I vividly remember watching my Uncle cook some sweet corn in the microwave. I was so surprised by that.. on the farm no less, where cooking was so traditional. He wrapped the ears in plastic wrap to cook them, which I have been doing for years. I just wanted to say your method is so much more appealing and delivers better results. In any event the MW is way to go. PS. I'm into cooking and keep an eye on lots of sites. Your site is top notch and I have taken advantage of several of your recipes which were all very good. Thanks for the quality content.
Dan Mikesell AKA DrDan says
Hi Dave,
Welcome to the blog.
This is much easier than dealing with the husking first. The taste is just right on.
Thanks for flowing the blog and glad you are enjoying it.
Thanks for the note and rating.
Dan
Knitty says
A friend recently did the MW version and now swears by it. I haven't tried it yet but will do it soon. She also gave me a recipe for a corn salad, but it calls for grilled corn. Another one I haven't tried yet but she assures me it is a tried and true crowd pleaser.
Chris says
I'm glad you gave the source of the cob holders, Alexis wanted them as soon as she saw them.