
The easiest BBQ pulled pork with crispy bark is made in your oven, not a smoker. This simple low-and-slow oven method turns pork butt (Boston butt) into tender, fall-apart pulled pork with great flavor and surprisingly little work.
⏱️ Quick Answer: How long to cook pork butt in the oven?
- A 4–5 pound pork butt takes about 8–10 hours in a 250°F oven.
- Cook to 200°–205°F internal temperature for tender pulled pork.
- Bone-in may take slightly longer.
- See the How Long to Cook section for other sizes and temperatures.
Jump To (scroll for more)
- 🐖 TL;DR — Oven Pulled Pork from Pork Butt
- 🐖 Ingredients for Oven Pulled Pork
- 👨🍳 Quick Overview: How to Cook Pork Butt in the Oven
- ⏰ How Long to Cook Pork Butt in the Oven
- 🌡️ When is Pork Butt Done?
- ❓ FAQs
- 🍽️ How to Serve BBQ Pulled Pork
- 🧊 Storing Pulled Pork
- 🔥 How to Reheat Pulled Pork (Crock Pot or Oven)
- 👍 More Pulled Pork Recipes
- 📖The Recipe Card

Featured Comment by Lisa B :
⭐⭐⭐⭐⭐
"I was beyond amazed at the end product of this recipe. The cooking method is foolproof. People thought the pork was cooked on a smoker or grill. It was perfectly moist but with the crunchy texture of the bark mixed in. So easy! Outstanding results."
🐖 TL;DR — Oven Pulled Pork from Pork Butt
What it is: Low-and-slow pork butt cooked in the oven until juicy, fall-apart tender, with crispy bark and BBQ flavor.
Why you’ll love it: No smoker needed. Easy prep, reliable results, and great pulled pork for sandwiches, tacos, or meal prep.
How to make it: Season pork butt with dry rub, cook low and slow in a 250°F oven until 200°–205°F internal temperature, rest well, then shred.
Jump to the Recipe Card or continue reading for step-by-step instructions, timing, and tips.
👨🍳 DrDan says: I’m not about babysitting a grill or smoker all day. This method gives me great pulled pork with bark and flavor—without the hassle. Just rub it, stick it in the oven at 250°, and it comes out perfect every time.
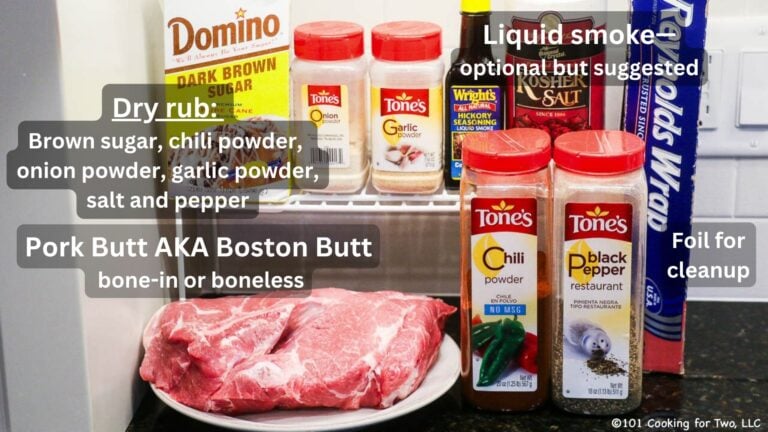
🐖 Ingredients for Oven Pulled Pork

Pork Butt (aka Boston Butt):
This is the upper part of the shoulder and the best cut for pulled pork. Bone-in or boneless both work—bone-in gives better bark and avoids the netting issue with boneless.
🔍 Also called pork shoulder: Many stores and recipes use the term "pork shoulder" for this same cut, even though technically it's just part of the whole shoulder. If your label says pork butt, Boston butt, or pork shoulder, you're in the right place.
✅ Pro Tip: Remove the net. Boneless pork butt often comes in a net. It will tear off your bark—remove it before cooking, or go bone-in to skip the hassle.
Dry Rub:
Use your favorite BBQ rub or the simple homemade version in the recipe card—brown sugar, kosher salt, chili powder, garlic powder, onion powder, and black pepper.
Liquid Smoke (optional but recommended)
Adds smoky BBQ flavor without a smoker. Look for a quality brand like Wright’s that lists only “smoke” and “water” on the label.
No liquid smoke? You can rub the pork with yellow mustard instead—it helps the dry rub stick and adds a subtle tang without changing the flavor.
Flavor Options:
Try my Memphis dry rub for a spicier twist. For something bolder, use my Chipotle Seasoning as a dry rub. Add cayenne for heat or smoked paprika for a deeper smoky flavor..
👨🍳 Quick Overview: How to Cook Pork Butt in the Oven
This is a summary, not the full recipe. See the recipe card below for complete instructions.
1. Prepare the pork butt.
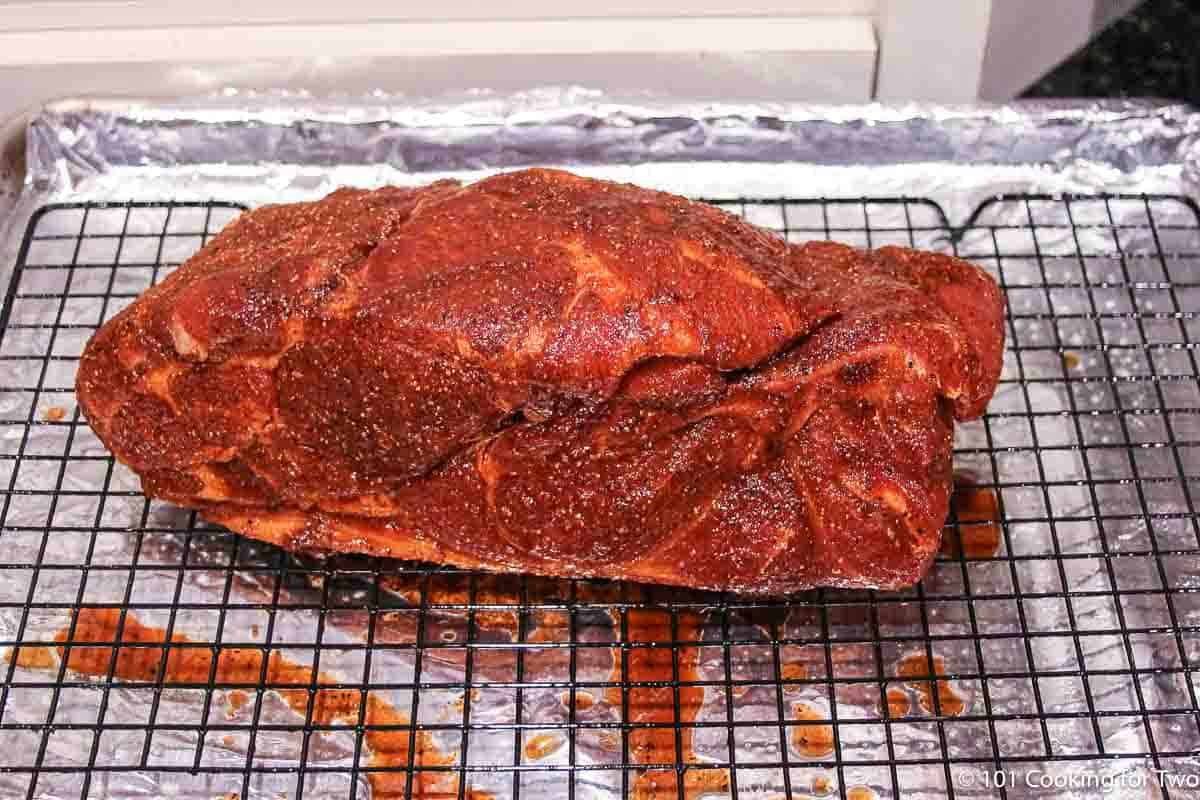
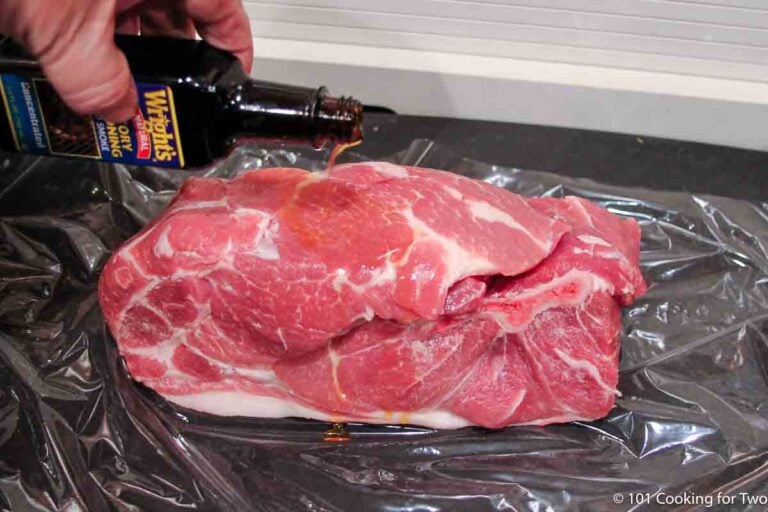
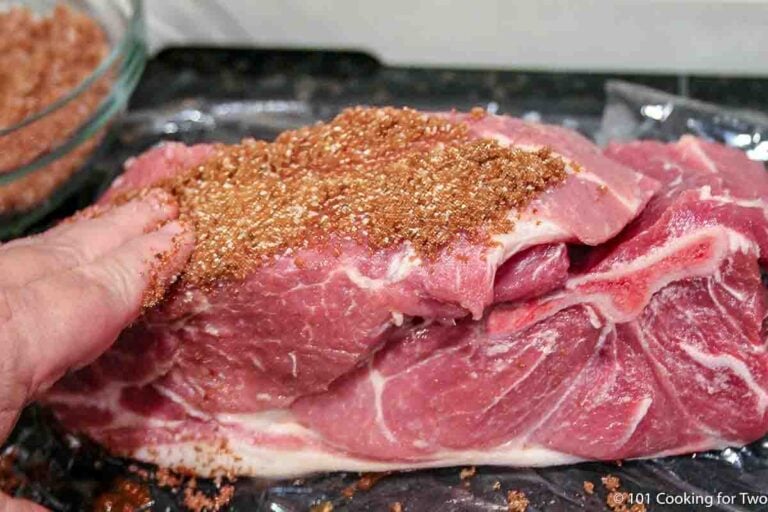
Mix the dry rub. Pat the pork butt dry, coat with liquid smoke (optional), and apply the rub.

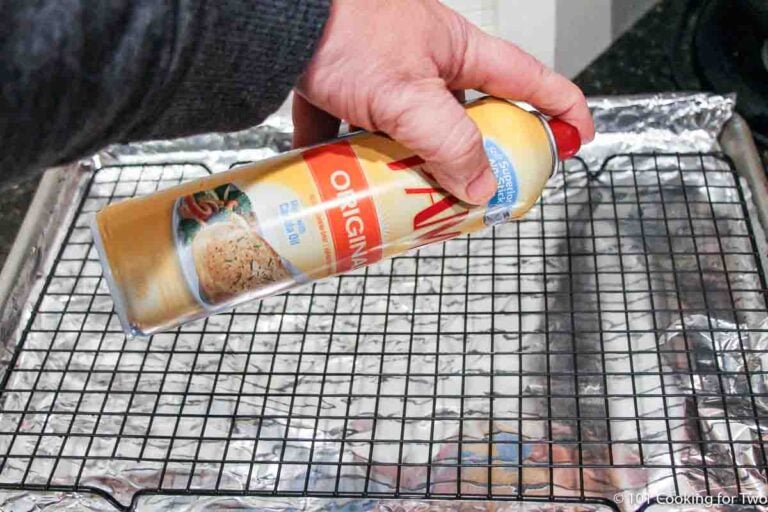
Place it on a foil-lined rimmed baking sheet with a rack for better bark.
2. Cook low and slow:
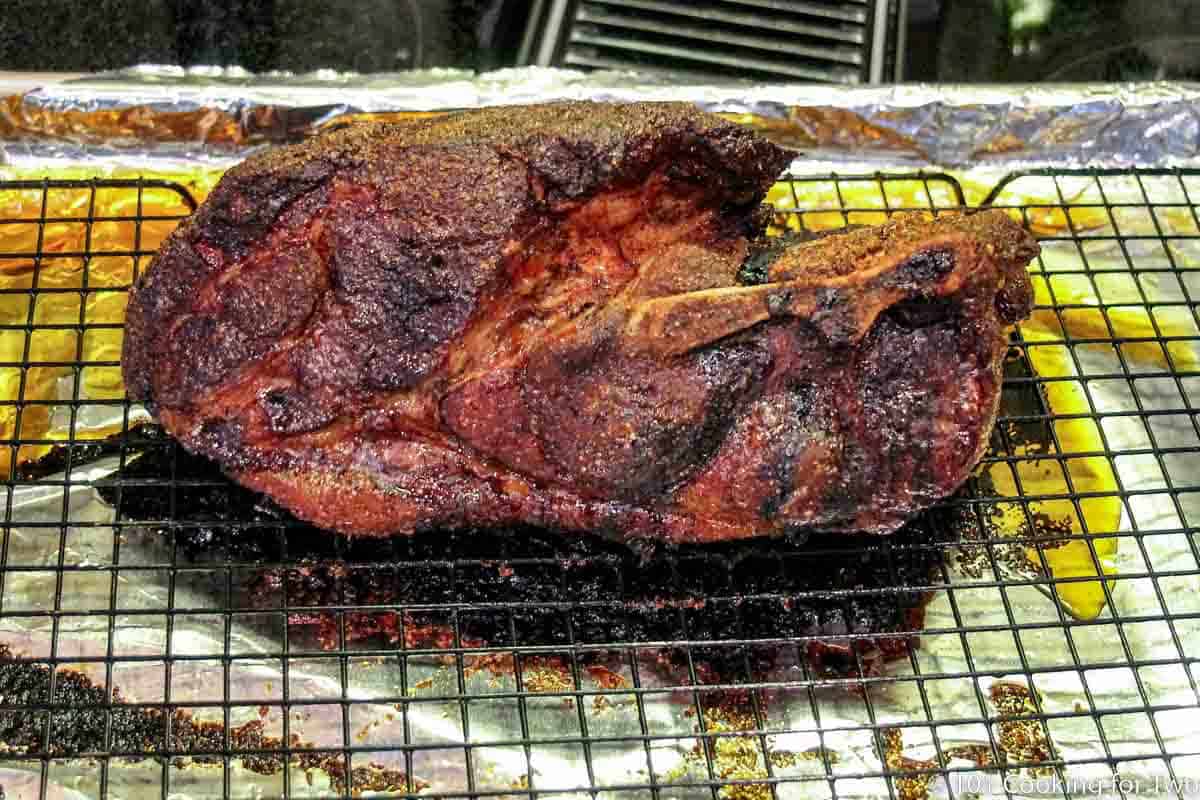
Bake in a 250°F oven (no convection) until the internal temperature reaches 200° to 205°F—usually 8 to 9 hours.
✅ Pro Tip: No need to preheat or use convection. Just a center rack and steady heat.
3. Rest the meat:
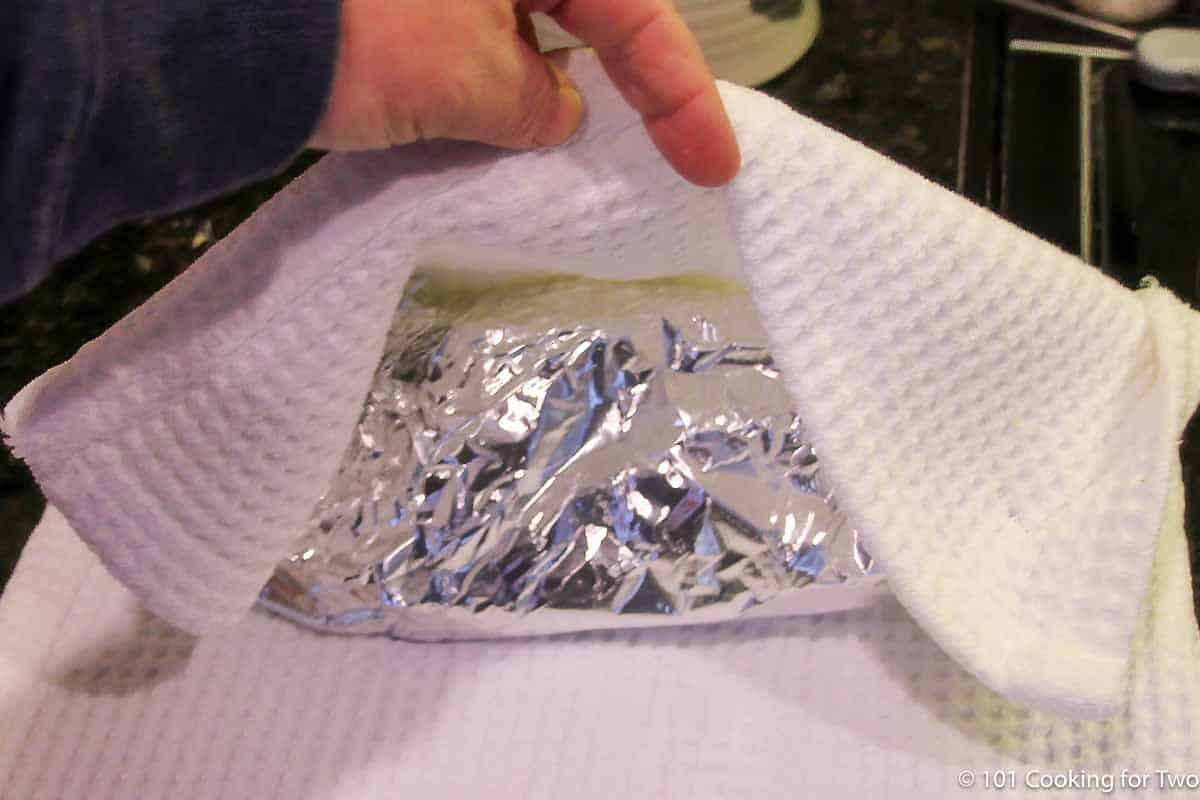
Wrap the pork tightly in foil, then in towels. Let it rest in a small insulated cooler (or on the counter) for 1 to 2 hours.
✅ Pro Tip: Don’t skip the rest. It locks in moisture and makes shredding easier. Shred too soon, and the juices end up on your cutting board.
4. Shred and serve:
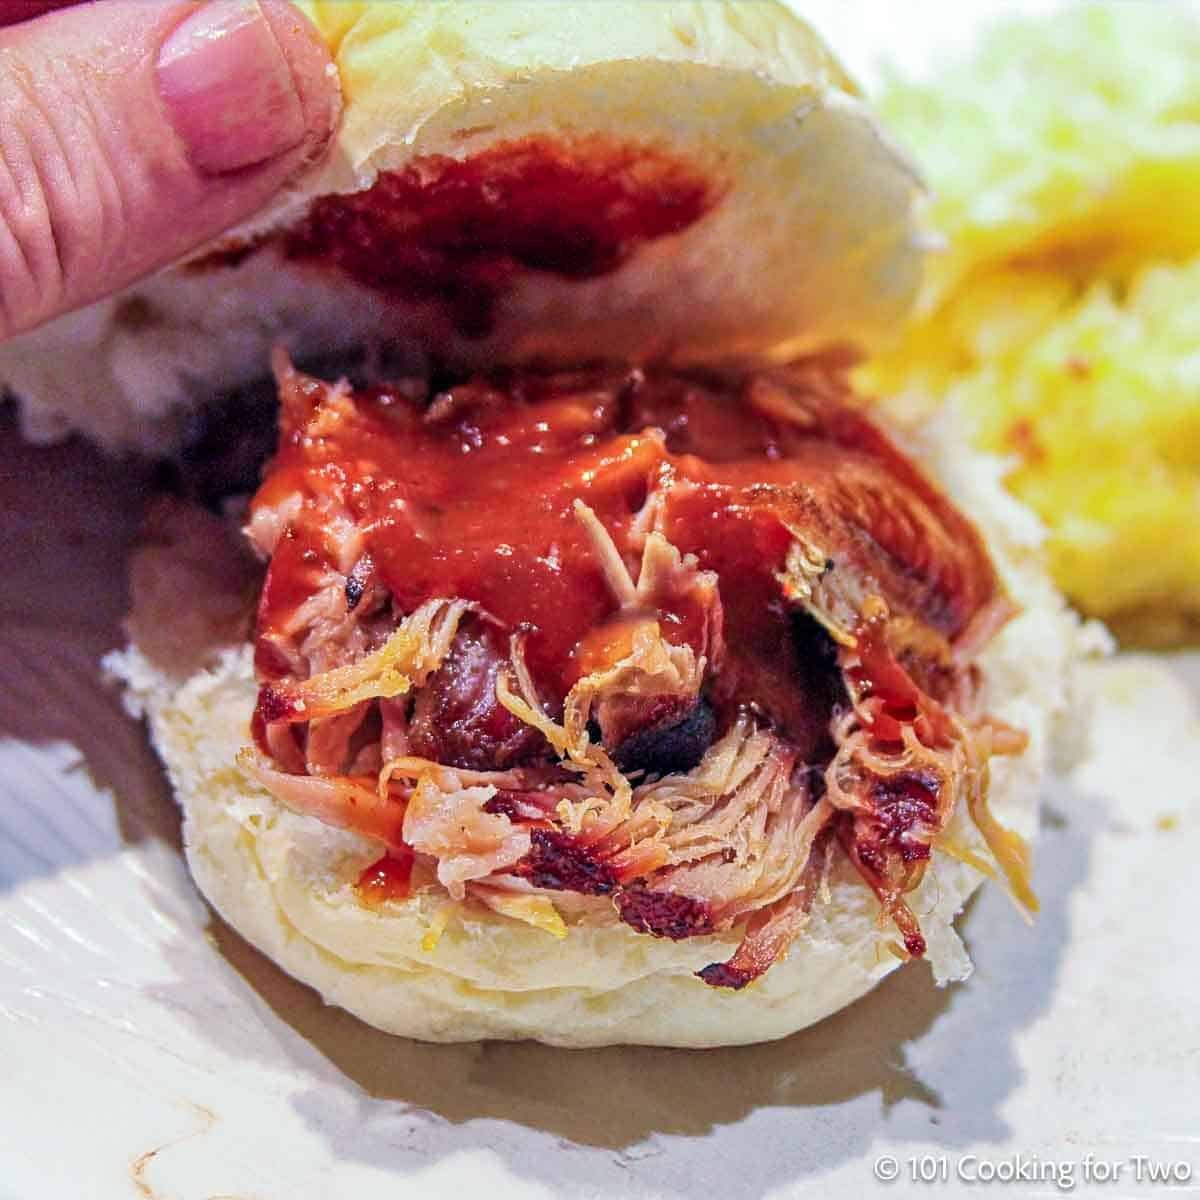
Use two forks to shred—it should fall apart easily and stay juicy, with crispy bark.
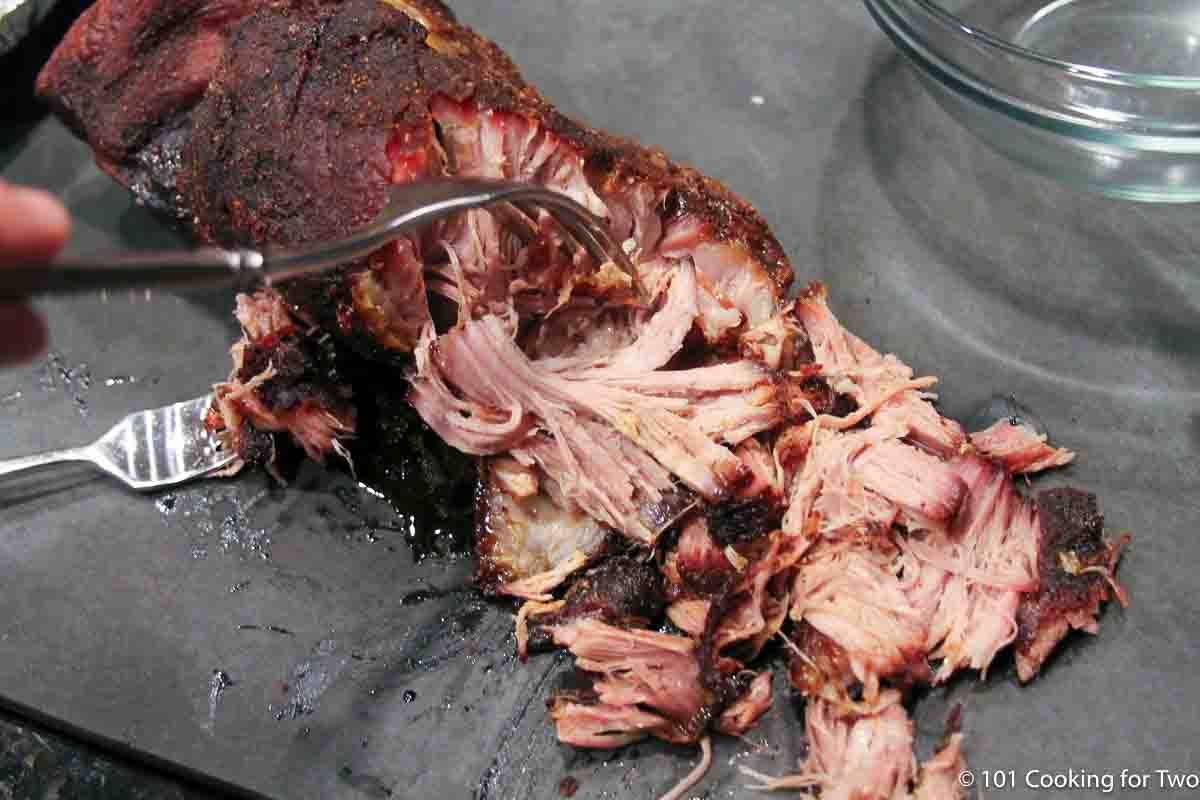
✅ Pro tip: A well-wrapped pork butt can stay warm in a cooler for up to 4 hours. Never try to shred one that’s gone cold—it just won’t work.
👇Want the full recipe? Scroll down to the printable recipe card for step-by-step instructions, tips, and serving ideas.
⏰ How Long to Cook Pork Butt in the Oven
At 250°F, a 4-pound boneless pork butt takes about 8 to 9 hours.
Bone-in cuts may take a little longer. As a general rule, plan for about 2 hours per pound, but it can range from 1½ to 2½ hours per pound depending on the shape and thickness.
You can adjust the temperature slightly—225° to 275°F will still work—but avoid going higher. At 300°F or more, the outside may dry out before the collagen fully melts.
For larger roasts (6 pounds or more), either divide them into two equal pieces or buy two smaller ones. Cook them separated on a rack for better airflow and bark—they’ll usually finish in about the same total time as a 4- to 5-pound roast.

✅ Pro Tip: Check your oven. Many ovens automatically shut off after 8–12 hours. Make sure yours won’t stop mid-cook.
Save this recipe!
🌡️ When is Pork Butt Done?
Pork butt is done when the internal temperature reaches 200°–205°F—that’s when the collagen has melted and the meat shreds easily.
Breakdown starts around 175°F, but it’s not truly pullable until it passes 200°F. Some stop at 195°F, but for the best texture, aim for that 200°–205°F sweet spot. During the rest, it may climb to about 210°F, finishing the tenderizing process.
✅ Don’t guess: Check temperature, not time. Color and texture can fool you—only a thermometer tells the truth.
❓ FAQs
You don’t have to, but it helps. Elevating the pork on a rack (or crumpled foil) keeps it out of the fat drippings and helps the bark form more evenly.
If your roast is over 6 pounds, cut it in half to speed up cooking and get more bark. Just space the pieces out on the rack—cook time will be similar to a 4–5 pounder.
Nope. Leave it uncovered so the bark can develop. The pork stays moist from melted connective tissue—not steam.
Yes, but only if your oven doesn’t shut off automatically. Many modern ovens turn off after 8–12 hours. Double-check your settings, use an oven-safe thermometer probe to monitor temperature safely, and keep the temperature steady at 250°F. The aroma might wake you before your alarm does.
Pork butt (also called Boston butt) is the upper part of the pork shoulder. It’s the best cut for pulled pork thanks to its marbling and connective tissue.
Many stores and recipes use “pork shoulder” to mean the same thing—so don’t worry if the label says shoulder, pork butt, or Boston butt. You're in the right place.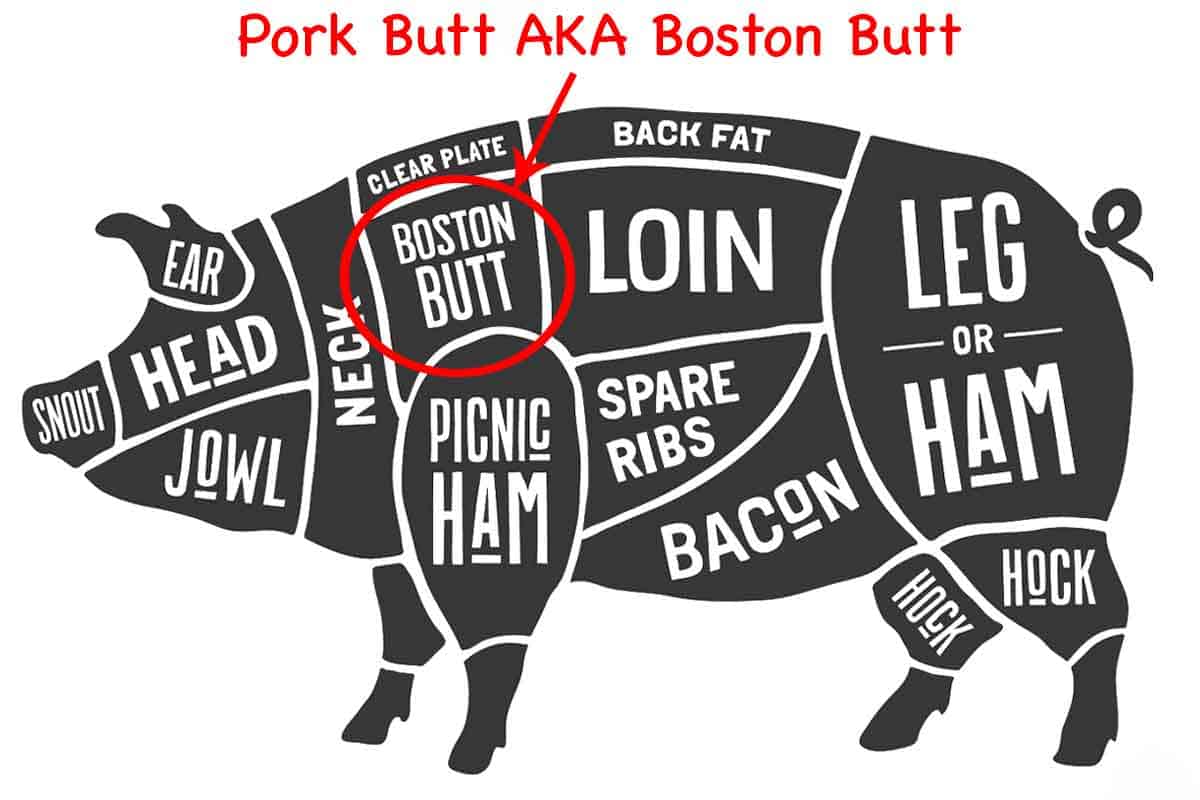
Fat up or down does not matter. All the rendering happens with time and temperature, not direction. The tenderness comes from the collagen and connective tissue melting, not the fat. Most of the fat melts and drains off anyway. Just use a rack and cook it low and slow to the right internal temperature.
🍽️ How to Serve BBQ Pulled Pork
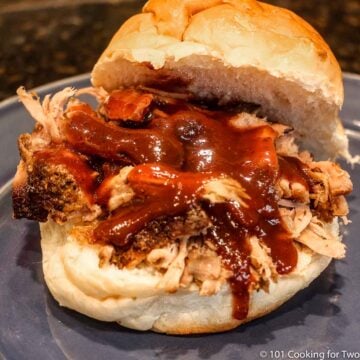
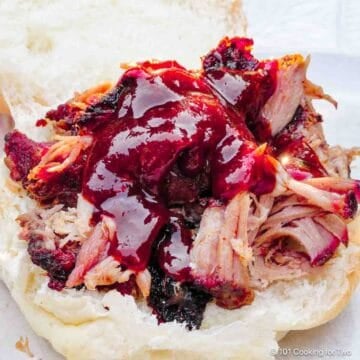
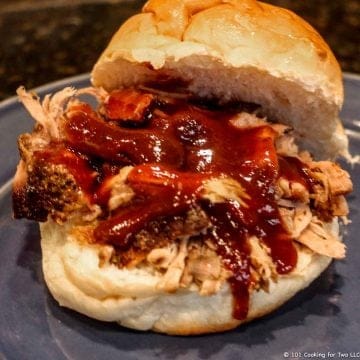
Pulled pork is best piled high on a toasted bun with Memphis BBQ Sauce and a scoop of coleslaw—but don’t stop there.
✅ Pro Tips: Plan on about ⅓ pound of pork butt per person before cooking, which yields roughly ¼ pound of pulled pork.
Other serving ideas:
- Use it in tacos, quesadillas, or nachos
- Serve it as a main dish with your favorite sides
- Pile it on a baked potato with cheese and sour cream
- Toss it into a breakfast hash with eggs
🍴 Great Side Dishes for Pulled Pork
Here are a few reader favorites to serve with pulled pork:
- Cold sides: Coleslaw, potato salad, Caprese Pasta Salad, or Classic Macaroni Salad
- Hot sides: Old fashioned cornbread, cheesy potato casserole, French Fries, or Stovetop Mac and Cheese
🧊 Storing Pulled Pork
Store leftover pulled pork in an airtight container and refrigerate for up to 4 days—though I prefer using it within 2 days for the best texture.
For longer storage, pulled pork freezes well for 3 to 4 months. Portion it into flat layers using vacuum-seal bags or boil-safe freezer bags. To reheat, use the oven method below, or gently simmer the sealed bag in water if it’s rated for boiling.
🔥 How to Reheat Pulled Pork (Crock Pot or Oven)
Crock Pot Method
- Load into a crock pot up to 75% full with pulled pork.
- As you load the crock pot, sprinkle lightly with water or apple juice—just enough to moisten.
- Cook on low for 2 to 3 hours, stirring every hour if possible. The serving temperature is 140°F or higher, but I recommend heating to 165°F to give some leeway when serving.
- Exact reheating time varies by amount, thickness, and your crock pot
- It will stay warm for quite a while unplugged or use the keep warm setting for serving.
Oven Method
- Spread the pork out on a rimmed baking sheet.
- Sprinkle lightly with water or apple juice—just enough to moisten.
- Cover tightly with foil.
- Heat in a 250°–300°F oven until hot (about 30 to 45 minutes, depending on the amount).
- Keep warm in the oven or transfer to a crock pot on low or keep warm.
✅ Pro Tip: Never reheat or store pulled pork with BBQ sauce already mixed in. The acid breaks down the texture, turning it mushy.
👍 More Pulled Pork Recipes
Looking for other ways to make pulled pork? Try these:
- Pork Butt Gas Grill – classic smoky BBQ flavor without a smoker
- Crock Pot Pulled Pork – low effort, great for busy days
- Pulled Pork Loin in the Oven – a leaner option with great texture
- Crock Pot Pork Loin Pulled Pork – healthy, juicy, and freezer-friendly
📖The Recipe Card

How to Cook Pork Butt in the Oven for Pulled Pork
Video Slideshow
Ingredients
- about 4 pounds Pork butt - aka Boston Butt frequently called pork shoulder
- Dry rub of your choice - good quality
- 2 tablespoons Wright's Liquid Smoke - optional but recommended
- ½ cup dark brown sugar
- 3 tablespoons Diamond Crystal kosher salt - 2 tablespoons if using Morton
- 1 tablespoon chili powder
- 1 teaspoon garlic powder
- 1 teaspoon onion powder
- 1 teaspoon black pepper
Step-by-Step Instructions
1. Prepare the pork butt:
- Use a rub of your choice. If using my rub, mix ½ cup dark brown sugar, 2 tablespoons kosher salt, 1 tablespoon chili powder, 1 teaspoon garlic powder, 1 teaspoon onion powder, and 1 teaspoon black pepper.

- Pat the pork butt dry, then coat all sides with about 2 tablespoons of liquid smoke (optional).

- Use about 1 cup of rub to cover generously. If prepping ahead, wrap in plastic wrap and refrigerate for a few hours or overnight. If not, go straight to baking.
2. Roast low and slow:
- Line a rimmed baking sheet with foil and place a rack on top. Spray the rack with PAM or oil.
- Place the pork butt on the rack and roast at 250°F (no convection)—no need to preheat. Fat cap up or down—doesn't matter.
- Bake until the internal temperature reaches 200°–205°F—about 8 to 9 hours, depending on size, bone-in vs. boneless, and oven behavior.


3. Rest the meat:
- Remove from oven, wrap tightly in heavy-duty foil, then several towels. Rest in a small insulated cooler or on the counter for 1–2 hours. It will stay warm in a well-wrapped cooler for up to 4 hours.

4. Shred and serve:
- Use forks to shred. The meat should fall apart easily and stay juicy, with crispy bark.

Recipe Notes
Pro Tips:
- Use the rest time to adjust your serving window by a few hours.
- No rack? Use foil balls to elevate the pork so it doesn’t sit in fat.
- Liquid smoke should only list “smoke” and “water”—Wright’s is a good brand.
- My rub is provided for you, but use the rub of your choice.
- Salt amounts are based on Diamond Crystal kosher salt: 1 tsp table salt = 1¼ tsp Morton kosher = 2 tsp Diamond Crystal. You can reduce the salt for a lower-sodium rub—it still works well.
- The rub works well even if you cut the salt in half for a lower-sodium version.
- 195°F is the minimum temp for pullable pork, but 200°–205°F is better. Don’t go over 210°F.
- Store leftovers in the fridge up to 4 days (2 is best for texture), or freeze up to 4 months
- Bone-in or boneless both work—bone-in may take a bit longer.
- Fat cap up or down doesn’t matter.
- I often go straight from seasoning to the oven—no wrap time needed.
- DO NOT cover the pork while baking. You need a dry oven to develop bark.
- Nutrition information is an estimate—fat content varies, and seasoning distribution may differ.
Your Own Private Notes
To adjust the recipe size:
You can adjust the number of servings above; however, only the amount in the ingredient list is adjusted, not the instructions.
Nutrition Estimate (may vary)
Editor's note: Originally Published November 2, 2013. Updated with expanded options, refreshed photos, and a table of contents to help navigation.


Max says
I put my pork in oven 2.5 lb at 10am and cooked 8 hours and it never got to 190 at 250 degrees, I kept turning up the heat later in the cooking. What gives?
Dan Mikesell AKA DrDan says
Hi Max,
Something is wrong temperature wise...
Possibilities: Mostly likely, inaccurate oven with a bad thermostat or heat leak.... check this with an oven thermometer. If you have a good instant read thermometer, you can put some vegetable oil in a small oven safe pan and see it reaches temperature.
An inaccurate meat thermometer.... boil water on the stove top and check the temp.
If you frequrently check the temp, that temperature leaked could also effect cooking time.
So it is all about temperatures.
Hope that helps...
Dan
Forgot to include starting temp... if it was frozen, cooking time is unpredictable.
Tara L says
Hi Dr. Dan,
This is my all time favorite pulled pork recipe. I’ve been making it for years. I do have a question. I have always made this as written, however, this time I have a 2.5 pound boneless pork butt. What is your advice as far as time and temperature for such a small roast? Thank you!
Dan Mikesell AKA DrDan says
Hi Tara,
Welcome to commenting. The cooking time is more a function of the thickness than the weight. So, the shape matters. Flat and thin will be maybe 4-5 hours. While a thick brick like butt may take 6-7 hours. As always, cook to a final temperature.
Hope that helps
Dan