
Once you make gravy, you’ll wonder why you haven’t been doing it for years. Learn the beginner-friendly slurry method or the classic roux to make homemade brown gravy with drippings, broth, or water — or to thicken any liquid for soups, stews, and more.
⏱️ Quick Answer: Ratio of Flour to Liquid for Gravy
For 1 cup of gravy—adjust up or down as needed, keeping the same ratio.
- Slurry Method (Easiest for Beginners): 2 tablespoons flour to 1 cup of liquid — fat or drippings optional.
- Roux Method (Classic Gravy): 2 tablespoons flour to 1 cup of liquid and 2 tablespoons of fat — the fat may come from drippings or butter.
Keep reading for a detailed discussion or jump to the Recipe Card.

Jump To (scroll for more)
- 😊 Why Make Homemade Gravy
- 🥣 Ingredients You’ll Need
- ✌️ The Two Methods: Slurry and Roux
- 👨🍳 Slurry Method — How to Make Gravy with Flour the Easiest Way
- 👨🍳 Roux Method — How to Make Gravy with Flour the Classic Way
- 🥣 Alternate Thickeners (Including Gluten-Free Options)
- 🍖 What Is Brown Gravy
- 🧊 Make Ahead, Leftovers, & Storage
- 📌 Recipes Featuring Gravy
- ❓ Troubleshooting Gravy
- 📖The Recipe Card
😊 Why Make Homemade Gravy
- It’s easy. If you can whisk, you can make pan gravy in about 10 minutes.
- It’s flexible. Works with drippings, broth, milk for white or sausage gravy, or even plain water with bouillon.
- It adapts. Flour thickens almost any liquid with the right ratios, but cornstarch or other starches can also be used to thicken in their own way.
- It’s multipurpose. Easily make beef, chicken, turkey, or other gravy—or use the same techniques to thicken soups, stews, and more.
- It impresses. Homemade brown gravy with flour makes any meal feel special.
🥣 Ingredients You’ll Need
The ingredients are simple and few. Both the slurry and roux methods use flour and some type of liquid. Add a little fat to make a classic roux, and you have it.
- Flour: Plain all-purpose flour is suggested, but Wondra or whole wheat flour may also be used. Alternative thickeners and flours are discussed in the Alternate Thickeners section below.
- Fat (for roux): Butter, pan drippings, or oil. Not needed if using the slurry method, but may be present.
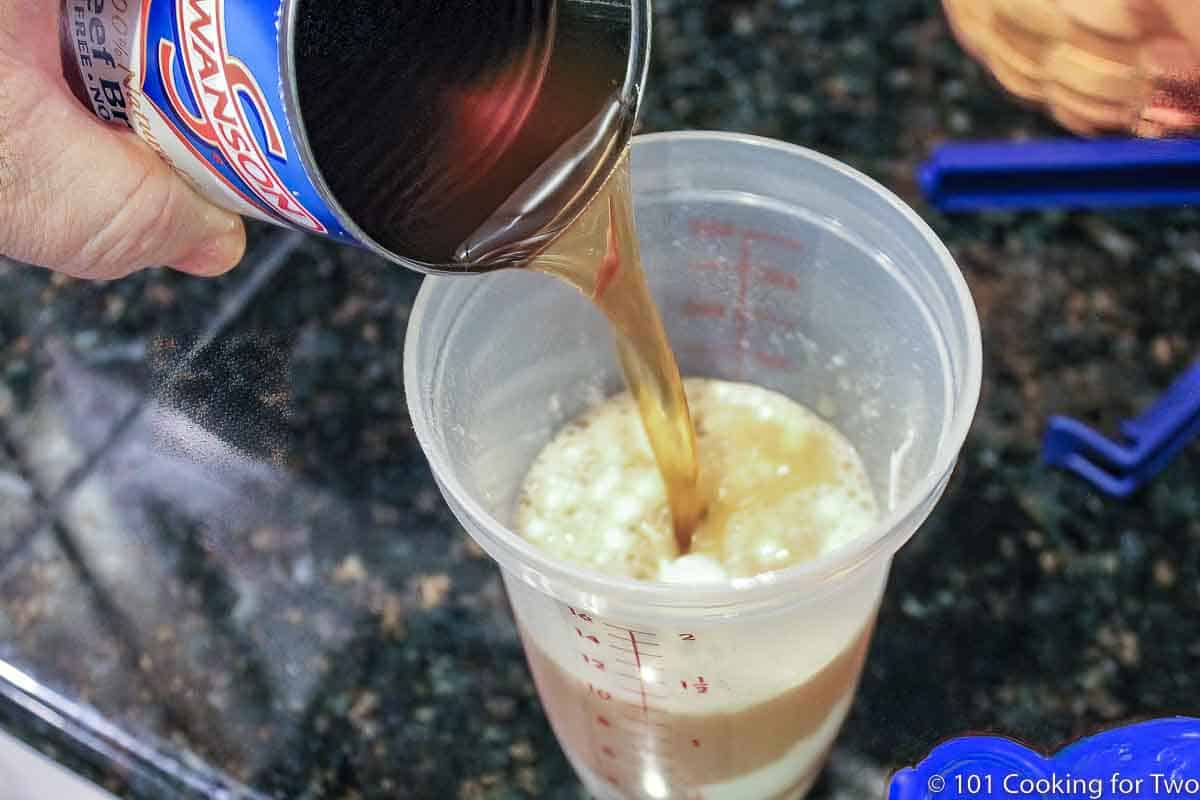
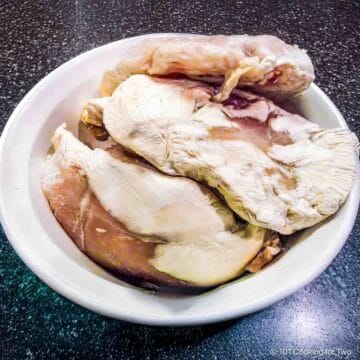
- Liquid: Broth, stock, or pan drippings. For brown gravy, use drippings if you have them, but beef or chicken broth adds flavor, and even milk or water with bouillon will work.
- Seasoning: Salt and pepper at minimum. Boost with bouillon, Worcestershire, soy sauce, herbs, or spices if needed.
✌️ The Two Methods: Slurry and Roux
Here’s a quick comparison to help you choose:
Slurry vs. Roux at a Glance
| Slurry Method | Roux Method | |
|---|---|---|
| How it works | Mix flour with cool liquid, then whisk into boiling liquid | Cook flour in fat, then whisk in liquid |
| Ingredients (per 1 cup gravy) | 2 tablespoons flour and 1 cup broth/drippings | 2 tablespoons fat, 2 tablespoons flour, 1 cup broth/drippings |
| Fat required | No | Yes |
| Skill level | 2/10 (easy) | 4/10 (moderate) |
| Advantage | Fast, flexible, easy to thin or thicken | Classic flavor, less “raw flour” taste |
| Disadvantage | Some notice a flour taste if undercooked | More steps, easier for beginners to burn or lump |
✅ Pro Tip: If you’re new to making gravy, start with the slurry method. It’s faster, more forgiving, and easier to fix if it’s too thin or thick.
👨🍳 Slurry Method — How to Make Gravy with Flour the Easiest Way
Key Ratio: For every 1 cup of gravy, use 1 cup of liquid (broth, drippings, stock, or water with bouillon or gravy base) and 2 tablespoons of flour.
Equipment: A wide stovetop pan, a whisk or slotted spoon for stirring, and a small bowl, shaker, or jar with a lid for mixing the slurry.
💡 Tip: Read through all the steps before starting — you’ll need to whisk while you pour, and you won’t have time to read once things get moving.
Step 1 of 4 Slurry Method — Mixing the slurry
- Measure 2 tablespoons flour for each cup of gravy you plan to make.
- Add about the same amount of cool liquid (2 tablespoons water or broth per 2 tablespoons flour).
- Whisk or shake until completely smooth with no lumps.
- Make about 50% more slurry than you think you’ll need so you can adjust thickness later.
Step 2 of 4 Slurry Method — Heat the liquid
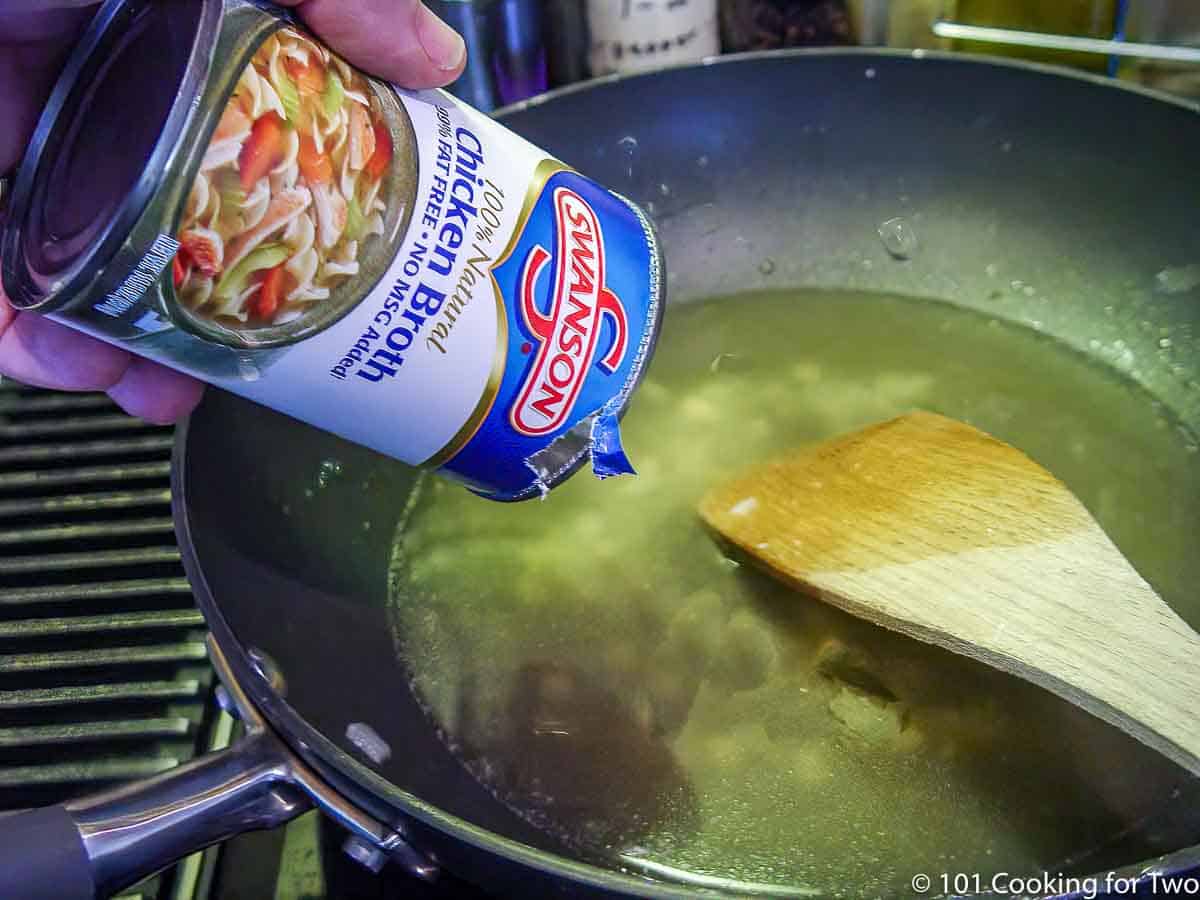
- Add your base liquid — drippings, broth, stock, or water with bouillon — to a wide pan. Do not add the slurry yet, just the liquid you’ll be thickening.
- If using drippings, keep fat to no more than 2 tablespoons per cup of gravy; skim off any extra.
- Bring to a rolling boil over medium-high heat. Use two burners if the pan spans them.
Step 3 of 4 Slurry Method — Mixing in the slurry
- Take the slurry you mixed earlier (flour + cool liquid).
- While the base liquid is at a rolling boil, begin pouring the slurry in a thin stream. Pour slowly over 2–3 minutes, not all at once.
- Whisk vigorously the entire time to keep it smooth.
- As the gravy thickens, lower the heat to a gentle simmer.
- Stop adding slurry when you’re just shy of your desired thickness — it will thicken a bit more in the next step.
Step 4 of 4 Slurry Method — Simmer, adjust, and season
- Keep the gravy simmering and whisk for 2–3 minutes to cook out the raw flour taste.
- Adjust if needed: add more slurry (the extra you set aside) to thicken, or whisk in broth/water to thin.
- Taste and season with salt, pepper, and optional flavor boosters like bouillon, Worcestershire, or herbs.
- Remove from heat and serve hot.

👨🍳 Roux Method — How to Make Gravy with Flour the Classic Way
Key Ratio: For every 1 cup of gravy, use 1 cup of liquid, 2 tablespoons of fat, and 2 tablespoons of flour.
Equipment: A wide stovetop pan, a whisk or slotted spoon for stirring, and measuring spoons for the fat and flour.
💡 Tip: Stay close to the stove — a lighter roux thickens more, but a darker roux has deeper flavor and less thickening power. It can go from perfect to burnt in seconds.
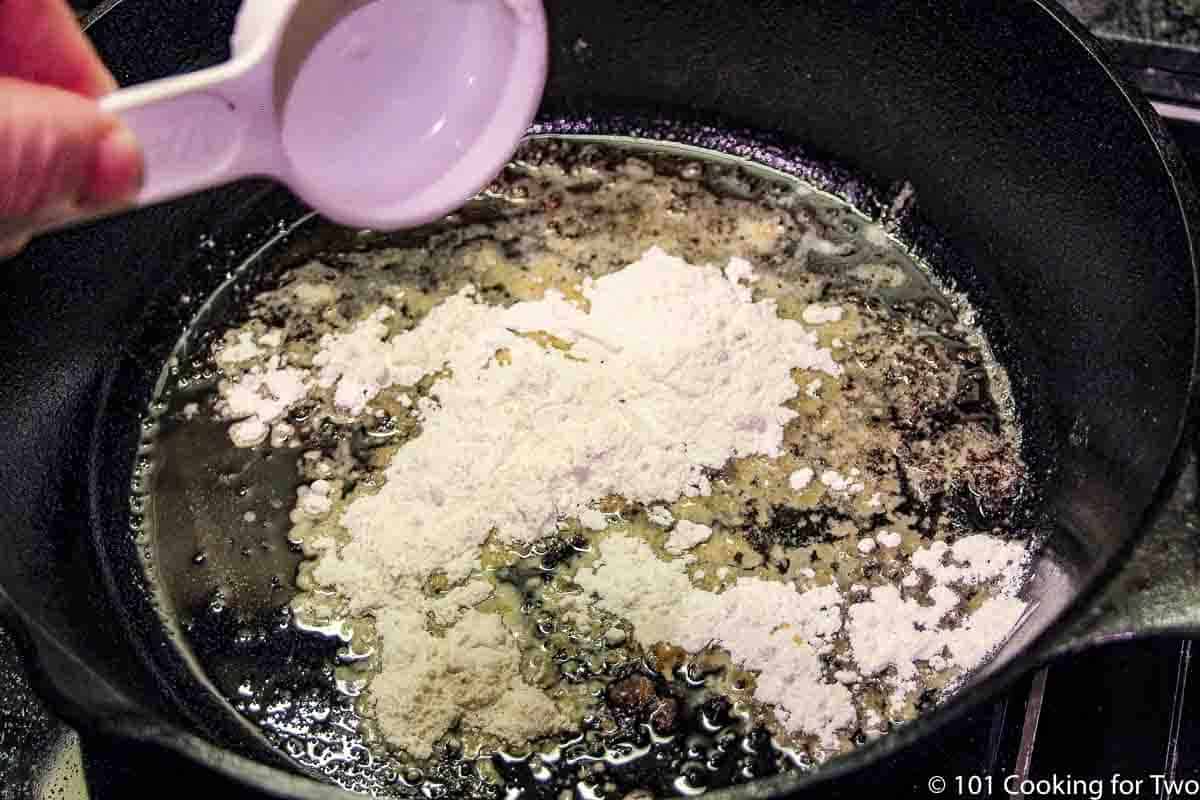
Step 1 of 4 Roux Method — Heat the fat
- Measure 2 tablespoons of fat per cup of gravy (butter, oil, or skimmed drippings).
- Add to a wide pan and heat over medium until hot but not smoking.
✅ Pro Tip: If you’re comfortable in the kitchen, you can estimate the fat amount. But always measure the flour—too much or too little flour will throw off the consistency.
Step 2 of 4 Roux Method — Cook the roux
- Sprinkle in 2 tablespoons flour per cup of gravy, whisking constantly to make a smooth paste.
- Keep whisking and cook the roux for 3–5 minutes until lightly browned.
- The more it browns, the deeper the flavor (and the darker the gravy), but don’t burn it.
✅ Pro Tip: If the roux smells burnt, toss it and start over. Burnt roux will ruin the flavor, and there’s no fixing it.
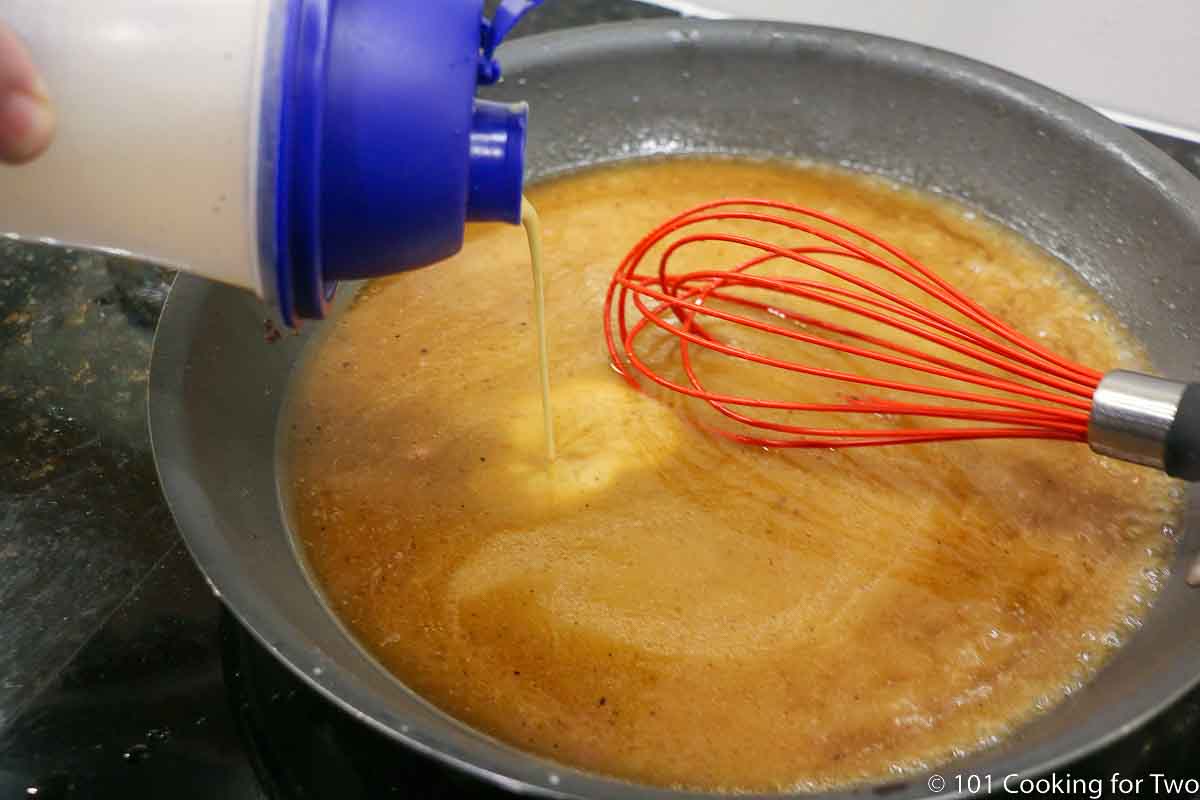
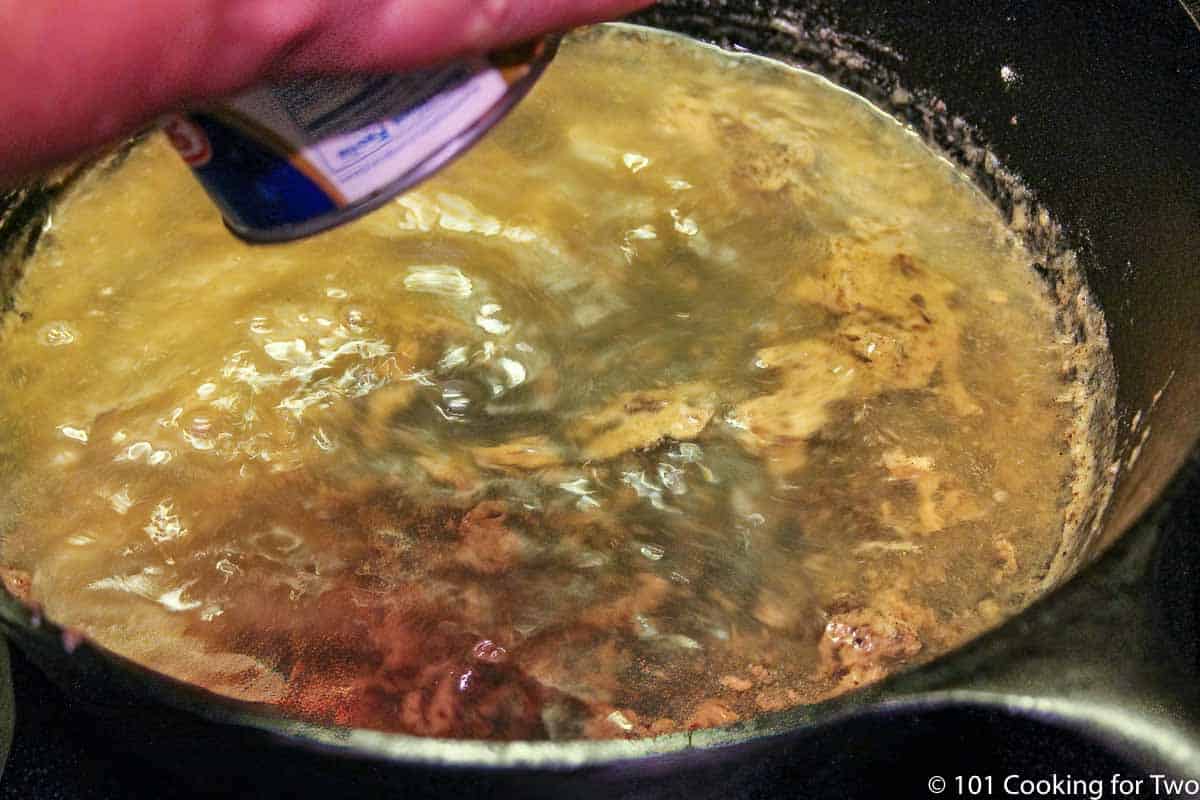
Step 3 of 4 Roux Method — Add the liquid
- Slowly pour in most of your liquid (broth, stock, or water with bouillon) while whisking continuously.
- Add it in a steady stream over 1–2 minutes, not all at once.
- Save a little of the liquid to adjust the thickness later.
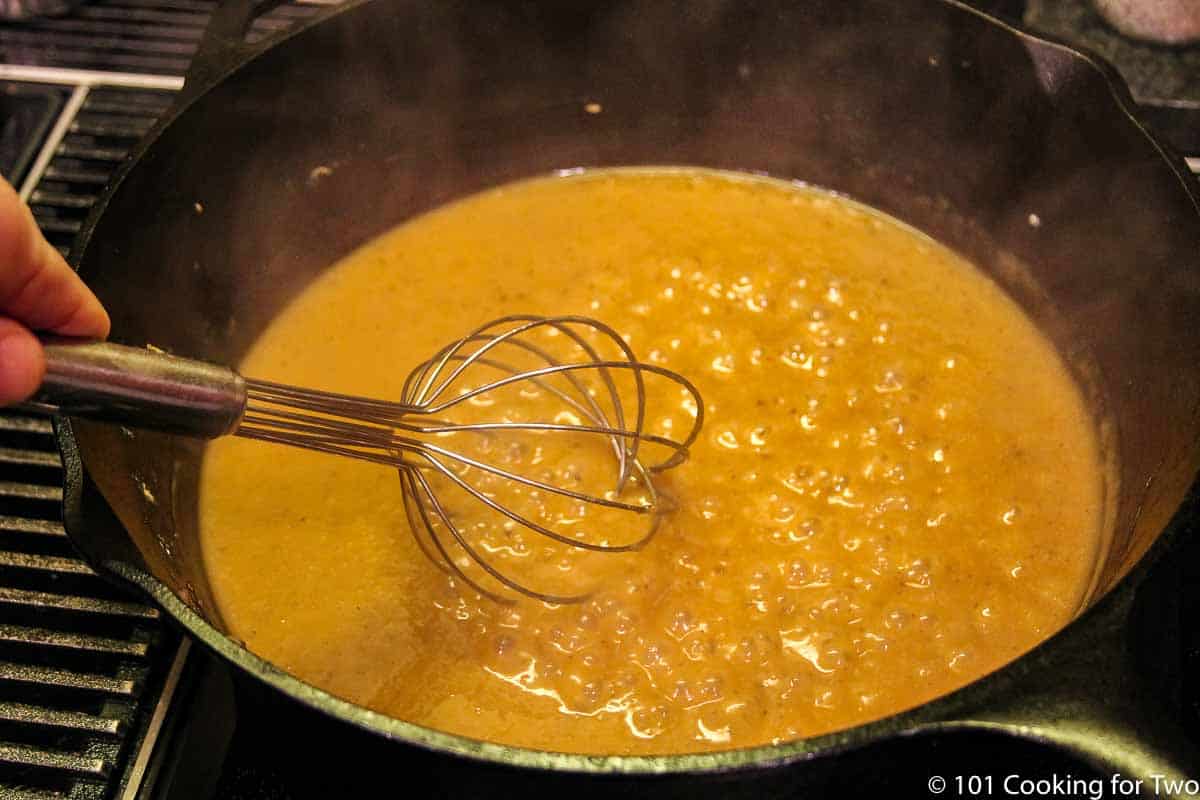
Step 4 of 4 Roux Method — Simmer, adjust, and season
- Lower the heat to a gentle simmer and whisk for 2–3 minutes to fully blend and cook out the flour taste.
- Adjust consistency: whisk in more liquid to thin, or cook slightly longer to thicken.
- Taste and season with salt, pepper, and optional boosters (bouillon, Worcestershire, herbs). Serve hot.
✅ Pro Tip: If you add too much liquid and the gravy is too thin, rescue it with a small flour slurry (see the slurry method).
🥣 Alternate Thickeners (Including Gluten-Free Options)
Not every gravy has to start with all-purpose flour. Try these alternate wheat flours or gluten-free starches for different textures, flavors, and dietary needs.
🌾 Other Wheat Flours
- Wondra flour – a precooked, finely milled flour that dissolves instantly and almost never clumps. Great for last-minute gravy fixes.
- Whole wheat flour – works fine but adds a nutty flavor and darker color.
👉 Alternate flours, like almond, coconut, or other grain-free types, are generally low in starch and don’t thicken well. Best avoided unless you’ve tested them before.
🌽 Cornstarch (Gluten-Free)
Cornstarch has about twice the thickening power of flour, so use 1 tablespoon per cup of liquid instead of 2 tablespoons flour.
- Mix with cold water first to make a smooth slurry.
- Slowly whisk into hot liquid until thickened.
👍 Best for: clear, glossy gravies or Asian-style sauces. Also good for long cooking, like crock pots.
⚠️ Watch out: refrigerated cornstarch gravy can gel — still safe to eat, just a texture issue.
🌿 Arrowroot (Gluten-Free)
Arrowroot powder is another starch-based thickener.
- Use about 2½ teaspoons per cup of liquid.
- Always make a slurry with cold water and add it near the end of cooking.
👍 Best for: delicate gravies and sauces that will be frozen later.
⚠️ Avoid: combining with dairy — it can turn slimy.
🍖 What Is Brown Gravy
Brown gravy is made from meat drippings or broth—beef, pork, chicken, or any other roast—thickened with flour using either the slurry or roux method.
If you don’t have drippings, you can still make homemade brown gravy with broth or even water with bouillon for flavor. The flour adds body and richness, while seasonings build depth.
You can enhance flavor with onions, mushrooms, herbs, or spices, or keep it simple for everyday meals. Brown gravy can even be made vegetarian using vegetable broth or a meatless gravy base.
👉 Common myth: All brown gravy is beef gravy. Not true!
All beef gravy is brown gravy, but not all brown gravy is beef. The darker the meat (or broth), the deeper the gravy color.
Save this recipe!
🧊 Make Ahead, Leftovers, & Storage
Gravy is easy to make ahead of time or save leftovers for later. Flour-based gravies made with the slurry or roux method will reheat well, but cornstarch gravies tend to break down and lose texture.
Make Ahead:
Prepare the gravy as usual, cool it, and store covered in the refrigerator for up to 4–5 days. It will thicken as it cools, so whisk in a little broth or water when reheating to restore the right consistency.
Freeze:
Gravy made with flour freezes for 3–4 months. Let it cool completely, then store in airtight containers or freezer bags. Thaw overnight in the refrigerator and reheat slowly, whisking to smooth it out.
Reheat Tip:
Always reheat over low to medium heat, whisking frequently. If it thickens too much, just add a splash of liquid until it looks right again.
Leftover Idea:
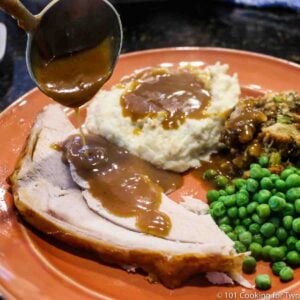
Use extra gravy over mashed potatoes, meatloaf, pork chops, or open-faced sandwiches—it’s too good to waste.
❓ Troubleshooting Gravy
Lumps form when flour clumps early in the process. With the slurry method, this happens if you try to mix flour into hot liquid or add the slurry before the base is boiling.
With the roux method, lumps usually mean you didn’t whisk continuously or added liquid too fast.
If it happens, run the gravy through a fine strainer — and whisk better next time.
Boost flavor with a soup base or bouillon product (my go-to when I don’t have drippings). A splash of Worcestershire or soy sauce works wonders, too. Don’t forget herbs and spices like thyme, sage, or rosemary.
Separation happens when there’s too much fat in the drippings or not enough flour to bind it. Skim off extra fat before adding the flour, or whisk in a bit more slurry if it separates later.
Overheating can also cause it — once your gravy thickens, reduce the heat to a gentle simmer and keep whisking until smooth again.
White gravy uses milk as the primary liquid — think chicken fried steak with creamy pan gravy. I often use leftover seasoned flour from the coating, plus pan drippings for flavor.
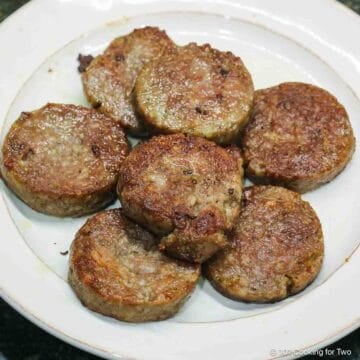
Sausage gravy starts the same way, adding cooked breakfast sausage before whisking in flour and milk. I usually use the slurry method and season with salt and pepper.
Both start with drippings, so they technically qualify as brown gravies, too.
📖The Recipe Card
Homemade Gravy with Flour (Easy With or Without Drippings)
Ingredients
- Liquid from the cooking - if available
- Extra broth if needed
- all-purpose flour
- salt and pepper to taste
- extra fat - oil or butter if needed for the roux
Step-by-Step Instructions
The Slurry Method of Making Gravy
- Key ratio: For every 1 cup of gravy, use 1 cup liquid (broth, drippings, stock, or water with bouillon/gravy base) and 2 tablespoons flour.Equipment: A wide stovetop pan, a whisk or slotted spoon for stirring, and a small bowl with a whisk, dressing shaker, or jar with a lid.💡 Tip: Read through the steps first—you’ll need to whisk while you pour.
- Measure 2 tablespoons flour for each cup of gravy you plan to make.Add about the same amount of cool liquid (2 tablespoons water or broth per 2 tablespoons flour).Whisk or shake until completely smooth with no lumps.Make about 50% more slurry than you think you’ll need so you can adjust the thickness later.

- Add your base liquid — drippings, broth, stock, or water with bouillon — to a wide pan. Do not add the slurry yet, just the liquid you’ll be thickening.If using drippings, keep fat to no more than 2 tablespoons per cup of gravy; skim off any extra.Bring to a rolling boil over medium-high heat. Use two burners if the pan spans them.

- While the base liquid is at a rolling boil, begin pouring the slurry in a thin stream. Pour slowly over 2–3 minutes, not all at onceWhisk vigorously the entire time to keep it smooth.As the gravy thickens, lower the heat to a gentle simmer.Stop adding slurry when you’re just shy of your desired thickness — it will thicken a bit more in the next step.
- Keep the gravy simmering and whisk for 2–3 minutes to cook out the raw flour taste.Adjust if needed: add more slurry (the extra you set aside) to thicken, or whisk in broth/water to thin.Taste and season with salt, pepper, and optional flavor boosters like bouillon, Worcestershire, or herbs.Remove from heat and serve hot.


The Roux Method of Making Gravy
- Key ratio: For every 1 cup of gravy, use 1 cup liquid, 2 tablespoons fat, and 2 tablespoons flour.Equipment: A wide stovetop pan, a whisk or slotted spoon for stirring, and measuring spoons for the fat and flour.💡 Tip: A lighter roux thickens more; a darker roux gives more flavor but less thickening power.
- Measure 2 tablespoons of fat per cup of gravy (butter, oil, or skimmed drippings).Add to a wide pan and heat over medium until hot but not smoking.
- Sprinkle in 2 tablespoons flour per cup of gravy, whisking constantly to make a smooth paste.Keep whisking and cook the roux for 3–5 minutes until lightly browned.The longer you cook, the darker and more flavorful the roux—but it will thicken less. Stop before it scorches.
- Slowly pour in most of your liquid (broth, stock, or water with bouillon) while whisking continuously.Add it in a steady stream over 1–2 minutes, not all at once.Save a little of the liquid to adjust the thickness later.
- Lower the heat to a gentle simmer and whisk for 2–3 minutes to fully blend and cook out the flour taste.Adjust consistency: whisk in more liquid to thin, or cook slightly longer to thicken.Taste and season with salt, pepper, and optional boosters (bouillon, Worcestershire, herbs). Serve hot.


Recipe Notes
Pro Tips:
1. Gravy can be stored in the refrigerator for 4–5 days or frozen for 3–4 months.2. General ratio: 2 tablespoons of flour per cup of liquid for both methods. For the roux method, also add 2 tablespoons of fat.
3. If pan drippings have a lot of fat, skim to no more than 2 tablespoons per cup of gravy.
4. Use two burners if your pan is large.
5. Alternative thickeners and tips are discussed in the post.
Your Own Private Notes
To adjust the recipe size:
You can adjust the number of servings above; however, only the amount in the ingredient list is adjusted, not the instructions.
Nutrition Estimate (may vary)
Originally published February 15, 2011. Updated with expanded options, refreshed photos, and a table of contents to help navigation.


Julie Gramoll says
Do you recommend chicken broth or beef broth?
Dan Mikesell AKA DrDan says
Hi Julie
Welcome to the blog.
Use the broth that matches the final use of the gravy. For turkey, I use a turkey gravy base from Penzeys that will make turkey broth. I haven't seen turkey broth for a number of years in the store. If I don't have that, I would use chicken broth.
For beef, like pot roasts or beef tips and gravy, I use beef.
Hope that helps
Dan
Glenda says
Apologies for the following reply as (since I'm incredibly NON tech savvy) I thought it was going to Anna; I realized it before I sent it, but then thought, instead of starting all over, I'd send as is in hopes of getting some really good "old fashioned" recipes like my Gramma used to make. I'll be back soon to see what you've got cooking soon.. Glenda
****************************** Anna~ Unfortunately, I have no idea how to create a blog😔 HOWEVER~ Plz let me know if you do as my grandmother said she had planned to leave her recipes to me in her will (& she had a LOT; in the Era she was born, 99% of married women didn't work outside the home & Grampa LOVED to eat! Lol); tragically, they we're lost in a fire; shortly after dementia had begun & progressed quickly (thankfully, the good Lord saw fit to still let us have her for almost 20 years~ she was less than a month away from being 101 yrs old).. on good days, she tried so hard to remember what she could but there were so many she often got them "mixed together". I sincerely hope to hear about your blog soon & can guarantee I'll visit it often! Good Luck!! Glenda Barrett
Dan Mikesell AKA DrDan says
Hi Glenda,
Welcome to the blog. There are occasionally food blogs specializing in vintage recipes but they seem to never last. I don't think Anna followed up on creating a blog—not positive on that... I do have some old recipes, mostly from the 1950s to 1970s range.
I find the best source is your local antique mall. For a dollar or two, you can pick up those old cookbooks your local school PTAs published as fundraisers decades ago. Everybody contributed their own best recipes. About once a year, I go through a couple of malls and come home with treasures. Some from the 1930s but mostly the 1950-1970 range.
Good luck with your quest.
Dan
Anna Gilstrap says
I am a 68 year old granny who cooks for a family of four daily plus cooking for many more at holidays. I will definitely use this recipe when I want a brown gravy. My family insists on country gravy (white gravy, usually with sausage in it) and biscuits very often. I have never had anyone complain about them and often receive compliments. Anyway, I don't know how one goes about starting a recipe blog site on the internet but I would love to do that. I want to share old fashioned, economical and/or easy recipes that I think many people would benefit from reading. I love cooking and make simple everyday foods as well as fancy foods. If anyone has any information on how I can start a site to share my recipes and tips I would be very greatful for your help. Thank you, Anna Gilstrap
Dan Mikesell AKA DrDan says
Hi Anna,
Welcome to the blog and glad an experienced n cook approves of my discussion.
About start a blog, it is a lot more involved than many want you to believe in the "How to start a blog in 5 minutes" type articles. Following their direction is like a new driver learning to drive by just getting in a car blindfolded and hoping to drive somewhere safely without any guidance. But the car salesman made money which is all they cared about.
I have a long discussion at https://www.101cookingfortwo.com/start-food-blog/ where I cover the basics and lots of the pitfalls. The main issue is other bloggers trying to make money off the newbie blogger want-to-be. They suggest things that make them money and are not the best for you. DON'T FALL FOR IT. The first question for every suggestion, like a spam phone call, what is in it for them. My guide has no paid links, I just got mad about the whole thing and did 4000 words on it.
Let me know if you have any questions. I will drop you an email when I have time probably later today.
Dan
Jeremy Kiter says
Very helpful thanks
Anna says
Throughout the decades, for as long as I have been making my gravy, I have *never* come across a recipe that mirrors my own nor did I have a name for it - The Slurry Method! My husband of nearly 30 years is a meat/potato/gravy man so when we got married, I joke that learning how to make gravy was in my wedding vows! ; )
By default, I always skip gravy recipe's that are there to compliment the main dish recipe that I'm after (the roux method makes me question my abilities at everything, lol) but that doesn't stop me from scanning over them, always looking for ideas/insights. I'm so glad I've kept that habit and picked up your idea (just in time for Holiday Cooking!) to use cold BROTH instead of water when combining the flour/cornstarch 1:1 to create the liquefied flour/starch mixture. Genius! I started using cornstarch so long ago I don't even recall why except I believe I found the finished gravy to be silkier so I've stuck with it ever since.
Making gravy using the slurry method easily allows for multiplying the ingredients for large events. On several occasions I've made huge batches (gallons +) for church events using a dutch oven. It's also a perfect way to make a gravy when you don't have the fat from a meat or for dietary reasons (that would be me) prefer to forgo the fat and just create a basic gravy. No matter the portion or reason, your slurry method allows the gravy to be tailored to the main dish, so since I don't add the meat fat or pan scrapings for my gravy, instead I add the same seasonings to the gravy mixture that I put in the main dish (a tip I learned years ago in an old cookbook I found in a thrift store - those are the best!), That way there is a compliment of flavors as opposed to a competition or flavorless gravy.
Hope you don't mind that I share, to make a gravy w/o meat fat or pan scrapping, I always start with a warm sauce pan, heat up olive oil and saute' a bit of chopped onion for a few minutes (just enough to sweat them) then add the chosen seasonings and a broken up bay leaf to the onion, stir a few more minutes to get those flavors cracked open, then add my base liquid/broth. Cover and let it simmer on the lowest setting for about 15-20 min. I don't necessarily use 'all' the same seasonings as the main dish but at least the ones which will set the flavor in the right direction. After the simmer, I pour the cooked gravy liquid through a mesh strainer into another saucepan I've had sitting on the stove nearby to get it nice and warm, straining out the cooked onion, bay leaf and seasonings. Now I have just the flavored base for my gravy so I put it on a burner set at med-high and right away start whisking in the measured amount of flour/cornstarch mixture for my batch. I keep whisking and whisking until it starts to come to a boil and begins to thicken; adding more flour/cornstarch mixture (only if necessary) to get that preferred sticks-to-the-back-of-a-spoon thickness. Boom! Perfect gravy, every time - The Slurry Method!
People are so afraid of making gravy but this slurry method you've laid out truly is very easy. I am now known for my gravy and when people come over I'm always asked, "are you making your gravy?" Not kidding! The main tips I always give out: no mater the flavor or dish, never forgo the bay leaf (unless, of course, there is dislike) and most important, when it comes time to make the gravy for the meal, make certain nothing else needs your attention and plant yourself at the stove; make that whisk your best friend because you're not going anywhere! Never stop stirring/whisking for even a second until it's done.
I always notice the following but never comment: When people are over for dinner, I always leave the final steps of whisking to make the finished gravy for last, right before it's time to serve the meal. Fresh, hot-off-the-stove gravy - yum! At the start of the process there's always a 'hush' that comes over the room...an involuntary *Respect* for The Gravy. Lol.
Best Wishes & Happy Holidays to You & Yours!
Anna [aka The Gravy Lady]
Anna says
I do want to add about the bay leaf, the longer my broth simmers, the better the flavor since after closer to an hour, the bay leaf can change to deeper complex flavors that are not the star but definitely the shoulders for the rest of the flavors. If I have a long cooking time for the main meal, I start off in my kitchen with the broth simmering up to 30-35 min then leave it sitting on that same but now 'off' burner, nearer to other burners in use or a hot oven always helps, keeping the broth warm and steeping the bay leaf for at least an hour. There is nothing to watch over, it does it all on it's own, much like making a cup of tea but longer steep time. Then after an hour or more, when it's time to make the gravy, I strain out the bay leaf, seasons, and onions and proceed.
Just wanted to clarify since my previous post was a bit vague on this and vagueness doesn't go over well on the internet. When in a hurry or needing to whip up a batch, I'll go with the quicker, shorter simmer time.
DrDan says
Hi Anna
I somewhat made up the "slurry method" name but it does fit well. I always talk about using things like cornstarch in a slurry and I needed to call it something. I learned it from my wife but really it is what my mother did but I didn't learn it then. I have never seen it documented in any formal way although I'm sure it is out there without a name.
I do find this method very forgiving so great for home cooking. But it does move fast so the beginners need to read and understand it before starting.
Thanks for the note and experience.
Happy Holidays
Dan