
Most ¼–½ lb burger patties cook in 7–12 minutes total over high heat, flipping once halfway through. Exact time depends on thickness and grill temperature.
⏱️ How long to grill hamburgers?
Grill burger patties over high heat (about 500–600°F) until they reach 160°F internal temperature.
- ¼ lb patties: 7–8 minutes total (about 4 minutes per side)
- ⅓ lb patties: 8–10 minutes total (about 4–5 minutes per side)
- ½ lb patties: 10–12 minutes total (about 5–6 minutes per side)
Rest 5 minutes before serving. Works on a gas grill or any grill.

Jump To (scroll for more)

Featured Comment by Jane:
⭐⭐⭐⭐⭐
"I am so excited!! This really worked for me. I am new to gas grills and have been struggling with it. Now I can make an awesome burger..."
🧾 TL;DR — Recipe Summary
What it is: Grilled hamburgers cooked over high heat with simple seasoning and no mixing—just form, grill, and finish to 160°F.
Why you’ll love it: Juicy burgers every time with clear temps and timing—no guesswork and beginner-friendly.
How to make it: Preheat grill to 500–600°F, grill 7–12 minutes (about 4–6 minutes per side), and cook to 160°F internal temperature.
🐄 Ingredients
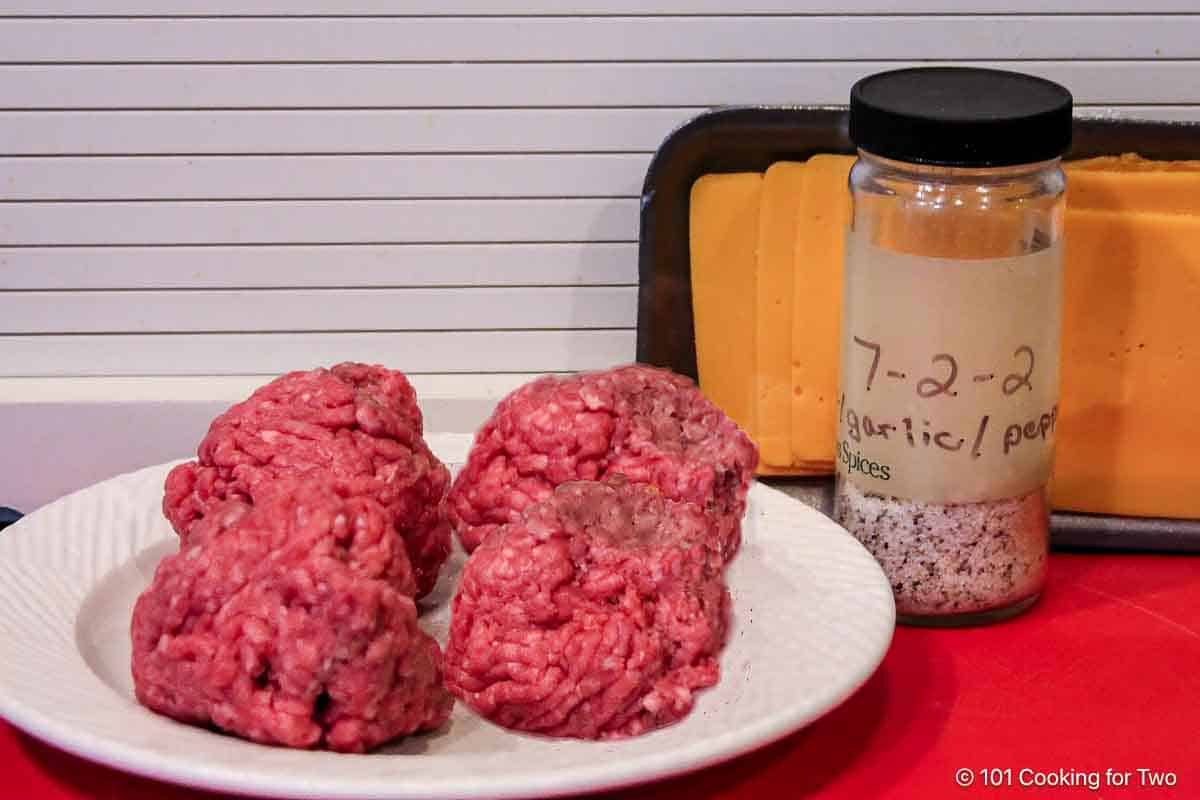
Choose 80/20 ground beef or ground chuck.
80% lean and 20% fat gives the best balance of juicy and flavorful. You can use 85/15, but leaner meat tends to dry out. Fresh beef is best for texture and moisture.
Season the patties simply
Salt and pepper are all you need, or use your favorite blend. I use my All Purpose Seasoning (7:2:1 and 7:2:2—salt, pepper, garlic). Montreal steak seasoning is another solid option.
Serve with (optional)
- Buns – Toasted if you like, but use something sturdy and soft.
- Cheese – Add during the last minute of grilling. Cheddar, Swiss, Colby Jack, or even Velveeta all work.
- Toppings – Go classic with lettuce, tomato, onion, and pickles, or get creative.
✅ Using lean beef, chicken, turkey, or meat alternatives? See the Burger Alternatives section below for tips.
👨🍳 Quick Overview: How to Cook Hamburgers on the Grill
1. Preheat the grill
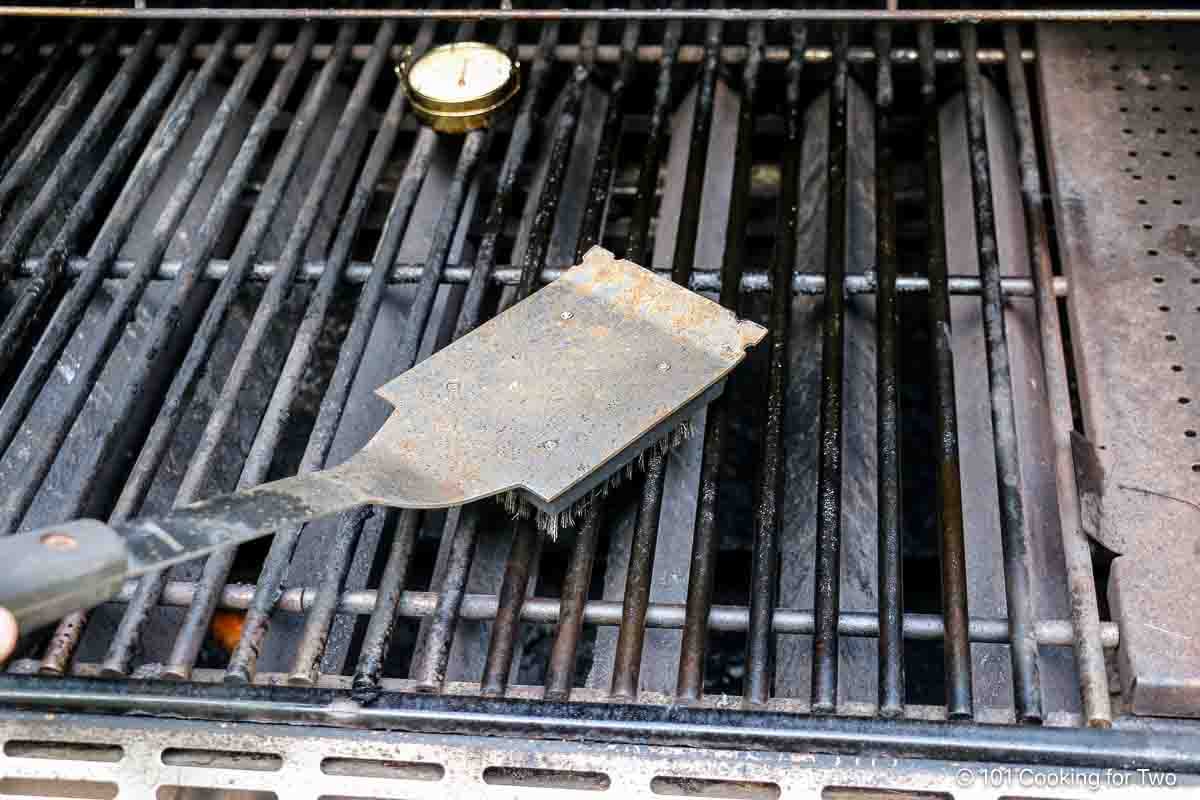
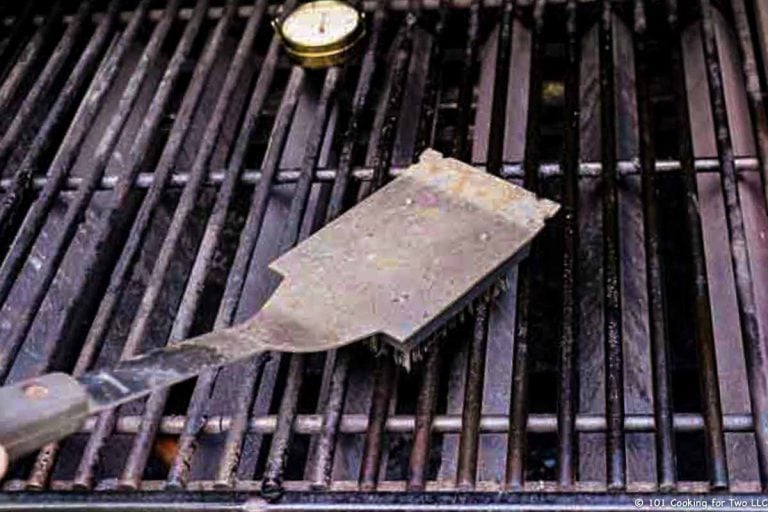
Clean, oil, and turn your grill to high preheating fully—aim for about 500–600°F or a bit higher.
2. Form and season the patties
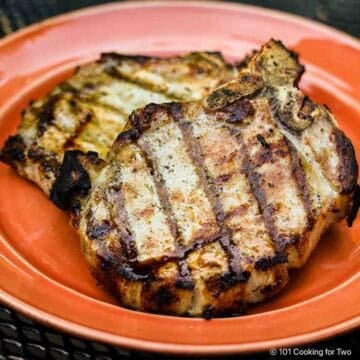
Use 80/20 ground beef and form patties ⅓ to ½ pound, about ½ inch wider than the bun. Dimple the center and season both sides.
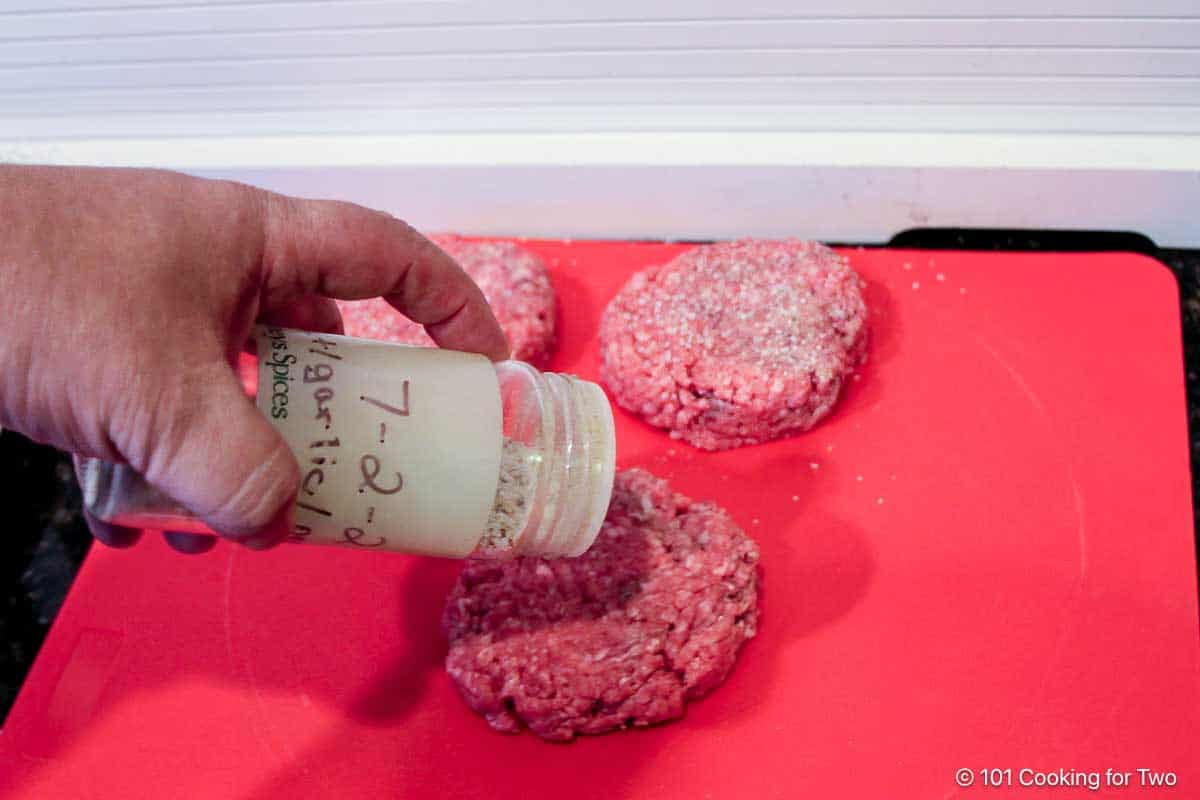
✅Pro Tip: The center dimple helps the patties cook evenly without puffing up.
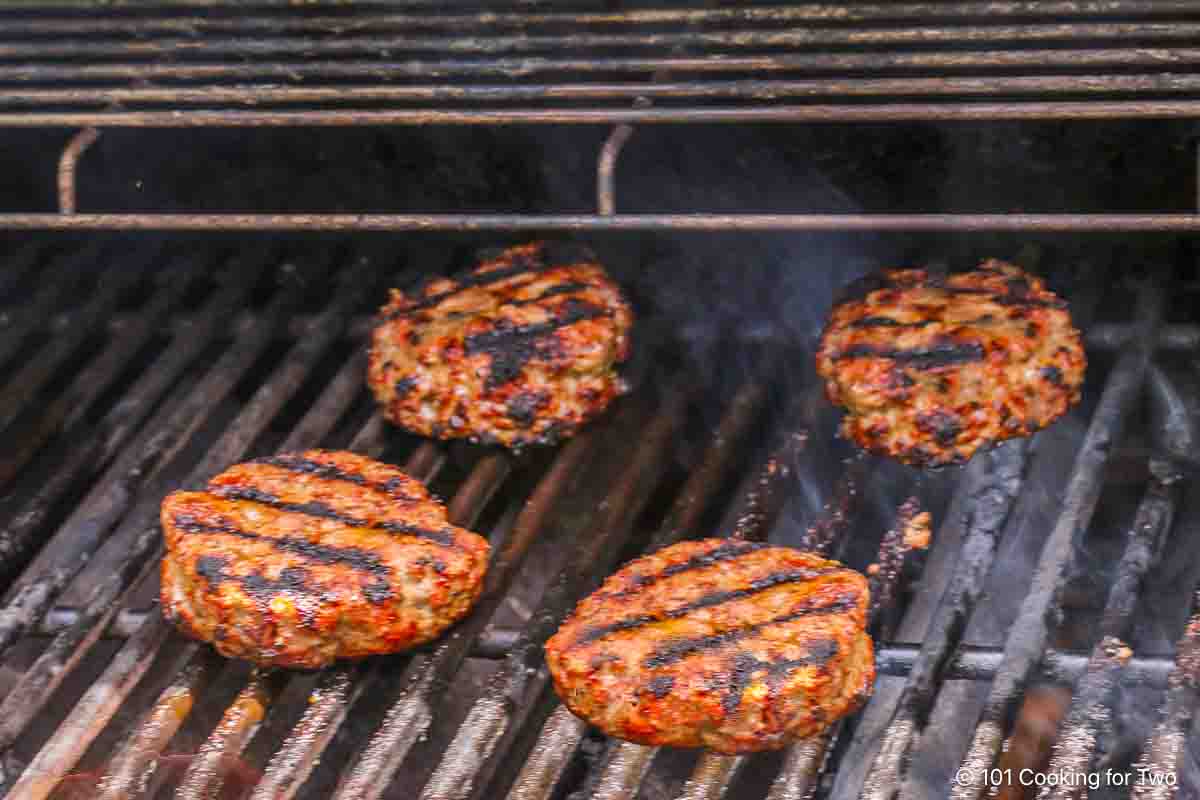
3. Grill over direct heat
Grill about 4–6 minutes per side, flipping once, until the internal temperature reaches 160°F.
✅Pro Tip: The USDA recommends 160°F as the safe final temperature for ground beef.
4. Rest and serve
Let the burgers rest 5 minutes before serving. Toast the buns if you like, then add your favorite toppings.

👇For full step-by-step instructions, scroll to the printable recipe card or keep reading for grilling tips and serving ideas.
⏲️ How Long to Grill Hamburgers (Time Chart & Temps)
Most ¼–½ lb burger patties cook in 7–12 minutes total over high heat, flipping once halfway through. Exact time depends on thickness and grill temperature.
Approximate Time Chart:
- ¼ lb patties: 7–8 minutes total (about 4 minutes per side)
- ⅓ lb patties: 8–10 minutes total (about 4–5 minutes per side)
- ½ lb patties: 10–12 minutes total (about 5–6 minutes per side)
Times are for dimpled burgers about ½ to 1 inch thick, cooked over high heat (about 500–600°F) and flipped once. Always cook to 160°F internal temperature — use an instant-read thermometer.
Thinner patties cook faster but can dry out. Thicker burgers (over 1 inch) will take longer and may need lower heat or a two-zone setup to avoid burning the outside before the center is done.
Save this recipe!
🥣 Burger Patty Tips
- Size matters: Form patties about ½ inch wider than the bun — usually 4 inches across and ½ to 1 inch thick. Use ⅓–½ lb of ground beef; ¼ lb works, but thinner burgers are easier to overcook.
- Keep it cold: Unlike steak, patties should go straight from the fridge to the grill, with only a quick pause to shape and season. Cold meat holds its shape and cooks more evenly.
- Handle gently: Work the meat as little as possible so the burgers stay tender.
✅ Pro Tip: Dimple the center: Press an indentation about 1 inch wide and roughly ⅓ the thickness of the patty. This prevents puffing so burgers cook evenly without drying out.
🔥 Grilling Tips
- Preheat fully to high heat (about 500–600°F). Most home gas grills reach 600–700°F — aim for at least 500°F for a proper sear.
- Lid closed: You can grill with the lid open for thin patties, but keeping it closed maintains even heat — especially on gas grills.
- Cook to 160°F internal temperature, then let rest 5 minutes.
✅ Top Pro Tips:
- Flip once — don’t mess with them.
- Don’t press or poke. It just squeezes out juices and invites flare-ups.
- And yes, that means don’t play with your food.
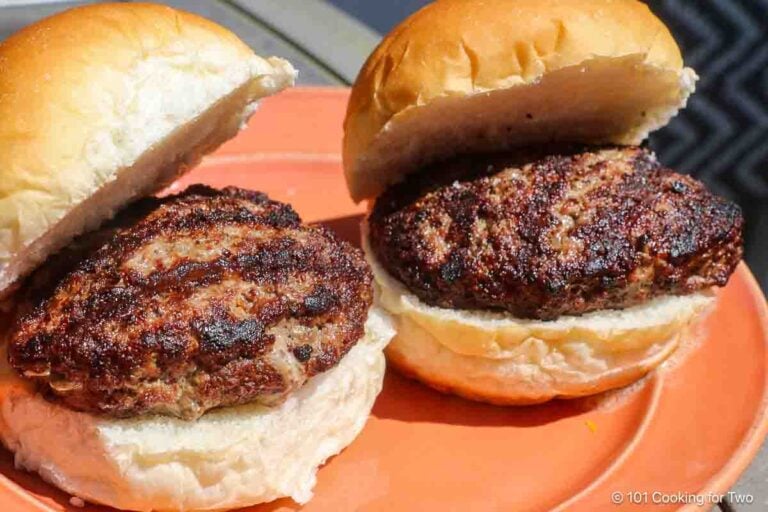
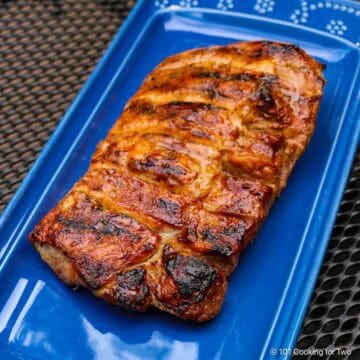
🍽️ Serving Hamburgers
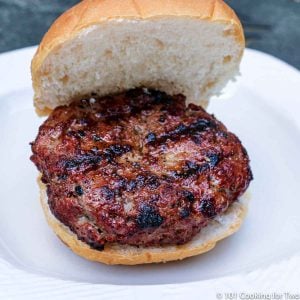
These are the classic diner-style grilled burgers—juicy inside, lightly charred outside, and ready for any topping combo you like.
- Buns matter: Skip the flimsy ones. Toast lightly on the grill if you like — brush with butter or oil first.
- Cheese timing: Add during the last minute on the grill or as soon as the burgers come off — it’ll melt from the residual heat.
- Classic toppings: Mustard, ketchup, mayo, lettuce, tomato, onion, pickles.
- Optional upgrades: Bacon or BBQ sauce if you want to mix it up.
Looking for the right sides? Try Microwave Corn on the Cob, Crispy Baked French Fries. Dessert? Strawberry Jello Pie or Brown Sugar Cinnamon Glazed Grilled Pineapple.
🧆 Burger Alternatives: Lean Meats and More
Want to use leaner meat or something different? You can use lean beef, chicken, turkey, or meat alternatives.
Remember, these alternatives cook a bit differently and can dry out faster, so adjust for texture and moisture. Cook poultry to 165°F and beef to 160°F for safety.
Check out these recipes for tips on getting great results:
- Low-Fat Burgers – Lean beef done right
- Grilled Chicken Burgers – Flavorful and juicy
- Juicy Lucy Burger – Stuffed with cheese for extra moisture
- Meatloaf Burgers – Moist and tender with a flavor boost
- Smoked Hamburgers – A slow-smoke twist if you're ready to level up
- Grilled Portobello Mushrooms – A satisfying vegetarian option
❓ FAQs
Check the center with an instant-read thermometer and cook to 160°F internal temperature. Time and color aren’t reliable. Below 160°F is unsafe for ground beef, and higher temperatures will dry out the burgers.
Yes — don’t trust looks or time alone. Ground beef must reach 160°F for safety. An instant-read thermometer is the only reliable way to know when burgers are done.
Ground chuck or 80/20 beef (80% lean, 20% fat) is ideal. It gives the best balance of flavor and juiciness. Leaner blends (90/10) can dry out.
Closed is best. It keeps the heat steady and speeds up cooking, especially on gas grills.
Yes. Shape and season up to a day in advance. Keep them cold in the fridge until grilling.
No. Thaw it first — frozen beef won’t shape well, cooks unevenly, and dries out on the grill.
📖The Recipe Card
How to Grill Hamburgers (Juicy, Easy Method)
Video Slideshow
Ingredients
- 1 pound 80/20 ground beef - ⅓ pound patties suggested
- Salt and pepper to taste or other seasoning
- buns and fixings
Step-by-Step Instructions
Preheat the grill
- Clean and oil grill grates. Preheat the grill on high (over 500°F), and let it fully preheat before grilling.
Form and season the patties
- Start with 80/20 ground beef. Divide into ⅓ to ½ pound balls—about tennis ball size—and shape into patties roughly 4 inches wide and ½ to ¾ inches thick.

- Sprinkle both sides with salt and pepper (or your preferred seasoning)—I use my All Purpose Seasoning 7:2:2 (salt, pepper, garlic). Another seasoning is fine.

- ✅ Press an indentation of 1-inch diameter and ⅓ the thickness in the center of one side of the patty. It prevents puffing and helps the burger cook evenly.

Grill over direct heat
- Grill with the lid closed (preferred) or open if you prefer. Flip after 5 minutes.

- Continue grilling 3–4 more minutes, until the internal temperature reaches 160°F. You're cooking to temperature, not time.

Rest and serve
- Remove from heat and let rest for 5 minutes before serving.
Recipe Notes
Pro Tips
- Use 80/20 ground beef for best results—juicy, flavorful, and grill-friendly.
- Always cook to a final temp of 160°F using an instant-read thermometer.
- Avoid pressing or poking during cooking—it drains juices and causes flare-ups.
- Resting helps the juices reabsorb, keeping your burger tender and moist.
Your Own Private Notes
To adjust the recipe size:
You can adjust the number of servings above; however, only the amount in the ingredient list is adjusted, not the instructions.
Nutrition Estimate (may vary)
Editor's Note: Originally published August 17, 2013, updated with expanded options, refreshed photos, and a table of contents to help navigation.

Tyler Johnson says
That's a good idea to make sure that you put the cheese on the burger at the end of it's cooking time. I always put it on afterward before now. I'll have to try putting it on and melting it since that sounds like it will taste better. I am pretty bad at making burgers so that might help. I'll have to try that and if that doesn't help then there is always the burger restaurant.
DrDan says
Hi Tyler,
Welcome to the blog.
I do this all the time. The most important step is the center dimple and then the final internal temperature.
Thanks for the note.
Dan
Rita M says
How would you grill a butterflied chicken? Only tried once but wasn't satisfied. I would like it crisp but mine (skin) stuck to the grill. I have read that you have to wait until the chicken " lets go" ???? Thanks 2.21.2019
DrDan says
Hi Rita,
Welcome to the blog.
I have a butterflied chicken around here somewhere. While it mirrored many other recipes, I'm not that happy with the technique now. I would start skin up then flip to skin down to get to a near done color then flip back to skin up until 165 internal temperature. All over 400-450 degree grill.
BUT I would not do butterflied normally for a whole chicken. Check out https://www.101cookingfortwo.com/grilled-whole-chicken-on-a-gas-grill/ which I now do. The skin is great and meat moist and tender.
Dan
Kellie says
Hello. Loved the reading. Thank you. I gave up gas grills years ago. I had a hard time cooking on them. Same as a gas stove. I prefer electric. People think Inam crazy hehe Anyway. One thing I like to do when cooking my burgers is use smoking chips. To make a GREAT tasting burger is to butter one bun and put it on the grill to crisp it while the other bun is on top of cheese melting on the burger. Close the lid for a few minutes. If you forget them you will burn your buns hehe I also like to slice onions and cook them under the burgers. I do the same with steak.
Jane says
I am so excited!! This really worked for me me. I am new to gas grills and have been struggling with it. Now I can make an awesome burger that tastes like it was grilled on charcoal. Always love your style.
DrDan says
Hi Jane,
Welcome to the blog.
Glad it worked so well for you.
Thanks for the note.
Dan
Michelle says
I am bookmarking this recipe. My hubs is not a talented griller and I have never grilled. We are 69 and 52, never too late to learn right? But I just got him a grill we can take in the camper. So we are testing it tonight with burgers. I am hoping our results will be better than in the past!
Glen Luehrman says
Just a side note. DO NOT USE A WIRE BRUSH TO CLEAN YOUR GRILL. The metal bristles can break off and get into the food. I am a physician and I have seen it many times. It requires a trip to the hospital and an endoscopy to remove if you are lucky. JustFYI
Seth Borneman says
Or... just avoid carelessness when cleaning your grill. There is no reason that a wire should be left on the grill after a proper cleaning.
Dan Mikesell AKA DrDan says
Hi Seth,
Welcome to the blog. You are right that taking a peak after cleaning is a good idea. Dr. Glen does have a point that this can happen but in over 40 years, I have only heard of it once or twice.
Thanks for the note.
Dan
Susie says
I've so enjoyed your site! Thank you Dr Dan for sharing your recipes and excellent cooking advice. My hamburgers were those charred puffs you mentioned! Now, since trying them your way, they are delicious. :)
Brian says
Great tutorial! I like to go back and see what James Beard was suggesting when he started us grilling in our backyards in the 50's and early 60's. Few know he is the father, indeed the inventor, of outdoor grilling in America. He thought it was a great place to showcase many of truly American our national dishes. Frequently, I find he already made many suggestions we are only now re-discovering. He'd be with you on every point: don't man-handle the meat, include enough fat, be sure the grill is hot, and make the center of the raw meat patty thinner than the periphery. And please lightly toast the bun, which should be a quality item!
The only thing he'd add, I think, is that if you want a burger with more moisture -especially if you are cutting back on the fat or cooking to "well-done"- try adding a bit of finely minced onion to the burger mix. It only takes a moment, and if you use a sweet onion, there is no added "bite". I like the boost in flavor as well.
Please keep the fine recipes and clear, sensible instructions coming!
Sophie Timmons says
My burgers continue to shrink and puff up even after indenting the patties. Should the beef be cold or come to room temperature before grilling? Do you close the lid again after flipping the burgers? Any ideas? Thanks!
DrDan says
Cold is fine. I don't rest ground meat to room temperature for safety reasons.
Make them a little thinner and the depression a little bigger. Lid is closed.
Let me know how it goes.
Dan
Rob says
A critical piece of information that wasn't covered, but could very much change the outcome -
Dan, when you cook these, do you close the lid to the grill?
Thanks,
Rob
DrDan says
Hi Rob,
Closed. As a good general rule, anything over 1/2 inch thick should have a closed lid. So a thin fish filet in a grill basket may not but most everything else should. Since I'm aiming at beginners, I have edited the post to be clear.
Dan
Shelley says
When buying store bought meat, how do you know if it's 80/20? Would that be the meat that is labelled Lean or Medium?
Thanks
Shelley
DrDan says
Hi Shelley,
I use three different stores but all label by percent. So the best thing to do is ask them how they label. My usual store also labels by cut. So hamburger is 75/25, ground beef 80/20, ground chuck 81/19 if branded and 80/20 if theirs, ground sirloin 85/15 and ground round 90/10. I usually do chuck. If I'm on a low fat kick, I do leaner but it can taste off some so mostly I use them for other than straight burgers.
Dan
LeRoy Soucie says
I really enjoyed reading your article & can't wait to try my next burger thanks again
Paul says
So you don't worry about the overall temp of the grill? Webber says 400-500 degrees. Honestly I can't get mine that hot anyway. I always over-cook them because I don't want any pink meat.
DrDan says
Hi Paul.
Very few grills won't make at least 500. But just get it as hot as it will go. I use a grill surface thermometer that is about $8-$10. Never look at the thermometer on the grill hood... useless. Also long as you get 500 plus the 5 minutes on the first side will do. If you can only get 450 the maybe 6 minutes on the first side. If you can't get 450 then get a new grill.
Be sure to use a meat thermometer to determine 165 as the end point. There is no pink at 165. If you go much over that they will start to dry. Notice there is no specific time for the second side. That is were the variation in grill temp and thicken is account for.
Hope that helps.
Dan
Judy Handschug says
I found the best grill a number of years ago for my hubby. You can use gas or charcoal. We love it.
DrDan says
I bought my son-in-law a combination smoker-gas-charcoal for Christmas... I had it delivered and haven't seen it yet but hear it is huge. I love my natural gas. Hooked directly to the house and no bottles to fill or charcoal to light... I'm so lazy.
Pam says
Your burgers look delicious and you are right on spot with the 80/20 and the indentation. Just wish I had one now because I am drooling over that photo!
Dan Mikesell says
I'm surprised about how many don't know these things many of us take for granted. The indentation is so simple but really important to the final results. Thanks for the comment.
Chris says
I've been craving burgers this weekend so this just made it worse. Thanks....I guess :)
Dan Mikesell says
I frequently crave a burger and it is all I have time for...
Edwin J Grasmann says
Your Golden Jake was so sweet. I lost my Yellow Lab of 12 years October, 2017
DrDan says
Hi Edwin,
Sorry for your loss. Jake lasted another 8 months after that picture. He was blind and had a bad leg but cancer did him in.
Dan