
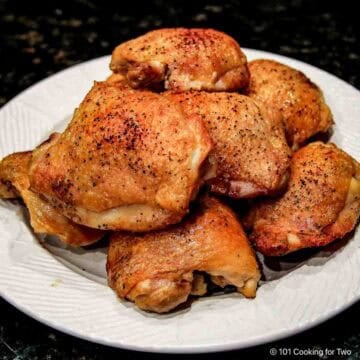
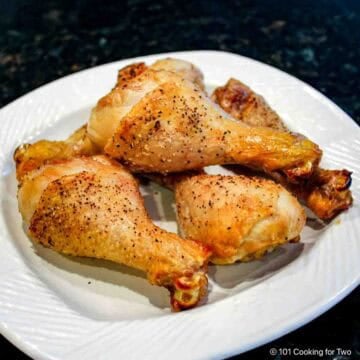
Trim it right, season it well, and bake it hot—that’s the whole secret to juicy, crispy baked split chicken breasts. This simple, foolproof recipe works in any oven for an economical, crave-worthy dinner every time.
How long do you bake split chicken breasts (bone-in)?
Bake trimmed split chicken breasts until the thickest part reaches an internal temperature of 165°F:
• 425°F (400°F convection): 35–40 minutes
• 400°F (375°F convection): 40–45 minutes
• Lower temperatures will work but produce less crispy skin.
Jump To (scroll for more)

Featured Comment by JJ:
⭐⭐⭐⭐⭐
"So delicious, crispy, fast, easy. This one is immediately in my top 3 chicken recipes…"
🧡 Why You’ll Love This Recipe
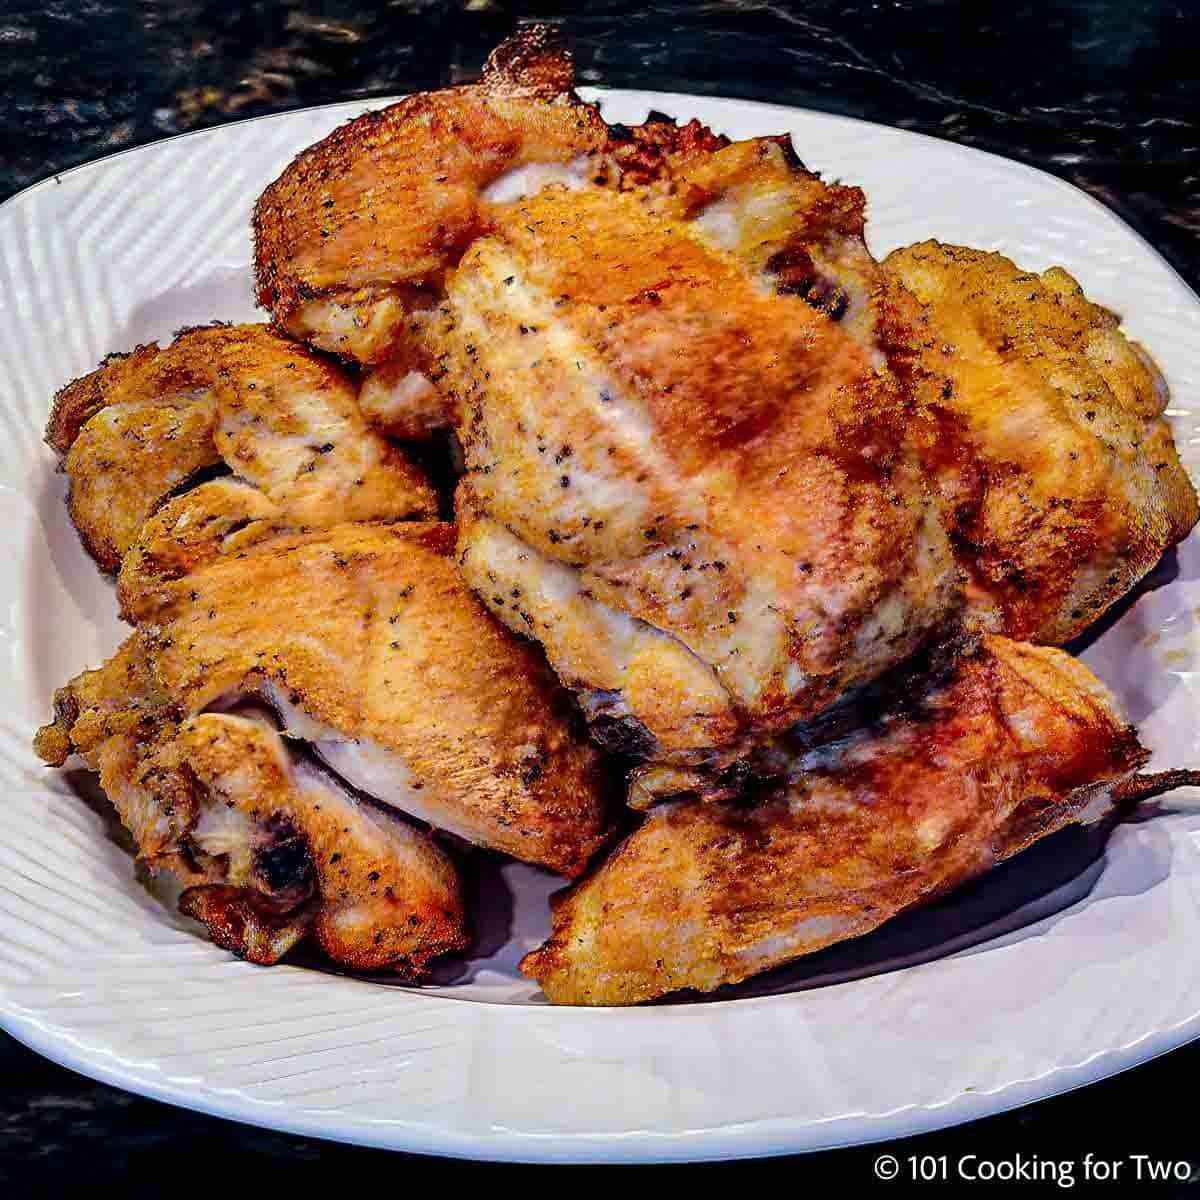
- Juicy inside, crispy outside: High oven heat plus proper trimming gives you great texture every time.
- Trim it once, cook it evenly: Smaller portions cook faster, season better, and stay juicy.
- Simple seasoning, big flavor: Garlic, onion, and spices do all the heavy lifting—no complicated rubs.
- Foolproof in any oven: Works just as well in convection or a regular oven.
- Economical and satisfying: An affordable cut that eats like a splurge.
🐓 Ingredients

- Split chicken breasts: Also called bone-in or skin-on bone-in chicken breasts. Big, flavorful, and budget-friendly.
- Seasonings: Garlic powder, onion powder, kosher salt, and black pepper—for simple, classic flavor.
- Cayenne pepper (optional): Adds a little kick if you like some heat.
- Celery salt (optional): Brings a subtle, savory bite—grassy and peppery.
- Baking powder (optional): Helps dry the skin for extra crispiness.
✅Pro Tip: Use aluminum-free baking powder. Some people can taste a bitter, metallic flavor in versions that contain aluminum.
👨🍳 Quick Overview: How to Bake Split Chicken Breasts (Bone-in)
This recipe works for a split chicken breast in an oven using either convection or conventional baking.
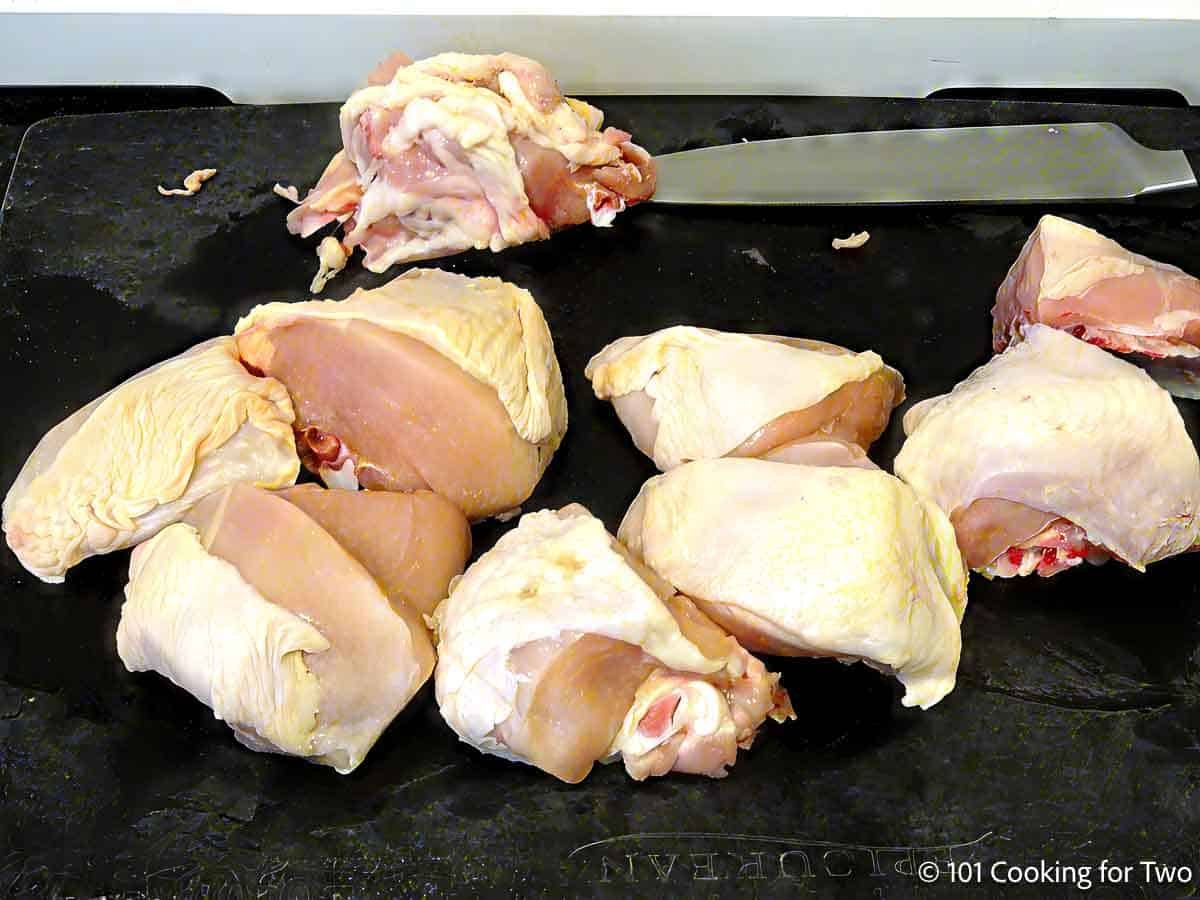
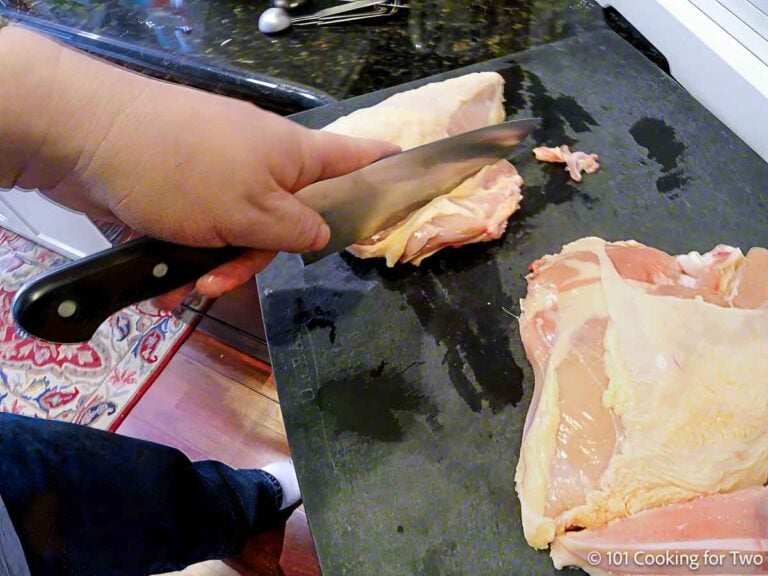
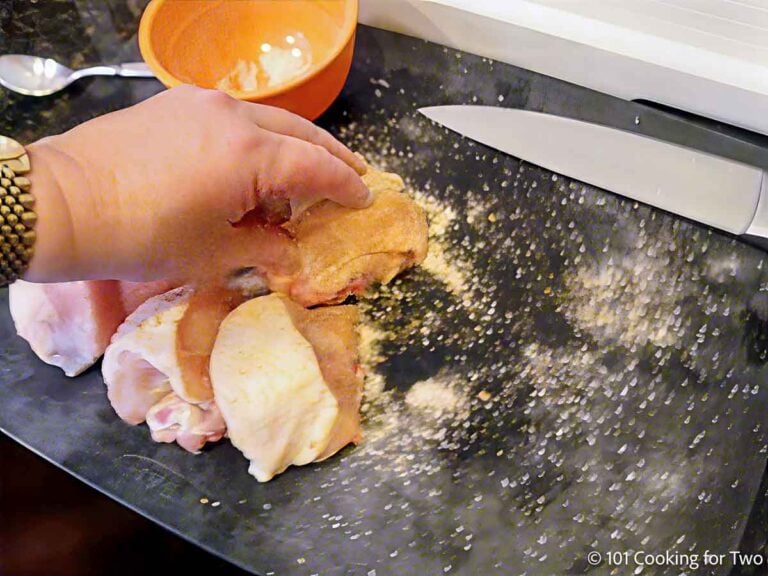
1. Trim the chicken: Pat dry, remove excess fat and the rib section, and cut each breast into 2–3 smaller pieces for even cooking.
2. Season well: Mix the spices (and optional baking powder) and coat all sides generously.

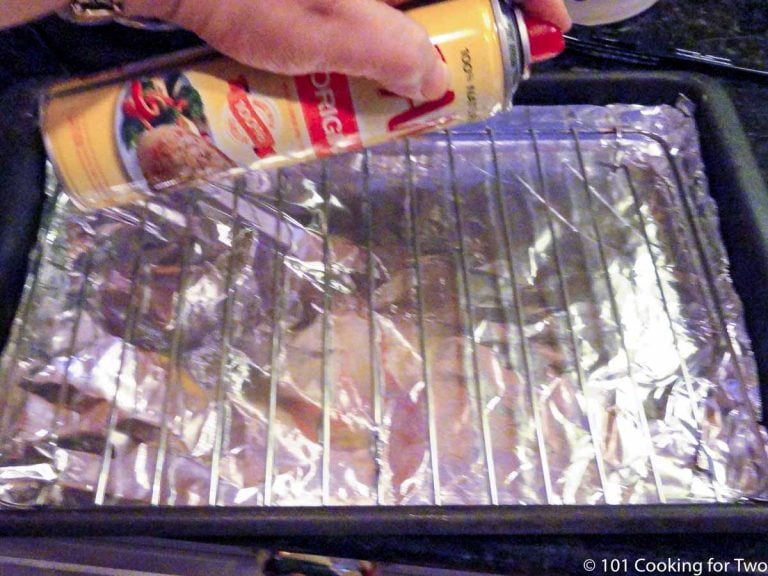
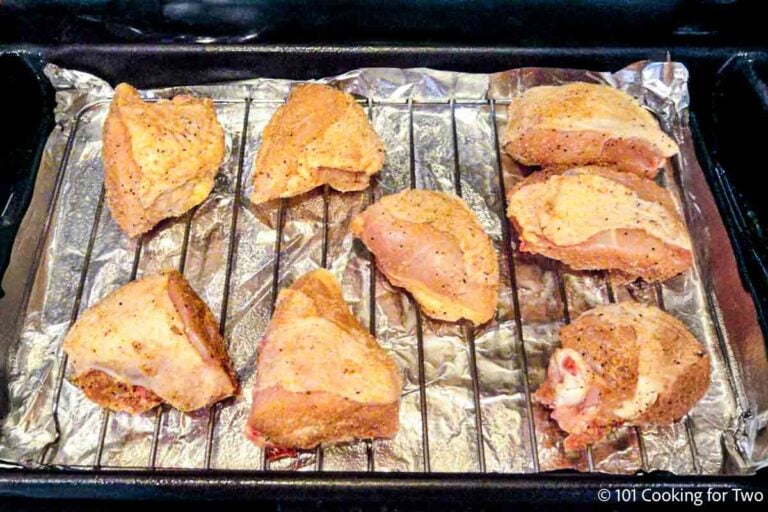
3. Prepare for the oven: Set the chicken on a foil-lined tray with a rack if you have one.

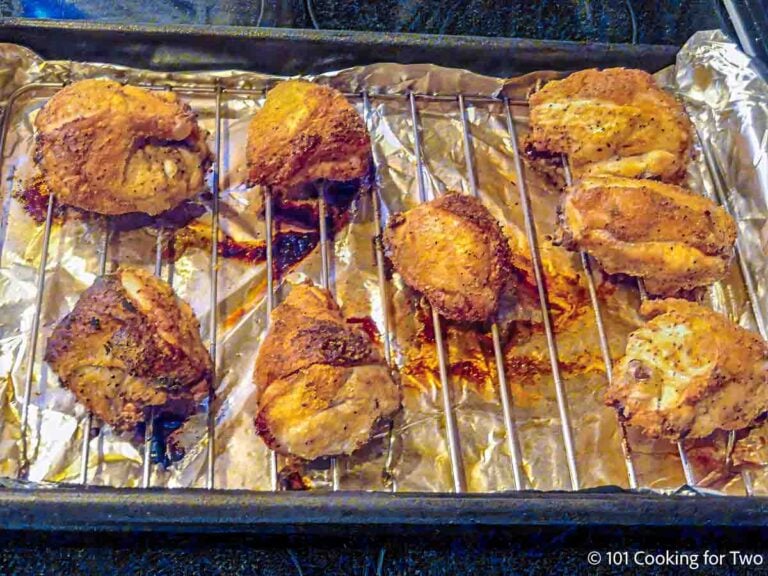
4. Bake hot to 165°F: Bake at 400°F convection or 425°F conventional until the thickest part reaches 165°F, about 35–40 minutes for most trimmed pieces. Rest 5 minutes before serving.

👉For split chicken breast oven cooking times at other temperatures, see the chart below.
✅Pro Tip: According to the USDA, chicken must reach 165°F for safety.
📌For complete step-by-step instructions, scroll down to the printable recipe card or keep reading for tips, flavor options, and serving ideas.
⏰ How Long to Bake Split Chicken Breasts (Bone-In)
Most trimmed split chicken breasts bake in about 35–40 minutes at 400°F convection or 425°F in a regular oven, but the exact time depends on thickness and how evenly they’re trimmed.
The chicken is done when the thickest part reaches an internal temperature of 165°F. Always use an instant-read thermometer—time alone isn’t reliable.
✅ Approximate Cooking Times by Oven Temperature
- 425°F (400°F convection) → 35–40 minutes (best for crisp skin)
- 400°F (375°F convection) → 40–45 minutes
- 375°F regular oven → 45–50 minutes
Lower temperatures will work but produce less crispy skin and require more time.
✅ Pro Tip: Cooking bone-in chicken breasts in a convection oven shaves a few minutes off the bake time and gives even crispier skin. If your oven has convection, use it.
Save this recipe!
✔️ Tips for Perfect Results
- Trim before baking: Cutting large split breasts into smaller pieces helps them cook more evenly, gives better portions, and increases seasoning coverage.
- Save the pan juices: Use them to make gravy—see How to Make Gravy from Scratch.
- Season to taste: The base mix is simple, but you can add herbs like rosemary, thyme, oregano, or basil.
- Rest before serving: Let the chicken sit for 5 minutes after baking. Carryover heat finishes the cooking and helps keep the meat moist.
🍗 More Split Chicken Breast Recipes
Split chicken breast oven baking is simple and reliable, but many home cooks skip it because they’re not sure how to use them.
- Stuffed: Try Garlic Butter Chicken or Chicken Cordon Bleu
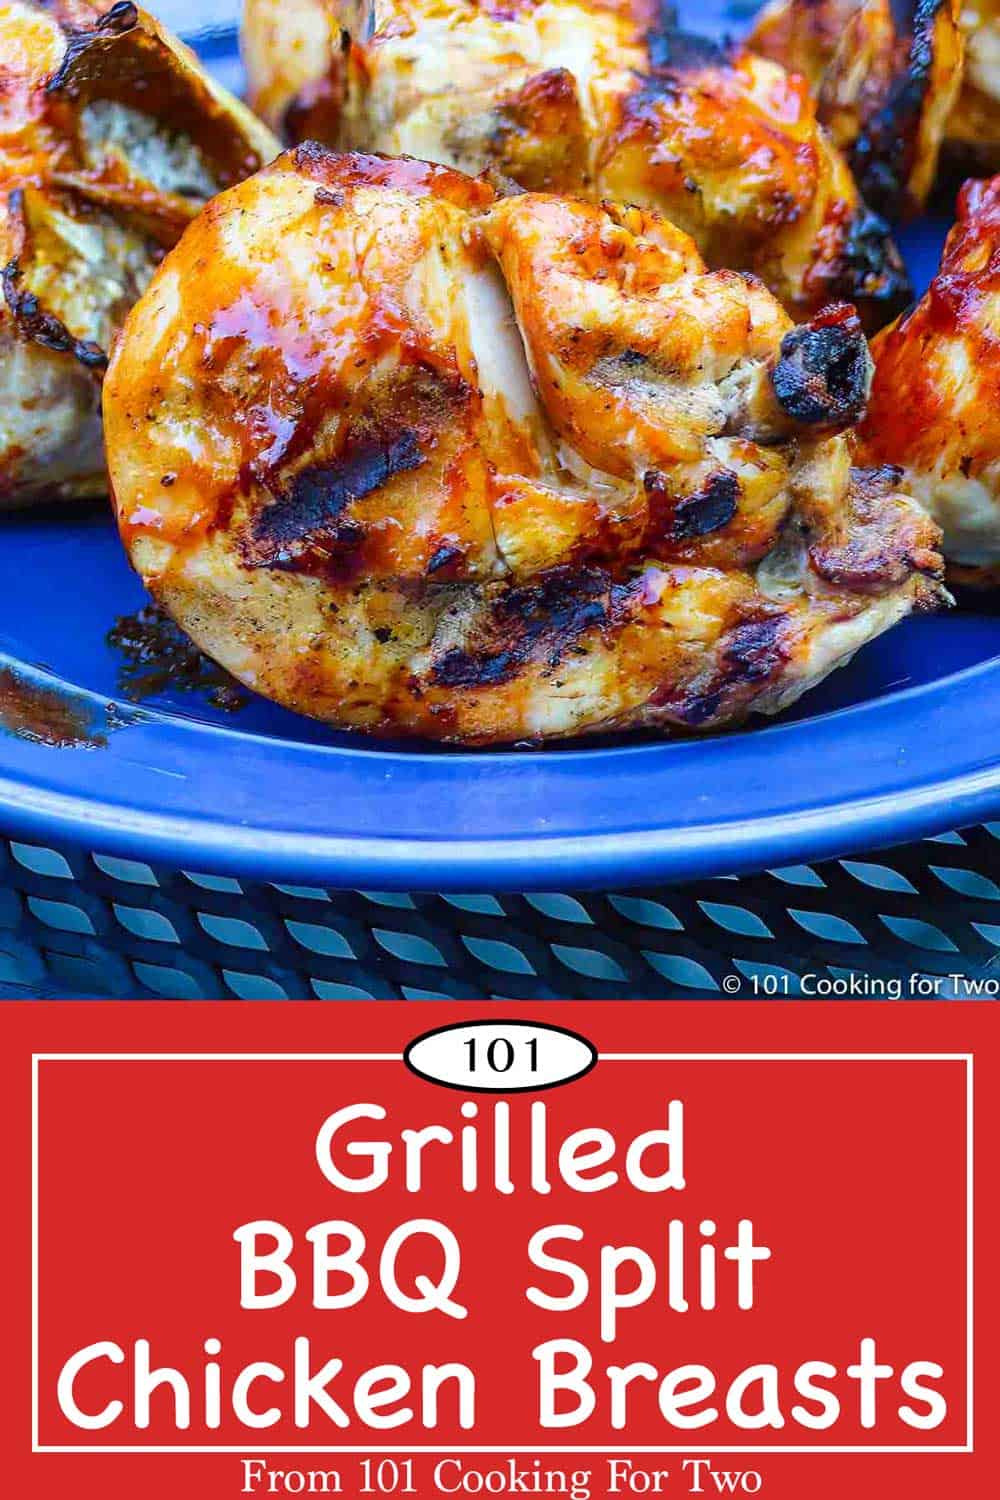
- BBQ-style: Go with Grilled BBQ Split Chicken or Baked BBQ Split Chicken
- Something different: Check out Herbs de Provence Chicken or Baked Mayonnaise Split Chicken
🍽️ Serving Suggestions
Serve with Roasted Small Potatoes, Cheesy Cauliflower Casserole, and green beans. Add yeast dinner rolls and a fresh strawberry jello pie to round out the meal.
❄️ Storing Leftovers
Leftovers should be stored in an airtight container in the refrigerator for 3–4 days. The skin will lose its crispness, but the meat stays moist and flavorful for reheating or repurposing. You can also freeze for 3 months.
For best results, reheat in a covered dish in the oven. The microwave works, but it will soften the texture. Leftover chicken is also excellent for garden salads, basic chicken salad, or Waldorf Chicken Salad.
❓FAQs
They’re bone-in chicken breasts with the breastbone split during processing—hence “split.” Most are skin-on and much larger than a standard serving, which makes trimming them before cooking a smart move. That also helps them cook more evenly and season better. Many people find them more flavorful and moist than boneless breasts.
Absolutely. A regular oven works great for split chicken breasts—just follow the same temperature and timing guidance. You’ll get crispy skin and juicy meat without needing convection.
No, but it helps. A rack keeps the bottom from getting soggy and promotes even crisping. If you don’t have one, coat the tray well with cooking spray or oil to help prevent sticking.
It draws moisture from the skin, helping it crisp in the oven. Even a short rest with the rub improves results. Use aluminum-free baking powder to avoid any off flavors. You’ll still get good chicken without it—just not quite as crispy.
Rinsing spreads bacteria and doesn’t help crisp the skin. Just pat the chicken dry with paper towels before seasoning. See Chicken... To Rinse or Not To Rinse? for a detailed discussion.
📖The Recipe Card

Juicy Oven-Baked Split Chicken Breasts (Bone-In & Crispy)
Ingredients
- 3 split chicken breasts (bone-in) - Scale to what you need
- 1 teaspoon garlic powder
- ½ teaspoon onion powder
- ½ teaspoon kosher salt
- ¼ teaspoon black pepper
- ¼ teaspoon cayenne pepper - optional
- ⅓ teaspoon celery salt - optional
- 1 teaspoon baking powder - optional Aluminum-free
Step-by-Step Instructions
- Preheat oven to 400°F convection or 425°F conventional oven.


Preparing the chicken
- Pat dry the chicken, trim the chicken off any trimmable fat and remove the rib area.

- Cut the chicken into pieces—the normal-size ones in half and the huge ones into thirds.
- Prepare a baking sheet with aluminum foil and a baking rack—coat with PAM cooking spray.

Seasoning the chicken
- Combine spices and baking powder (if using) in a small bowl. Sprinkle and rub on all surfaces, but you may not need all of the spice mixture; just season to your taste.
Baking the chicken
- Place on a rack skin side up with larger pieces in the corners—and thinner edges to the center. If you used baking powder and have time, let it set for 30 minutes to help dry the skin.

- Bake until internal temp of 165°. It takes about 35 minutes, depending on your oven and the thickness of the chicken. Let the chicken rest for 5 to 10 minutes before serving.
Recipe Notes
Pro Tips:
- Scale to the amount you want. I suggest a serving size of 4 to 5 oz.
- Proper trimming makes all the difference—smaller portions cook more evenly, season better, and make for easier serving.
- The celery salt adds some taste, but skip it if you don't have it.
- The cayenne pepper is also optional, to taste. ¼ teaspoon has a 2 or 3/10 heat level. kip it if feeding kids.
- I like cooking chicken on racks, but it is not that important here.
- Keep the thicker parts of the chicken towards the outside of the baking tray.
- Be sure to check for a final internal temperature of 165°. Do not guess or cook by time alone. Use an instant-read thermometer.
- Leftovers are great in the refrigerator for 3-4 days and can be frozen for 3 months.
Your Own Private Notes
To adjust the recipe size:
You can adjust the number of servings above; however, only the amount in the ingredient list is adjusted, not the instructions.
Nutrition Estimate (may vary)
Editor's Note: Originally Published May 25, 2011. Updated with expanded options, refreshed photos, and a table of contents to help navigation. Please enjoy one of our easiest, most flavorful chicken recipes.

Charles Schmitt says
Recipe looks good I want to try to tonight
Patricia A says
Is it not necessary to rub with olive oil as well? I see that in many other recipes
Dan Mikesell AKA DrDan says
Hi Patricia,
Welcome to the blog.
Oil is an option if you want...the skin will be a little thicker and a bit less crispy. One of the focus of this recipe is the crispy skin with the baking powder, so it somewhat goes aginst that.
If you want try a light brush of oil on some and skip it on other and you decide which you prefer.
Hope hat helps.
Dan
sally laRhette says
Curious, What does baking powder do in this chicken dish?
Dan Mikesell AKA DrDan says
Hi Sally, s
Welcome to the blog.
The baking powder pulls moisture out of the skin to make it crispy. It is discussed in the FAQ section in the post.
Thanks for the rating.
Dan
Cindy says
This is my go to recipe for baked chicken breasts (skin on) and wings!! Delicious and so easy. I've made using the seasoning in the recipe, but I've also added smoked paprika, thyme, and rosemary at times. Thanks so much for sharing this recipe!
Stephen Adams says
Thanks for really good recipe. I trimmed the breasts (though removed the skin) as you suggested and seasoned them as you suggested. Even cooked 'em on a rack as suggested. Perfectly cooked. Perfectly seasoned. My wife has already put in her order for another batch tomorrow. Yum!
Dan Mikesell AKA DrDan says
Hi Stephen,
Thanks for the note and rating.
If you are going to remove the skin, which is fine, skip the baking powder, it serves no purpose with no skin and no need to rest before baking—that was to give the baking powder some time to pull moisture out of the skin. Lastly and optional, the meat may dry more without the skin, give it a light brush of melted butter or oil before seasoning.
Dan
Jane Nicholls says
Your recipes help me cook more healthy and flavourful meals. I appreciate your detailed instructions and your excellent information.
Pats to the girls.
Eva says
This was great exactly as is and as promised! I do have a tip. Invest in a good pair of kitchen shears! You can then easily and safely snip through those bones.
Brooke says
So many thanks for creating this post! I bought split chicken breasts at the grocery last night due to the unbeatable price! I knew I could tackle a little bit of trimming and basic deboning (One of the best kitchen skills I have learned is deboning chicken thighs.) but I needed to find a “how to” and your article explained it perfectly. I’m about to prep all of these super huge breasts for the freezer, and one or two (not decided yet if I want leftovers) for supper later tonight for my husband and me. Thank you so much for this valuable info, and the delicious sounding recipe!
Deborah Lein says
Dear Dr Dan, Bought split bone-in skin-on chicken breasts by mistake. Here was your recipe to the rescue! However... I rarely cook with bone-in chicken. now I know why boneless is more expensive. More work and more waste. I sure could have benefited with more detailed explanation of cutting the ribs off. I worked my way through ribs AND wish bone AND breast bone and several more bony things. When I looked through the recipe for the tenth time, I realized the chicken photos had bones in them that I had so diligently and laboriously removed. Which just goes to show that I don't know what I don't know. Maybe it should have read, cut the ribs and don't worry about the other bones. Husband is lurking in kitchen saying this smells delicious. I hope so. I'm not cut out to be a poultry butcher on a regular basis.
Karen says
Very,very good. Has been well received by fussy water in my house. Your dog's are lovely and I really enjoy the pictures.
Andi Fox says
Just love the backing powder tip (hack? lol). Just wish I'd seen this recipe before I put the 3 huge chicken breasts into the oven. Love rosemary & thyme seasonings with chicken, but I like the idea of a little zing the cayenne will give.
Thanks & I'm signing up for your newsletter.
Andi Fox