
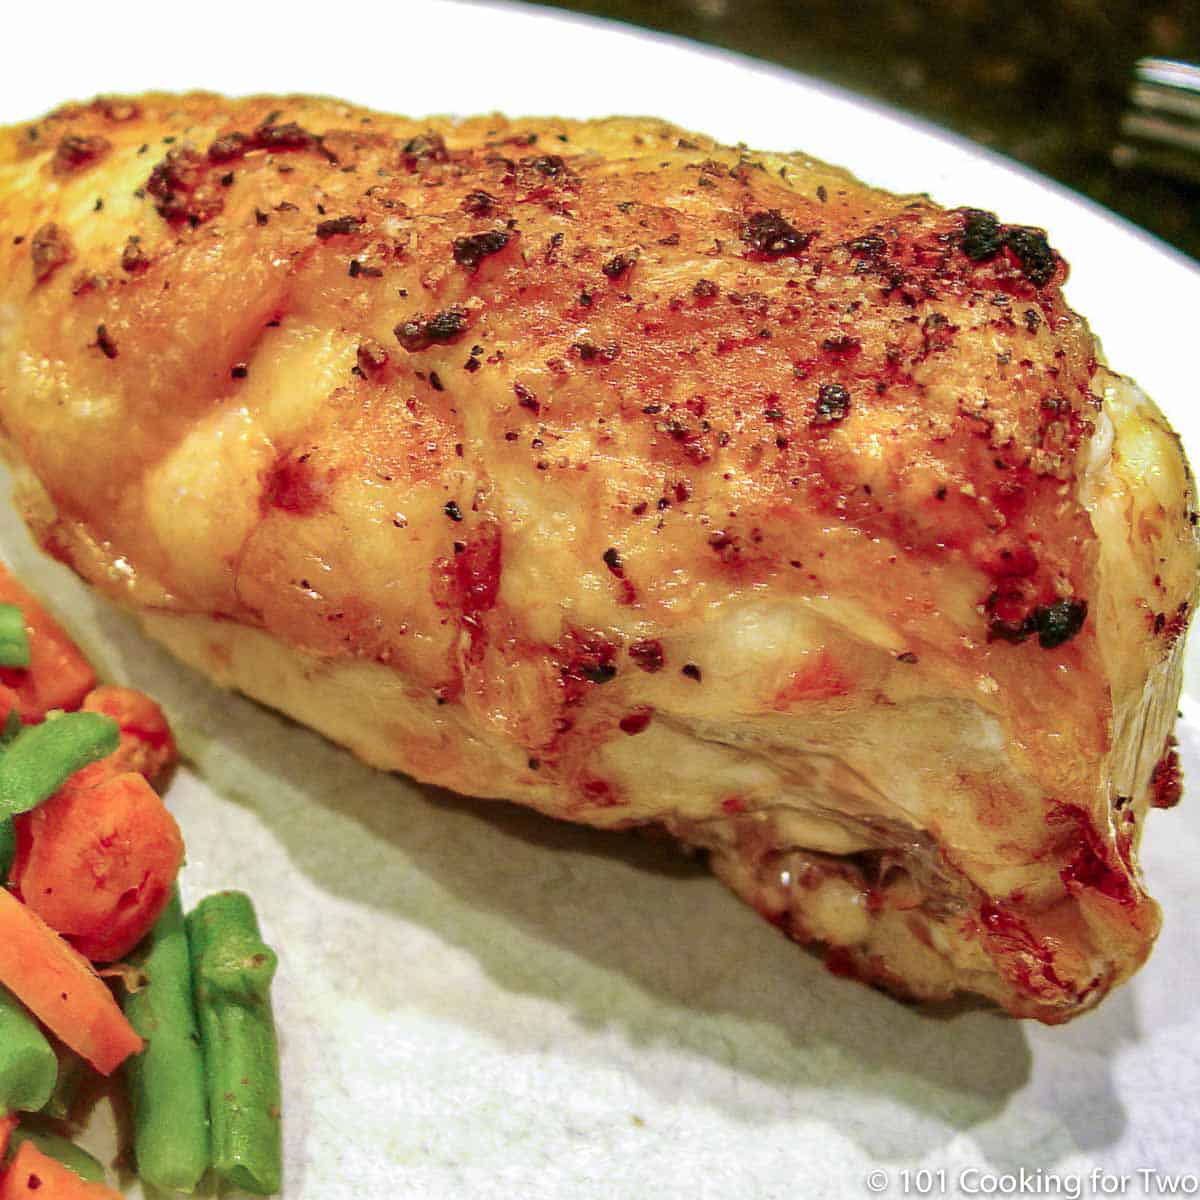
Garlic butter stuffed chicken breast starts with a bone-in split chicken breast that's filled with garlic butter before baking. As the garlic butter melts into the chicken meat, it helps keep the meat moist while the skin turns golden and crispy.
Split chicken breasts are an economical cut that's full of flavor, making this an easy baked chicken recipe that's perfect for a family dinner or whenever you want something a little special without spending a lot.
⏱️ Quick Answer: How Long to Bake Garlic Butter Stuffed Chicken Breast
It takes about 45 minutes to bake garlic butter stuffed split chicken breasts at 400°F (375°F convection).
- Most split chicken breasts take about 45 minutes, but it depends on size.
- Cook to a safe internal temperature of 165°F in the thickest part of the meat.
Jump To (scroll for more)

Featured Comment by Paula:
"Can't tell you how awesome this recipe was! I have tried SO many baked chicken recipes, even from the Food TV chefs and Bon Appetit and Epicurious, yours is by far the best! Thanks so much…"
🤔 TL;DR — Recipe Summary
✔️ What: Garlic butter stuffed chicken breast is a bone-in split chicken breast with a pocket cut into the meat and filled with garlic butter before baking.
✔️ Why: The garlic butter melts into the chicken meat as it bakes, keeping it moist while the skin turns golden and crispy.
✔️ How: Stuff the pocket with garlic butter, bake at 400°F until the thickest part reaches 165°F, then rest for a few minutes before serving.
🐓 Ingredients
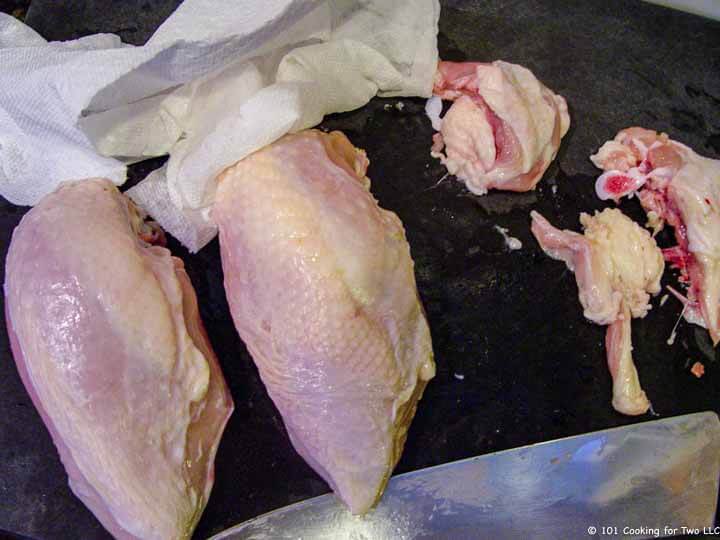
- Split chicken breast – Bone-in, skin-on split chicken breasts work best. I usually remove the rib section to make them easier to handle and serve.
- Garlic – Fresh garlic flavors the butter. Garlic powder may be substituted, but fresh is better.
- Butter – Softened butter mixes with the garlic and melts into the chicken for moisture and flavor as it bakes.
- Olive oil – Used to gently cook the fresh garlic and help brown and crisp the skin.
- Seasoning – Salt, black pepper, and garlic powder keep the flavors simple without overpowering the garlic butter.
👨🍳 Quick Overview: Garlic Butter Stuffed Chicken Breasts
Preheat oven to 400°F (375°F convection). Trim any extra fat and remove the rib section from the split chicken breasts.
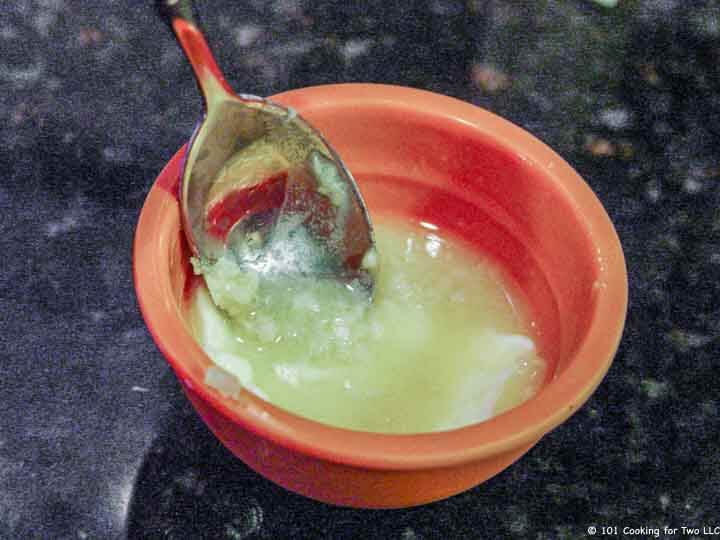
Cook the crushed garlic in olive oil for 1–2 minutes. Let it cool, then mix with the softened butter.
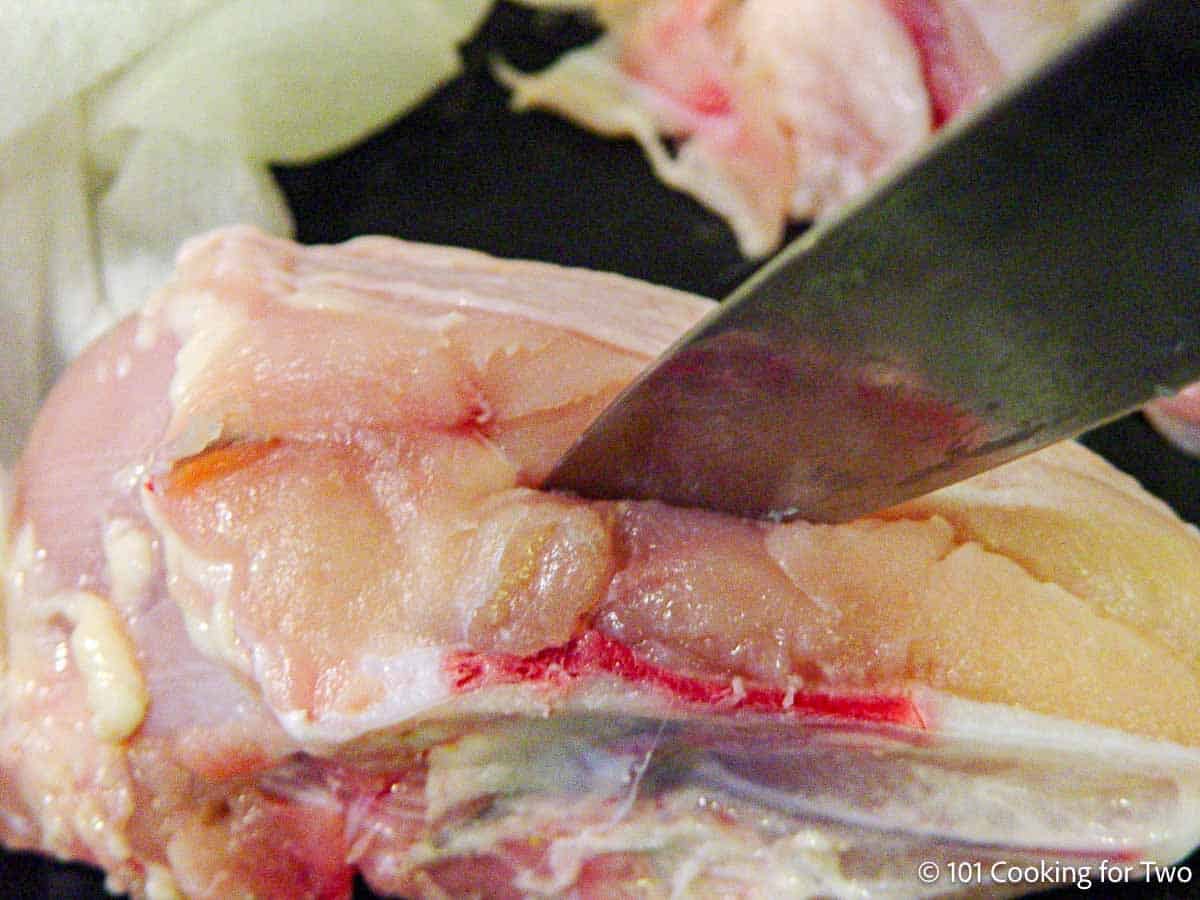
Cut a 1-inch opening into the side of each chicken breast, then use your finger to create a large pocket for the garlic butter.
Stuff the pocket with about half of the garlic butter. Brush the remaining garlic butter over the skin.
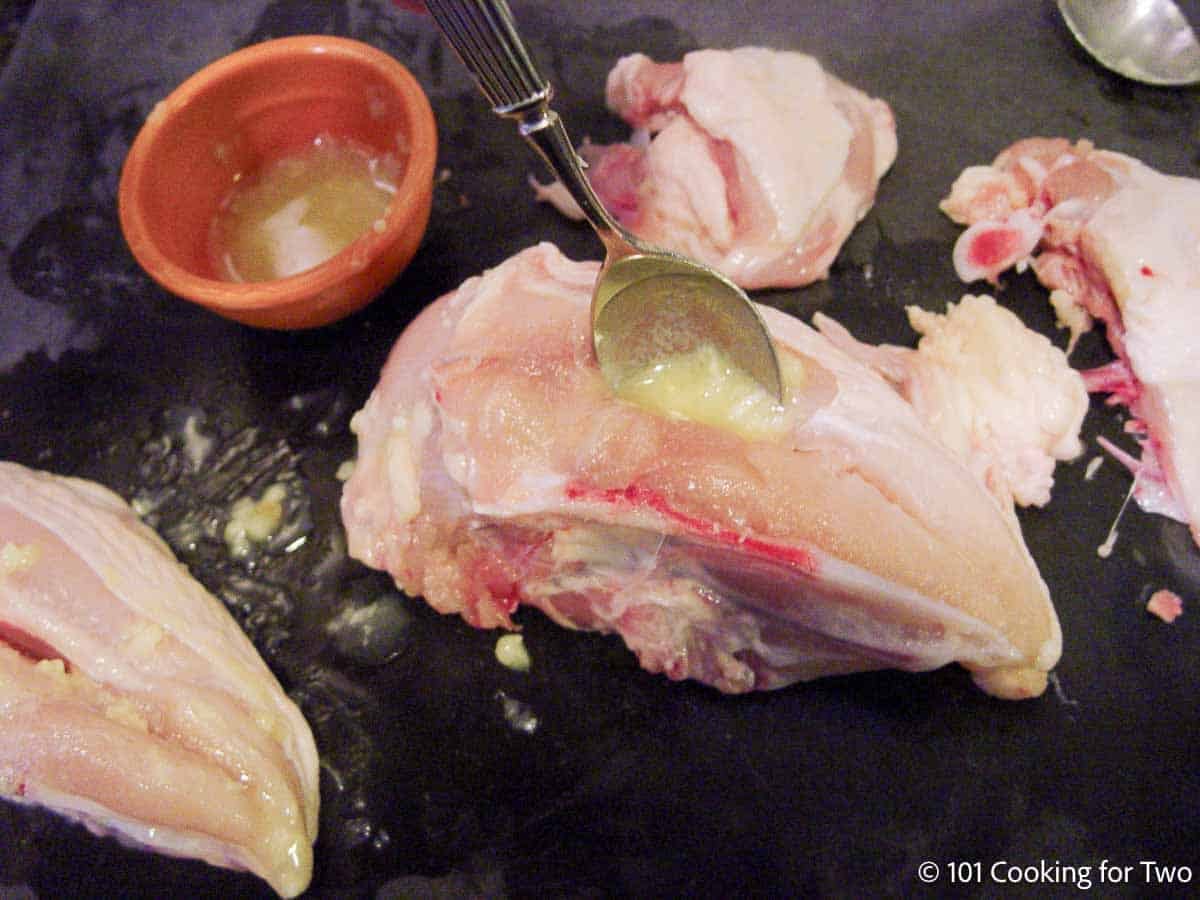
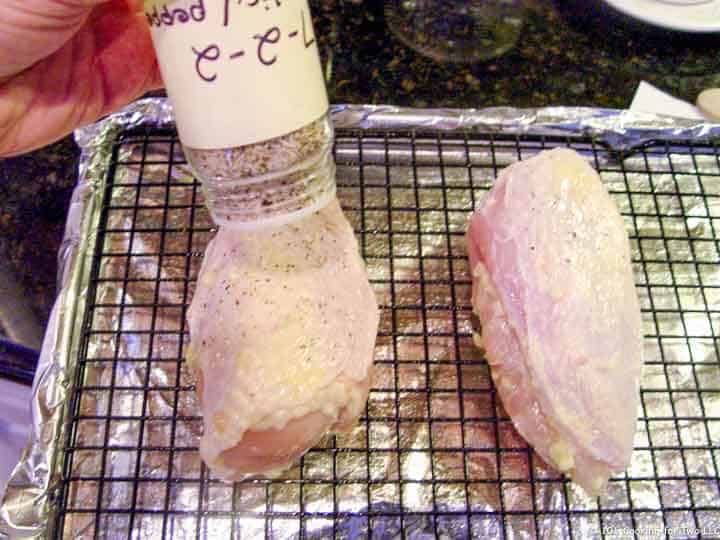
Season the skin with garlic powder, salt, and black pepper (or All-Purpose Seasoning).
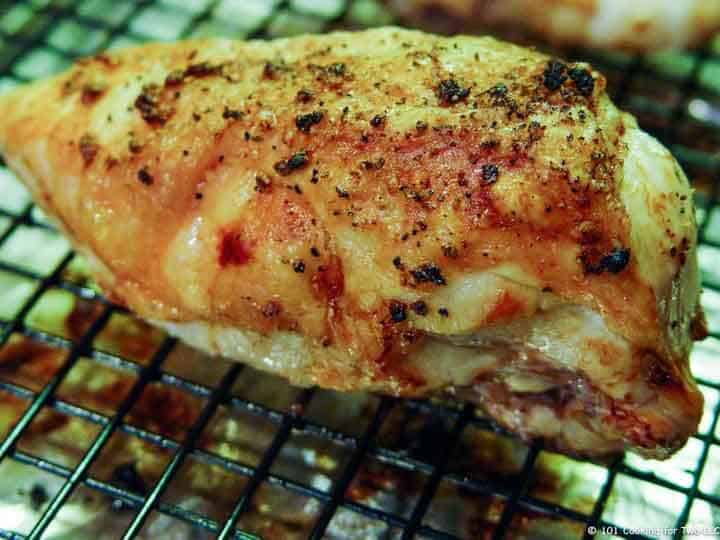
Bake until the thickest part reaches 165°F, about 45 minutes depending on the size of the chicken breasts. Rest for 10 minutes before serving.
This is a summary of the steps. See the recipe card or the complete step-by-step photo instructions.
Save this recipe!
🧂 The Seasoning
I prefer salted butter for the garlic butter instead of unsalted. The salt helps season the chicken from the inside as the butter melts during baking.
Cook the fresh garlic in a little olive oil for 1–2 minutes before mixing it with the butter. This mellows the garlic flavor so it doesn't have a harsh, raw bite.
For the outside, I use my 7:2:1 or 7:2:2 All-Purpose Seasoning, which contains salt, pepper, and garlic powder. Any favorite chicken seasoning or a simple mix of salt, black pepper, and garlic powder will also work.
🍽️ Serving
Serve with a fresh salad like Simple Spinach Salad with Bacon or your favorite garden salad.
Add a potato side such as Roasted Small Potatoes or Twice Baked Potatoes, and a green vegetable like Roasted Parmesan Asparagus or Parmesan Roasted Cauliflower.
Finish with Old Fashioned Apple Crisp for dessert.
❄️ Storage of Leftovers
Store leftovers in an airtight container in the refrigerator for up to 4 days or freeze for up to 4 months.
Thaw overnight in the refrigerator if frozen. Reheat covered in the oven for the best texture, although the microwave works if you're short on time.
📝 Other Split Chicken Breast Recipes
If you enjoy split chicken breasts, try my Chicken Cordon Bleu, Crispy Split Chicken Breasts, or Grilled Split Chicken Breasts.
❓ FAQs
They are called split chicken breasts because a whole bone-in chicken breast is split down the breastbone into two pieces during processing. They include the skin, breast meat, wing joint, and part of the ribs.
No. The rib section is safe to cook and eat, but I usually remove it because it has very little meat, tends to overcook, and makes the chicken breast easier to handle and serve. Simply cut it off with a sharp, heavy knife before cooking.
Cook split chicken breasts to 165°F in the thickest part of the meat. Check the temperature with an instant-read thermometer instead of relying on cooking time alone.
Originally Published: October 15, 2011. Updated with expanded options, refreshed photos, and a table of contents to help navigation.


Beda Stoner says
What is 7-2-2 seasoning?
Dan Mikesell AKA DrDan says
Hi Beda,
Welcome to the blog.
I have it linked in the post and recipe card but it is easy to miss. It is a mix of 7 parts kosher salt to 2 parts pepper to 2 parts granular garlic powder. Here is the link. https://www.101cookingfortwo.com/everyday-spice-mix-721-mix/
Dan
Nate M says
I paired this recipe with rice pilaf and steamed broccoli. Roasted brusselsprouts would be a good pairing too.
DrDan says
Hi Nate,
Welcome to the blog.
All that sounds great.
Thanks for the note.
Dan
Keri Vitagliano says
3rd time and amazing every time, just as it is. However, I had some leftover herbs from a bread I was making and threw some of those in the butter. Din't hurt!
Kim Quinn says
About 'cooking out the raw garlic taste'. When I shop I try to buy 5 or 6 heads of really nice, large clove heads. When I get home I immediately take 2 whole heads, place them on foil, drizzle with olive oil, close tight and roast about 40-50 minutes at 400F. Till it feels tender. When ready, slice off thin cut across bottom and squeeze the garlic out into a cereal bowl. Mash with a fork and top with a drizzle of olive oil and cover with plastic. Use when you want a yummy, gentle, garlic flavor. OR, slice a baguette, smear with really great butter and swipe of the garlic. Follow with a sip of cabernet sauvengion (please forgive spelling). Enjoy!!!
Lauren says
Tried this tonight and it was absolutely delightful!!! The family LOVED IT!!
DrDan says
Hi Lanae,
I try to cook the garlic a tad in recipes like this. It prevents that "raw" garlic taste. The main thing I liked about this recipe was the moisture.
Thanks for the note.
Dan
Lanae says
Nice recipe. I use something similar when making a whole roast chicken. Cooking the garlic first was a nice touch, though. I did the pocket but also covered the chicken in the butter and garlic then sprinkled with the 7:2:2 mixture and baked. I thought the chicken turned out very moist, juicy, and flavorful.
Coco says
Thanks for the yummy-sounding recipe! I cannot wait to try it tonight. How do you keep the butter from leaking out?
DrDan says
As long as you make the cut only about 1 inch on the side and a good size pocket it will not leak much. If you are concerned then pin it with a tooth pick.
DrDan
Kathy says
If I add baking powder will it make the skin crispier & if so how would I do it?
DrDan says
Yes to some extent. Please see my post at https://www.101cookingfortwo.com/oven-baked-crispy-garlic-split-chicken/
DrDan
DrDan says
Thanks so much... It is so moist and does have good flavor but it is filled with butter.
Thanks again for the note and rating.
DrDan
Paula Burger says
Can't tell you how awesome this recipe was! I have tried SO many baked chicken recipes, even from the Food TV chefs, and Bon Appetit and Epicurious, yours is by far the best! Thanks so much, can't wait to try your other recipes!
Penny says
What is a good side for this chicken? Sorry, I'm still on Learning How Cook 101 :(
Dan Mikesell says
I call the smooth side that was under the skin as the "good" side.
Diana says
Haha, I'm thinking she meant side dish. I could be wrong thou :)
Dr Dan says
400 degrees in convection mode, do not convert. If you don't have convection mode then about 425.
ezckimo says
What does 400° convection mean? Just convection mode + 400° or converted to convection mode+ 375°?
Chris says
It still sounds good to me, even if the garlic on the inside was underwhelming.