
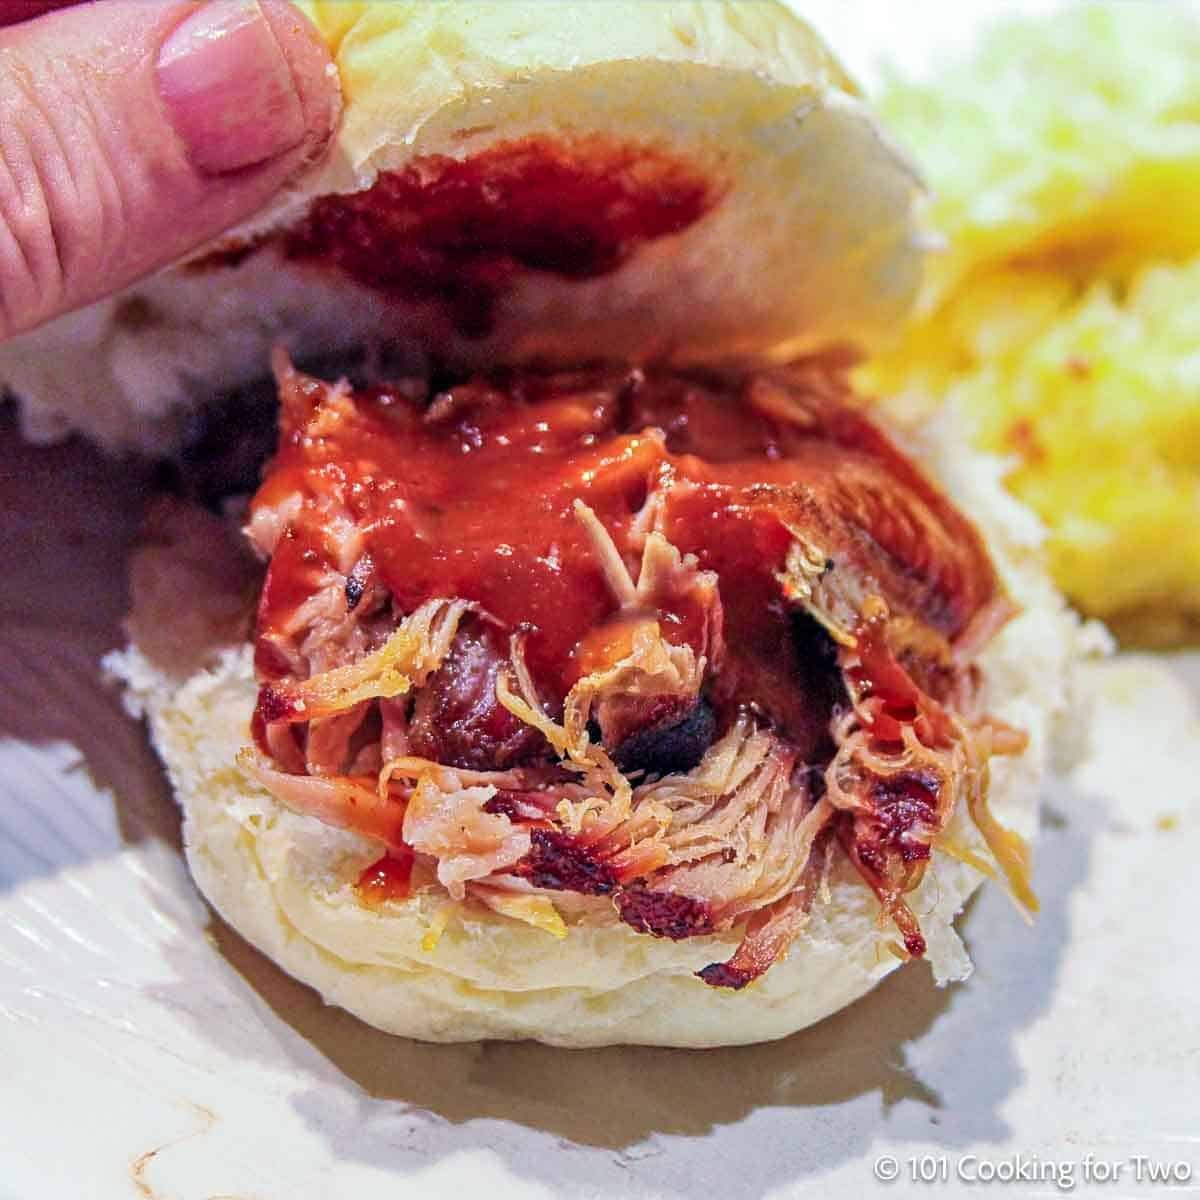
Not much beats the smell of pork butt roasting all day in the oven — rich BBQ aroma, crispy bark, and tender, juicy pulled pork. One of the easiest recipes ever: coat a pork butt (Boston butt) with dry rub, roast it low and slow at 250°Fin your oven, and enjoy tender meat with crisp bark perfect for sandwiches.
⏱️Quick Answer: How long to cook pork butt in oven?
A 4–5 pound pork butt takes about 8–10 hours in a 250°F oven to reach 200°–205°F internal temperature for perfect pulled pork.
Refer to the How Long to Cook section for additional oven temperatures and sizes.
Jump To (scroll for more)
- ❤️ Why You’ll Love This Recipe
- 🐖 Ingredients
- 👨🍳 Quick Overview: How to Cook Pulled Pork in the Oven
- ⏰ How Long to Cook Pork Butt in the Oven
- 🌡️ When is Pork Butt Done?
- ❓ FAQs
- 🍽️ Serving Pulled Pork and Side Ideas
- 🧊 Storing Pulled Pork
- 🔥 How to Reheat Pulled Pork (Crock Pot or Oven)
- 👍 More Pulled Pork Recipes
- 📖The Recipe Card

Featured Comment by Lisa B :
⭐⭐⭐⭐⭐
"I was beyond amazed at the end product of this recipe. The cooking method is foolproof. People thought the pork was cooked on a smoker or grill. It was perfectly moist but with the crunchy texture of the bark mixed in. So easy! Outstanding results."
❤️ Why You’ll Love This Recipe
- No smoker? No problem. Get smoky pulled pork with bark right in your oven.
- Set it and forget it. Low and slow cooking the easy way. No flipping, no basting, no fuss. Just slow cook in your oven all day for perfect pulled pork.
- Juicy and tender. The fat and collagen melt into the meat for flavor you won’t get from lean cuts.
- Beginner-friendly. If you can turn on the oven, you can make this.
- Cook once, eat for days. Pile it on buns, tacos, or eat it straight from the pan.
👨🍳 DrDan says: I’m not about babysitting a grill or smoker all day. This method gives me great pulled pork with bark and flavor—without the hassle. Just rub it, stick it in the oven at 250°, and it comes out perfect every time.
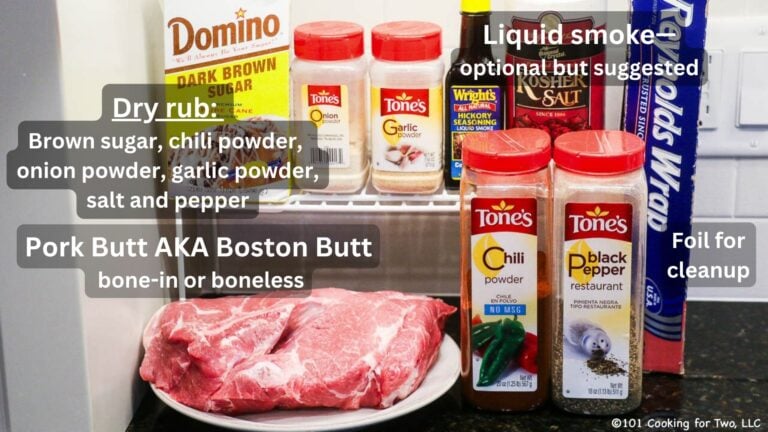
🐖 Ingredients

Pork Butt (aka Boston Butt):
This is the upper part of the shoulder and the best cut for pulled pork. Bone-in or boneless both work—bone-in gives better bark and avoids the netting issue with boneless.
🔍 Also called pork shoulder: Many stores and recipes use the term "pork shoulder" for this same cut, even though technically it's just part of the whole shoulder. If your label says pork butt, Boston butt, or pork shoulder, you're in the right place.
✅ Pro Tip: Remove the net. Boneless pork butt often comes in a net. It will tear off your bark—remove it before cooking, or go bone-in to skip the hassle.
Dry Rub:
Use your favorite BBQ rub or the simple homemade version in the recipe card—brown sugar, kosher salt, chili powder, garlic powder, onion powder, and black pepper.
Liquid Smoke (optional but recommended)
Adds smoky BBQ flavor without a smoker. Look for a quality brand like Wright’s that lists only “smoke” and “water” on the label.
No liquid smoke? You can rub the pork with yellow mustard instead—it helps the dry rub stick and adds a subtle tang without changing the flavor.
Flavor Options:
Try my Memphis dry rub for a spicier twist. For something bolder, use my Chipotle Seasoning as a dry rub. Add cayenne for heat or smoked paprika for a deeper smoky flavor..
👨🍳 Quick Overview: How to Cook Pulled Pork in the Oven
This is a summary, not the full recipe. See the recipe card below for complete instructions.
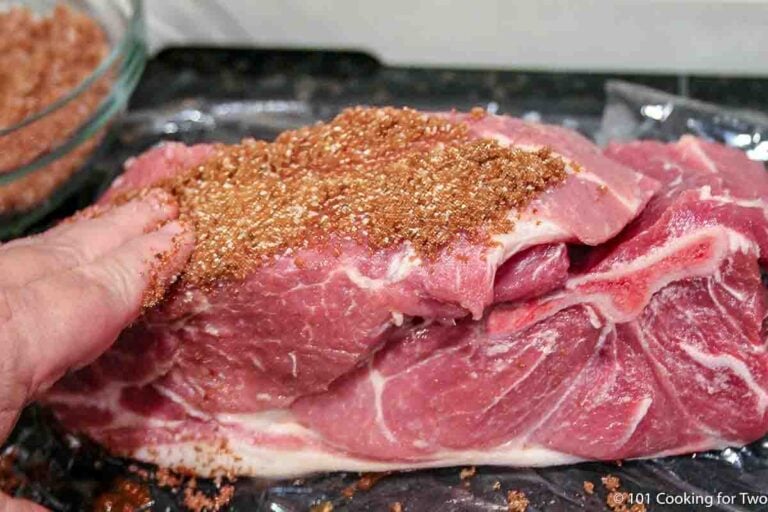
1. Prepare the pork butt.
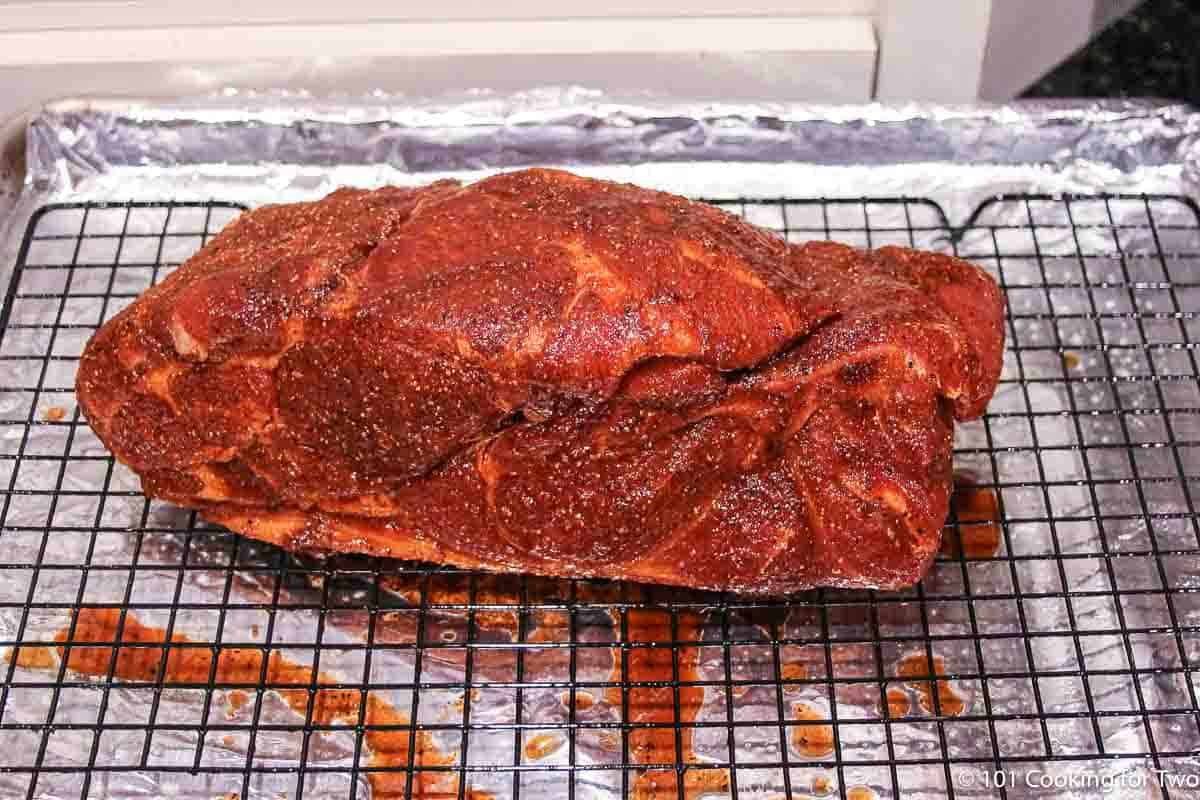
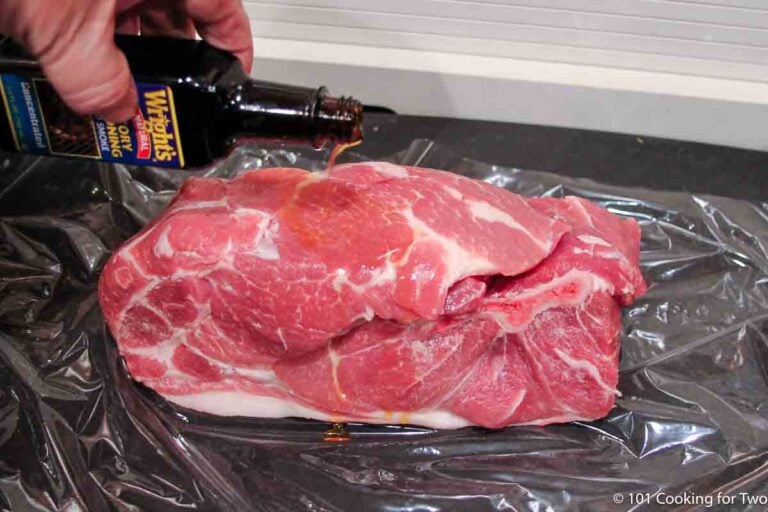
Mix the dry rub. Pat the pork butt dry, coat with liquid smoke (optional), and apply the rub.

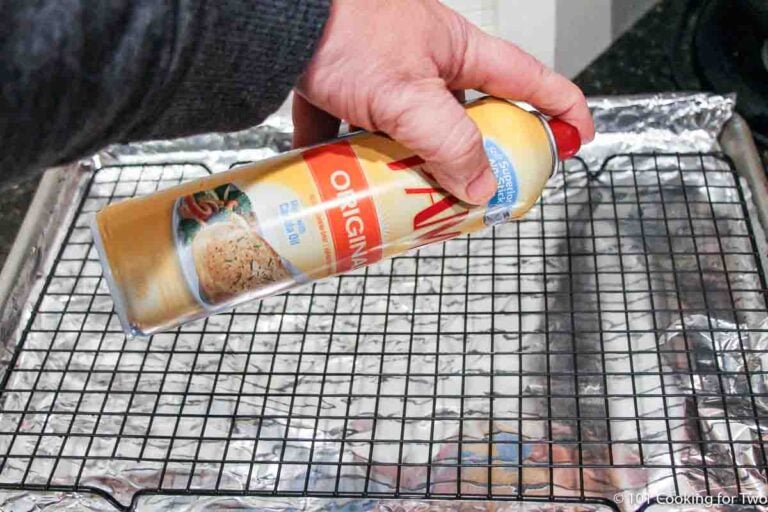
Place it on a foil-lined rimmed baking sheet with a rack for better bark.
2. Roast low and slow:
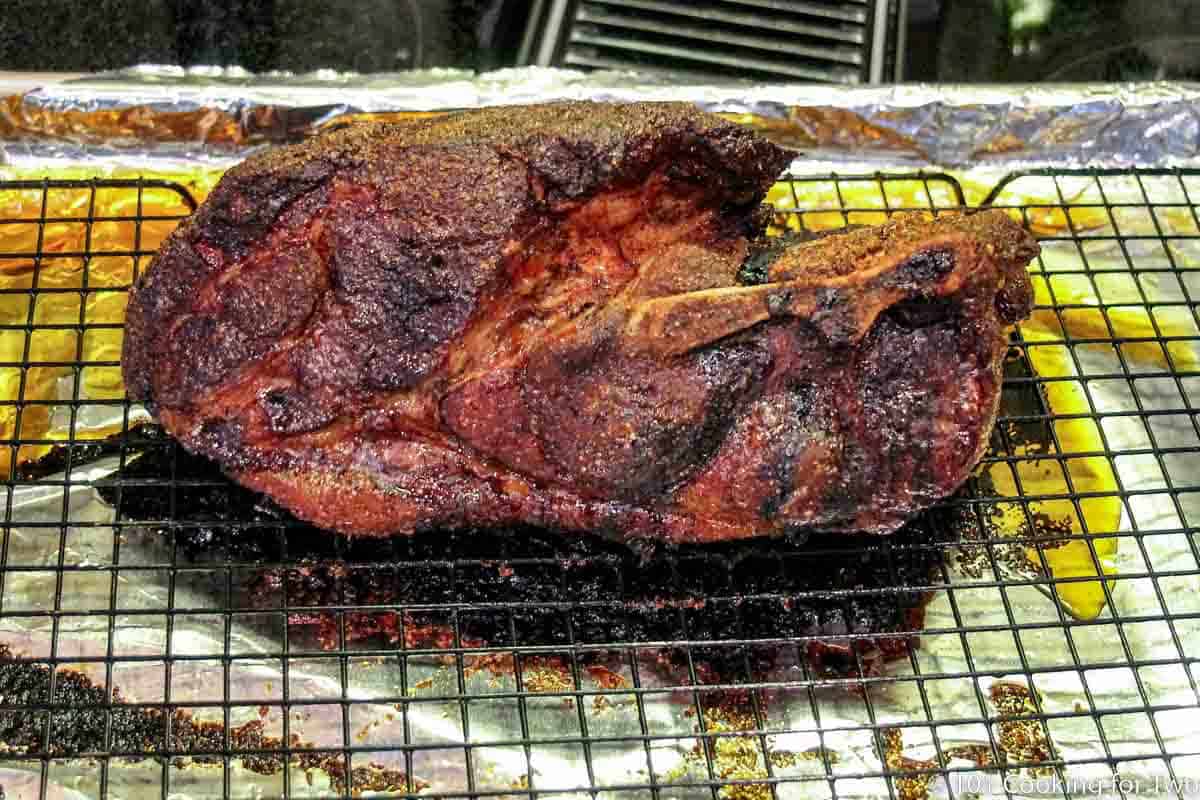
Bake in a 250°F oven (no convection) until the internal temperature reaches 200° to 205°F—usually 8 to 9 hours.
✅ Pro Tip: No need to preheat or use convection. Just a center rack and steady heat.
3. Rest the meat:
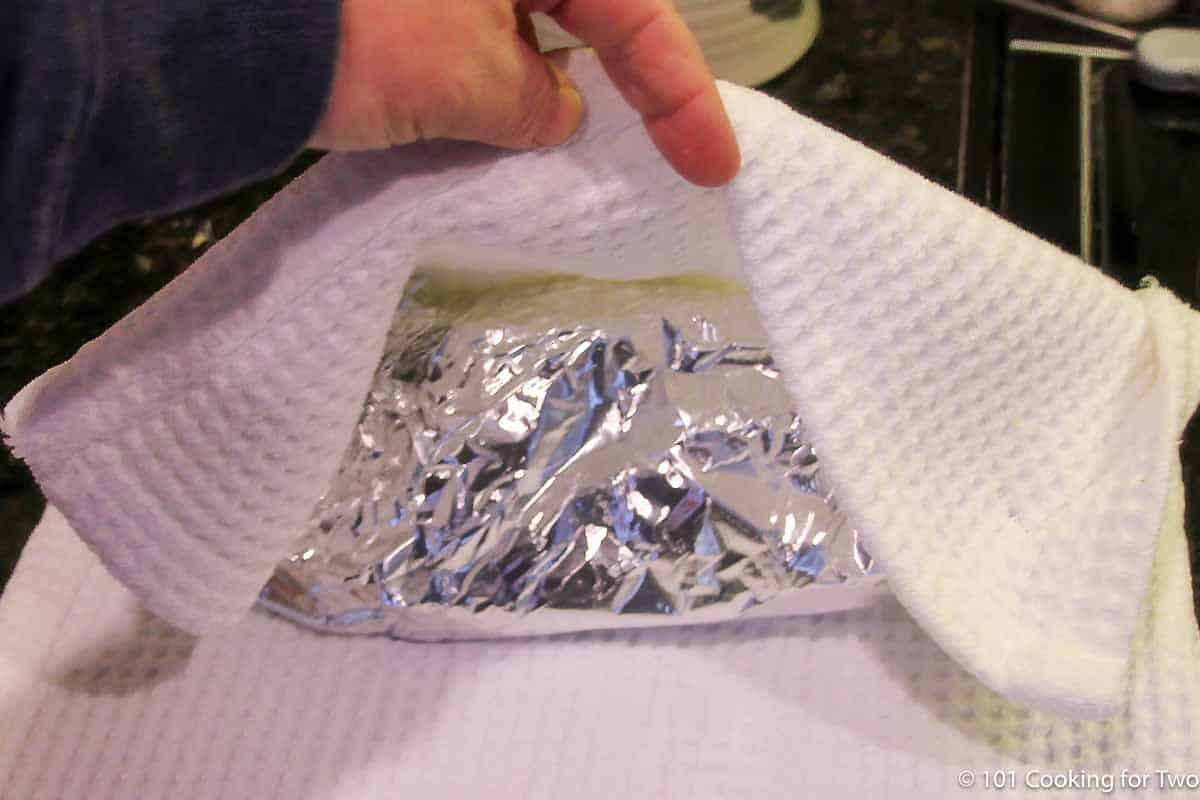
Wrap the pork tightly in foil, then in towels. Let it rest in a small insulated cooler (or on the counter) for 1 to 2 hours.
✅ Pro Tip: Don’t skip the rest. It locks in moisture and makes shredding easier. Shred too soon, and the juices end up on your cutting board.
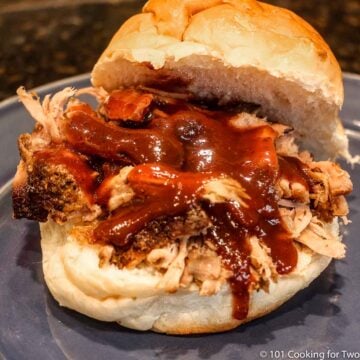
4. Shred and serve:
Use two forks to shred—it should fall apart easily and stay juicy, with crispy bark.
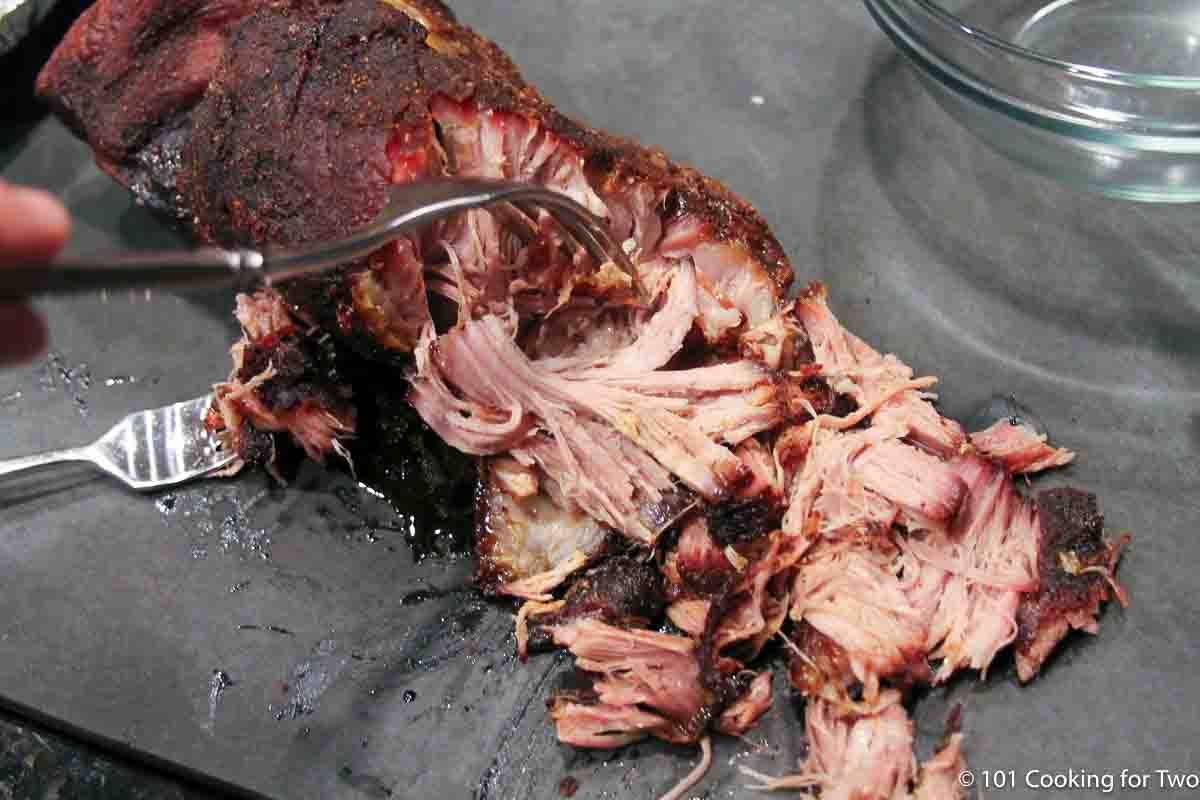
✅ Pro tip: A well-wrapped pork butt can stay warm in a cooler for up to 4 hours. Never try to shred one that’s gone cold—it just won’t work.
👇Want the full recipe? Scroll down to the printable recipe card for step-by-step instructions, tips, and serving ideas.
⏰ How Long to Cook Pork Butt in the Oven
At 250°F, a 4-pound boneless pork butt takes about 8 to 9 hours.
Bone-in cuts may take a little longer. As a general rule, plan for about 2 hours per pound, but it can range from 1½ to 2½ hours per pound depending on the shape and thickness.
You can adjust the temperature slightly—225° to 275°F will still work—but avoid going higher. At 300°F or more, the outside may dry out before the collagen fully melts.
For larger roasts (6 pounds or more), either divide them into two equal pieces or buy two smaller ones. Cook them separated on a rack for better airflow and bark—they’ll usually finish in about the same total time as a 4- to 5-pound roast.

✅ Pro Tip: Check your oven. Many ovens automatically shut off after 8–12 hours. Make sure yours won’t stop mid-cook.
Save this recipe!
🌡️ When is Pork Butt Done?
Pork butt is done when the internal temperature reaches 200°–205°F—that’s when the collagen has melted and the meat shreds easily.
Breakdown starts around 175°F, but it’s not truly pullable until it passes 200°F. Some stop at 195°F, but for the best texture, aim for that 200°–205°F sweet spot. During the rest, it may climb to about 210°F, finishing the tenderizing process.
✅ Don’t guess: Check temperature, not time. Color and texture can fool you—only a thermometer tells the truth.
❓ FAQs
You don’t have to, but it helps. Elevating the pork on a rack (or crumpled foil) keeps it out of the fat drippings and helps the bark form more evenly.
If your roast is over 6 pounds, cut it in half to speed up cooking and get more bark. Just space the pieces out on the rack—cook time will be similar to a 4–5 pounder.
Nope. Leave it uncovered so the bark can develop. The pork stays moist from melted connective tissue—not steam.
Yes, but only if your oven doesn’t shut off automatically. Many modern ovens turn off after 8–12 hours. Double-check your settings, use an oven-safe thermometer probe to monitor temperature safely, and keep the temperature steady at 250°F. The aroma might wake you before your alarm does.
Pork butt (also called Boston butt) is the upper part of the pork shoulder. It’s the best cut for pulled pork thanks to its marbling and connective tissue.
Many stores and recipes use “pork shoulder” to mean the same thing—so don’t worry if the label says shoulder, pork butt, or Boston butt. You're in the right place.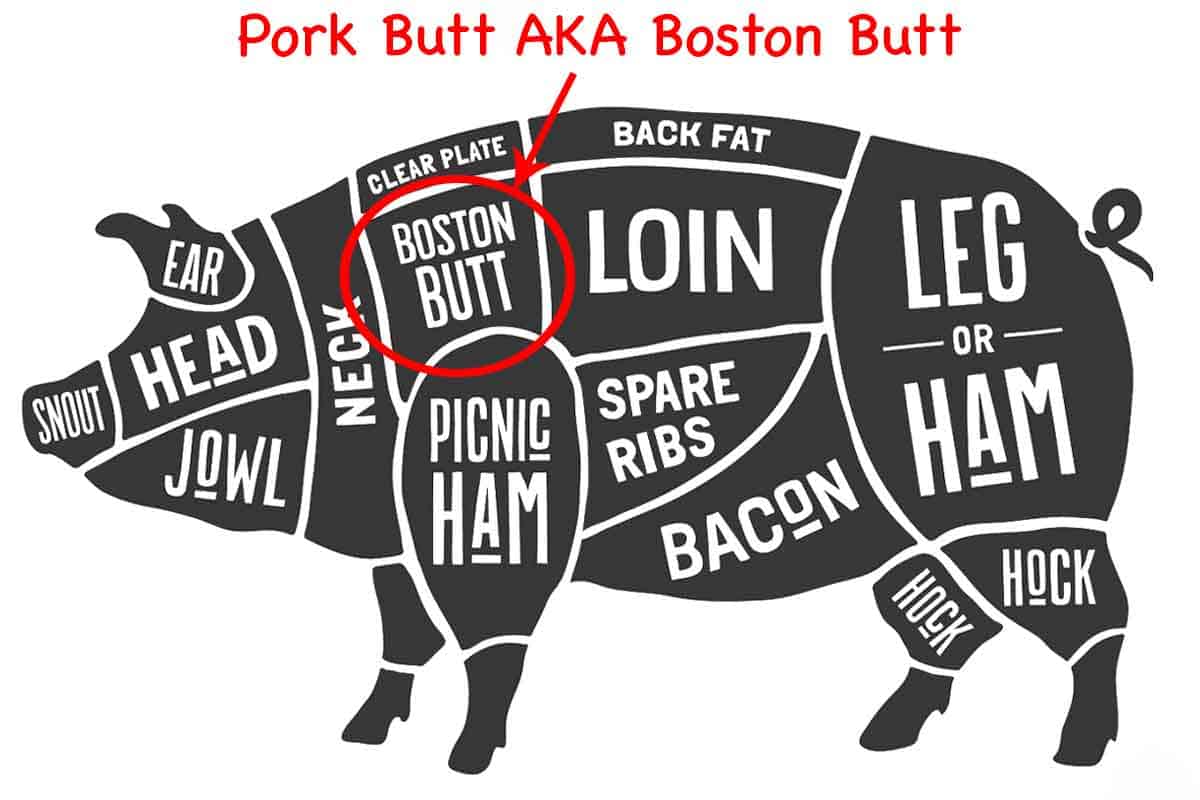
Fat up or down does not matter. All the rendering happens with time and temperature, not direction. The tenderness comes from the collagen and connective tissue melting, not the fat. Most of the fat melts and drains off anyway. Just use a rack and cook it low and slow to the right internal temperature.
🍽️ Serving Pulled Pork and Side Ideas
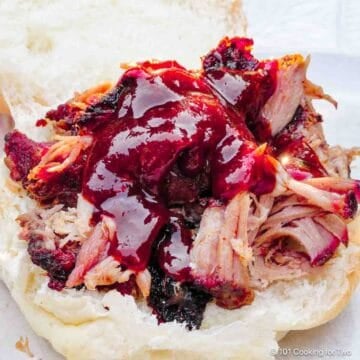
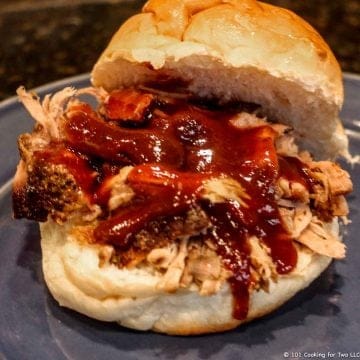
Pulled pork is best piled high on a toasted bun with Memphis BBQ Sauce and a scoop of coleslaw—but don’t stop there.
✅ Pro Tips: Plan on about ⅓ pound of pork butt per person before cooking, which yields roughly ¼ pound of pulled pork.
Other serving ideas:
- Use it in tacos, quesadillas, or nachos
- Serve it as a main dish with your favorite sides
- Pile it on a baked potato with cheese and sour cream
- Toss it into a breakfast hash with eggs
🍴 Great Side Dishes
Here are a few reader favorites to serve with pulled pork:
- Cold sides: Coleslaw, potato salad, Caprese Pasta Salad, or Classic Macaroni Salad
- Hot sides: Old fashioned cornbread, cheesy potato casserole, French Fries, or Stovetop Mac and Cheese
🧊 Storing Pulled Pork
Store leftover pulled pork in an airtight container and refrigerate for up to 4 days—though I prefer using it within 2 days for the best texture.
For longer storage, pulled pork freezes well for 3 to 4 months. Portion it into flat layers using vacuum-seal bags or boil-safe freezer bags. To reheat, use the oven method below, or gently simmer the sealed bag in water if it’s rated for boiling.
🔥 How to Reheat Pulled Pork (Crock Pot or Oven)
Crock Pot Method
- Load into a crock pot up to 75% full with pulled pork.
- As you load the crock pot, sprinkle lightly with water or apple juice—just enough to moisten.
- Cook on low for 2 to 3 hours, stirring every hour if possible. The serving temperature is 140°F or higher, but I recommend heating to 165°F to give some leeway when serving.
- Exact reheating time varies by amount, thickness, and your crock pot
- It will stay warm for quite a while unplugged or use the keep warm setting for serving.
Oven Method
- Spread the pork out on a rimmed baking sheet.
- Sprinkle lightly with water or apple juice—just enough to moisten.
- Cover tightly with foil.
- Heat in a 250°–300°F oven until hot (about 30 to 45 minutes, depending on the amount).
- Keep warm in the oven or transfer to a crock pot on low or keep warm.
✅ Pro Tip: Never reheat or store pulled pork with BBQ sauce already mixed in. The acid breaks down the texture, turning it mushy.
👍 More Pulled Pork Recipes
Looking for other ways to make pulled pork? Try these:
- Pork Butt Gas Grill – classic smoky BBQ flavor without a smoker
- Crock Pot Pulled Pork – low effort, great for busy days
- Pulled Pork Loin in the Oven – a leaner option with great texture
- Crock Pot Pork Loin Pulled Pork – healthy, juicy, and freezer-friendly
📖The Recipe Card

How to Cook Pork Butt in Oven for Pulled Pork (250°F Low & Slow)
Video Slideshow
Ingredients
- about 4 pounds Pork butt - aka Boston Butt frequently called pork shoulder
- Dry rub of your choice - good quality
- 2 tablespoons Wright's Liquid Smoke - optional but recommended
- ½ cup dark brown sugar
- 3 tablespoons Diamond Crystal kosher salt - 2 tablespoons if using Morton
- 1 tablespoon chili powder
- 1 teaspoon garlic powder
- 1 teaspoon onion powder
- 1 teaspoon black pepper
Step-by-Step Instructions
1. Prepare the pork butt:
- Use a rub of your choice. If using my rub, mix ½ cup dark brown sugar, 2 tablespoons kosher salt, 1 tablespoon chili powder, 1 teaspoon garlic powder, 1 teaspoon onion powder, and 1 teaspoon black pepper.
- Pat the pork butt dry, then coat all sides with about 2 tablespoons of liquid smoke (optional).
- Use about 1 cup of rub to cover generously. If prepping ahead, wrap in plastic wrap and refrigerate for a few hours or overnight. If not, go straight to baking.
2. Roast low and slow:
- Line a rimmed baking sheet with foil and place a rack on top. Spray the rack with PAM or oil.
- Place the pork butt on the rack and roast at 250°F (no convection)—no need to preheat. Fat cap up or down—doesn't matter.

- Bake until the internal temperature reaches 200°–205°F—about 8 to 9 hours, depending on size, bone-in vs. boneless, and oven behavior.

3. Rest the meat:
- Remove from oven, wrap tightly in heavy-duty foil, then several towels. Rest in a small insulated cooler or on the counter for 1–2 hours. It will stay warm in a well-wrapped cooler for up to 4 hours.

4. Shred and serve:
- Use forks to shred. The meat should fall apart easily and stay juicy, with crispy bark.

Recipe Notes
Pro Tips:
- Use the rest time to adjust your serving window by a few hours.
- No rack? Use foil balls to elevate the pork so it doesn’t sit in fat.
- Liquid smoke should only list “smoke” and “water”—Wright’s is a good brand.
- My rub is provided for you, but use the rub of your choice.
- Salt amounts are based on Diamond Crystal kosher salt: 1 tsp table salt = 1¼ tsp Morton kosher = 2 tsp Diamond Crystal. You can reduce the salt for a lower-sodium rub—it still works well.
- The rub works well even if you cut the salt in half for a lower-sodium version.
- 195°F is the minimum temp for pullable pork, but 200°–205°F is better. Don’t go over 210°F.
- Store leftovers in the fridge up to 4 days (2 is best for texture), or freeze up to 4 months
- Bone-in or boneless both work—bone-in may take a bit longer.
- Fat cap up or down doesn’t matter.
- I often go straight from seasoning to the oven—no wrap time needed.
- DO NOT cover the pork while baking. You need a dry oven to develop bark.
- Nutrition information is an estimate—fat content varies, and seasoning distribution may differ.
Your Own Private Notes
To adjust the recipe size:
You can adjust the number of servings above; however, only the amount in the ingredient list is adjusted, not the instructions.
Nutrition Estimate (may vary)
Editor's note: Originally Published November 2, 2013. Updated with expanded options, refreshed photos, and a table of contents to help navigation.


Judy Uhl says
Hi Dr. DAN, I'll be putting in 8.5 pork butt in my roaster oven. I read to crank up the heat to 400 for the first 30 minutes then lower to 250 or 275 for 8 to 10 hours. Any thoughts? I also put chicken broth and onions in the bottom of the roaster and dry rub on top of the roast.
Dan Mikesell AKA DrDan says
Hi Judy,
Welcome back, I haven't heard from you for a while.
I have not cooked much in a roaster, mainly using mine to keep things warm for parties.
The 400° thing is a bit odd. If it is a roaster recipe, maybe it is a preheating thing—getting it up to temperature fast, so I'm ok with it. But starting a large chunk of meat at a high temp is generally not the way to get the center to over 200° where you need a pork butt for shredding, but then they get down to a low and slow temp range which is right.
The total time seems a little low for 8 pounds. Get it to at least 200°-205° to shred well.
The onion and broth. Fine, if you want. I prefer a dryer environment for a better crust.
I would cook on a rack to get it out of the broth or any drainage. And I would put a dry rub on all sides.
So, final verdict, it will probably be fine, but get to a good final temp.
Just my off-the-cuff comments.
Have a good holiday.
Dan
Karen says
I first discovered this recipe about 7 years ago, and I make it regularly - I keep single servings in the freezer. Super tasty and very easy. Thanks for posting it!
Althea says
No comment just a question. Where in the oven do I want to place my oven rack? Lowest near bottom heat element or in the middle of the oven?
Thanks for the recipe and looking forward to making this.
Dan Mikesell AKA DrDan says
Hi Althea,
Welcome to the blog.
Middle. In general, all oven recipes should have the dish in the middle. Somethings, like a whole chicken or turkey, should be lowered a bit to get the bird in the middle.
Hope that helps. Enjoy your pork.
Dan
Dawn says
So if we cut an 11 lb pork butt in half and cook both pieces at the same time just spread a bit apart, the time would be closer to 10-11 hours at 250?
Thanks!
Dan Mikesell AKA DrDan says
Hi Dawn,
Welcome to the blog and good question.
The cooking time is dependent on the distance from the outside to the center of the pork butt. So cutting in half will shorten that distance and the time. When placing them on the tray, get them as far apart as reasonable on your tray. This will decrease the "envelope" of cold area. The cooking time will be more close to 5-6 pound but you should monitor it. So your guess is reasonable but be sure to check a few hours early. If you find you are "running over time" and need to speed it up, go up by 25° or a bit more (300° max).
Also pay attention to my warning about many ovens turning off after 8-10 hours for safety if left on accidentally. You don't want that happening to you without being able to correct it.
Dan
SuperDave says
My 11.27# butt took 15hrs-50min, had to foil-wrap after a 3hr stall, @198° turned oven off and coasted 2hrs.
The reason I am commenting is I was shocked, even my racked/braised elk shoulder was only 12hrs @250°.
You are correct Sir, this is the only way to "grill" indoors. I roasted on the bare oven rack, sheet pan below filled with water (possible extended cook time), with excellent bark.
Truth be known, I have laid oak wood pieces on my oven element with the stove vent plugged, fan and window open to smoke meats indoors ; )
Dan Mikesell AKA DrDan says
Hi SuperDave,
Thanks for the note. I enjoyed it and I'm sure other readers will also. I'm not recommending wood on the oven elements or interfering with venting. Some definite safety issues. Use liquid smoke next time.
Dan
SE says
The FAQs are not opening.
Dan Mikesell AKA DrDan says
Hi and welcome to the blog.
I can not reproduce this in three browsers.
I had the auto close turned on until about a month ago but they are now open by default. The plugin that closed them was still installed but turned off. I just took it off the site and cleared all caches.
So, check it now and if it still does not work, you may have an old version "caught" in the browser cache, so you may need to clear that.
If it still does not work, let me know the OS and browser you are seeing this in.
Thanks for the heads up.
Dan
Patrick says
Seems straight forward but there’s no mention of a stall. Wouldn’t that really affect the cook time?
Dan Mikesell AKA DrDan says
Hi Patrick,
Welcome to the blog.
You are right that I don't discuss the stall with the oven or crockpot based recipes. Most people using those techniques don't monitor the temperature curve as closely as grillers and smokers must. It would probably add some needless confusion for those users.
I do discuss the stall and the Texas crunch wrap in the grill-based brisket and pork butt recipes. https://www.101cookingfortwo.com/pulled-pork-on-gas-grill-not-that-hard/ (discussed stall but not the Texas crunch due to the size of the butts won't usually need it.)
And https://www.101cookingfortwo.com/cook-brisket-gas-grill/ with a much longer discussion on cause and treatment.
As to affecting the oven cooking time of butt, it probably does a bit but if you are under 5-6 pounds, not much.
Dan
Nicole says
Just wondering if it is totally necessary to let it rest for so long or is that optional? I only ask so I know how to get my timing right to accommodate for the cooking time. What would your recommended minimum resting time be if not the 1-2 hours? SO excited to try this out.
Dan Mikesell AKA DrDan says
Hi Nicole,o
Welcome to the blog. It is in the post under FAQs https://www.101cookingfortwo.com/oven-pulled-pork-from-pork-butt/#❓faqs . As little as 15 minutes will work fairly well. It gives time for the moisture to reabsorb back into the cells. I frequently only do 15 minutes because that is the limit of my wife's patience.
"The rest before the shred could be as short as 15 minutes, but longer is better. Shred just before serving. It will stay warm with my method for about 4 hours, giving you an ample time window to hit to serve freshly shredded pork."
Dan
Jennifer Matthews says
Can I mix the rub with the liquid smoke and coat the pork with it or will the consistency not work with sticking to the pork?
Dan Mikesell AKA DrDan says
Hi Jennifer,
he
Welcome to the blog.
Can you, possibly, but there is not that much liquid smoke, and you might make a clumpy mess. I would just lightly wet the surface with the liquid smoke and dry rub.
Dan
Meg says
Absolutely delicious! Really does taste like it’s been in a smoker.
Grace Hawkins says
This is in the over right now! Cannot wait - I had to make it a day ahead of time for our party tomorrow night. Would you wait to shred it? OR would you shred and then reheat?
Dan Mikesell AKA DrDan says
Hi Grace,
Welcome to the blog.
You shred it now and refrigerated it, or it will become very hard to shred. Reheating instructions are in both the post and recipe card.
Dan
Brandon says
‘Simply’ amazing! Cooked exactly to recipe andEVERYONE raved about it… 5 lbs/ 9 hours …. Rest wrapped 3-4 hours and it was the perfect temp and consistency to then shred…. Liquid smoke awesome! Thanks so much …
Celesti says
This was a delicious and easy recipe that received several compliments from the folks on my dart league. I used the Wright's Liquid Smoke in hickory and some of my friends (who own smoker grills) asked me if I smoked the meat ! Served the pulled pork with slider rolls and a side of cole slaw.
Thanks !!
Myra says
Of the 3 Wright’s Liquid smoke flavors, which is your favorite? (Hickory,Mesquite, Applewood). I am looking forward to trying this recipe for Labor Day and would like your suggestions before I order from Amazon. Thanks.
Dan Mikesell AKA DrDan says
Hi Myra,
Welcome to the blog. I'm a traditional hickory guy and can always find it at most of my local stores. It will be around the sauces like tobacco. It is a small bottle that will only be one or two rows and is easy to miss.
Dan
Gary Atkinson says
DrDan,
I've been eating pork barbeque for 60 years and have come to prefer the eastern North Carolina style. I've traveled out of my way to reach several of the vaunted barbeque restaurants in North and South Carolina, and there's no doubt in my mind that your recipe is the absolute best in terms of flavor and texture. I've found that the best way to reheat the meat is to steam it in a steamer basket. This method resuscitated even year-old frozen barbeque that I was going to throw away after originally drying it out when I tried to reheat a large batch in a slow cooker. Thanks for a fantastic recipe!
Wendi Dys says
I wanted to thank you for your recipe. I made it for my daughter's and her best friend graduation party in 2015. I made 2 butt roast we had nothing left. It was my first time making pulled pork. I'm going to use this recipe again tomorrow.
Thank you,
Wendi Dys