
The easiest BBQ pulled pork with crispy bark is made in your oven, not a smoker. This simple low-and-slow oven method turns pork butt (Boston butt) into tender, fall-apart pulled pork with great flavor and surprisingly little work.
⏱️ Quick Answer: How long to cook pork butt in the oven?
- A 4–5 pound pork butt takes about 8–10 hours in a 250°F oven.
- Cook to 200°–205°F internal temperature for tender pulled pork.
- Bone-in may take slightly longer.
- See the How Long to Cook section for other sizes and temperatures.
Jump To (scroll for more)
- 🐖 TL;DR — Oven Pulled Pork from Pork Butt
- 🐖 Ingredients for Oven Pulled Pork
- 👨🍳 Quick Overview: How to Cook Pork Butt in the Oven
- ⏰ How Long to Cook Pork Butt in the Oven
- 🌡️ When is Pork Butt Done?
- ❓ FAQs
- 🍽️ How to Serve BBQ Pulled Pork
- 🧊 Storing Pulled Pork
- 🔥 How to Reheat Pulled Pork (Crock Pot or Oven)
- 👍 More Pulled Pork Recipes
- 📖The Recipe Card

Featured Comment by Lisa B :
⭐⭐⭐⭐⭐
"I was beyond amazed at the end product of this recipe. The cooking method is foolproof. People thought the pork was cooked on a smoker or grill. It was perfectly moist but with the crunchy texture of the bark mixed in. So easy! Outstanding results."
🐖 TL;DR — Oven Pulled Pork from Pork Butt
What it is: Low-and-slow pork butt cooked in the oven until juicy, fall-apart tender, with crispy bark and BBQ flavor.
Why you’ll love it: No smoker needed. Easy prep, reliable results, and great pulled pork for sandwiches, tacos, or meal prep.
How to make it: Season pork butt with dry rub, cook low and slow in a 250°F oven until 200°–205°F internal temperature, rest well, then shred.
Jump to the Recipe Card or continue reading for step-by-step instructions, timing, and tips.
👨🍳 DrDan says: I’m not about babysitting a grill or smoker all day. This method gives me great pulled pork with bark and flavor—without the hassle. Just rub it, stick it in the oven at 250°, and it comes out perfect every time.
🐖 Ingredients for Oven Pulled Pork

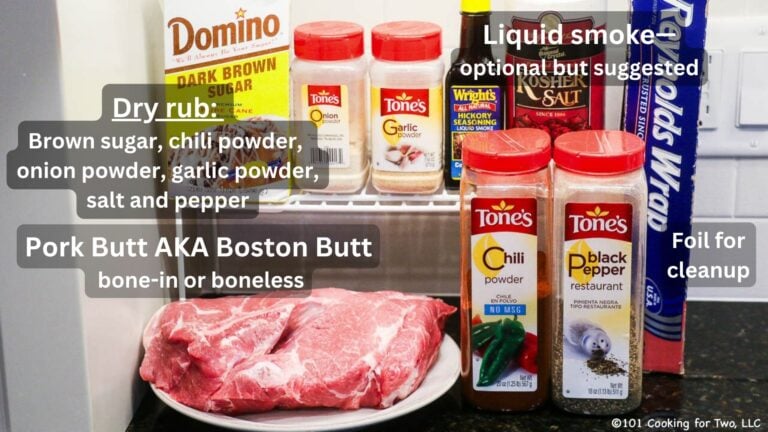
Pork Butt (aka Boston Butt):
This is the upper part of the shoulder and the best cut for pulled pork. Bone-in or boneless both work—bone-in gives better bark and avoids the netting issue with boneless.
🔍 Also called pork shoulder: Many stores and recipes use the term "pork shoulder" for this same cut, even though technically it's just part of the whole shoulder. If your label says pork butt, Boston butt, or pork shoulder, you're in the right place.
✅ Pro Tip: Remove the net. Boneless pork butt often comes in a net. It will tear off your bark—remove it before cooking, or go bone-in to skip the hassle.
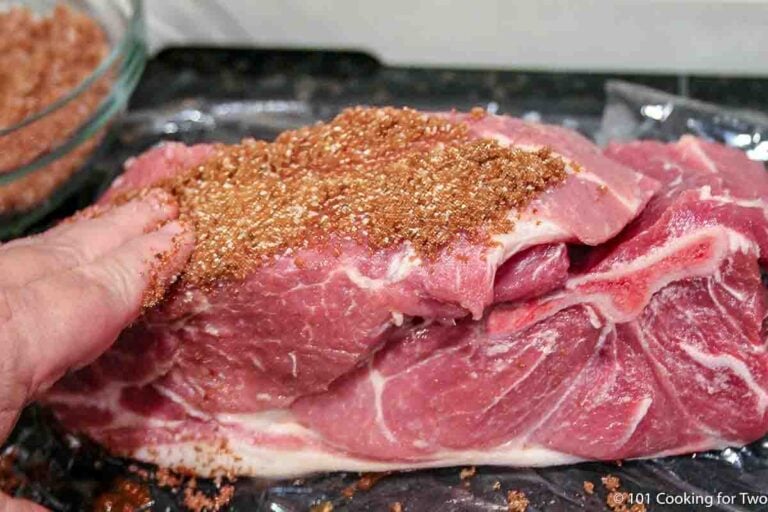
Dry Rub:
Use your favorite BBQ rub or the simple homemade version in the recipe card—brown sugar, kosher salt, chili powder, garlic powder, onion powder, and black pepper.
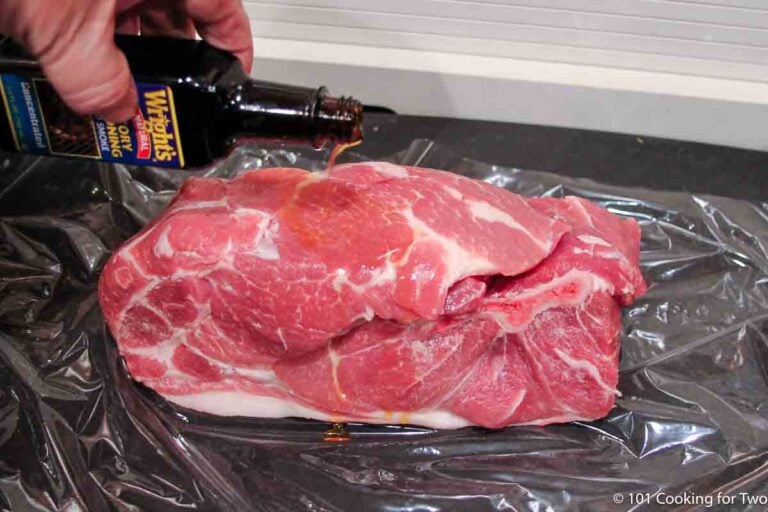
Liquid Smoke (optional but recommended)
Adds smoky BBQ flavor without a smoker. Look for a quality brand like Wright’s that lists only “smoke” and “water” on the label.
No liquid smoke? You can rub the pork with yellow mustard instead—it helps the dry rub stick and adds a subtle tang without changing the flavor.
Flavor Options:
Try my Memphis dry rub for a spicier twist. For something bolder, use my Chipotle Seasoning as a dry rub. Add cayenne for heat or smoked paprika for a deeper smoky flavor..
👨🍳 Quick Overview: How to Cook Pork Butt in the Oven
This is a summary, not the full recipe. See the recipe card below for complete instructions.
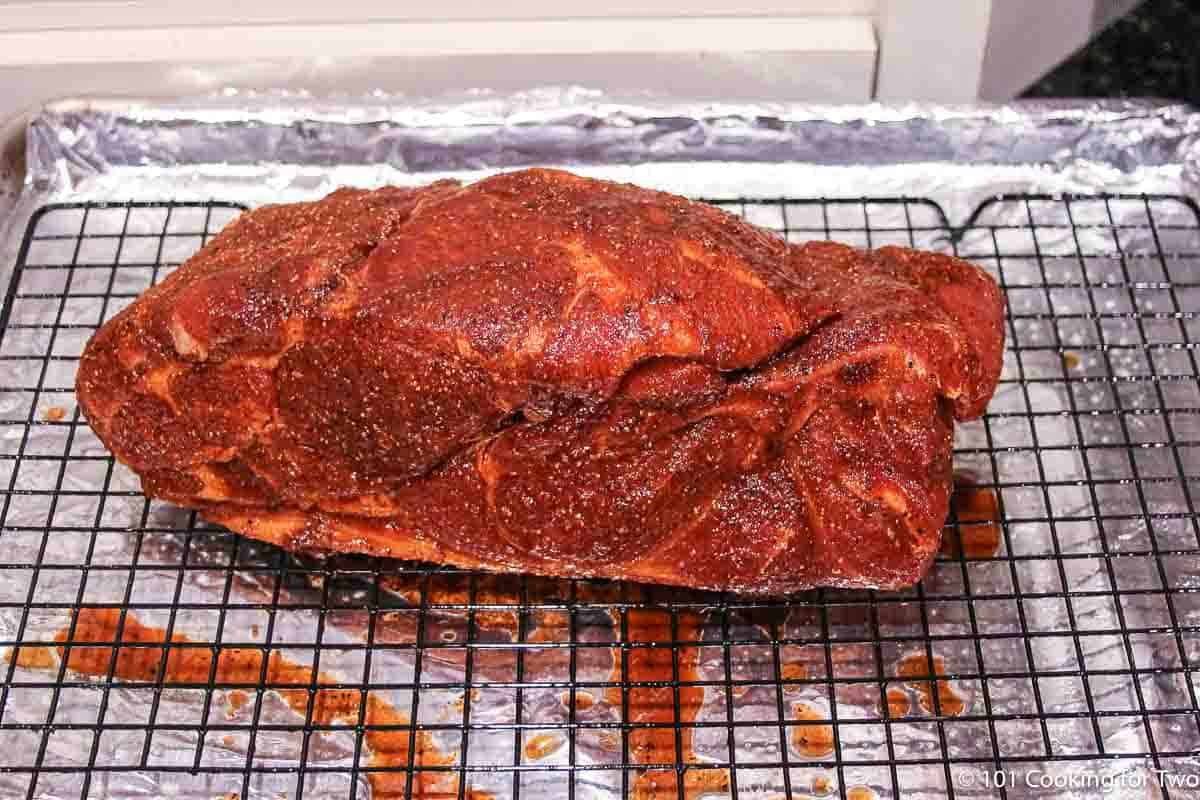
1. Prepare the pork butt.
Mix the dry rub. Pat the pork butt dry, coat with liquid smoke (optional), and apply the rub.

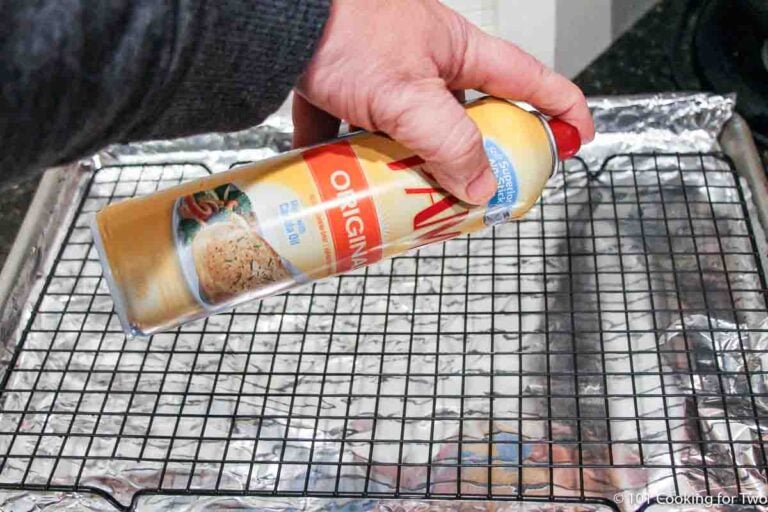
Place it on a foil-lined rimmed baking sheet with a rack for better bark.
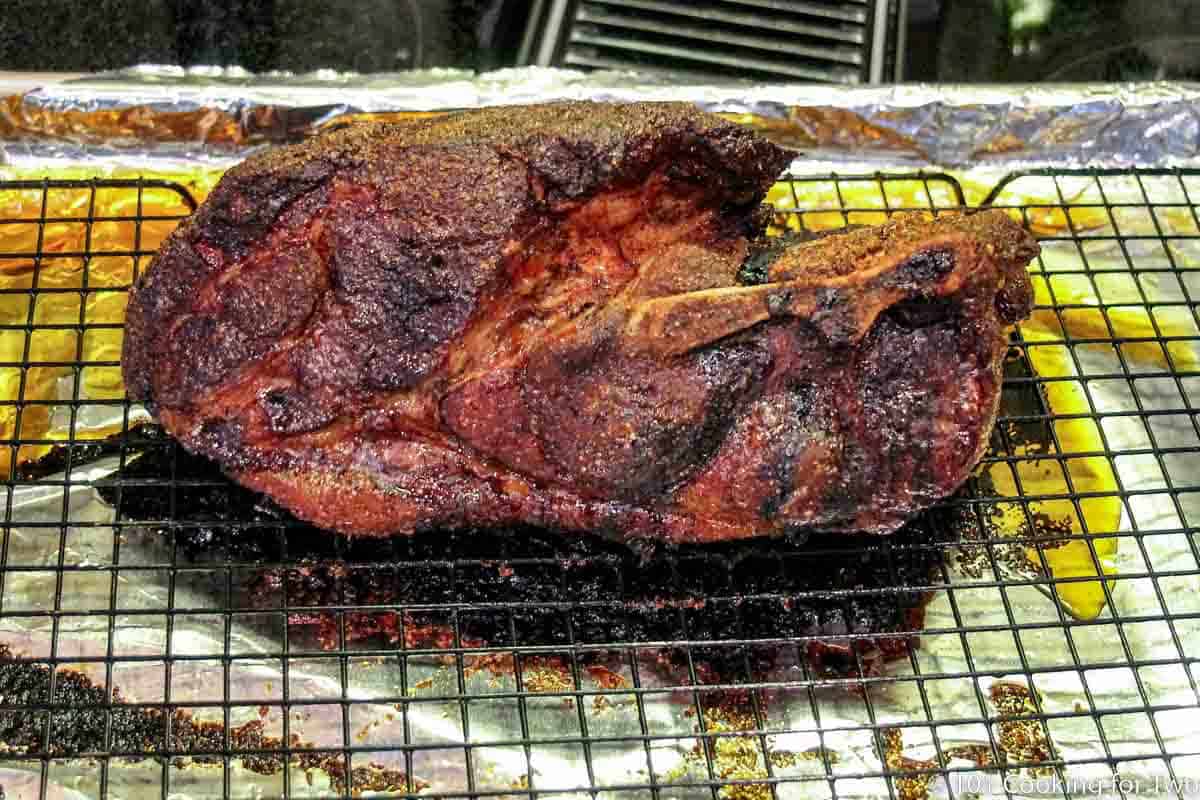
2. Cook low and slow:
Bake in a 250°F oven (no convection) until the internal temperature reaches 200° to 205°F—usually 8 to 9 hours.
✅ Pro Tip: No need to preheat or use convection. Just a center rack and steady heat.
3. Rest the meat:
Wrap the pork tightly in foil, then in towels. Let it rest in a small insulated cooler (or on the counter) for 1 to 2 hours.
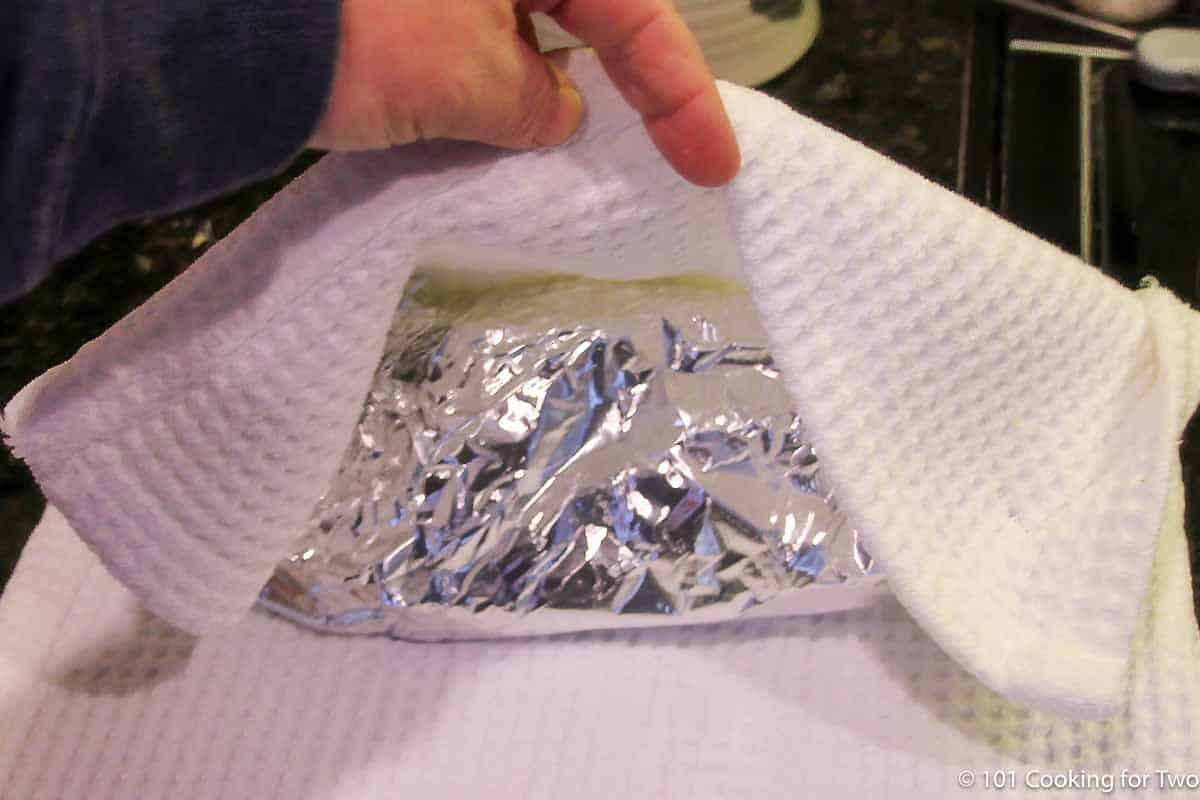
✅ Pro Tip: Don’t skip the rest. It locks in moisture and makes shredding easier. Shred too soon, and the juices end up on your cutting board.
4. Shred and serve:
Use two forks to shred—it should fall apart easily and stay juicy, with crispy bark.
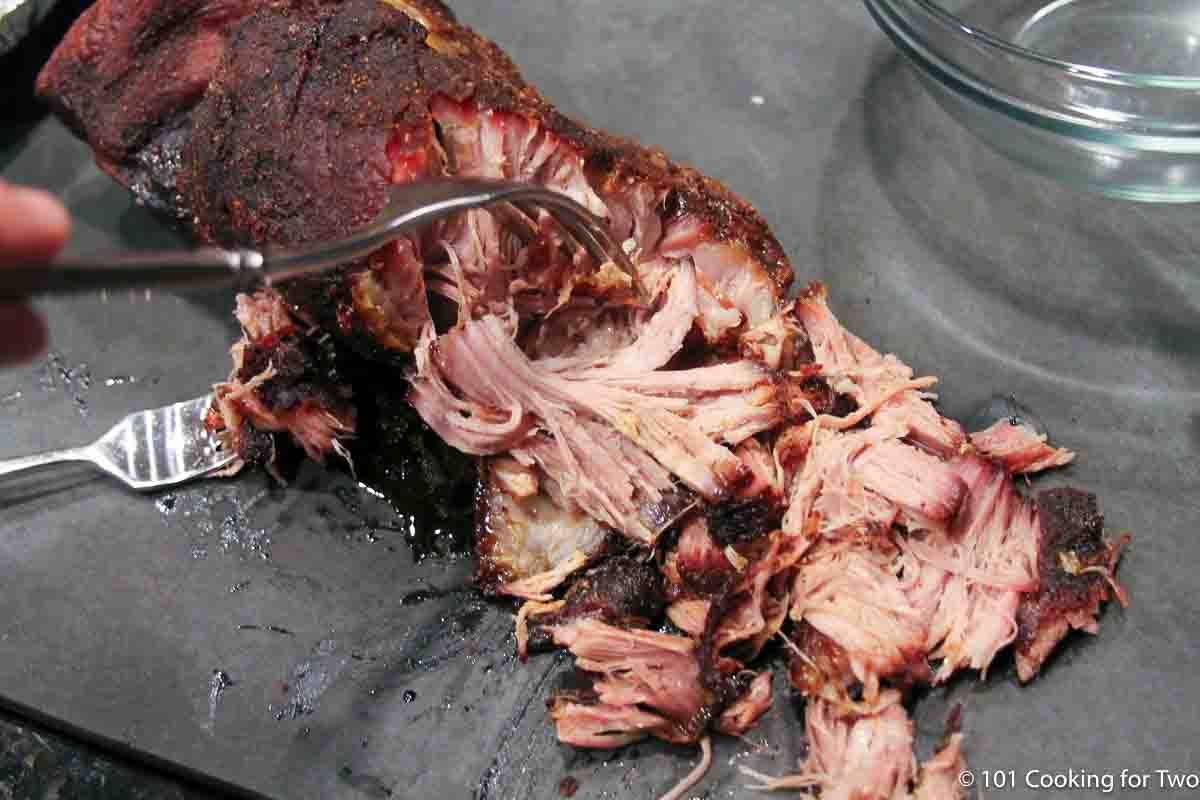
✅ Pro tip: A well-wrapped pork butt can stay warm in a cooler for up to 4 hours. Never try to shred one that’s gone cold—it just won’t work.
👇Want the full recipe? Scroll down to the printable recipe card for step-by-step instructions, tips, and serving ideas.
⏰ How Long to Cook Pork Butt in the Oven
At 250°F, a 4-pound boneless pork butt takes about 8 to 9 hours.
Bone-in cuts may take a little longer. As a general rule, plan for about 2 hours per pound, but it can range from 1½ to 2½ hours per pound depending on the shape and thickness.
You can adjust the temperature slightly—225° to 275°F will still work—but avoid going higher. At 300°F or more, the outside may dry out before the collagen fully melts.
For larger roasts (6 pounds or more), either divide them into two equal pieces or buy two smaller ones. Cook them separated on a rack for better airflow and bark—they’ll usually finish in about the same total time as a 4- to 5-pound roast.

✅ Pro Tip: Check your oven. Many ovens automatically shut off after 8–12 hours. Make sure yours won’t stop mid-cook.
Save this recipe!
🌡️ When is Pork Butt Done?
Pork butt is done when the internal temperature reaches 200°–205°F—that’s when the collagen has melted and the meat shreds easily.
Breakdown starts around 175°F, but it’s not truly pullable until it passes 200°F. Some stop at 195°F, but for the best texture, aim for that 200°–205°F sweet spot. During the rest, it may climb to about 210°F, finishing the tenderizing process.
✅ Don’t guess: Check temperature, not time. Color and texture can fool you—only a thermometer tells the truth.
❓ FAQs
You don’t have to, but it helps. Elevating the pork on a rack (or crumpled foil) keeps it out of the fat drippings and helps the bark form more evenly.
If your roast is over 6 pounds, cut it in half to speed up cooking and get more bark. Just space the pieces out on the rack—cook time will be similar to a 4–5 pounder.
Nope. Leave it uncovered so the bark can develop. The pork stays moist from melted connective tissue—not steam.
Yes, but only if your oven doesn’t shut off automatically. Many modern ovens turn off after 8–12 hours. Double-check your settings, use an oven-safe thermometer probe to monitor temperature safely, and keep the temperature steady at 250°F. The aroma might wake you before your alarm does.
Pork butt (also called Boston butt) is the upper part of the pork shoulder. It’s the best cut for pulled pork thanks to its marbling and connective tissue.
Many stores and recipes use “pork shoulder” to mean the same thing—so don’t worry if the label says shoulder, pork butt, or Boston butt. You're in the right place.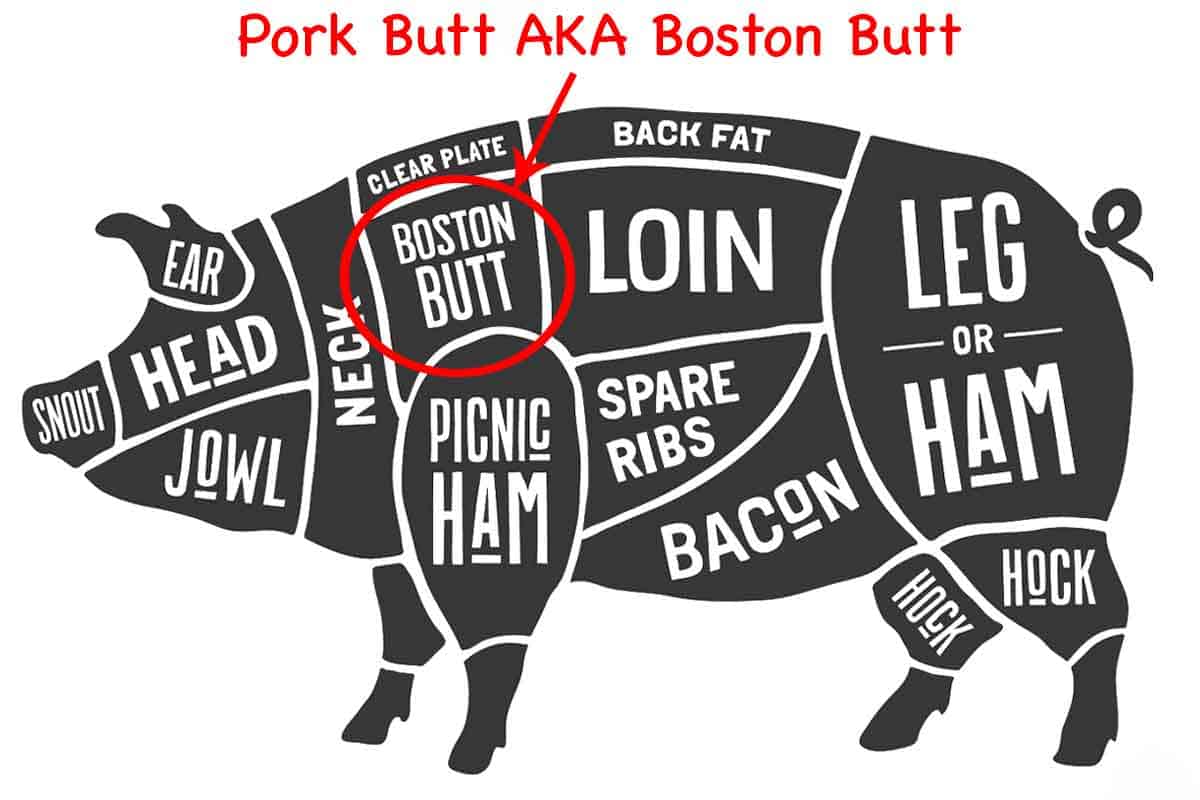
Fat up or down does not matter. All the rendering happens with time and temperature, not direction. The tenderness comes from the collagen and connective tissue melting, not the fat. Most of the fat melts and drains off anyway. Just use a rack and cook it low and slow to the right internal temperature.
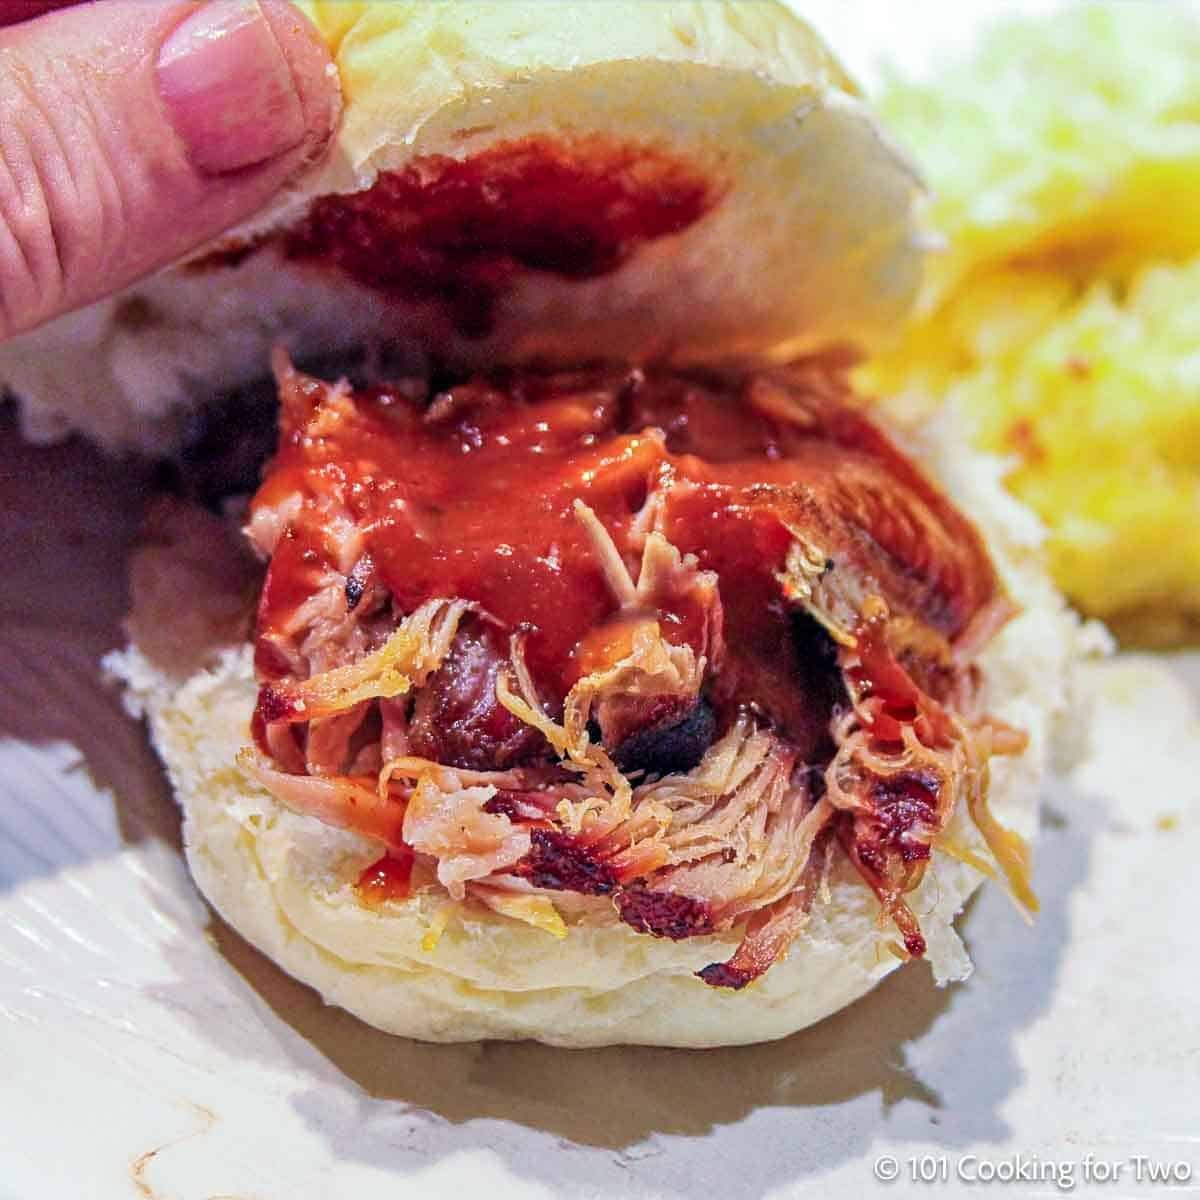
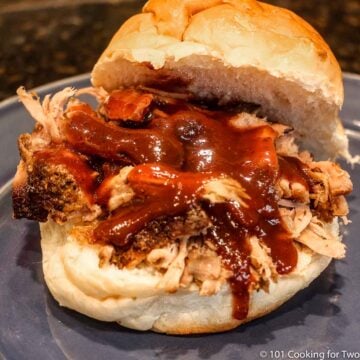
🍽️ How to Serve BBQ Pulled Pork
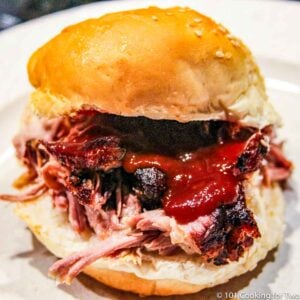
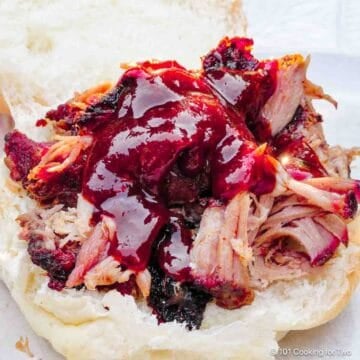
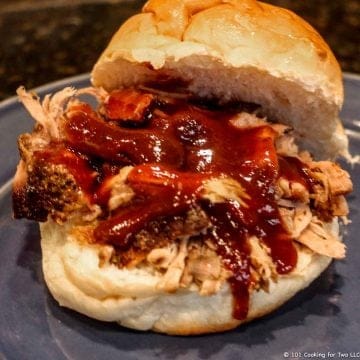
Pulled pork is best piled high on a toasted bun with Memphis BBQ Sauce and a scoop of coleslaw—but don’t stop there.
✅ Pro Tips: Plan on about ⅓ pound of pork butt per person before cooking, which yields roughly ¼ pound of pulled pork.
Other serving ideas:
- Use it in tacos, quesadillas, or nachos
- Serve it as a main dish with your favorite sides
- Pile it on a baked potato with cheese and sour cream
- Toss it into a breakfast hash with eggs
🍴 Great Side Dishes for Pulled Pork
Here are a few reader favorites to serve with pulled pork:
- Cold sides: Coleslaw, potato salad, Caprese Pasta Salad, or Classic Macaroni Salad
- Hot sides: Old fashioned cornbread, cheesy potato casserole, French Fries, or Stovetop Mac and Cheese
🧊 Storing Pulled Pork
Store leftover pulled pork in an airtight container and refrigerate for up to 4 days—though I prefer using it within 2 days for the best texture.
For longer storage, pulled pork freezes well for 3 to 4 months. Portion it into flat layers using vacuum-seal bags or boil-safe freezer bags. To reheat, use the oven method below, or gently simmer the sealed bag in water if it’s rated for boiling.
🔥 How to Reheat Pulled Pork (Crock Pot or Oven)
Crock Pot Method
- Load into a crock pot up to 75% full with pulled pork.
- As you load the crock pot, sprinkle lightly with water or apple juice—just enough to moisten.
- Cook on low for 2 to 3 hours, stirring every hour if possible. The serving temperature is 140°F or higher, but I recommend heating to 165°F to give some leeway when serving.
- Exact reheating time varies by amount, thickness, and your crock pot
- It will stay warm for quite a while unplugged or use the keep warm setting for serving.
Oven Method
- Spread the pork out on a rimmed baking sheet. A thicker pan, like a casserole or cake pan, may be used but will take longer.
- Sprinkle lightly with water or apple juice—just enough to moisten.
- Cover tightly with foil.
- Heat in a 250°–300°F oven until hot (about 30 to 45 minutes, depending on the amount). Longer in a thicker pan
- Keep warm in the oven (140°-150°F oven) or transfer to a crock pot on low or keep warm.
✅ Pro Tip: Never reheat or store pulled pork with BBQ sauce already mixed in. The acid breaks down the texture, turning it mushy.
👍 More Pulled Pork Recipes
Looking for other ways to make pulled pork? Try these:
- Pork Butt Gas Grill – classic smoky BBQ flavor without a smoker
- Crock Pot Pulled Pork – low effort, great for busy days
- Pulled Pork Loin in the Oven – a leaner option with great texture
- Crock Pot Pork Loin Pulled Pork – healthy, juicy, and freezer-friendly
📖The Recipe Card
How to Cook Pork Butt in the Oven for Pulled Pork
Video Slideshow
Ingredients
- about 4 pounds Pork butt - aka Boston Butt frequently called pork shoulder
- Dry rub of your choice - good quality
- 2 tablespoons Wright's Liquid Smoke - optional but recommended
- ½ cup dark brown sugar
- 3 tablespoons Diamond Crystal kosher salt - 2 tablespoons if using Morton
- 1 tablespoon chili powder
- 1 teaspoon garlic powder
- 1 teaspoon onion powder
- 1 teaspoon black pepper
Step-by-Step Instructions
1. Prepare the pork butt:
- Use a rub of your choice. If using my rub, mix ½ cup dark brown sugar, 2 tablespoons kosher salt, 1 tablespoon chili powder, 1 teaspoon garlic powder, 1 teaspoon onion powder, and 1 teaspoon black pepper.
- Pat the pork butt dry, then coat all sides with about 2 tablespoons of liquid smoke (optional).
- Use about 1 cup of rub to cover generously. If prepping ahead, wrap in plastic wrap and refrigerate for a few hours or overnight. If not, go straight to baking.
2. Roast low and slow:
- Line a rimmed baking sheet with foil and place a rack on top. Spray the rack with PAM or oil.
- Place the pork butt on the rack and roast at 250°F (no convection)—no need to preheat. Fat cap up or down—doesn't matter.

- Bake until the internal temperature reaches 200°–205°F—about 8 to 9 hours, depending on size, bone-in vs. boneless, and oven behavior.

3. Rest the meat:
- Remove from oven, wrap tightly in heavy-duty foil, then several towels. Rest in a small insulated cooler or on the counter for 1–2 hours. It will stay warm in a well-wrapped cooler for up to 4 hours.

4. Shred and serve:
- Use forks to shred. The meat should fall apart easily and stay juicy, with crispy bark.

Recipe Notes
Pro Tips:
- Use the rest time to adjust your serving window by a few hours.
- No rack? Use foil balls to elevate the pork so it doesn’t sit in fat.
- Liquid smoke should only list “smoke” and “water”—Wright’s is a good brand.
- My rub is provided for you, but use the rub of your choice.
- Salt amounts are based on Diamond Crystal kosher salt: 1 tsp table salt = 1¼ tsp Morton kosher = 2 tsp Diamond Crystal. You can reduce the salt for a lower-sodium rub—it still works well.
- The rub works well even if you cut the salt in half for a lower-sodium version.
- 195°F is the minimum temp for pullable pork, but 200°–205°F is better. Don’t go over 210°F.
- Store leftovers in the fridge up to 4 days (2 is best for texture), or freeze up to 4 months
- Bone-in or boneless both work—bone-in may take a bit longer.
- Fat cap up or down doesn’t matter.
- I often go straight from seasoning to the oven—no wrap time needed.
- DO NOT cover the pork while baking. You need a dry oven to develop bark.
- Nutrition information is an estimate—fat content varies, and seasoning distribution may differ.
Your Own Private Notes
To adjust the recipe size:
You can adjust the number of servings above; however, only the amount in the ingredient list is adjusted, not the instructions.
Nutrition Estimate (may vary)
Editor's note: Originally Published November 2, 2013. Updated with expanded options, refreshed photos, and a table of contents to help navigation.


Lisa B. says
In all my years of trying recipes from the internet, I have never commented on one...good, bad, or otherwise. I could not refrain from doing so here! I was beyond amazed at the end product of this recipe. The cooking method is foolproof. People thought the pork was cooked on a smoker or grill. It was perfectly moist but with the crunchy texture of the bark mixed in. So easy! OUtstanding results.
Dan Mikesell AKA DrDan says
Hi Lisa,
Welcome to the blog.
I generally only reply to comments with questions or problems but wanted to comment on yours. I totally agree. I have gotten lazy in the last few years and now only do this oven version. Just rub and bake.
Thanks for the comment and rating.
Dan
Jackie Brown says
Haven’t tried this yet but definitely will! It sounds delicious! I will let you know of my results! I love your site! I only make your chili!
EKrc says
I roasted an 8 lb pork shoulder roast fat side down for 12 hours and it only reached 181. It got “stuck” there for awhile so I took it out. Next time I will let it go longer l after it realized it would start rising again if I left it to cook longer.
But to reach 200-210 at a low cooking temp you need to cook it waaayyy longer than 9-10 hours. More like 20 hours for the size roast I had.
EB says
At 180ish I usually pull out, wrap in foil, then put back in oven until 195-200z
Darrell Wells says
I cooked an 8 lb butt for 16 hours, including a stall at about hour 12. Be patient. Stalls are part of the equation. No need to wrap during stall, you only lose temp and valuable time. Wonderful recipe I’ve been using for years!!
Walter says
Hi Dan first time to this site. I was wondering would you inject the butt before you cooked it. By the way your instructions is by far the best I've seen on the net
Dan Mikesell AKA DrDan says
Hi Walter,
Welcome to the blog.
You can inject if you wish. If you are injecting things with sodium, use a rub with no or little salt.
I don't usually think of injection since I have no desire to change the flavor of the meat.
Enjoy you pulled pork.
Dan
FrankW says
DrDan, thank you. I too stumbled across this site and it will now remain book marked into the future. I am a home cook who does a Pork Butt once a year and, usually the Momofuko Bo Ssam style with at best mixed results. This year the plan was to make this a key center piece. While reviewing my notes I decided I had to rectify some of the issues I had in the past, plus as simple as the recipe I had was, it never was quite right so I started my search. I discovered lots of conflicting info but kept coming back to your post and loved that you provided the "why" I always look for. What I employed this year was 1) Fat cap up or down doesnt matter, I used up. 2) double tinfoil on sheet pan with cooling rack and parchment. 3) Low and slow, I used 260F temp and did a 6 lb Butt over 9 hours (exquisite). 4) Wrapped in tinfoil and a towel at the end and let rest for 2 hours (I was working on other prep). 5) Gloves on fat cap slid off, bone tapped out easily and the meat shredded itself ( it was a pound less after I was done because I couldnt stop taste testing). This was perfection. I completed the fat cap in a preheated 500F oven after dry rubbing some brown sugar and salt, it took 7 minutes to get the crackling just right, right when the sugar and salt start to melt and the cap starts to blister and they merge at that point done and removed from the oven before burning. For the record I did a dry rub of white sugar and salt in a big baggie and stuck it in the fridge over a day or so, rotating when ever I went into the fridge.
I'd post pictures/video if I could it was so good and the best experience using your guidance.
DrDan you have a new patient. Thank You.
Jan says
I was wondering I always brine my pork butt do I need to cut back on the salt in your rub because of the salt on the brine?
I so much to try your recipe and the barbeque sauce you where talking about.
Thank you for time.
Dan Mikesell AKA DrDan says
Hi Jan,
If brined, I would eliminate all the salt in the rub. It is always easy to add salt later but impossible to remove it if a dish is too salty.
Dan
Chris says
I've been cooking pork butt for many years, but always look for different options that people have tried. I cooked a 7.7 lb Boston butt yesterday, expecting it to take all day & night. Two things I did differently this time. I used my oven at 250°, instead of my BGE, AND I had to bake a pie midway through the cook time, so oven was at 400° for 20 minutes. Result was total cook time of around 7 hours. I expected to have to leave it in til about 9:30pm, but it was at 195° around 5pm! Let it rest an hour, pulled it, and it was ready! Yay! I did fat side down and no rack this time. It was fine, but I will use the rack next time. Lots of great bark all the same!
Charlene says
Hey Chris, I have a 5.5lb pork butt that’s in the oven right now at 250f but I started later in the morning and I am afraid it would not be ready by dinner time around 7pm. I’m looking to cut down the time by doing what you did. How many hours after the pork’s been cooking at 250 do you then begin to turn the oven up to 400? Thanks!
Jan says
I didn't use any salt like you said sense I brined my pork . The only thing I can say is that is was the best bbq I have ever made. Smelling it all day made me do hungry that when it was finely done and we could eat it , I ate it so fast I ended up with stomach problem, not because of your recipe . I have problems if I eat to fast.
Let's get back to your recipe it was great. I followed it to a tea including the bbq sauce. I'm North Carolina so you know how we are about our Q
Thanks for the great recipes
Love the pictures not your puppies
All dogs are puppies to me
I lost my s year ago to lung cancer, something we where not expecting. We miss him very much. He was a great company
Anthony andrews says
I ABSOLUTELY LOOOOVVEEE THIS RECIPE!! I use this recipe and a North Carolina-inspired sauce that is absolutely phenomenal. My question is, can I do a brisket (a whole packer) in the same manner? I know this blog is old, but I am curious if it will work and still hold its shape, not shred like the pork does
Dan Mikesell AKA DrDan says
Hi Anthony,
Welcome to the blog.
You "should" be able to cook brisket similarly but I have not done that. If I oven cooked brisket and didn't use our normal brisket recipe (link below), my wife would beat me. Check my grill recipe and the timing should be similar if you want to experiment. But no guarantee here since I haven't done it. https://www.101cookingfortwo.com/cook-brisket-gas-grill/
May I suggest https://www.101cookingfortwo.com/oven-baked-kansas-city-bbq-beef-brisket/ which is an oven brisket we have made for 45 years many many times.
Thanks for the note and rating.
Dan
Chip says
Just FYI, it is a "butt" because that was the name of the barrel size that was used to ship salted meat on sailing ships. It has nothing to do with the cut of meat itself
Melinda McLaughlin says
The best pulled pork I've ever had! Directions were perfect. Everyone loved it! Some people even ate it without a roll or barbecue sauce- it was that good! I cooked 3 pork buts at once in the oven and put them right on to the oven rack to cook, with a sheet cake pan lined with foil on the next rack down.
Yvonne says
Hello I have a 7 lb bone in going to bake 250 for 12 hrs Using your rub. After that can be shred then put a n slow cooker
Happy in Texas says
I will have to agree that the lower temperatures are a better way to go. I have a friend that uses a grill to smoke and cook the meat and he likes to keep it around 270 for the target temp.
I didn't want to stay chained to my grill for 12+ hours so I decided to go with a target temp of 225-240F @ 1.5 hours per pound in the oven.
My first pork butt/boston butt was 9.21 lbs. It was already bag/plastic wrapped so I removed it from the fridge and brought it up to room temp by soaking it in a large bowl of warm-hot water while leaving it in the plastic bag. This took about 15-20 min. I made a dry rub while I was waiting. I used the rub recipe in Jeff Phillip's Smoking Meat book called the Big Bald BBQ Rub which can also be found in the smokingmeatforumsDOTcom.
I coated the entire pork butt in mustard as directed by several popular forums. Adding the dry rub made a nice paste. I made sure the mustard got into every nook and cranny of the pork but. I figured that my pork butt might taste like a large mutant hotdog at the end ... but the mustard flavor pretty much disappears completely.
After the mustard, I added the rub. Basically, the rub includes sugar, paprika, black pepper, lemon pepper, kosher salt, powdered garlic, powdered onion, cayenne pepper, chili powder, and lemon pepper.
Based on several finishing sauce recipes for pulled pork that I found in the forums, I also included about a tablespoon of allspice. I also included Lime Pepper seasoning (I cut the amount of lemon pepper by 1/2 and added the lime)
While these ingrediants would make you think that the drippings would have a heck of a kick, they didn't really have the level that I was expecting. I am not a big fan of hot sauces, so this was well within my comfort zone. Nice flavor, but nothing that would cause a novice to start sweating, or think about sweating.
I started out at 225, and after the fat cap split (I put the fat side up) around the 4 hour mark, I spritzed with apple cider vinager every hour for about 3 hours. Then I wrapped it in butcher paper (waxless) and then in foil and put back into the oven. I pulled the drippings pan and poured off the drippings and put the pan back under the butt in case my wrappings leaked (they did not). I bumped the heat up to 240 since the internal temp was only around 165.
At the 12 hour mark the oven safety feature turned off the oven. I was asleep and didn't notice immediately. When I came down at the 13 hour mark the meat was at 190F. I turned the oven back on and set the temp to 300 for 90 minutes. This brought the temp into the 203-205F range which was my target temp.
Since I wanted to get back to bed, I opened the oven door for about 20 minutes to dissapate the heat, then I closed the door and let the roast coast/rest for about 5 hours until I got up again. The internal temp was a bit over 160 so no food safety issues. I wouldn't have been worried if it was 60F lower since it had been wrapped the entire time.
I took the roast out of the oven and pulled the pork. It was pretty hot but it was so tender, moist, and juicy, that it pretty much fell apart.
I saved the additional drippings while setting aside the fat.
I cooled the drippings so that the fat congealed so that it could be removed, but found that it was pretty easy to pour the drippings into another bowl while the fat remained in the original bowl. A slotted spoon helped with this process.
after I pulled the pork, I put the very moist pork on some racks and cold-smoked them. There is a YouTube video of a $1 cold smoker setup using a cardboard box and some sawdust from a pecan tree or whatever smoking wood that you like to use. I used Pecan since we had one cut down recently and I saved a garbage bag full of the sawdust. But I also have mesquite chips as well. I put the sawdust in an aluminum baking pan and used bow torch to start it (youtube has videos of how people do this).
With the racks under some sort of enclosure (any type of box, teepee type thing, traditional BBQ with smoker, whatever) I cold smoked the racks of pulled pork for 1 hour. I also experimented with 30 minutes of smoking but 1 hour was the sweet spot. Even 30 minutes had good flavor but I wouldn't go longer than 60. It would be a waste of time.
The racks of pulled pork were still very very moist. The overall temp inside the smoking enclosure only went up 3-5 degrees. I immediately bagged and chilled the pork after 1 hour.
I lightly simmered the drippings for a few minutes to make sure there weren't any food safety issues, and then poured all of the drippings (minus the fat that was skimmed off) back into the bags of pulled pork.
When making the sandwiches later on, we toasted hawaiian slider and regular sized buns with butter in our oven broiler.
Some of the family likes pickles and onions added, some like their favorite bbq sauce, and some like a finishing sauce added to their pork. There are a lot of interesting recipes. It just depends on the individual.
I liked doing the cold-smoke after the oven cooking. It was simple to do. It did not take much in materials (a couple hands of sawdust and a few mesquite wood chips) ... and it had a great smoked flavor. Trying to light the sawdust with a match or lighter did not work well. A propane or butane torch worked really really well and only took a couple seconds.
The initial 9.21lb roast was bone in. I am currently cooking one right now that is 5lb with no bone. We will see how that goes.
If you have any need for smoked spices. I would recommend spreading your seasonings out on some aluminum foil and smoking them while you do the pork. It is easy, takes no extra time, and you can pour them back in the original bottle afterwards. I do this with paprika, pepper, garlic and onion powders. The give a nice flavor when doing hamburgers or other things on the stove when you don't have easy access to the grill.
Monica says
I booked marked this page because I cannot tell you just how much conflicting information I got on how to cook a butt. The information on this post is clear, super helpful...and I'm on my way! Wish me luck ! Lol
Dan Mikesell AKA DrDan says
Hi Monica,
Welcome to the blog.
I try to be informative. I always told my students it is much more important to know "why" than "what" usually so you can fix things when something doesn't quite work.
I have a 4 pounder in the refrigerator now for tomorrow.
Dan
Stephanie Licon says
I’ve used this recipe twice, perfect every time.
Kim says
We had this for dinner last night and it was delish!! I put it on the smoker for about an hour to add the smoked flavor. We’ll definitely use this recipe again! Thanks for sharing! I also appreciate all of the helpful hints and ways to tweak the ingredients & cooking times.
Bob Gilda says
I look at the nutrition facts and often see "Per Serving." Yet no where is the amount of a serving stated. For example, Oven Pulled Pork from Pork Butt. What is amount of a serving that has 680kcal?
Dan Mikesell AKA DrDan says
Hi Bob,
Welcome to the blog.
There are 8 servings in 4-pound pork butt. So with cooking, it will be 6-7 oz. Remember the nutrition is calculated by a machine, there is drainage and it is a natural product, so variable, unlike factory produced foods.
Dan
Karen says
So glad I found your site. I’ve got a big boy 7lbs. I’m calculating 14hours at 250, boneless pork shoulder butt(off the label lol). I’ll let you know how it turns out. Your recipe is the most straightforward I’ve found and went through quite a few.
Dan Mikesell AKA DrDan says
Hi Karen,
Welcome to the blog.
Your time estimate may be a bit high. Everybody talks about weight but the cooking time is somewhat more related to the thickness which is not totally proportional to weight. Check it at 10 and 12 hours to be sure.
Enjoy your pork.
Dan
Karen says
Thanks for the quick reply Dr Dan!! Yes and good because I’m wanting to cook it overnight so if I start cook time around 11pm I’ll check my temp at 9am.
Jim Holstein says
I cooked a 5# loin at 325 until 175-deg per the thermometer dial. It was excellent for the 2 of us. We each had 2 slices, lots left.
How can I make some pulled pork from the remainder?
Dan Mikesell AKA DrDan says
Hi Jim,
Welcome to the blog.
Making pulled pork out of already cooked pork loin will probably not go very well. With pork butt, you have all the fat and melted connective tissue, but with loin, the fibers just tighten up. If you want to try, I would do some thinner slices and braise in some broth over at a low simmer. But again, I think you are fighting a losing battle.
Dan
Jeanne says
Thank you sooooooo much for this recipe and instructions. I did not have liquid smoke, so I used a chipotle chili powder. I followed all other instructions. This was unbelievably good. Will recommend and share to everyone. I didn't know it could be so easy.