
The easiest BBQ pulled pork with crispy bark is made in your oven, not a smoker. This simple low-and-slow oven method turns pork butt (Boston butt) into tender, fall-apart pulled pork with great flavor and surprisingly little work.
⏱️ Quick Answer: How long to cook pork butt in the oven?
- A 4–5 pound pork butt takes about 8–10 hours in a 250°F oven.
- Cook to 200°–205°F internal temperature for tender pulled pork.
- Bone-in may take slightly longer.
- See the How Long to Cook section for other sizes and temperatures.
Jump To (scroll for more)
- 🐖 TL;DR — Oven Pulled Pork from Pork Butt
- 🐖 Ingredients for Oven Pulled Pork
- 👨🍳 Quick Overview: How to Cook Pork Butt in the Oven
- ⏰ How Long to Cook Pork Butt in the Oven
- 🌡️ When is Pork Butt Done?
- ❓ FAQs
- 🍽️ How to Serve BBQ Pulled Pork
- 🧊 Storing Pulled Pork
- 🔥 How to Reheat Pulled Pork (Crock Pot or Oven)
- 👍 More Pulled Pork Recipes
- 📖The Recipe Card

Featured Comment by Lisa B :
⭐⭐⭐⭐⭐
"I was beyond amazed at the end product of this recipe. The cooking method is foolproof. People thought the pork was cooked on a smoker or grill. It was perfectly moist but with the crunchy texture of the bark mixed in. So easy! Outstanding results."
🐖 TL;DR — Oven Pulled Pork from Pork Butt
What it is: Low-and-slow pork butt cooked in the oven until juicy, fall-apart tender, with crispy bark and BBQ flavor.
Why you’ll love it: No smoker needed. Easy prep, reliable results, and great pulled pork for sandwiches, tacos, or meal prep.
How to make it: Season pork butt with dry rub, cook low and slow in a 250°F oven until 200°–205°F internal temperature, rest well, then shred.
Jump to the Recipe Card or continue reading for step-by-step instructions, timing, and tips.
👨🍳 DrDan says: I’m not about babysitting a grill or smoker all day. This method gives me great pulled pork with bark and flavor—without the hassle. Just rub it, stick it in the oven at 250°, and it comes out perfect every time.
🐖 Ingredients for Oven Pulled Pork

Pork Butt (aka Boston Butt):
This is the upper part of the shoulder and the best cut for pulled pork. Bone-in or boneless both work—bone-in gives better bark and avoids the netting issue with boneless.
🔍 Also called pork shoulder: Many stores and recipes use the term "pork shoulder" for this same cut, even though technically it's just part of the whole shoulder. If your label says pork butt, Boston butt, or pork shoulder, you're in the right place.
✅ Pro Tip: Remove the net. Boneless pork butt often comes in a net. It will tear off your bark—remove it before cooking, or go bone-in to skip the hassle.
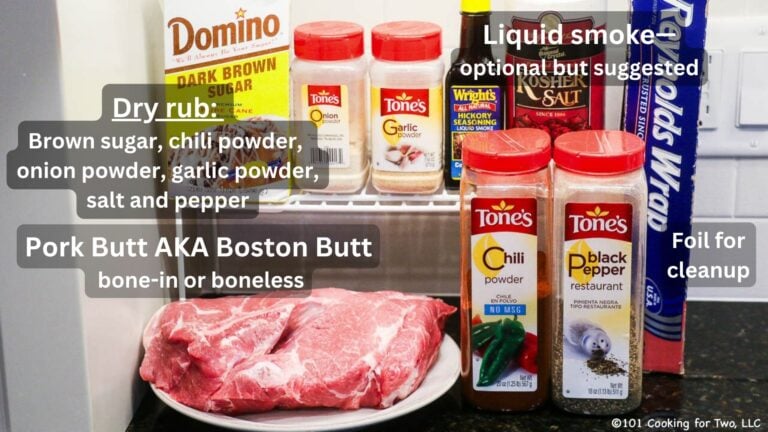
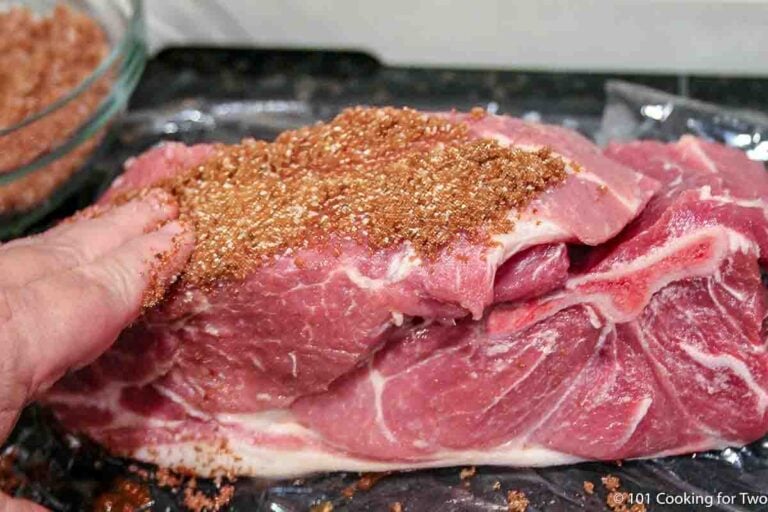
Dry Rub:
Use your favorite BBQ rub or the simple homemade version in the recipe card—brown sugar, kosher salt, chili powder, garlic powder, onion powder, and black pepper.
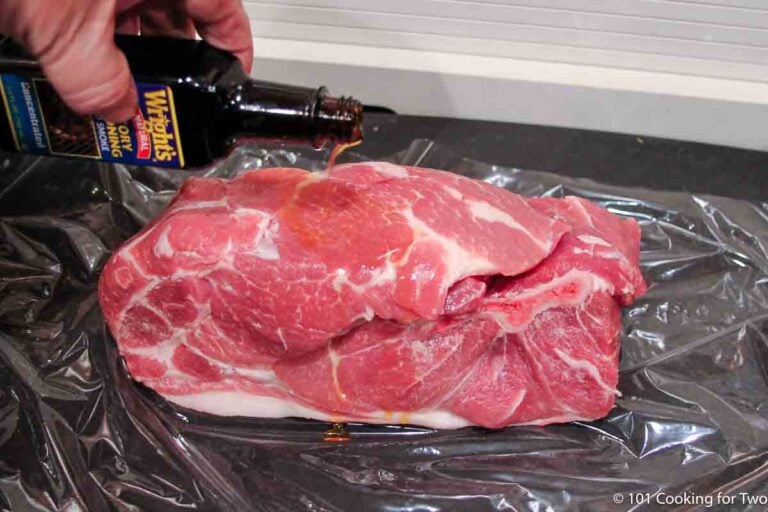
Liquid Smoke (optional but recommended)
Adds smoky BBQ flavor without a smoker. Look for a quality brand like Wright’s that lists only “smoke” and “water” on the label.
No liquid smoke? You can rub the pork with yellow mustard instead—it helps the dry rub stick and adds a subtle tang without changing the flavor.
Flavor Options:
Try my Memphis dry rub for a spicier twist. For something bolder, use my Chipotle Seasoning as a dry rub. Add cayenne for heat or smoked paprika for a deeper smoky flavor..
👨🍳 Quick Overview: How to Cook Pork Butt in the Oven
This is a summary, not the full recipe. See the recipe card below for complete instructions.
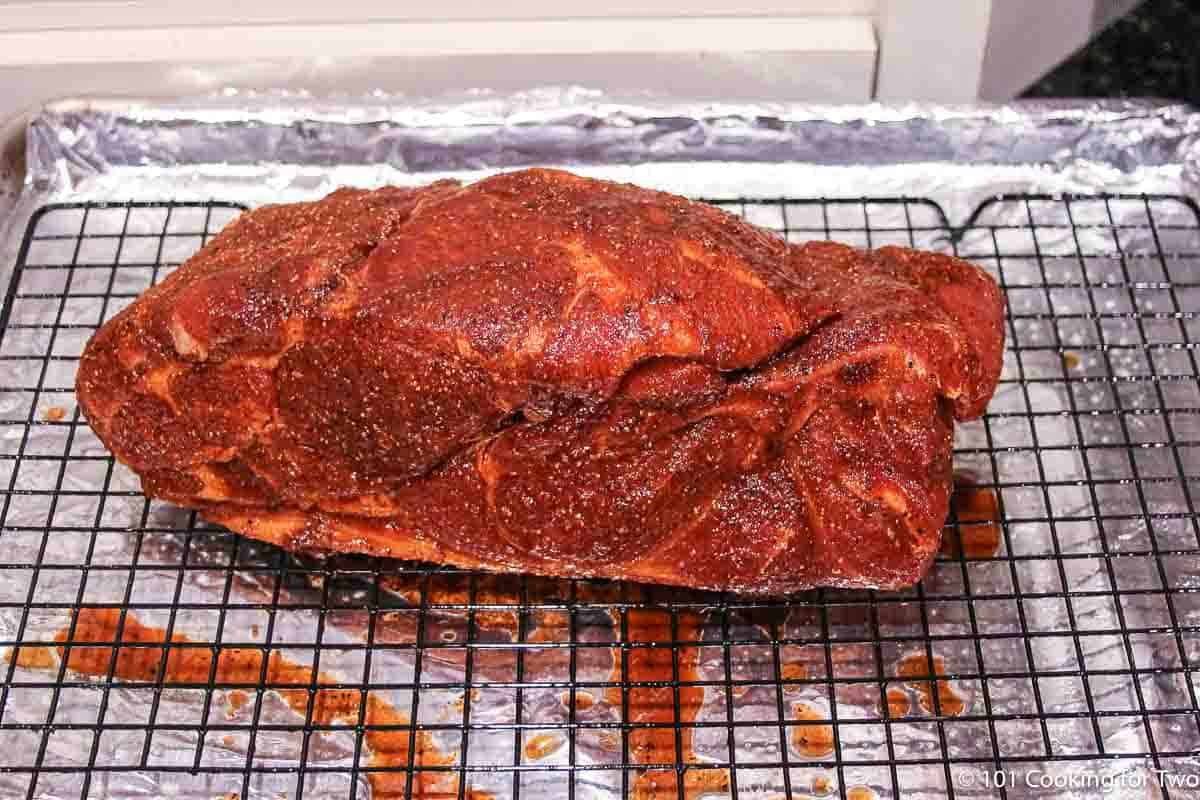
1. Prepare the pork butt.
Mix the dry rub. Pat the pork butt dry, coat with liquid smoke (optional), and apply the rub.

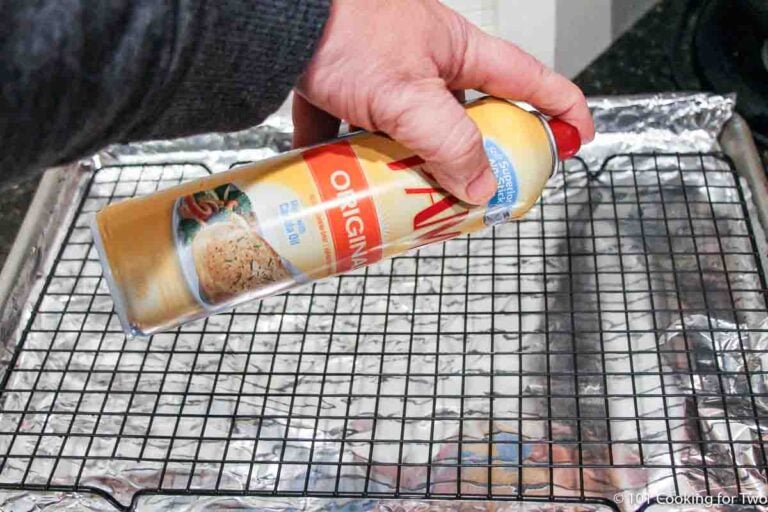
Place it on a foil-lined rimmed baking sheet with a rack for better bark.
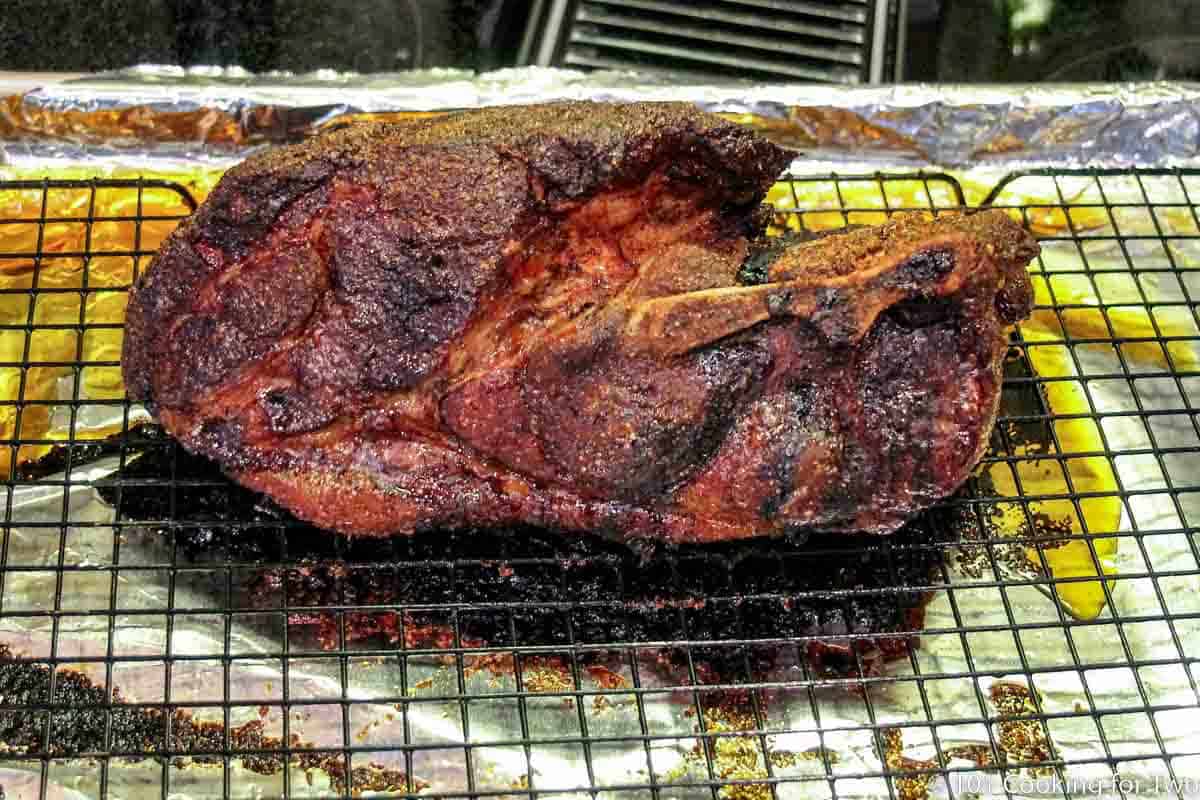
2. Cook low and slow:
Bake in a 250°F oven (no convection) until the internal temperature reaches 200° to 205°F—usually 8 to 9 hours.
✅ Pro Tip: No need to preheat or use convection. Just a center rack and steady heat.
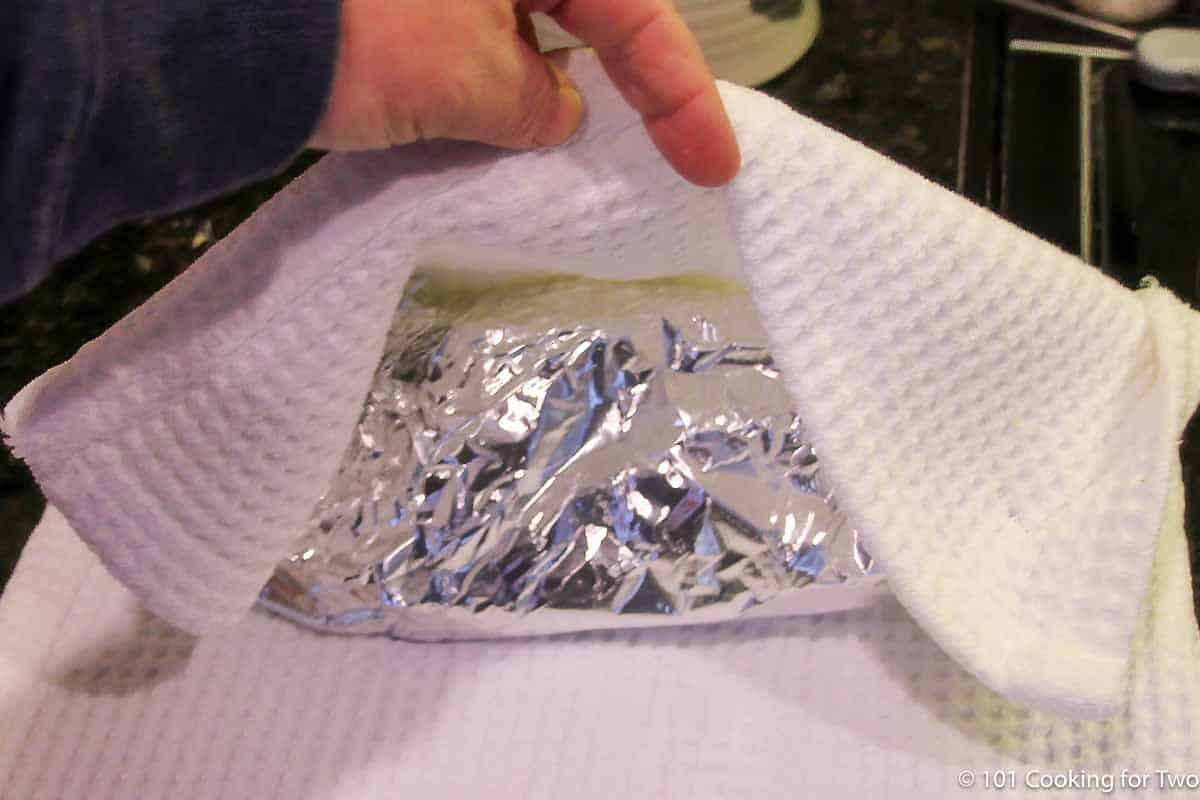
3. Rest the meat:
Wrap the pork tightly in foil, then in towels. Let it rest in a small insulated cooler (or on the counter) for 1 to 2 hours.
✅ Pro Tip: Don’t skip the rest. It locks in moisture and makes shredding easier. Shred too soon, and the juices end up on your cutting board.
4. Shred and serve:
Use two forks to shred—it should fall apart easily and stay juicy, with crispy bark.
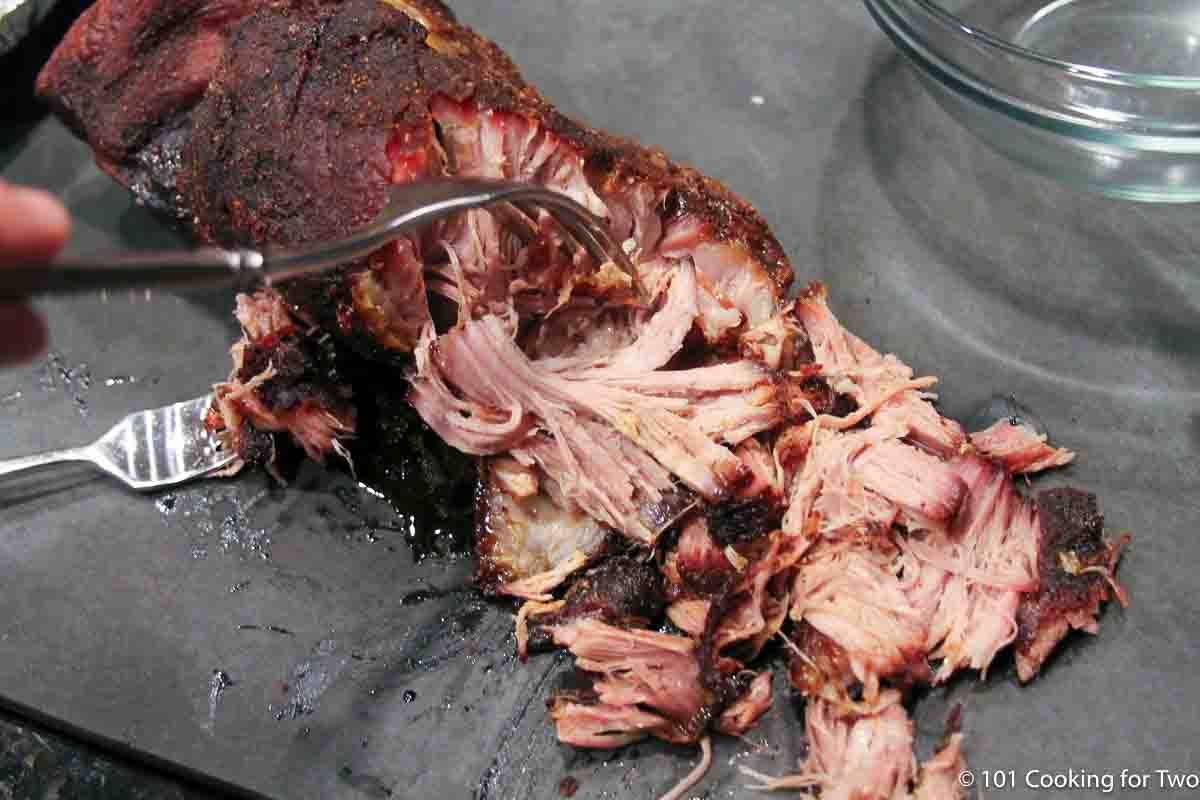
✅ Pro tip: A well-wrapped pork butt can stay warm in a cooler for up to 4 hours. Never try to shred one that’s gone cold—it just won’t work.
👇Want the full recipe? Scroll down to the printable recipe card for step-by-step instructions, tips, and serving ideas.
⏰ How Long to Cook Pork Butt in the Oven
At 250°F, a 4-pound boneless pork butt takes about 8 to 9 hours.
Bone-in cuts may take a little longer. As a general rule, plan for about 2 hours per pound, but it can range from 1½ to 2½ hours per pound depending on the shape and thickness.
You can adjust the temperature slightly—225° to 275°F will still work—but avoid going higher. At 300°F or more, the outside may dry out before the collagen fully melts.
For larger roasts (6 pounds or more), either divide them into two equal pieces or buy two smaller ones. Cook them separated on a rack for better airflow and bark—they’ll usually finish in about the same total time as a 4- to 5-pound roast.

✅ Pro Tip: Check your oven. Many ovens automatically shut off after 8–12 hours. Make sure yours won’t stop mid-cook.
Save this recipe!
🌡️ When is Pork Butt Done?
Pork butt is done when the internal temperature reaches 200°–205°F—that’s when the collagen has melted and the meat shreds easily.
Breakdown starts around 175°F, but it’s not truly pullable until it passes 200°F. Some stop at 195°F, but for the best texture, aim for that 200°–205°F sweet spot. During the rest, it may climb to about 210°F, finishing the tenderizing process.
✅ Don’t guess: Check temperature, not time. Color and texture can fool you—only a thermometer tells the truth.
❓ FAQs
You don’t have to, but it helps. Elevating the pork on a rack (or crumpled foil) keeps it out of the fat drippings and helps the bark form more evenly.
If your roast is over 6 pounds, cut it in half to speed up cooking and get more bark. Just space the pieces out on the rack—cook time will be similar to a 4–5 pounder.
Nope. Leave it uncovered so the bark can develop. The pork stays moist from melted connective tissue—not steam.
Yes, but only if your oven doesn’t shut off automatically. Many modern ovens turn off after 8–12 hours. Double-check your settings, use an oven-safe thermometer probe to monitor temperature safely, and keep the temperature steady at 250°F. The aroma might wake you before your alarm does.
Pork butt (also called Boston butt) is the upper part of the pork shoulder. It’s the best cut for pulled pork thanks to its marbling and connective tissue.
Many stores and recipes use “pork shoulder” to mean the same thing—so don’t worry if the label says shoulder, pork butt, or Boston butt. You're in the right place.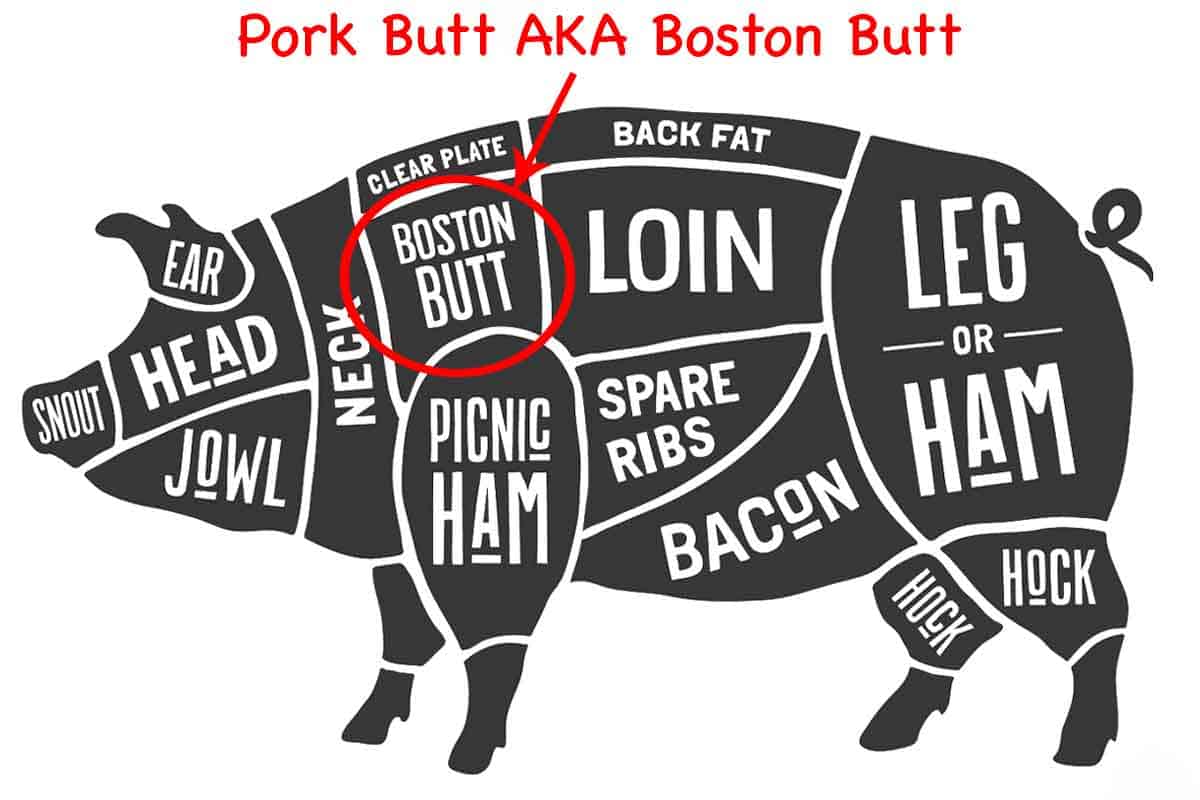
Fat up or down does not matter. All the rendering happens with time and temperature, not direction. The tenderness comes from the collagen and connective tissue melting, not the fat. Most of the fat melts and drains off anyway. Just use a rack and cook it low and slow to the right internal temperature.
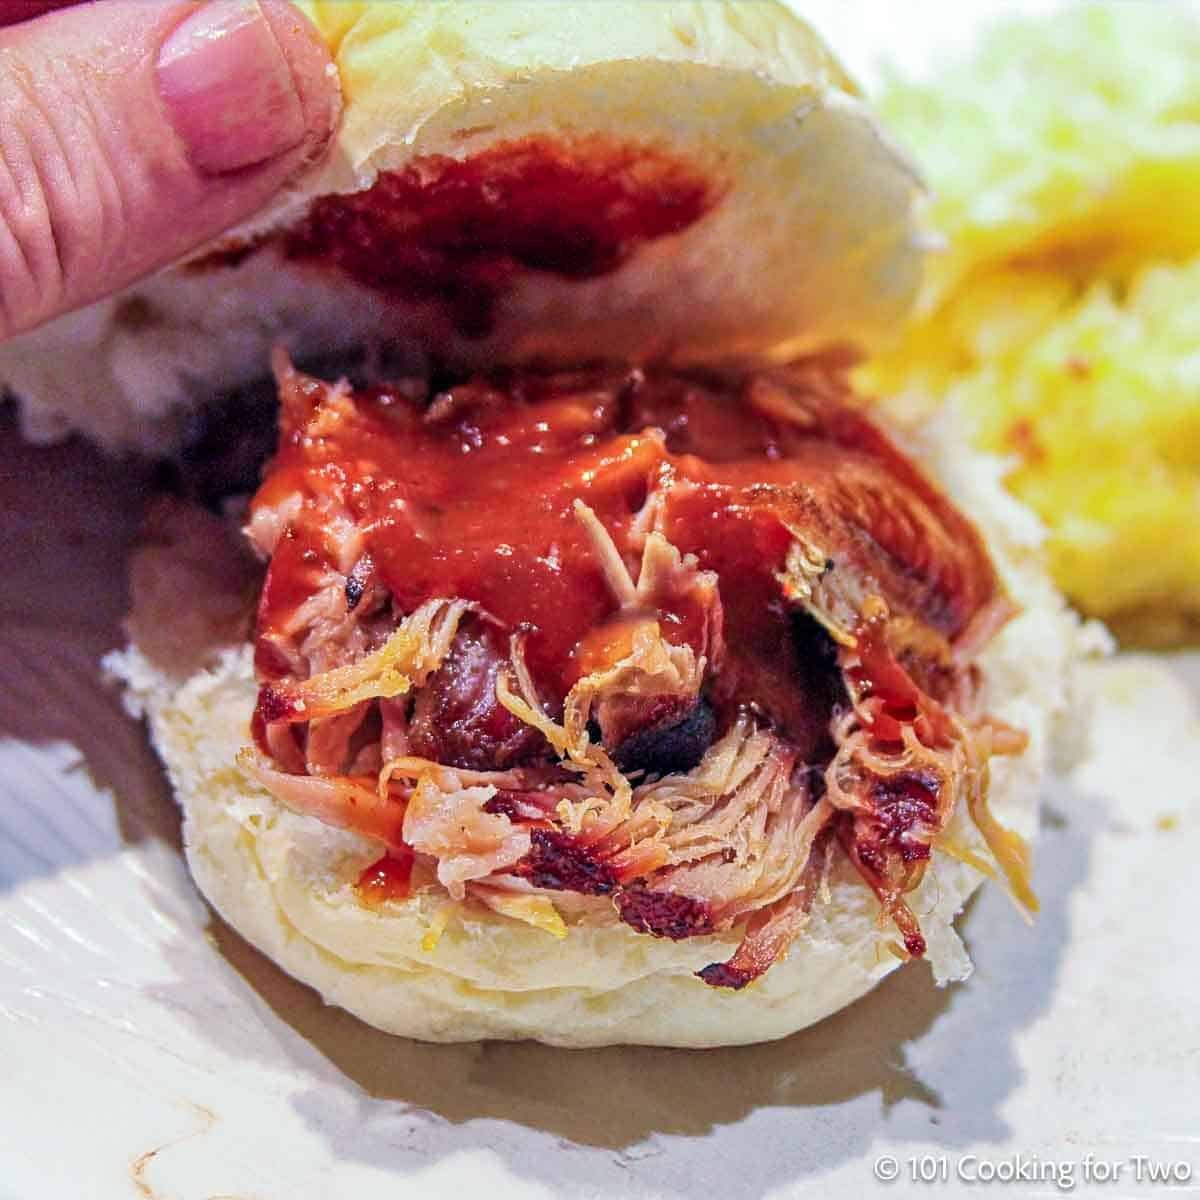
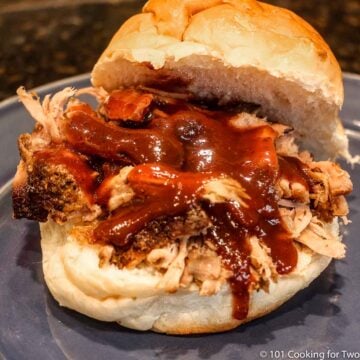
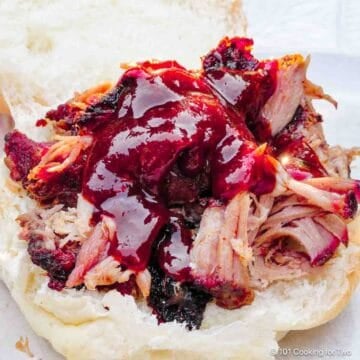
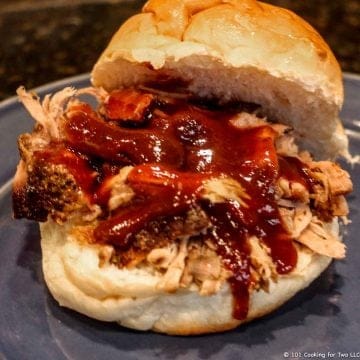
🍽️ How to Serve BBQ Pulled Pork
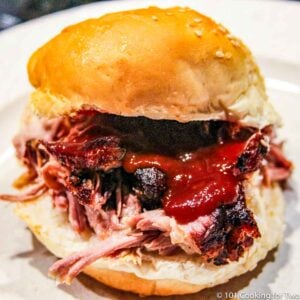
Pulled pork is best piled high on a toasted bun with Memphis BBQ Sauce and a scoop of coleslaw—but don’t stop there.
✅ Pro Tips: Plan on about ⅓ pound of pork butt per person before cooking, which yields roughly ¼ pound of pulled pork.
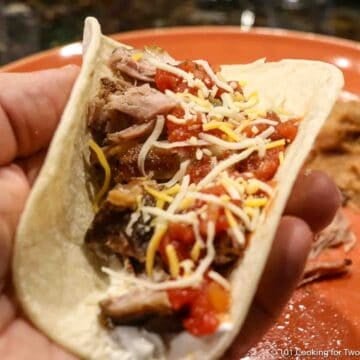
Other serving ideas:
- Use it in tacos, quesadillas, or nachos
- Serve it as a main dish with your favorite sides
- Pile it on a baked potato with cheese and sour cream
- Toss it into a breakfast hash with eggs
🍴 Great Side Dishes for Pulled Pork
Here are a few reader favorites to serve with pulled pork:
- Cold sides: Coleslaw, potato salad, Caprese Pasta Salad, or Classic Macaroni Salad
- Hot sides: Old fashioned cornbread, cheesy potato casserole, French Fries, or Stovetop Mac and Cheese
🧊 Storing Pulled Pork
Store leftover pulled pork in an airtight container and refrigerate for up to 4 days—though I prefer using it within 2 days for the best texture.
For longer storage, pulled pork freezes well for 3 to 4 months. Portion it into flat layers using vacuum-seal bags or boil-safe freezer bags. To reheat, use the oven method below, or gently simmer the sealed bag in water if it’s rated for boiling.
🔥 How to Reheat Pulled Pork (Crock Pot or Oven)
Crock Pot Method
- Load into a crock pot up to 75% full with pulled pork.
- As you load the crock pot, sprinkle lightly with water or apple juice—just enough to moisten.
- Cook on low for 2 to 3 hours, stirring every hour if possible. The serving temperature is 140°F or higher, but I recommend heating to 165°F to give some leeway when serving.
- Exact reheating time varies by amount, thickness, and your crock pot
- It will stay warm for quite a while unplugged or use the keep warm setting for serving.
Oven Method
- Spread the pork out on a rimmed baking sheet. A thicker pan, like a casserole or cake pan, may be used but will take longer.
- Sprinkle lightly with water or apple juice—just enough to moisten.
- Cover tightly with foil.
- Heat in a 250°–300°F oven until hot (about 30 to 45 minutes, depending on the amount). Longer in a thicker pan
- Keep warm in the oven (140°-150°F oven) or transfer to a crock pot on low or keep warm.
✅ Pro Tip: Never reheat or store pulled pork with BBQ sauce already mixed in. The acid breaks down the texture, turning it mushy.
👍 More Pulled Pork Recipes
Looking for other ways to make pulled pork? Try these:
- Pork Butt Gas Grill – classic smoky BBQ flavor without a smoker
- Crock Pot Pulled Pork – low effort, great for busy days
- Pulled Pork Loin in the Oven – a leaner option with great texture
- Crock Pot Pork Loin Pulled Pork – healthy, juicy, and freezer-friendly
📖The Recipe Card
How to Cook Pork Butt in the Oven for Pulled Pork
Video Slideshow
Ingredients
- about 4 pounds Pork butt - aka Boston Butt frequently called pork shoulder
- Dry rub of your choice - good quality
- 2 tablespoons Wright's Liquid Smoke - optional but recommended
- ½ cup dark brown sugar
- 3 tablespoons Diamond Crystal kosher salt - 2 tablespoons if using Morton
- 1 tablespoon chili powder
- 1 teaspoon garlic powder
- 1 teaspoon onion powder
- 1 teaspoon black pepper
Step-by-Step Instructions
1. Prepare the pork butt:
- Use a rub of your choice. If using my rub, mix ½ cup dark brown sugar, 2 tablespoons kosher salt, 1 tablespoon chili powder, 1 teaspoon garlic powder, 1 teaspoon onion powder, and 1 teaspoon black pepper.
- Pat the pork butt dry, then coat all sides with about 2 tablespoons of liquid smoke (optional).
- Use about 1 cup of rub to cover generously. If prepping ahead, wrap in plastic wrap and refrigerate for a few hours or overnight. If not, go straight to baking.
2. Roast low and slow:
- Line a rimmed baking sheet with foil and place a rack on top. Spray the rack with PAM or oil.
- Place the pork butt on the rack and roast at 250°F (no convection)—no need to preheat. Fat cap up or down—doesn't matter.

- Bake until the internal temperature reaches 200°–205°F—about 8 to 9 hours, depending on size, bone-in vs. boneless, and oven behavior.

3. Rest the meat:
- Remove from oven, wrap tightly in heavy-duty foil, then several towels. Rest in a small insulated cooler or on the counter for 1–2 hours. It will stay warm in a well-wrapped cooler for up to 4 hours.

4. Shred and serve:
- Use forks to shred. The meat should fall apart easily and stay juicy, with crispy bark.

Recipe Notes
Pro Tips:
- Use the rest time to adjust your serving window by a few hours.
- No rack? Use foil balls to elevate the pork so it doesn’t sit in fat.
- Liquid smoke should only list “smoke” and “water”—Wright’s is a good brand.
- My rub is provided for you, but use the rub of your choice.
- Salt amounts are based on Diamond Crystal kosher salt: 1 tsp table salt = 1¼ tsp Morton kosher = 2 tsp Diamond Crystal. You can reduce the salt for a lower-sodium rub—it still works well.
- The rub works well even if you cut the salt in half for a lower-sodium version.
- 195°F is the minimum temp for pullable pork, but 200°–205°F is better. Don’t go over 210°F.
- Store leftovers in the fridge up to 4 days (2 is best for texture), or freeze up to 4 months
- Bone-in or boneless both work—bone-in may take a bit longer.
- Fat cap up or down doesn’t matter.
- I often go straight from seasoning to the oven—no wrap time needed.
- DO NOT cover the pork while baking. You need a dry oven to develop bark.
- Nutrition information is an estimate—fat content varies, and seasoning distribution may differ.
Your Own Private Notes
To adjust the recipe size:
You can adjust the number of servings above; however, only the amount in the ingredient list is adjusted, not the instructions.
Nutrition Estimate (may vary)
Editor's note: Originally Published November 2, 2013. Updated with expanded options, refreshed photos, and a table of contents to help navigation.
Jill L. says
Thanks for the info...I have to cook for 100 to serve by 10 am. I will start it the day before but not sure if I should start the roasts about 2 pm and cook over night so I can pull first thing in the morning. Did this about 3years ago but only for 60. My roasts range 2.5 - 7.5# will start the smaller ones later or I can cut the large ones in half. Any thoughts?
DrDan says
It is always better to have consistent size so they all can be treated the same. So for a hundred you will need about 1/4-1/2 pound per person depending on what else is being served. So depending on oven space.... I would rub and refrigerate. Start cooking about 8 pm and check them about 5-6 am. I think that much mass may take up to 12-13 hours (just a guess). If your doing 40-50 pounds , I would try two ovens.
Sue says
Hi Dan,
I want to make pulled pork for Christmas but didn't know how. I came across your website and I started reading and thought, hey, I can do this. My question is....I need to make this the day before. Can I bake it, pull the pork and then reheat it in a crock pot for the next day? I am using your rub and will follow your directions to a tee. Can you give me your thoughts please? Thanks
DrDan says
Shred it the first day. It should reheat in a crock pot on the lowest setting in an hour or two. However I would give it a little moisture. A dash of sauce or apple juice but don't overdo it. If you're keeping it hot for a prolonged time then you might need more.
The most common reheat method is vacuum sealed then into boiling water but probably not practical for you. Also large aluminum disposable pans covered in an oven is commonly done. It may also need a little moisture.
DrDan
Pokervibe says
I am getting ready to make this for the first time. Realize I have a 9 lb pork butt curious if you think I should cut and freeze half or make the whole thing and then freeze? Cooking for 2 here was thinking of making just pork for (like just serving a big piece) and then add BBQ sauce and shred it for the next day. I've never made a pork roast and first got a loin read that wouldn't work.
DrDan says
The amount you cook depends on needs but the cooked meat will freeze well. But if you're cooking for two, half should be fine. I think a 9 pounder might take 12 hours or so. Remember to cook to the final temp and not time.
You're right, loin is a no-no for this. If you want to use loin for shredded pork, I do have an oven and a crock pot recipe for braising it and then shredding.
DrDan
Shawn Crowe says
Oh this worked out so well. I did modify a bit though. I added one Tablespoon of ground Jalapeno pepper to the rub. I found that the top of my broiler pan will rest neatly on a huge cast iron frying pan so thats where the meat sat. I would add a glass of water to the frying pan on occasion so as to keep the humidity level high. An 8 lb roast took 12 hours to fully cook but the last three hours was at reduced heat of 175. It was impossible to lift the roast without it falling apart so i tipped the roaster pan to dump it into a large bowl.
Ted says
Dr. Dan plan on cooking up 10lbs (2x5) for the hunt camp tomorrow. My intent is to use a prepackage mix intended for a crock pot and let it sit overnight. I have used the mix in the past and the flavor was quite nice, however its not as dry as what you have suggested. In either case when I made the pulled pork last year in the oven for the guys (same mix) I cooked it in a roasting pan with the lid on (trying to simulate a very large crock pot). With all this said I have two questions for you.
1) I am assuming if I am using my same mix, I can use your method to cook (to get the crust I like) and get rid of the roasting pans
2) As I said, cooking tomorrow; with the intent of reheating Monday night at the hunt camp. should I freeze or keep refrigerated.
Thanks Ted
DrDan says
Hi Ted
Your plan sounds fine. The two five pounders could even go on the same rack but separate as much as possible.
Storage wise, I think safety wise you are on the "edge" and taste wise it is a bit long. I would freeze.
Hope that helps,
DrDan
Cheryl says
Can i freeze the rest of the pork butt
DrDan says
Absolutely. This freezes great. Put a meals worth in good freezer bags. Usually reheat in the bag in boiling water. A little apple juice is usually recommended if it get a little dry.
DrDan
eric says
hi, came across your recipe tonight. i've been doing a very similar version for a couple of years now and wanted to share a few things i've discovered. the oven temp can vary pretty far and give the same result. i have done them at 225, 250 and 275 and all have been nearly identical in texture and moistness. obviously the lower temp will take longer to cook, i do put it in the oven before bed and it's ready for lunch the next day. or if it's for supper i use the higher temp and put in the oven before work so it's ready to wrap when i get home. also i use foil pans for easy clean-up, no dishes to wash! the weight of the butt can be an issue in foil, so i use a cutting board any time i have to move the pan in or out of the oven. thanks, love your blog!
DrDan says
Thanks for the note and tips. Like all recipes, they are guidelines and not rules. It is hard to get though the flexibility of a technique. You just did...
Again thanks for the great comments
DrDan
Amy Gandy says
Just found your blog while looking for a way to cook a pork put in the oven. I don't grill. Love the easy to follow directions and pictures to follow along. Saw several other recipes I want to try. Will be checking in a lot for dinner ideas. Thanks!
DrDan says
Thanks for the note. I love pulled pork on the grill but this is a great alternative.
DrDan
Lori says
I made this today and the flavors were amazing! My roast was boneless (unfortunately) & on the small side. The only adjustment I would have to make for next time would be to cut the salt by at least 1/2. Thanks for the great recipe though!!
DrDan says
I occasionally think the salt is a little high in this rub. It is a classic 8:3:1:1 recipe that I frequently use. I usually use Morton Kosher and that is less "salt" than Diamond. You will sometimes see Diamond in my pictures but I usually cut it back a little. I have a salt discussion under FAQ's. But salt is always "to taste" anyways...
Thanks for the note
DrDan
joanna says
i agree about making pork like this!! this is how i do it too. always 250 F for 8-10 hours. 10 hours seems to be the perfect time. i have a special rub i use and it's like heaven.
DrDan says
It is just darn easy... But once you have your grill method down, it also is easy. I did a 4 pound one on the gas grill last weekend. I have natural gas so no tank worries so maybe easier for me then others.
Thanks for the note
DrDan
Lea says
Last year I discovered your 30min Boneless bbq ribs. That recipe instantly became a family favorite. Last week I found this recipe and started it early this morning. FANTASTIC! thank you so much for wonderful instructions and delicious recipes. I'll have to explore this blog further.
DrDan says
Thanks for the note. Check 101's Favorites for my personal pick
DrDan
Linda says
I'm making this as we speak. I cut an 8 pounder in 1/2 to decrease cook time. I would like to do this in the crock pot. Any thoughts Dr. Dan? I do have a cooking pan, but no rack. Could I do crock pot or would pan with no rack be better in 250 oven? If crock pot, do I cook on high or low? I want to make sure it's done enough to start resting at 5:00pm tomorrow.
I'm excited. I have fingerling roasted potatoes, coleslaw, carrots, and hawaiian buns. Yum.
Thank you,
Linda
DrDan says
I love the "bark" so I would not do the crock pot. Just on a pan in the oven should be fine. I would start early so you have an hour or two of flex time. It can rest longer if you need to. Getting to the final temp takes a surprisingly long time. Back to the crock pot for a minute. They vary a lot but I usually think of low as 180-190 and high as about 210-220 (this off a little I'm sure) That is going to take a LONG TIME to get to the correct temp. I see recipes but they seem to be stopping the cooking way early (temp wise) for pulled pork.
Hope it works well for you
Regards
DrDan
Heidi Menocal says
Thank you for recipe that does not need a slow cooker or a smoker. This I can do!
Sandi Lugo says
I added Celery Salt and Cayenne Pepper to my rub. I also turned mine every 3 hours so all sides were dark bark and delicious! My 8 lbs roast was in 9 hours and it was perfect!
Dan Mikesell says
Good additions to the spices. I like the celery salt and the cayenne is always good for me but some people may not want it. I'm surprised the 8 pounder only took 9 hours but it just goes to show you need to check occasionally.
Thanks for the comment
Chris says
I quit worrying about fat cap up or down a year or two ago. I noticed that every time I shredded a pork butt, the first thing you removed was what was left of the fat cap. That entire section would not have any bark. I talked to a bunch of pitmasters and many of them just trim off the fat cap altogether since 1) there is enough intramuscular fat, it doesn't need the cap and 2) now that area will get to keep the bark that develops and bark is my favorite part. Works for me, even if both the fat cap up and fat cap down people say I'm wrong ;)
EL says
I was just wondering why you cooked with the fat cap down. I always thought the fat cap was placed on top so that the fat and juices could permeate the roast better and also for protection during the roasting process. I'm not a great cook, so no judgment here...just wondering and always wanting to learn. Thanks for your blog. Just found it and love it already.
Dan Mikesell says
There appears to be a great divide between fat up and fat down people. I went with down since I love the pieces with the rub charred some and I feel I get more of that with fat down. Notice I said "I chose". I'm sure experts out there will have strong opinions both ways but either would be alright.
Steve says
Hi, one thing I have learned since moving to Alabama where outdoor cooking rules is that when cooking Boston butt is to always put the fat cap down. Because if you burn it nobody is going to care because it will be cut off before shredding the meat up for sandwiches. This advise came from a multi blue ribbon BBQ and smoker champion from Big Bob Gibson's BBQ restraunt here in my area.
DrDan says
Hi Steve,
If I lived close to Bob Gibson's I would stop cooking and move in.
I think I noted that my competition guys say it doesn't matter and a few remove it. I tend to remove some or most of it if it is large. But I always like down. Mainly so I get more great bark on the top. Hopefully I don't burn the bottom but it is a good reason depending on the setup.
Thanks for the note and the thoughts of Gibsons
Dan
Pam says
This is the first recipe for oven pulled pork that I've liked!!! Bookmarked to try! I agree with the longer cooking time-it's better when it falls off the bone, easy to shred with a fork. Thanks for the recipe!