
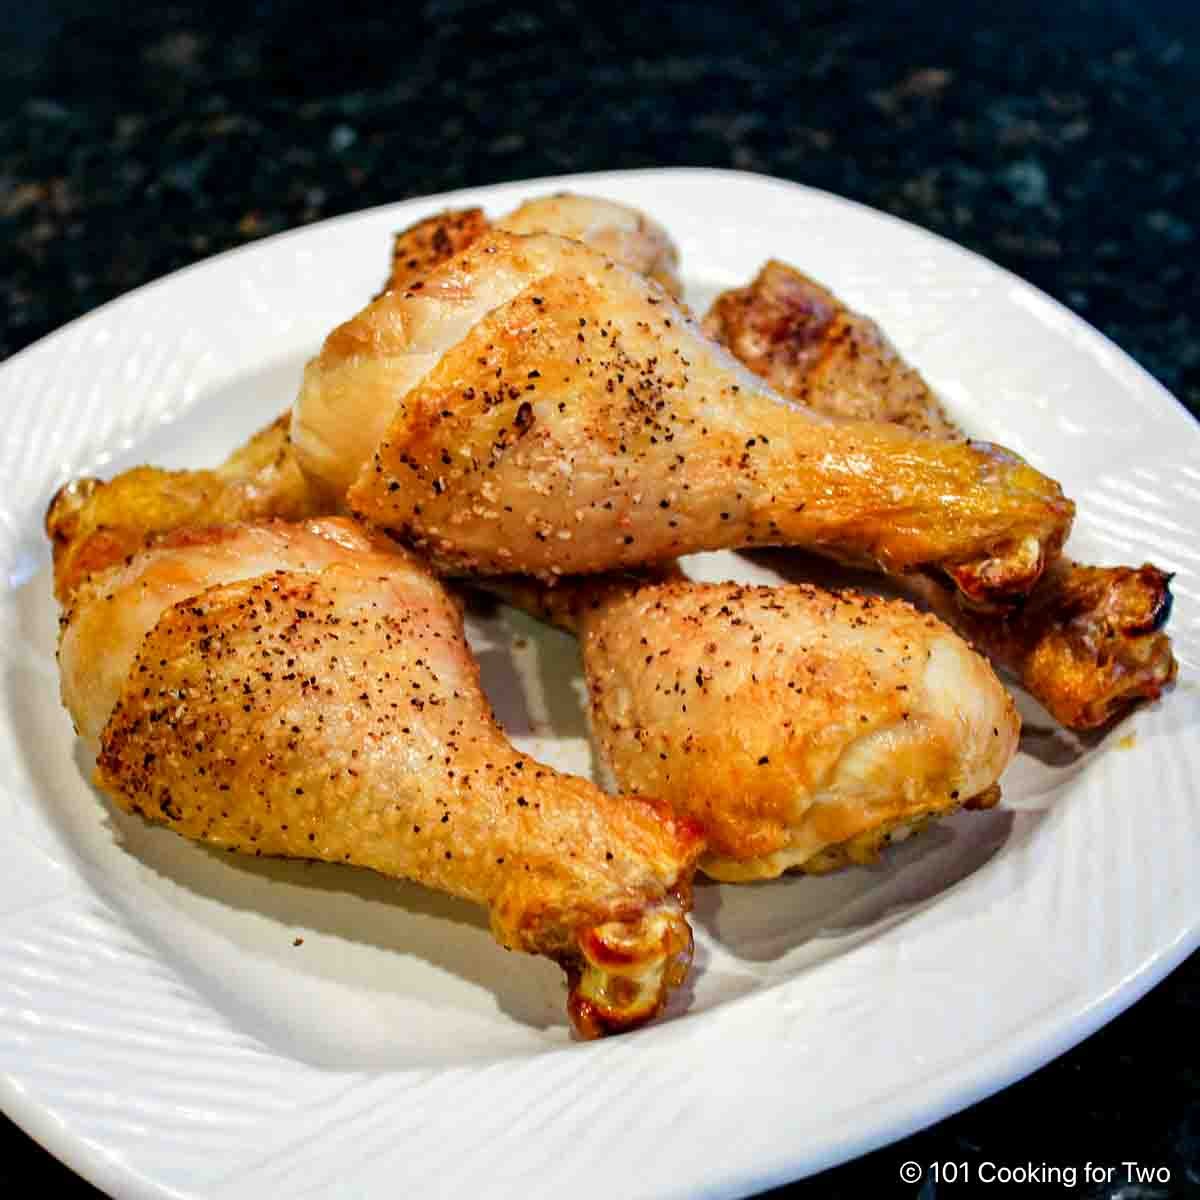
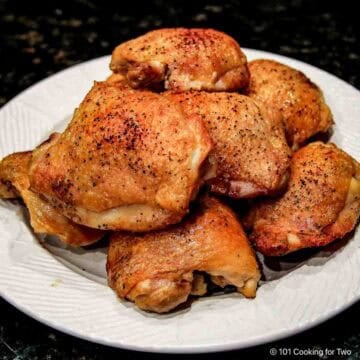
Baked chicken legs (drumsticks) are easy, budget-friendly, and ready in about 35 minutes. Bake hot for crispy skin and juicy meat every time — no flipping, no breading, no guesswork.
This foolproof recipe has been a reader favorite for over a decade. Perfect for beginners, it walks you through how long to bake chicken legs at different oven temps, the best internal temperature for tenderness (185°–195°F), and simple tricks for maximum crisp.
⏱️ Quick Answer: How Long to Cook Chicken Legs in the Oven
Chicken legs are best cooked to 185°F for juicy, tender meat. Here’s how long it takes at common oven temperatures:
- 350°F: 45–55 minutes
- 425°F: 35–40 minutes (recommended for crispy skin)
Cooking time varies by size and whether you use convection — convection ovens run about 5 minutes faster.
Jump To (scroll for more)
- 👍 Why You’ll Love This Recipe
- 🛒 Ingredients for Baked Chicken Legs
- 👨🍳 Quick Overview – How to Bake Chicken Legs
- ⏱️ How Long to Bake Chicken Legs at 350°F, 375°F, 400°F, or 425°F
- 🧂 Seasoning & Flavor Options for Baked Chicken Legs
- 🛠️ Beginner Troubleshooting for Baked Chicken Legs
- 🌡️ Best Internal Temperature for Baked Chicken Legs
- 📋 Other Chicken Recipes
- 🍽️ Serving Suggestions
- ❄️ How to Store Leftovers
- ❓ FAQs
- 📖The Recipe Card

Featured Comment by Tonya:
⭐⭐⭐⭐⭐
"I followed the recipe to the "T" and I usually do my own thing. But this is absolutely the BEST ever drum recipe I have ever had in all my 46 years. Thank you!!!!"
👍 Why You’ll Love This Recipe
- Super simple – No breading or marinades, just trim, season, and bake. No fuss.
- Crispy skin, juicy meat – High heat + optional rack (or a halfway flip) makes it happen.
- Beginner-friendly – Clear steps and tips for consistent results.
- Healthier family favorite – Low-carb, low-calorie, affordable, and a hit with kids and adults.
- Versatile flavors – Works with any seasoning blend or just salt and pepper.
🛒 Ingredients for Baked Chicken Legs
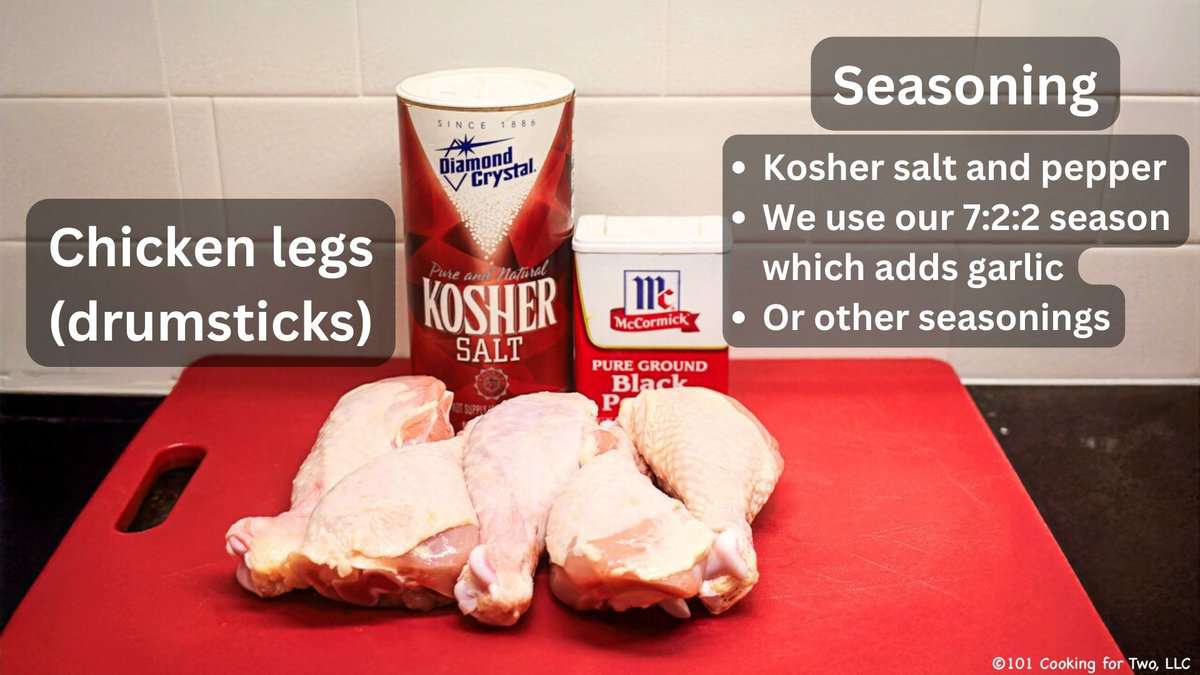
🐓 Chicken Legs (Drumsticks)
Use bone-in, skin-on pieces – don’t confuse them with leg quarters, which include the thigh. Leg quarters are better cooked using my Baked Chicken Thighs recipe.
✅ Trim tip: Check the cut end for loose bone fragments or skin flaps and trim.
🧂 Seasoning
My go-to is kosher salt, black pepper, and garlic powder. You can season any way you like – from simple salt and pepper to your favorite spice blend.
(For more seasoning ideas, BBQ variations, and marinades, see the Seasoning & Flavor Options section below.)
👨🍳 Quick Overview – How to Bake Chicken Legs
1. Preheat and Prep
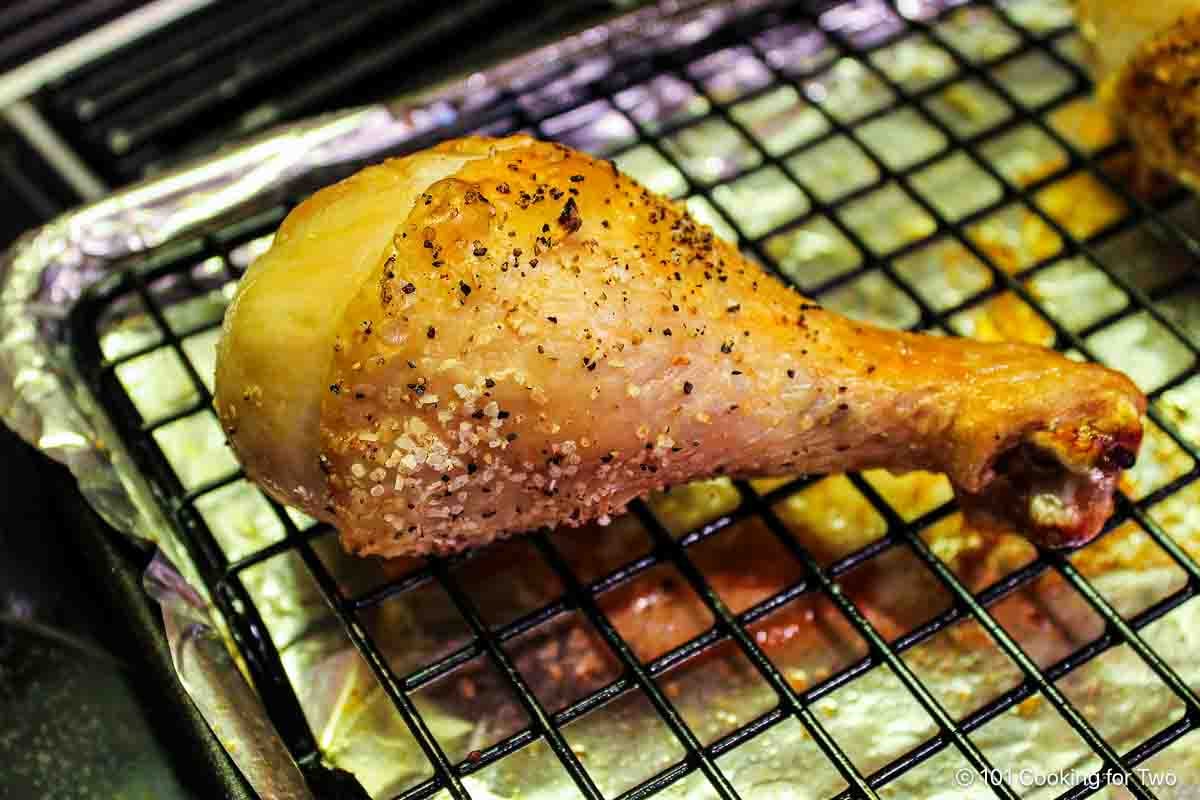
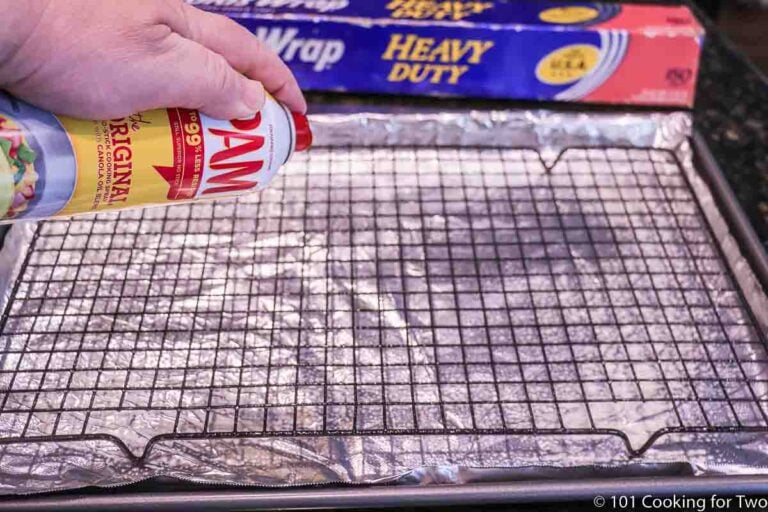
Preheat oven to 425°F. Line a rimmed sheet pan with foil for easy cleanup. Add a wire rack if you have one.
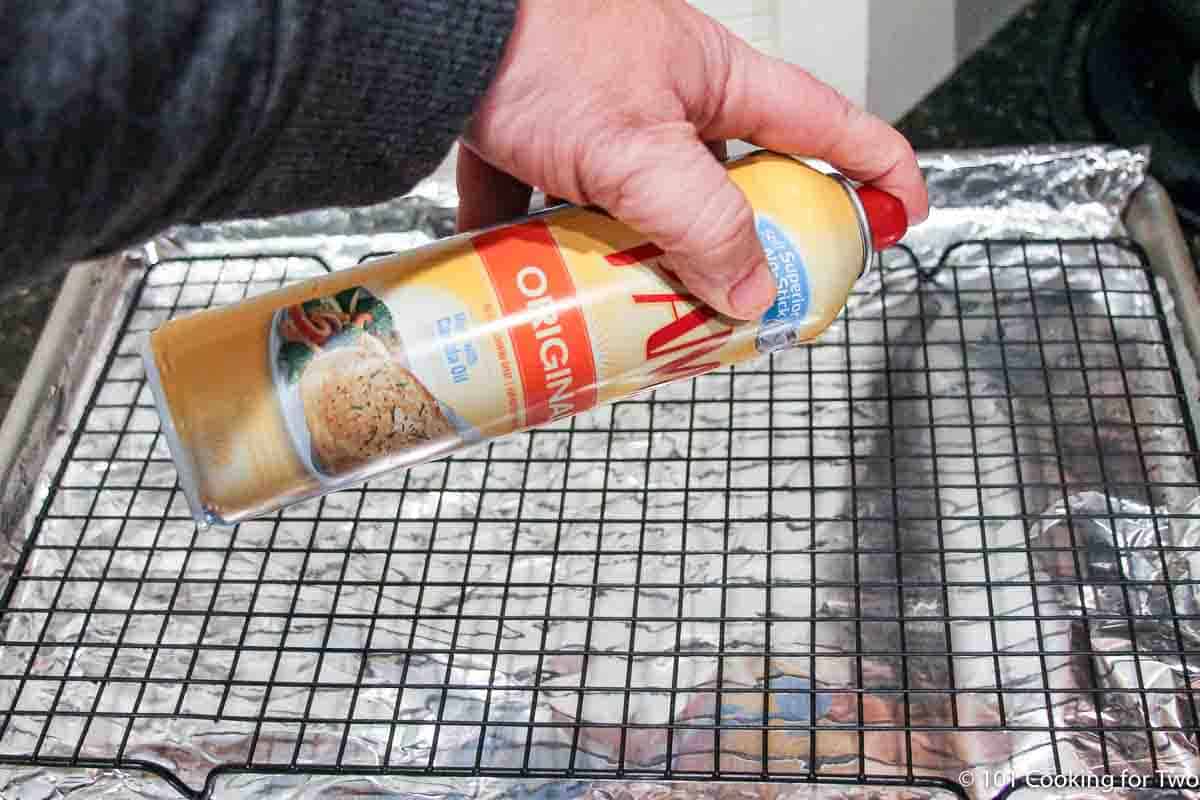
✅ Pro Tip: A rack helps crisp the skin and keeps the legs out of the drippings. No rack? Place legs directly on the foil and flip halfway through baking.
2. Season the Chicken
Pat drumsticks very dry with paper towels – this is key for crisp skin. Trim any loose skin or bone fragments. Season all sides with kosher salt, black pepper, and garlic powder – or your favorite blend.
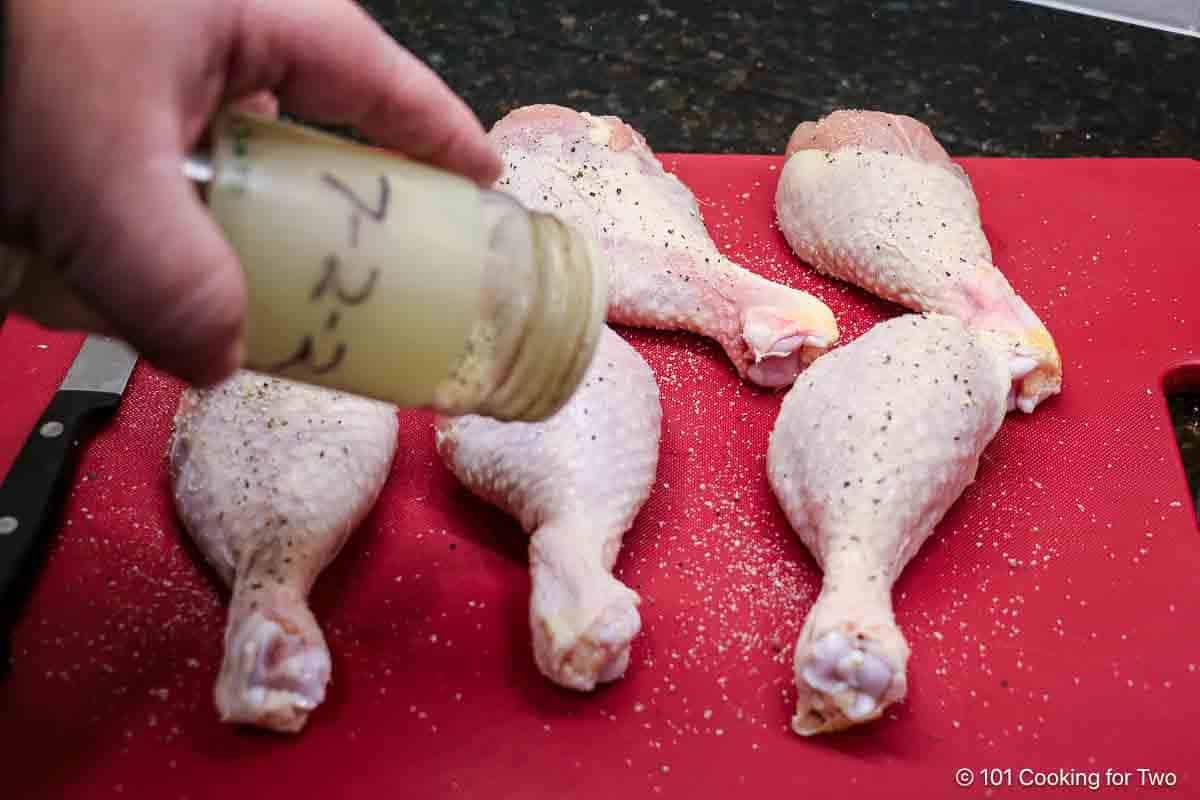
✅ Pro Tip: Moisture is the enemy of crispy skin — don’t skip the drying step.
3. Bake
Place legs on the rack with thicker ends facing out. Bake at 425°F to an internal temp of 185°–195°F, about 35 minutes with convection or a few minutes longer without.

✅ Pro Tip: Use an instant-read thermometer – it’s the only way to know they’re cooked perfectly.
4. Rest and Serve
Let drumsticks rest for 5 minutes before serving so the juices settle and the skin stays crisp.
Note: This is a quick overview, not the full recipe. See the printable recipe card below for complete step-by-step instructions, tips, and variations.
⏱️ How Long to Bake Chicken Legs at 350°F, 375°F, 400°F, or 425°F
Here's approximately how long to bake chicken legs at different oven temperatures. Times will also vary depending on the thickness and your oven. Always use an instant-read thermometer.
- 350°F conventional – 50 to 55 minutes
- 350°F convection / 375°F conventional – 45 to 50 minutes
- 375°F convection / 400°F conventional – 40 to 45 minutes
- 400°F convection / 425°F conventional – 35 to 40 minutes – recommended
- 425°F convection – about 35 minutes – recommended
✅ Pro Tip: Chicken legs are best at 185°–195°F — going higher than 165°F makes the meat more tender and juicy.
Save this recipe!
🧂 Seasoning & Flavor Options for Baked Chicken Legs
- Classic: Kosher salt, black pepper, and garlic powder (my go-to).
- BBQ Style: Use a BBQ dry rub instead of salt and pepper. Brush with BBQ sauce in the last 5 minutes of baking.
- Smoky: Add smoked paprika for color and depth of flavor.
- Herb Blend: Try poultry seasoning, Italian seasoning, or fresh rosemary and thyme.
- Marinades: Italian dressing, lemon butter marinade, or teriyaki work well, but you’ll lose the crispy skin.
✅ Pro Tip: A light coat of olive oil can help spices stick, but may make the skin slightly thicker and less crisp. I skip it for drumsticks, but it’s useful for skinless cuts.
🛠️ Beginner Troubleshooting for Baked Chicken Legs
Skin not crisp? The chicken wasn’t dry enough before seasoning, or your oven temperature was too low – is your oven accurate?. Pat thoroughly with paper towels and use the recommended temperature.
Cooking unevenly? Place thicker ends toward the pan edges — those areas cook hotter.
Still underdone? Don’t stop at 165°F. While it’s safe, the meat will be chewy and stringy. Drumsticks are most tender at 185°–195°F — always check with an instant-read thermometer.
🌡️ Best Internal Temperature for Baked Chicken Legs
The sweet spot for tender, juicy drumsticks is 185°–195°F. At this range, the connective tissue breaks down, making the meat moist and easy to eat.
Yes, 165°F is safe (USDA), but drumsticks cooked only to that temp will be chewy and stringy. The extra time to reach 185°–195°F is worth it for the texture alone.
America’s Test Kitchen recommends going even higher – 190°–195°F – for maximum tenderness.
📋 Other Chicken Recipes
If you like baked drumsticks, try these other easy chicken recipes:
- Crispy Oven Baked Chicken Thighs – juicy meat with golden skin.
- Grilled Chicken Thighs – quick, flavorful, and perfect for summer.
- Crispy Baked Chicken Wings – oven-baked but tastes deep-fried.
- Baked Bone-In Chicken Breasts – moist, flavorful, and easy.
- Cooking for a crowd? See How to Cook Chicken for a Group.
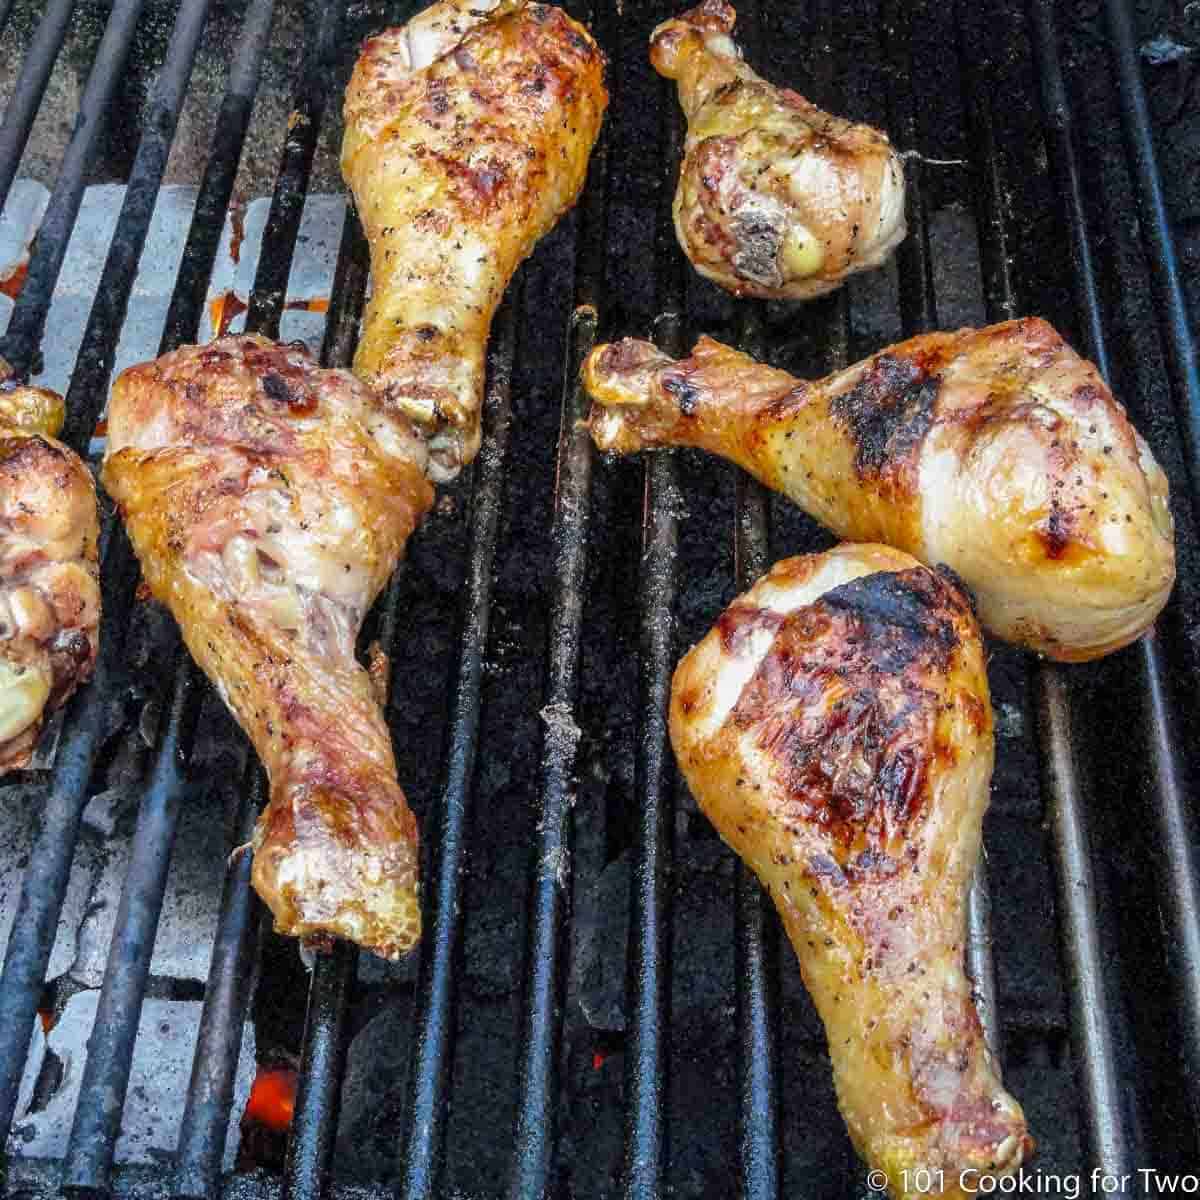
Grilled Chicken Drumsticks
This never-fail recipe makes perfectly grilled chicken drumsticks fast and easy. Tender, flavorful, and budget-friendly, they'll delight everybody, from picky kids to grandma.
🍽️ Serving Suggestions
Serve with a green salad and your favorite sides:
- Oven Baked French Fries
- Baked Rice
- Microwave Corn on the Cob
- Oven Roasted Red Potatoes
- Steamed or roasted broccoli
❄️ How to Store Leftovers
Store leftovers in an airtight container:
- Fridge: Up to 4 days
- Freezer: Up to 4 months
- Reheat: Thaw if frozen, then reheat in the oven or air fryer. The microwave works, but it softens the skin.
❓ FAQs
A rack lifts the chicken, allowing air to circulate underneath, which is especially helpful with convection ovens. It also keeps the legs out of the drippings for crisper skin.
No rack? Place them directly on foil and flip halfway through baking.
With previously frozen drumsticks, bone marrow can release pigment as it thaws and cooks. The meat may look pink, but it’s safe if the internal temperature reaches at least 165°F.
It’s best not to. Baking from frozen causes uneven cooking — the outside can overcook before the inside is done, and the texture suffers. Thaw completely for safety and the best results.
While 165°F is safe, drumsticks will still be chewy and stringy at that point. For tender, juicy meat, keep baking until they reach 185°–195°F so the connective tissue has time to break down.
In a convection oven, about 35 minutes. In a conventional oven, plan for 40–45 minutes. Always check for an internal temperature of 185°–195°F for the best texture.
📖The Recipe Card

Baked Chicken Legs (Drumsticks) – Crispy & Juicy
Video Slideshow
Ingredients
- 6 Chicken legs - (about 1½ lbs) – Scale to as many as you want
- Salt and pepper to taste (or your favorite seasoning)
Step-by-Step Instructions
Preheat and Prep
- Preheat oven to 425°F (with convection if you have it)

- Prep a sheet pan with aluminum foil and a wire rack (optional). Spray with cooking spray. If you don't have a rack, flip the legs halfway through cooking.
- Pat the drumsticks very dry with paper towels. Trim any loose skin or joint fragments.

Season the Chicken
- Season all sides with salt and pepper (or your preferred seasoning).

Bake
- Place legs on the prepared rack with the thicker ends toward the pan edges. Bake until the internal temperature reaches 185°–195°F, about 35 minutes with convection (a few minutes longer without). Do not stop short of 185°F; use an instant-read thermometer.

Rest and Serve
- Let the cooked drumsticks rest for 5–10 minutes before serving. This allows the juices to redistribute and the skin to stay crisp.

Recipe Notes
Pro Tips:
- Optimal baking temperature: 400°F or 425°F convection. Lower temperatures, like 350°F or 375°F, will yield slightly less crisp skin. Refer to the main post for guidance on time across various temperatures.
- Pat dry: Removing surface moisture is the #1 key to crispy skin.
- Rack or flip: A rack promotes airflow and keeps meat out of drippings. No rack? Flip halfway.
- Seasoning: Adjust spices to your taste (see post for flavor and options).
- Scaling: This recipe can be scaled to any quantity needed.
- BBQ variation: Use a BBQ dry rub instead of salt/pepper; brush with BBQ sauce during the last 5 minutes of baking.
- Storage: Refrigerate leftovers for up to 4 days or freeze for up to 4 months.
Your Own Private Notes
To adjust the recipe size:
You can adjust the number of servings above; however, only the amount in the ingredient list is adjusted, not the instructions.
Nutrition Estimate (may vary)
Editor's Note: This article was originally published on September 9, 2012. It has been updated with discussion and photos to improve the presentation and add more information. The recipe remains the same. Please enjoy the update.


Mark M. says
Thanks for the excellent write-up and recipe! Giving this a go this afternoon! 😁
Barbara Taddeo says
Hi - I came upon your site as I was looking for something else, and am I glad I did!! It's wonderful. I was encouraged to try my convection oven for the first time, after many years of only using my conventional setting. The drummies were out of this world! The crispest, juiciest chicken I have ever made. My husband and I loved them. I'm looking forward to trying more of your recipes. Thank you!
DrDan says
Hi Barbara,
This on my most popular recipe. Have a look around and let me know if you have any questions.
Thanks for the note.
Dan
SunSetter says
Thanks Doc!
I was one of those who cooked drums at a much lower temp for a much longer time. They were always good drumsticks, but I tried your way and they are ten times better!! Thank you for being generous and sharing your recipes. God bless Dan-the doctor of palates!!
SebastianandWinniesMommy says
Thank you for making this as easy as and cheaper than frozen pizzas... I used to cook, I stopped, and have my reasons BUT I love my husband and want to give him FOOD again. Anything that can give us all more time together, less fanciness, but honest goodness, I'm really appreciative of.
Irene T Houle says
Love this recipe! It is absolutely my go-to for cooking up drumsticks, works equally well on the grill
(we turn them every 7 minutes when we cook them on the grill). Have used the spice on thighs and breasts as well. Making some right now for my son and his buddies.
DrDan says
Hi Irene,
Thanks for the note and keep feeding those growing teens.
Dan
Brittany says
I just wanted to say thank you a million for sharing. Having never made drumsticks before, I came to google for advice and chose your recipe based on simplicity. My boyfriend loves these drumsticks, I've made them several times now and he continues to tell me 'best chicken I've ever had.'
DrDan says
Thanks Brittany,
I try to keep things simple and logical.
Dan
NicoleB says
Thank you so much for this crispy, delicious recipe! I've made it twice for my family and it was a hit both times. Super easy and economical! Even the leftovers are wonderful. This will definitely become a regular dish in the meal rotation.
DrDan says
Hi Nicole,
Thanks for the note. I do love a good drummie.
Dan
Terry says
So good! My grand kids love it and so do I. Easy and quick! Thank you.
Tracey Blais says
Found this recipe today after I found a great sale on chicken drumsticks. My husband is a huge fan of wings but I personally am not a fan of chicken wiings (and drumsticks) unless the skin is really really crispy, I made up your seasoning mix, made sure the drumsticks were patted dry, and followed your cooking instructions. Once the 35 minstrel were up I brushed some with a bar b questions sauce, some with a honey garlic sauce and a few with a General Tao sauce and wow oh wow!!!They were probably the best wings I've ever had! My husband said they were fantastic! This recipe is definitely a keeper!
Robin says
This is the easiest chicken recipe that turns out perfect every time. I found this recipe after I had purchased a huge amount of drummies ( they had an incredible sale). I only have a countertop convection oven. I've found that mine only need to cook about 25 min. Probably due to its size. But I pack as many as I can on the rack and they come out perfect. Plus I made the 7:2:1 seasoning. Perfection! Thank you.
Pauline says
How would you bake the chicken legs if the skin is removed? I have tried baking with skin on and then removing and the meat is tasteless that way.
DrDan says
Hummm.... not sure. Without the skin, these will dry rapidly at high cooking temperature. At a lower cooking temperature, due to longer time, they will dry. You might try a nice coat of seasoned olive oil but I'm not sure.
Dan
Beth says
I made these the other night and did not have a meat thermometer so used a candy one. I checked them after 35 minutes and were only at 150 so left them in for twenty more minutes and the thermometer said 155. They looked done so I ate one. Been in bed sick since then! Will never make that mistake again!
DrDan says
Sorry you got ill.
You probably need Santa to bring two thermometers. One meat and one for the oven. If it spent 55 minutes at that high of an oven temperature, they should have been over cooked.
Dan
Heather Coale says
I've created this recipe several times and sometimes with variation. If you have little ones and yet like a little kick to the flavor, please try Old Bay Seasoning on your chicken. Most Marylanders have been raised on steamed crabs with Old Bay and use it on most everything else. Spicy without excessive heat. Works great in potato salad also, which is a very nice side dish to this recipe.
DrDan says
Hi Heather,
Thanks for the note. I never thought Old Bay since I'm from Iowa. But it sounds great.
Dan
Bev says
Can one use chicken wings instead?
DrDan says
Almost, check my chicken wings at https://www.101cookingfortwo.com/crispy-baked-buffalo-chicken-wings/ for a similar but slightly different technique.
Dan
Steven says
We're celebrating Thanksgiving on Sat. because of conflicting family schedules so I took some chicken legs out of the freezer for dinner tonite. They were still a little frozen when it cam e time to cook . I was planning on BBQing but had other things to do with my time besides standing outside freezing. Soooo I fired up Google and out popped your recipe.
I used a regular gas oven @ 425, a 13X9 pyrex dish (unfortunately no rack available) and my usual go-to seasonings sea salt, Lawrey's Seasoned Pepper, onion powder & garlic powder.
I rinsed the legs, patted dry , sprinkled with seasoning and slid them in the oven for 50 mins. The whole family thought they were the best oven legs EVER! My picky daughter who has to have katsup on her chicken ALWAYS, said it didn't need it! Definitely going to purchase a oven rack for these. I think they would've been cooked more thoroughly with one . Thanks for this recipe.
Amy says
Turned out great - my son was eating the pan drippings LOL...will never make them another way. Thanks so much!
DrDan says
Hi Amy,
Thanks so much. It is very kid friendly.
Dan