101 Cooking For Two

  • Recipes
  • About
  • FAQs/Help
  • Shop
  • 📖Emails
menu icon
go to homepage
  • Recipes
  • About
  • FAQs/Help
  • Shop
  • 📖Emails
subscribe
search icon
Homepage link
  • Recipes
  • About
  • FAQs/Help
  • Shop
  • 📖Emails
×
🏠Home » Recipes

Easy Cheesy Cauliflower Casserole (Fresh or Frozen Cauliflower)

cheesy cauliflower casserole

No more boring, bland steamed vegetables for you. This cheesy cauliflower casserole delivers the creamy richness you crave and works with either fresh or frozen cauliflower. Whether you're eating low carb or just want an easy, crowd-pleasing side dish, this simple 30-minute recipe is satisfying and surprisingly versatile.


Cheesy cauliflower casserole on a white plate.
[feast_advanced_jump_to]

quote mark
A reader's favorite, they keep repeating:
Sally—⭐⭐⭐⭐⭐"This is delicious and I make it a lot."
Mrs. Leeburg—⭐⭐⭐⭐⭐"This recipe is beyond delicious! It has become a staple side dish ever since we started eating low-carb, high-fat.

😊Why You'll Love This Cheesy Cauliflower Casserole

  • Quick and easy: From prep to table in about 30 minutes
  • Great potato lovers: It's like "cheesy potatoes" without the carbs
  • Low-carb, gluten-free, and keto-friendly: without the "diet food" taste
  • Versatile: using fresh or frozen cauliflower
  • Easy to modify: Use a different cheese or adding flavor with your favorite spices and herbs.
  • Easy to love: Perfect for family dinners or potlucks

🥣Ingredients you will need

Cauliflower with casserole ingredients—labeled.

Cauliflower (fresh or frozen)
Sour cream
Cheddar cheese (mild or sharp)
Green onions
Optional: Bacon, ham, other proteins. Smoked paprika, garlic powder

👨‍🍳Quick Overview: How to Make Cauliflower Casserole

1. Prep Time

a. Preheat the oven to 375° convection or 400° conventional.
b. Cook cauliflower in the microwave.
c. Slice green onions.

Putting cauliflower into the microwave.

✅Microwave cooking cauliflower: For frozen, follow the package instructions. For fresh, wash, trim, and cook on high until tender — 4–5 minutes.

2. Mixing

Mash the cauliflower and mix with cheddar cheese, sour cream, green onion, salt, and black pepper. Bacon is optional.

Mashing cauliflower with a potato masher.

3. Baking

Pour the mixture into a prepared baking pan. Cook in the oven until the top is browned and bubbling around the edges—about 20 to 25 minutes. Let it sit for 5 minutes before serving

baked cauliflower casserole in dish

📌For complete step-by-step instructions, scroll down to the printable recipe card or keep reading for tips, flavor options, and serving ideas.

👨‍🍳Add-0ns and Variations

  • Cheeses: Mild cheddar, sharp cheddar, Colby Jack, or Swiss
  • Spices: Garlic powder, smoked paprika, Italian herbs
  • Proteins: Bacon, ham, shredded chicken
  • Add some heat: cayenne pepper, hot sauce, jalapeno pepper

👍About the cauliflower

👍 Pro Tip: No matter how you cook the cauliflower, for the best texture, drain cooked cauliflower thoroughly to avoid a watery casserole.

🤔Using frozen cauliflower

This is a perfect frozen cauliflower casserole recipe. No need to thaw—just follow the package instructions to cook.

The recipe is for one pound of florets, but bags have gotten smaller. Now, most frozen cauliflower comes in 12-oz. bags. If you use 12 oz., please adjust the other ingredients accordingly.

🤔Using fresh cauliflower

You can use fresh cauliflower. One medium head of cauliflower (approximately 2 pounds) will yield about 1 pound of well-trimmed florets. You should cook the fresh cauliflower in a microwave or boil it.

To cook in the microwave: Place the cauliflower florets in a large microwave-safe bowl with a couple of tablespoons of water. Cover the bowl loosely but not tightly. Cook on high until tender, 4-5 minutes, and then drain.

⚕️Safety Tips: Fresh cauliflower should be washed to remove dirt, bacteria, and potential pesticide residue. I suggest rinsing before trimming, then a more thorough cleaning after trimming.

😊Topping options

  • No topping (my usual go-to—it’s rich enough without one)
  • Low-carb topping: low-carb breadcrumbs or pork rinds, grated parmesan, crumbles of bacon, a shake of paprika (like old-fashioned scalloped potatoes)
  • Higher carb toppings: cornflakes, crushed potato chips, or Ritz crackers with melted butter. Panko bread crumbs, Parmesan cheese, and melted butter can also be used.

📅Making ahead

While this is a quick and easy casserole to assemble, there may be times you need to make it ahead. Assemble the casserole, ready to cook, then prepare for storage. Refrigerate for 2 days or freeze for 2 months.

To cook, if frozen, thaw completely overnight in the refrigerator. Follow the baking instructions, but allow 5–10 extra minutes if baking straight from the fridge.

👍Related recipes to try

If you're following a low-carb diet, consider trying these popular low-carb recipes. Start with this super-easy Low Carb Tortilla Pizza and add some crunch with Low Carb Parmesan-Sesame Crackers. And top it off with Low-Carb Lemonade with Splenda.

Or try other popular cauliflower recipes, such as Garlic Mashed Cauliflower and Parmesan Roasted Cauliflower.

❄️Storage of leftovers

For leftovers, store sealed airtight in the refrigerator for up to 3 days or freeze for up to 3 months. Reheating in the microwave, but we prefer the oven.

❓FAQs

What’s the best cheese for cauliflower casserole?

Mild cheddar is my go-to choice, but sharp cheddar offers a stronger flavor. Colby Jack, Monterey Jack, or Swiss are all great options. Use what you like and what melts well.

How do I keep cauliflower casserole from getting watery?

Nobody likes a soggy, runny casserole. Be sure to drain the cauliflower well after cooking. I always pat dry the florets with paper towels. If the cauliflower seems moist after mashing, press down on it with additional paper towels.

The other source of fluid is the sour cream. I always feel that cheaper generic sour cream is runny, so I buy the good stuff.

Lastly, a bag of frozen cauliflower is usually 12 oz., not 16 oz. anymore. If you didn't use the right amount or adjust the recipe, your casserole will be very runny.

📖The Recipe Card
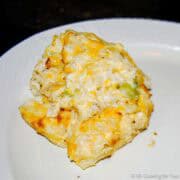
Cheesy cauliflower casserole on a white plate.
Print Recipe Add to Collection Go to Collections
4.67 from 9 votes

Easy Cheesy Cauliflower Casserole (Fresh or Frozen Cauliflower)

Creamy, cheesy, and comforting—this easy cauliflower casserole is ready in 30 minutes and works with fresh or frozen cauliflower. It’s a low-carb, keto-friendly side that never feels like a compromise.
Prep Time10 minutes mins
Cook Time20 minutes mins
Total Time30 minutes mins
Course: Main Course, Side Dish
Cuisine: American
Keyword: Cheesy cauliflower casserole, frozen cauliflower casserole, Low carb cauliflower casserole
Servings: 4
Calories: 263kcal
Author: Dan Mikesell AKA DrDan

Ingredients

  • 1 lb frozen cauliflower
  • 1 cup sour cream
  • 1 cup cheddar cheese
  • 3 green onions sliced thin
  • ½ teaspoon salt
  • ¼ teaspoon black pepper coarse ground
  • 3 slices bacon optional. Cooked and crumbled.
US Customary - Convert to Metric

Instructions

  • Preheat the oven to 375° convection or 400° conventional.
    Cauliflower with casserole ingredients—labeled.
  • Use frozen cauliflower and cook 1 pound of cauliflower florets in the microwave. Follow the instructions on the package. Drain and pat dry.
    For Fresh Cauliflower: One medium head of cauliflower (approximately 2 pounds) yields about 1 pound of well-trimmed florets after trimming. Be sure to clean well.
    Place the fresh cauliflower florets in a large microwave-safe bowl with a couple of tablespoons of water. Cover the bowl loosely but not tightly. Cook on high until tender, 4-5 minutes, then drain and pat dry.
    Putting cauliflower into the microwave.
  • Prepare a 6x9 baking dish or a 9x10 casserole dish with PAM cooking spray.
    spray casserole dish with PAM
  • Slice 3 green onions.
    slicing green onion on wooden board.
  • Add the cauliflower to a large mixing bowl and mash it with a potato masher or fork. You could also use a mixer or food processor, but you are NOT trying to cream this. Add cheddar cheese, sour cream, green onion, salt, and black pepper. Bacon is optional.
    Mashing cauliflower with a potato masher.
  • Mix well and pour the mixture into a prepared baking pan. It may be refrigerated or cooked now. 
    moving casserole filling to baking dish
  • Cook in the oven until the top is browned and bubbling around the edges—about 20 to 25 minutes. Let it sit for 5 minutes before serving.
    baked cauliflower casserole in dish

Notes

Pro Tips

  1. Optional ingredients and variations are in the recipe post.
  2. It reheats well in the microwave, but we prefer to use the oven.
  3. Pan size. I usually use a 7x10 CorningWare dish. A 6x9 or an 8x8 would be good, or anything in that size range.
  4. Since this was initially published, many bags of frozen cauliflower have been reduced in size from 1 pound to 12 oz. The recipe will need to be decreased by 25%  if that is what you have. Cooking time will be about the same.

Nutrition

Calories: 263kcal | Carbohydrates: 8g | Protein: 11g | Fat: 20g | Saturated Fat: 13g | Polyunsaturated Fat: 0.4g | Monounsaturated Fat: 3g | Cholesterol: 69mg | Sodium: 476mg | Potassium: 269mg | Fiber: 3g | Sugar: 5g | Vitamin A: 750IU | Vitamin C: 78.4mg | Calcium: 270mg | Iron: 0.9mg

I was initially inspired by my Cheesy Potatoes with Real Potatoes when we wanted a smaller, non-potato casserole side dish 15 years ago, and I've repeated the recipe many times since.

Dogs romping in the yard.
Lilly and Molly 6 months 3 weeks

Editor's Note: Originally Published February 25, 2010. Updated with expanded options, refreshed photos, and a table of contents to help navigation.

Rotisserie Chicken Enchilada Casserole

chicken enchiladas on white plate.

This easy Chicken Enchilada Casserole only needs six ingredients, including rotisserie chicken, cheese, and sauce. You can have restaurant-quality Mexican food at home using the classic rolled enchilada method.

Ingredients

Shredded or rotisserie chicken
Enchilada sauce
Sour cream
Onion
Tortillas
Shredded cheese

chicken enchiladas on white plate.
[feast_advanced_jump_to]
Blue ribbon divider used for visual effect

Rotisserie Chicken Enchilada Casserole is smoother with melted cheese and wonderful homemade enchilada sauce for an out-of-this-world taste in about 35 minutes.

The recipe is flexible; use other precooked chicken and your options of cheese and tortillas. You can use canned enchilada sauce, but it will be your new favorite meal if you use my homemade enchilada sauce.

Try these related recipes you may enjoy, like Healthier Chicken Enchilada Casserole, Crock Pot Chicken Enchilada Casserole, Taco Casserole, Sour Cream Chicken Enchiladas, and Crock Pot Southwest Chicken Casserole.

👨‍🍳How to Make Rotisserie Chicken Enchilada Casserole—Step-by-Step

shredded chicken in three piles

1. Start with 2-3 cups of rotisserie or other shredded chicken.

chopped onion on white board.

2. Chop onion and mix with sour cream.

Homemade Enchilada Sauce in sauce pan.

3. Use canned enchilada sauce if you have one you love. I prefer my Homemade Enchilada Sauce.

setup to create enchiladas.

4. Set up an assembly line of two dinner plates Place enchilada sauce on the first plate and coat tortillas on both sides.

tortilla with sauce and sour cream.

5. Add the sour cream/onion mixture, a generous amount of shredded chicken mixture, and cheese.

filled tortilla being rolled up.

6. Tightly roll the enchilada.

enchiladas rolled up in baking pan.

7. Place the enchiladas seam down in the baking dish. Repeat until done.

enchilada casserole ready for the oven.

8. Pour all remaining sauce over the pan and top with cheese.

browned casserole out of the oven.

9. Preheat over to 375° convection or 400° until the cheese is browned—about 20 minutes.

For more details, keep reading. See the Recipe Card below for complete instructions and to print.

🐓Ingredients variations and options

The Chicken

While this recipe is perfect for leftover rotisserie chicken, any precooked chicken will do. If you don't have cooked chicken, a large skinless boneless chicken breast will make about 2 cups of shredded chicken. You can bake until 165°— about 30 to 40 minutes in a 375° oven

An interesting option is this recipe with Freezer Burn Chicken.

Tortillas

Use either corn tortillas for classic enchiladas or flour, low-carb, or whole wheat tortillas if you wish. Pick about an 8-inch diameter or the size that fits your baking dish.

🥣The Sauce

You could use canned enchilada sauce if there is one you love. But my enchilada sauce is terrific— Homemade Enchilada Sauce - Tomato Based.

Add some green chilies, black beans, or pinto beans for other flavors.

The Cheese

Use the cheese you like. Mild or sharp cheddar cheese, Monterey Jack cheese, pepper jack cheese, or a Mexican cheese blend are all excellent choices.

Serving

Top with your favorite toppings like fresh cilantro, slices of avocado, black beans, green or red onion, olives, chopped tomatoes, sour cream, salsa, or pico de Gallo.

For side dishes, try a side salad, refried beans, Mexican Rice, corn chips, salsa, or guacamole.

Storing and reheating leftovers

Leftovers can be stored in an airtight container, refrigerated for 3 days, or frozen for 3 months.

To reheat, thaw overnight in the refrigerator, then reheat in the oven, an air fryer, or microwave.

❓FAQs

Is chicken enchilada casserole gluten-free?

It can be if you use traditional corn or gluten-free tortillas instead of flour. Also, you should read the ingredient label of any component, like sauce, that you add.

How to keep the tortillas from being soggy?

You can prevent soggy tortillas by frying each for about 10 seconds per side in a bit of oil over medium-high heat. Corn tortillas will be most likely be soggy, but other tortillas can have issues, especially if they are leftover. The oil will form a barrier to keep the sauce from being absorbed.

Blue ribbon divider used for visual effect

📖The Recipe Card

chicken enchiladas on white plate.
Print Recipe Add to Collection Go to Collections

Rotisserie Chicken Enchilada Casserole

This easy Chicken Enchilada Casserole only needs six ingredients, including rotisserie chicken, cheese, and sauce. You can have restaurant-quality Mexican food at home using the classic rolled enchilada method.
Prep Time15 minutes mins
Cook Time20 minutes mins
Total Time35 minutes mins
Course: Main Course
Cuisine: Mexican
Keyword: chicken enchilada bake, enchilada casserole with rotisserie chicken, rotisserie chicken enchilada casserole
Servings: 4 servings
Calories: 469kcal
Author: Dan Mikesell AKA DrDan

Ingredients

  • 2-3 cups shredded or rotissorie chicken
  • 2 ½ cups enchilada sauce homemade preferred
  • ½ cup sour cream
  • ½ small onion chopped
  • 4 tortillas 8 inch corn, flour, or other
  • ½ pound shredded cheese Of your choice
US Customary - Convert to Metric

Instructions

  • Start with 2-3 cups of rotisserie or other shredded chicken, and add ½ cup of enchilada sauce to the chicken.
    shredding chicken by hand
  • Preheat over to 375° convection or 400° conventional. Chop ½ small onion and add it to ½ cup of sour cream.
    chopped onion on white board
  • You will need about 2 ½ cups of enchilada sauce. Use canned sauce if you have one you love. I prefer my Homemade Enchilada Sauce.
    Homemade Enchilada Sauce in sauce pan
  • Set up an assembly line of two dinner plates and an 8 by 8 or other baking dish coated with PAM cooking spray. Place about ¼ cup enchilada sauce on the first plate. Take the first tortilla and place it on the first plate. Coat both sides lightly with sauce and move to the second plate for assembly.
    plate with sauce ready to start coating tortillas
  • Place 2 tablespoons of the sour cream/onion mixture in a line about ⅓ from the left side. Add a generous amount of shredded chicken mixture and top with about 2 tablespoons of cheese of your choice.
    tortilla with sauce and sour cream
  • Start on the left side and tightly roll the enchilada.
    filled tortilla being rolled up
  • Place the enchiladas seam down in the baking dish. Repeat until done. Add sauce to the first plate as needed.
    enchiladas rolled up in baking pan
  • Pour all remaining sauce over the pan and top with cheese.
    enchilada casserole ready for the oven
  • Bake until the cheese is browned—about 20 minutes.
    browned casserole out of the oven

Notes

Pro Tips:

  1. Note: The ingredients and discussion are for a single recipe, but the pictures are for a double recipe.
  2. Any shredded chicken will do.
  3. Homemade Enchilada Sauce is preferred for the best results.
  4. Use a 9X13-inch casserole for a double recipe and an 8X8 or 9X9 for a full recipe.
  5. Please try my enchilada sauce linked above. It is the absolute best.
  6. Good refrigerated for 2-3 days and frozen for 3-4 months.

Nutrition

Calories: 469kcal | Carbohydrates: 30g | Protein: 36g | Fat: 22g | Saturated Fat: 11g | Cholesterol: 107mg | Sodium: 1675mg | Potassium: 325mg | Fiber: 3g | Sugar: 10g | Vitamin A: 1307IU | Vitamin C: 3mg | Calcium: 369mg | Iron: 3mg

Editor's Note: This recipe was published on February 1, 2010. It was my first grand project and resulted in three posts. Updated with expanded options, refreshed photos, and a table of contents to help navigation.

Molly and Lilly in the yard.

Baked Chicken Cordon Bleu

chicken cordon bleu with green beans.

Mouthwatering Chicken Cordon Bleu at home is easier and healthier by making and baking it without frying. Stuff a chicken breast with ham and cheese with a Parmesan Panko breadcrumb coating. You can have this classic dish at home.

Ingredients

Chicken—boneless skinless chicken breasts
Stuffing—ham. Swiss cheese, optional green onion
Base coat—flour, onion powder, garlic powder, salt, black pepper
Egg
Breading coat—panko bread crumbs, Parmesan cheese, olive oil

chicken cordon bleu with green beans.
[feast_advanced_jump_to]
Blue ribbon divider used for visual effect

A "cordon bleu" is a thin, usually pounded meat wrapped around a cheese filling. It is then traditionally fried. The French term "cordon bleu" is translated as "blue ribbon." The dish first appeared in the 1940s.

I had done a chicken cordon bleu with a pounded-out chicken breast. It did work but got overly complicated. But this "stuffed" oven-baked method works better by not overcooking the coating to get the chicken to a safe 165°.

👨‍🍳How to Make Chicken Cordon Bleu—Step-by-Step Photo Instructions

bread crumbs in skillet with wooden spoon.

1. Brown Panko bread crums

chopping cheese, ham and onion.

2. Dice cheese and ham. Optional add a green onion.

cutting slit into chicken breast for stuffing.

3. Create a pocket in the chicken breast.

pans of flour with egg and bread curmbs for topping.

4. Create shallow pans with coating ingredients.

spraying a rack on baking sheet with PAM.

5. Line the pan with aluminum foil and add a rack, then spray of PAM.

chicken breast in flour starting the coating.

6. Coat with spicy flour, egg white, then browned breadcrumbs and Parmesan.

chicken on the tray adding more breading.

7. Place on a rack.

three cooked chicken breaats on tray.

8. Bake at 400° convection or 425° conventional until 165° internal temperature—about 40-45 minutes.

For more details, keep reading. See the Recipe Card below for complete instructions and to print.

🐓What chicken to use

I suggest medium to larger size skinless boneless chicken breasts. You can use smaller (8 oz or less), but they are hard to find and stuff without going through the side.

If you do the flattened-out chicken breast, you should use slices of ham and cheese, but diced works better for this pocket method.

How to serve

Serve with Julia Child's French Bread, Parmesan Roasted Cauliflower, Roasted Asparagus with Parmesan or Baked Parmesan Green Beans.

Great Italian Recipes

Check out other easy Italian recipes, like Chicken Parmesan Soup, Italian Grilled Chicken Breasts, Easy Chicken Parmesan, Cheesy Chicken Pasta Bake, and Lower Fat Spicy Chicken Alfredo.

How to make chicken cordon bleu ahead

Wrap them airtight and refrigerate for 2-3 days or freeze for 3 months. If frozen, thaw completely before cooking and cook to 165° internal temperature.

Storage and reheating leftovers

Store leftovers in an airtight container. Refrigerate for 2-3 days or freeze for 3 months.

To reheat leftovers, thaw them if frozen and cook them in the oven or air fryer to 165° internal temperature. You can reheat it in a microwave, but the breading will not be crisp, and the texture suffer.

❓FAQs

How to make a hole in a chicken breast for stuffing?

Use a knife to make the slit in the chicken breast. Do it on the breast's thicker side, 1 to 1 ½ inches long, and initially 1 inch deep. Then, I like to use my finger to extend the pocket. You can use the knife, but it tends to go too far.

How do you get the breading to stick better?

The breading in all recipes sticks better if the meat is very dry before the flour coats. Also, allowing the coating to set for 5 to 10 minutes before cooking will help it sit up and stick better.

What is the safe final internal temperature for Chicken Cordon Bleu?

Like all chicken and poultry recipes, the meat must reach 165° to be served safely according to USDA recommendations.

Blue ribbon divider used for visual effect

📖The Recipe Card

chicken cordon bleu with green beans.
Print Recipe Add to Collection Go to Collections
4.43 from 14 votes

Baked Chicken Cordon Bleu

Mouthwatering Chicken Cordon Bleu at home is easier and healthier by making it and baking it at home without frying. Stuff a chicken breast with ham and cheese with a Parmesan Panko breadcrumb coating, you can have this classic dish at home.
Prep Time20 minutes mins
Cook Time45 minutes mins
Total Time1 hour hr 5 minutes mins
Course: Main, Main Course
Cuisine: Italian
Keyword: baked chicken cordon bleu, chicken cordon bleu easy, How long to bake Chicken Cordon Bleu
Servings: 4 servings
Calories: 433kcal
Author: Dan Mikesell AKA DrDan

Ingredients

  • 4 boneless skinless chicken breasts
  • 2 oz ham diced
  • 2 oz Swiss cheese diced
  • 1 green onion optional

Tray #1

  • ½ cup flour
  • ½ teaspoon onion powder
  • ½ teaspoon garlic powder
  • ½ teaspoon salt
  • ¼ teaspoon pepper

Tray #2

  • 1 egg whip with some water

Tray #3

  • 1 cup panko bread crumbs
  • 1 teaspoon olive oil to brown bread crumbs
  • ¼ cup Parmesan cheese shredded
US Customary - Convert to Metric

Instructions

  • Preheat oven to 400° convection or 425° conventional. Heat a medium skillet over medium heat with 1 tablespoon olive oil. Add 1 cup of panko bread crumbs and brown.
    bread crumbs in skillet with wooden spoon
  • Dice 2 oz. Swiss cheese and 2 oz. Ham together in ⅛-1/4 inch pieces. Toss together. Add a minced green onion—optional, and do not add if storing.
    cutting up onion with ham and cheese on board
  • Pat the chicken breasts dry with paper towels. Trim the fat. Lay a breast on a cutting board. Cut a slit about 1 ½ inches long and deep into the thick side of the breast. With a finger, expand the pocket to extend into most of the breast. BE CAREFUL not to put a hole in your pocket. Stuff the chicken breasts. You could use a toothpick to close the pocket if needed.
    cutting slit into chicken breast for stuffing
  • Make a dredge line. Mix ½ cup flour, ½ teaspoon onion powder, ½ teaspoon garlic powder, ½ teaspoon salt, and ¼ teaspoon pepper. In a second pan/bowl, one egg and 1 tablespoon of water and whip with a fork. In a third pan/bowl, place the browned breadcrumbs. Add ¼ cup shredded Parmesan cheese to the breadcrumbs.
    pans of flour with egg and bread curmbs for topping
  • Line the baking pan with aluminum foil and add a rack if you have one. Please give it a heavy spray of PAM.
    spraying a rack on baking sheet with PAM
  • Dry the breasts well. Dip in the flour mixture. Coat both sides and shake off the excess. Dip in the egg wash, and shake off excess. Then the breadcrumbs.
    chicken breast in flour starting the coating
  • Place on a rack. Add a few more breadcrumbs if there are bald spots.
    chicken on the tray adding more breading
  • Place on the center rack of the preheated oven. Cook until 165° internal temperature. It takes about 40-45 minutes.
    three cooked chicken breaats on tray

Notes

Pro Tips:

  1. You can also flatten the chicken roll it if you want.
  2. I used three large breasts in the pictures, but I wrote this for 4.
  3. I like the touch of onion, but it is not traditional and omit it if you want. The onion will dominate the taste if stored, so only use it for fresh cooking and serving.
  4. Use your finger to extend the cut, not the knife.
  5. The breading sticks better if you are sure to dry the breasts well, and after coating, let them sit for 5-10 minutes before cooking or freezing.
  6. Good refrigerated for 3 to 4 days. Should freeze well either before or after cooking.

Nutrition

Calories: 433kcal | Carbohydrates: 33g | Protein: 40g | Fat: 15g | Saturated Fat: 6g | Cholesterol: 139mg | Sodium: 1513mg | Potassium: 563mg | Fiber: 2g | Sugar: 2g | Vitamin A: 290IU | Vitamin C: 2mg | Calcium: 247mg | Iron: 3mg

Editor's Note: This recipe was originally published on January 13, 2010, only two weeks into this blog's life. It was updated with expanded options, refreshed photos, and a table of contents to help navigation.

Molly and Lilly in the yard 4

Low-Carb Tortilla Pizza

tortilla pizzas on a pizza stone

This easy and fast Low-Carb Tortilla Pizza recipe is perfect for your pizza craving if you follow a keto diet. It's made with low-carb tortillas or flatbread and topped with your favorites, such as mozzarella cheese, Italian sausage, and pepperoni slices. The pizza is oven-baked in 10 minutes on a pizza stone or sheet pan.

🍕Ingredients

Low-carb tortillas
Italian sausage
Green pepper—chopped
Onion—chopped medium size
Pepperoni
Pizza sauce
Mozzarella
Any toppings you like on regular pizza—red onion, mushrooms, ham, bacon, Parmesan cheese

tortilla pizzas on a pizza stone.
[feast_advanced_jump_to]
Blue ribbon divider used for visual effect

quote mark
Featured Comment From Carol :
"My tortilla pizza turned out to be great!"
⭐⭐⭐⭐⭐

Pizza is everybody's favorite, but many diets exclude it. You will love this low-carb pizza recipe for your keto diet. Instead of pizza dough, you use a low-carb tortilla for your low-carb pizza crust.

Prep your favorite ingredients ahead of time, and in 20 minutes, you can have fresh-out-of-the-oven pizzas that even picky kids love.

Use them for a party as personalized pizzas that everybody, even picky kids, will love. Use any tortillas you want: low-carb, gluten-free, corn, flour, or whole wheat tortillas.

👨‍🍳How to Make Tortilla Pizza—Step-by-Step Photo Instructions

bag of low carb Flatout bread

1. Preheat oven to 425° convection or 450° conventional with the pizza stone or sheet pan on the center rack.

browned flat bread in a fry pan.

2. Brown your tortilla or flat bread over medium-high heat with some oil.

spreading sauce on browned tortilla.

3. Top with sauce, cheese, and other toppings

tortilla pizza on pizza stone.

4. Transfer to the pizza stone to bake. This will cook rapidly for about 10 minutes.

For more details, keep reading. See the Recipe Card below for complete instructions and to print.

🤔Tips to make it right every time

The most important thing for good results is to give the tortillas a light browning before starting to top them.

This can become a quick recipe to make with a bit of planning. Brown Italian sausage, chop some green bell peppers ahead of time, and freeze. Use your favorite toppings you order on traditional pizza.

If you want sauce, use jar pizza or marinara sauce. You can also make your own with my recipe in the FAQ section.

Preheat a baking sheet or cast iron skillet if you don't have a pizza stone.

Make up the pizza on a pizza peel or edgeless cookie tray.

👍Options and Variations

There are hundreds of types of pizzas, most of which you know. But here are a few variations you may like trying.

BBQ chicken tortilla pizza with shredded chicken and barbecue sauce.

Caprese tortilla pizza with ricotta and mozzarella cheese, then topped with thinly sliced tomatoes and leaves of fresh basil.

Chicken Alfredo Pizza with Alfredo sauce, shredded chicken, and Parmesan cheese.

😊Other Pizza and Low-Carb Recipes

If you need low-carb recipes, see Parmesan-Sesame Crackers, Cheesy Cauliflower Casserole, Mashed Cauliflower, and Simple Splenda Lemonade.

Check out other pizza recipes, like Bisquick® Pizza Dough, Homemade Pizza Dough, and Crock Pot Pizza Casserole.

Quick and Easy French Bread Pizza

Delicious Quick and Easy French Bread Pizza is the perfect 20 minute evening meal or a party. Full of your favorite toppings, browned melted cheese, and crispy crust. 

Quick French Bread Pizza from 101 Cooking for Two

❄️Storage and reheating of leftovers

Store leftovers in an airtight container and refrigerate for 3-4 days. Reheat on a pizza stone or tray in the oven or air fryer.

❓FAQs

Do I need a pizza stone to cook tortilla pizzas?

Without the pizza stone, use a large ½ sheet baking sheet or cast iron skillet coated with PAM cooking spray. But the stone will help crisp up the crust more, and it is great to have around for heating standard pizza.

How to make your tortilla pizza low-carb?

Use low-carb ingredients, especially tortillas. The popularity of low-carb diets has led to multiple commercial versions of low-carb tortillas and flatbreads that are excellent products, cheap, and readily available.

Can I make tortilla pizzas ahead and cook them when needed?

Not a good idea. The tortilla will eventually get soggy. Prepare the ingredients ahead and assemble them while the oven is heating.

How to keep the tortillas from becoming soggy?

The trick is not just to slap the sauce and goodies on raw tortillas. You need to brown them a little in some oil, which will help keep them from becoming mush. It is that simple.

How to make your own pizza sauce?

To make your own sauce: One 6 oz can of tomato paste and 6 oz water. Add ½ teaspoon salt, ½ teaspoon pepper, 1 clove of garlic, about half a small chopped onion, and 1 teaspoon oregano—a pinch (¼ teaspoon) of crushed red pepper flakes for a touch of heat.

🧀Four Cheese White Pizza with Chicken—my favorite variation

An extraordinary change of pace. Give it a try today.

Just a change in toppings: Eliminate Italian sausage, green pepper, pepperoni, and pizza sauce.

New ingredient:
1 tablespoon butter
½ tsp garlic powder
½ cup diced chicken
1-2 oz each of feta, white cheddar, mozzarella, and shredded Parmesan
1 Plum tomato - thinly sliced  (about ¼ inch)
Instructions:
1) Melt 1 tablespoon butter and add ½ tsp garlic powder. Spread over the crust like sauce.
2) Add the topping: ½ cup of diced chicken, thinly sliced plum tomato (about ¼ inch), 2 oz each of feta, white cheddar, mozzarella, and shredded Parmesan.

Blue ribbon divider used for visual effect

📖The Recipe Card

tortilla pizzas on a pizza stone
Print Recipe Add to Collection Go to Collections
4.50 from 24 votes

Low-Carb Tortilla Pizza

This easy and fast low-carb tortilla recipe is perfect for your pizza craving if you are following a keto diet. Made with low-carb tortillas or flatbread and topped with your favorites like mozzarella cheese, Italian sausage, and pepperoni slices. Or use your favorite pizza toppings.
Prep Time10 minutes mins
Cook Time10 minutes mins
Total Time20 minutes mins
Course: Main Course
Cuisine: Italian
Keyword: keto tortilla pizza, Low Carb Pizza, low carb tortilla recipe
Servings: 2
Calories: 373kcal
Author: Dan Mikesell AKA DrDan

Ingredients

  • 1 large low carb tortilla or low carb flatbread
  • 2 teaspoons vegetable oil

My suggested toppings - use what you like

  • ¼ pound Italian sausage browned
  • ¼ cup green pepper chopped
  • ¼ onion Chopped medium size
  • 18 pieces pepperoni
  • 2 tablespoons premade pizza sauce I like Ragu Sweet Basil
  • ½ cup mozzarella shredded
US Customary - Convert to Metric

Instructions

  • Preheat oven to 425° convection or 450° conventional with the pizza stone on a center rack.
    bag of low carb Flatout bread
  • In a large skillet over medium-high heat, add 2 teaspoons of oil. Brown your tortillas on both sides slightly. You are just firming it up to keep it from falling apart with the sauce and ingredients.
    browned flat bread in a fry pan
  • Spoon 2 tablespoons premade pizza sauce on the crust and spread. Add other ingredients: my choices are sausage, onion, 12 pieces of pepperoni, green pepper, shredded mozzarella cheese, and topped off with 6 more slices of pepperoni.
    spreading sauce on browned flat bread
  • Transfer to the pizza stone. This will cook rapidly for about 10 minutes.
    A low-carb tortilla pizza on pizza stone

Notes

Pro Tips:

  1. I generally eat a whole one of these, but most look at it as two servings. So nutrition says two serving on one of these. You can double the number if you consider the whole thing one serving.
  2. Obviously, nutrition varies completely by ingredients.
  3. The pizza stone helps a lot. Preheat a heavy cooking sheet in the oven if you don't have one. Even a cast iron skillet will work.
  4. Use the flatbread if you can find it. It is thicker and will remind you more of a thin-crust pizza.
  5. DO NOT skip the browning step.
  6. I suggest making the ingredients up ahead, but the "crust" will be soggy and fall apart if you try to store a cooked one of these.

Nutrition

Calories: 373kcal | Carbohydrates: 4g | Protein: 17g | Fat: 32g | Saturated Fat: 15g | Cholesterol: 75mg | Sodium: 832mg | Potassium: 292mg | Fiber: 1g | Sugar: 2g | Vitamin A: 323IU | Vitamin C: 18mg | Calcium: 152mg | Iron: 1mg

Editor's note: This was originally published on January 5, 2010. Updated with expanded options, refreshed photos, and a table of contents to help navigation.

Molly and Lilly in the yard.

Roasted Whole Beef Tenderloin

sliced beef tenderloin on wooden board ©ricka_kinamoto - stock.adobe.com

Whole oven-roasted beef tenderloin is the best meal you can offer for extra special occasions. Just follow these easy instructions.

sliced beef tenderloin on wooden board ©ricka_kinamoto - stock.adobe.com©ricka_kinamoto - stock.adobe.com
Sliced beef tenderloin on wooden board ©ricka_kinamoto - stock.adobe.com
[feast_advanced_jump_to]
Blue ribbon divider used for visual effect

This is our traditional Christmas dinner. We cook the whole thing at once. My wife refuses to do turkey for Christmas... too much work.

I do this to keep the work down and increase family time. So the absolute best meal for me is beef.... beef tenderloin specifically. And this is the best.

👨‍🍳How to cook a whole beef tenderloin

  1. Trim the tenderloin of excess fat and the silverskin. Don't try to be perfect.
  2. Preheat oven to 450°.
  3. Place tenderloin in a shallow roasting pan on a rack. Roll the narrow tail around to double that area and help fit.
  4. Mix olive oil and garlic and liberally coat the tenderloin—with a nice coat of salt and coarse pepper. You may also add other spices like thyme if you wish.
  5. Place on a center rack with a meat thermometer—roast for 15 minutes at 450°. After the first 15 minutes, reduce heat to 325° and roast for about 10-12 minutes per pound. Cooking time is highly variable due to thickness.
  6. Remove at 130°-150° (your choice) internal temperature in the thickest part — tent for about 10 minutes before slicing. The final temperature will rise about 5° during tenting.

⏰🌡️How Long to Cook

One thing about doing a whole tenderloin is that various parts will cook faster or slower, depending on the thickness. This is great in large groups where we get anywhere from rare to well-done (not recommended) requests.

Roast for 15 minutes at 450°. After the first 15 minutes, reduce heat to 325° and roast for about  10-12 minutes per pound. But as always, cook to a final internal temperature.

Doneness

DonenessDescriptionTemperature
RareCold red center125°-130°
Medium RareWarm red center130°-135°
MediumPink and firm center140°-150°
Medium WellMinimal pink150°-155°
WellNo pink155°+

🐄About Beef Tenderloin

Beef tenderloin is a large muscle in the upper back of the cow. The psoas muscle gets very little work and no weight-bearing, so it is very tender.

Graphic of the location of filet and beef tenderloin- licensed from Fotolia May 16,2017. Copyright foxysgraphic - Fotolia. Modified per allow by licensed.
Licensed from Fotolia May 16, 2017. Copyright foxysgraphic - Fotolia. Modified per allow by license.

What To Buy?

It is all about quality here, more than almost any other cut of beef. Prime is the top 2%; you can buy it for $35 per pound, which I have done at the best meat shops.

Next, just under Prime, is Choice. About half the beef sold in the USA is Choice, which you should usually buy. It will be about $10-15 per pound.

Select is next but just say no. If you see a beef tenderloin that does not have one of these three ratings, it is guaranteed to be bad.

How to Trim: An excellent guide to trimming a whole beef tenderloin is at Serious Eats - How to Trim a Whole Beef Tenderloin for Roasting.  But I usually don't bother tieing.

🔥What About the Smoke?

You will probably have some smoking from the oven due to the fat and the high temperature to start.

So you have some choices.

  1. You can just realize it will probably happen and live with it.
  2. You could add some water to the pan under the rack so that when the fat melts, it hits the water. (max temp of 212°) instead of the 450° pan.

📖Other Beef Tenderloin Recipes

Pan Seared Oven Roasted Filet Mignon

Filet Mignon on a Gas Grill

What to Do With Leftover Beef Tenderloin? Philly Sandwiches

Editor note: Originally Published January 3, 2010. The original photos for this post were lost. It was the blog's first month, and I wasn’t the most organized blogger. But they were probably bad anyway. I have substituted some stock photos that represent the recipe well. But no step-by-step photos. I have rewritten and updated the discussion and clarified the instructions.

Blue ribbon divider used for visual effect
↑Jump to Table of Contents

This recipe is listed in these categories. See them for more similar recipes.

Beef Recipes

Have you tried this recipe, or have a question? Join the community discussion in the comments.

Step-by-Step Photo Instructions

Chef trimming beef tenderloin. ©Alexander Raths - stock.adobe.com 2018

Trim the tenderloin of excess fat and silverskin. Don't try to be perfect.

Whole beef tenderloin whole-©golubsergei-stock.adobe_.com

Preheat oven to 450°. Place tenderloin in a shallow roasting pan on a rack. Roll the narrow tail around to double that area and help fit.

mixing oil and garlic in glass bowl

Mix oil and garlic and liberally coat the loin—a nice coat of salt and coarse pepper. You may also add other spices like thyme if you wish.

Cooked-beef-tenderloin-on-wooden-board-©Jascha-Asadov-from-Shutterstock-2018
Cooked beef tenderloin ©Jascha Asadov from Shutterstock-2018

Place on a center rack with a meat thermometer—roast for 15 minutes at 450°. After the first 15 minutes, reduce heat to 325° and roast for about  10-12 minutes per pound.

sliced beef tenderloin on wooden board ©ricka_kinamoto - stock.adobe.com©ricka_kinamoto - stock.adobe.com
©ricka_kinamoto - stock.adobe.com

Remove at 130°-150° internal temperature in the thickest part per your desire — tent for about 10 minutes before slicing. The final temperature will rise about 5°.

↑Jump to Table of Contents

📖The Recipe Card

sliced beef tenderloin on wooden board ©ricka_kinamoto - stock.adobe.com
Print Recipe Add to Collection Go to Collections
4.20 from 5 votes

Roasted Whole Beef Tenderloin

Whole oven-roasted beef tenderloin is the absolutely best meal you can offer for extra special occasions. Just follow these easy instructions.
Prep Time10 minutes mins
Cook Time1 hour hr
Total Time1 hour hr 10 minutes mins
Course: Main Course
Cuisine: American
Keyword: Roasted Beef Tenderloin, Whole Beef Tenderloin
Servings: 12
Calories: 490kcal
Author: Dan Mikesell AKA DrDan

Ingredients

  • 5 pounds Beef tenderloin Prime or Choice
  • 2-3 tablespoons olive oil
  • 2-4 cloves garlic crushed
  • spices, salt, and pepper to taste
US Customary - Convert to Metric

Instructions

  • Trim the tenderloin of excess fat and the silverskin. Don't try to be perfect.
    Chef trimming beef tenderloin. ©Alexander Raths - stock.adobe.com 2018
  • Preheat oven to 450°. Place tenderloin in a shallow roasting pan on a rack. Roll the narrow tail around to double that area and help fit.
    Whole beef tenderloin whole-©golubsergei-stock.adobe_.com
  • Mix oil and garlic and liberally coat the loin.  A nice coat of salt and coarse pepper. You may also add other spices like thyme if you wish.
    mixing oil and garlic in glass bowl
  • Place on a center rack with a meat thermometer. Roast for 15 minutes at 450°. After the first 15 minutes, reduce heat to 325° and roast for about 10-12 minutes per pound. Cooking time is highly variable due to thickness.
  • Remove at 130°-150° internal temperature in the thickest part per your desire — tent for about 10 minutes before slicing. The final temperature will rise about 5° during tenting.
    sliced beef tenderloin on wooden board ©ricka_kinamoto - stock.adobe.com

Notes

Pro Tips

  1. Buy Prime or Choice. Do not buy Select.
  2. Trim of extra fat and silver skin. A reference is provided in the post if you need it.
  3. Coat with oil, garlic, salt, and pepper to taste and other spices if you want.
  4. Cook to a final internal temperature you want.
  5. You will have some smoke. A little water in the bottom of the pan will cut that way down.
  6. Be sure to tent lightly and rest for 10 minutes before cutting.
  7. Cooking time is highly variable due to thickness. Cook to a final internal temperature never by time.
  8. Save the juices from the platter for reheating. Good refrigerated for 3-4 days.

Nutrition

Calories: 490kcal | Carbohydrates: 0.3g | Protein: 37g | Fat: 37g | Saturated Fat: 14g | Polyunsaturated Fat: 2g | Monounsaturated Fat: 16g | Cholesterol: 125mg | Sodium: 428mg | Potassium: 574mg | Fiber: 0.02g | Sugar: 0.01g | Vitamin C: 0.8mg | Calcium: 40mg | Iron: 2.7mg
dogs running in the snow

So how is a recipe like the Pirate's Code?

Pirate-Licensed from Depositphotos August 24 2021. @ aglia83. Modified for use.

Welcome to 101 Cooking for Two.

I'm DrDan, and this is my cooking blog. I felt this post was the most fitting first post even though it was published originally on January 20, 2010, 20 days after the blog's start.

Pirate-Licensed from Depositphotos August 24 2021. @ aglia83. Modified for use.
Licensed from Depositphotos August 24, 2021. @ aglia83. Modified for use.
Blue ribbon divider used for visual effect

So how is a recipe like the Pirate's Code?

Think about it. What is the pirate's code? Did you hear it in a movie? Do you really care?

Answer: Captain Barbossa to Elizabeth Swann in Pirates of the Caribbean:

"First, your return to shore was not part of our negotiations nor our agreement, so I must do nothing, and secondly, you must be a pirate for the Pirate's Code to apply, and you're not, and thirdly the code is more of what you call guidelines than actual rules."

Part three of this quote is the answer.

So a recipe is "more of what you call guidelines than actual rules." So guidelines... GOT IT... not rules...

I consider it playtime. Time to experiment. Add this... substitute that.. change to your taste, or use what you have. Just don't blame me for the results if you do...

So relax and enjoy your cooking... they're just guidelines, REALLY.

Many people, including "Foodies," take this way too seriously. You can always order pizza.

Note: I have moved this post to the blog's beginning as I have reorganized the blog and pruned posts and recipes that needed to go. Some early posts did not even have pictures, and some were lost. The writing was not very good, and some recipes didn't fit the blog anymore.

Many have been rewritten and moved up in the timeline to current dates. So the early months that many times had 15-20 recipes now have only a few.

See About DrDan and 101 Cooking for Two

Originally Published January 20, 2010.

  • « Previous Page
  • 1
  • …
  • 8
  • 9
  • 10

DrDan imageHi, I'm DrDan.
Welcome to 101 Cooking for Two, the home of great everyday recipes with easy step-by-step photo instructions.
About DrDan

Top THANKSGIVING RECIPES

  • turkey slice with gravy on orange plate.
    How to Roast a Turkey Breast in the Oven
  • Cut ham with pineapple honey glaze on a white plate
    Small Ham in a Crock Pot (2–4 lb Boneless Ham)
  • slice of Ribeye Roast on a white plate
    Small Boneless Prime Rib (Ribeye) Roast
  • Sausage dressing on a white plate.
    Old Fashioned Sausage Dressing Recipe
  • A spoonful of green bean casserole.
    Green Bean Casserole Without Mushroom Soup
  • Sweet potato casserole on a white plate
    Old Fashioned Sweet Potato Casserole
SITES THAT I WORK WITH OR HAVE HAD RECIPES FEATURED OR REFERENCED.

Footer

BACK TO TOP
OF PAGE
Join the club
SUBSCRIBE TODAY

About

  • About DrDan and the Blog
  • Contact Me
  • Comment Policy
  • Guest Posts, Partnering, and Business Questions

Content

  • Food FAQ
  • Kitchen Reference Sheets
  • Recipes Featured in the Videos
  • Guide To Cooking for Two
  • Old Saved Recipes Collections

dogs by the pond

↑ back to top ↑a

Privacy Policy | Terms of Service | Contact

COPYRIGHT © 2010-2026 101 COOKING FOR TWO. ALL RIGHTS RESERVED | BASED ON FOODIE PRO THEME