101 Cooking For Two

  • Recipes
  • About
  • FAQs/Help
  • Shop
  • 📖Emails
menu icon
go to homepage
  • Recipes
  • About
  • FAQs/Help
  • Shop
  • 📖Emails
subscribe
search icon
Homepage link
  • Recipes
  • About
  • FAQs/Help
  • Shop
  • 📖Emails
×
🏠Home » Recipes

Bone-In Country Style Pork Ribs in the Oven (or Grill)

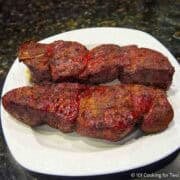
BBQ bone-in country pork ribs on a plate.

Learn how to cook bone-in country-style pork ribs from the pork shoulder low and slow in the oven. With a simple dry rub and easy instructions, you'll have juicy, fall-apart tender BBQ ribs.

These meaty ribs are perfect for cooking for two, with no smoker needed. Prefer grilling? I've included an easy grill alternative.

⏱️ Quick Answer: How Long to Cook Bone-In Country-Style Pork Ribs

  • Oven: 250°F.
  • Time: About 2½–3 hours.
  • Done: 200°–205°F internal temperature for fall-apart tender ribs.
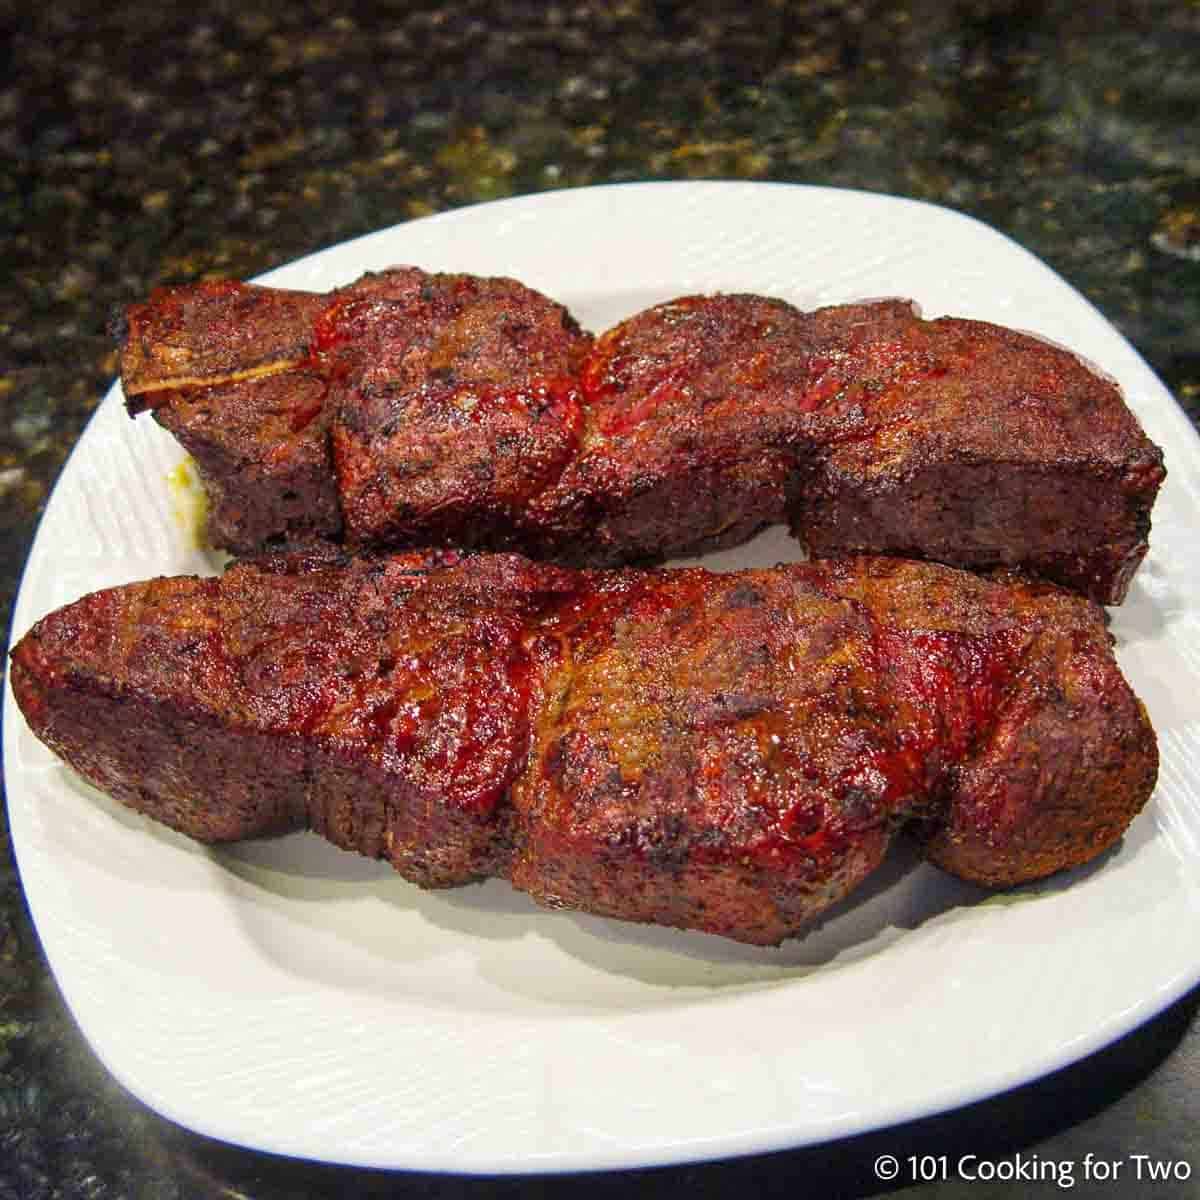
BBQ bone-in country pork ribs on a plate.
[feast_advanced_jump_to]

🤔 TL;DR — Recipe Summary

What it is: Bone-in country-style pork ribs cut from the pork shoulder, baked low and slow in the oven (or grilled).

Why you'll love it: Juicy, fall-apart tender BBQ ribs with a simple homemade dry rub. Perfect for two.

How to make it: Bake at 250°F for 2½–3 hours, until the internal temperature reaches 200°–205°F.

🐖 Ingredients

You only need a few ingredients for tender, oven-baked bone-in country-style pork ribs.

  • Bone-in country-style pork ribs — Cut from the pork shoulder (Boston butt), these meaty, well-marbled ribs are ideal for low-and-slow cooking.
  • BBQ dry rub — Use your favorite, my 8:3:1:1 pork rib rub (in the card), or Memphis-style dry rub.
  • Liquid smoke (optional) — A few drops of Wright's liquid smoke add smoky BBQ flavor when oven baking.
  • BBQ sauce (optional) — Add near the end of cooking or serve on the side.

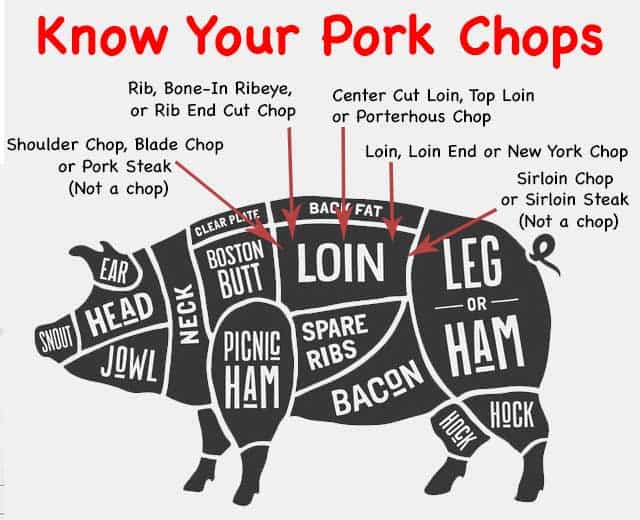
✅ Don't get fooled at the store: Bone-in country-style ribs come from the pork shoulder. Boneless country-style ribs are generally cut from the leaner pork loin and cook more like pork chops. These cuts need different cooking methods.

👨‍🍳 Quick overview: Bone-in Country Style Pork Ribs in the Oven

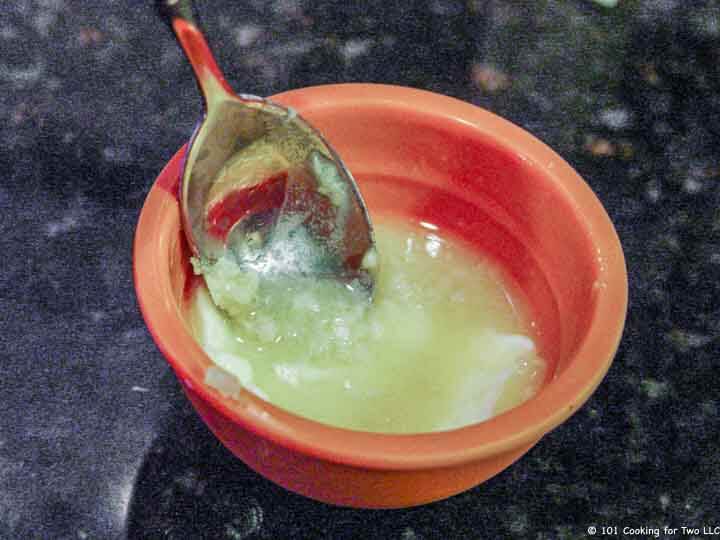
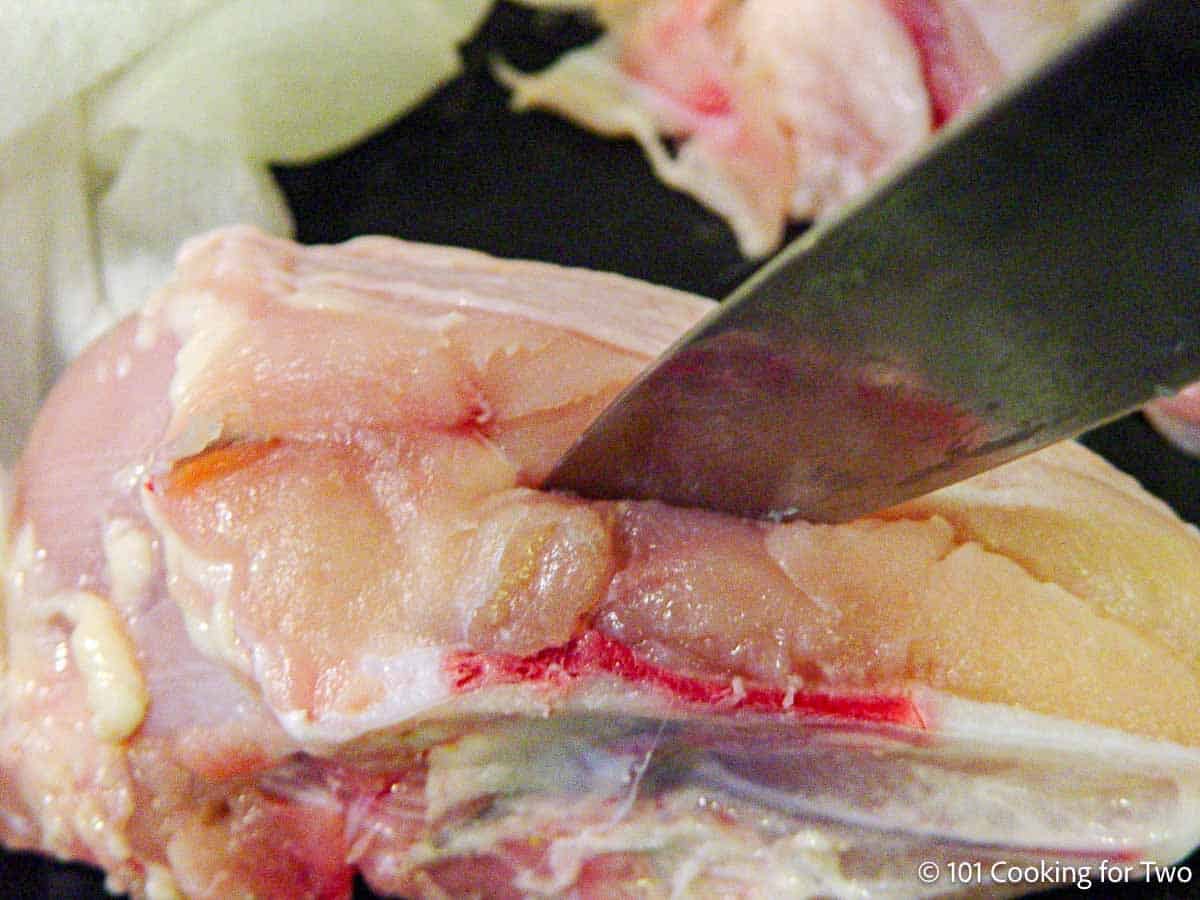
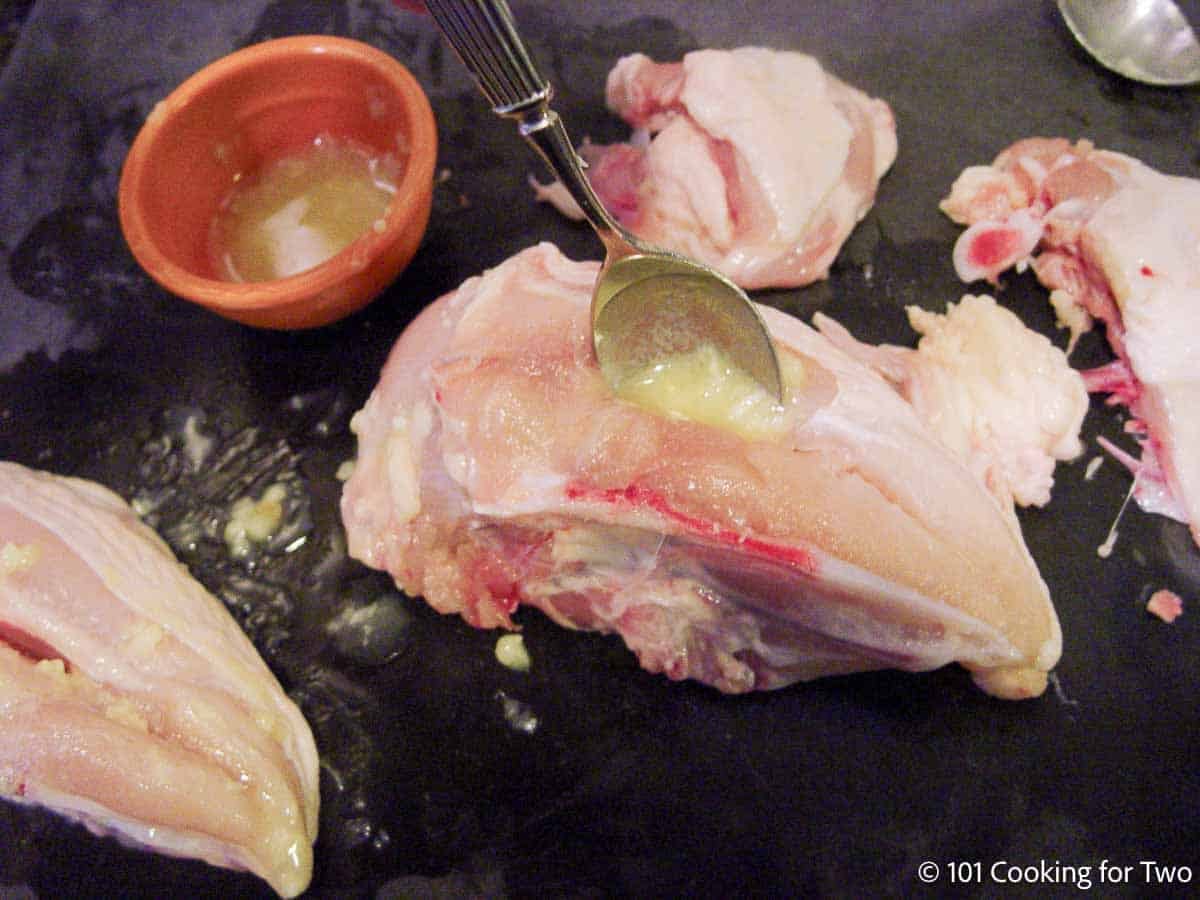
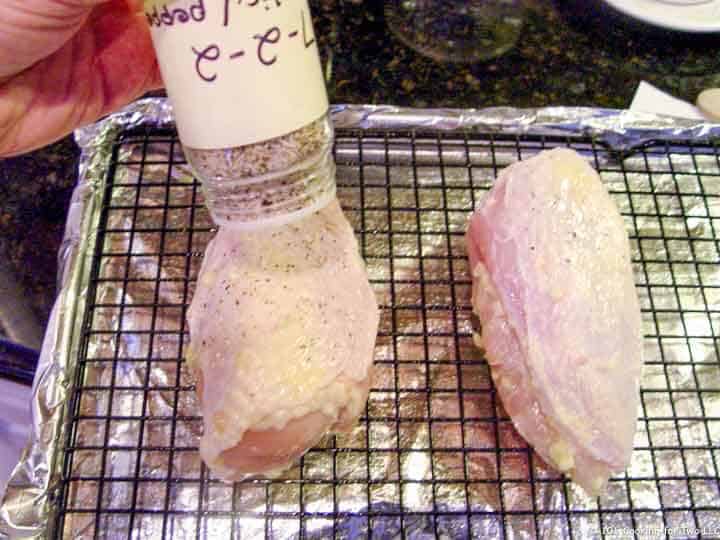
1. Prep and season. Line a rimmed baking sheet with foil and add a rack (optional). Coat the ribs lightly with liquid smoke (optional), then generously with dry rub.

Applying dry rub to bone-in country-style pork ribs.

2. Bake low and slow. Bake at 250°F, flipping every 60 minutes, until the internal temperature reaches 200°–205°F, about 2½–3 hours.
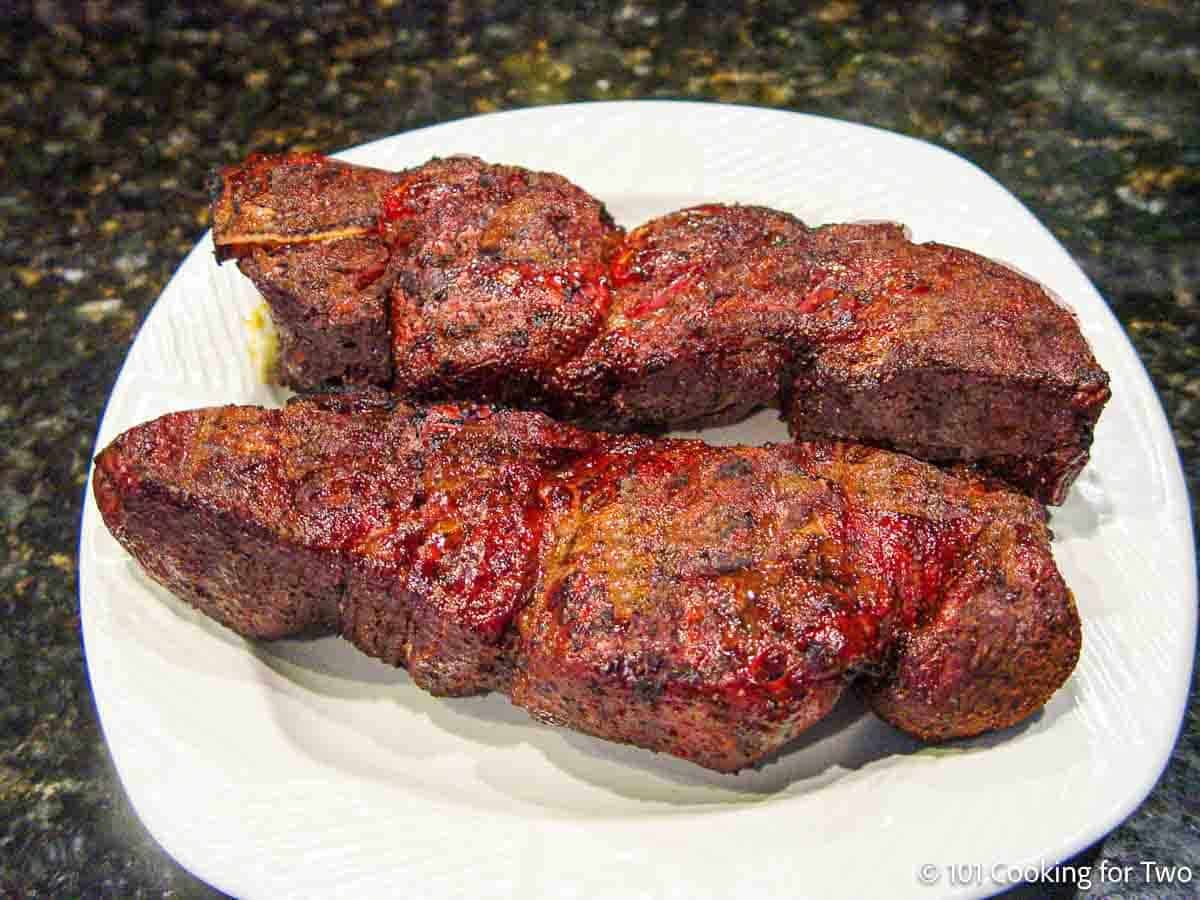
Bone-in country pork ribs on a plate.

👇 Scroll down for the full recipe card or keep reading for tips, FAQ, and serving ideas.

⏱️ How Long to Cook Bone-in Country-Style Pork Ribs in the Oven

Bake at 250°F for about 2½–3 hours, until the internal temperature reaches 200°–205°F. Cooking time will vary with the thickness of the ribs.

✅ Pro Tip: These ribs come from the pork shoulder and need low-and-slow cooking to break down collagen and become fall-apart tender. Always cook to temperature, not time alone.

🔥 How To Cook Bone-in Country Style Pork Ribs on the Grill

I originally developed this recipe on a gas grill, and it's still an excellent way to cook these ribs. The time, temperature, and doneness are the same as the oven method.

  1. Set up the grill for indirect heat at 250°F.
  2. Season the ribs with dry rub, omitting the liquid smoke. Add wood chips for smoking if desired.
  3. Cook over indirect heat, flipping every 60 minutes, for about 2½–3 hours, until the internal temperature reaches 200°–205°F.

For help with grill setup and smoking, see my How to Set Up Your Gas Grill for Low-and-Slow Cooking guide.

🍽️ Serving Suggestions

Serve these tender pork ribs whole with your favorite BBQ sauce, or pull the meat from the bone for sandwiches. I like them with Memphis BBQ Sauce, Baked French Fries, or Macaroni Salad. Coleslaw and baked beans are also excellent sides.

❄️ How to Store And Reheat Leftover Pork Ribs

Storage: Refrigerate leftover ribs in an airtight container for up to 4 days, or freeze for up to 3 months.

Reheating: Keep the meat moist while reheating.

  • Oven: Place ribs in a baking dish with a splash of broth, water, or BBQ sauce. Cover tightly with foil and heat at 300°F for about 15–20 minutes, until heated through.
  • Microwave: Slice or shred the meat, add a little liquid or sauce, cover, and reheat in short intervals.

❓FAQs

What's the difference between bone-in and boneless country style ribs?

Bone-in country-style ribs come from the pork shoulder (Boston butt). They contain well-marbled meat and need low-and-slow cooking to 200°–205°F for fall-apart tenderness.
Boneless country-style ribs are usually cut from the leaner pork loin. They cook faster, more like thick pork chops.
These are different cuts and should not be substituted for each other.
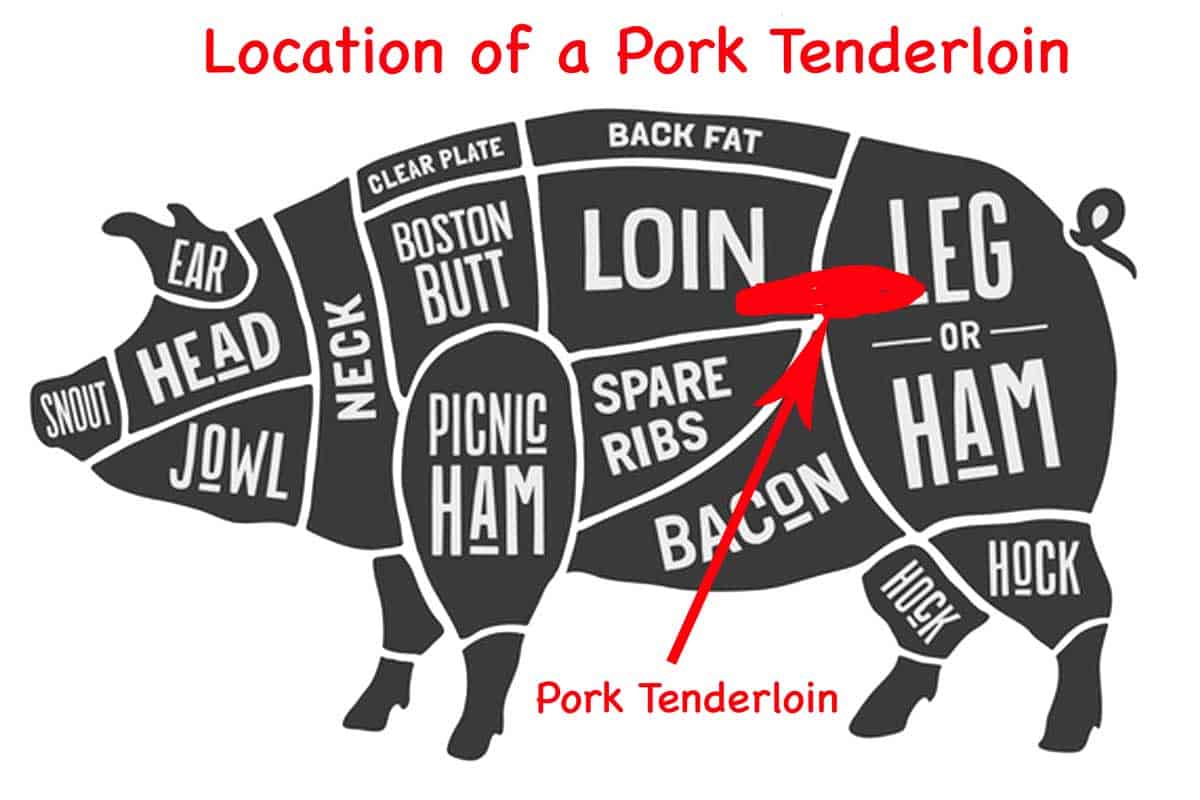
(Image licensed May 17, 2017, from Fotolia. Copyright by foxysgraphic - Fotolia. Image modified in accordance with the license.)graphic with location of country style pork ribs

Should I cover country-style pork ribs while baking?

No. Bake the ribs uncovered so dry heat can develop a browned, delicious exterior. Covering them traps steam and prevents that surface browning.

What is the best liquid smoke for oven-baked pork ribs?

I use Wright's™ liquid smoke. Look for a brand made with only smoke and water, without added artificial flavorings.

Apply a few drops to the ribs before adding the dry rub. Liquid smoke is optional but adds a smoky BBQ taste without using a grill or smoker.

🐖 More Pork Shoulder (Pork Butt) Recipes

  • Pork Butt on a Gas Grill
  • Pork Butt in the Oven
  • Crock Pot Pulled Pork

Looking for boneless country-style ribs instead? Try Boneless Country-Style Ribs on the Grill or Baked Boneless Pork Ribs.

📖The Recipe Card

BBQ bone-in country pork ribs on a plate.
Print Recipe Add to Collection Go to Collections
5 from 1 vote

Bone-In Country-Style Pork Ribs in the Oven (or Grill)

Tender bone-in country-style pork ribs from the pork shoulder, baked low and slow at 250°F until juicy and fall-apart tender. Includes an alternative grilling method.
Prep Time10 minutes mins
Cook Time3 hours hrs
Total Time3 hours hrs 10 minutes mins
Course: Main Course
Cuisine: American
Keyword: Bone-in country style ribs, country ribs, country style ribs
Servings: 2 servings
Calories: 209.8kcal
Author: Dan Mikesell AKA DrDan

Ingredients

  • 2 Bone in country style pork ribs about 1 pound each
  • 2 tablespoons Rub of your choice
  • Liquid smoke for oven method (optional)
  • BBQ sauce

Optional for Grilling

  • Wood chips for smoking (hickory preferred)
US Customary - Convert to Metric

Instructions

Prepare the ribs

  • Line a rimmed baking sheet with foil and add a rack (optional). Spray with cooking spray.
  • Coat the ribs lightly with liquid smoke (optional), then generously with dry rub. Refrigerate for a few hours if you have time.

Bake low and slow

  • Bake uncovered at 250°F, flipping every 60 minutes, until the internal temperature reaches 200°–205°F, about 2½–3 hours

Rest

  • Transfer the ribs to a plate, cover with foil, and rest for 10 minutes before serving.

Grilling alternative

  • Set up your grill for indirect heat at 250°F. Add wood chips for smoke if desired.
  • Cook the seasoned ribs over indirect heat, flipping every 60 minutes, until they reach 200°–205°F (about 2½–3 hours).

Notes

Pro Tips

  1. Use bone-in country-style ribs from the pork shoulder, not the leaner boneless ribs from the loin.
  2. Cook low and slow until 200°–205°F for fall-apart tenderness. Always check with a thermometer.
  3. Use your favorite dry rub, or make the homemade pork rub included below.
  4. For grilling, maintain steady indirect heat. See my Gas Grill Setup Guide for help. A drip pan under grill grates is helpful but not required for small batches.

My Pork Rub

Makes more than you need. Store leftover rub tightly sealed in a dark place for a few months.
  • ½ cup dark brown sugar
  • 3 tablespoons Diamond Crystal kosher salt
  • 1 tablespoon chili powder
  • 1 teaspoon garlic powder
  • 1 teaspoon onion powder
  • 1 teaspoon black pepper
Salt conversion notes:
1 teaspoon table salt = 1¼ teaspoons Morton kosher = 2 teaspoons Diamond Crystal kosher

Nutrition

Serving: 8oz | Calories: 209.8kcal | Carbohydrates: 20.3g | Protein: 14.3g | Fat: 8.3g | Saturated Fat: 2.6g | Cholesterol: 48.8mg | Sodium: 675.9mg | Sugar: 16.5g | Vitamin A: 170.1IU | Vitamin C: 2mg | Calcium: 56.7mg | Iron: 1mg

Editor's Note: Originally Published May 28, 2012. Updated with expanded options and refreshed photos.

Molly is running with her ears flopping.

Raspberry Scones (Easy Recipe)

closeup of raspberry scone

Raspberry scones made with buttermilk are light, tender, and filled with juicy fresh or frozen raspberries. Optional cream cheese makes them even more special.

Even beginners can follow the easy step-by-step instructions for bakery-style raspberry scones at home.

❓Quick Answer: Why Use Buttermilk for Raspberry Scones?

  • Buttermilk makes the scones lighter and more tender than many traditional recipes.
  • No buttermilk? No problem. Make an easy substitute with vinegar and milk, or simply use regular milk for a more traditional scone texture.
  • Buttermilk adds a slight tang that balances the sweet-tart raspberries without making the scones taste sour.
closeup of raspberry scone
[feast_advanced_jump_to]

🤔 TL;DR – Recipe Summary

  • What: Easy homemade raspberry scones made with buttermilk for a light, tender texture.
  • Why: Fresh or frozen raspberries work beautifully, with optional cream cheese for an extra-rich variation.
  • How: Mix the dough gently, shape into wedges or drop biscuit-style, and bake until golden for bakery-style raspberry scones at home.

🥣 Ingredients

flour with sugar and ingredients for scones
  • Fresh raspberries: Fresh raspberries are best, but wash, dry, and freeze them before using. Individually frozen raspberries work well, too. Avoid frozen raspberries packed in syrup.
  • Pantry staples: All-purpose flour, sugar, baking powder, baking soda, and salt.
  • Cold butter: Cold butter creates flaky layers. Cube or grate it before cutting it into the flour.
  • Buttermilk: Makes the scones lighter and more tender with a slight tang. No buttermilk? See the easy substitute below.
  • Egg and vanilla: Add structure and flavor.
  • Optional cream cheese: Freeze small cubes before mixing so they stay in distinct pockets while baking.

👨‍🍳 Quick Overview: Raspberry Scones

Preheat oven to 400°F (375° convection). Mix the flour, sugar, salt, baking powder, and baking soda. Cut in cold butter.

cutting butter into flour in a white bowl

Gently fold in the frozen raspberries and optional cream cheese.

adding frozen berries and cream cheese to the dry mixture

Whisk together the egg, vanilla, and buttermilk. Drizzle into the flour mixture and stir gently until combined.

adding wet mixture into dry mix with berries

Form into wedges or drop biscuit-style onto a baking sheet, then brush with egg wash and sprinkle with sugar.

brushing the raw scone with an egg wash

Bake at 400°F (375° convection) until golden brown, about 25 minutes.

raspberry scones on a cooling rack

This is an overview of the recipe. Complete instructions are in the Recipe Card below.

🐄 No Buttermilk? Here's an Easy Substitute

If you don't have buttermilk, add 1 tablespoon of lemon juice or white vinegar to a measuring cup, then add enough milk to make 1 cup. Let it sit for about 5 minutes before using.

For this recipe, add 2 teaspoons of lemon juice or vinegar to a measuring cup, then add enough milk to make ¾ cup. Let it sit for about 5 minutes before using.

You can also use regular milk if that's what you have. The scones will still be delicious but will have a slightly more traditional texture.

👍 The Raspberries and Substitutes

Raspberries: Fresh raspberries have the best texture and flavor, but they should be washed, dried, and frozen before mixing into the dough. You may also use individually flash-frozen raspberries. Avoid frozen raspberries packed in syrup since they add too much moisture.

Blueberries: Blueberries are an excellent substitute and don't need to be frozen before mixing. Fresh or frozen blueberries both work well for delicious blueberry buttermilk scones, although frozen berries may add a minute or two to the baking time.

Other fruit: Blackberries, chopped strawberries, diced peaches, and cherries all work well. Cut larger fruit into bite-size pieces so the scones hold together and bake evenly. A frozen mixed berry blend is another great option.

✔️ Pro Tips

  • Keep everything cold: Cold butter, buttermilk, egg, raspberries, and optional cream cheese help create light, flaky scones.
  • Handle the dough gently: Mix just until combined and avoid overworking the dough, which can make the scones tough.
  • Cream cheese is optional: Use full-fat cream cheese and freeze the cubes before mixing so they stay in distinct pockets while baking.
  • Adjust the dough if needed: The dough should be slightly sticky but hold its shape. If it's too wet, sprinkle in a little flour. If it's dry and crumbly, add a teaspoon or two of buttermilk until it comes together.
  • Use aluminum-free baking powder: It helps prevent a bitter aftertaste in baked goods.

❄️ How to Store Scones

Store plain raspberry scones at room temperature in an airtight container for 2–3 days or refrigerate for 4–5 days.

If your scones contain cream cheese, refrigerate them within 2 hours and store for up to 4–5 days. You can also freeze them for up to 3 months.

📖 More Scone Recipes

Whole Wheat Blueberry Scones

Low-Fat Blueberry Scones

📖The Recipe Card

closeup of raspberry scone
Print Recipe Add to Collection Go to Collections
2 from 1 vote

Easy Raspberry Scones with Buttermilk

Easy raspberry scones made with buttermilk for a light, tender texture and filled with fresh or frozen raspberries. Optional cream cheese makes them even more special.
Prep Time15 minutes mins
Cook Time25 minutes mins
Total Time40 minutes mins
Course: Breakfast
Cuisine: American
Keyword: Raspberry scones
Servings: 8 scones
Calories: 315kcal
Author: Dan Mikesell AKA DrDan

Ingredients

Fillings

  • 1 cup raspberries frozen
  • 4 oz cream cheese optional

Dry

  • 2 cups AP flour
  • ¼ cup sugar
  • ½ teaspoon salt
  • 2 teaspoon baking powder
  • ⅕ teaspoon baking soda
  • 6 tablespoons butter

Wet

  • ¾ cup buttermilk
  • 1 egg
  • ½ teaspoon vanilla

Topping

  • 1 egg
  • 1 teaspoon water
  • sugar
US Customary - Convert to Metric

Instructions

  • Wash and dry 1-1½ cups of fresh raspberries, then freeze them for about 2 hours (or use frozen berries). If using cream cheese, cut 4 oz of cream cheese into ¼-½ inch cubes and freeze it, too.
    raspberries and cream cheese on a tray
  • Preheat oven to 400°F (375° convection). Mix dry ingredients: 2 cups AP flour, ¼ cup sugar, ½ teaspoon salt, 2 teaspoons baking powder, and ¼ teaspoon baking soda. Mix well with a fork.
    flour with sugar and ingredients for scones
  • Chop six tablespoons of cold butter into small cubes. With a large fork, cut the butter into the dry mix until crumbly.
    cutting butter into flour in a white bowl
  • Gently fold the frozen raspberries and optional cream cheese into the flour mixture.
    adding frozen berries and cream cheese to the dry mixture
  • Whisk together the wet components: 1 egg, ½ teaspoon vanilla, and ¾ cup buttermilk. See tips below if you need to substitute for the buttermilk.
    whipping egg with other wet ingredient in a medium bowl
  • Drizzle in the wet to the dry while stirring gently until just until combined. The dough should be slightly sticky but hold its shape. Add a little flour if needed or a teaspoon or two of buttermilk if too dry.
    adding wet mixture into dry mix with berries
  • Form the dough into drop biscuit-style pieces or make wedge-style from an 8-inch disk. Move onto a parchment-lined baking sheet.
    cutting scones from the dough on a bllack board
  • Whisk an egg with 1 teaspoon of water. Brush the scones with the egg wash.
    brushing the raw scone with an egg wash
  • Sprinkle the top with a little sugar.
    sprinkling the scone with sugar before baking
  • Bake until golden brown, about 25 minutes.
    raspberry scones on a cooling rack

Notes

Pro Tips:

  1. Keep everything cold.
  2. Use fresh or individually frozen raspberries—not berries packed in syrup.
  3. Cream cheese is optional; freeze the cubes first.
  4. The dough should be slightly sticky. Add a little flour if wet or a teaspoon or two of buttermilk if dry.
  5. Use aluminum-free baking powder.
  6. To make a buttermilk substitute: Add 1 tablespoon of lemon juice or white vinegar to a 1-cup measuring cup and fill with milk. Stir and let set for 5 minutes before using.
  7. Storage: room temperature 2–3 days; always refrigerate cream cheese scones; freeze up to 3 months.

Nutrition

Serving: 1scone | Calories: 315kcal | Carbohydrates: 36g | Protein: 7g | Fat: 16g | Saturated Fat: 9g | Polyunsaturated Fat: 1g | Monounsaturated Fat: 3g | Cholesterol: 85mg | Sodium: 386mg | Potassium: 124mg | Fiber: 2g | Sugar: 10g | Vitamin A: 500IU | Vitamin C: 7.4mg | Calcium: 130mg | Iron: 2mg

Originally published May 22, 2012. Updated with expanded options, refreshed photos, and a table of contents to help navigation.

dogs playing with a ball

Easiest Crock Pot BBQ Chicken

a shredded BBQ chicken sandwich on a white plate

One of the easiest recipes ever—tasty BBQ chicken in under 4 hours. Great for family gatherings and parties or just when you want to be lazy for an easy family dinner.

close up picture of a bbq chicken sandwich on a bun on a white plate

[feast_advanced_jump_to]

Blue ribbon divider used for visual effect

Introduction

Some people might call this pulled chicken or shredded chicken. Most will use this for sandwiches, but it works well in a wrap, on nachos, and so much more.

I have done this in the past and never thought much of it. Usually, it was with some salsa and chicken for Mexican, but BBQ more in the summer. Both recipes have grown into full recipes. But with the BBQ, I just never formalized it.

I have seen a number of these recipes popping up around the net. Most are identical, and there are some issues with the suggested cooking time. Most had the Worcestershire sauce and some added sugar which I felt was a good idea. Of course, they were too big for my purpose and needed to be cut down the size.

See other crock pot sandwich recipes, like our Crock Pot Shredded Pork Tenderloin, Crock Pot French Dip Sandwiches, Crock Pot Pulled Pork Loin, and Crock Pot Pulled Boston Butt.

👨‍🍳How to make this recipe

  1. Trim skinless boneless chicken breasts of visible fat and cut them into 2-3 chunks each.
  2. Mix the BBQ sauce of your choice in a 2 quart or larger crock pot with Worcestershire sauce (optional but suggested). Add brown sugar to taste, depending on the sweetness of the BBQ sauce.
  3. Add chicken and mix well to cover the chicken with sauce.
  4. Cover and cook on low at 2 ½ hours, then check the internal temperature of the chicken. If 165° or above, remove, shred and return to pot. If not 165° yet, extend the cooking time by checking the internal temperature every 15-20 minutes. Once you reach 165°, remove, shred and return to the crock pot for 15 to 20 minutes.

Ingredients

🐓The Chicken

I suggest using skinless boneless chicken breast for this. Chicken with skin can be used, but you will discard the skin.

It will work if you want to use skinless thighs, but you need to get to the 185° internal temperature range to shred well. It is probably about 3 to 3 ½ hours before shredding.

🥣The Sauce

I use Original Sweet Baby Ray's BBQ sauce but use the sauce of your choice. I recommend the Worcestershire sauce, which will make the taste pop, but it is optional.

The sugar is more to taste and if you're using a honey-based sauce, proceed with care.

The amount of sauce is important since the chicken will release some fluid, and you don't want it soupy.

❓FAQs

Can I cook this recipe on high?

I suggest cooking on low. The final results are more controllable. High may zoom right through your endpoint since some crock pots run too hot on high, and the sauce has sugar that can burn.

If you must cook on high, please watch the internal temperature of the chicken and remove it to shred at 165° and watch the edges of the sauce for burning.

How to store leftover shredded BBQ chicken.

Store airtight in the refrigerator for 3-4 days. Good frozen for 3-4 months if sealed airtight.

📖Crock Pot BBQ Recipes

Crock Pot Shredded Pork Tenderloin

Crock Pot Pulled Pork from Butt the Right Way

Crock Pot Pulled Pork Loin

Crock Pot Baby Back Ribs

Blue ribbon divider used for visual effect
↑Jump to Table of Contents

This recipe is listed in these categories. See them for more similar recipes.

BBQ Recipes, Chicken Breast Recipes, Chicken Recipes, Crock Pot Recipes, Mini Crock Pot Recipes, Small Crock Pots Recipes

Have you tried this recipe, or have a question? Join the community discussion in the comments.

Step-by-Step Photo Instructions

raw chicken with crock pot and seasoning

Only four ingredients

trimmed chicken breasts on a red board

Trim two skinless boneless chicken breasts of visible fat and cut them into 2-3 chunks each

adding brown sugar to sauce in the crock pot

In a 2 quart or larger crock pot, mix ¾ cup BBQ sauce of your choice with 1 ½ teaspoon Worcestershire sauce (optional but suggested). Add up to 1 tablespoon of brown sugar to taste, depending on the sweetness of the BBQ sauce.

mixing chicken into the sauce in the crock pot

Add chicken and mix well to cover the chicken with sauce.

shredding cooked chicken with forks on a white board

Cover and cook on low for 3 hours total, but at 2 ½ hours, check the internal temperature of the chicken. If 165° or above, remove, shred and return to pot. If not 165° yet, extend the cooking time by checking the internal temperature every 15-20 minutes. Once you reach 165°, then remove, shred and return.

shredded BBQ chicken in a spoon over the crock pot

Cook 15-20 minutes more after the chicken is returned from shredding.

making a shredded BBQ chicken sandwich
↑Jump to Table of Contents

📖The Recipe Card

a shredded BBQ chicken sandwich on a white plate
Print Recipe Add to Collection Go to Collections
4.67 from 3 votes

Easiest Crock Pot BBQ Chicken

This is one of the easiest recipes ever—tasty BBQ chicken in under 4 hours. Great for family gatherings and parties or just when you want to be lazy for an easy family dinner.
Prep Time10 minutes mins
Cook Time3 hours hrs 20 minutes mins
Total Time3 hours hrs 30 minutes mins
Course: BBQ
Cuisine: American
Keyword: BBQ Chicken, Crock Pot Chicken
Servings: 6
Calories: 171kcal
Author: Dan Mikesell AKA DrDan

Ingredients

  • 1½ pounds boneless skinless chicken breasts plus or minus a little
  • ¾ cup BBQ sauce of choice
  • 1 tablespoon brown sugar vary by the sweetness of the sauce
  • 1½ teaspoon Worcestershire sauce optional but suggested
US Customary - Convert to Metric

Instructions

  • Trim two skinless boneless chicken breast of visible fat and cut into 2-3 chunks each.
    trimmed chicken breasts on a red board
  • In a 2 quart or larger crock pot, mix ¾ cup BBQ sauce of your choice with 1 ½ teaspoon Worcestershire sauce (optional but suggested). Add up to 1 tablespoon brown sugar to taste depending on the sweetness of the BBQ sauce.
    adding brown sugar to sauce in the crock pot
  • Add chicken and mix well to cover the chicken with sauce.
    mixing chicken into the sauce in the crock pot
  • Cover and cook on low for 3 hours total, but at 2 ½ hours check the internal temperature of the chicken. If 165° or above, remove, shred and return to pot. If not 165° yet, extend the cooking time by checking the internal temperature every 15-20 minutes. Once you reach 165°, then remove, shred and return.
    shredding cooked chicken with forks on a white board
  • Cook 15-20 minutes more after the chicken is returned from shredding.
    shredded BBQ chicken in a spoon over the crock pot

Notes

Pro Tips

  1. Scale to the size you need. Consider about ¼ pound of meat per sandwich.
  2. You may use boneless skinless chicken thighs but take them to about 180°-185° internal temperature which should take an extra 30 or so minutes. They will be more tender and shred easier if cooked to a higher temperature.
  3. The chicken releases fluid so be careful not to add too much sauce or it will be soupy.
  4. If you overcook chicken breast, it will be dry.
  5. The suggested amounts of  Worcestershire sauce and brown sugar will be just right for most BBQ sauce.
  6. Good refrigerated for 3-4 days and will freeze well for 3-4 months.

Nutrition

Calories: 171kcal | Carbohydrates: 15g | Protein: 23g | Fat: 3g | Saturated Fat: 1g | Monounsaturated Fat: 1g | Cholesterol: 66mg | Sodium: 475mg | Potassium: 9mg | Sugar: 14g | Calcium: 2mg | Iron: 0.9mg

Originally Published: May 5, 2018. Updated with expanded options, refreshed photos, and a table of contents to help navigation.

image of Molly and Lilly dogs having a game of chase

Creamy Mashed Cauliflower—Fresh or Frozen

mashed cauliflower on plate

This creamy mashed cauliflower recipe is quick and easy with either fresh or frozen cauliflower. It is great for any low-caloric or low-carb diet with excellent taste and texture.

mashed cauliflower on plate

[feast_advanced_jump_to]

Blue ribbon divider used for visual effect

Introduction

The secret to great-tasting mashed cauliflower lies in how you flavor them. Some butter, garlic, and sour cream go a long way in making you forget mashed potatoes.

Cauliflower is a great way to cut down carbs but also calories. Just cooked raw potato vs. cauliflower is about a 4:1 ratio in calories. But considering what you then do to them with butter, heavy cream, and other things, your nutritional savings will vary by what you are comparing.

I can't tell it from real garlic mashed potatoes, and really good ones at that — a good and very healthy side dish. Maybe you should cut the butter a little to call it healthy.

👨‍🍳How to make this recipe

  1. Use fresh trimmed cauliflower or thawed frozen cauliflower.
  2. Cook the cauliflower to be tender with a fork. For fresh, you can boil or steam for about 15 minutes. Or microwave covered with a bit of water for 4-5 minutes. For frozen, cook according to package instructions but usually for 4-5 minutes in the microwave.
  3. While cooking cauliflower, put all remaining ingredients in the large food processor. Place hot cauliflower in the processor and puree. Open and occasionally check to be sure the stems are incorporated.
  4. Serve hot.

The Cauliflower

You can get your cauliflower any way you want. Frozen, fresh, or riced.

If using fresh cauliflower, one medium head will weigh about 1 ½ to 2 pounds and yield about 75% of that weight after trimming and cooking. So adjust accordingly. I think it is about the same as two 12 oz frozen packages.

You may steam the fresh cauliflower for about 15 minutes or boil it for about 10 minutes. You need to get to tender by fork so that it will vary. You can also microwave with a bit of water, usually for 4-5 minutes.

Frozen Cauliflower is very convenient for me. The packages were 1 pound, but now in 2021 are usually only 12 oz. Cook according to package instructions and can vary a bit due to microwave strength. Again you are looking for tender.

There are also proceeded types of cauliflower now available and cook according to their instructions.

🥘Make It Special

I think a little dairy is needed. In mashed potatoes, I add milk and butter. You can do that here, also.

But I feel that the cauliflower needs a bit more flavor. For a special touch, you need some garlic, more butter, a touch of sour cream, and perhaps some cheese of your choice.

The garlic is somewhat of a to-taste thing like the salt. I suggest two cloves of minced or crushed garlic /pound of cauliflower, but my wife will double that amount.

You can add some Parmesan cheese for a special taste. 2-3 tablespoons grated per pound of cauliflower. Or a half teaspoon of thyme or rosemary.

FAQs

Can I use a hand mixer, or is a food processor required?

The better mixed the cauliflower is, the creamier it will be. The food processor is needed for that. If you don't mind some chunkiness, a hand mixer will do but it will not process stems well.

How to store mashed cauliflower.

Mashed cauliflower stores so well it is perfect for making ahead and reheating.

Refrigerated should be good for 3-4 days and frozen for several months.

📖Cauliflower Recipes

Cheesy Cauliflower Casserole A personal favorite of ours. This is my version of Crack Mashed Cauliflower.

Parmesan Roasted Cauliflower

Blue ribbon divider used for visual effect
↑Jump to Table of Contents

This recipe is listed in these categories. See them for more similar recipes.

Low Carb/Keto Recipes, Side Dish Recipes

Have you tried this recipe, or have a question? Join the community discussion in the comments.

Step-by-Step Photo Instructions

trimmed cauliflower on a black board

Get your cauliflower either by trimming a medium head or frozen. A bag of frozen is about ¾ pounds now, and a trimmed medium head of raw cauliflower will be approximately 1 ½ pounds.

putting cauliflower into microwave

Cook the cauliflower to be tender with a fork. For fresh, you can boil or steam for about 15 minutes. Or microwave covered with a bit of water for 4-5 minutes. For frozen, cook according to package instructions but usually for 4-5 minutes in the microwave.

cauliflower in the food processor

Put all remaining ingredients in the large food processor. Place hot cauliflower in the processor and puree. Open occasionally and check to be sure the stems are incorporated.

mashed cauliflower in a bowl
↑Jump to Table of Contents

📖The Recipe Card

mashed cauliflower on plate
Print Recipe Add to Collection Go to Collections

Creamy Mashed Cauliflower—Fresh or Frozen

Your keto diet just got a lot easier with this wonderful mashed cauliflower recipe. Great for any low-carb diet. So quick and easy with a microwave and these step by step photo instructions.
Prep Time6 minutes mins
Cook Time8 minutes mins
Total Time14 minutes mins
Course: Vegetables
Cuisine: American
Keyword: Keto Caulifower, Mashed Cauliflower
Servings: 4
Calories: 77kcal
Author: Dan Mikesell AKA DrDan

Ingredients

  • ¾ lb cauliflower
  • 1 tablespoon sour cream
  • 2 tablespoons butter decrease if you want lower fat
  • 2 cloves garlic minced or crushed
  • ¼ teaspoon Kosher salt to taste
  • pepper to taste

Instructions

  • Get your cauliflower either by trimming a medium head or frozen. A bag of frozen is about ¾ pounds now and a trimmed medium head of raw cauliflower will be about 1 ½ pounds. Adjust the ingredients to compensate
    trimmed cauliflower on a black board
  • Cook the cauliflower to being tender by a fork. For fresh, you can boil, or steam for about 15 minutes. Or microwave covered with a bit of water for 4-5 minutes. For frozen, cook according to package instructions but usually 4-5 minutes in the microwave.
    Putting cauliflower into the microwave.
  • While cauliflower is cooking, put all remaining ingredients in the large food processor. Place hot cauliflower in the processor and puree. Open and occasionally check to be sure the stems are incorporated.
    cauliflower in the food processor
  • Serve hot.
    mashed cauliflower in a bowl

Notes

Pro tips:

  1. A food blender is required to get this right.
  2. This is written for ¾ pound (one frozen bag) of cauliflower. If using a medium head of fresh cauliflower, it will be close to 1 ½ pounds, so double the there ingredients.
  3. You can vary the other ingredients for taste, Grated Parmesan about 2-3 tablespoons, a half teaspoon of thyme or rosemary if that is your taste.
  4. Good in refrigerator for 3-4 days and may be frozen for several months.
 

Nutrition

Calories: 77kcal | Carbohydrates: 4g | Protein: 1g | Fat: 6g | Saturated Fat: 3g | Polyunsaturated Fat: 0g | Monounsaturated Fat: 0g | Trans Fat: 0g | Cholesterol: 16mg | Sodium: 147mg | Potassium: 254mg | Fiber: 1g | Sugar: 1g | Vitamin A: 175IU | Vitamin C: 41.5mg | Calcium: 26mg | Iron: 0.4mg

Editor's Note: Originally posted May 5, 2010. Updated with expanded options, refreshed photos, and a table of contents to help navigation.

Lilly puppy relaxing

Crock Pot White Chocolate Almond Clusters

white chocolate almond clusters on a white plate

Super easy and delicious white chocolate almond clusters are the perfect gift for the holidays or for any special occasion. Simple with these step-by-step photo instructions for the perfect white chocolate candy.

white chocolate almond clusters on a white plate

[feast_advanced_jump_to]

Blue ribbon divider used for visual effect

Introduction

Everybody loves great candy, and it makes awesome gifts. What would be better than to give great candy that you made yourself? Just don't tell them how easy it is to make.

I have a wonderful chocolate peanut cluster recipe that many people use for holiday gifts, but it is time to change it up a bit. This kicks up that recipe a few notches.

My Rating

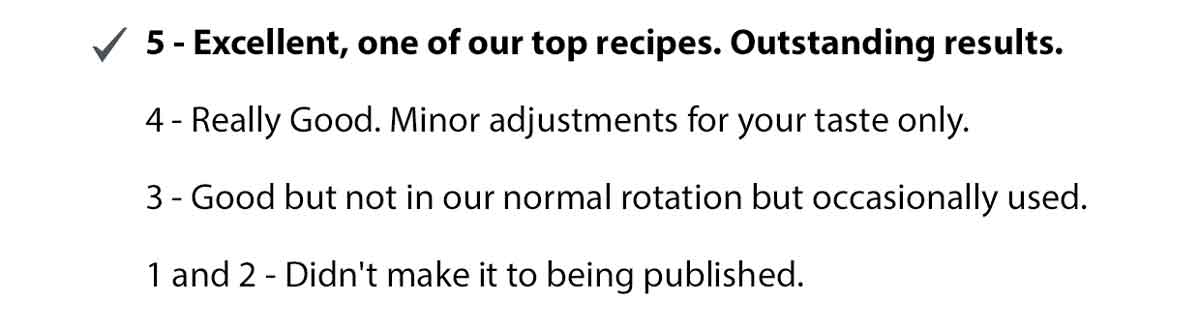
My rating system. Great 5 out of 5

This is the easiest 5 rating of the year.

What is White Chocolate?

The FDA said to be called white chocolate; a product contains at least 20% cocoa butter, 14% milk solids, and 3.5% milkfat — and no more than 55% sugar or other sweeteners. There is a bit more to it, but that is enough for us.  FDA Offical Definition

Note that there is no cocoa powder in white chocolate. Obviously, that would no longer be white. Some will argue it is not chocolate without cocoa powder. That is an argument for another day.

Almond Bark vs. Candy Melts

Candy Melts, candy wafers, chocolate coating, and almond bark are products made for coating without needing to temper chocolate or other special handling.

Almond Bark (which does not contain almonds) is a bit old school, and in recent years, we see more "candy melt" products available. These candy making components will have partly hydronated oil that will firm up the coating and have no cocoa butter.

Think of them all as interchangeable. They will help you produce excellent results with no fuss.

Some people like the results with just almond bark/candy melts and only use these for all the "chocolate" in a recipe like this. I want better.

What "chocolate" to use?

White cooking chips are almost never labeled as chocolate since they don't meet the minimum requirements. Many are just downright bad.

Since the main "feature" of this recipe is the coating, I went with one of the top-rated chips from Ghirardelli. I added a bar of white cooking chocolate for more cocoa butter. I also used some "Almond Bark."

NOTE: This is NOT a sponsored post, and I have no relationship of any type with Ghirardelli. I mention them by name since it is a commonly available good quality brand. There are other excellent choices also. But the quality of the components is important for top quality results.

✔️Tips

The Nuts

I used roasted almonds this time, but you can add almost anything. Since we are using a closed crock pot, you don't want anything with significant water.

Chocolate to Nut Ratio

You will want about 1 ½ pounds of "chocolate" to 1 pound of nuts. It can be a little more or a little less.

I used an 11 oz bag of chips, 4 oz of white chocolate baking bar, and 10 oz of almond bark (5 squares of the brand I used). So 25 oz of "chocolate."

The serving size is about one tablespoon, which is about one heaping kitchen teaspoon. Make them a little small says the guy who has eaten hundreds of these.

❄️Storage

These candies are good at room temperature for about 5 days. I do not suggest freezing chocolate.

♨️Cooking

I prefer a crockpot for this. It can be done on the stovetop, but you will need to be very careful about overheating, or there will be texture issues.

Crock Pot

Due to some reported issues that may be related to smaller crock pots, even though the recipe fits in a 3 quart, please use a full size crock pot.

Using a large crock pot for the small recipe, it can heat faster, so be sure to check at 60 and 90 minutes into cooking–but it will probably still take the full 2 hours.

The crock pot needs to be on low. This is not a recipe to be cooked on high. On low, most crock pots slowly will get to 200° over 4 or more hours. So a great slow heat to melt chocolate.

On high, some crock pots may run 250°+. They shouldn't, but they do. Also, the run-up to full temperature is much faster on the high setting. This adds a good chance to overheat the chocolate and "scorching" the chocolate.

Stovetop

You can do this in a large, heavy pot on the stovetop over low heat. You will need to add everything but the nuts. Stand there and frequently stir until the chocolate melts and comes together completely. This will take about 15 minutes to complete.  Stir in the nuts at the end.

The crock version takes only a few minutes. Then you come back when done. I always do the crock pot method.

📖Crock Pot Candies

Crock Pot Chocolate Peanut Clusters

Crock Pot Fudge

Banner for Christmas Candy Recipes

This recipe is part of Christmas Candy Recipes. Check out other easy candy recipes.

Blue ribbon divider used for visual effect
↑Jump to Table of Contents

This recipe is listed in these categories. See them for more similar recipes.

101's Best Recipes, Candy Recipes, Crock Pot Recipes, Holiday Recipes

Have you tried this recipe, or have a question? Join the community discussion in the comments.

Step-by-Step Photo Instructions

almonds and chocolate

Decide on the "Chocolate" you are using. I use 11 oz. of  Ghirardelli chips, one four oz bar of Ghirardelli white baking chocolate, and 10 oz. of white almond bark.

spraying a crock pot with PAM

Spray a full size crock pot with a good coat of PAM.

almonds and chocolate in the crock pot

Add 1 pound of almonds to the crock pot, then top with all the "chocolate." Cover and cook on low until the chocolate melts enough to mix together.

mixing melted chocolate with the nuts with a spatula

In most crock pots, that should be about 2 hours, but some crock pots are a bit hotter and may have a hotter area. Stir and check at 60 and 90 minutes. When it is melted and combined completely, you are done.

spooning melted candy onto parchment paper

Mix well, then spoon out onto parchment paper. The serving size is about one tablespoon, which is about one heaping kitchen teaspoon. I like to use two spoons: one to scoop and one to push it onto the parchment.

almond clusters cooking on parchment paper

Make them a little small with 3-4 almonds each and mix the crock pot occasionally while spooning.

almond clusters on a red plate

Allow to cool for about 30 minutes.

↑Jump to Table of Contents

📖The Recipe Card

white chocolate almond clusters on a white plate
Print Recipe Add to Collection Go to Collections
4.67 from 15 votes

Crock Pot White Chocolate Almond Clusters

Super easy and delicious white chocolate almond clusters are the perfect gift for the holidays or for any special occasion. Simple with these step by step photo instruction for the perfect white chocolate candy.
Prep Time10 minutes mins
Cook Time2 hours hrs
Total Time2 hours hrs 10 minutes mins
Course: Appetizer
Cuisine: American
Keyword: Crock Pot Candy, White Chocolate Almond Clusters, White Chocolate Candy
Servings: 80
Calories: 82kcal
Author: Dan Mikesell AKA DrDan

Ingredients

  • 1 pound almonds
  • 11 oz white chips Ghirardelli preferred
  • 4 oz white chocolate bar Ghirardelli preferred
  • 10 oz vanilla almond bark or candy melts
US Customary - Convert to Metric

Instructions

  • Decide on the "Chocolate" you are using. I suggest 11 oz. of Ghirardelli chips (one bag), one four oz bar of Ghirardelli white baking chocolate and 10 oz. of white almond bark.
    almonds and chocolate
  • Spray a full size crock pot with a good coat of PAM.
    spraying a crock pot with PAM
  • Add 1 pound of almonds to the crock pot, then top with all the "chocolate." Cover and cook on low until the chocolate melts enough to mix together.
    almonds and chocolate in the crock pot
  • In most crock pots, that should be about 2 hours, but some crock pots are a bit hotter and may have a hotter area. Stir and check at 60 and 90 minutes. When it is melted and combines completely, you are done.
    mixing melted chocolate with the nuts with a spatula
  • Mix well, then spoon out onto parchment paper. The serving size is about one tablespoon, which is about one heaping kitchen teaspoon. I like to use two spoons: one to scoop and one to push it onto the parchment.
    spooning melted candy onto parchment paper
  • Make them a little small with 3-4 almonds each and mix the crock pot occasionally while spooning.
    almond clusters cooking on parchment paper
  • Allow to cool for about 30 minutes.
    white chocolate almond clusters on a white plate

Notes

Pro Tips

  1. You need a ratio of about 1 pound of nuts to 1 ½ pounds of "chocolate." The chocolate can be white chips, white chocolate baking bars, or white almond bark/candy melts.
  2. Do not cook on high. The faster run up on temperature can scorch the chocolate.
  3. Since the coating is the main feature of this recipe, you need good quality. There is a lot of bad white "chocolate" out there. I used Ghirardelli which is good quality.
  4. I added the baking chocolate bar to get more cocoa butter and an even better taste.
  5. Think of almond bark and candy "melts" of various types as interchangeable.
  6. Most crock pots should be 2 hours, but some crock pots are a bit hotter and may have a hotter area. Stir and check at 60 and 90 minutes. When it is melted and combines completely, you are done. Overcooking will scorch the chocolate.
  7. I suggest getting about 4 almonds in most clusters as you spoon them out. They are very rich, and that is the size I think most people will want.
  8. I got at least 80 pieces, but I had some bigger pieces. I think if you keep to the 4 almond per piece range, you will be closer to 100.
  9. An easy recipe to double or cut in half.
  10. Store in an airtight container. If refrigerated then good for several weeks. Freeze if you must to store longer but freeze can affect chocolate and I generally do not recommend it.

Nutrition

Calories: 82kcal | Carbohydrates: 7g | Protein: 1g | Fat: 6g | Saturated Fat: 3g | Cholesterol: 0.3mg | Sodium: 15mg | Potassium: 36mg | Fiber: 1g | Sugar: 6g | Vitamin A: 5IU | Vitamin C: 0.1mg | Calcium: 20mg | Iron: 0.2mg

Originally Published December 2, 2018. Updated with expanded options, refreshed photos, and a table of contents to help navigation.

image of dogs running next to each other in snow

Crock Pot Cheeseburger Soup

Cheeseburger Soup on a spoon

This easy Crock Pot Cheeseburger Soup is loaded with ground beef, potatoes, and vegetables in a rich, cheesy broth. Velveeta makes it smooth and creamy, and you can add sharp cheddar for extra cheese flavor.

It's a hearty, comforting slow-cooker cheeseburger soup, perfect for cold weather. Make it thick and creamy, or double the butter and flour for an extra-thick cheeseburger chowder.

⏱️ How long does cheeseburger soup take in a crock pot?

  • COOK: LOW for 4–5 hours or HIGH for 2–2½ hours, until the potatoes are tender.
  • ADD: Roux-thickened milk and cheese.
  • FINISH: Cook on HIGH for another 30–45 minutes, until melted and creamy.
  • TOTAL: About 5–6 hours on LOW or 3–3½ hours on HIGH, including preparation.
Cheeseburger Soup on a spoon.
[feast_advanced_jump_to]

quote mark
Featured Comment by Amy:
⭐⭐⭐⭐⭐
"This was delicious!… My husband and I have enough for leftovers, but the soup seems to be disappearing fast. So good on a cold December night."

📋 TL;DR — Recipe Summary

  • What: A thick, creamy Crock Pot Cheeseburger Soup loaded with ground beef, potatoes, vegetables, and melted cheese.
  • Why: An easy, hearty comfort food dinner that's perfect for cold weather. Make a full batch or a smaller half batch.
  • How: Cook the vegetables until tender, then add browned ground beef, roux-thickened milk, and cheese. Double the butter and flour for an extra-thick cheeseburger chowder.

🍔 Ingredients

raw burger with vegetables and ingredients for soup.
  • Ground beef: Lean ground beef is preferred, but ground turkey or chicken also works.
  • Cheese: Velveeta gives the smoothest, creamiest results. Replace part of it with sharp cheddar for more cheese flavor.
  • Potatoes: Russet potatoes are preferred for their starch and creamy texture. Frozen diced potatoes also work.
  • Vegetables: Carrots, celery, and onion add flavor and texture.
  • Dairy: Milk, butter, and sour cream make the creamy cheese sauce.
  • Chicken broth: Use low-sodium broth to control the salt.
  • Flour: Combined with butter to make a roux that thickens the soup.
  • Seasonings: Salt and pepper, with optional dried parsley and basil.

👨‍🍳 How to Make Crock Pot Cheeseburger Soup

1. Prepare the potatoes, carrots, celery, and onion.

chopped vegetables on a black board.

2. Add the prepared vegetables, chicken broth, and optional seasonings to the crock pot. Cook on LOW for 4–5 hours or HIGH for 2–2½ hours, until the potatoes are tender.

pouring broth into crock pot with vegetables.

3. Brown ground beef. Drain the beef and add to the crock pot.

browning ground meat in a black pan.

4. Make a roux with butter and flour. Gradually whisk in the milk and simmer until thickened. Add the salt, pepper, and sour cream as it thickens.

pouring milk into the pan with the roux and whisk.

✅ Pro Tip: For an extra-thick cheeseburger chowder, double the butter and flour to 6 tablespoons each. Keep the milk amount the same.

5. Add the thickened milk mixture and cheese to the crock pot. Cook on HIGH for another 30–45 minutes, until the cheese melts and the soup is thick and creamy.

soup on a ladel over a crock pot.

For more details, keep reading. See the recipe card below for complete instructions and to print.

✔️ Tips and Options for the Best Cheeseburger Soup

  • Ground meat: Lean ground beef is preferred, but ground turkey or chicken also works. Brown and drain the meat before adding it to the crock pot.
  • Potatoes: Russet potatoes work best because their starch helps give the soup a creamy texture. Cut into ½-inch cubes for even cooking. Frozen diced potatoes also work.
  • Cheese: Velveeta melts smoothly and gives the soup its creamy texture. Replace part of it with sharp cheddar for more cheese flavor. Avoid using only sharp cheddar, which may become grainy.
  • Seasonings: Dried parsley and basil are optional. Add additional salt and pepper to taste after adding the cheese.
  • Toppings: Add crispy bacon for bacon cheeseburger soup, or try diced tomatoes, chopped dill pickles, or green onions.

⬇️ Small-Batch Cheeseburger Soup (Half Recipe)

A full recipe makes 8 servings and needs a 5-quart or larger crock pot. A half recipe makes 4 servings and fits in a 2½-quart or larger crock pot.

  • Adjust the recipe card servings from 8 to 4.
  • Use the ingredient amounts in the adjusted list, not the instructions.
  • Cooking times remain the same. Cook until the potatoes are tender.

❄️ Storage and Reheating

  • Refrigerate: Store leftovers in an airtight container in the refrigerator for up to 4 days.
  • Freeze: Not recommended. Potatoes may become mushy, and the milk-and-cheese broth can separate when thawed.
  • Reheat: Warm gently in a saucepan over low heat, stirring frequently. Add a splash of milk if the soup has thickened too much. Avoid boiling.

📝 More Crock Pot Soup Recipes

  • Crock Pot French Onion Soup
  • Crock Pot Ham and Bean Soup
  • Crock Pot Chicken Noodle Soup
  • Crock Pot Broccoli Cheese Soup

📖The Recipe Card

Cheeseburger Soup on a spoon
Print Recipe Add to Collection Go to Collections
5 from 2 votes

Crock Pot Cheeseburger Soup

This easy Crock Pot Cheeseburger Soup combines ground beef, potatoes, and vegetables in a rich, cheesy broth. Velveeta makes it smooth and creamy, with an option for extra-thick cheeseburger chowder.
Prep Time20 minutes mins
Cook Time5 hours hrs
Total Time5 hours hrs 20 minutes mins
Course: Soup
Cuisine: American
Keyword: Cheeseburger soup, crockpot cheeseburger soup
Servings: 8 a
Calories: 431.3kcal
Author: Dan Mikesell AKA DrDan

Ingredients

  • 3-4 medium potatoes Russets preferred
  • 2 medium carrots
  • 1 rib celery
  • 1 small onion
  • 2 cups chicken broth low sodium
  • 1 teaspoon dry parsley optional
  • 1 teaspoon dry basil optional
  • 1 pound ground beef
  • 3 tablespoons butter
  • 3 tablespoons flour
  • 2 ½ cups milk
  • ¼ cup sour cream
  • ½ teaspoon salt
  • ½ teaspoon pepper
  • 1 pound Velveeta Part replaceable by sharp cheddar.
US Customary - Convert to Metric

Instructions

  • Prepare the vegetables. Peel and chop 3–4 medium potatoes into ½-inch cubes (about 3–4 cups). Shred 2 medium carrots, and chop 1 small onion and 1 rib of celery.
    chopped vegetables on a black board
  • Start the crock pot. Add the prepared vegetables, 2 cups of low-sodium chicken broth, and optional parsley and basil to a 5-quart or larger crock pot. Cook on LOW for 4–5 hours or HIGH for 2–2½ hours, until the potatoes are tender.
    pouring broth into crock pot with vegetables
  • Brown the beef. Near the end of the vegetable cooking time, brown 1 pound of ground beef in a skillet. Drain well and add to the crock pot.
    browning ground meat in a black pan
  • Make the roux. In the same skillet, melt 3 tablespoons of butter over medium heat. Whisk in 3 tablespoons of flour and cook for 2–3 minutes, stirring continuously, until slightly golden.
    adding flour to melted butter to make a roux
  • Make the creamy sauce. Gradually whisk in 2½ cups of milk. Simmer and stir until thickened, adding ¼ cup sour cream, ½ teaspoon salt, and ½ teaspoon pepper.
    pouring milk into the pan with the roux and whisk
  • Add the cheese. Stir the thickened milk mixture into the crock pot. Add 1 pound of Velveeta, or replace part with sharp cheddar. Cook on HIGH for another 30–45 minutes, stirring occasionally, until the cheese melts and the soup is creamy.
    soup on a ladel over a crock pot
  • Serve. Stir well and serve hot. Top with bacon, diced tomatoes, chopped dill pickles, or your favorite cheeseburger toppings.
    cheeseburger soup in a blue bowl with toppings

Notes

Pro Tips

  • Crock pot size: Use a 5-quart or larger crock pot for the full recipe. A half recipe makes 4 servings and fits in a 2½-quart or larger crock pot. Cooking times remain the same.
  • Ground beef: Lean ground beef is preferred. Brown and drain before adding to the crock pot. Ground turkey or chicken may also be used.
  • Potatoes: Russets are preferred, but frozen diced potatoes also work. Cook until tender.
  • Cheese: Velveeta melts smoothly and makes a creamy soup. Replace part with sharp cheddar for more flavor, but avoid using only cheddar.
  • Extra-thick cheeseburger chowder: Double the butter and flour to 6 tablespoons each, keeping the milk amount unchanged.
  • Leftovers: Refrigerate for up to 4 days. Reheat gently with a splash of milk if needed. Freezing is not recommended.

Nutrition

Calories: 431.3kcal | Carbohydrates: 29.7g | Protein: 31.8g | Fat: 20.8g | Saturated Fat: 10.5g | Polyunsaturated Fat: 0.6g | Monounsaturated Fat: 4.9g | Trans Fat: 0.7g | Cholesterol: 88.7mg | Sodium: 1197.4mg | Potassium: 1008.5mg | Fiber: 2.1g | Sugar: 10.7g | Vitamin A: 3440.5IU | Vitamin C: 6.7mg | Calcium: 481.1mg | Iron: 2.7mg

Originally published January 7, 2018. Updated with expanded discussion, additional options, and refreshed photos.

The model recipe was a Taste of Home recipe that was stovetop. It was converted to a crock pot with other adjustments to match an excellent restaurant version.

Lilly in light snow.

Soup Nazi's Mexican Chicken Chili

Soup Nazi's Mexican Chicken Chili from 101 Cooking for Two

Time to try one of the Soup Nazi's recipes, the Soup Nazi's Mexican Chicken Chili. Loaded with excellent tastes for the spicing you will love.

You always wanted to try a Soup Nazi's recipe. It's an excellent-tasting spicy tomato chicken soup. It will take some time but not a lot of work.

🥣Ingredients

Chicken—breast or thighs
Vegetables—potato, carrot, celery, jalapeno, fresh parsley, frozen corn,
Aromatics—onion and garlic
Pantry ingredients—olive oil, chicken stock, canned tomatoes, tomato sauce, kidney beans, pimento, chili powder, cumin, cayenne pepper, basil, oregano, and salt

 Mexican Chicken Chili in bowl.
[feast_advanced_jump_to]
Blue ribbon divider used for visual effect

Featured Comment from DjAcucrack:
"Great recipe. I've made this soup three times."

Create great flavor by cooking the chicken with a Maillard reaction and use the soup to deglaze the pan to incorporate that flavor. Then, we simmer to reduce the volume at the end. This will concentrate on the flavors.

I'm calling this a "copycat" recipe since I can not confirm it is original. If you Google Soup Nazi recipes, you will get four different Soup Nazi recipes: Cream of Sweet Potato Soup, Indian Mulligatawny Soup, Crab Bisque, and the one I chose, the Mexican Chicken Chili. 

👨‍🍳How to make the Soup Nazi's Mexican Chicken Chili

trimmed chicken on black board.

Clean and filet 1 pound of chicken breast or thighs. (I snuck it up to 1 ½ pounds.)

chicken in bottom of deep soup pot.

Heat 1 tablespoon olive oil over medium-high heat in a large pot. Cook until internal temp of 165°. Do NOT clean the pot.

hand shredding chicken on plate.

Let chicken cool for 20-30 minutes, and then hand shreds.

chopped veggies on black board.

Knife skill time: prep the carrot(sliced), celery(chopped), potato(chopped), onion(diced), jalapeno(diced), parsley(chopped), and garlic clove(minced).

soup pot with broth, chicken and veggies.

Put all ingredients into the uncleaned pot and bring it to a boil, then decrease the heat to a simmer. Work the fond into the liquid with a wooden spoon.

chicken chili in white bowl with chips.

Cook uncovered for 4 to 5 hours, stirring frequently. The color will change from red to brown. The soup will thicken and reduce by about 40 %.

For more details, keep reading. See the Recipe Card below for complete instructions and to print.

✔️Tips to make it right every time

  • Do not use a non-stick pan. You want the fond to develop for more flavor.
  • On a spicy scale, this is about a 3 out of 10, so some of you might want to spice it up by adjusting the cayenne pepper.
  • I like a lot of meat and usually double the chicken.
  • Chicken breasts tend to be dry in soup, use thighs for more tender meat.
  • It makes a large amount and freezes well. You can decrease the recipe size if you want.

Related Recipes

Check out some other great chicken soup and chili recipes, like Taco Chili, Crock Pot White Chili, Healthy White Chicken Chili, and Salsa Verde White Chicken Chili.

⬇️How to make this a smaller recipe

This is an easy recipe to cut in half. The full recipe makes 10 servings, obviously a larger amount than most of us want to make.

  1. Use the recipe card and adjust the number of servings to half.
  2. Use the amount of ingredients in the ingredient list, not the instructions—those do not adjust.
  3. Cook for the same amount of time.

How to serve

I do not top this soup with anything. It is so good, let it stand alone.

I like soup and salad, so just a garden salad with toppings is a good start. Add in some yeast dinner rolls or cornbread for a starch.

How to store this soup?

Good refrigerated for 3-4 days. Or frozen for 3-4 months.

FAQs

Who is the Soup Nazi?

The "Soup Nazi" was made famous by the comedy series "Seinfeld" in the 1990s. While we all enjoyed the show, the chef the character was based on was not a fan of the treatment.

The story is more involved, but I will say that his soups were famous before the show and are wonderful.

Blue ribbon divider used for visual effect

This recipe is listed in these categories. See them for more similar recipes.

Chili Recipes, Soup Recipes

Have you tried this recipe, or have a question? Join the community discussion in the comments.

📖The Recipe Card

Soup Nazi's Mexican Chicken Chili from 101 Cooking for Two
Print Recipe Add to Collection Go to Collections

Soup Nazi's Mexican Chicken Chili

Time to try one of the Soup Nazi's recipes, the Soup Nazi's Mexican Chicken Chili. Loaded with excellent tastes for the spicing you will love.
Prep Time45 minutes mins
Cook Time4 hours hrs
Total Time4 hours hrs 45 minutes mins
Course: Soup
Cuisine: Mexican
Keyword: mexican chicken chili, Soup Nazi Chicken Chili, soup nazi recipes
Servings: 10
Calories: 159kcal
Author: Dan Mikesell AKA DrDan

Ingredients

  • 1-1 ½ lb chicken breast or thighs
  • 1 tablespoon olive oil
  • 1 potato peeled; chopped
  • 1 onion small diced
  • ½ carrot sliced
  • 1 stalk celery diced
  • 1 jalapeno diced finely
  • ¼ cup Italian parsley chopped
  • 1 clove garlic minced
  • 10 cups water
  • 2 cups chicken stock
  • ½ cup tomato sauce
  • 1 cup frozen yellow corn
  • 1 cup canned diced tomatoes
  • 15 ounces red kidney beans plus liquid
  • ¼ cup diced canned pimento
  • 1 ½ teaspoons chili powder
  • 1 teaspoon cumin
  • ¼ teaspoon salt
  • ⅛ teaspoon cayenne pepper
  • ⅛ teaspoon basil
  • ⅛ teaspoon oregano
US Customary - Convert to Metric

Instructions

  • Clean and filet 1 pound of chicken breast or thighs. (I snuck it up to 1 ½ pounds.)
    trimmed chicken on black board
  • Heat 1 tablespoon olive oil over medium-high heat in a large pot. Cook until internal temp of 165°. Do NOT clean the pot.
    chicken in bottom of deep soup pot
  • Let chicken cool for 20-30 minutes and then hand shred.
    hand shredding chicken on plate
  • Knife skill time: prep the carrot(sliced), celery(chopped), potato(chopped), onion(diced), jalapeno(diced), parsley(chopped), and garlic clove(minced).
    chopped veggies on black board
  • Put all ingredients into the uncleaned pot and bring it to a boil, then decrease the heat to a simmer. Work the fond into the liquid with a wooden spoon.
    soup pot with broth, chicken and veggies
  • Cook uncovered for 4 to 5 hours stirring frequently. The color will change from red to brown. The soup will thicken and reduce by about 40 %.
    bowl of chicken chili

Notes

Pro Tips:

  1. Do not cook this in a non-stick pan. You need the fond to help the flavor the soup.
  2. The original recipe calls for 1 pound of chicken, but with this much soup, I prefer a little more meat so more like a pound and a half for me. Thighs will be fine also.
  3. On a spicy scale, this is about a 3 out of 10 so some of you might want to spice it up a little by adjusting the cayenne pepper.
  4. Good refrigerated for 3-4 days and frozen for 3-4 months.
  5. The serving size is about 12 oz.
  6. This makes a larger amount of soup and for a smaller household, it may be too much. So freezing will be a good option. I don't see this is a good recipe to cut in half due to the number of ingredients, amount of work, and you would end up wasting a lot of unused ingredients.

Nutrition

Calories: 159kcal | Carbohydrates: 20g | Protein: 15g | Fat: 3g | Saturated Fat: 0.5g | Polyunsaturated Fat: 1g | Monounsaturated Fat: 1g | Trans Fat: 0.01g | Cholesterol: 26mg | Sodium: 512mg | Potassium: 507mg | Fiber: 5g | Sugar: 3g | Vitamin A: 1050IU | Vitamin C: 23.1mg | Calcium: 30mg | Iron: 1.8mg

Editor's Note: Originally Published November 3, 2010. Updated with expanded options, refreshed photos, and a table of contents to help navigation.

Jake chewing a ball.

Dogs in Leaves

a college of dog photos running through the leaf pile.

We all need a smile and this is one of my favorite posts every year. And over the years, the dogs in leaves post have be favorites. But they and I are getting old. Here are the top years of this blog tradition.

a college of dog photos running through the leaf pile.

I usually gather the fall leaves and let Molly and Lilly run through them. So simple, but I love the photos. I think you will agree; they were good dogs for the photos.

[feast_advanced_jump_to]
Dogs in snow Nov 2019
Dogs in Snow November 2019 - Photo by Wifo No leave pile in 2019.

Dogs in Leaves - 2018

Image of Molly and Lilly Dogs running through leaves image 20 of 20
Image of Molly and Lilly Dogs running through leaves image 1 of 20
Image of Molly and Lilly Dogs running through leaves image 2 of 20
Image of Molly and Lilly Dogs running through leaves image 3 of 20
Image of Molly and Lilly Dogs running through leaves image 4 of 20
Image of Molly and Lilly Dogs running through leaves image 5 of 20
Image of Molly and Lilly Dogs running through leaves image 6 of 20
Image of Molly and Lilly Dogs running through leaves image 7 of 20
Image of Molly and Lilly Dogs running through leaves image 8 of 20
Image of Molly and Lilly Dogs running through leaves image 9 of 20
Image of Molly and Lilly Dogs running through leaves image 10 of 20
Image of Molly and Lilly Dogs running through leaves image 11 of 20
Image of Molly and Lilly Dogs running through leaves image 12 of 20
Image of Molly and Lilly Dogs running through leaves image 13 of 20
Image of Molly and Lilly Dogs running through leaves image 14 of 20
Image of Molly and Lilly Dogs running through leaves image 15 of 20
Image of Molly and Lilly Dogs running through leaves image 16 of 20
Image of Molly and Lilly Dogs running through leaves image 17 of 20
Image of Molly and Lilly Dogs running through leaves image 18 of 20
Image of Molly and Lilly Dogs running through leaves image 19 of 20
Molly dog in the yard with leave - The end
Blue ribbon divider used for visual effect

Dogs in Leaves - 2017

Dogs in Leaves 2017 #1
Dogs in Leaves 2017 #2
Dogs in Leaves 2017 #3
Dogs in Leaves 2017 #4
Dogs in Leaves 2017 #5
Dogs in Leaves 2017 #6
Dogs in Leaves 2017 #7
dogs-in-leaves-2017--7
Dogs in Leaves 2017 #10
full speed Lilly
Dogs in Leaves 2017 #9
Dogs in Leaves 2017 #8
dogs in leaves
Blue ribbon divider used for visual effect

Dogs in Leaves - 2016

Dogs in leafs 2016 #1 Running hard
Dogs in leafs 2016 2
Dogs in leafs 2016 3
Dogs in leafs 2016 4
Dogs in leafs 2016 5
Dogs in leafs 2016 6
Dogs in leafs 2016 7
Blue ribbon divider used for visual effect

Dogs in Leaves - 2015

Lilly with John Deere getting ready to run
Dogs in Leaves 2015 - 1
Dogs in Leaves 2015 - 2
Dogs in Leaves 2015 - 3
Dogs in Leaves 2015 - 4
Dogs in Leaves 2015 - 5
Dogs in Leaves 2015 - 6
Dogs in Leaves 2015 - 7
Dogs in Leaves 2015 - 8

We hope you enjoy the pictures.

Molly, Lilly, Wifo, and DrDan

Originally Published October 28, 2018 but now combined with multiple years.

Crock Pot Scalloped Potatoes

Scalloped Potatoes on white plate

These cheesy Crock Pot Scalloped Potatoes have tender, thinly sliced potatoes in a rich, creamy homemade cheddar cheese sauce. They're an easy, comforting side dish made with simple ingredients.

Using your slow cooker frees up oven space and makes this recipe perfect for holiday dinners or everyday meals.

⏱️ Quick Answer: How long do scalloped potatoes take in a crock pot?

Cook until the potatoes are tender, preferably 200°–205°F internally.

  • LOW: About 8 hours.
  • HIGH: About 4–5 hours.
Scalloped Potatoes on white plate.
[feast_advanced_jump_to]

quote mark
Featured Comments:
From Bonnie: "Delish! One of the best scalloped potatoes I have eaten!"
From Glady: "This was fantastic and yummy. So easy. Thanks for the great recipes"

📝 TL;DR — Recipe Summary

  • What: Creamy, cheesy Crock Pot Scalloped Potatoes with tender potato slices in a homemade cheddar cheese sauce.
  • Why: Made with milk and real cheese instead of canned soup, and frees up oven space for family dinners and holidays.
  • How: Slice the potatoes thinly, make a simple cheese sauce, and layer everything in your crock pot, then cook until tender.

🥔 Ingredients

Potatoes with cheese and scalloped potato ingredients.
  • Potatoes: Peeled russet potatoes are preferred. Yukon Gold potatoes also work well and have thinner skins that don't need peeling.
  • Cheese: Sharp cheddar adds more flavor, but mild cheddar, Monterey Jack, or Gruyère are other good options. Block cheese melts more smoothly than pre-shredded.
  • Sauce ingredients: Butter, flour, and milk
  • Seasoning: Salt and black pepper. Optional cayenne pepper for a little heat and paprika for color.

👨‍🍳 Quick Overview: Crock Pot Scalloped Potatoes

1. Prepare the potatoes: Slice into ⅛-inch slices, then soak in cold water. Rinse and pat dry before using.

cutting potatoes with a mandolin.

2. Make the sauce: Make a roux with butter and flour. Slowly add the milk while whisking, then add the seasonings. Once thickened, remove from heat and whisk in the cheese until smooth.

adding milk to roux.

3. Layer the potatoes: Add half the potato slices individually to the crock pot, then half the cheese sauce. Repeat with the remaining potatoes and sauce. Sprinkle with paprika for an old-fashioned look.

pouring cheese sauce over potato slices.

4. Cook: Cover and cook until the potatoes are tender, preferably 200°–205°F internally.

very brown scalloped potatoes in crock pot.

📌 For full step-by-step instructions, scroll to the printable recipe card or keep reading for details and tips.

⏲️ How Long to Cook Scalloped Potatoes in a Crock Pot

Scalloped potatoes take about 8 hours on LOW or 4–5 hours on HIGH. Cooking time varies with the size of your crock pot, the thickness of the potato layers, and how hot your crock pot runs.

The potatoes are done when they are fork-tender, preferably reaching an internal temperature of 200°–205°F. Some crock pots only reach about 190°F, which is acceptable if the potatoes are tender.

The edges should become dark golden brown and slightly crispy—one of the best parts of this casserole. But watch closely near the end of cooking, especially on HIGH, since the edges can burn if your crock pot runs hot.

Let the potatoes rest for 10–15 minutes before serving so the sauce can thicken and the casserole can firm up.

💡 Tips for the Best Crock Pot Scalloped Potatoes

  • Crock pot size: Use a 4-quart or larger crock pot. A 6-quart gives you more of those delicious browned edges.
  • Slice evenly: Cut potatoes about ⅛ inch thick. A mandoline makes this easier, but use the safety guard.
  • Prevent sticking: Soak and rinse the potato slices, then pat dry. Separate the slices as you layer them so they cook evenly.
  • Avoid grainy cheese sauce: Shred your own cheese from a block. Pre-shredded cheese may not melt as smoothly.
  • Scaling: A half recipe works well in a 3-quart crock pot. A double recipe may need additional cooking time.

❄️ Storage and Reheating

Refrigerate: Store leftovers in an airtight container for 3–4 days.

Freeze: Freeze in airtight containers for up to 3 months. Thaw overnight in the refrigerator before reheating. The cheese sauce may change texture slightly after freezing.

Reheat: Cover and warm in a 325°F oven until heated through, or microwave individual portions. Add a splash of milk if the sauce has thickened too much.

❓FAQs

Why are my scalloped potatoes still firm?

The most common causes are potato slices that are too thick, a crock pot that runs cool, or a casserole that's too deep. Slice potatoes about ⅛ inch thick and continue cooking until fork-tender. A larger or fuller crock pot may need additional time.

What is the difference between scalloped potatoes and au gratin potatoes?

Traditionally, scalloped potatoes are cooked in a creamy sauce, while au gratin potatoes include cheese. Since this recipe uses a homemade cheddar sauce, it could technically be called either.

Why is my cheese sauce grainy?

Pre-shredded cheese contains anti-caking ingredients that can affect melting. For the smoothest sauce, shred cheese from a block and add it after removing the thickened sauce from the heat.

Can I add ham to crock pot scalloped potatoes?

Yes. Add 2–3 cups of diced cooked ham between the potato layers before adding the cheese sauce. For a complete main-dish version, try my Old Fashioned Scalloped Potatoes and Ham.

📖The Recipe Card

Scalloped Potatoes on white plate
Print Recipe Add to Collection Go to Collections
5 from 3 votes

Crock Pot Scalloped Potatoes

Make creamy, cheesy Crock Pot Scalloped Potatoes with tender potato slices in a homemade cheddar cheese sauce. An easy slow cooker side dish that frees up oven space.
Prep Time20 minutes mins
Cook Time8 hours hrs
Total Time8 hours hrs 20 minutes mins
Course: Side Dish, Vegetable
Cuisine: American
Keyword: Au Gratin Potatoes, Crock Pot Scalloped Potatoes, Scalloped Potatoes
Servings: 8
Calories: 317kcal
Author: Dan Mikesell AKA DrDan

Ingredients

  • 2 pounds Russet potatoes 4-6 medium russets. Peeled and cut into ⅛ inch slices. To make about 4 cups
  • 3 tablespoons butter
  • 3 tablespoons flour
  • 1½ cups milk
  • 1 teaspoon salt
  • ½ teaspoon pepper
  • ⅛ teaspoon cayenne pepper optional
  • 1½ cups shredded cheddar cheese or cheese of choice
  • sprinkle paprika optional
US Customary - Convert to Metric

Instructions

  • Prepare the potatoes: Peel 2 pounds of russet potatoes and cut them into ⅛-inch slices. Soak in cold water, then rinse and pat dry.
    cutting potatoes with a mandolin
  • Start the sauce: Melt 3 tablespoons of butter in a saucepan over medium heat. Add 3 tablespoons of flour and whisk for a few minutes.
    whisking roux in black pan
  • Thicken the sauce: Gradually whisk in 1½ cups of milk. Add the salt, pepper, and optional cayenne. Bring to a gentle boil, whisking until thickened.
    adding milk to roux
  • Add the cheese: Remove from heat and whisk in 1½ cups of shredded cheddar cheese until smooth.
    mixing cheese into sauce with a whisk
  • Layer the potatoes: Coat a 4-quart or larger crock pot with cooking spray. Separate the potato slices and arrange half in the crock pot.
    adding slices of potato to crock pot
  • Add the sauce: Pour half the cheese sauce over the potatoes. Repeat with the remaining potatoes and sauce.
    pouring cheese sauce over potato slices
  • Cook: Sprinkle with paprika if desired. Cover and cook on LOW for about 8 hours or HIGH for 4–5 hours, until fork-tender and preferably 200°–205°F internally.
    very brown scalloped potatoes in crock pot
  • Rest: Let stand for 10–15 minutes before serving to allow the sauce to thicken.
    scalloped potatoes on a large spoon

Notes

Pro Tips

  • Crock pot size: Use a 4-quart or larger crock pot. A 6-quart gives more browned edges. A half recipe works in a 3-quart crock pot.
  • Potatoes: Russets should be peeled, but thinner-skinned Yukon Gold potatoes don't need peeling. Slice evenly, about ⅛ inch thick.
  • Cheese: Freshly shredded block cheese melts more smoothly than pre-shredded cheese.
  • Doneness: Cook until fork-tender. Crock pots vary, and some only reach about 190°F. Dark brown edges are desirable, but avoid burning.
  • Storage: Refrigerate leftovers for 3–4 days or freeze for up to 3 months. Thaw in the refrigerator before reheating.

Nutrition

Calories: 317kcal | Carbohydrates: 28g | Protein: 10g | Fat: 19g | Saturated Fat: 8g | Polyunsaturated Fat: 4g | Monounsaturated Fat: 4g | Cholesterol: 13mg | Sodium: 552mg | Potassium: 624mg | Fiber: 3g | Sugar: 3g | Vitamin A: 250IU | Vitamin C: 28.1mg | Calcium: 70mg | Iron: 1.3mg

This recipe is a simplified crockpot adaptation of Food.com's Scalloped Potatoes recipe.

Editor's Note: Originally Published January 9, 2017. Updated with expanded options and discussion plus refreshed photos.

Dogs romping in the yard.

How to Make Pork Carnitas in the Oven

carmita taco in a hand

Anybody can make perfect pork carnitas in the oven at home without a mess or deep fryer. This easy oven carnitas recipe uses simple ingredients and step-by-step instructions that are ideal for beginners.

You’ll get juicy, crispy oven carnitas that taste just like your favorite restaurant version—without the stress or special tools.

⏱️ Quick Answer: Oven Carnitas Time and Temperature

  • Oven temperature: 275°F conventional or 250°F convection.
  • Cooking time: About 4½ hours total for 2-inch chunks.
  • Internal temperature: Cook until the largest pieces reach 200°–205°F for tender, shreddable carnitas.
Shredded carnitas in a tortilla.
[feast_advanced_jump_to]

quote mark
Featured Comment by PacifiCoast:
⭐⭐⭐⭐⭐
" I've tried many ways of making Carnitas, pulled pork, pork shoulder, whatever you want to call it……THIS IS IT!!!!!!!!!! This no fail recipe has given me the keys to the kingdom"

🩵 TL;DR — Recipe Summary

What it is: Juicy, crispy carnitas in the oven with pork butt—use it in tacos, burritos, bowls, or any way you want.

Why you’ll love it: Easy oven recipe with no fryer mess—simple seasoning, a touch of citrus, and restaurant flavor at home.

How to make it: Roast seasoned pork butt 275°F for about 4½ hours until it reaches 200°–205°F, then shred and broil briefly for crispy edges.

🐖 What You’ll Need for Oven Carnitas

Pork butt with seasoning and a lime—labeled.

🐖 Pork: Use a pork butt (Boston butt) for the best flavor and texture. A 3–4-pound roast is ideal. A boneless roast will be easier to trim.

🍋‍🟩 Citrus: Fresh lime or orange juice adds brightness and balances the rich pork.

🧂 Seasoning blend:

  • Kosher salt
  • Black pepper
  • Garlic powder
  • Cumin
  • Oregano

👍 Optional: Add a pinch of chili powder or smoked paprika for a touch of heat or smokiness.

👨‍🍳Quick Overview: How to Make Carnitas in the Oven

1. Prep and Season the Pork

Trim and cut the pork butt into large chunks—about 2 inches. Toss with lime (or orange) juice and the seasoning blend.

Trimming a pork butt into two-inch cubes.

2. Arrange in the Pan

Place the pork on a foil-lined baking tray. A rack helps with crisping and drainage, but isn’t required. Cover tightly with foil.

Cover the tray with foil.

3. Low and Slow Roast

Bake at 250° convection (or 275° conventional) for 2½ hours. Then remove the foil and roast uncovered for about 2 more hours, until the biggest chunks reach 200° to 205°.

Cooked carnitas on the tray.

4. Serving

Let it rest for 10 minutes before serving. For classic carnitas, shred the pork, spread it on a tray, drizzle lightly with broth or cooking juices, and broil for 3-5 minutes until the edges are crispy.

Shredded carnitas with toppings for a taco.

For complete step-by-step instructions, scroll down to the printable recipe card or keep reading for tips, flavor options, and serving ideas.

🌶️ Flavor Upgrades

If you want to mix things up, try a few simple tweaks before baking or when reheating:

  • Add onion wedges or crushed garlic to the pan for richer flavor.
  • Use orange juice or zest for extra citrus brightness.
  • Sprinkle in smoked paprika or chipotle for smoky heat.
  • Stir in diced jalapeño for a fresh, spicy kick.

🍽️ Serving Oven Carnitas

Carnitas are incredibly versatile—tender, crispy Mexican pulled pork you can use almost anywhere. Once cooked, shred the pork and serve it hot.

🌮 Tacos & Burritos: Load into warm tortillas with diced onion, cilantro, and lime. Or roll into burritos, enchiladas, or quesadillas.

🥗 Bowls & Nachos: Serve over rice, salad, or tortilla chips with beans, cheese, and toppings—then broil briefly for melted, crispy perfection.

🍽️ Serve With: Refried beans, Mexican rice, or chips and salsa to round out the meal.

👍 More Carnitas Recipes to Try

Love carnitas? Here are a few more easy versions to add to your rotation:

  • Crock Pot Pork Carnitas – Same great flavor with slow cooker convenience.
  • Healthier Pork Tenderloin Carnitas – A leaner twist that still hits all the right notes.
  • Chicken Carnitas AKA Carnitas de Pollo – Faster, lighter, and still packed with flavor.

Each one is beginner-friendly and perfect for tacos, burritos, bowls, or meal prep.

❄️ Make Ahead, Storage & Reheating

Carnitas are perfect for make-ahead meals. Store in an airtight container for up to 4 days in the refrigerator, or freeze for up to 3 months.

👉 Tip: Shred the pork and let it cool completely before freezing — it reheats faster and stays more tender.


🔥 Reheating:

  • Thaw overnight in the refrigerator if frozen.
  • For small portions, microwave with a damp paper towel to prevent drying out.
  • For larger amounts, reheat in a skillet over medium heat or in the oven at 300°F until hot.
  • To re-crisp, spread on a baking sheet and broil briefly until the edges sizzle.

❓ FAQs

How do I get crispy carnitas in the oven?

These oven carnitas get moderately crispy as they roast uncovered. For extra crisp edges, shred the pork, spread it on a baking sheet, and broil for 3–5 minutes until browned and crackly.

How do I prevent dry carnitas?

Start with the right cut — pork butt has the fat needed to stay moist. Cook to 200°–205°F using a thermometer, not just time. For dry leftovers, add a splash of broth, cover with foil, and heat at 250°F until warmed through. Then uncover and broil briefly to re-crisp.

Do I need to use a rack?

A rack helps fat drain off and promotes even cooking without flipping. It’s optional — if you skip it, flip the pork pieces once when you remove the foil halfway through cooking.

What cut of meat is best for carnitas?

Use a pork butt (Boston butt) for the best texture and flavor. It stays juicy through long, slow roasting and shreds beautifully.

What are carnitas?

Carnitas means “little meats” in Spanish. It’s a traditional Mexican dish made from pork cooked low and slow until tender, then crisped for texture. Unlike BBQ pulled pork, carnitas aren’t smoky or saucy — they’re all about juicy meat and crispy bits.

📖The Recipe Card

Shredded carnitas in a tortilla.
Print Recipe Add to Collection Go to Collections
5 from 2 votes

Pork Carnitas in the Oven (Juicy, Tender & Crispy)

Make juicy, crispy pork carnitas in the oven—no mess or deep fryer. An easy low-and-slow recipe for tender Mexican pulled pork that’s perfect for tacos, burritos, or nachos.
Prep Time15 minutes mins
Cook Time4 hours hrs 30 minutes mins
Total Time4 hours hrs 45 minutes mins
Course: Main Course
Cuisine: Mexican
Keyword: carnitas in the oven, how to make carnitas in the oven, Oven Carnitas
Servings: 6
Calories: 303.1kcal
Author: Dan Mikesell AKA DrDan

Ingredients

  • 3–4 pounds pork butt
  • 1 juice of lime or orange
  • 1 tablespoon chili powder
  • 1 teaspoon cumin
  • 1 teaspoon kosher salt
  • ½ teaspoon pepper
  • ½ teaspoons garlic powder optional but recommend
US Customary - Convert to Metric

Instructions

  • Preheat oven to 250° convection or 275° conventional.
    Pork butt with seasoning and a lime—labeled.
  • Line a rimmed baking sheet with foil. Add a rack and spray it well with PAM. A rack is optional but recommended.
    Prep a rimmed tray with foil and a rack.

Preparing the pork and seasoning

  • Cut the pork butt into 2-inch chunks, trimming only large fat pieces. Bone-in works but requires more trimming.
    Trimming a pork butt into two-inch cubes.
  • In a large bowl, coat the pork with the juice of one lime ( or orange) and mix well. Add 1 tablespoon chili powder, 1 teaspoon cumin, ½ teaspoon garlic powder (optional), 1 teaspoon kosher salt, and ½ teaspoon pepper. Mix to coat evenly.
    Coating pork with seasoning in a bowl.

Arrange in the pan

  • Place the pork on the prepared pan, spacing chunks evenly—put the largest pieces near the corners. Cover tightly with foil.
    Spread the seasoned pork on the prepared tray.

Low and slow bake

  • Bake for 2½ hours. Remove the foil and continue roasting for about 2 more hours, until the internal temperature of the largest pieces reaches 200°–205°F. Note: If you are not using a rack, you should flip the pork when removing the foil cover.
    cooked carnitas still on the rack

Rest and serve

  • Let it rest for 10 minutes before serving. For classic carnitas, shred the pork, spread it on a tray, drizzle lightly with broth or cooking juices, and broil for 5–10 minutes until the edges are crispy.
    Shredded carnitas with toppings for a taco.

Video

Notes

Pro Tips

  1. The recipe calls for a 3–4 pounds pork butt, but you can use a bigger butt with no problem. Boneless pork butt is easier to work with, but bone-in will work too.
  2. Thicker chunks belong near the tray corners—they cook more slowly.
  3. Time estimates are based on 2–2½-inch chunks of pork. Smaller chunks will cook much faster.
  4. The rack helps drain fat and promotes better crisping. Optional, but worth it.
  5. The final temperature endpoint is the most important part of this recipe. Never cook by time alone.
  6. Use carnitas in tacos, burritos, rice bowls, nachos, or salads.

❄️ Storage

Refrigerate for up to 4 days, or freeze for 3–4 months. Shred and cool completely before freezing.

♨️ Reheating

Microwave smaller portions with a damp paper towel.
For larger portions, use a skillet or 300°F oven.
Want crispiness back? Spread on a sheet pan and broil briefly.
The nutrition information on this recipe is variable due to the nature of pork butt.

Nutrition

Calories: 303.1kcal | Carbohydrates: 0.9g | Protein: 42.6g | Fat: 13g | Saturated Fat: 4.5g | Polyunsaturated Fat: 1.4g | Monounsaturated Fat: 5.7g | Trans Fat: 0.1g | Cholesterol: 136.1mg | Sodium: 535.8mg | Potassium: 785.9mg | Fiber: 0.1g | Sugar: 0.1g | Vitamin A: 7.6IU | Vitamin C: 1.5mg | Calcium: 36.7mg | Iron: 3mg

Editor's Note: Originally Published October 1, 2017. Updated with expanded options, refreshed photos, and a table of contents to help navigation.

Dogs standing in the yard.

Basic White Stand Mixer Bread Recipe

loaf of bread sliced on a board

This homemade basic white stand mixer bread recipe makes one loaf at a time. It's easy to prepare in your stand mixer or by hand. This classic white bread recipe will fill your home with the wonderful aroma of freshly baked homemade bread.

🍞Ingredients

Flour AP
Dry powdered milk
Yeast instant or rapid
Sugar or honey
Butter
Salt

A loaf of bread sliced on a board.
[feast_advanced_jump_to]
Blue ribbon divider used for visual effect

quote mark
Featured Comment by Jennell:
⭐⭐⭐⭐⭐
"I was looking for a bread recipe that would be easy for my to try me hand at making bread. I came across your recipe and not only was it easy it turned out beautiful and tasted delicious."

For smaller households, one loaf at a time is an everyday bread that is easy to make and tastes great—good enough to become the standard for years to come.

This easy stand mixer bread recipe makes a large loaf for tasty toast and full-size sandwiches. And by using milk to give a smoother texture.

👨‍🍳How to Bake Basic White Stand Mixer Bread—Step-by-Step Photo Instructions

Flour, yeast, and other bread ingredients.

1. To a stand mixer bowl, mix all dry ingredients including dry milk.

Pouring water into stand mixer bowl.

2. Slowly mix in 105°-110° water.

Kneading dough in the stand mixer.

3. Allow kneading 6-7 more minutes. You're looking for smooth, bouncy, and elastic.

transfer the dough to a large bowl.

4. Move to an oiled bowl and form into a ball. Cover and place in a warm place, let rise to almost doubled—about 60-90 minutes.

Coating a loaf pan with butter or oil.

5. Prep a 9 by 5 loaf pan with a light coat of butter or oil.

Raw dough in a loaf pan.

6. Form the dough into the prepared pan. Cover and allow to rise until about 1 inch above the top of the pan. About 1 to 1 ½ hours.

Loaf pan in oven tented lightly with foil.

7. Bake for 20 minutes in a preheated oven to 350°, then tent lightly with foil and continue to bake for 15-20 minutes more until golden brown.

Baked loaf of bread on cooling rack.

8. If you thump the crust, it should sound hollow. If you are unsure, an internal temperature of 195° to 200° is done. Cool on a rack.

For more details, keep reading. See the Recipe Card below for complete instructions and to print.

🌡️Temperature tips to make it right

A temperature over 120° can start killing the yeast. It is much easier just to turn on the hot water instead of heating the milk. You can use warm milk instead of the dried milk and water.

I liked to run some warm water into the stand mixer bowl to get it warm before starting.

If your house is cold, it may take a long time to rise. Many ovens have a bread-rising setting (the name varies).

🌾Flour tips and options

All-purpose (AP) flour is suggested, or you can use bread flour.

You can use up to 25% whole wheat flour, but more than that requires other adjustments.

The most accurate way to use flour is by weight, which accounts for its hydration. But we Americans insist on cups, so never "pack it in. "Instead, fluff it up a bit and level the cup with a knife.

🤔Yeast tips for beginners

Instant and rapid yeast are the same. It dissolves rapidly and has a lot of live organisms.

Active dry yeast (the old-fashioned stuff) is the same organism but needs to be proofed (pre-dissolved). It will have fewer live organisms, so it will be slower to work.

The usual substitute for honey is sugar. Generally between 1 part honey to 1.5-2 parts sugar.

Dried milk simplifies getting the right liquid temperature for the yeast, but you can use warm milk of the same volume and temperature.

📖Bread Recipes

For a rustic bread, perfect for Italian, don't miss Stand Mixer Rustic Peasant Bread. And for the absolutely best toast, try my Easy English Muffin Bread recipe.

Julia Child's French Bread-Simplified

Julia Child's French Bread recipe is the ultimate crusty artisan French bread. An excellent round bread, simplified to the essentials to get it done with less fuss.

Julia Child's French Bread on wooden peel.

❄️How to store homemade bread

reshly baked bread should be stored airtight (after cooling) at room temperature. It will generally last about 3 days. Remember, there are no preservatives. Refrigeration can prolong this for a few days but has some texture issues.

You can freeze baked bread, although I prefer not to. One month is the maximum time to have acceptable results.

❓FAQs

Can I freeze or refrigerate the uncooked dough?

It is best to do the first rise before either refrigerating or freezing.
You can place it in a loaf pan, cover it with plastic wrap overnight, and bake it the following day.

To freeze, form the dough into a loaf shape, seal it well, and freeze for up to 2-3 months. To bake, thaw overnight, covering it in a loaf pan in the refrigerator, then let it rise before baking.

Blue ribbon divider used for visual effect

📖The Recipe Card

loaf of bread sliced on a board
Print Recipe Add to Collection Go to Collections

Basic White Stand Mixer Bread Recipe

This homemade basic white stand mixer bread recipe makes one loaf at a time. It's easy to prepare in your stand mixer or by hand. This classic white bread recipe will fill your home with the wonderful aroma of freshly baked homemade bread.
Prep Time15 minutes mins
Cook Time40 minutes mins
Rising Time2 hours hrs
Total Time2 hours hrs 55 minutes mins
Course: Bread
Cuisine: American
Keyword: Basic White Bread Recipe, Beginner bread recipe, Stand mixer bread recipe
Servings: 18 slices
Calories: 112kcal
Author: Dan Mikesell AKA DrDan

Ingredients

  • 4 cups flour AP
  • ½ cups dry powdered milk
  • 1 package yeast instant or rapid
  • 1 tablespoon honey or 1 ½ tablespoon sugar
  • 2 tablespoons butter softened
  • 2 teaspoons salt
  • 1-1½ cup water 105° to 110°
US Customary - Convert to Metric

Instructions

  • To a stand mixer, add 4 cups flour, 1 package quick or instant yeast, 2 teaspoons salt, and ½ cup dried milk. Add 1 tablespoon of honey or sugar and 2 tablespoons of soft butter. Mix well in the bowl.
    flour yeast and other bread ingredients
  • Start the mixer on a speed of two with the dough hook. Measure 1½ cups of water at a temperature of 105°-110°. Add 1 cup and allow it to mix. Slowly add a tablespoon of water at a time. If the dough is "shaggy," you need more water.
    pouring water into stand mixer bowl
  • Once it smooths, you are about right. It needs to be stuck some to the bottom of the bowl. Allow kneading 6-7 more minutes. You can also just mix well in a bowl and hand knead for 8-10 minutes. You're looking for smooth, bouncy, and elastic.
    kneading dough in the stand mixer
  • Roll into a lightly oiled bowl and form into a ball. Cover and place in a warm place. Allow to rise until puffy and almost doubled—about 60-90 minutes. Please note the variation in rising time is based mainly on temperature.
    trasfer the dough to a large bowl
  • Prep a 9 by 5 loaf pan with a light coat of oil. Preheat oven to 350°. Deflate the raised dough.
    raised dough in a glass bowl
  • Form the dough into the prepared pan. Cover and allow to rise until about 1 inch above the top of the pan. About 1 to 1½ hours.
    raw dough in a loaf pan
  • Bake for 20 minutes, then tent lightly with foil and continue to bake for 15-20 minutes more until golden brown. If you thump the crust, it should sound hollow. If you are unsure, an internal temperature of 195° to 200° is done.
    loaf pan in oven tented lightly with foil
  • Cool on a rack.
    baked bread on cooling rack

Notes

Pro Tips

  1. This is a one-loaf recipe using a 9X6 or 10X6 loaf pan.
  2. Use instant or rapid yeast. If you use active dry yeast, dissolve it in warm water and wait for some foam (about 5 minutes). The rising times will be longer.
  3. You can use liquid milk instead of dry. For the water, use warm milk in the 105° to 110° range and skip the dry milk.
  4. You can use bread flour. I always suggest unbleached flour. You can substitute about 25% whole wheat flour. This is not gluten-free, and gluten-free baking is a specialty that does not just substitute flour.
  5. The tenting with foil prevents over-browning of the crust since this is a large loaf.
  6. If you are comfortable with “tapping” for a hollow sound for the endpoint, that is fine, but an internal temperature of 195° to 200° is done.
  7. Good airtight at room temperature for 2-3 days. Making ahead is discussed in the post.

Nutrition

Calories: 112kcal | Carbohydrates: 21g | Protein: 4g | Fat: 1g | Saturated Fat: 1g | Polyunsaturated Fat: 0.1g | Monounsaturated Fat: 0.4g | Cholesterol: 4mg | Sodium: 270mg | Potassium: 81mg | Fiber: 1g | Sugar: 2g | Vitamin A: 100IU | Vitamin C: 0.2mg | Calcium: 20mg | Iron: 1.1mg

Editor's Note: Originally published November 14, 2016. Updated with expanded options, refreshed photos, and a table of contents to help navigation.

Adaptation from King Authur Flour's Classic White Sandwich Bread.

Molly and Lilly running in the snow.

The Best BBQ Pork Tenderloin - Memphis Style

image of slices of pork tenderloin with sauce on white plate

BBQ pork tenderloin is outstanding and is the best grill pork tenderloin—period. Moist, tender, and the most wonderful sweet-spicy taste of Memphis BBQ.

image of slices of pork tenderloin with sauce on white plate
[feast_advanced_jump_to]
Blue ribbon divider used for visual effect

Introduction

This is the most common recipe people will claim as their all-time favorite from my site. It had a special spot on my site for years as "My One Must Try Recipe." And I called it the best meal I had ever grilled at the time and it probably still is. It really is that good.

I'm claiming a dream sequence for this one. I only had a few hours of sleep the night before; I lay down for a few minutes with dinner on my mind.  I had a pork tenderloin in the refrigerator for dinner but no plans. I should do another one for my grilled pork tenderloin series, but I had done no research.

So, what to do with that tenderloin? I really would like more of my Memphis BBQ sauce, but on what? Just grill the thing and dump sauce on it?

But out of my drowsiness came the memory of wanting to try dry rub Memphis ribs sometime. I have seen them over and over on the various cooking show. Well, my half-awake self-decided to use the rib rub on the tenderloin. I obviously have my best ideas when I'm not really with it.

🐖Pork Tenderloin

Start with well-trimmed pork tenderloin. You need to get th,e silverskin and any other membranes off so the brine and the dry rub can do their thing.

location of pork tenderloin on a chart of a pig- Image licensed May 17, 2017, from Fotolia. Copyright by foxysgraphic - Fotolia. Image modified in accordance with the license.
Image licensed from Fotolia. Copyright by foxysgraphic - Fotolia. Image modified in accordance with the license.

The tenderloin refers to the psoas muscle along the lower back. It is chicken tenders in the chicken or beef tenderloin (filet mignon) in cattle. The psoas is generally most tender cut since it is not used for movement. Please be sure you have a pork tenderloin and not a pork loin.

🧂The Brine

Brine for a few hours to make that already moist and tender meat cut with a fork. I'm suggesting a very simple brine of salt and some brown sugar. We will pick up most of the flavors in the rub.

The brine is optional but will increase the tenderness some and prevent drying on the grill. If you use the brine, make the rub without the salt.

🥣The Rub

Memphis BBQ is sweet and spicy. Very similar to Kansas City or St. Louis BBQ. But my favorite is Memphis.

I like to add the dry rub for a few hours and allow it to penetrate, and flavor the meat. Then I suggest adding a bit more just before cooking.

You can vary the rub for your taste if you want, but I highly recommend the rub as written. Also, I generally make up 2-3 times as much as I need for later use. It will last for up to 6 months sealed airtight and preferably in a dark place.

There is a range for the cayenne pepper. I suggest most people will prefer the lower end of the range. Skip if you want, but Memphis BBQ usually has a touch of mild heat in all that great spice.

♨️The Grill

Almost any gas grill will do. We want a grill surface temperature of 450° to a maximum of 500°. For most grills, that is a little over half power.

For help on grill surface temperature, please see my A Beginners Guide to Grill Temperature on a Gas Grill.

Let the tenderloin rest at room temp for 30 minutes before grilling. This allows you to get to the correct internal temperature easier without overcooking the spicy crust.

Charcoal should be fine. Just don't crank up the heat all the way and watch the temperature.

Of course, preheat, clean and brush with vegetable oil to prevent sticking due to the sugar in the rub.

🖊️ Tips

Pork tenderloin is not round, flat, nor even square — it is a triangle, so there are three sides. Whether cooking on a grill or in a pan, cook three sides and don't force it into a shape that is not natural.

There are some things you can skip in this technique, but each of them contributes to the outstanding final results. You will decrease results a tiny bit with each omission. The possible omissions are the brine, the rub waiting time, and the rest at room temperature before grilling.

📖Related Recipes

How to Grill a Pork Tenderloin on a Gas Grill

Balsamic Pork Tenderloin

Grilled Pork Tenderloin Sandwiches

Grilled Memphis Boneless Pork Ribs

How to Grill Baby Back Ribs on a Gas Grill

Rubs and Sauces

Memphis BBQ Sauce Recipe

Marlowe's Memphis Dry Rub

Marlowe's Black Magic Seasoning

Blue ribbon divider used for visual effect
↑Jump to Table of Contents

This recipe is listed in these categories. See them for more similar recipes.

101's Best Recipes, BBQ Recipes, Grill Recipes, Pork Recipes, Pork Tenderloin Recipes

Have you tried this recipe, or have a question? Join the community discussion in the comments.

Step-by-Step Photo Instructions

brine ingredients of brown sugar and salt

Start with a simple brine. 4 cups cold water, 4 tablespoons table salt, 3 tablespoons brown sugar. Mix well in a one-gallon food storage bag.

trimmed pork tenderloin on black board

Trim pork tenderloin of any silver skin, lose fat and membranes.

adding the pork tenderloin to the bag with brine

Add the tenderloin to the brine and refrigerate for 1 to 4 hours.

multiple spices as ingredients for the rub

Mix the Memphis dry rub: 2 tablespoons paprika, 1 tablespoon brown sugar, 1 teaspoon black pepper, ½ teaspoon chili powder, ¼ to ½ teaspoon cayenne pepper, ½ teaspoon dry mustard, ½ teaspoon garlic powder, ½ teaspoon onion powder, 1 teaspoon kosher salt - only add if not brining.

rinsing the tenderloin under running water

When the tenderloin is done brining, rinse under running water and pat dry with a paper towel. This will remove the brine salt from the surface.

adding rub to the tenderloin with a spoon

Place on a piece of plastic wrap about 6 inches longer than the tenderloin. Rub all sides of the tenderloin well with the rub reserving about ¼ of the rub for later.

tenderloin with rub wrapped tightly in plastic wrap

Roll the tenderloin tightly in the plastic wrap, seal the ends and refrigerate for 1 -2 hours. Longer is OK.

adding some more rub to tenderloin on white plate

Remove from refrigerator, unwrap and rub with the remainder of the rub on all sides and allow to rest at room temperature for 20-30 minutes. Preheat grill. You want a surface temp 450°- 500°. That is medium-high on most grills. Clean and oil the grill well. This last step is important, or it will stick.

pork tenderloin going on the grill

Grill for 5-6 minutes per side and then decrease the heat a little and continue to flip about every 5-6 minutes until internal temp of 150°. About 25 minutes in total. Remember that a pork tenderloin has three sides.

cut pork tenderloin on white plate

Let rest for 5-10 minutes before cutting. Serve with Memphis BBQ sauce.

↑Jump to Table of Contents

📖The Recipe Card

image of slices of pork tenderloin with sauce on white plate
Print Recipe Add to Collection Go to Collections
5 from 8 votes

The Best BBQ Pork Tenderloin – Memphis Style

BBQ pork tenderloin is outstanding and is the best grill pork tenderloin—period. Moist, tender, and the most wonderful sweet-spicy taste of Memphis BBQ. This will become your top recipe for company grilling.
Prep Time15 minutes mins
Cook Time25 minutes mins
brining time3 hours hrs 30 minutes mins
Total Time4 hours hrs 10 minutes mins
Course: Main Course
Cuisine: American
Keyword: Best Pork Tenderloin, Grilled Pork Tenderloin, Memphis Pork Tenderloin
Servings: 4 servings
Calories: 242kcal
Author: Dan Mikesell AKA DrDan

Ingredients

  • 1 ½ pound pork tenderloin

Brine

  • 4 cups water
  • 4 tablespoons table salt
  • 3 tablespoons brown sugar

Dry Rub

  • 2 tablespoons paprika
  • 1 tablespoon brown sugar
  • 1 teaspoon black pepper
  • ½ teaspoon chili powder
  • ¼ to ½ teaspoon cayenne pepper
  • ½ teaspoon dry mustard
  • ½ teaspoon garlic powder
  • ½ teaspoon onion powder
  • 1 teaspoon kosher salt only add if not brining
US Customary - Convert to Metric

Instructions

  • Start with a simple brine. 4 cups cold water, 4 tablespoons table salt, 3 tablespoons brown sugar. Mix well in an one-gallon food storage bag.
    brine ingredients of brown sugar and salt
  • Trim a pork tenderloin of any silver skin, loose fat and membranes. Add the tenderloin to the brine and refrigerate for 1 to 4 hours.
    trimmed pork tenderloin on black board
  • Mix the Memphis dry rub: 2 tablespoon paprika, 1 tablespoon brown sugar, 1 teaspoon black pepper, ½ teaspoon chili powder, ¼ to ½ teaspoon cayenne pepper, ½ teaspoon dry mustard, ½ teaspoon garlic powder, ½ teaspoon onion powder, 1 teaspoon kosher salt - only add if not brining.
    multiple spices as ingredients for the rub
  • When the tenderloin is done brining, rinse under running water and pat dry with a paper towel. This will remove the brine salt from the surface.
    rinsing the tenderloin under running water
  • Place on a piece of plastic wrap about 6 inches longer than the tenderloin. Rub all sides of the tenderloin well with the rub reserving about ¼ of the rub for later.
    adding rub to the tenderloin with a spoon
  • Roll the tenderloin tightly in the plastic wrap, seal the ends and refrigerate for 1 -2 hours. Longer is OK.
    tenderloin with rub wrapped tightly in plastic wrap
  • Remove from refrigerator, unwrap and rub with the remainder of the rub on all sides and allow to rest at room temp for 20-30 minutes.
    adding some more rub to tenderloin on white plate
  • Preheat grill. You want a surface temp of 450°-500°. That is medium high on most grills. Clean and oil the grill well. This last step is important or it will stick.
    clean and oil grill crates
  • Grill for 5-6 minutes per side and then decrease heat a little and continue to flip about every 5-6 minutes until internal temp of 145°-150°. About 25 minutes total. Let
    pork tenderloin going on the grill
  • Let rest for 5-10 minutes before cutting.
    cut pork tenderloin on white plate

Notes

Pro Tips

  1. Be sure you have a pork tenderloin and not a pork loin.
  2. 1 teaspoon table salt = 1 ¼ teaspoon Morton kosher salt = 2 teaspoons Diamond Crystal kosher salt
  3. I like to make more rub and save for later. Store airtight in a dark area for up to 6 months.
  4. You can skip the brine, the time with the rub, and the rest to room temperature but all these things add something to the final results.
  5. Dry rubs and the sauce you use should complement each other. I suggest my Memphis sauce or another sweeter sauce like a Kansas City or St. Louis sauce. Not a Carolina vinegar-based sauce.

Nutrition

Calories: 242kcal | Carbohydrates: 14g | Protein: 36g | Fat: 4g | Saturated Fat: 1g | Cholesterol: 111mg | Sodium: 1390mg | Potassium: 731mg | Fiber: 1g | Sugar: 12g | Vitamin A: 988IU | Calcium: 27mg | Iron: 2mg

Editor note: This is a republishing of one of the best recipes on this site. It is a bit more work but not hard and so worth the extra work. Originally published May 2, 2010, and then redone with new pictures May 2, 2013. It was in need of a rewrite and re-editing of pictures.  Now updated again with expanded options, refreshed photos, and a table of contents to help navigation.

dogs playing in the yard with flag bandanas

Copycat KFC Chicken—Oven Fried

Oven fiied chicken on a blue plate

Oven-fried Copycat KFC Chicken? Is it authentic spices? This is the alleged original KFC™ spice blend found in a family album by Colonel Sander's nephew—you judge.

Using an oven-fried chicken method that is home-friendly and much healthier, this is a recipe you must try.

🐓Ingredients

Chicken—skinless boneless chicken breasts
Buttermilk or regular milk
Egg
Flour—all-purpose flour
Butter
The 11 spices—salt, thyme, basil, oregano, celery salt, black pepper, dried mustard, paprika, garlic salt, ground ginger, white pepper

Oven fiied chicken on a blue plate.
[feast_advanced_jump_to]
Blue ribbon divider used for visual effect

Featured Comment from Robin:
"I just made this tonight, and it was delicious! I broke down a chicken into 10 pieces, and after cooking, they had quite a KFC flavour but were much healthier."

This copycat recipe has the great KFC®️ like flavor that many feel is the real spicing—it is finger-lickin'®️ good and has the promised "eleven herbs and spices," fits the era of development, and tastes just right. If not the authentic formula, then it is very close.

This recipe uses the "higher" spiced version of the leaked recipe. It is an excellent oven-fried chicken recipe that the whole family will love.

👨‍🍳How to Make Oven Fried KFC®️ Chicken

raw chicken breast and seasonings.

Start with trimming two skinless boneless chicken breasts. Try to use breasts of about the same size. If thick, flatten to ¾ inch thick with a meat mallet or heavy pan.

adding chicken to the milk marinade.

Mix 2 cups buttermilk and the egg. Add the chicken and allow it to marinate in the refrigerator for 30-60 minutes.

If you don't have buttermilk, you can substitute by adding 2 tablespoons of vinegar or lemon juice to 2 cups of milk and let it sit for a few minutes. Or just use milk.

flour with spices in metal bowl.

Preheat oven to 375° convection or 400° conventional. Mix the 11 spices with the flour.

dipping chicken into the coating and place on rack.

Prepare an oven-safe pan with 2 tablespoons of butter. Remove chicken breast from the milk one at a time, allowing the excess marinade to drain off. Dip in the spice/flour mix, cover completely, shake to remove excess, and on a rack.

coated chicken breasts in pan being sprayed with PAM.

Allow to sit for 20-30 minutes. This will help the coating stick. While the chicken is resting, place the baking sheet or pan with the butter into the oven for about 5 minutes to melt the butter. Remove and coat the pan with the melted butter. Give any of the coating on the breasts that looks dry a light spray of PAM and move into the pan with melted butter.

cooked chicken in cast iron pan.

After baking for 20 minutes, carefully flip the chicken with a fork near the edge of the chicken. Bake until internal temp of 165°, about 35-40 minutes total. Cooking time will vary due to oven variations, the pan, and the size and thickness of the chicken.

whisking gravy in cast iron pan.

If you want gravy, remove the chicken from the pan. Mix 1 cup of chicken broth with 4 tablespoons flour either by whisking or in a shaker. Over medium-high heat, add 1 more cup of chicken broth to the pan and bring to a boil. Slowly add the flour mixture while whisking continuously until thickened and then a few more minutes. If some of the breading comes off the chicken, leave it in the gravy for extra flavor.

fried chicken breasts on orange plate.

For more details, keep reading. See the Recipe Card below for complete instructions and to print.

✔️Tips to make it right every time

  • Try to use breasts of almost the same size if possible. If they are thick, flatten the thickest part to about ¾ inches thick with a meat mallet or the bottom of a heavy pan.
  • If you skip the marinade, dry the chicken well with paper towels. Dip in the spice/flour mixture, then an egg coating of a whipped egg with a bit of water. Shake off and coat again with the flour/spice mixture.
  • Gravy is optional but highly recommended. I'm using a "slurry" method. See How To Make Gravy at Home for detailed instructions.
  • The cooking of the chicken at the restaurant involves a pressurized fryer and other things. We are not trying to duplicate that. We are going for a healthier, tender chicken breast with the same or similar spicing.
  • Make up a batch of the KFC™ spice mix and keep it around for other chicken recipes like chicken tenders.
  • It is easier and probably cheaper to go to the restaurant. But this is interesting. And if you like it, mix up a batch of spices for the pantry.

Oven-baked chicken recipes

Don't miss out on other baked chicken recipes, like Baked Chicken with Mayonnaise Chicken, Pan Seared Oven Baked Chicken Breast, Roast Chicken Breasts in a Convection Oven, Oven Baked Chicken Legs, and Crispy Oven Baked Chicken Thighs.

Serving

Serve with Crispy Baked French Fries and a fresh salad like Spinach Salad with Bacon. I love it with Cornbread or Cornmeal Biscuits.

Storage and reheating leftovers

Store leftovers in an airtight container for up to 4 days, but it is better if only 1-2 days. You may also freeze for 3 months.

Reheat in the oven or an air fryer. A microwave may be used, but it may change the texture of the chicken.

❓FAQs

How to lower the sodium in the recipe.

This recipe is very high in sodium, typical for the 1940s. In addition to the salt, it is hidden in garlic salt and celery salt. You can make substitutions that will retain the taste but eliminate the sodium.

You can use ½ the volume of the celery salt as the celery seed powder. And ¼ of the volume of garlic salt as garlic powder. That cuts the sodium way down to about 600.

What is the secret ingredient in KFC™ chicken?

The nephew who leaked the recipe felt the primary "secret ingredient" was the white pepper. I think he is right.

Some others speculate it is MSG (monosodium glutamate). It is in the chicken at the restaurant, other chicken restaurants, and other foods. If you want to try MSG along with the 11 spices, sprinkle a little on at serving.

📰The Story of the Leaked Original KFC®️ Recipe

The original secret recipe is a closely guarded secret in a vault at the company's headquarters. Handwritten by the Colonel himself, it is said.

This story is about the nephew of Colonel Sanders, Joe "H.D." Lexington, and a family album he inherited. In the album is his aunt's will, and on the back of the will is a handwritten note titled "11 spices". He believes it is real and mixed tons of this at his uncle's restaurant as a child. I tend to believe, especially after my trial cooking.

Check out the original article, the Tribune. It is a fascinating read and has a picture of the note. But also check out their test cooking of the recipe.

📋What is on the note?

The 11 spices Mix with 2 cups white fl

  • ⅔ Ts salt
  • ½ Ts thyme
  • ½ Ts basil
  • ⅓ Ts oregano
  • 1 Ts celery salt
  • 1 Ts black pepper
  • 1 Ts dried mustard
  • 4 Ts paprika
  • 2 Ts garlic salt
  • 1 Ts ground ginger
  • 3 Ts white pepper

******************************

I'm sure you see a problem right away. What the heck is "Ts"? Is it tablespoons or teaspoons? The Tribune tried both and concluded tablespoons. I tried both, also. I believe in tablespoons, but my wife preferred the lighter spiced teaspoon version.

Blue ribbon divider used for visual effect

This recipe is listed in these categories. See them for more similar recipes.

101's Best Recipes, Chicken Breast Recipes, Chicken Recipes

Have you tried this recipe, or have a question? Join the community discussion in the comments.

📖The Recipe Card

Oven fiied chicken on a blue plate
Print Recipe Add to Collection Go to Collections
5 from 2 votes

Copycat KFC Chicken—Oven Fried

Oven-fried Copycat KFC Chicken? Is it authentic spices? This is the alleged original KFC™ spice blend found in a family album by Colonel Sander's nephew—you judge.
Prep Time10 minutes mins
Cook Time35 minutes mins
marinade30 minutes mins
Total Time45 minutes mins
Course: Main Course
Cuisine: American
Keyword: KFC Copycat Chicken, oven fried chicken
Servings: 2
Calories: 278kcal
Author: Dan Mikesell AKA DrDan

Ingredients

  • 2 skinless boneless chicken breasts

Marinade

  • 2 cups buttermilk or milk
  • 1 egg optional

Coating

  • 1 cups AP flour
  • 1 teaspoon salt
  • ¾ teaspoon thyme
  • ¾ teaspoon basil
  • ½ teaspoon oregano
  • 1 ½ teaspoon celery salt
  • 1 ½ teaspoon black pepper
  • 1 ½ teaspoon dried mustard
  • 2 tablespoons paprika
  • 1 tablespoon garlic salt
  • 1 ½ teaspoon ground ginger
  • 4 ½ teaspoons white pepper

In Pan for Oven

  • 2 tablespoons butter

Gravy - optional

  • 2 cups chicken broth
  • 4 tablespoons flour
US Customary - Convert to Metric

Instructions

  • Start with trimming two skinless boneless chicken breasts. Try to use breasts of about the same size. If thick, flatten to ¾ inch thick with a meat mallet or heavy pan.
  • Mix 2 cups buttermilk or milk and the egg. Add the chicken and allow it to marinate in the refrigerator for 30-60 minutes.
  • Preheat oven to 375° convection or 400° conventional. Mix the 11 spices with the flour.
  • Prepare an oven-safe pan with 2 tablespoons of butter. Remove chicken breast from the milk one at a time, allowing the excess marinade to drain off. Dip in the spice/flour mix, cover completely, shake to remove excess, and on a rack.
  • Allow to sit for 20-30 minutes. This will help the coating stick. While the chicken is resting, place the baking sheet or pan with the butter into the oven for about 5 minutes to melt the butter. Remove and coat the pan with the melted butter. Give any of the coating on the breasts that looks dry a light spray of PAM and move into the pan with melted butter.
  • After baking for 20 minutes, carefully flip the chicken with a fork near the edge of the chicken. Bake until internal temp of 165°, about 35-40 minutes total. Cooking time will vary due to oven variations, the pan, and the size and thickness of the chicken.
  • If you want gravy, remove the chicken from the pan. Mix 1 cup of chicken broth with 4 tablespoons flour either by whisking or in a shaker. Over medium-high heat, add 1 more cup of chicken broth to the pan and bring to a boil. Slowly add the flour mixture while whisking continuously until thickened and then a few more minutes. If some of the breading comes off the chicken, leave it in the gravy for extra flavor.

Notes

Pro Tips

  1. Use the chicken you want, but I suggest skinless boneless chicken breasts.
  2. Try to use chicken breasts of about the same size, and if thick, flatten to about ¾ inches thick with a meat mallet or heavy pan.
  3. The most important spice is white pepper. You can adjust spices if you want, but you are fighting with the Colonel.
  4. I suggest making more spice mix for future use to save time. Remember that 3 teaspoons are 1 tablespoon.
  5. Letting the coating set on the chicken before baking is a must to keep the coating sticking well.
  6. The gravy is optional but recommended.
  7. Sodium note - You can use ½ the volume of the celery salt as the celery seed powder. And ¼ of the volume of garlic salt as garlic powder. That cuts the sodium way down to about 600.
  8. This is the "heavy" spice version. You can cut the spices in half and have great results, also. Discussed in the post above.

Nutrition

Calories: 278kcal | Carbohydrates: 24g | Protein: 28g | Fat: 8g | Saturated Fat: 4g | Cholesterol: 72mg | Sodium: 2576mg | Potassium: 545mg | Fiber: 3g | Sugar: 1g | Vitamin A: 1786IU | Vitamin C: 3mg | Calcium: 34mg | Iron: 3mg

Editor's Note: Originally Published August 28, 2016. Updated with expanded options, refreshed photos, and a table of contents to help navigation.

Molly running in the snow with bandana.

Oven Baked Banana Pancakes

A Banana Pancake being covered with syrup

Fluffy Oven-Baked Banana Pancakes are full of banana goodness, but they're super easy and almost foolproof. Make the one-banana version or scale it up if needed. Or add nuts for great banana nut pancakes.

🍌Ingredients

Banana—ripe
Chopped nuts—walnuts or pecans—optional
Pantry ingredients—vegetable oil, milk, flour, sugar, baking powder, salt, butter

syrup pouring on to butter on a banana nut pancajke.
[feast_advanced_jump_to]
Blue ribbon divider used for visual effect

quote mark
Featured Comment from Jean :
"Love your site and loved the banana pancake. My husband was blown away at the flavor and tenderness of the pancake. Simply amazing"

So, what can you do with one overripe banana? Well, the best answer is fluffy banana nut pancakes, which are easy to make and have a wonderful banana nut taste.

A perfect cooking-for-two recipe, making two large servings. But easy to scale up if needed.

This super easy recipe with step-by-step photo instructions has reliable results, even for the pancake-flipping-impaired cook. It mixes and bakes for 25 minutes while you do something else, and it uses only pantry ingredients; no mix is needed.

👨‍🍳How to Make Banana Nut Pancakes—Step-by-Step

bananas and pancake ingredients.

1. Use a ripe banana.

mashing a banana in bowl with fork.

2. Mash one ripe banana.

mixing milk and egg into the mashed banana in a bowl

3. Add egg, oil, and milk to the banana.

coating pan with melting butter with brush.

4. Melt butter in a preheated 375° oven and brush the pan with the butter.

mixing wet ingredients into dry with a whisk.

5. Mix dry flour, sugar, baking powder, and salt. Mix wet into dry.

pouring batter into a black skillet.

6. Pour into the heated pan and top with ¼ cup of chopped nuts.

browned pancake in black pan with nuts on top.

7. Bake for about 25 minutes. You can turn the broiler on near the end if you want more browning.

bite of pancake on a fork with syrup and nuts.

8. Serve with butter and maple syrup.

For more details, keep reading. See the Recipe Card below for complete instructions and to print.

✔️Tips to make it right every time

I used a 10-inch cast iron, but a 9-inch pie pan or another pan should be fine.

This recipe makes a large breakfast for 2.

Don't be afraid to turn the broiler on near the end to increase the browning.

Related recipes you will love

While you are baking the pancake, you can easily Bake Breakfast Sausage or learn how to cook bacon in the oven at the same time.

You may like other versions of baked pancakes, like baked blueberry pancakes and carrot cake pancakes. For other breakfast treats, check out Cinnamon Coffee Cake, Cinnamon Biscuits, or Whole Wheat Blueberry Scones.

And don't miss the other banana recipes like, Old Fashioned Banana Bread, Banana Nut Cookies, Banana Nut Cake, or Banana Nut Muffins,

↕️Adjusting the size of the recipe

Use the recipe card's serving feature to adjust the recipe's size. If your adjustment asks for a fraction of an egg, round up the higher number.

The pan size for adjusted recipes

2 servings (half recipe) - 6-inch round pan or an 8 ½ X 4 ½ standard loaf pan

4 servings (whole recipe) - 10-inches cast iron fry pan, but any similar size pan will work. A 9-inch round or an 8 or 9-inch square pan will be fine, but the thickness will vary.

6 servings (1 ½ recipe) - You can use a 12-inch cast iron fry pan, a standard 9X13 cake pan, or a ¼ sheet pan.

8 servings (double recipe) - A 9X13 standard cake pan will do but be a bit thicker. If you have a larger casserole dish, it will do fine. Thicker pancakes may take a few minutes more to cook.

Leftovers—storage and reheating

Store in an airtight container—a ZipLock bag is fine. Refrigerate for 3 days or freeze for 2-3 months.

To reheat, use a microwave but thaw first if frozen.

❓FAQs

Do I need to use cast iron?

No, any oven-safe pan will work for this recipe. But cast iron will conduct heat evenly and retain heat well, so it is ideal for recipes like this.

Why use aluminum-free baking powder?

Many people can taste a bitter metallic taste in baked products with aluminum. So to avoid that, buy aluminum-free baking powder. It is readily available, costs the same, and works the same. The packaging will be labeled aluminum-free.

Why use a ripe instead of a greener banana?

As bananas age, they release a gas that converts some of the starch to sugar, increasing the sweetness.

📖The Recipe Card

A Banana Pancake being covered with syrup
Print Recipe Add to Collection Go to Collections
4.53 from 36 votes

Oven Baked Banana Pancakes

Fluffy Oven-Baked Banana Pancakes are full of banana goodness but super easy and almost foolproof. Make the one banana version or scale it up if needed.
Prep Time10 minutes mins
Cook Time25 minutes mins
Total Time35 minutes mins
Course: Breakfast
Cuisine: American
Keyword: Baked Banana Pancakes, Banana Nut Pancakes, Banana Pancake
Servings: 2 servings
Calories: 607kcal
Author: Dan Mikesell AKA DrDan

Ingredients

Wet Ingredients

  • 1 banana ripe
  • 1 egg
  • 2 tablespoons oil
  • ¾ cup milk

Dry Ingredients

  • 1 cup flour
  • 2 tablespoons sugar
  • 2 teaspoons baking powder
  • ½ teaspoon salt

Finish

  • 1 tablespoon butter to coat pan
  • ¼ cup chopped nuts optional to top
US Customary - Convert to Metric

Instructions

  • Preheat oven to 375°. Add an oven-safe pan to preheat also. A 10-inch cast-iron skillet works well.
    bananas and pancake ingredients.
  • Mash one ripe banana.
    mashing a banana in bowl with fork.
  • Add 1 egg, 2 tablespoons oil, and ¾ cup milk—whisk together.
    mixing milk and egg into the mashed banana in a bowl
  • Remove preheated pan and coat with 1 tablespoon of butter.
    coating pan with melting butter with brush
  • Mix dry ingredients. 1 cup of flour, 2 tablespoons of sugar, 2 teaspoons of baking powder, and ½ teaspoon salt. Mix wet into dry.
    mixing wet ingredients into dry with a whisk
  • Pour into the heated pan and top with ¼ cup of chopped nuts. I like walnuts, but pecans are okay or skip the nuts.
    pouring batter into a black skillet
  • Bake for about 25 minutes. You can turn the broiler on near the end if you want more browning.
    browned pancake in black pan with nuts on top
  • Serve with butter and maple syrup.
    bite of pancake on a fork with syrup and nuts

Notes

Pro Tips

  1. I like to use a 9-inch cast iron pan but this will work well in a 9-inch round baking pan or an 8X8 or 6X9 baking dish.
  2. A double-size recipe will use a 12-inch cast iron pan or a 9X13 casserole or cake pan. Cooking time should be unchanged.
  3. The riper the banana, the sweeter.
  4. Be sure to preheat the pan with the oven for at least a few minutes.
  5. The nuts are optional. I like walnuts, but pecans are also a favorite.
  6. You might need a few minutes of the broiler to brown the pancake to your preference at the end. I need it in one of my ovens but not the other.

Nutrition

Calories: 607kcal | Carbohydrates: 66g | Protein: 15g | Fat: 33g | Saturated Fat: 8g | Polyunsaturated Fat: 9g | Monounsaturated Fat: 15g | Cholesterol: 124mg | Sodium: 789mg | Potassium: 501mg | Fiber: 5g | Sugar: 15g | Vitamin A: 550IU | Vitamin C: 5.8mg | Calcium: 310mg | Iron: 3.2mg

Editor's Note: Originally Published September 21, 2015. Updated with expanded options, refreshed photos, and a table of contents to help navigation.

dogs with purple puppy.
What evil can we do now...

Crock Pot Cheesy Potatoes with Real Potatoes

chessy potatoes on a white plate

Crock Pot Cheesy Potatoes with Real Potatoes are so easy and good. From scratch with real fresh potatoes, no frozen potatoes here. An excellent side dish for any meal.

🥔Ingredients

Potatoes—usually Russets
Green onions
Sour Cream
Cheese—sharp cheddar cheese
Salt and pepper
Cooked bacon—
optional

chessy potatoes on a white plate.
[feast_advanced_jump_to]
Blue ribbon divider used for visual effect

Featured Comment from Lindsey:
"Tried it. Loved it. Can't wait to make it again!"

This simple crockpot cheesy potatoes recipe features real raw potatoes with only 4 ingredients plus salt and pepper. No need for a can of cream of mushroom or chicken soup.

This recipe is easy to make with step-by-step photo instructions. And has a much better texture due to the real potatoes and not overcooking the dairy products.

Don't use the oven space you need for other holiday dishes like Thanksgiving and Christmas. It pairs perfectly with holiday meals like a Small Ribeye Roast Easter ham or Oven Roasted Turkey Breast.

I based this on our old family recipe Old Fashion Cheesy Potato Casserole.

👨‍🍳How to Make Crock Pot Cheesy Potatoes with Real Potatoes

raw potatoes with sour cream and other ingredients.

Simple ingredients.

cut up raw potatoes on black board.

Peel and cube about 1 pound of potatoes—two large or three medium russet potatoes. Make the cubes about 1-inch size or smaller.

spraying a crock pot with PAM.

Coat a large crock pot with PAM cooking spray. You can use a smaller crock pot of down to 3-quart.

a single layer of raw potato chunks in crock pot.

Spread evenly and cook on high for about two hours. If you have more than 1 layer, stir 1 hour into cooking. You want an internal temperature of 190° or more for the potatoes.

mashing e potatoes with a masher in the crock pot.

Mash the potatoes in the crock pot. Leave a little texture.

chopped green onion on black board.

Clean and slice six green onions.

mixing sour cream into potatoes in crock pot.

Add 1 teaspoon of kosher salt and ½ teaspoon of black pepper. Add the sliced green onion, 1 cup of sour cream, and 1 cup of shredded cheddar cheese. Add cooked bacon or other things at this point. Mix until combined, then smooth over the bottom of the crock pot.

potato casserole on a fork.

Cook for 30 minutes more on high.

For more details, keep reading. See the Recipe Card below for complete instructions and to print.

Other Potato Recipes

Don't miss these other easy potato recipes, like Roasted Small Potatoes, Crispy Smashed Potatoes, Parmesan Baked Potatoes, and Twice Baked Potatoes.

When to use

Cheesy potatoes are the perfect side dish for many comfort food meals like Small Meatloaf for Two, Seared and Baked Pork Chops, Baked Boneless Pork Ribs, or Crock Pot French Dip Sandwiches.

Storage

Good refrigerated for 3-4 days or frozen for 3 months.

To reheat, thaw if frozen, then reheat in the microwave or oven.

❓FAQs

Can I use frozen potatoes?

Yes, but here are definite taste and texture issues. It is okay with frozen hash browns, but it is fantastic cooking fresh potatoes.

What size of crock pot to use?

A large crock pot is best, but a 3-quart one will work. The thicker the contents, the longer the cooking time. With the one-inch cubes, it is best to keep them as one layer. If you need more than one layer, stir the potatoes ` one hour into cooking.

If you need to use a smaller crock pot or increase the recipe size, check the cooked potatoes' temperature before mixing. It needs to be 190° or more.

Blue ribbon divider used for visual effect

This recipe is listed in these categories. See them for more similar recipes.

101's Best Recipes, Comfort Food Recipes, Crock Pot Recipes, Potato Recipes, Side Dish Recipes

Have you tried this recipe, or have a question? Join the community discussion in the comments.

📖The Recipe Card

chessy potatoes on a white plate
Print Recipe Add to Collection Go to Collections
5 from 4 votes

Crock Pot Cheesy Potatoes from Real Potatoes

Crock Pot Cheesy Potatoes with Real Potatoes are so easy and good. From scratch with real fresh potatoes, no frozen potatoes here. An excellent side dish for any meal. 
Prep Time5 minutes mins
Cook Time2 hours hrs 30 minutes mins
Total Time2 hours hrs 35 minutes mins
Course: Side Dish
Cuisine: American
Keyword: Cheesy Potato Casserole, Crock Pot Cheesy Potatoes, Crock Pot Funeral Potatoes
Servings: 4 large
Calories: 289kcal
Author: Dan Mikesell AKA DrDan

Ingredients

  • 1 pound potatoes peeled
  • 6 green onions
  • 1 teaspoon Kosher salt
  • ½ teaspoon pepper
  • 1 cup sour cream
  • 1 cup sharp cheddar cheese shredded
  • 2-3 strips cooked bacon optional
US Customary - Convert to Metric

Instructions

  • Peel and cube about 1 pound of potatoes—two large or three medium russet potatoes. Make the cubes about 1-inch size or smaller.
    cut up raw potatoes on black board
  • Coat a large crock pot with PAM cooking spray. You can use a smaller crock pot of down to 3-quart.
    spraying a crock pot with PAM
  • Spread evenly and cook on high for about two hours. If you have more than 1 layer, stir 1 hour into cooking. You want an internal temperature of 190° or more for the potatoes.
    a single layer of raw potato chunks in crock pot
  • Mash the potatoes in the crock pot. Leave a little texture.
    mashing e potatoes with a masher in the crock pot
  • Clean and slice six green onions.
    chopped green onion on black board
  • Sprinkle with one teaspoon of coarse salt and ½ teaspoon of black pepper. Add the sliced green onion, 1 cup of sour cream, and 1 cup of shredded cheddar cheese. Add cooked bacon or other things at this point. Mix until combined, then smooth over the bottom of the crock pot.
    mixing sour cream into potatoes in crock pot
  • Cook for 30 minutes more on high.
    potato casserole on a fork

Notes

Pro Tips

  1. Using a large crockpot to lower the potatoes' thickness will help more even cooking.
  2. Use the potatoes you want.
  3. Cook the potatoes to 190° or more. It may take longer if you need to pile up the potatoes. Also, crock pots can vary, so the potatoes must be fully cooked before mashing. It may take longer than 2 hours.
  4. If you have more than one layer of potatoes, occasionally stir to help even out the cooking.
  5. Add 3 strips of cooked chopped-up bacon with the sour cream if you want.
  6. You can easily use different cheese or add other seasonings.
  7. Good refrigerated for 3-4 days or frozen for 3-4 months.

Nutrition

Calories: 289kcal | Carbohydrates: 26g | Protein: 12g | Fat: 16g | Saturated Fat: 10g | Cholesterol: 50mg | Sodium: 225mg | Potassium: 672mg | Fiber: 2g | Sugar: 1g | Vitamin A: 651IU | Vitamin C: 10mg | Calcium: 312mg | Iron: 1mg

Editors Note: Originally Published July 6, 2014. Updated with expanded options, refreshed photos, and a table of contents to help navigation.

Molly is dog in charge,

Oven Baked English Muffins Recipe

English Muffin on orange plate with butter

This Oven Baked English Muffin Recipe is easy, delicious, and packed with all the nooks and crannies for your butter and jam.

Start your day with something special for breakfast.

Ingredients

Flour
Yeast—rapid, instant, or quick
Milk and butter
Pantry ingredients—sugar, salt, cornmeal

Baked English Muffin cut with butter melting.
[feast_advanced_jump_to]
Blue ribbon divider used for visual effect

These baked English muffins have a wonderful taste and loads of nooks and crannies for jelly and jam.

It's an easy hand-mixing recipe. No need for a hand or stand mixer. It uses the no-knead "raise until it drops" method, just mixing and letting it rise at room temperature overnight, giving great gluten formation.

It makes wonderful toasted English muffins slathered with butter and jam. It is perfect for a breakfast sandwich.

See English Muffin Bread for more of these great flavors and textures in an easy loaf of bread. Serve with Convection Oven Bacon or Baked Sausage Patties.

👨‍🍳How to Bake English Muffins

flour and other ingredients for English muffins.

Warm 1 cup of milk in the microwave to about 100° to 105°—about 30 seconds. Also, melt 1 tablespoon of butter—for about 10 seconds.

mixing flour into wet ingredients in a glass bowl.

Stir together the warmed milk, melted butter, one tablespoon of sugar, and one package (2 ¼ teaspoons) of quick or rapid yeast. Mix well and allow the yeast to proof for about 5 minutes until it starts to foam a little. Add 2 ½ cups of flour and ½ teaspoon salt to the yeast mixture—mix well, scraping the sides of the bowl to make a shaggy dough.

forming the dough into a ball in a the bowl.

Cover the dough with plastic wrap. Allow it to sit overnight at room temperature.

dough after a rise and fall.

The dough will "fall in upon itself." Cut some 4-5 inch squares of parchment paper for later use. Preheat the oven to 400° with a large nonstick sheet pan in the oven.

dough cut into eight pieces.

Turn the dough onto a floured work surface, gently roll it up, and then cut it into 8 equal pieces. Be gentle with the dough. DO NOT KNEAD.

coating dough in yellow corn meal.

Place some cornmeal in a shallow bowl. Gently form the dough into balls and coat with the cornmeal.

raw dough in baking ring on a piece of parchment paper.

Place a 3-inch cooking ring on a piece of parchment paper. Drop the coated balls of dough into the ring and flatten gently to fill the ring, then "dimple" the center in about a quarter of an inch. This will help it bake flatter. Repeat for all the dough balls. Allow to rest 30 minutes for any residual rise to occur.

moving raw muffins to heated baking sheet.

Remove the preheated baking sheet from the oven. Place the muffins on the tray and sprinkle with a little more cornmeal.

flipping muffins during cooking.

Bake for 10 minutes. Flip the muffins. Bake another 8 minutes or so until the color is golden brown and the internal temperature of 200°.

baked English muffins on a cooling rack.

Move to a cooling rack. Allow cooling for at least 5 minutes before serving.

close up of baked English muffin.
English Muffin on orange plate with butter.

For more details, keep reading. See the Recipe Card below for complete instructions and to print.

Options

Add some raisins or cinnamon for different flavors.

I will recommend against using whole wheat flour, which will need several adjustments.

Biscuit and scone recipes you will love

Check out these biscuit or scone recipes you may like. Start with Cheddar Bay Biscuits a la Red Lobster™ and my Low Calorie Biscuits. Or try some Low-Fat Blueberry Scones, Whole Wheat Blueberry Scones, or Raspberry Scones.

Serving

Perfect for breakfast or brunch slathered with butter and jam.

But also the foundation for the perfect on-the-go breakfast sandwich.

Storage

Seal airtight at room temperature for 2-3 days. They will not last long due to the lack of preservatives. If refrigerated, they should be good for about a week.

They will freeze well for 2-3 months in a freezer bag. Thaw entirely before toasting.

❓FAQs

I don't have a baking ring; what else can I use?

If you don't have English muffin rings or a cookie cutter that would work, you can use a tuna can or something similar.

You also could form them by hand, but the more you play with the dough, the fewer nooks and crannies.

Are English muffins really English?

No. They originated in New York City by an English baker in the late 1800s. They were flatter crumpets but were full of nooks and crannies that hold the butter, jam. or runny eggs.

The British did not become aware of their existence until Thomas English muffins were imported to England in the 1990s after they became popular in the USA in the 70s and 80s.

Blue ribbon divider used for visual effect

This recipe is listed in these categories. See them for more similar recipes.

Bread Recipes, Breakfast Recipes

Have you tried this recipe, or have a question? Join the community discussion in the comments.

📖The Recipe Card

English Muffin on orange plate with butter
Print Recipe Add to Collection Go to Collections
4 from 1 vote

Oven Baked English Muffin Recipe

This Oven Baked English Muffin Recipe is easy, delicious, and packed with all the nooks and crannies for your butter and jam.
Prep Time40 minutes mins
Cook Time18 minutes mins
Total Time58 minutes mins
Course: Bread
Cuisine: American
Keyword: Baked English Muffins, English Muffins, Homemade English Muffins
Servings: 8
Calories: 190kcal
Author: Dan Mikesell AKA DrDan

Ingredients

  • 1 cup milk
  • 1 tablespoon butter
  • 1 tablespoon sugar
  • 1 package rapid dry yeast or quick
  • ½ teaspoon salt
  • 2 ½ cup flour
  • ¼ cup cornmeal
US Customary - Convert to Metric

Instructions

  • Warm 1 cup of milk in the microwave to about 100° to 105°—about 30 seconds. Also, melt 1 tablespoon of butter—for about 10 seconds.
    butter in a small bowl in a microwave
  • Stir together the warmed milk, melted butter, one tablespoon of sugar, and one package (2 ¼ teaspoons) of quick or rapid yeast. Mix well and allow the yeast to proof for about 5 minutes until starting to foam a little. Add 2 ½ cups of flour and ½ teaspoon salt to the yeast mixture—mix well, scraping the sides of the bowl to make a shaggy dough.
    mixing flour into wet ingredients in a glass bowl
  • Cover the dough with plastic wrap. Allow it to sit overnight at room temperature.
    forming the dough into a ball in a the bowl
  • The dough will "fall in upon itself." Cut some 4-5 inch squares of parchment paper for later use. Preheat the oven to 400° with a large nonstick sheet pan in the oven.
    dough after a rise and fall
  • Turn the dough onto a floured work surface, gently roll up, and then cut into 8 equal pieces. Be gentle with the dough. DO NOT KNEAD.
    dough cut into eight pieces
  • Place some cornmeal in a shallow bowl. Gently form the dough into balls and coat with the cornmeal.
    coating dough in yellow corn meal
  • Place a 3-inch cooking ring on a piece of parchment paper. Drop the coated balls of dough into the ring and flatten gently to fill the ring, then "dimple" the center in about a quarter of an inch. This will help it bake flatter. Repeat for all the dough balls. Allow to rest 30 minutes for any residual rise to occur.
    raw dough in baking ring on a piece of parchment paper
  • Remove the preheated baking sheet from the oven. Place the muffins on the tray and sprinkle with a little more cornmeal.
    moving raw muffins to heated baking sheet
  • Bake for 10 minutes. Flip the muffins. Bake another 8 minutes or so until the color is golden brown and the internal temperature of 200°.
    flipping muffins during cooking
  • Move to a cooling rack. Allow cooling at least 5 minutes before serving.
    baked English muffins on a cooling rack

Notes

Pro Tips

  1. Never knead this dough.
  2. Add a little cinnamon and raisins for a special treat.
  3. If you like a thicker muffin, make six instead of eight.
  4. These will spoil in 2-3 days at room temperature. Store refrigerated for up to a week or 2-3 months frozen.
  5. If you don't have a baking ring, you can use a tuna can or something similar. You also could from them by hand but the more you play with the dough, the fewer nooks, and crannies.

Nutrition

Calories: 190kcal | Carbohydrates: 36g | Protein: 6g | Fat: 2g | Saturated Fat: 1g | Cholesterol: 4mg | Sodium: 172mg | Potassium: 106mg | Fiber: 2g | Sugar: 3g | Vitamin A: 106IU | Calcium: 43mg | Iron: 2mg

Originally published May 9, 2015. Updated with expanded options, refreshed photos, and a table of contents to help navigation.

dogs playing in the yard.

Honey Garlic Chicken Skewers (Easy Marinade for Grill or Oven)

honey garlic chicken kabobs on a white board

These beginner-friendly honey garlic chicken skewers are an easy way to put a flavorful dinner on the table. An easy marinade makes tender chicken and colorful vegetables for a complete meal on one skewer.

❓ Quick Answer: What Is Honey Garlic Chicken Marinade?

Honey garlic chicken marinade uses just 5 ingredients to make one of the best sweet and savory marinades for chicken skewers (kabobs).

  • Ingredients: Honey, soy sauce, garlic, olive oil, and black pepper.
  • How long to marinate: 30 minutes to 2 hours for the best flavor.
honey garlic chicken kabobs on a white board.
[feast_advanced_jump_to]

quote mark
Featured Comment by Patty:
"As expected, this was delicious!! "

TL;DR — Recipe Summary

What: Honey garlic chicken skewers with a simple 5-ingredient marinade, colorful bell peppers and onions, cooked on the grill or in the oven.

Why: The honey caramelizes into a flavorful glaze while the soy sauce and garlic help keep the chicken juicy and tender.

How: Marinate for 30 minutes to 2 hours, thread the chicken and vegetables onto skewers, then grill or bake until the chicken reaches 165°F.

🐓 Ingredients

raw chicken and ingredients for kabobs.
  • Boneless skinless chicken breasts – Trimmed and cut into 1-inch chunks
  • Bell peppers – Any color; a mix adds more color and flavor
  • Red onion – Cut into chunks

Honey Garlic Marinade

  • Olive oil – For moisture and flavor
  • Low-sodium soy sauce – Adds umami without too much salt
  • Honey – Balances the savory with sweetness
  • Garlic – Fresh or crushed cloves
  • Black pepper – Just enough seasoning

Optional Vegetables

  • Cherry tomatoes – Use separate skewers—they cook faster than chicken
  • Zucchini – Cut into thick rounds or half-moons
  • Mushrooms – Whole or halved; soak up marinade well

👨‍🍳 Quick Overview: Honey Garlic Chicken Skewers

1. Prepare chicken and vegetables

Chop bell peppers and red onions into chunks. Trim and cut chicken breasts into 1-inch pieces.

trimmed chicken on red board.

2. Marinate

Add chicken and veggies to a ZipLock bag or bowl. Add olive oil, soy sauce, honey, black pepper, and crushed garlic. Mix well and refrigerate for 30 minutes to 2 hours.

adding soy sauce to bag with chicken.

3. Assemble the skewers

Preheat the grill to a surface temperature of 450°–500°F. Thread the chicken and veggies onto skewers.

assembled kabobs ready on black board.

✅ Pro Tip: The chicken and veggies should touch but not squish together for best cooking.

4. Grill

Cook over direct heat, turning every 5–6 minutes. Grill until the chicken reaches an internal temperature of 165°F—about 12–15 minutes total.

kabobs on grill surface.

✅ Pro Tip: Chicken must be cooked to a safe internal temperature of 165°F, according to the USDA. Use a meat thermometer to check the thickest pieces near the center of the skewers.

5. Serve

Remove from the grill and serve hot.

grilled kabobs on white tray.

👇 Scroll down for the printable recipe card and complete step-by-step photo instructions—or keep reading for tips, veggie options, and serving ideas.

🥣 Why This Honey Garlic Chicken Marinade Works

This easy honey garlic chicken marinade uses just five pantry ingredients that work together for juicy, flavorful chicken skewers (kabobs).

  • Honey caramelizes into a light honey glaze.
  • Soy sauce adds savory flavor and salt.
  • Garlic gives the marinade its classic flavor.
  • Olive oil helps coat the chicken and vegetables evenly.
  • Marinating 30 minutes to 2 hours gives plenty of flavor—longer isn't needed.

This honey garlic marinade also works well with boneless skinless chicken breasts or thighs, pork tenderloin, and shrimp.

🧑‍🍳 Tips for Perfect Chicken Skewers

👉 Use the Right Skewers

✅ Pro Tip: Metal skewers help chicken cook evenly by conducting heat into the center of each piece.

Wood skewers are fine, too—just soak them in warm water for 15–30 minutes so they don’t burn. (Yes, they will burn.)


👉 Best Vegetables for Chicken Skewers (Kabobs)

If you mix bell peppers and onions with the chicken on the same skewer, they’ll cook at about the same rate—so no need to separate them unless you prefer it.

If you’re using slower-cooking vegetables like potatoes or thick chunks of carrot, they’ll take much longer and should go on separate skewers or be pre-cooked.

Cherry tomatoes cook quickly and often burst—use separate skewers or skip them entirely.

🔥 How to Cook Honey Garlic Chicken Skewers in the Oven

No grill? No problem. You can bake the skewers on a tray at 450°F for about 15 minutes. The honey caramelizes as they cook, giving them a delicious, glossy honey glaze.

✅ Pro Tip: Just like on the grill, cook chicken to an internal temperature of 165°F for food safety.

Oven times can vary depending on your pan, oven, and how big your chicken pieces are—start checking early.

The same honey garlic marinade works just as well in the oven, creating juicy chicken skewers with a caramelized honey glaze.

❓ FAQs

Can chicken thighs be used for kabobs?

Yes, this honey garlic chicken skewers recipe works with either breasts or thighs.

Just be sure to cook them to a final internal temperature of 185°F for the best texture. Thighs will take longer than breasts, so I recommend putting them on separate skewers to prevent the vegetables from overcooking or burning.

What type of grill to use?

Any grill where you can control the temperature will work. Gas, charcoal, and pellet grills all cook these honey garlic chicken skewers well. Aim for a grill surface temperature of 450°–500°F and cook the chicken to 165°F.

For more on managing grill temps, check out my guide to Grill Temperature.

Can I prep the skewers ahead of time?

Yes, but don’t overdo the marinating. The chicken only needs 30 minutes to 2 hours in the marinade—longer than that, and the texture can suffer. If you want to get ahead, chop the chicken and veggies earlier in the day, store them separately in the fridge, and marinate closer to cook time. You can also assemble the skewers up to an hour in advance and keep them chilled until grilling.

Can I bake these instead of grilling?

“Yes. Bake at 450°F for about 15 minutes, or until the chicken reaches 165°F. It’s the same honey garlic chicken skewers recipe, and the honey caramelizes in the oven into a glossy honey glaze.”

🍽️ Serving Suggestions

These skewers go with just about any summer side. Try them with:

  • Simple Spinach Salad
  • Grilled Mixed Vegetables
  • Grilled Baby Red Potatoes
  • Cold Macaroni Salad
  • Microwave Corn on the Cob or Grilled Corn

Easy to scale up for a cookout or serve as a no-fuss dinner for two.


🥡 Storing Leftovers

Refrigerate leftover chicken and vegetables in an airtight container for up to 3 days. You can freeze the cooked chicken for up to 3 months, but skip freezing the vegetables—they don’t hold up well after thawing.

🍢 More Kabob Recipes to Try

Make it a kabob summer with more easy, flavorful skewers:

  • Steak Kabob Marinade – Bold flavor for sirloin, strip steak, or your favorite cut
  • Easy Beef Kabobs – Classic and customizable for grill nights
  • BBQ Chicken Kabobs – Sweet, smoky, and saucy
  • Buttermilk Ranch Chicken Kabobs – Tender and tangy with a creamy twist

Perfect if you're cooking for two or feeding a backyard crowd.

📖The Recipe Card

honey garlic chicken kabobs on a white board
Print Recipe Add to Collection Go to Collections

Honey Garlic Chicken Skewers with Honey Garlic Marinade

Juicy chicken and tender vegetables in an easy 5-ingredient honey garlic marinade, then grilled or baked with a caramelized honey glaze.
Prep Time10 minutes mins
Cook Time12 minutes mins
Total Time22 minutes mins
Course: Main Course
Cuisine: American
Keyword: Chicken Kabobs, grilled chicken kabobs recipe, honey garlic chicken kabobs, honey garlic chicken skewers
Servings: 4
Calories: 335kcal
Author: Dan Mikesell AKA DrDan

Ingredients

  • 2 skinless boneless chicken breasts 1½ to 2 pounds
  • 2 bell peppers, any color
  • 2 medium red onion

Honey Garlic Chicken Marinade

  • ¼ cup olive oil
  • ¼ cup soy sauce Low Sodium
  • ¼ cup honey
  • 4 cloves garlic
  • ½ teaspoon pepper
US Customary - Convert to Metric

Instructions

Prepare chicken and vegetables

  • Prep two peppers (any color) and two medium red onions. Chop into chunks.
    cut up peppers and red onion on black board
  • Trim two skinless boneless chicken breasts and chop them into 1-inch cubes.
    trimmed chicken on red board

Marinate

  • Add the chicken and veggies to a one-gallon ZipLock bag or bowl. Add ¼ cup of olive oil, ¼ cup of low-sodium soy sauce, and ¼ cup of honey. Add ½ teaspoon of black pepper and 4 cloves of crushed garlic. Seal the bag and mix well. Refrigerate for 30 minutes to 2 hours.
    adding soy sauce to bag with chicken

Assemble the skewers

  • Place meat and veggies on kabob skewers. Metal skewers preferred, but soaked wood skewers will work.
    assembled kabobs ready on black board

Grill

  • Preheat the grill to a surface temperature of 450°–500°F.
    clean and oil grill crates
  • Grill over direct heat, turning every 5–6 minutes, until the chicken reaches an internal temperature of 165°F—about 12–15 minutes total.
    kabobs on grill surface

Serve

  • Remove from the grill and serve hot.
    grilled kabobs on white tray

Notes

Pro Tips

  1. A very easy recipe to scale up or down to the amount you need.
  2. If using chicken thighs, cook to a final internal temperature of 185°F for the best texture. Keep vegetables on separate skewers to avoid burning
  3. I prefer metal skewers since they will transfer heat to the center of the chicken.
  4. You can use wooden skewers, but be sure to soak them in water for about 30 minutes to prevent them from catching on fire.
  5. The grill surface temperature should be in the 450°-500°F range.
  6. Always cook chicken to a minimum of 165°F (per USDA guidelines).
  7. You can also bake these in an oven—about 15 minutes at 450°F.

Nutrition

Calories: 335kcal | Carbohydrates: 16g | Protein: 50g | Fat: 10g | Saturated Fat: 1g | Polyunsaturated Fat: 1g | Monounsaturated Fat: 5g | Cholesterol: 142mg | Sodium: 444mg | Potassium: 200mg | Fiber: 2g | Sugar: 10g | Vitamin A: 250IU | Vitamin C: 72.6mg | Calcium: 20mg | Iron: 0.4mg

Originally published April 24, 2016. Updated with expanded options, refreshed photos, and a table of contents to help navigation.

Molly as a deck puppy.
Lilly as a deck puppy.

Basic Meatloaf Recipe (2-Pound Family Size)

Easy Basic Meatloaf—Paula Deen Inspired

This basic meatloaf recipe is classic comfort food—a ground beef loaf with pantry ingredients and a simple ketchup glaze. Inspired by Paula Deen, it's everything you expect from an old-fashioned comfort food dinner.

Written as a 2-pound (8-serving) family-size recipe, it's easy to adjust the ingredients for a smaller loaf or a larger crowd. Bake it in a convection or regular oven—your choice.

❓ Quick Answer: How Long to Cook Meatloaf at 350°F

  • A 2-pound meatloaf takes about 1 hour to 1 hour 15 minutes at 350°F convection (375°F conventional).
  • Other sizes: 1-pound — 40–50 minutes. 3-pound — about 1¼–1½ hours.
  • Cooking time varies. Cook to a safe 165°F, since timing depends on the size and thickness of the meatloaf, your oven, and the baking pan.
close up image of a large serving of meatloaf with ketchup on a white plate
[feast_advanced_jump_to]

🤔 TL;DR – Recipe Summary

What: A classic 2-pound (8-serving) basic meatloaf with a simple ketchup glaze, inspired by Paula Deen.

Why: Easy pantry ingredients, adjustable for different loaf sizes, and cooks in convection or conventional ovens.

How: Mix, shape, glaze, and bake at 350°F convection (375°F conventional) until the center reaches 165°F.

🐄 Ingredients

  • Ketchup glaze – Ketchup, brown sugar, and yellow mustard.
  • Ground beef – I prefer 80/20 for the best flavor and a moist meatloaf.
  • Onion and green bell pepper – Add classic flavor and moisture. The green pepper is optional.
  • Bread crumbs – Help bind the meatloaf and keep it tender. Quick oats also work.
  • Diced tomatoes – Add moisture and classic tomato flavor.
  • Pantry ingredients – Egg, salt, and black pepper.

👨‍🍳 Quick Overview: Basic Meatloaf

1. Mix the meatloaf

Mix all meatloaf ingredients except the glaze in a large bowl. Mix well, but don't overmix.

two eggs in white bowl

2. Make the glaze

Stir together the ketchup, brown sugar, and mustard.

topping ingredients in bowl

3. Shape and glaze

Shape into a 2-pound loaf about 1½ inches thick, then spread the glaze evenly over the top.

meatloaf with topping in oven

4. Bake

Bake at 350°F convection (375°F conventional) for about 1 hour to 1 hour 15 minutes, until the center reaches 165°F. Let rest for 5–10 minutes before draining any excess liquid, slicing, and serving.

cooked meatloaf baking dish

For more details, keep reading. See the Recipe Card below for complete instructions and to print.

⏲️ How Long to Cook Meatloaf

A 2-pound meatloaf usually takes about 1 hour to 1¼ hours in a 350°F convection (375°F conventional) oven. Cooking time depends on the size and thickness of the loaf, your oven, and even the baking pan.

  • 1-pound meatloaf: 40–50 minutes
  • 2-pound meatloaf: 1–1¼ hours
  • 3-pound meatloaf: 1¼–1½ hours
  • Mini or cupcake meatloaf: 20–30 minutes

Always cook meatloaf to a final internal temperature of 165°F, not by time alone. An instant-read thermometer is the only reliable way to know when it's done.

🔄 How to Adjust This Meatloaf Recipe

This recipe is written as a 2-pound (8-serving) meatloaf, but it's easy to make a smaller or larger loaf. Simply adjust the number of servings in the recipe card, and the ingredient amounts will recalculate automatically.

Cooking time will also change with the size of the loaf:

  • 1-pound meatloaf: About 40–50 minutes
  • 2-pound meatloaf: About 1–1¼ hours
  • 3-pound meatloaf: About 1¼–1½ hours

Always cook meatloaf to a final internal temperature of 165°F, regardless of size.

🍽️ How to Serve

Serve this classic meatloaf with a hot vegetable like  Baked Green Beans with Bacon, corn, or peas. Add a potato side such as a Baked Potato, Twice Baked Potato, or Scalloped Potatoes. Finish the meal with Basic White Stand Mixer Bread or Easy Dinner Rolls.

🧊 Leftovers and Storage

Store leftover meatloaf in an airtight container in the refrigerator for 3–4 days or freeze for up to 3 months.

Reheat individual slices in the microwave, or warm larger portions in the oven or a covered skillet on the stovetop until heated through.

❓FAQs

Can I use ground turkey, chicken or sausage?

Yes. Ground turkey or chicken can replace the ground beef, but cook the meatloaf to a final internal temperature of 165°F. You can also substitute pork sausage or Italian sausage for part of the ground beef for extra flavor.

Can I use oats instead of bread crumbs?

Yes. Paula Deen's original recipe uses quick oats, but I prefer bread crumbs for a slightly finer texture. Either works well in this recipe.

Can I make this meatloaf ahead of time?

Yes, but only for a day. Assemble the meatloaf, cover, and refrigerate for up to 24 hours before baking. For longer storage, bake the meatloaf first, cool completely, then freeze individual slices or larger portions for up to 3 months.

What is meatloaf?

Meatloaf is a classic comfort food made by combining ground meat with ingredients that add moisture, flavor, and structure before baking it into a loaf. Most recipes include bread crumbs or oats, an egg, seasonings, and a tomato-based topping or glaze.

This recipe uses ground beef, bread crumbs, onion, green bell pepper, diced tomatoes, and a simple ketchup glaze for a traditional old-fashioned meatloaf.

❤️ More Comfort Food Dinner Recipes

Start with my Small Meatloaf for Two or More, our family favorite for almost 50 years and perfect for smaller households. Then try Meatloaf Burgers and Salisbury Steak with Onion Gravy for more classic comfort food dinners.

📖The Recipe Card

Easy Basic Meatloaf—Paula Deen Inspired
Print Recipe Add to Collection Go to Collections
4.25 from 4 votes

Basic Meatloaf Recipe (2-Pound Family Size)

Classic 2-pound (8-serving) basic meatloaf with a simple ketchup glaze. Bake in a convection or regular oven, and easily adjust the recipe for smaller or larger meatloaves.
Prep Time10 minutes mins
Cook Time1 hour hr
Total Time1 hour hr 10 minutes mins
Course: Main Course
Cuisine: American
Keyword: how long to cook meatloaf, meatloaf in convection oven, Paula Deen Meatloaf
Servings: 8
Calories: 415.9kcal
Author: Dan Mikesell AKA DrDan

Ingredients

  • 2 pounds ground beef
  • 2 teaspoons salt
  • ½ teaspoon black pepper
  • 1 chopped mediuml onion
  • 1 green pepper about 1 cup-optional
  • 2 eggs lightly whipped
  • 1 cup bread crumbs or quick oats
  • 2 cups diced tomatoes

Topping - Just straight ketchup is good also.

  • ⅔ cup ketchup
  • 4 tablespoons brown sugar
  • 2 tablespoons mustard
US Customary - Convert to Metric

Instructions

  • Preheat the oven to 350° convection (375° conventional). Mix all meatloaf ingredients except the glaze in a large bowl. Mix well, but don't overmix. Shape into a loaf about 1½ inches thick and place in a baking dish.
    two eggs in white bowl
  • Mix topping.
    topping ingredients in bowl
  • Spread the glaze evenly over the meatloaf. Bake for about 1 hour to 1¼ hours until the center reaches 165°F. Let rest for 5–10 minutes before serving.
    meatloaf with topping in oven
  • Drain or remove from pan for serving.
    cooked meatloaf in dish

Notes

Pro Tips

  1. This recipe is written as a **2-pound (8-serving)** meatloaf. Adjust the **number of servings** in the recipe card to make a smaller or larger loaf. Cooking times for different sizes are listed in the post
  2.  I prefer bread crumbs, but quick oats work well if you prefer them.
  3. I also prefer just ketchup as the topping. It is simpler and less sweet.
  4. The green pepper releases fluid during cooking, so mix a little dry, or it may fall apart some. If you add the green pepper, be careful not to overdo it.
  5. Mix well but don't "over mix".
  6. Bake to a final internal temperature of **165°F**. Always use an instant-read thermometer.
  7. Use a long spatula to lift it out of the pan.
  8. Good refrigerated for 3-4 days and will freeze well for 3-4 months.

Nutrition

Calories: 415.9kcal | Carbohydrates: 24.5g | Protein: 23.6g | Fat: 24.7g | Saturated Fat: 9.2g | Polyunsaturated Fat: 1.2g | Monounsaturated Fat: 10.6g | Trans Fat: 1.4g | Cholesterol: 121.4mg | Sodium: 1002.6mg | Potassium: 558.2mg | Fiber: 1.7g | Sugar: 12.8g | Vitamin A: 290.6IU | Vitamin C: 18.4mg | Calcium: 82.6mg | Iron: 3.9mg

Inspired by Paula Deen and her basic meatloaf. I substituted breadcrumbs for quick oats and added detailed instructions, options, and recipe size adjustments.

Originally Published April 26, 2011. Updated with expanded options, refreshed photos, and a table of contents to help navigation.

Lilly and Molly standing nose to nose

Pan Seared Oven Roasted Pork Chops

Pan Seared Oven Roasted Pork Chops from 101 Cooking for Two

Learn to cook the best baked pork chops that are tender and moist. With a little searing and minimal time, they are juicy and favorable. It doesn’t get better or easier than this.

Picture of two roasted Pork Chops on an off white plate

[feast_advanced_jump_to]

Blue ribbon divider used for visual effect

Introduction

Simple, moist, and tasty are all good words. In cooking, I love these words, and here they are all in one place with these great baked pork chops.

We all love a good pork chop, and they make an excellent weeknight dinner. So let's make them as good and as easy as possible.

My Rating

My rating system of a 4

A solid high 4. And a low five if you brine.

🐖Pork Chops

What is a pork chop?

graphic for pork chop location -Image licensed May 17, 2017, from Fotolia. Copyright by foxysgraphic - Fotolia. Image modified in accordance with the license.
Image licensed from Fotolia. Copyright by foxysgraphic - Fotolia. Image modified in accordance with the license.

Let's talk about pork and pork chops. First, pork is not graded like beef. There is no prime, choice, etc. unless made up as a marketing gimmick. There are multiple names for the same cut only for marketing.

A pork chop is from the loin of the hog. If there is a bone, it is usually the same bone, as you will find in baby back ribs.

I have listed five chops in the diagram, but only the middle three should be considered "real" chops and will all cook the same. The other two "chops" do not cook the same, and, to me, should be avoided.

Boneless or bone-in?

It doesn't matter to me. Some people feel bone-in will be more flavorful, but if that is true, it is minimal. The bone can slow cooking a small amount.

Our favorite chop is a center cut boneless, which I usually cut myself from a whole pork loin. I buy a whole pork loin and cut it as thick as I want easily, freezes great and great for other things like my Mexican shredded pork. I like to cut mine about 1 inch thick to cook well but still be moist.

♨️How to Cooking Pork Chops

The Pan

Cast iron work great. I generally use a 10- inch cast iron skillet if I am cooking two or the 12-inch for 4.

The preferred pan is safe on the stovetop and can go directly to the oven. Most skillets can do this, but not all. If you are unsure if you pan is safe used this way, then preheat an oven-safe pan in the oven. Then sear in a stovetop pan and transfer to the oven pan after searing.

Pick Your Chop

This is good for ¾ to 1 ½ inch pork chops. I generally use a center cut 1-inch boneless chop I cut myself.

🥣Should I Brine?

Yes, if you have time. But fresh pork chops cooked quickly will generally be moist and tender anyway. I feel that a pork chop that has been frozen is a bit drier, and I like to brine those chops.

Skip the brine if you want, and I think you will only have a little effect if you are careful not to overcook but do it if you have time.

The Searing

The searing creates a Maillard reaction, which is the scientific name for the browning you will see. It adds lots of flavors to enhance the final results. It is this searing that will get you the outstanding flavor you want.

The first thing is wet meat does not sear well. Pat dry the chops before searing.

Generally, sear for about 3-4 minutes per side. It will vary a bit you the temperature of the pan and the meat. Get the meat to almost the final color you want.

Also, I like to flip the meat one final time just as the meat goes into the oven. This puts the coldest side of the meat on the hot pan for the final cooking.

Gravy Option

You can easily make gravy in the pan after done cooking. See Fried Pork Chops with Gravy and How To Make Gravy at Home.

🌡️⏰Temperature and Time for Cooking Pork Chops

I like to sear over medium-high heat. I prefer a higher oven temperature, and the recipe calls for 400° convection or 425° conventional. You can use lower temperatures, but it will take a bit longer and may dry some.

The searing time is generally about 3-4 minutes per side. The time in the oven varies by the thickness, the amount of searing, and the exact oven temperature. Also, a bone-in chop may take a few minutes longer.

The 1-inch thick chops I suggest will take 8-10 minutes to get to 145°-150° internal temperature.

If you do ¾ inch thick, it will be in the 5-7 minute range. And if you don't sear, it will take a few minutes before reaching your final internal temperature.

And the usual reminder- never cook by time alone. You are cooking to a final internal temperature and not by the clock. The time estimates are provided for your planning.

Final Internal Temperature for Pork

Taste, moisture, and safety-wise, 145° with a three-minute rest is correct. There will be a little pink left in the pork at 145°, and if you are like my wife, who wants no pink, you will be more comfortable at 150° or even 155°. Please do not go over 155° for this cut, or it will begin to dry.

For many years, due to the fear of trichinosis, which was a parasite found in undercooked pork, pork was cooked to 170° by common wisdom. However, with modern farming methods, that has not been a risk in the USA for decades.

The FDA went to a recommendation of 160° for a number of years. Then in 2012 went to the current recommendation of 145° with a 3-minute rest.

📖Pork Chop Recipes

Fried Pork Chops with Gravy

Breaded Pork Chops

How to Grill Pork Chops on a Gas Grill

Pan Seared Oven Roasted Thick Cut Pork Chops

Blue ribbon divider used for visual effect
↑Jump to Table of Contents

This recipe is listed in these categories. See them for more similar recipes.

30-Minute Dinner Recipes, Pork Chop and Loin Recipes, Pork Recipes

Have you tried this recipe, or have a question? Join the community discussion in the comments.

Step-by-Step Photo Instructions

trimmed pork chop on red board

Use the pork chop of your choice. If there is a fat rim over ½ inch thick, then trim it down. Then notch the fat through to prevent cupping.

raw pork chops in bag with brine

If brining, mix brine in 1-gallon freezer bag, place bag in a bowl, submerge chops and refrigerate for 1-2 hours. Then lightly rinse and pat dry.

two pork chops on white plate under a pepper shaker

Preheat oven to 400° convection or 425° conventional oven. Pat dry the chops with a paper towel. Salt (only if not brined) and pepper to taste.

two pork chops in cast iron pan seared

Heat oil in an oven-safe pan over medium-high heat until shimmering. Brown both sides of the chops to the point you might call done—about 3 minutes per side. Flip one final time and place in the oven until the internal temp of your choice. I did 150° degrees, and it took 10 minutes.

bite of pork on a fork with the chop in the background
↑Jump to Table of Contents

📖The Recipe Card

Pan Seared Oven Roasted Pork Chops from 101 Cooking for Two
Print Recipe Add to Collection Go to Collections
4.64 from 11 votes

Pan Seared Oven Roasted Pork Chops

Learn to cook the best baked pork chops that are tender and moist. With a little searing and minimal time, they are juicy and favorable. It doesn’t get better or easier than this.
Prep Time5 minutes mins
Cook Time18 minutes mins
Total Time23 minutes mins
Course: Main Course
Cuisine: American
Keyword: Baked Pork Chops, Pan Seared Oven Roasted Pork Chops, Pork Chops
Servings: 2 chops
Calories: 225kcal
Author: Dan Mikesell AKA DrDan

Ingredients

  • 2 pork chops
  • 1 teaspoon vegetable oil
  • salt
  • pepper

Optional Brine

  • 3 cups water cold
  • 3 tablespoons table salt
  • 2 tablespoons brown sugar
US Customary - Convert to Metric

Instructions

  • Use the pork chop of your choice. If there is a fat rim over ½ inch then trim it down. Then notch the fat through to prevent cupping.
  • If brining, mix brine in 1 gallon freezer bag (the water, salt and brown sugar) place bag in bowl, submerge chops and refrigerate for 1-2 hours. Then lightly rinse and pat dry.
  • Preheat oven to 400° convection or 425° conventional oven. Pat dry the chops with a paper towel. Salt (only if not brined) and pepper to taste.
  • Heat oil in over safe pan over medium high heat until shimmering.
  • Brown both sides of the chops to the point you might call done. About 3-4 minutes per side.
  • Flip one final time and place in the oven until internal temp of your choice. I did 150, and it took 10 minutes.
  • Rest for 5 minutes before cutting.

Video

Notes

Pro Tips

  1. This is for ¾ to 1 ½ inch thick pork chops. Bone-in or boneless either will be good. Bone-in will take a few more minutes in the oven.
  2. Brining is an option, but it will still be good without it. If you brine, rinse it off and do not add more salt.
  3. Searing goes a lot better if you pat dry the chops before searing.
  4. When you sear, get to about the final browning you want. Also, do a final flip just be putting in the oven.
  5. Use a stovetop to oven-safe pan. If you don’t have that, you can preheat an oven-safe pan and transfer the seared chops to it.
  6. Remember, you are cooking to a final internal temperature and NEVER by time only. There are too many variables and time estimates are provided to help your meal planning.
  7. 145° is the minimum temperature and should have a 5-minute rest after cooking.
  8. For gravy, see Fried Pork Chops with Gravy and How To Make Gravy at Home.

Nutrition

Calories: 225kcal | Protein: 29g | Fat: 11g | Saturated Fat: 5g | Cholesterol: 90mg | Sodium: 646mg | Potassium: 500mg | Calcium: 9mg | Iron: 1mg

Editor's note: Originally published April 6, 2011. Updated with expanded options, refreshed photos and a table of contents to help navigation.

Molly and Lilly dogs hanging out by the pond with snow in the air

BBQ Boneless Chicken Breasts on the Grill (Easy & Juicy)

BBQ chicken breast on white plate

BBQ chicken breasts should be juicy, not dry. You only need two ingredients—chicken breasts and BBQ sauce. This simple grilled version delivers big flavor with minimal fuss—just boneless chicken, your favorite sauce, and a few smart tips.

🍖 How Long Does It Take to Grill BBQ Chicken Breasts?

  • Most boneless BBQ chicken breasts take 25–35 minutes at about 450°F.
  • Cook to 165°F, flipping every 5 minutes.
  • BBQ sauce: A light base coat at the start and a heavier coat for the last 3–4 minutes.
BBQ chicken breast on white plate.
[feast_advanced_jump_to]

quote mark
Featured Comment from Basil :
⭐⭐⭐⭐⭐
"Best bbq'd SBCBs we've ever eaten. Perfect!"

🧡 Why You’ll Love This Recipe

  • Only 2 ingredients – just chicken and BBQ sauce.
  • Juicy every time – no more dry BBQ chicken, just moist and flavorful.
  • Simple method – works on any grill (gas or charcoal) with no special gear.
  • Boneless & fast – perfect for quick weeknight dinners or summer cookouts.
  • BBQ flavor you control – use your favorite sauce or spice it your way.

🐓Ingredients

Just two ingredients — the chicken (properly prepared) and your favorite BBQ sauce provide all the flavor (so choose wisely).

  • Chicken – Skinless boneless chicken breasts
  • BBQ Sauce – Use your favorite store-bought or try my Memphis Style BBQ Sauce
  • Optional Brine – Water, table salt, brown sugar, and a pinch of cayenne (optional)

👨‍🍳Quick Overview: BBQ Boneless Chicken Breasts on the Grill

1. Prepare

Trim boneless skinless chicken breasts. Thin to about ¾ inch if needed. Brine is optional.

flattening chicken breasts.

Clean and oil the grill grates, then preheat to a surface temperature of about 450°F (medium on most gas grills). Avoid going over that—too hot and the sauce may burn.

cleaning and oiling grill grates.

2. Brush with Sauce

Pat the chicken dry with paper towels. Brush lightly with your favorite BBQ sauce.

Brushing chicken with BBQ sauce on plate

3. Grill

Place over direct heat. Flip every 5 minutes. In the last 3–4 minutes, brush both sides with more sauce.

Cook to an internal temperature of 165°F—about 25 to 35 minutes total.

brushing chicken with sauce on the grill.

✅ Pro Tip: According to the USDA, chicken is safe to eat at 165°F internal temperature. Use an instant-read thermometer for best results—don’t guess.

4. Rest

Remove from the grill and let rest for 5 minutes before serving.

Grilled BBQ boneless chicken breasts.

👇 Scroll down for the printable recipe card and step-by-step photo instructions—or keep reading for tips, veggie ideas, and serving suggestions.

⏲️ How Long to Cook BBQ Chicken Breasts on the Grill

Grill boneless chicken breasts for about 30 minutes total at a surface temperature of about 450°F.

  • Thin breasts may finish in 25 minutes
  • Thicker cuts may take up to 35 minutes
  • Flip every 5 minutes for even cooking and saucing

🌡️ When Is Chicken Done and Safe to Eat?

Chicken breasts are fully cooked and safe to eat at an internal temperature of 165°F, per USDA guidelines. Use an instant-read thermometer for accuracy.

✅ Pro Tip: Chicken thighs and drumsticks are safe at 165°F but are more tender at 185°F+ once the fibrous tissues have broken down.

♨️ Grill Setup Tips

Set your grill surface temp to about 450°F. That’s medium to medium-high on most gas grills. Too hot and you’ll scorch the sauce before the chicken cooks through.

If you have a surface thermometer, use it. If not, just don’t crank the dial to high.

✅ Charcoal? Totally fine—just manage the heat. Keep one side cooler for flare-ups, and watch those vents.

And whatever grill you’re using, your real target is 165°F internal temp.

❓FAQs

Can I really make BBQ chicken breasts with only 2 ingredients?

Yes — chicken and BBQ sauce are all you need. The grill gives smoky flavor without extra marinades or rubs.

Can I use skinless chicken thighs instead of breasts?


Yes, absolutely. Just know they’ll need a few extra minutes and should cook to 185°F for the best texture.

Should I brine?


Brining helps moisturize and tenderize the chicken—especially useful if it’s been previously frozen, which can dry it out.

My brine is simple: water, table salt, brown sugar, and optional cayenne. It’s on the saltier side, so limit the brine time to 30–60 minutes max. Even 20 minutes helps.

After brining, rinse carefully, clean your sink area, and skip any added salt in your seasoning. You can skip the brine altogether, but it takes more attention on the grill to keep the chicken moist.

Why use a thin coat of BBQ sauce first?

It gives the final layer of BBQ sauce something to stick to. That light first coat acts as a flavorful base and won’t burn—as long as your grill isn’t too hot and you don’t overcook the chicken.

Can I use a charcoal grill instead of gas?

Yes—just watch your heat closely. You’re aiming for about 450°F at the grate. Keep a cooler zone ready in case things start to flare up. Charcoal takes more tending, but the flavor payoff is great.

🥗 How to Serve BBQ Chicken Breasts

Keep it classic on a plate or a bun with extra sauce. Add a green salad or slaw for a lighter meal. Or serve it with chips, Grilled French Fries, Corn on the Cob, or Grilled Mixed Vegetables.

❄️ How to Store and Reheat Leftovers

Store leftovers in an airtight container in the fridge for up to 3 days or freeze for up to 3 months.

Reheat in the oven or on the grill for the best texture. The microwave works too, but it may affect the texture. If frozen, thaw first for best results.

♨️ More Grilled Chicken Breast Recipes

Looking for more ways to grill boneless chicken breasts?

  • Grilled Chicken Breasts — complete tutorial For extra moist and juicy try
  • Reverse Seared Chicken Breasts — for extra moist and juicy breasts
  • Grilled Chicken Sandwiches with chicken filets
  • Honey Glazed Grilled Chicken Breasts for a fast and easy change of pace

📖The Recipe Card

BBQ chicken breast on white plate
Print Recipe Add to Collection Go to Collections
4.86 from 7 votes

BBQ Boneless Chicken Breasts on the Grill (Easy & Juicy)

Moist, tender BBQ boneless chicken breasts with a simple two-coat BBQ sauce method. Ready in about 30 minutes on a gas grill.
Prep Time10 minutes mins
Cook Time30 minutes mins
Optional Brine30 minutes mins
Total Time1 hour hr 40 minutes mins
Course: Main Course
Cuisine: American
Keyword: bbq boneless chicken breast, bbq chicken breast on gas grill, easy grilled bbq chicken
Servings: 2 servings
Calories: 159kcal
Author: Dan Mikesell AKA DrDan

Ingredients

  • 2 skinless boneless chicken breasts
  • 2 tablespoon BBQ sauce of choice

Brine (optional)

  • 3 cups cold water
  • 1½ tablespoons table salt
  • 1½ tablespoons brown sugar
  • ½ to 1 teaspoon cayenne pepper (optional)
US Customary - Convert to Metric

Instructions

Prepare

  • Trim skinless, boneless chicken breast of any trimmable fat. Try to use chicken breasts of about the same size. And if you get some that are very plump, flatten them to about ¾ inch thick with a meat mallet or the bottom of a pan.
    trimmed chicken breasts on white board
  • Optional Brine: Mix brine of 3 cups water, 1½ tablespoons table salt, 1½ tablespoons brown sugar, and ½ to 1 teaspoon cayenne pepper (optional). Add the chicken, submerge it, and refrigerate for 30 minutes (no longer than 1 hour). Remove chicken from the brine and rinse lightly under running water. Please be careful and wash up the surrounding area and your hands.
    adding chicken to the brine
  • Clean and oil the grill grates, then preheat the surface to 450°F, which is approximately medium on most grills. I recommend using a surface thermometer to help you control your grill effectively.
    clean and oil grill crates

Brush with sauce

  • Pat dry the chicken breasts with paper towels.
    patting dry chicken breasts with paper towels
  • Brush lightly with the BBQ sauce of your choice.
    Brushing chicken with BBQ sauce on plate

Grill

  • Place over direct heat.
    placing chicken breast on the grill
  • Flip about every 5 minutes. Brush both sides with sauce during the last 3–4 minutes. Remove from the grill at an internal temperature of 165°F—usually around 30 minutes, depending on the grill temperature and breast size.
    brushing chicken with sauce on the grill

Rest

  • Allow to rest for about 5 minutes before serving.
    Two BBQ chicken breasts on white plate

Notes

Pro Tips:
  1. The brine is optional but helpful, especially for previously frozen chicken. It’s salt-heavy, so brine no longer than 1 hour, and rinse carefully.
  2. Grill time varies by heat and thickness—expect a total of 25 to 35 minutes. The thinner breasts may take 25 minutes, while those with larger, thicker ones may take 35 minutes. But 30 minutes is average.
  3. Flatten uneven chicken breasts with a mallet for even cooking—aim for a thickness of no more than ¾ inch.
  4. A thin first coat of BBQ sauce helps the final layer stick. It won’t burn if the grill temp is right.

Nutrition

Calories: 159kcal | Carbohydrates: 7g | Protein: 24g | Fat: 3g | Saturated Fat: 1g | Cholesterol: 72mg | Sodium: 678mg | Potassium: 459mg | Fiber: 1g | Sugar: 6g | Vitamin A: 73IU | Vitamin C: 1mg | Calcium: 23mg | Iron: 1mg

Editors Note: Originally published August 1, 2011. It was in need of a rewrite, some better photo editing, and some clarification of technique.

Jake begging for food,

Buttermilk Ranch Chicken Kabobs

chicken kabobs cooked on plate

Delicious Buttermilk Ranch Chicken Kabobs with tender and favorable chicken will make picky eaters happy. The easy buttermilk ranch marinade tenderizes and adds exceptional flavor.

Add in the optional vegetables for a great complete grilled meal.

🐓Ingredients

Chicken—breasts or thighs
Buttermilk Ranch Marinade—olive oil, Buttermilk ranch dressing or buttermilk and ranch dressing powder, Worcestershire sauce, lemon juice, apple cider vinegar
Pantry ingredients—salt, black pepper, and thyme or rosemary (optional)

chicken kabobs cooked on plate.
[feast_advanced_jump_to]
Blue ribbon divider used for visual effect

Featured comment from Kimberly:
"Did this yesterday. Best. Grilled. Chicken. Ever. Husband says it was totally "top notch restaurant quality"."

I love kabobs, and they are great for cooking for two. You can control the amount and cook more for leftovers and salads. But most importantly, the side dish is always a veggie kabob that simultaneously time or is mixed in with the chicken on the same skewers.

You may enjoy other kabobs with recipes like Steak Kabob Marinade, Simple Beef Kabob Marinade, Honey Garlic Chicken Kabobs, and 30 Minute BBQ Chicken Kabobs. And check out some other great chicken recipes on a gas grill, llike Grilling Chicken Breasts, Grilled Bone-in Chicken Thighs, and Grilled Chicken Drumsticks.

👨‍🍳How to Cook Buttermilk Ranch Chicken Kabobs 

  1. Trim and cut skinless boneless chicken breasts into 1-inch cubes.
  2. Mix marinade: olive oil, buttermilk ranch dressing, Worcestershire sauce, salt, black pepper, lemon juice, apple cider vinegar, and optionally thyme or rosemary.
  3. Cover the chicken with marinade and refrigerate for 30 minutes; a few hours is better. Use a bowl or Ziplock bag.
  4. Thread the chicken onto skewers and discard the marinade
  5. Place over direct heat on the grill and turn every 5 minutes until an internal temperature of 165°—about 15-20 minutes. Or bake at 450° for about 20 minutes.

This is a summary of the steps and ingredients. See the recipe card or the step-by-step photo instructions below for complete instructions.

When are chicken kabobs done?

According to the USDA, both breasts and thighs are safe at 165° internal temperature, but thighs need to reach 185°+ for tenderness. That is overcooked breast meat. So, if using thigh meat, cook a bit longer, and your final internal temperature needs to be higher.

How to cook chicken kabobs in the oven

You can cook them in the oven on a tray at 450° for about 20 minutes.

As always, you are cooking to a final internal temperature of 165°, not by time alone. Time varies by the oven, the tray, and the size of the chicken pieces.

♨️Grill setup

Like all good chicken recipes, this uses a grill surface temperature of about 450°. That is about medium or slightly above on most gas grills. On charcoal grills, it is not over the raging coals. For more information on grill temperature, please see my detailed instructions about Grill Temperature.

🍴What to serve with chicken kabobs

Kobobs are a great summer dish and need tasty summer side dishes. Check out Caprese Pasta Salad, Grilled Baby Red Potatoes, Grilled Mixed Vegetables, Grilled Pineapple, or a slice of Strawberry Pie with Jello.

❄️Storage of leftovers

It is good refrigerated for 4 days and makes great salad toppings. You can also freeze leftovers in an airtight container for 3 months.

❓FAQs

What skewers to use for chicken kabobs?

Metal skewers will conduct heat to the center of the chicken better, so I prefer them to wooden skewers. Before using wooden skewers, soak them in warm water for 15-30 minutes.

Can I use vegetables on the chicken kabobs?

Yes, you can add chunks of bell peppers and red onions. Give them a good brush of olive or vegetable oil and alternate with vegetables with the chicken.

You can also make separate vegetable kabobs. Just brush with oil and put on the grill a few minutes after starting to grill the chicken.

Some vegetables will require different cooking times than onions and bell peppers. A good example would be potatoes, which take much longer. So you need to be aware of your vegetables' cooking times.

Blue ribbon divider used for visual effect
↑Jump to Table of Contents

This recipe is listed in these categories. See them for more similar recipes.

Chicken Breast Recipes, Chicken Recipes, Grill Recipes

Have you tried this recipe, or have a question? Join the community discussion in the comments.

Step-by-Step Photo Instructions

raw chicken breasts with buttermilk and seasonings.

Skinless boneless chicken breasts are usually used for this recipe, but thighs are fine; but will need to cook to 185° to be tender instead of 165° for breasts.

chicken cut into cubes on red board.

Trim and cut two skinless boneless chicken breasts into 1-inch pieces.

marinade in bowl.
Double marinade in the picture. I have adjusted the recipe now for less waste.

Marinade: 2 tablespoons olive oil, ¼ cup buttermilk dressing, 2 teaspoons Worcestershire sauce, ½ teaspoon salt, ¼ teaspoon pepper, ¼ teaspoon lemon juice, ¼ teaspoon vinegar, ¼ teaspoon thyme or rosemary. You may substitute ¼ cup of liquid buttermilk and 2 teaspoons of ranch dressing powder for the buttermilk.

marinade in bowl with chicken cubes.

Cover the chicken with marinade in a bowl or use a Ziplock bag. Refrigerate for 30 minutes minimum, but a few hours is better.

grill surface thermometer.

Preheat the grill to a surface temperature of about 450°—medium-high on most grills. Clean and oil the grill grates.

raw chicken on skewers.

Thread the chicken onto skewers and discard the marinade. Metal skewers are preferred for heat conductivity, but wood skewers can be used—soak them in water for 15-30 minutes.

raw chicken on skewers on grill.

Place skewers over direct heat and flip every 5 minutes until an internal temperature of 165°—15-20 minutes total, depending on the grill and chicken size.

chicken kabobs cooked with some vegetables on plate.

📖The Recipe Card

chicken kabobs cooked on plate
Print Recipe Add to Collection Go to Collections
5 from 1 vote

Buttermilk Ranch Chicken Kabobs

Delicious Buttermilk Ranch Chicken Kabobs with tender and favorable chicken will make picky eaters happy. The easy buttermilk ranch marinade tenderizes and adds exceptional flavor.
Prep Time40 minutes mins
Cook Time20 minutes mins
Total Time1 hour hr
Course: Main Course
Cuisine: American
Keyword: Buttermilk Ranch Chicken, Chicken Kabobs, Chicken Skewers, Picnic
Servings: 2
Calories: 131kcal
Author: Dan Mikesell AKA DrDan

Ingredients

  • 2 skinless boneless chicken breasts

Marinade

  • 2 tablespoons olive oil
  • ¼ cup buttermilk ranch dressing substitute buttermilk and ranch powder
  • 2 teaspoons Worcestershire sauce
  • ½ teaspoon salt
  • ¼ teaspoon pepper
  • ¼ teaspoon lemon juice
  • ¼ teaspoon vinegar
  • ¼ teaspoon thyme or rosemary

Instructions

  • Skinless boneless chicken breasts are usually used for this recipe, but thighs are fine, but will need to cook to 185° to be tender instead of 165° for breasts.
    raw chicken breasts with buttermilk and seasonings
  • Trim and cut two skinless boneless chicken breasts into 1-inch pieces.
    chicken cut into cubes on red board
  • Marinade: 2 tablespoons olive oil, ¼ cup buttermilk dressing, 2 teaspoons Worcestershire sauce, ½ teaspoon salt, ¼ teaspoon pepper, ¼ teaspoon lemon juice, ¼ teaspoon vinegar, ¼ teaspoon thyme or rosemary. You may substitute ¼ cup of liquid buttermilk and 2 teaspoons of ranch dressing powder for the buttermilk.
    marinade in bowl
  • Cover the chicken with marinade in a bowl or use a Ziplock bag. Refrigerate for 30 minutes minimum, but a few hours is better.
    marinade in bowl with chicken cubes
  • Preheat the grill to a surface temperature of about 450°—medium-high on most grills. Clean and oil the grill grates.
    grill surface thermometer at 450 degrees
  • Thread the chicken onto skewers and discard the marinade. Metal skewers are preferred for heat conductivity, but wood skewers can be used—soak them in water for 15-30 minutes.
    raw chicken on skewers_
  • Place skewers over direct heat and flip every 5 minutes until an internal temperature of 165°—15-20 minutes total, depending on the grill and chicken size.
    raw chicken on skewers on grill

Notes

Pro Tips

  1. Chicken thighs work fine but cook to a final internal temperature of 180° or a bit more. It will take longer.
  2. You can use liquid buttermilk ranch dressing in this recipe. Replace the ranch powder and the buttermilk with ¼ cup of the dressing.
  3. The marinade is enough for a double recipe. You can cut it down if you want.
  4. Marinade for at least 30 minutes, but 2-3 hours is better.
  5. If you are using wooden skewers, make sure you soak them in water for 15-30 minutes.
  6. As will all grilled chicken, the grill surface temperature is critical to success. It needs to be in the 450° range.
  7. Oven baking: You can just pop them in the oven on a tray at 450° for about 20 minutes. As always, you are cooking to a final internal temperature and not by time alone.
  8. For the veggies: The standard onion and bell peppers can be mixed in the kabob with the chicken and cooked with it. Or if done separately, they will cook faster- about 10-12 minutes. Give them a good coat of oil either way. Other vegetables are up to you, but cooking time is variable with other vegetables.
  9. Good refrigerated for 3-4 days and great on salads. You could also freeze the cooked meat for 3-4 months, but that will dry it some.

Nutrition

Calories: 131kcal | Carbohydrates: 1g | Protein: 24g | Fat: 3g | Saturated Fat: 1g | Cholesterol: 73mg | Sodium: 193mg | Potassium: 418mg | Sugar: 1g | Vitamin A: 34IU | Vitamin C: 1mg | Calcium: 6mg | Iron: 1mg

Originally Published April 26, 2014. Updated with expanded options, refreshed photos, and a table of contents to help navigation.

dogs in trees

White Chicken Chili from Bone-in Chicken

ladle of white bean chicken chili

This will become your favorite chili with hearty white beans, tender chicken, and a rich, spicy broth. Just follow these easy step-by-step photo instructions.

🐓Ingredients

  • Chicken—Use about 3 pounds of skin-on bone-in split chicken breasts or thighs.
  • Chicken broth—low sodium,
  • Beans—Great Northern beans, Cannellini beans, or Navy beans drained and rinsed.
  • Aromatics—Onion and garlic
  • Peppers—Green chilies and jalapeno pepper.
  • Chili spices— include cumin, paprika, cayenne pepper, salt, and white or black pepper.
  • Thicken (optional)—Masa flour or corn starch. I usually skip thickening.
  • Milk and cheese (optional)—can be added to make it creamier.
white chicken chili in a ladle.
Blue ribbon divider used for visual effect
[feast_advanced_jump_to]

My best stovetop white bean chicken chili will leave you wanting more.

With exceptional taste and tenderness, this skin-on-bone-in chicken chili recipe is economical and has loads of tender chicken with a touch of heat.

This an easy recipe to adjust the thickness, spiciness, or even the size of the recipe. A few simplifications and modifications were all I wanted.

Check out my other white chicken chili recipes. First, see my favorite, Crock Pot White Chili. For a healthier alternative, try this Low Fat Crock Pot White Chicken Chili. And for a change of pace, check out

👨‍🍳How to Make White Bean Chicken Chili with Split Chicken Breasts

  1. Trim the split chicken breasts. and cover with broth in a large stockpot and simmer covered until 165°—about 40 minutes.
  2. Remove and allow the chicken to cool for about 10 minutes, and then hand shred discarding the skin and bones.
  3. Mince garlic, chop an onion, and clean and mince a jalapeno.
  4. Combine all ingredients, except any thickener, and simmer for about 2 hours, stirring occasionally.
  5. Adjust the jalapeno or cayenne pepper to adjust the heat of the chili.
  6. Optional thickening with corn starch or Masa flour. Make it creamy with optional milk and shredded Pepper Jack cheese.

This is a summary of the steps and ingredients. See the recipe card or the step-by-step photo instructions below for complete instructions.

Option—using rotisserie chicken

You can also use precooked rotisserie chicken. You will need about 4 to 5 cups of shredded precooked chicken. Pick up the instructions after the shredding of the chicken.

What to serve with white chicken chili

Garnish with cheese, sour cream, slices of avocado, or cilantro. Serve with salsa, pico de gallon tortilla chips, and guacamole.

Add Old Fashioned Cornbread or some Cornmeal Biscuits to round out your meal.

How to store and reheat leftovers

Cover airtight in the refrigerator for 3-4 days. Or store in the freezer sealed in an airtight container for 3 months.

Reheat on the stovetop over medium-high heat or in a microwave. If frozen, thaw first.

❓FAQs

Can I use skinless boneless chicken breasts or thighs?

Yes, follow the instructions and start cooking the chicken but use low-sodium chicken broth instead of water.

How to thicken white chicken chili?

For every 4 cups of chili to be thickened, add 1 tablespoon of Masa flour or cornstarch into a slurry with cold water to remove any lumps and stir into the chili. It will take about 5 to 10 minutes to work. Repeat if needed.

You can also add shredded Monterey Jack cheese to thicken the chili.

Blue ribbon divider used for visual effect
↑Jump to Table of Contents

This recipe is listed in these categories. See them for more similar recipes.

Chili Recipes, Healthy Recipes, Low Fat Recipes

Have you tried this recipe, or have a question? Join the community discussion in the comments.

Step-by-Step Photo Instructions

Cutting cut chicken breasts in half on board.

Trim 2-3 pounds of skin-on bone-in chicken breasts (split chicken breasts) or thighs of any trimmable fat, then cut in half to aid cooking.

chicken pieces in soup pot covered with water.

Place the chicken in a large stockpot and cover it with 8 cups of low-sodium chicken broth. Bring to a boil, then decrease to low to simmer. Cover with the lid and cook until internal temp is 165°—about 40 minutes.

minicing a jalapeno on black board.

Mince 4 cloves of garlic and chop a large onion. Then prep the jalapeno by splitting it and removing the seeds and veins before mincing.

shredded chicken on board.

Remove the chicken and allow it to cool for about 10 minutes, then hand shred discarding the skin and bones. Combine all ingredients except thickener or optional dairy products, and simmer for about 2 hours, stirring occasionally.

adding messa flour slury to chili pot.

Options:

Thickening (I usually don't): Mix 2 tablespoons of corn starch or Masa flour in ¼ cup cold water and mix until smooth. Combine the slurry with the soup and frequently stir for another 10 minutes. Repeat if needed.

Make it creamier: Add 1 cup of milk or cream. You can also add 1-2 cups of shredded pepper jack cheese.

📖The Recipe Card

ladle of white bean chicken chili
Print Recipe Add to Collection Go to Collections

White Chicken Chili from Bone-in Chicken

Based on a Pioneer Woman recipe using skin-on bone-in chicken to add more flavor. This will become your favorite chili with hearty white beans, tender chicken, and a rich, spicy broth. Just follow these easy step-by-step photo instructions.
Prep Time10 minutes mins
Cook Time3 hours hrs
Total Time3 hours hrs 10 minutes mins
Course: Main Course
Cuisine: American
Keyword: Chicken Chili, Stovetop White Chicken Chili, White Bean Chicken Chili
Servings: 12 servings
Calories: 175.5kcal
Author: Dan Mikesell AKA DrDan

Ingredients

  • 2-3 pounds split chicken breast or thighs both with bone and skin
  • 8 cups low sodium chicken broth
  • 1 onion large chopped
  • 1 jalapeno pepper cleaned and minced
  • 4 cloves garlic minced
  • 72 oz Navy beans precooked, drained, and rinsed
  • 8 oz diced green chilies
  • 4 teaspoons ground cumin increase if you want spicy
  • ½ teaspoon paprika increase if you want spicy
  • ½ teaspoon cayenne pepper increase if you want spicy
  • 1 teaspoon salt
  • ½ teaspoon white or black pepper

Optional

  • 2 tablespoon masa flour or corn starch in ¼ cup cold water to thicken
  • 1 cup milk or cream
  • 1-2 cups shredded pepper jack cheese
US Customary - Convert to Metric

Instructions

  • Trim 2-3 pounds of skin-on bone-in chicken breasts (split chicken breasts) or thighs of any trimmable fat, then cut in half to aid cooking.
    split chicken breast with knife of black board
  • Place the chicken in a large stockpot and cover it with 8 cups of low-sodium chicken broth. Bring to a boil, then decrease to low to simmer. Cover with the lid and cook until internal temp is 165°—about 40 minutes.
    chicken pieces in soup pot covered with water
  • Mince 4 cloves of garlic and chop a large onion. Then prep the jalapeno by splitting it and removing the seeds and veins before mincing.
    minicing a jalapeno on black board
  • Remove the chicken and allow it to cool for about 10 minutes, then hand shred discarding the skin and bones. Combine all ingredients except thickener or optional dairy products, and simmer for about 2 hours, stirring occasionally.
    shredded chicken on board
  • Options:
    Thickening (I usually don't): Mix 2 tablespoons of corn starch or Masa flour in ¼ cup cold water and mix until smooth. Combine the slurry with the soup and frequently stir for another 10 minutes. Repeat if needed.
    Make it creamier: Add 1 cup of milk or cream. You can also add 1-2 cups of shredded pepper jack cheese.
    adding masa flour slury to chili pot

Notes

Pro Tips:

  1. This is an easy recipe to cut in half.
  2. You need about 2 pounds of chicken after cooking. You may use almost any chicken. A whole chicken or chicken thighs work well.
  3. Instructions for skinless boneless chicken breasts and rotisserie chicken are in the recipe post above.
  4. You can thicken it with Masa flour or corn starch. Or skip thickening entirely.
  5. This is about 3/10 on my heat scale. You can decrease that by eliminating the jalapeno. Or increase by doubling the jalapeno or adding additional cayenne pepper.
  6. Good refrigerated for 3-4 days or frozen for 3-4 months.

Nutrition

Calories: 175.5kcal | Carbohydrates: 5.9g | Protein: 19.9g | Fat: 8.2g | Saturated Fat: 2.3g | Polyunsaturated Fat: 1.8g | Monounsaturated Fat: 3.4g | Trans Fat: 0.1g | Cholesterol: 48.4mg | Sodium: 292.3mg | Potassium: 397.4mg | Fiber: 1.2g | Sugar: 1.2g | Vitamin A: 182.4IU | Vitamin C: 4.3mg | Calcium: 35.7mg | Iron: 1.7mg

Originally Published December 4, 2010. Updated with expanded options, refreshed photos, and a table of contents to help navigation.

Molly and Lilly looking for Mr Squirral in the snow.

Caprese Pasta Salad—Fresh and Easy

Caprese Pasta salad on a large spoon

Caprese Pasta Salad is a light fresh Italian cold salad with tender pasta, fresh tomatoes, and mozzarella cheese with fresh basil and garlic.

It is the perfect side dish, a light meal, or take it to a picnic, potluck, or a quick dinner.

🥣Ingredients

Pasta
Vegetables—cherry tomatoes, bell pepper
Fresh mozzarella cheese
Fresh garlic and fresh basil
Extra virgin olive oil
Other add-ins - diced or shredded chicken, ham or pepperoni

Caprese Pasta salad on a large spoon.
[feast_advanced_jump_to]
Blue ribbon divider used for visual effect

Featured comment from Terri:
"This is fantastic! I used to buy a similar salad made at Wegman’s, but this is much better!"

Caprese Pasta Salad is a traditional Italian dish with fresh mozzarella, fresh basil, pasta, and olive oil or Italian dressing. Fresh cherry tomatoes are commonly added for color and taste. It is a light dish that screams summer.

For other summer dishes you may like, check out Broccoli Salad with Bacon and Raisins, Classic Macaroni Salad, Broccoli Slaw, Simple Spinach Salad, and Waldorf Chicken Salad. For a sweet ending to your light meal, try some Grilled Pineapple or a slice of Strawberry Pie with Jello.

👨‍🍳How to make this Caprese Pasta Salad

  1. Cut cherry or grape tomatoes in half and add crushed garlic, olive oil, Kosher salt, crushed red pepper (optional), and black pepper and set aside for at least 30 minutes.
  2. Cook pasta to Al Dente, rinse with cold water, then toss with olive oil.
  3. Chop fresh basil. Chop fresh mozzarella into bite-size pieces.
  4. Add the pasta, the mozzarella, and the basil to the tomatoes and mix well. Refrigerate for a few hours to let flavors blend if you have time.

This is a summary of the steps and ingredients. See the recipe card or the step-by-step photo instructions below for complete instructions.

Ingredients options

Use a short pasta is like the mini penne, elbow macaroni, or rotini pasta. Gluten-free pasta can also be used. Cook per the instructions to Al Dente. Rinse with cold water to stop cooking, then toss with a few teaspoons of oil to stop cooking.

Juicy tomatoes are the feature of the salad; cherry tomatoes cut in half. Other vegetables like bell pepper, cucumber, olives, asparagus, or squash could be added.

Fresh mozzarella cheese is a must use—do not substitute. Use mozzarella balls or pearls. You can also chop larger pieces into bite-size bits.

A good extra virgin olive oil is traditional and is perfect for this classic salad. Possible substitutes are Italian dressing, vinaigrette dressings, balsamic vinegar, or red wine vinegar.

↕️How to make this recipe smaller or larger

This half-size recipe is a more reasonable size but still makes a large amount. You can cut it in half again for only 6 servings, but you will end up wasting some ingredients.

  1. Use the recipe card and adjust the number of servings to half or double.
  2. Use the amount of ingredients in the ingredient list, not the instructions—those do not adjust.

It stores well for only a few days but no longer. So not very "cooking for two" friendly for everyday use. So a special occasion dish for a large family get-together, a dish to pass, or a potluck.

❄️Storage

Store leftovers covered airtight in the refrigerator. If you store it for a day, toss before serving and taste test, and add more oil and salt/pepper if needed. But two days is pushing it.

❓FAQs

Is Caprese Salad healthy?

It is low in calories, uses healthier oil, and has no simple carbohydrates, so it will fit most healthy diets.

Can rotisserie chicken be added?

Yes, about 2 cups of shredded rotisserie chicken make an excellent addition and make the salad a complete light meal.

Blue ribbon divider used for visual effect
↑Jump to Table of Contents

This recipe is listed in these categories. See them for more similar recipes.

Appetizer and Party Recipes, Cooking for Groups Recipes, Grill Side Dish Recipes, Pasta Recipes, Salad Recipes, Side Dish Recipes

Have you tried this recipe, or have a question? Join the community discussion in the comments.

Step-by-Step Photo Instructions

tomatoes, pasta and cheese for Caprese Salad.

Use the freshest ingredients you can get.

cherry tomatoes cut in half on black board.

Start by cutting about 1 pound of cherry or grape tomatoes in half.

adding oil to caprese salad.

In a large serving bowl, add tomatoes along with 2-3 cloves crushed garlic, ¼ cup good olive oil, 1 teaspoon of Kosher salt, a pinch of red pepper (optional), and black pepper to taste (about ¼ teaspoon to start) mix well and set aside for at least 30 minutes.

cooked pasta in white bowl.

Use mini penne or other smaller pasta. Cook 8 oz of pasta according to package instructions for Al Dente. When done, rinse with cool water to stop the cooking. Then, toss with a few teaspoons of olive oil to prevent sticking.

chopped fresh mozzarella cheese in black board.

Chop 8 oz of fresh mozzarella into bite-size pieces.

chopped fresh basil on black board.

Chop 10 leaves of fresh basil.

Adding basil to the caprese.

Add the pasta, the mozzarella, and the basil to the tomatoes and mix well. Refrigerate covered with plastic wrap for a few hours to let flavors blend if you have time.

Caprese Pasta salad on a white plate.

📖The Recipe Card

Caprese Pasta salad on a large spoon
Print Recipe Add to Collection Go to Collections
5 from 1 vote

Caprese Pasta Salad—Fresh and Easy

Caprese Pasta Salad is a light, fresh Italian cold salad with tender pasta, fresh tomatoes, and mozzarella cheese with fresh basil and garlic.
Prep Time10 minutes mins
Cook Time10 minutes mins
Resting time1 hour hr
Total Time1 hour hr 20 minutes mins
Course: Side Dish
Cuisine: American
Keyword: Caprese Pasta Salad, Dish to Pass, Fresh Pasta Salad
Servings: 12 servings
Calories: 134kcal
Author: Dan Mikesell AKA DrDan

Ingredients

  • 1 pound cherry or grape tomatoes
  • ½ pound small pasta
  • 8 oz fresh mozzarella
  • 2-3 cloves garlic crushed
  • 1 teaspoon Kosher salt
  • 10 fresh basil leaves
  • 1 pinch crushed red pepper (optional) about ⅛ teaspoon
  • Black pepper to taste start at ¼ teaspoon
US Customary - Convert to Metric

Instructions

  • Use the freshest ingredients you can get.
    tomatos, pasta and cheese for Caprese Salad
  • Start by cutting about 1 pound of cherry or grape tomatoes in half.
    cherry tomatoes cut in half on black board
  • In a large serving bowl, add tomatoes along with 2-3 cloves crushed garlic, ¼ cup good olive oil, 1 teaspoon of Kosher salt, a pinch of red pepper (optional), and black pepper to taste (about ¼ teaspoon to start) mix well and set aside for at least 30 minutes.
    adding oil to caprese salad
  • Use mini penne or other smaller pasta. Cook 8 oz of pasta according to package instructions for Al Dente. When done, rinse with cool water to stop the cooking. Then, toss with a few teaspoons of olive oil to prevent sticking.
    cooked pasta in white bowl
  • Chop 8 oz of fresh mozzarella into bite-size pieces.
    chopped fresh mozzarella cheese in black board
  • Chop 10 leaves of fresh basil.
    chopped fresh basil on black board
  • Add the pasta, the mozzarella, and the basil to the tomatoes and mix well. Refrigerate covered with plastic wrap for a few hours to let flavors blend if you have time.
    Adding basil to the caprese

Notes

Pro Tips

  1. Fresh ingredients are the key to a good result.
  2. This makes a lot of salad. It has already been decreased. You can decrease more but probably will have lots of partially used containers of ingredients.
  3. Great for family get-togethers, picnics, take a dish, or potluck.
  4. The ingredients are not set in stone. Many options are discussed in the recipe post.
  5. This is very good with added shredded rotisserie chicken—about 2 cups.
  6. Only good refrigerated for 1-2 days.

Nutrition

Calories: 134kcal | Carbohydrates: 16g | Protein: 7g | Fat: 5g | Saturated Fat: 3g | Cholesterol: 15mg | Sodium: 318mg | Potassium: 139mg | Fiber: 1g | Sugar: 2g | Vitamin A: 330IU | Vitamin C: 9mg | Calcium: 104mg | Iron: 1mg

Originally Published August 10, 2013. Updated with expanded options, refreshed photos, and a table of contents to help navigation.

Molly with in flowers.

Extra Crispy Chicken Tenders

cripsy fried chicken tender on a white plate

Golden brown Extra Crispy Chicken Tender the whole family will love. Start with chicken tenders in a buttermilk marinade, a seasoned shaggy coating, then fry to 165° on your stovetop.

🐓Ingredients

Chicken tenders
Buttermilk—or substitute
Flour—All-purpose
Seasoning salt and black or white pepper
Vegetable Oil

close up of cripsy fried chicken tender.
[feast_advanced_jump_to]
Blue ribbon divider used for visual effect

Featured Comment from Dinad:
"This is THE best fried chicken fingers recipe ever. I've always been afraid of frying, but you made it easy. The coating is crunchy and stays on. It's moist and delicious."

Chicken tenders are a traditional "kid food" the whole family, even the pickiest kids, love. You can easily make them at home where you control the ingredients—no hidden preservatives or chemicals.

With these easy-to-follow step-by-step photo instructions, learn to control the oil temperature. And to make the shaggy coating that gives them a wonderful extra crispy coating.

👨‍🍳How to Fry Crispy Chicken Tenders

  1. Trim and pat dry chicken tenders and marinate chicken in buttermilk for 15- 20 minutes.
  2. Heat ¼ to ½ inch of oil in a large pan over medium heat. Get to a steady temperature of about 365°. Don't be under 325° or above 375°.
  3. Mix the coating of flour with seasoning salt and black or white pepper in a shallow bowl. Drizzle some buttermilk into the flour mixture while continuously mixing. It will make a "shaggy" coating.
  4. Remove the chicken from the buttermilk and shake off the excess—do not dry. Coat in the flour mixture. Let them sit for 5 minutes before cooking.
  5. When you place the chicken in the oil, the temp will drop. Increase the burner setting some at this point to maintain the temp in the 325°-375° range.
  6. Cook in batches for about 3-4 minutes per side until golden brown and internal temp of 165°.
  7. Drain the cooked chicken tenders on a paper towel or a wire rack. Tent the plate with foil or place it in a 200° oven to keep it warm.

This is a summary of the steps and ingredients. See the recipe card or the step-by-step photo instructions below for complete instructions.

Other kid-friendly recipes

Try some other kid-friendly chicken recipes: Grilled Chicken Tenders, Baked Chicken Tenders, Baked Chicken Nuggets, Oven Baked Chicken Legs, or Grill Chicken Drumsticks. Add in some microwave corn on the cob, One-Pot Mac and Cheese, and Baked French fries to complete

How to keep the coating attached to the chicken

  1. Shake off excess buttermilk. Do not pat dry.
  2. Coat with the flour mixture.
  3. After coating with the flour mixture, set it on a flat surface like a cutting board or plate for about 5 minutes to allow the layers to combine and adhere better.
  4. Fry near the high end of the temperature range.
  5. Flip and move the least possible. Things like tongs will rip the breading. So, use a fork and stab the edges.

♨️Frying Tips

  • A heavy pan like a Dutch oven or cast iron will hold the temperature better.
  • The oil should be a neutral oil, like corn, peanut, or canola oil.
  • If you have some way to continuously monitor the oil temp, use it.
  • Kept the between 325° and 375°. Start at the high end of the range since the temperature will drop when the tenders are added. Once you add the tenders, you will need to turn up the burner to keep the temperature in range.
  • Do not fry with the oil under 325°—the breading will absorb more oil.
  • You can use a countertop deep fryer if you have one.

Serving chicken tenders

Many people, especially kids, love to dip their chicken tenders. Try BBQ sauce, Ranch Dressing, Honey mustard sauce, or anything you like.

For side dishes, fruit bowls, side salads, and Convection Oven French fries are frequently used.

Storage of leftovers

Store in the refrigerator in an airtight container for 3-4 days. They will freeze for 3 months.

Reheat in the oven or air fryer. A microwave may be used but will effect the texture of the chicken.

✔️FAQs

What can be used instead of buttermilk?

Buttermilk has a low pH and will tenderize the chicken by breaking down proteins. So, it does contribute to the final results.

You can make a substitute for buttermilk by adding 1 tablespoon of lemon juice or vinegar per cup of regular milk and letting it rest for about 5 minutes before using it.

If you want nothing to do with the milk, trim and pat dry the tenders, pat dry, then use a whipped egg to coat first instead of milk. You can also skip the buttermilk in the coating or just use water to make it clumpy.

What is the best internal temperature for fried chicken tenders?

For tenderness and safety, cook to 165° internal temp. According to the FDA, chicken is done at 165° internal temperature in the thickest part. A higher temperature will dry, and a lower temperature is unsafe. An instant-read thermometer is required to get this right.

Should I use panko bread crumbs?

No, bread crumbs work great when "frying" in the oven, but with deep frying, they are not needed.

If you want a chicken tender recipe with panko, see Baked Chicken Tenders.

🥣Extra crispy and the secret of the shaggy coat

By adding some liquid to the flour coating, it will clump a little. When cooked, those clumps will make a much crisper coating. The key to the extra crispy coating is to get chunks of the breading to stick.

I first saw this coating technique in Cook's Country. But the same technique was also in the model Pioneer Woman recipe. Cook's Country discovered this by noticing that when a flour-based coating was used, the chicken later in the cooking had a crunchier coating that was due to some clumping in the flour.

Blue ribbon divider used for visual effect
↑Jump to Table of Contents

This recipe is listed in these categories. See them for more similar recipes.

Chicken Breast Recipes, Chicken Recipes

Have you tried this recipe, or have a question? Join the community discussion in the comments.

Step-by-Step Photo Instructions

Chicken tenders with buttermilk and seasoning.

One pound of chicken tenders will be 7-8 tenders.

Trimming the tendon off the tenderloin with a knife.

Pat dry 1 pound of chicken tenders or cut skinless boneless chicken breasts into strips. Trim well.

covering chicken tenders with buttermilk.

Put strips into a deep bowl and cover with buttermilk. It took only a cup for me. Let soak for 15- 20 minutes while you work on the coating and oil. If you are cooking a large amount, preheat the oven to 200 with a cooking sheet for a place to hold the cooked strips.

checking oil temperature,

Heat ¼ to ½ inch of oil in a large pan over medium heat. I used about 2 cups in a 12-inch fry pan. Get to a steady temperature of about 365°. Don't be under 325° or above  375°.

pouring seasoning salt into flour.

Mix 1 ½ cups AP flour with 1 tablespoon of Lowey's seasoning salt. Options of adding 1 teaspoon of white or black pepper. Also, an option of ⅛ teaspoon cayenne pepper. Other seasoning salts should be fine, or make your own spicing combination. Mix well.

adding buttermilk to flour mixture.

Now drizzle ¼ cup buttermilk into the flour mixture while continuously mixing.

mixing buttermilk to the flour mixture.

It will make a "shaggy" coating.

coating the chicken tenders in the flour mixture.

Remove the chicken from the buttermilk, shake off excess buttermilk, and coat it in the flour mixture.

Chicken tenders with shaggy coating on a white plate.

Place the coated tenders on a plate. Let sit for 5 minutes before cooking.

placing chicken tender into hot oil with a fork.

When you place the chicken in the oil, the temp will drop. Increase the burner setting some at this point to maintain the temp in the 325°-375° range.

chicken tenders cooking in hot oil.

Cook in batches for about 3-4 minutes per side until golden brown and internal temp of 165°. These can cook very quickly if your oil temperature is high. If the oil is colder, the time increases, and they will absorb more oil.

fried tenders on white plate.

Drain on a paper towel or rack. Tent with foil or place in a 200° oven to keep warm while you do more batches.

📖The Recipe Card

fried chicken tenders on white plate
Print Recipe Add to Collection Go to Collections

Extra Crispy Chicken Tenders

Golden brown Extra Crispy Chicken Tender the whole family will love. Start with chicken tenders in a buttermilk marinade, a seasoned shaggy coating, then fry to 165° on your stovetop.
Prep Time20 minutes mins
Cook Time15 minutes mins
Total Time35 minutes mins
Course: Main Course
Cuisine: American
Keyword: Buttermilk Chicken Tenders, Chicken Fingers, Crispy Chicken Tenders, Fried Chicken Tenders
Servings: 8 servings
Calories: 216kcal
Author: Dan Mikesell AKA DrDan

Ingredients

  • 1 pound Chicken tenders about 8
  • 1 ½ cup AP flour
  • 1 tablespoon seasoning salt Lowey’s
  • buttermilk
  • oil
  • ½ teaspoon white or black pepper
  • ⅛ teaspoon cayenne pepper optional
US Customary - Convert to Metric

Instructions

  • Pat dry 1 pound of chicken tenders or cut skinless boneless chicken breasts into strips. Trim well.
    Trimming the tendon off the tenderloin with a knife
  • Put strips into a deep bowl and cover with buttermilk. It took only a cup for me. Let soak for 15- 20 minutes while you work on the coating and oil. If you are cooking a large amount, preheat the oven to 200 with a cooking sheet for a place to hold the cooked strips.
    covering chicken tenders with buttermilk
  • Heat ¼ to ½ inch of oil in a large pan over medium heat. I used about 2 cups in a 12-inch fry pan. Get to a steady temperature of about 365°. Don't be under 325° or above  375°.
    checking oil temperature
  • Mix 1 ½ cups AP flour with 1 tablespoon of Lowey's seasoning salt. Options of adding 1 teaspoon of white or black pepper. Also, an option of ⅛ teaspoon cayenne pepper. Other seasoning salts should be fine, or make your own spicing combination. Mix well.
    pouring seasoning salt into flour
  • Drizzle ¼ cup buttermilk into the flour mixture while continuously mixing.
    adding buttermilk to flour mixture
  • It will make a "shaggy" coating.
    mixing buttermilk to the flour mixture
  • Remove the chicken from the buttermilk, shake off excess buttermilk, and coat it in the flour mixture.
    coating the chicken tenders in the flour mixture
  • Place the tenders on a plate. Let sit for 5 minutes before cooking.
    Chicken tenders with shaggy coating on a white plate
  • When you place the chicken in the oil, the temp will drop. Increase the burner setting some at this point to maintain the temp in the 325°-375° range.
    placing chicken tender in hot oil to cook
  • Cook in batches for about 3-4 minutes per side until golden brown and internal temp of 165°. These can cook very quickly if your oil temperature is high. If the oil is colder, the time increases, and they will absorb more oil.
    fried tenders on white plate

Notes

Pro Tips

  1. Do not try this recipe without a good instant read thermometer. Try the oven baked recipe if you don't have the correct equipment.
  2. Chicken tenders are preferred, but you can cut strips of chicken breasts. If you do that, cut across the grain.
  3. If one or two tenders are thicker than the others, flatten them to even out the cooking time.
  4. The pepper and cayenne pepper are optional. I highly suggest the white pepper, which adds a wonderful taste and it is the “secret” ingredient of KFC.
  5. Use a neutral oil with a high smoke point. Corn, peanut, or canola are good choices.
  6. The most common error in stovetop frying is the temperature and keeping it within a range between 325° and 375°. If you cook at a lower temperature, it takes longer, but the bigger issue is the absorption of too much oil. If too high a temperature, the outside cooks rapidly.and maybe burnt before the center is done (165°).
  7. You can make your own buttermilk by adding 1 tablespoon of lemon juice or vinegar to 1 cup of milk and allowing it to sit for 5 minutes before using.
  8. Nutrition is calculated on my estimate of fat absorption during frying.

Nutrition

Calories: 216kcal | Carbohydrates: 18g | Protein: 15g | Fat: 9g | Saturated Fat: 1g | Cholesterol: 37mg | Sodium: 70mg | Potassium: 240mg | Fiber: 1g | Sugar: 1g | Vitamin A: 30IU | Vitamin C: 1mg | Calcium: 11mg | Iron: 1mg

This is an adaptation of a Pioneer Woman recipe. Most other recipes made a simple thing hard, and it really is not that hard.

Originally Published September 16, 2012. Updated with expanded options and discussions. Refreshed photos, some from other cooking, so they may not match the pan but convey the meaning. And a table of contents was added to help navigation.

Molly and Lilly with pink puppy.

Creamy Crock Pot Mac and Cheese

mac and cheese on fork

A creamy, tasty mac and cheese recipe that is ultra-simple, and this will become your favorite comfort food recipe. As easy as boiling water, it is a delicious alternative to the blue box.

It uses ingredients that you can keep in stock to make this recipe when you want.

🥣Ingredients

Pasta—elbow macaroni or similar
Milk and sour cream
Cheese—cheddar, American cheese
Cheddar cheese soup
Pantry ingredients—butter, dry mustard, salt, black pepper, and cayenne pepper (optional)

mac and cheese on fork.
[feast_advanced_jump_to]
Blue ribbon divider used for visual effect

Featured comment from Angela:
"Delicious…Everyone loved it. NO EGGS!! :) Thanks for the recipe."

It is an extra creamy, tasty mac and cheese that even kids will love. And it's good enough to make my "in-house mac and cheese expert" go back for seconds.

It makes only 4 servings in a 3-quart crock pot with a double-size 8-serving recipe fitting in a 6-quart or larger crock pot. Cooks to an endpoint to avoid overcooking.

This is basically a Paula Deen recipe without eggs with some simplification. It is extraordinarily creamy with great texture, and if you can boil water, you can do this recipe.

👨‍🍳How to make Crock Pot Mac and Cheese

  1. Cook pasta in boiling water for ⅔ of the minimum time listed on the package, then drain.
  2. In a 3-quart or larger crock pot, combine milk, sour cream, cheese, butter, salt, pepper, dry mustard, cheddar cheese soup, and cayenne pepper (optional). Mix in the cooked pasta.
  3. Cook on low for about 2 hours. Stir about every 30 minutes to mix and check the pasta.
  4. It's done when you get some browned cheese on the pot's side and some light browning of some of the pasta on the edge. And the macaroni is tender—about 2 hours.

This is a summary of the steps and ingredients. See the recipe card or the step-by-step photo instructions below for complete instructions.

⏰How long to cook mac and cheese in the crock pot

Usually about 2 hours in the crock pot. It is done when it starts to get some browning along the edge and the pasta is tender. A bit undercooked is better than overcooked and burnt. 

If cooking this recipe as written in a large crock pot, it may also cook a bit faster.

Make it right every time

For the pasta, traditional elbow macaroni is suggested. Use a standard commercial pasta and undercook it. The non-standard, thin, or gluten-free pastes will cook unpredictably and are not suggested.

Any milk will work. Or for more creaminess, use same volume of evaporated milk or half and half.

Do not use fat-free sour cream. If you like, substitute cream cheese.

The cheese choice is wide open. American cheese like Velveeta cheese melts well and is creamy. Sharp cheddar cheese adds a lot of flavor. I like a combination. Other possible cheeses are Muenster, Gouda, or Gruyere.

Don't skip the cheddar cheese soup. It is primarily for thickening and creaminess.

Optional additions— crumble-up cooked bacon or frozen broccoli

Mac and cheese recipes

Check out these other mac and cheese recipes, like Uncooked Macaroni Crock Pot Mac and Cheese, Roadhouse Mac and Cheese, One-Pot Mac and Cheese, and Baked Mac and Cheese.

Leftover storage and reheating

Store leftover mac and cheese in an airtight container in the refrigerator for 3-4 days.

To reheat leftovers, add a bit of milk and reheat in the microwave, on the stovetop, or covered with foil in the oven.

❓FAQs

What can be a substitute for dry mustard powder?

Use dijon or yellow mustard. Use triple the volume.

Can I add dry, uncooked pasta to the crock pot?

Not for this recipe, although the pasta is undercooked before adding to the crock pot to prevent overcooking the pasta.

If you want to use uncooked pasta, see Uncooked Macaroni Crock Pot Mac and Cheese.

Can I make the mac and cheese ahead and reheat it for later?

It is the best and creamiest when cooked. It will always lose its texture if stored.

You can cook the pasta and refrigerate it for a day or two.

Why does my cheese not melt well and become grainy?

Some cheaper shredded cheese has a lot of anti-caking agents, so it may become grainy. Buy deli chunks of cheese and shred yourself. I do find brand-name cheese works better than generic.

Another solution is to add half of the Velveeta cheese early and then add any shredded cheese a few minutes before stopping cooking.

Blue ribbon divider used for visual effect
↑Jump to Table of Contents

This recipe is listed in these categories. See them for more similar recipes.

101's Best Recipes, Comfort Food Recipes, Crock Pot Recipes, Pasta Recipes, Small Crock Pots Recipes

Have you tried this recipe, or have a question? Join the community discussion in the comments.

Step-by-Step Photo Instructions

cheese with pasta and other ingredeints.

Start with a pan of boiling water over high heat for the pasta.

pouring dry pasta into boiling water.

Once the water is boiling, add 2 cups (about 8 oz) of elbow macaroni, cook for about ⅔ of the minimum time, then drain.

adding can of soup to crock pot.

Combine in a 3 quart or larger crock pot: 1 cup milk, ½ cup sour cream, 2 ½ cups cheese, 4 tablespoons butter cut into several pieces, ½ teaspoon each of table salt, black pepper, and dry mustard, and one can (10 ¾ oz) cheddar cheese soup. For a touch of heat, add the option of ¼ teaspoon of Cayenne pepper.

pouring cooked pasta into crock pot.

Mix the pasta into the crock pot—and turn it on low.

mixing ingredients in crock pot.

Stir the pot about 30 minutes into cooking when the butter is melted. Continue to stir about every 30 minutes to check the pasta for overcooking.

cooked mac and cheese on a spatula.

It's done when the pasta is tender—about 2 hours. You should be getting some browned cheese on the side of the pot and some light browning of some of the pasta on the edge.

📖The Recipe Card

Macaroni and Cheese on fork
Print Recipe Add to Collection Go to Collections
4.06 from 77 votes

Creamy Crock Pot Mac and Cheese

A creamy, tasty mac and cheese recipe that is ultra-simple, and this will become your favorite comfort food recipe. As easy as boiling water, it is a delicious alternative to the blue box. And good enough to make my "in-house mac and cheese expert" go back for seconds.
Prep Time10 minutes mins
Cook Time2 hours hrs
Total Time2 hours hrs 10 minutes mins
Course: Pasta
Cuisine: American
Keyword: crock pot mac and cheese, Easy, Mac and Cheese, Macaroni and Cheese
Servings: 4 servings
Calories: 364kcal
Author: Dan Mikesell AKA DrDan

Ingredients

  • 2 cups pasta About 8 oz.
  • 1 cup milk or condensed milk or half&half
  • ½ cup sour cream
  • 2½ cup shredded cheese your choice
  • 4 tablespoons butter
  • 10¾ oz cheddar cheese soup
  • ½ teaspoon salt
  • ½ teaspoon pepper
  • ½ teaspoon dry mustard
  • ¼ teaspoon cayenne pepper optional
US Customary - Convert to Metric

Instructions

  • Start with a pan of boiling water over high heat for the pasta.
    cheese with pasta and other ingredeints
  • Once the water is boiling, add 2 cups (about 8 oz) of elbow macaroni and cook for about ⅔ of the minimum time, then drain.
    pouring dry pasta into boiling water
  • Combine in a 3 quart or larger crock pot: 1 cup milk, ½ cup sour cream, 2 ½ cups cheese, 4 tablespoons butter cut into several pieces, ½ teaspoon each of table salt, black pepper, and dry mustard, and one can (10 ¾ oz) cheddar cheese soup.  For a touch of heat, add the option of ¼ teaspoon of Cayenne pepper.
    adding can of soup to crock pot
  • Mix the pasta into the crock pot—turn it on low.
    pouring cooked pasta into crock pot
  • Stir the pot about 30 minutes into cooking when the butter is melted. Continue to stir about every 30 minutes to check the pasta for overcooking.
    mixing ingredients in crock pot
  • It's done when the pasta is tender—about 2 hours. You should be getting some browned cheese on the side of the pot and some light browning of some of the pasta on the edge.
    cooked mac and cheese on a spatula

Notes

Pro Tips

  1. This fits nicely in a 3-quart crock pot. A double recipe will need a 6-quart or bigger crock pot.
  2. A good-quality standard elbow macaroni works best here. Cook it to al dente or a bit less before adding it to the crock pot. You can use other pasta, and they may or may not work.
  3. Use the cheese you like, but generic, cheap, or outdated cheese can separate. More discussion on cheese issues are in the post.
  4. If you like cream cheese, you can substitute it for sour cream. Don’t use fat-free versions of either of them.
  5. Be sure to stir a few times while cooking to watch the pasta.
  6. The serving size is about 1 ½ cups.
  7. Good in the refrigerator for 3-4 days and frozen for about 3 months.

Nutrition

Calories: 364kcal | Carbohydrates: 24g | Protein: 16g | Fat: 22g | Saturated Fat: 13g | Cholesterol: 66mg | Sodium: 851mg | Potassium: 414mg | Fiber: 1g | Sugar: 4g | Vitamin A: 934IU | Vitamin C: 1mg | Calcium: 335mg | Iron: 1mg

Originally Published August 14, 2012. Updated with expanded discussion and options. Photos have been refreshed, and a table of contents added to help navigation.

Lilly at 14 months old.

Baked Parmesan Green Beans

Parmesan green beans on white plate

Baked Parmesan green beans are delicious and tender—an easy side dish for any meal. Learn to pick the best beans and bake them with this easy recipe.

Ingredients

Green beans—fresh
Olive oil
Parmesan cheese—fresh grated
Pantry ingredients—kosher salt, black pepper, garlic powder

Parmesan green beans on white plate.
[feast_advanced_jump_to]
Blue ribbon divider used for visual effect

We all need a collection of easy, dependable vegetable side dish recipes that deliver dependable, great taste every time. Add this one to the collection.

This baked Parmesan green beans recipe is easy to make with simple step-by-step photo instructions. They are a great way to get more fresh vegetables into your diet—even picky kids will love them.

This is inspired by Tyler Florence's recipe from Food Network. I have decreased the size to "cooking for two," simplified the technique, used more standard-size beans, and added more detailed instructions.

For other bean recipes, see Green Beans with Bacon, Green Beans with Toasted Almonds, and Green Bean Casserole Without Soup.

👨‍🍳How to cook Parmesan Green Beans

  1. Clean and trim fresh green beans, coat beans with olive oil, then add kosher salt, pepper, and garlic powder.
  2. Spread the beans evenly on a parchment-covered baking tray and sprinkle with grated Parmesan cheese.
  3. Roast at 375° for about 10-15 minutes until the cheese melts, with some browning and tender.

This is a summary of the steps and ingredients. See the recipe card or the step-by-step photo instructions below for complete instructions.

🛒How to buy the best fresh green beans

This is a fresh green bean recipe and not for frozen beans. So, let's learn how to find the best fresh beans.

  • While reasonable fresh green beans are available year-round, the peak season is June through September, and local fresh will be best.
  • Fresh off the vine is the best or at the farmer’s market. Use the store produce department if you must.
  • Look for beans that are firm and have a vibrant green color.
  • Try to avoid bigger beans with swelling around the seeds.
  • Try to buy beans that are about the same size. The skinny ones seemed to over cook and were a little dry.

Serving

Serve hot out of the oven. These beans go well with Pan Seared Filet Mignon, Pan Seared Oven Baked Chicken Breasts, or Seared and Baked Roasted Pork Tenderloin,

What to do with leftovers

While leftovers will never be as good as freshly cooked, leftovers happen. Seal tightly in an airtight container and refrigerate for 3 days. They may be frozen for 2-3 months.

Reheat uncovered in the oven or an air fryer.

❓FAQs

Do I need to blanch green beans before baking?

No, blanching is not needed. Baking in the oven will cook them.

What other spices go well with green beans?

In addition to salt, black pepper, and garlic powder, other tastes that work well are onion powder, basil, oregano, or thyme.

Spice mixes like Cajan seasoning or lemon pepper also work well.

Fresh ingredients like onion and garlic must have time to cook in the recipe or be cooked before adding.

What other things can be added to green beans to add different flavors?

Things like almonds, other hard cheese, bacon, or panko bread crumbs can add a lot of flavor to green bean dishes.

Blue ribbon divider used for visual effect
↑Jump to Table of Contents

This recipe is listed in these categories. See them for more similar recipes.

Side Dish Recipes

Have you tried this recipe, or have a question? Join the community discussion in the comments.

Step-by-Step Photo Instructions

fresh green beans with seasonings

Preheat oven to 375° convection or 400° conventional. Clean and trim ½ pound of green beans. Try to use medium-sized beans of consistent size — the skinny ones will dry out, and the big ones will not be tender.

mixing beans with oil in bowl

In a medium bowl, combine beans with 2 teaspoons of olive oil. Mix to coat, then add ¼ teaspoon kosher salt, ⅛ teaspoon pepper, and ⅛ teaspoon garlic powder—mix again.

sprinkling parmesan cheese on beans

Cover a baking sheet with parchment paper. Spread the beans evenly across the paper. Sprinkle with ¼ cup Parmesan cheese (fresh preferred).

baked green beans on tray

Roast at 375° for about 10-15 minutes until the cheese melts, with some browning and tender.

📖The Recipe Card

Parmesan green beans on white plate
Print Recipe Add to Collection Go to Collections
4.32 from 38 votes

Baked Parmesan Green Beans

Baked Parmesan green beans are delicious and tender—an easy side dish for any meal. Learn to pick out the best beans and bake them with this easy recipe.
Prep Time10 minutes mins
Cook Time15 minutes mins
Total Time25 minutes mins
Course: Vegetable
Cuisine: American
Keyword: Green Beans
Servings: 2 large servings
Calories: 120kcal
Author: Dan Mikesell AKA DrDan

Ingredients

  • 8 oz green beans
  • 2 teaspoons olive oil
  • ¼ teaspoon garlic powder
  • ¼ teaspoon Kosher salt
  • ⅛ teaspoon pepper
  • ¼ cup Parmesan cheese grated fresh preferred
US Customary - Convert to Metric

Instructions

  • Preheat oven to 375° convection or 400° conventional. Clean and trim ½ pound of green beans. Try to use medium-size beans of consistent size — the skinny ones will dry out, and the big ones will not be tender.
    fresh green beans with seasonings
  • In a medium bowl, combine beans with 2 teaspoons of olive oil. Mix to coat, then add ¼ teaspoon kosher salt, ⅛ teaspoon pepper, and ⅛ teaspoon garlic powder—mix again.
    mixing beans with oil in bowl
  • Cover a baking sheet with parchment paper. Spread the beans evenly across the paper. Sprinkle with ¼ cup Parmesan cheese (fresh preferred).
    sprinkling parmesan cheese on beans
  • Roast at 375° for about 10-15 minutes until the cheese melts, with some browning and tender.
    baked green beans on tray

Notes

Pro Tips

  1. This an easy recipe to double, and still use a half-sheet pan.
  2. Use a tray with parchment paper to prevent sticking.
  3. Look for green beans that are firm and have a vibrant green color. Try to avoid bigger beans with swelling around the seeds. Try to use beans of about the same size.
  4. The better the Parmesan, the better the taste.
  5. Ovens and beans can vary some. Go by color.

Nutrition

Calories: 120kcal | Carbohydrates: 9g | Protein: 7g | Fat: 7g | Saturated Fat: 3g | Cholesterol: 9mg | Sodium: 498mg | Potassium: 239mg | Fiber: 3g | Sugar: 4g | Vitamin A: 880IU | Vitamin C: 14mg | Calcium: 190mg | Iron: 1mg

Originally Published July 8, 2012. Updated with expanded options, refreshed photos, and a table of contents to help navigation.

Jake saying please play with me.

Easy Marinated Steak Fajitas

Steak Fajitas on tortilla and white plate

This Easy Marinated Steak Fajitas recipe starts with a great fajita marinade and ends with great-tasting melt-in-your-mouth tender steak strips and vegetables.

A Tex-Mex classic, these better-than-restaurant-quality steak fajitas are easy to make at home.

🐄Ingredients

Steak
Onion, Green and Red Bell Pepper
Marinade—lime juice, olive oil. fresh garlic, vinegar, soy sauce, liquid smoke, kosher salt, chili powder, cayenne pepper, black pepper, and onion powder
Serving—tortillas, sour cream, cheese, salsa, guacamole, and other toppings

Beef Fajitas on tortilla and white plate.
[feast_advanced_jump_to]
Blue ribbon divider used for visual effect

Featured Comment from Doug:
"This makes for a nice, easy-to-prepare meal which is also easily adapted to suit both vegetarians and omnivores."

Use the steak you choose; sirloin, flank, or skirt steak will all work. And the vegetables are also marinated for deep flavor.

This recipe uses an easy fajita marinade made from pantry ingredients—an easy 10-minute prep ahead with the marinade, then only 20 minutes to cook. Impress your family and friends with your new specialty of the house.

👨‍🍳How to Make Marinated Steak Fajitas

  1. Trim and cut into strips the steak— sirloin, flank, or skirt steak. Prep the onion and peppers.
  2. Mix marinade ingredients and marinade meat and vegetables.
  3. Saute the veggies and remove them from the pan. Then, cook the meat to 140° and add the veggies back to the meat to reheat.
  4. Serve with heated tortillas, sour cream, guacamole, and anything else you like.

For more details, keep reading. See the Recipe Card below for complete instructions and to print.

How long to marinade fajitas

While you will get some good taste with even a few minutes, a minimum of 1 hour is suggested, and up to 24 hours is good.

You can marinate too long. More than 24 hours can start to break down the meat fibers, and over 48 hours will affect the meat texture.

Other Fajitas Recipes

Check out some other easy fajitas recipes: Grilled Flank Steak Fajitas, Easy Pork Fajitas, Grilled Chicken Fajitas, or Sheet Pan Chicken Fajitas.

✔️Tips to get it right every time

  • It is best to marinade overnight, but 1 hour will do.
  • Marinade no longer than 24 hours.
  • A cast-iron skillet is preferred since it retains heat well and cooks without hotspots. Also, it is excellent for serving since the heat is retained. But any large skillet will work.
  • Be sure to cut the beef across the grain.

🍴Serving

Serve in the skillet; it will keep it hot and give the sizzle. Warm some tortillas in the oven or the microwave covered.

Common toppings are avocados, guacamole, pico, sour cream, and salsa. Or anything else you want.

For side dishes, try chips and Pineapple Salsa, Mexican Rice, black or refried beans, pico de gallo, or Chunky Guacamole.

Storage of leftovers

Store in an airtight container refrigerated for up to 3 days. I don't recommend freezing. Reheat on the stovetop or in a microwave.

❓FAQs

Can I cook steak fajitas on the grill?

You can use the recommended cast-iron skillet as above or a large griddle, preferably with sides. If the griddle is large enough, you can cook the meat and vegetables simultaneously since the cooking time is about the same.

How to warm tortillas?

Wrap up to 8 flour or corn tortillas in aluminum foil and place in a 300° oven for 10-15 minutes.

In a microwave, wrap up to 4 tortillas at a time with a slightly damp paper or cloth towel. Microwave for 30 seconds.

Blue ribbon divider used for visual effect
↑Jump to Table of Contents

This recipe is listed in these categories. See them for more similar recipes.

Mexican Recipes

Have you tried this recipe, or have a question? Join the community discussion in the comments.

Step-by-Step Photo Instructions

trimmed steak cubes on board.

Trim and cut 1 pound of sirloin steak into strips about ¼ inch thick.

sliced peppers and onion with knife.

Slice a large onion and one or two peppers. Cut into smaller pieces if you wish.

marinade ingredients for fajitas.

Mix marinade ingredients in a medium bowl. Add about ¾ of the marinade to a 1-gallon ziplock bag for the meat. Add the remainder to a second bag for the vegetables.

cubes of beef in bag with marinade,

Add the beef and vegetables to their bags, mix well, and seal after removing as much air as possible. Refrigerate for at least an hour and longer if possible. Overnight would have been fine.

sliced peppers and onion in frying pan.

When ready to cook, put 1 tablespoon of vegetable oil in a large cast-iron pan over medium-high heat. When the oil is hot, add the vegetables. When onions are nicely browned (about 8-9 minutes), remove from pan, set aside, and cover.

browning beef in cast iron skillet,

Add a little oil to the pan, increase the heat to high, add the drained beef, and cook until browned — about 8-10 minutes.

veggies and meat browned in skillet.

Move the meat to one side and add the vegetables to the pan. Cook and stir the vegetables for a minute or two until reheated. Then mix the meat and vegetables.

Beef Fajitas on tortilla and white plate.

Serve with heated tortillas, sour cream, guacamole, and anything else you like.

📖The Recipe Card

Steak Fajitas on tortilla and white plate
Print Recipe Add to Collection Go to Collections

Easy Marinated Steak Fajitas

This Easy Marinated Steak Fajitas recipe starts with a great fajita marinade and ends with great-tasting melt-in-your-mouth tender steak strips and vegetables.
Prep Time10 minutes mins
Cook Time20 minutes mins
Total Time30 minutes mins
Course: Main Course
Cuisine: Mexican
Keyword: Beef Fajitas, Steak Fajitas
Servings: 4
Calories: 242kcal
Author: Dan Mikesell AKA DrDan

Ingredients

  • 1 lb sirloin steak
  • 1 green pepper
  • 1 red pepper
  • 1 onion large

Marinade

  • ¼ cup lime juice
  • ⅓ cup water
  • 2 tablespoons olive oil
  • 1 - 2 cloves garlic crushed
  • 1 tablespoon vinegar
  • 2 teaspoons soy sauce
  • ½ teaspoon liquid smoke
  • 1 teaspoon kosher salt
  • ½ teaspoon chili powder
  • ½ teaspoon cayenne pepper
  • ¼ teaspoon black pepper
  • ¼ teaspoon onion powder

Serving

  • 4-6 flour tortillas
  • sour cream
  • cheese
  • salsa
  • Guacamole
US Customary - Convert to Metric

Instructions

  • Trim and cut 1 pound of sirloin steak into strips about ¼ inch thick.
    trimmed steak cubes on board
  • Slice a large onion and one or two peppers. Cut into smaller pieces if you wish.
    sliced peppers and onion with knife
  • Mix marinade ingredients in a medium bowl. Add about ¾ of the marinade to a 1-gallon ziplock bag for the meat. Add the remainder to a second bag for the vegetables.
    marinade ingredients
  • Add the beef and vegetables to their bags, mix well, and seal after removing as much air as possible. Refrigerate for a least an hour and longer if possible. Overnight would have been fine.
    cubes of beef in bag with marinade
  • When ready to cook, put 1 tablespoon of vegetable oil in a large cast-iron pan over medium-high heat. When the oil is hot, add the vegetables. When onions are nicely browned (about 8-9 minutes), remove from pan, set aside, and cover.
    sliced peppers and onion in frying pan
  • Add a little oil to the pan, increase the heat to high, add the drained beef, and cook until browned — about 8-10 minutes.
    browning beef in cast iron skillet
  • Move the meat to one side and add the vegetables back to the pan. Cook and stir for a minute or two until vegetables are reheated—then mix meat and vegetables.
    veggies and meat browned in skillet
  • Serve with heated tortillas, sour cream, guacamole, and anything else you like.
    Beef Fajitas on tortilla and white plate

Notes

Pro Tips:

  1. Always cut your beef against the grain.
  2. Use a BIG skillet. Cast iron is preferred.
  3. Use the beef you want, but sirloin steak is a good choice. Flank or skirt steak also works.
  4. The marinade ingredients can be adjusted to your taste. But this is a great marinade.
  5. Marinade overnight to use the next day. A great prep-ahead meal. Try to marinade for at least 1 hour and no longer than 24 hours.
  6. You can just flavor it with the marinade and cook immediately. But the marinade will tenderize some, and the flavor penetrates, so a 1-hour minimum is suggested.
  7. Good in the refrigerator for 2-3 days. Reheat in a skillet or microwave.
  8. Nutrition includes beef and veggies but no serving options.

Nutrition

Calories: 242kcal | Carbohydrates: 6g | Protein: 26g | Fat: 12g | Saturated Fat: 3g | Cholesterol: 69mg | Sodium: 151mg | Potassium: 543mg | Fiber: 2g | Sugar: 3g | Vitamin A: 1042IU | Vitamin C: 64mg | Calcium: 41mg | Iron: 2mg

Originally published April 6, 2012. Updated with expanded discussion and options, refreshed photos, and a table of contents.

Molly setting in the play room.

Oven Baked Carrot Cake Pancakes with Cream Cheese Glaze

bite of carrot cake pancake on fork

One of the best breakfast recipes is this amazing Oven Baked Carrot Cake Pancake with cream cheese glaze. It is time for dessert for breakfast or breakfast for any meal.

Baking pancakes is the perfect way to cook pancakes, especially when life is going on around you, and after 30 minutes of standing at the stove, flipping pancakes is just not happening.

Ingredients

Carrot
Milk
Egg
Walnuts or Pecans
Cream Cheese
Pantry ingredients—AP flour, sugar, baking powder, salt, cinnamon, nutmeg, vanilla extract, butter, powdered sugar

bite of carrot cake pancake on fork.
[feast_advanced_jump_to]
Blue ribbon divider used for visual effect

Featured Comment from Naomi:
"What could be better than a mix of healthy cake and pancake in one? Love this recipe! Thank you.'

A pancake everybody will love, and no flipping is required. Breakfast is much easier with these fluffy baked pancakes. Just follow these simple step-by-step photo instructions.

This is a variation of my baked blueberry pancakes.

👨‍🍳How to Bake Carrot Cake Pancakes—Step-by-Step

carrot cake pancake ingredients.

1. Preheat oven to 375° convection or 400° conventional. Add a ten-inch oven-safe pan to preheat it. I used a cast iron fry pan.

shredding raw carrots

2. Finely grate 1 medium carrot with a box grater. Whisk with ¾ cup of milk, one egg, ½ teaspoon salt, ½ teaspoon cinnamon, ½ teaspoon nutmeg, and ½ teaspoon vanilla. In a second bowl, mix 1 cup of flour, 1 tablespoon of sugar, and 2 teaspoons of baking powder. Mix well

adding butter to a cast iron pan.

3. When the oven is preheated, remove the pan and coat it with 1 tablespoon of butter.

whisk in bowl mixing orange liquid into dry ingredients.

4. Stir the wet ingredients into the dry ingredients.

raw pancake in skillet with hand adding chopped nuts.

5. Pour the batter into a preheated pan and top with ¼ cup chopped walnuts and ¼ cup raisins if using.

browned pancake in skillet.

6. Bake for about 20 minutes until nicely brown.

adding syrup to cream cheese in bowl.

7. While baking, mix the maple cream cheese glaze. Start with ½ cup Whipped Cream Cheese Spread and add two tablespoons maple syrup, ¼ cup powdered sugar, ¼ teaspoon vanilla, and one tablespoon skim milk. Mix well. You may need a little more milk to thin.

pancake on plate with frosting going on.

8. Allow the pancake to set for a few minutes, then add the glaze.

whole carrot cake pancake on gray plate.
carrot cake pancake slice on plate with sausage.

For more details, keep reading. See the Recipe Card below for complete instructions and to print.

⏰🌡️Cooking Time

Baking time is about 20-22 minutes at the suggested oven temperature of 375° or 400° without convection. You can increase or decrease the baking temperature and adjust the time.

Several variables can affect cooking time: the oven, the thickness, and the pan. But the good news is it is pancakes; they can take a bit of variability.

The old toothpick test is the best way to tell if your pancake is done. Not just the color. If it is done, but the color is not what you want, turn the broiler on for a few minutes.

🥞Servings # and Pan Sizes

I'm using ¼ of the recipe as the serving size. That would be about a standard size pancake size. We commonly eat double that.

This is an easy recipe to adjust the size.

  • Two servings (half recipe) - 6-inch round pan or an 8 ½ X 4 ½ standard loaf pan.
  • Four servings (full recipe) - 10-inch cast iron fry pan, but any similar-sized pan will work. A 9-inch round or 8-9 inch square pan will be fine. The thickness will vary a bit.
  • Six servings (1 ½ recipe) - Use a 12-inch cast iron fry pan, a standard 9X13 cake pan, or a ¼ sheet pan.
  • Eight servings (double recipe) - I don’t know of a pan this size, so use two of the 4-serving recommendations.
  • Twelve servings (triple recipe) - ½ size sheet pan.

Serving

These pancakes work well with some protein, like Oven Baked Sausage and Cripsy Oven Baked Bacon. Add a large glass of orange juice or milk, and you will have a delicious breakfast. You may want some maple syrup on the side if you need more sugar.

Other recipes you will like

You may also like Oven Baked Banana Pancake, Cinnamon Coffee Cake. or Small French Toast Casserole. This recipe is also featured in Mother's Day Recipes and Valentine's Day Recipes.

For other delicious carrot recipes, check out Healthier Carrot Cake and Grilled Carrots with Honey Brown Sugar Glaze.

Cooking on the stovetop

Sure. Heat a griddle or large frying pan with oil over medium heat. When hot, add ¼ cup mounds and fry for 2-3 minutes when the edges are brown and the top is covered with bubbles. Flip and cook for 1-2 minutes more.

FAQs—Storage and heating leftovers

How to reheat leftover pancakes

Reheat in the microwave on a plate with a paper towel under the pancake and one on top.

Or in a 350° oven on a baking sheet for about 5 minutes.

How to store leftover pancakes

Store leftovers sealed airtight and refrigerated for 3 days or frozen for 3 months.

Blue ribbon divider used for visual effect

This recipe is listed in these categories. See them for more similar recipes.

Breakfast Recipes

Have you tried this recipe, or have a question? Join the community discussion in the comments.

📖The Recipe Card

bite of carrot cake pancake on fork
Print Recipe Add to Collection Go to Collections
4.86 from 7 votes

Oven Baked Carrot Cake Pancakes with Cream Cheese Glaze

One of the best breakfast recipes is this amazing Oven Baked Carrot Cake Pancake with cream cheese glaze. It is time for dessert for breakfast or breakfast for any meal.
Prep Time15 minutes mins
Cook Time25 minutes mins
Total Time40 minutes mins
Course: Breakfast
Cuisine: American
Keyword: baked pancake recipe, carrot cake pancakes recipe, carrot cake sheet pan pancakes
Servings: 4
Calories: 323kcal
Author: Dan Mikesell AKA DrDan

Ingredients

Dry

  • 1 cup flour
  • 1 tablespoon sugar
  • 2 teaspoon baking powder
  • ½ teaspoon salt

Wet

  • ¾ cup milk
  • 1 egg
  • ½ teaspoon salt
  • ½ teaspoon cinnamon
  • ½ teaspoon nutmeg
  • ½ teaspoon vanilla
  • 1 carrot medium

Mix in

  • ¼ cup chopped walnuts
  • ¼ cup raisins optional

Maple Cream Cheese Glaze

  • ½ cup whipped cream cheese or ⅜ cup regular cream cheese
  • 2 tablespoons maple syrup Optional
  • ¼ cup powdered sugar
  • ¼ teaspoon vanilla
  • 1 tablespoon milk or a bit more
US Customary - Convert to Metric

Instructions

  • Preheat oven to 375° convection or 400° conventional. Add a ten-inch oven-safe pan to preheat it. I used a cast iron fry pan.
    carrot cake pancake ingredients
  • Finely grate 1 medium carrot with a box grater. Mix with ¾ cup of milk, one egg, ½ teaspoon salt, ½ teaspoon cinnamon, ½ teaspoon nutmeg, and ½ teaspoon vanilla. In a second bowl, mix 1 cup of flour, 1 tablespoon of sugar, and 2 teaspoons of baking powder. Mix well
    grating carrots into white bowl
  • When the oven is preheated, remove the pan and coat it with 1 tablespoon of butter.
    adding butter to a cast iron pan
  • Stir the wet ingredients into the dry ingredients.
    whisk in bowl mixing orange liquid into dry ingredients
  • Pour the batter into preheated pan and top with ¼ cup chopped walnuts and ¼ cup raisins if using.
    raw pancake in skillet with hand adding chopped nuts
  • Bake for about 20 minutes until nicely brown.
    browned pancake in skillet
  • While baking, mix the maple cream cheese glaze. Start with ½ cup Whipped Cream Cheese Spread and add two tablespoons maple syrup, ¼ cup powdered sugar, ¼ teaspoon vanilla, and one tablespoon skim milk. Mix well. You may need a little more milk to thin.
    adding syrup to cream cheese in bowl
  • Allow the pancake to set for a few minute then add the glaze.
    pancake on plate with frosting going on

Notes

Pro Tips

  1. I'm using ¼ of the recipe as the serving size. That would be about a standard size pancake size. We commonly eat double that.
  2. This is an easy recipe to adjust the size.
    -2 servings (half recipe) - 6 inch round pan, or an 8 ½ X 4 ½ standard loaf pan.
    -4 servings (full recipe) - 10 inches cast iron fry pan, but any similar size pan will work. A 9-inch round or 8-9 inch square pan will be fine. The thickness will vary a bit.
    -6 servings (1 ½ recipe) - You can use a 12-inch cast iron fry pan, a standard 9X13 cake pan, or ¼ sheet pan.
    -8 servings (double recipe) - I don’t know of a pan this size, so use two of the 4 serving recommendations.
    -12 servings (triple recipe) - ½ size sheet pan.
  3. The old toothpick test is the best way to tell if your pancake is done.
  4. Use a bit of broiler time to brown up if needed at the end.
  5. You can skip the maple syrup if you want.
  6. 1 cup of whipped cream cheese is ¾ cup of regular cream cheese.
  7. Good refrigerated for 3-4 days and also will freeze well for 2-3 months.

Nutrition

Calories: 323kcal | Carbohydrates: 56g | Protein: 11g | Fat: 7g | Saturated Fat: 1g | Cholesterol: 44mg | Sodium: 783mg | Potassium: 559mg | Fiber: 3g | Sugar: 21g | Vitamin A: 2701IU | Vitamin C: 1mg | Calcium: 258mg | Iron: 2mg

Originally Published February 28, 2015. Updated with expanded discussion and options, refreshed photos, and a table of contents.

dogs standing in the yard.
Lilly and Molly at six months and three weeks of age.

Healthy Blueberry Scones

blueberry scone on white plate

Healthy Blueberry Scones are packed with juicy blueberries and have about half the calories of traditional scones and almost zero fat. They will fit your healthy diet.

🫐Ingredients

Flour—AP flour and whole wheat flour
Baking powder
Baking soda
Yogurt—non-fat
Blueberries—fresh or frozen
Pantry ingredients—sugar, vanilla extract, salt

blueberry scone on white plate.
[feast_advanced_jump_to]
Blue ribbon divider used for visual effect

You can have your cake and eat it, too. Healthy blueberry scones will take the boredom out of a healthy diet, like a low-calorie and low-fat diet, and are the perfect guilt-free breakfast or brunch treat.

This healthy scone recipe has only 165 calories and almost zero fat (less than 0.5 grams) per scone. It comes together easily and quickly in a little over 30 minutes. Just follow the simple step-by-step photo instructions.

The whole wheat flour gives them a slightly nutty taste. They are packed with tasty fruit in a moist, soft, fluffy scone sprinkled with sugar. This is a perfect recipe to make fresh for breakfast, brunch, or a snack.

For other almost fat-free recipes, see Healthy Biscuits and Healthier Sausage Gravy and Biscuits.

👨‍🍳How to Make These Healthy Blueberry Scones—Step-by-Step

blueberries and ingredients for scones.

1. Preheat oven to 375° convection or 400° conventional.

Combining the dry ingredients in a glass bowl.

2. Combine dry ingredients. 1 ½ cup AP flour and ½ cup whole wheat flour, 1 tablespoon aluminum-free baking powder, ½ teaspoon baking soda, 1 teaspoon salt, and 3 tablespoons sugar.

adding yogart to dry mix in bowl.

3. Add 1 ¼ cups of non-fat yogurt and ½ teaspoon vanilla. Mix until fully incorporated.

pouring blueberries into bowl with dough.

4. Add 1 cup of fresh or frozen blueberries. Fold in until well distributed.

cutting dough into wedges,

5. Lightly dust a baking mat with flour. Place dough in the middle of the mat. With lightly flour-dusted hands, form an 8-inch disk. Cut into eight wedges.

wedges of scone on baking mat,

6. Separate them on the pad for some expansion space. Lightly dust with one tablespoon of sugar.

scones browned on tray,

7. Transfer the baking mat to a sheet pan. Bake until golden brown—about 18 minutes.

Plate full of blueberry scones,

8. Move to a cooling rack until served.

For more details, keep reading. See the Recipe Card below for complete instructions and to print.

✔️Tips

  • Do not over-mix the dough; if it is dry, it needs a little more yogurt or milk.
  • Greek yogurt will add a bit more yogurt twang that can be noticed and may need a splash of milk, but otherwise, it will work fine.
  • If you want a little "fluffier," use 100% all-purpose flour, but it will still be firmer. The texture is a little heavier than a regular scone. If you want flaky, you will need a different recipe since you won't get that without fat.

Variations

This healthy scone recipe can easily use other berries like strawberry, raspberry, etc. The berries or pieces of berry will work better if smaller and firmer. So, you may need to cut them up or freeze them before mixing them into the firm dough.

Chocolate chips, cinnamon chips, or nuts are also good additions.

You can make savory scones with a variety of cheese and herbs. Just put them in this base recipe without the sugar and blueberries.

Other low-fat recipes

Here are a few of my favorite low-fat dinner recipes: Healthier Chicken Enchilada Casserole, Pork Chili, or Small Crock Pot White Chicken Chili.

Or for sweet but still low-fat, try Healthy Carrot Cake. And don't forget the dog—try Low-Fat Homemade Dog Biscuits

Storage of leftovers

Leftovers should be sealed in an airtight container at room temperature for 3-4 days and frozen for 3-4 months.

❓FAQs

Can I use frozen blueberries in scones?

Yes. There is no need to thaw first.

Why are there scones healthy?

They are both low-fat and low-calorie and fit those diets perfectly. They are not low in carbohydrates and are not gluten-free.

Flour and blueberries have a minimal amount of fat. Fat-free yogurt may have a trace depending on the brand. But there are less than 0.5 grams per serving.

Scone vs. Biscuit

While the ingredients are similar,  scones frequently have some sweetness and fruit. Both are "quick bread," which means they use chemical leaveners like baking powder and baking soda. Biscuits and scones are both built on the foundation of flour, fat (usually butter), and liquid.

The texture of a scone should be more dense and less of that biscuit fluff. Also, a little dryer, not really dry, just not as moist as a biscuit.

Blue ribbon divider used for visual effect

📖The Recipe Card

blueberry scone on white plate
Print Recipe Add to Collection Go to Collections
4.78 from 9 votes

Healthy Blueberry Scones

Healthy Blueberry Scones are packed with juicy blueberries and have about half the calories of traditional scones and almost zero fat. They will fit your healthy diet.
Prep Time15 minutes mins
Cook Time18 minutes mins
Total Time33 minutes mins
Course: Breakfast
Cuisine: American
Keyword: Blueberry Scones, Low Fat, Low Fat Scones
Servings: 8
Calories: 170kcal
Author: Dan Mikesell AKA DrDan

Ingredients

  • 1 ½ cups all-purpose flour
  • ½ cup whole wheat flour
  • 1 tablespoon baking powder aluminum-free
  • ½ teaspoon baking soda
  • 1 teaspoon salt
  • 3 tablespoons sugar
  • 1 ¼ cup non-fat yogurt
  • ½ teaspoon vanilla extract
  • 1 cup blueberries fresh or frozen
  • 1 tablespoon sugar for topping
US Customary - Convert to Metric

Instructions

  • Preheat oven to 375° convection or 400° conventional.
    blueberries and ingredients for scones
  • Combine dry ingredients. 1 ½ cup AP flour and ½ cup whole wheat flour, 1 tablespoon aluminum-free baking powder, ½ teaspoon baking soda, 1 teaspoon salt, and 3 tablespoons sugar.
    Combining the dry ingredients in a glass bowl
  • Add 1 ¼ cups of non-fat yogurt and ½ teaspoon vanilla. Mix until fully incorporated.
    adding yogurt to biscuit ingredients in white bowl
  • Add 1 cup of fresh or frozen blueberries. Fold in until well distributed.
    pouring blueberries into bowl with dough
  • Lightly dust a baking mat with flour. Place dough in the middle of the mat. With lightly flour-dusted hands, form an 8-inch disk. Cut into eight wedges.
    cutting dough into wedges
  • Separate them on the pad for some expansion space. Lightly dust with one tablespoon of sugar.
    wedges of scone on baking mat
  • Transfer the baking mat to a sheet pan. Bake until golden brown—about 18 minutes. Move to the cooling rack, but excellent served warm.
    scones browned on tray

Notes

Pro Tips

  1. Frozen or fresh blueberries will do. If you use frozen, give them a rinse and pick over for stems.
  2. You can vary the ratio of the flours, but this is a nice compromise for texture and taste while still being moist.
  3. If you want a little "fluffier," use 100% all-purpose flour.
  4. If you want flaky, then you will need a different recipe.
  5. You may use Greek yogurt if you want, but there will be a bit more of a yogurt taste. They may need a splash of milk.
  6. Variations with other berries and additives are discussed in the post.
  7. Store sealed at room temperature for 3-4 days and frozen for 3-4 weeks.
  8. Nutrition Note: Flour and blueberries have a very small amount of fat. Fat-free yogurt may have a bit depending on the brand. But these are less than 0.5 grams per serving.

Nutrition

Calories: 170kcal | Carbohydrates: 36g | Protein: 6g | Fat: 0.4g | Saturated Fat: 0.4g | Cholesterol: 1mg | Sodium: 508mg | Potassium: 145mg | Fiber: 1g | Sugar: 11g | Vitamin A: 10IU | Vitamin C: 2mg | Calcium: 191mg | Iron: 2mg

I  based this on my popular  Low-Fat Biscuits recipe. You wouldn't mistake them for my wonderful Whole Wheat Blueberry Scones, but they are a nice treat.

Editor's Note: Originally published January 16, 2016. Updated with expanded options, refreshed photos, and a table of contents to help navigation.

Molly and Lilly in the trees.

Garlic Butter Salmon in a Convection Oven

\salmon flaking on a plate with a salad

Quick and easy, baked garlic butter salmon fillets are perfect for dinner, ready in just 20 minutes. Coated with a simple garlic butter with lemon juice and baked in a hot convection oven to sear, they provide great flavor while remaining flaky and moist.

🐟Ingredients

Salmon fillet
Garlic—powder or fresh
Butter
Lemon juice
Salt and pepper

closeup image of salmon flaking on a light gray plate.
[feast_advanced_jump_to]

quote mark
Featured Comment by Michael:
"I made this recipe tonight (January 5, 2024) for my wife and I. Excellent recipe. Simple and delicious. Add fresh haricot verts, brown rice and salad, and a New Zealand Chardonnay from Kumeu River and you have a perfect meal."

This easy, economical, and convenient baked salmon recipe uses common ingredients like garlic, butter, and lemon juice. There is no need for a plank or to cover with aluminum foil; follow the simple step-by-step photo instructions in your convection or conventional oven.

This baked salmon recipe will fit well with your healthy diet. It works well in low-fat, low-calorie, and keto-low-carb diets.

👨‍🍳How to Cook Salmon in a Convection Oven—Step-by-Step Photo Instructions

Salmon with lemon and butter—labeled.
Preparing a tray with a rack and foil.

1. Preheat the oven to 400° convection or 425° conventional. Prepare a baking sheet with a rack if available.

Combining butter with juice.

2. Combine butter, lemon juice, garlic powder, salt, and pepper. Microwave to melt the butter, then mix.

Brushing the salmon with lemon butter.

3. Pat dry the salmon with paper towels, then brush both sides (skip the skin if present).

Baked salmon out of the oven.

4. Bake until flaky and with an internal temperature of 145°—about 12-15 minutes. The time may vary with the thickness, pan, and oven.

For more details, keep reading. See the Recipe Card below for complete instructions and to print.

⏰How long to cook salmon

Salmon filets will take 12 to 15 minutes to cook in a 400° convection or 425° conventional oven. The time will vary by your salmon, especially the thickness, the pan, and the oven.

🤔When is the salmon done?

The fish should be opaque and flake easily. So, watch for the final internal temperature of 145°, the minimum safe internal temperature according to the USDA.

😊Tips to make it perfect every time

The salmon may be skin-on or skinless fillets. For even cooking, look for an even thickness. Try to buy the freshest available if using frozen, thaw for this method, or follow the instructions below for cooking still-frozen salmon.

You can cut the salmon into serving-size pieces before cooking. Cooking time will decrease some. If you do this, put the thicker pieces on the outer end of the rack and the thinner pieces in the center. That will help even out the cooking.

Skip the rack if you don't have one—use a well-oiled pan or parchment paper.

You can use fresh garlic cloves crushed or minced, but this recipe cooks fast, so the fresh garlic could be a bit "raw." So you probably should cook it a bit ahead of time. I use garlic powder to skip precooking the fresh garlic.

A medium fresh lemon will yield about 2 tablespoons of juice. Concentrated lemon juice is convenient and works well.

🌡️The best oven temperature

The suggested temperature is 400° in a convection oven. Or if you don't have convection, then 425° conventional.

You can vary the cooking temperature from 350° to 425° and still get great results since we are cooking to a final internal temperature, but lower temperatures will tend to dry more.

🤔How to cook still-frozen salmon

It is simple to cook salmon while still frozen, and some feel it is the best way to avoid drying it too much. The instructions are the same, with one major addition.

Tightly seal the entire tray with foil before going into the oven. This will trap any steam. Cook for about 15 minutes at the suggested temperature, then remove the covering foil.

It will probably take another 8-10 minutes of cooking to reach the required 145° internal temperature. Remember that thickness is a variable with cooking times.

🐟Fish Recipes

Try these easy and healthy baked tilapia recipes, which can be adapted to other fish; check out the Blackened Tilapia in the Oven, Lemon Butter Tilapia recipe, and Parmesan Crusted Tilapia recipe.

🍽️What to serve with baked salmon?

Garnish with some chopped fresh parsley or thyme and a lemon slice. Some fresh dill or other fresh herbs can be added along with more garlic butter or fresh lemon juice.

I like a nice tossed salad, but a hot side dish like Roasted Asparagus, baked rice, or baked baby potatoes. My easy dinner rolls are also a great addition. But use your favorite side dishes.

❄️How to store and reheat leftover baked salmon

Any fish, including salmon, is always better freshly cooked. But sometimes there are leftovers. They are good in the refrigerator for only a day. They will dry out rapidly if you reheat them, so they are better cold on salad.

❓FAQs

Is baked salmon healthy?

Yes. It will fit many diets like low-calorie, low-fat, gluten-free, low-carb, and keto diets. The present fats are generally healthier fats that most of us lack adequately in our diet.

Can I use olive oil instead of butter to coat the salmon?

Yes, but you will be happier with the butter taste.

🐟What you need to know about salmon

You can get salmon skin on or off. Most believe skin-on is a better choice for moisture. If you have skin on, then seasoning the skin side is useless, and you should cook with the skin side down.

Wild-caught salmon has a deeper, richer flavor but is significantly more expensive. It has a deeper color and a bit more nutrition. The farm-raised version is a good choice and is what most people buy.

Most will buy whole filets, but this recipe works for smaller pieces since we cook to a final internal temperature and not (never) by time alone.

📖The Recipe Card

\salmon flaking on a plate with a salad
Print Recipe Add to Collection Go to Collections
4.43 from 7 votes

Baked Garlic Butter Salmon

Quick and easy, baked garlic butter salmon fillets are perfect for dinner, ready in just 20 minutes. Coated with a simple garlic butter with lemon juice and baked in a hot convection oven to sear, they provide great flavor while remaining flaky and moist.
Prep Time5 minutes mins
Cook Time15 minutes mins
Total Time20 minutes mins
Course: Fish
Cuisine: American
Keyword: garlic butter salmon, Lemon Butter Salmon, salmon in convection oven
Servings: 4 servings
Calories: 187kcal
Author: Dan Mikesell AKA DrDan

Ingredients

  • 1 pound salmon fillet with or without skin
  • 2 tablespoons butter
  • 1 tablespoon lemon juice
  • ¼ teaspoon garlic powder
  • ½ teaspoon Kosher salt
  • ¼ teaspoon black pepper
US Customary - Convert to Metric

Instructions

  • Start with about a 1-pound salmon fillet—preheat the oven to 400° convection or 425° conventional.
    Salmon with lemon and butter—labeled.
  • Prep a baking sheet with aluminum foil and a rack. Give it a coat of PAM baking spray. If you don't have a rack, just use the foil and spray.
    Preparing a tray with a rack and foil.
  • In a small microwave-safe bowl, combine 2 tablespoons butter, 1 tablespoon lemon juice, ½ teaspoon kosher salt, ¼ teaspoon garlic powder, and ¼ teaspoon pepper.
    Combining butter with juice.
  • Microwave the butter mixture until melted (about 20 seconds). Then brush both sides of the salmon. Place on the baking rack.
    Brushing the salmon with lemon butter.
  • Place on the baking rack.
    Salmon on the rack ready to cook.
  • Bake until flaky with an internal temp of 145°—about 12-15 minutes. But time may vary with the thickness, pan, and oven.
    Baked salmon out of the oven.

Notes

Pro Tips:

  1. If you have skin on your salmon, don't put the butter on the skin and place the skin side down to bake.
  2. Skip the rack if you don't have one. Just use a well-oiled pan or parchment paper.
  3. The safe internal temperature of the salmon is 145°F.
  4. You can use fresh garlic, but the recipe cooks fast, so the fresh garlic could be a bit "raw." You should cook fresh garlic a bit ahead of time.
  5. You can cut the salmon into serving-size pieces before cooking. Cooking time will decrease slightly. The thicker pieces are put on the outside end of the rack, and the thinner pieces are put in the center. That will help even out the cooking.
  6. Fish is always better when freshly cooked. But sometimes there are leftovers. Good in the refrigerator for only a day. It will dry out rapidly if you reheat, so it's better cold on salad.
  7. TIME WARNING. Like many recipes, you should cook to a final internal temperature and not by time. Times are given for planning purposes only. You have variables of the pan and oven, but mostly the size and thickness of the salmon.
  8. Instructions for cooking still frozen fillets are in the recipe post.
 

Nutrition

Calories: 187kcal | Carbohydrates: 1g | Protein: 23g | Fat: 10g | Saturated Fat: 5g | Polyunsaturated Fat: 0.2g | Monounsaturated Fat: 2g | Cholesterol: 103mg | Sodium: 293mg | Potassium: 3mg | Fiber: 0.04g | Sugar: 0.01g | Vitamin A: 200IU | Vitamin C: 0.1mg | Calcium: 40mg | Iron: 0.4mg

Editor's Note: Originally Published February 25, 2013. The text has been re-edited and expanded, the photos updated, and a table of contents added.

Molly in the yard.

Beer Bread Recipe with 4 Ingredients

cut beer bread on a wooden board

This fast and easy Beer Bread Recipe has only four ingredients—butter, self-rising flour, sugar, and your favorite beer. Soft, buttery, and slightly sweet inside, with a crispy, buttery top, it is perfect for chili, stews, or soups.

A perfect "guy" recipe that goes with most "guy" foods.

🍺Ingredients

Self-rising flour— substitute AP flour, baking powder, and salt
Sugar or honey
Butter
Beer— OR plain seltzer water or a soda.
Optional additions—cheddar cheese, chopped jalapenos, garlic

cut beer bread on a wooden board.
[feast_advanced_jump_to]
Blue ribbon divider used for visual effect

Featured Comment from Sarah:
"My husband and I devoured the better part of the loaf, so I'm currently baking another fresh loaf to go with the leftover soup tonight!"

Soft, buttery, and slightly sweet inside with a crispy, buttery top, even the "non-beer" person will love this beer bread. It's super easy to make, even for the non-cook. You can do this.

Slathered with butter, it is an excellent compliment to chili, stews, or soups. Makes great toast and sandwiches.

Check out some quick bread recipes: Old Fashioned Banana Bread, Betty Crockers Corn Bread, Easy Pumpkin Bread, and Easy Apple Bread.

👨‍🍳How to make Beer Bread

  1. Combine self-rising flour with sugar.
  2. Add beer and melted butter. Stir until the foam subsides and all of the dry flour is incorporated. Do not over-mix.
  3. Pour the batter into a prepared pan and brush the top with more butter.
  4. Bake in a preheated oven until a toothpick comes out clean—about 50 minutes.

This is a summary of the steps and ingredients. See the recipe card or the step-by-step photo instructions below for complete instructions.

Options

  • Use seltzer water or soda instead of bear.
  • Use 2 tablespoons of honey for the 3 tablespoons of sugar.
  • Add optional ingredients like chopped jalapenos, bacon, or garlic.
  • Add a cup of shredded cheddar cheese to make cheddar bread.

What is the best beer to use for beer bread?

The easy answer is whatever type of beer you like. Some of the bread tastes will be the beer you add, butter, and a yeasty malt flavor. So use what you want. Something with less intense flavors is probably preferred.

Most people don't think they can tell a taste difference between using darker beers vs. lighter beers or expensive vs. cheap beers. But some feel that more flavor will come through with a robust dark beer.

Serving

This bread goes great with Small Crock Pot Beef Stew, Slow Cooker Chicken Stew, and Stew Meat Chili. It is perfect to serve at tailgating and game-day parties.

Storage

Store at room temperature in an airtight container for 3-4 days—no need for a refrigerator.

It can also be frozen for 4 months.

Making self-rising flour

Self-rising flour is a bit old-fashioned, but it is a shortcut your grandmother would use for biscuits or other quick bread recipes.

It is a standardized mixture, so if you were making biscuits, you would cut in your butter, add some milk, and be ready for the oven.

  • 1 cup of all-purpose flour
  • 1 ½ teaspoon baking powder
  • ¼ teaspoon salt

Bisquick is self-rising flour with some hydrogenated vegetable shortening added, so you won’t need to add the butter.

❓FAQs

What is a quick bread?

Quick bread is a bread product that uses leavening agents other than yeast or eggs, usually baking soda or baking powder. The texture of quick bread is very different than yeast-leavened bread.

Quick bread has more of a muffin-like texture than yeast bread's gluten texture. Typical quick bread includes banana, soda, beer bread, biscuits, cornbread, muffins, pancakes, scones, and cookies.

What does sifting flour do?

When we sift flour, it breaks down any clumps and provides a fluffier result. It also helps mix other ingredients throughout the flour. It will improve the texture a bit. If you don't have an old-school flour sifter, you can get about the same effect using a large fine-mesh strainer.

Do you have to sift if a recipe suggests it? No, but the results will be denser, but not a lot.

Blue ribbon divider used for visual effect
↑Jump to Table of Contents

This recipe is listed in these categories. See them for more similar recipes.

Bread Recipes

Have you tried this recipe, or have a question? Join the community discussion in the comments.

Step-by-Step Photo Instructions

beer with self-riesing flour.

Preheat oven to 375° conventional.

coating loaf pan with PAM.

Start by prepping a 9 by 4 inch loaf pan with a good spray of PAM or a light coat of butter. Your loaf pan size may vary, but it will be fine.

adding flour to sifter.

Combine 3 cups of self-rising flour with 3 tablespoons of sugar. Optional: run the flour/sugar mixture through a sifter. If you do not have self-rising flour, mix 3 cups of AP flour with 4 ½ teaspoons of baking powder and ¾ teaspoons of salt.

pouring beer into flour mixture.

Add 12 oz of beer. Add 3 tablespoons of melted butter. Stir until the foam subsides and all of the dry flour is incorporated. Do not over-mix.

pouring batter into greased pan.

Add to prepared pan and level in the pan.

brushing top of loaf with melted butter.

Brush top with 1 tablespoon of melted butter.

toothpick coming out clean from baked beer bread.

Bake until a toothpick comes out clean—about 50 minutes.

beer bread on a cooking rack.

Turn onto a rack to cool for about 15 minutes before cutting. Store airtight at room temperature for up to 3-4 days.

📖The Recipe Card

cut beer bread on a wooden board
Print Recipe Add to Collection Go to Collections
5 from 1 vote

Beer Bread Recipe with 4 Ingredients

This fast and easy Beer Bread Recipe has only four ingredients—butter, self-rising flour, sugar, and your favorite beer. Soft, buttery, and slightly sweet inside, with a crispy, buttery top, it is perfect for chili, stews, or soups.
Prep Time10 minutes mins
Cook Time50 minutes mins
Total Time1 hour hr
Course: Bread
Cuisine: American
Keyword: Beer Bread, Quick Bread
Servings: 12
Calories: 263kcal
Author: Dan Mikesell AKA DrDan

Ingredients

  • 3 cups self-rising flour Substitute is listed in the instructions
  • 3 tablespoons sugar
  • 4 tablespoons butter divided
  • 12 oz beer

Optional

  • 1 cup cheddar or other cheese
  • Chopped jalapenos
  • garlic powder
US Customary - Convert to Metric

Instructions

  • Preheat oven to 375° conventional.
    beer with self-riesing flour
  • Start by prepping a 9 by 4 inch loaf pan with a good spray of PAM or a light coat of butter. Your loaf pan size may vary but will be fine.
    coating loaf pan with PAM
  • Combine 3 cups of self-rising flour with 3 tablespoons of sugar. Optional: run the flour/sugar mixture through a sifter. If you do not have self-rising flour, mix 3 cups of AP flour with 4 ½ teaspoons of baking powder and ¾ teaspoons of salt.
    adding flour to sifter
  • Add 12 oz of beer. Add 3 tablespoons of melted butter. Stir until the foam subsides and all of the dry flour is incorporated. Do not over-mix.
    pouring beer into flour mizture
  • Add the batter to the prepared pan and level in the pan.
    pouring batter into greased pan
  • Add to prepared pan and level in the pan.
    brushing top of loaf with melted butter
  • Bake until a toothpick comes out clean. About 50 minutes.
    toothpick coming out clean from baked beer bread
  • Turn onto a rack to cool for about 15 minutes before cutting. Store airtight at room temperature for up to 3-4 days.
    beer bread on a cooking rack

Notes

Recipe Tips:

  1. Use the beer of your choice. You can substitute 1 ½ cups (12 ounces) plain seltzer water or a soda.
  2. To make one cup of self-rising flour mix 1 cup of all-purpure flour with 1 ½ teaspoon of baking powder and ¼ teaspoon of salt.
  3. I suggest sifting the flour to make the bread less dense. You skip it if you want.
  4. This bread is easy to add things. A cup of cheese, some chopped-up pickled jalapenos, or some garlic powder. Have some fun with it. Google will give you endless suggestions.
  5. Good sealed tightly for about 3-4 days or frozen for 4 months.

Nutrition

Calories: 263kcal | Carbohydrates: 47g | Protein: 6g | Fat: 4g | Saturated Fat: 2g | Cholesterol: 11mg | Sodium: 737mg | Potassium: 18mg | Sugar: 3g | Vitamin A: 150IU | Calcium: 150mg | Iron: 2mg

Originally Published March 11, 2018. Updated with more explanation, refreshed photos, and table of contents.

Dogs with purple puppy toy.

Based on King Authur's Classic Beer Bread.

30-Minute Chicken Marinara Sauce

chicken marinara with pasta on white plate

The best Chicken Marinara Sauce is fast and easy with tender meat and authentic Italian flavor with a few pantry ingredients. Make it with other meat or vegetarian on the stovetop or in a slow cooker.

🐓Ingredients

Chicken—breast or thighs
Tomato—crushed or diced
Aromatics—onion, garlic
Panty ingredients—butter, sugar, basil, salt, and black pepper

Chicken Spaghetti on white plate.
[feast_advanced_jump_to]
Blue ribbon divider used for visual effect

Featured comment from Jeanne:
"This was delicious!….. I will be making this again. Thank you!"

The whole family will love this sauce that is packed with great Italian flavor; it's one of the best marinara sauces you will ever make. Easy to make on the stovetop or in a crock pot with only pantry ingredients and these easy step-by-step photo instructions.

Very easy to make vegetarian, use precooked meat like rotisserie chicken or ground meat like Italian sausage, ground beef, or ground turkey.

Shredding the onion releases the juices and tastes quickly and is the secret to great, quick results. Perfect to use on pasta like spaghetti or in other recipes. It can be done in only 15 minutes if no raw meat is involved.

Try Italian Sausage Marinara Sauce for a different taste. And for easy crock pot Italian, check out Baked Ziti, Chicken Baked Ziti, Crock Pot Pizza Casserole, or Chicken Cacciatore.

👨‍🍳How to make Chicken Marinara Sauce on the stovetop

  1. If using raw chicken, trim it into bite-size pieces and start browning. Raw ground meat should be browned and drained.
  2. Shred the onion and add to the meat during cooking. If not using meat, saute the onion until clearing. Add the garlic near the end of cooking.
  3. Add the tomato products and spices. Mix well and simmer—15 minutes minimum, but longer is better. If using it for a quick spaghetti dinner, cook the pasta while simmering.

📋Ingredients options and variations

  • Chicken - If using raw chicken, like skinless boneless chicken breasts or chicken thighs, diced into bite-sized pieces. You can also use precooked chicken, like rotisserie chicken, added with the tomatoes.
  • Other Meat - you can use other ground meat like Italian sausage, ground beef, or ground turkey. They require cooking prior to adding the other sauce ingredients.
  • Skip the meat and make a wonderful vegetarian marinara sauce.
  • Tomatoes - Good quality is important - use crushed or diced depending on the texture you like.
  • Onion - Grating the onion is the key to a quick sauce with great flavor. You can just dice small, but it will need a bit longer to cook fully.
  • Seasoning - the usual garlic, salt, and pepper. The Italian touch comes from basil, which can be dry or fresh basil. But oregano, rosemary, or an Italian seasoning mix could be used. The optional red pepper flakes add a touch of heat.

👨‍🍳How to make Chicken Marinara Sauce in a crock pot

  1. You can leave out any meat and make it vegetarian. If using precooked meat, like rotisserie chicken, use about 3 cups. If using raw ground meat, like Italian sausage, ground beef, or ground turkey, you must brown the meat, be sure it reaches a safe temperature, and drain well.
  2. If using raw chicken, cube the chicken as stated in this recipe, but you can cut the breasts into 2-3 chunks each if you want to shred them near the end.
  3. The onion can be chopped or shredded.
  4. Cook on low for about 3 hours in a 3 quart or larger crock pot until chicken is 165°. The main time variation is due to chicken size.
  5. If shredding chicken, remove the chunks from the pot, shred and then add them back to the crockpot. You could add rotisserie chicken at this point, also. Cook another 30-60 minutes to infuse with flavor.
  6. If using rotisserie chicken or the ground meat you cooked, add them at the start of cooking and cook for about one hour, but a longer simmer will add flavor.
  7. A double recipe in a 6 quart or bigger crock pot.

How to use

Usually, you will serve chicken marinara as a simple chicken spaghetti. Just cook pasta like spaghetti or linguine and sprinkle it with some parmesan cheese.

Baked chicken ziti or baked chicken spaghetti would be easy with this sauce. In a casserole dish, add some al denta ziti pasta with mozzarella cheese and bake in a 350° oven to a golden brown—instant Italian comfort food.

FAQs

What is marinara sauce?

Marinara sauce is a tomato-based sauce with garlic, onion, herbs and spices. There are many variations with and without meat, some with wine and other additions. It is frequently served on pasta but is also used in other dishes like casseroles.

How to store marinara sauce

Store in the refrigerator for 4 days or freeze airtight for 3-4 months.

Blue ribbon divider used for visual effect
↑Jump to Table of Contents

This recipe is listed in these categories. See them for more similar recipes.

30-Minute Dinner Recipes, Chicken Recipes, Crock Pot Recipes, Italian Recipes, Low Fat Recipes, Small Crock Pots Recipes

Have you tried this recipe, or have a question? Join the community discussion in the comments.

Step-by-Step Photo Instructions

two chicken breasts trimmed into chunks.

If using raw chicken, trim the chicken breast of any fat. Cut into slices across the grain of the meat about ⅜ inch thick, then cut again the other way to make more bit size pieces. You can leave out any meat and make it vegetarian. If using precooked meat, like rotisserie chicken, add about 3 cups with tomato products. If using raw ground meat, like Italian sausage, ground beef, or ground turkey, you must brown 1 to ½ pounds of the meat, be sure it reaches a safe temperature, and drain well.

shedding onion into bowl.

Shred onion with the large side of a shredder into a medium bowl. You can also chop the onion instead, just simmering it a bit longer.

browning chicken in a black pan.

In a large skillet, add a tablespoon of butter or olive oil over medium-high heat. Saute the chicken for about 5 minutes, add the onion, and cook until clearing the onion—about 10-12 minutes total. Add the garlic for the last few minutes of cooking.

adding spices to chicken and tomatoes.

Add all other spices and tomatoes. Simmer for at least 15 minutes—cook pasta during the simmering time.

chicken marinara on pasta.

📖The Recipe Card

chicken marinara with pasta on white plate
Print Recipe Add to Collection Go to Collections
5 from 1 vote

30-Minute Chicken Marinara Sauce

The best Chicken Marinara Sauce is fast and easy with tender meat and authentic Italian flavor with a few pantry ingredients. Make it with other meat or vegetarian on the stovetop or in a slow cooker.
Prep Time5 minutes mins
Cook Time25 minutes mins
Total Time30 minutes mins
Course: Main Course
Cuisine: Italian
Keyword: Chicken Marinara Sauce, Chicken Spaghetti, Marinara Sauce
Servings: 6 servings
Calories: 112.9kcal
Author: Dan Mikesell AKA DrDan

Ingredients

  • 1 pounds skinless boneless chicken breasts or thighs unto 1½ lbs
  • 1 tablespoon butter
  • 2-4 cloves garlic minced or crushed
  • 1 onion medium shredded or diced
  • 28 oz crushed tomatoes
  • 2 teaspoons dry basil or 2 tablespoons fresh
  • 1 teaspoon salt
  • ½ teaspoon pepper
  • ¼ teaspoon crushed red pepper optional to taste
  • ¼ teaspoon sugar
  • 1 pound Pasta of your choice
US Customary - Convert to Metric

Instructions

  • If using raw chicken, trim the chicken breast of any fat. Cut into slices across the grain of the meat about ⅜ inch thick, then cut again the other way to make more bit size pieces.
    OTHER OPTIONS: You can leave out any meat and make it vegetarian. If using precooked meat, like rotisserie chicken, add about 3 cups with tomato products. If using raw ground meat, like Italian sausage, ground beef, or ground turkey, you must brown 1 to ½ pounds of the meat, be sure it reaches a safe temperature, and drain well.
    two chicken breasts trimmed into chunks
  • Shred onion with the large side of a shredder into a medium bowl. You can also chop the onion instead-but simmer a bit longer.
    shedding onion into bowl
  • In a large skillet, add a tablespoon of butter or olive oil over medium-high heat. Saute the chicken for about 5 minutes, add the onion and cook until clearing the onion—about 10-12 minutes total. Add the garlic for the last few minutes of cooking.
    browning chicken in a black pan
  • Add all other spices and tomatoes.  Simmer for at least 15 minutes—cook pasta during the simmering time.
    adding spices to chicken and tomatoes
  • Perfect for Chicken Spaghetti or other dishes.
    chicken marinara on pasta

Notes

Pro Tips

  1. An easy recipe to cut in half.
  2. Use good ingredients. If you use generic tomatoes, you will have generic results.
  3. The shredded onion released flavor and cooks rapidly. It is the secret of the quick sauce. You can use chopped onion and cook a bit longer.
  4. Good refrigerated for 3-4 days or frozen for 3-4 months.
  5. Nutrition does not include any pasta.

Crockpot Option

  1. If using raw chicken, cube the chicken as stated in this recipe, but you can cut the breasts into 2-3 chunks each if you want to shred them near the end.
  2. You can leave out any meat and make it vegetarian. If using precooked meat, like rotisserie chicken, use about 3 cups. If using raw ground meat, like Italian sausage, ground beef, or ground turkey, you must brown 1 to 1 ½ pounds of the meat, be sure it reaches a safe temperature, and drain well.
  3. The onion can be chopped or shredded.
  4. Cook on low for about 3 hours in a 3 quart or larger crock pot until chicken is 165°. The main time variation is due to chicken size.
  5. If shredding, remove the chunks from the pot, shred and then add them back to the crockpot. You could add rotisserie chicken at this point, also. Cook another 30-60 minutes to infuse with flavor.
  6. If using rotisserie chicken or the ground meat you cooked, add them at the start of cooking and cook for about one hour, but a longer simmer will add flavor.
    A double recipe in a 6 quart or bigger crock pot.

Nutrition

Calories: 112.9kcal | Carbohydrates: 12.2g | Protein: 10.6g | Fat: 3.3g | Saturated Fat: 1.5g | Polyunsaturated Fat: 0.4g | Monounsaturated Fat: 0.8g | Trans Fat: 0.1g | Cholesterol: 29.1mg | Sodium: 623.5mg | Potassium: 571mg | Fiber: 3g | Sugar: 6.8g | Vitamin A: 382.6IU | Vitamin C: 14.3mg | Calcium: 62.2mg | Iron: 2.3mg

It was inspired by Americas Test Kitchen's Quick Tomato Sauce (subscription required), a flavorful marinara that cooks in about the time of cooking the pasta.

Editor's Note: Originally Published January 29, 2010. Updated with expanded options, refreshed photos, and a table of contents to help navigation.

dogs running in the snow.

Puerto Rican Ham Bone Soup with Potatoes and Beans

Puerto Rican Ham soup in a ladle

An excellent ham soup bursts with potatoes, rice, carrots, and beans in a spicy broth. Give that ham bone a great ending today with this hardy soup you will love.

Ladle of ham soup
[feast_advanced_jump_to]
Blue ribbon divider used for visual effect

Introduction

This has been a standard at our house for years. We are the only ones calling it Christmas soup, but I'm sticking with the name since that is when we usually make it. I originally called this recipe "Puerto Rican Chuletón Soup, AKA Xmas Ham Bone Soup," but shortened the name.

Based on a recipe from a children's book, "Everybody Serves Soup" by Norah Dooley. I should have guessed the origin of the requested recipe with two children librarians in the family (a wife and a daughter).

This is so NOT cooking for two friendly unless you have freezer space or a crowd coming for dinner.

👨‍🍳How to Make Puerto Rican Ham Bone Soup

  1. Rinse the ham under running water if there is a sugary coating, and trim any large chunks of fat.
  2. In a large stock pot, cover the ham bone most of the way with water simultaneously, measuring the water to adjust other ingredients later.
  3. Bring to boil over medium-high heat and then decrease to low and simmer for 60 to 90 minutes, then remove to cool some.
  4. Peel and chop potatoes and carrots into bite-size pieces. Chop onions.
  5. Remove all meat from the bone. Discard bone and any fat and waste. You want about 2 cups, but a bit less or more is fine.
  6. Add ham, vegetables, and all other ingredients to the stock pot. Bring to boil with medium-high heat, then decrease to simmer for 1-2 hours until potatoes and carrots are tender. Cool in the refrigerator overnight, then skim the fat before serving is recommended but not required.

When you cover the ham with water, measure it. The vegetables and spices are set for about 6 cups of water. If you need a lot more, increase the vegetables and beans proportionally.

📋 Ingredients

Ham Bone—If your ham is covered with a sugary coat, rinse off as much as possible under running water before starting. Also, there is usually a fat coating over a lot of the ham. Cut or scrape it off. You want about 2 cups of ham but can use more or less.

Do I Need Chicken Broth? I suggest using water with the ham to make the broth. I don't see the need to use chicken broth, which will add salt. There is plenty of salt in the ham already. The ham will make its own's broth.

Potatoes—This recipe needs 1 ½ to 3 pounds of potatoes, peeled and diced. A medium size potato is about ½ pound. I generally have russet potatoes but use what you have.

Beans—The original recipe calls for pigeon beans... not in West Michigan. I see this as your option to make the soup what you want. I used black and navy beans.

♨️Can I Do This in a Crock Pot?

This stovetop recipe can be easily done in a crock pot. Add everything at the beginning. Cook on low for 7-8 hours, then remove the ham and strip the meat. Add the ham back and cook for another 1-2 hours until the potatoes and carrots are tender.

❓FAQs

What can be done to control the sodium in ham soup?

The sodium can get very high in soups made with ham bones. Ham is high in sodium, some more than others.

Use low-sodium beans and rinse them.

Never add salt to a ham soup until near the end, and you are sure it is needed.

How to store ham soup?

Ham soup will store in a refrigerator for 3-4 days. You can also freeze in an airtight container for 3-4 months.

T

📖 Ham Soup Recipes

Crock Pot Ham Bone and Bean Soup

Ham and Vegetable Soup

Blue ribbon divider used for visual effect
↑Jump to Table of Contents

This recipe is listed in these categories. See them for more similar recipes.

Pork | Ham and Bacon Recipes, Soup Recipes

Have you tried this recipe, or have a question? Join the community discussion in the comments.

Step-by-Step Photo Instructions

rinsing ham bone under running water

Rinse the ham under running water if there is a sugary coating. Also, if there are large chunks of fat, then trim them some.

Ham bone in stock pot

Cover the ham most of the way with water. Measure water and increase all other ingredients proportionally. Bring to a boil over medium-high heat and then decrease to low and simmer for 60 to 90 minutes. Remove the ham bone to cool.

chopped potatoes and carrots on black board

Peel and chop potatoes and carrots into bite-size pieces. Chop onions.

stripping meat off the ham bone

After the ham is cooled enough to handle, remove all meat from the bone. Discard bone and any fat and waste.

ham soup in the stock pot

Add all ingredients back to the broth. Bring to boil with medium-high heat, then decrease to simmer for 1-2 hours until potatoes and carrots are tender.

ham soup in a white bowl

Cool in the refrigerator overnight, then skim the fat before serving is recommended but not required.

↑Jump to Table of Contents

📖The Recipe Card

Ladle of ham soup
Print Recipe Add to Collection Go to Collections

Puerto Rican Ham Bone Soup with Potatoes and Beans

An excellent ham soup bursts with potatoes, rice, carrots, and beans in a spicy broth. Give that ham bone a great ending today with this hardy soup you will love.
Prep Time2 hours hrs
Cook Time1 hour hr
Total Time3 hours hrs
Course: Soup
Cuisine: American
Keyword: Ham Bone Soup, Ham Soup, Puerto Rican Ham Bone Soup
Servings: 10
Calories: 420kcal
Author: Dan Mikesell AKA DrDan

Ingredients

  • 1 ham bone with meat
  • 6 cups water enough to cover the bone
  • 2 onions large
  • 3-4 potatoes about 1 ½ to 2 pounds
  • 3-4 carrots
  • 42 oz precooked beans I used ⅔ navy and ⅓ black beans
  • ½ cup rice not instant or rapid cooking
  • 1 teaspoon turmeric
  • ½ teaspoon cumin
  • ¼ teaspoon pepper
US Customary - Convert to Metric

Instructions

  • Rinse the ham under running water if there is a sugary coating. Also, if there are large chunks of fat, then trim them some.
    rinsing ham bone under running water
  • Cover the ham most of the way with water. Measure water and increase all other ingredients proportionally. Bring to a boil over medium-high heat and then decrease to low and simmer for 60 to 90 minutes. Remove the ham bone to cool.
    Ham bone in stock pot
  • Peel and chop potatoes and carrots into bite-size pieces. Chop onions.
    chopped potatoes and carrots on black board
  • After the ham is cooled enough to handle, remove all meat from the bone. Discard bone and any fat and waste.
    stripping meat off the ham bone
  • Add all ingredients back to the broth. Bring to boil with medium-high heat, then decrease to simmer for 1-2 hours until potatoes and carrots are tender
    ham soup in the stock pot
  • Cool in the refrigerator overnight, then skim the fat before serving is recommended but not required.
    ham soup in a white bowl

Notes

Pro Tips

  1. This is set for 6 cups of water. If you need more to mostly cover the ham bone, you will need to adjust the vegetable and spices up some.
  2. This makes a large amount of soup. The amount varies by the amount of water needed.
  3. If your ham has a sugar coat, rinse it off. And then do it a second time—you do not want the sweetness in the soup.
  4. Ham bones freeze well for 3-4 months.
  5. The sodium can get way high on this. The ham is high in sodium. Try to use low-salt beans and rinse them. You can add salt near the end if needed.
  6. You can skim off the fat after the soup is refrigerated overnight. This is preferred but not required.
  7. Good in refrigerator for 3-4 days and frozen for 3-4 months.
  8. There is nothing exact about either the serving number or nutrition on this recipe. I estimate a serving size of about 1 ½ cups.

Crock Pot Variation

This is a stovetop recipe but can be done easily in a crock pot. Add everything at the beginning. Cook on low for 7-8 hours, then remove the ham and strip the meat. Add the meat back and cook for another 1-2 hours until the potatoes and carrots are tender.

Nutrition

Calories: 420kcal | Carbohydrates: 50g | Protein: 27g | Fat: 12g | Saturated Fat: 4g | Cholesterol: 42mg | Sodium: 841mg | Potassium: 1028mg | Fiber: 15g | Sugar: 2g | Vitamin A: 3057IU | Vitamin C: 11mg | Calcium: 127mg | Iron: 6mg

Editor's Note: Originally Published February 3, 2011. Updated with newly edited pictures, expanded discussion with more details, and a jump table.

Dogs wanting treats

Easy Homemade Sugar Cookies

sugar cookie on spatula ready to decorate

Classic homemade sugar cookies are a delicious classic that every parent and grandparent needs in the recipe box.

sugar cookie on spatula ready to decorate
[feast_advanced_jump_to]
Blue ribbon divider used for visual effect

'Tis the season for... Christmas Cookies. So here is an excellent quick and easy sugar cookie recipe that even the cookie rookie can handle.

These soft and chewy sugar cookies are perfect rolled cookies to cut into shapes and decorate with the kids. The recipe is adjusted for a smaller household but can be scaled as needed.

Check out some other delicious sweet recipes, like Cheesecake Bars, Easy Lemon Bars, Chocolate Chip Cheesecake, Flourless Chocolate Cake Recipe, and Cream Cheese Cupcakes

All sugar cookie recipes are similar, not identical, but very similar. The inspiration recipe is The Best Rolled Sugar Cookies from All Recipes. I cut the recipe in half, expanded the discussion/options, and added an optional frosting to get you started.

👨‍🍳How to make homemade sugar cookies

  1. Start with softened butter in a large bowl. Add sugar and beat with a stand mixer or hand electric mixer until creamy,
  2. Beat in the eggs and vanilla. Add all the dry ingredients, mix well, form into a ball, cover the bowl with plastic wrap, and place in the refrigerator to cool for at least one hour.
  3. Roll to about ¼ inch thickness on a surface dusted with powdered sugar. Cut into desired shapes and place on baking sheets with parchment paper or silicone baking mats.
  4. Bake cookies in a preheated 400° oven for 7 to 8 minutes until the edge is browning.
  5. After removal from the oven, let the cookies stay on the tray for 2 minutes, then move them to a wire rack.
  6. Decorate as desired with frosting and sprinkles.

🧂Ingredients

  • Butter - Use soft real butter. Salted is fine, but unsalted butter will do; add a pinch more salt.
  • Eggs - Use two, which will help hold things together. Many recipes will use only one.
  • Vanilla - Use only real vanilla extract, please.
  • Baking Powder - Use aluminum-free to avoid an aftertaste.
  • Other ingredients - Salt, sugar, and all-purpose flour.

❓FAQs

What texture should the raw dough be for sugar cookies, and how to adjust it?

The final dough should have a texture close to Play-Doh. Not sticky and wet but also not hard. If the dough is sticky and wet, add a little flour. If dry, then a touch of milk.

Can sugar cookie dough be made ahead?

Yes. The cookie dough can be refrigerated for 2-3 days before use. It should be sealed tightly since it can easily pick up flavors from other foods.

Raw dough can also be frozen for 2-3 months. Thaw completely before proceeding.

How to store baked sugar cookies.

After cooking, the baked cookies are excellent for about three days. Sealed in an airtight container, they are very good for a week. After that, they will start to dry some. Two weeks is about the maximum time.

Sugar cookies will freeze well for 3-4 months.

Blue ribbon divider used for visual effect
↑Jump to Table of Contents

This recipe is listed in these categories. See them for more similar recipes.

Dessert Recipes, Holiday Recipes

Have you tried this recipe, or have a question? Join the community discussion in the comments.

Step-by-Step Photo Instructions

sugar cookie ingredients

Start with ¾ cup (1 ½ sticks) of butter. Soften a little by resting at room temperature or in a microwave for 10-15 seconds.

bowl with sugar and butter and mixer ready to beat

Add 1 cup of sugar to the butter in a large bowl. Cream together with an electric mixer.

mixing eggs into whipped butter and sugar

Add 2 eggs and ½ teaspoon vanilla—mix well.

ball of dough in a covered bowl

Add 2 ½ cup flour, 1 teaspoon baking powder, and ½ teaspoon salt. Mix well, cover, and refrigerate for at least one hour. Preheat oven to 400°. Prep baking sheets by covering them with parchment paper or a silicone mat.

dough rolled onto floured mat

Dust a prep area with some powdered sugar. Form the dough into a ball and place it on the mat. Flatten and then roll out with a rolling pin. Use lots of powdered sugar on the mat and on top of the dough to prevent sticking. Roll to a thickness of about ¼ inch or a bit thicker.

cutting shapes in rolled dough

Cut with a cookie cutter.

raw cookies on baking tray ready for the oven

Layout the cookies on a cookie sheet, keeping them about one inch apart. They will spread out during cooking. Work quickly, reuse the scraps, and keep dusting the surface and dough with powdered sugar to prevent sticking. Continue to cut cookies until done. Recool dough scraps if it gets too soft to work.

graphic pointing to browning edge of cookie on cooking mat

Bake until the edge of the cookies is starting brown a little. It takes about 7-8 minutes. Do not overbake.

cookies on a cooling rack

Remove from oven and allow to sit on the pan for a few minutes, then move to a wire cooling rack.

powder sugar with milk and frosting ingredients

After cooling, it is time for decoration. Make a simple sugar cookie icing by mixing 1 cup of powdered sugar, 1 tablespoon of butter, 2 drops of vanilla, and 3-4 teaspoon of milk. Add a few drops of food coloring of your choice—mix well.

↑Jump to Table of Contents

📖The Recipe Card

sugar cookie on spatula
Print Recipe Add to Collection Go to Collections
5 from 3 votes

Easy Homemade Sugar Cookies

Classic homemade sugar cookies are a delicious classic that every parent and grandparent needs in the recipe box. These soft and chewy sugar cookies are perfect rolled cookies to cut into shapes and decorate with the kids. The recipe is adjusted for a smaller household but can be scaled as needed.
Prep Time1 hour hr 15 minutes mins
Cook Time8 minutes mins
Total Time1 hour hr 23 minutes mins
Course: Dessert
Cuisine: American
Keyword: Christmas Cookies, Sugar Cookies
Servings: 24
Calories: 160kcal
Author: Dan Mikesell AKA DrDan

Ingredients

  • ¾ cup butter softened - 1 ½ stick
  • 1 cup sugar
  • 2 eggs
  • ½ teaspoon vanilla
  • 2 ½ cup flour
  • 1 teaspoon baking powder
  • ½ teaspoon salt

Optional Glaze

  • 1 cup powdered sugar
  • 1 tablespoon butter
  • 2 drops vanilla
  • 3-4 teaspoon milk
  • food coloring as desired
US Customary - Convert to Metric

Instructions

  • Start with ¾ cup (1 ½ sticks) of butter. Soften a little by resting at room temperature or in a microwave for 10-15 seconds.
    sugar cookie ingredients
  • Add 1 cup of sugar to the butter in a large bowl. Cream together with an electric mixer.
    bowl with sugar and butter and mixer ready to beat
  • Add 2 eggs and ½ teaspoon vanilla—mix well.
    mixing eggs into whipped butter and sugar
  • Add 2 ½ cup flour, 1 teaspoon baking powder, and ½ teaspoon salt. Mix well, cover, and refrigerate for at least one hour. Preheat oven to 400°. Prep baking sheets by covering them with parchment paper or a silicone mat.
    ball of dough in a covered bowl
  • Dust a prep area with some powdered sugar. Form the dough into a ball and place it on the mat. Flatten and then roll out with a rolling pin. Use lots of powdered sugar on the mat and on top of the dough to prevent sticking. Roll to a thickness of about ¼ inch or a bit thicker.
    dough rolled onto floured mat
  • Cut with a cookie cutter.
    cutting shapes in rolled dough
  • Layout the cookies on a cookie sheet, keeping them about one inch apart. They will spread out during cooking. Work quickly, reuse the scraps, and keep dusting the surface and dough with powdered sugar to prevent sticking. Continue to cut cookies until done. Recool dough scraps if it gets too soft to work.
    raw cookies on baking tray ready for the oven
  • Bake until the edge of the cookies is starting brown a little. It takes about 7-8 minutes. Do not overbake.
    graphic pointing to browning edge of cookie on cooking mat
  • Remove from oven and allow to sit on the pan for a few minutes, then move to a wire cooling rack.
    cookies on a cooling rack

Optional Frosting

  • After cooling, it is time for decoration. Make a simple sugar cookie icing by mixing 1 cup of powdered sugar, 1 tablespoon of butter, 2 drops of vanilla, and 3-4 teaspoon of milk. Add a few drops of food coloring of your choice—mix well.
    powder sugar with milk and frosting ingredients

Notes

Pro Tips

  1. This an easy recipe to cut half or double.
  2. Room temperature or slightly softer butter is important to get the right texture.
  3. Real butter is not required, but you will be happy if you do—salted is fine.
  4. Cool the dough to cut and if you don't work fast, cool again before proceeding.
  5. Use real vanilla if possible.
  6. Never use aluminum-containing baking powder for anything. There is an aftertaste.
  7. The dough should have a texture close to Play-Doh. If sticky and wet, add a bit of flour. If dry, then a touch of milk.
  8. I suggest a thickness of about ¼ inch. Thinner will cook faster, and thicker will take longer.
  9. I recommend powdered sugar, not flour, on the surface when making out the dough and on the top as your roll out the dough.
  10. Your oven and the pans will also affect cooking time, so watch the lower edge of the cookie for a hint of brown. Usually about 8 minutes. DO NOT OVER COOK.
  11. Allow cooling on the tray for a few minutes before moving it to the cooling rack.
  12. After cooking, the baked cookies are excellent for about three days. Sealed in an airtight container, they are very good for a week. After that, they will start to dry some. Two weeks is about the maximum time.
  13. Raw dough can be refrigerated for up to 3 days but can easily pick up odors from the refrigerator. The dough can also be frozen for about 3 months.
  14. Nutrition includes optional frosting. Of course, nutrition will also vary by the size of the cookies. You will get about 24 average-size cookies from this recipe.

Nutrition

Calories: 160kcal | Carbohydrates: 23g | Protein: 2g | Fat: 7g | Saturated Fat: 4g | Cholesterol: 30mg | Sodium: 109mg | Potassium: 38mg | Fiber: 1g | Sugar: 13g | Vitamin A: 212IU | Calcium: 14mg | Iron: 1mg

Originally Published December 3, 2014. Updated with expanded options, refreshed photos, and a table of contents to help navigation.

Lilly in light snow

Pretzel Candies

Pretzel Candies on mat

Super easy chocolate pretzel candies are a great sweet and salty combo. Just three ingredients and no skill will get you these delicious candies.

Pretzel Candies on mat
[feast_advanced_jump_to]
Blue ribbon divider used for visual effect

These pretzel candies are perfect for "take a treat" to school, an office party, or even giving as gifts.

😊Why you will love this recipe

  • Super easy to make with a skill level of 1 out of 10.
  • Cheap to make a large number of pieces for something like a classroom or a large party.
  • Tastes great with the combination of chocolate and the salty pretzel.
  • While this is geared towards Christmas, it is easily adapted to Valentine's Day or Halloween.

This recipe goes by many names: chocolate pretzel candies, pretzel candy melts, M&M candy melts, and many more.

Check out some other great recipes for sweets, like Spicy Candied Bacon, Old Fashion Popcorn Balls, Candied Almonds, and Crock Pot Chocolate Peanut Clusters. This recipe is part of Christmas Candy Recipes. Check out other easy candy recipes.

Banner for Christmas Candy Recipes

👨‍🍳How to Make Chocolate Pretzel Candies

  1. Cover a cookie sheet with parchment paper or a silicone baking mat and spread pretzels on the sheet, spaced in a single layer and not to touch.
  2. Top with an unwrapped chocolate kiss or hug.
  3. Bake at 200° until the chocolate is shiny but not melted. Watch continuously, and it should be about 4 minutes—do not walk away.
  4. Remove from oven and immediately press an M&M into the soft chocolate. If not soft enough, place it back in the oven for 30-60 seconds.
  5. Allow to cool on the tray at room temperature, but the freezer is faster.

🥨 Ingredients

The Pretzels: A small pretzel is mandatory to get this right. The square pretzels are an excellent choice, but a more traditional shape will work fine since we will let the candies cool before moving them.

The Candies: I am using "hugs," but regular candy kisses will work fine. Hershey's Kisses are brown chocolate, and Hershey's Hugs are white with stripes. Other candies, like Rolo candies, will also work.

Hugs are a little more interesting and add some holiday cheer. There were 78 Hugs in the package.

Then top with a regular M&M candy.

✔️Tips on baking

  • You are NOT trying to melt the chocolate—just soften it. Bake for a few minutes and as soon as the kisses are shiny, remove them and press in the M&M's.
  • If they are not soft enough, pop them back in for 30-60 seconds. When done, they can firm up at room temperature or faster in a freezer.
  • Different types of Kisses soften differently. The Hugs tend to melt faster than the brown Kisses. So don't mix your tray.
How to store chocolate pretzel candies?

They are good covered at room temperature for 3-4 days. Keep them sealed since the pretzel will become stale with air exposure.

Blue ribbon divider used for visual effect
↑Jump to Table of Contents

This recipe is listed in these categories. See them for more similar recipes.

Appetizer and Party Recipes, Candy Recipes, Holiday Recipes

Have you tried this recipe, or have a question? Join the community discussion in the comments.

Step-by-Step Photo Instructions

Pretzels with chocolates

Preheat oven to 200°.

Pretzels with chocolate hugs on baking mat

Cover a baking sheet with parchment paper or a silicone baking mat. Spread pretzels on the sheet single layer and spaced not to touch. Top with an unwrapped chocolate kiss or hug.

pressing M&M into melted chocolate hug

Bake until the chocolate is shiny but not melted. Watch continuously, and it should be about 3-4 minutes. Remove from the oven and immediately press an M&M into the softened chocolate. If not soft enough, place it back in the oven for 30-60 seconds.

chocolate pretzel candies cooling on mat

Allow to cool at room temperature, but the freezer is faster.

↑Jump to Table of Contents

📖The Recipe Card

Chocolate Pretzel Buttons from 101 Cooking For Two
Print Recipe Add to Collection Go to Collections
4.29 from 7 votes

Pretzel Candies

Super easy chocolate pretzel candies are a great sweet and salty combo. They are perfect for "take a treat" to school, an office party, or even giving as gifts. Just three ingredients and no skill will get you these delicious candies.
Prep Time5 minutes mins
Cook Time5 minutes mins
Total Time10 minutes mins
Course: Appetizer
Cuisine: American
Keyword: Pretzel Candies
Servings: 78 pieces
Calories: 32kcal
Author: Dan Mikesell AKA DrDan

Ingredients

  • 1 bag Snyder pretzel 'snaps' or other small pretzel
  • 1 bag Hershey kisses or Hugs
  • 1 bag M & M
US Customary - Convert to Metric

Instructions

  • Preheat the oven to 200°.
    Pretzels with chocolates
  • Cover a baking sheet with parchment paper or a silicone baking mat. Spread pretzels on the sheet single layer and spaced not to touch. Top with an unwrapped chocolate kiss or hug.
    Pretzels with chocolate hugs on baking mat
  • Bake until the chocolate is shiny but not melted. Watch continuously, and it should be about 3-4 minutes. Remove from the oven and immediately press an M&M into the softened chocolate. If not soft enough, place it back in the oven for 30-60 seconds.
    pressing M&M into melted chocolate hug
  • Allow to cool at room temperature, but the freezer is faster.
    chocolate pretzel candies cooling on mat

Notes

Pro Tips

  1. Preheat oven. The softening time is short, so don't walk away.
  2. You need to use small pretzels.
  3. Keep a very close eye on the candy in the oven. When it is shiny, pull it out and try to press the M & M into it. It may need another 30-60 seconds back in the oven. You are NOT trying to melt the chocolate; just soften it.
  4. Good covered at room temperature for 3-4 days.
  5. Do not try on a tray without parchment paper or a baking mat.
  6. Let the candies cool some on the tray before trying to remove them.

Nutrition

Calories: 32kcal | Carbohydrates: 5g | Protein: 3g | Fat: 3g | Saturated Fat: 3g | Cholesterol: 1mg | Sodium: 1mg | Sugar: 5g

Originally published December 7, 2014. Updated with expanded options, refreshed photos, and a table of contents to help navigation.

Lilly chewing a stick

Grilled Chicken Sandwich Recipe

grilled chicken sandwich on blue plate

15-minute Grilled Chicken Sandwich recipe that is guaranteed to please. A fast and flavorful dinner or lunch with a moist, tender chicken filet and simple seasoning.

🐓Ingredients

  • Chicken breasts—skinless boneless chicken breasts trimmed into cutlets
  • Oil—Olive oil or vegetable oil for brushing
  • Seasoning—just kosher salt and black pepper, or use All Purpose Seasoning. Other seasoning options include Blackened Seasoning, BBQ DryRub, Memphis Dry Rub, Black Magic, or Southwest Chipotle Seasoning. Or use the seasoning or marinade you prefer.
grilled chicken sandwich on blue plate.
[feast_advanced_jump_to]
Blue ribbon divider used for visual effect

Featured comment from Cabe:
"Thanks so much for sharing this! It was exactly what I was looking for!"

The secret to the best-grilled chicken sandwiches is the thickness of the chicken breasts. Using smaller, thin chicken breasts or making cutlets will be the better sandwich serving size and will cook quicker and more evenly.

With a short prep and about 15 minutes of grill time, everybody, including the chef, will love this recipe. Just follow these easy step-by-step photo instructions.

Try Grilled Pork Tenderloin Sandwiches if you want another option for an easy lunch. For other easy grilled chicken on a gas grill, try Grilled Chicken Drumsticks, Grilled Chicken Thighs, Grilling Chicken Breasts, or Grilled Chicken Tenders the kids will love.

👨‍🍳How to Cook Grilled Chicken Sandwiches

  1. Pat dry chicken breast. Trim off any fat and bone. Cut any large chicken breasts into cutlets. A smaller breast can be evened out in thickness with a meat mallet.
  2. Season to your taste.
  3. Place over direct heat or preheated grill pan and flip when the edge of the chicken is starting to turn white—about 4-5 minutes.
  4. Continue to flip every 4-5 minutes until an internal temp of 165°. The thinnest breasts were done in 12 minutes. Most are done in 15 minutes; the thickest whole breast takes about 20 minutes. COOKING TIME WILL VARY.

This is a summary of the steps and ingredients. See the recipe card or the step-by-step photo instructions below for complete instructions.

Variation—make them BBQ chicken sandwiches

Follow the instructions with a light brush of oil and seasoning. Brush all sides of the chicken with only a few minutes left in cooking with the barbecue sauce of your choice and again when coming off the grill. I suggest my Memphis BBQ Sauce.

♨️Grill Temperature

The grill surface temperature needs to be about 450°, give or take a little. That is about medium or a bit more on most gas grills. If you need help controlling your BBQ Temperature, see my detailed instructions.

A little under is okay, but a lot over is not and will make hockey pucks.

How to serve

Usually, serve on a hamburger or brioche bun—toast on the grill brushed with butter or oil. Top with mayonnaise, Dijon mustard, lettuce, a slice of onion, and tomato. Toss on some cheddar cheese slices and bacon if you have them.

Some good-sided dishes are Grilled French Fries, Grilled Pineapple Slices, Corn on the Cob, and Cold Macaroni Salad.

Storing and reheating leftovers

Store leftovers sealed in an airtight container. Refrigerate for 3 days or freeze for 3 months.

To reheat leftovers, thaw overnight in the refrigerator, then reheat covered tightly in the oven. You can reheat it in the microwave, but it may affect the texture.

I like to cut up the leftovers to top a salad.

❓FAQs

Is it safe to rinse chicken?

No. The splatter of rinsing will increase the risk of food-related illnesses. Please see Chicken... To Rinse or Not To Rinse? for a more complete discussion.

Are chicken sandwiches healthy?

Yes, they are low in fat, sodium, and calories. Also, the chicken is low in carbs but not a bun. So unless you add a lot of unhealthy toppings, they fit a healthy diet.

Storage of leftovers

Grilled chicken breasts are moister and more tender when fresh but can be refrigerated for 4 days or frozen for 3 months.

Use the leftovers on green salads or in Chicken Salad Sandwiches. You can also reheat leftover grilled chicken by carefully microwaving it, which can affect the texture, or cover it in the oven.

Blue ribbon divider used for visual effect
↑Jump to Table of Contents

This recipe is listed in these categories. See them for more similar recipes.

30-Minute Dinner Recipes, Chicken Breast Recipes, Chicken Recipes, Grill Recipes, Healthy Recipes, Low Fat Recipes

Have you tried this recipe, or have a question? Join the community discussion in the comments.

Step-by-Step Photo Instructions

Clean and oil grill grates.

Clean, oil, and preheat the grill to about 450° surface temperature. If using a grill pan, oil and preheat it also.

cutting chicken into cutlets.

Pat dry chick breast. With a sharp knife, trim off any fat and bone, then cut any larger chicken breasts into cutlets. Smaller breasts, 8 oz or less, can be evened out in thickness with a meat mallet or rolling pin.

seasoning to your taste

Give them a light brush of olive oil or melted butter—season to your taste. Just kosher salt and black pepper are fine. I use my Homemade All Purpose Seasoning. Other seasoning options are discussed in the post.

chicken on grill grates.

Place over direct heat on the grill grates or in a preheated grill pan.

edges of chicken cutlets turning white.

Flip when the edge of the chicken is starting to turn white—about 4-5 minutes.

cutting chicken into cutlets.

Flip every 4-5 minutes and cook until an internal temp of 165°. The thinnest breasts were done in 12 minutes. Most in 15 and the thickest whole breast, about 20 minutes. COOKING TIME WILL VARY.

📖The Recipe Card

grilled chicken sandwich on blue plate
Print Recipe Add to Collection Go to Collections
5 from 1 vote

Grilled Chicken Sandwich Recipe

15-minute Grilled Chicken Sandwich recipe that is guaranteed to please. A fast and flavorful dinner or lunch with a moist, tender chicken filet and simple seasoning.
Prep Time10 minutes mins
Cook Time20 minutes mins
Total Time25 minutes mins
Course: Main Course
Cuisine: American
Keyword: Chicken Sandwiches, Grilled Chicken
Servings: 4
Calories: 129kcal
Author: Dan Mikesell AKA DrDan

Ingredients

  • 2 skinless boneless chicken breasts make cutlets
  • Salt and Pepper to Taste 7:2:2 seasoning or Blackening Seasoning
  • Olive oil
US Customary - Convert to Metric

Instructions

  • Clean, oil, and preheat the grill to about 450° surface temperature. If using a grill pan, oil and preheat it also.
    clean and oil grill crates
  • Pat dry chick breast. With a sharp knife, trim off any fat and bone, then cut any larger chicken breasts into cutlets. Smaller breasts, 8 oz or less, can be evened out in thickness with a meat mallet or rolling pin.
    Cutting chicken breasts into filets
  • Give them a light brush of olive oil or melted butter—season to your taste. Just kosher salt and black pepper are fine. I use my Homemade All Purpose Seasoning. Other seasoning options are discussed in the post.
    Seasoning chicken cutlets
  • Place over direct heat on the grill grates or in a preheated grill pan. Flip when the edge of the chicken is starting to turn white—about 4-5 minutes.
    edges of cutlets turning white
  • Flip every 4-5 minutes and cook until an internal temp of 165°. The thinnest breasts were done in 12 minutes. Most in 15 and the thickest whole breast, about 20 minutes. COOKING TIME WILL VARY.
    grilled chicken cutlets on a plate

Notes

Pro Tips

  1. If small chicken breasts, then just even out the thickness a bit. Otherwise, make cutlets.
  2. Please get the grill surface temperature correct, or you can end up with hockey pucks.
  3. Season to your taste—many options are discussed in the post.

Nutrition

Calories: 129kcal | Protein: 24g | Fat: 3g | Saturated Fat: 1g | Cholesterol: 72mg | Sodium: 422mg | Potassium: 418mg | Vitamin A: 34IU | Vitamin C: 1mg | Calcium: 6mg | Iron: 1mg

a

Originally published September 5, 2011. Updated with expanded options, refreshed photos, and a table of contents to help navigation.

dogs romping in the yard.

Crock Pot Southwest Chicken Chili

southwest chicken chili in spoon

This Southwest Chicken Chili has beans, tender chunks of vegetables, and chicken in a spicy southwest broth. This dump-and-go recipe has excellent hardy warmth, plus it is low-fat and calories!

🥣Ingredients

Chicken—breasts or thighs
Beans—cannellini, pinto, black, kidney, navy or Great Northern.
Salsa or Rotel
Bell peppers
Optional Thickening—masa harina or cornstarch

southwest chicken chili in spoon.
[feast_advanced_jump_to]
Blue ribbon divider used for visual effect

Featured comment from Charles
"This turned out beautifully! Thank you."

This simple recipe has a hardy, warm, you-to-the-bone taste with a mild heat. It is easy to make in your crock pot using raw chicken, so there is no need to buy a rotisserie chicken or precook.

This great-tasting healthy chili is less than 300 calories, is gluten-free, and is low-fat. Everybody will want seconds—we did.

👨‍🍳How to make Southwest Chicken Chili

trimmed and cubed chicken on board.

Trim and cube (about ¾ inch) about 2 pounds of skinless boneless chicken breasts.

chopped veggies on board.

Chop 1 large onion and 2 bell peppers—dice 1 jalapeno pepper.

rinsing white beans under running water

Drain and rinse three cans of beans of your choice: cannellini, beans, black beans, kidney beans, or white beans like Navy or Great Northern.

mixing all ingredients in crock pot.

Add all the ingredients except the optional thickener to a 4 quart or larger crock pot. Cook on low until the chicken is 165°, which should be 3-4 hours.

adding thickener to crock pot.

To thicken (optional), start with two tablespoons of masa harina or cornstarch whisked with an equal amount of cool water, then stir into the chili. Add more in 10-15 minutes if needed.

ladle of chili over crock pot.

Serve hot. For leftovers, refrigerate for 4 days or freeze for 3 months.

For more details, keep reading. See the Recipe Card below for complete instructions and to print.

🥣Ingredient options

  • Chicken—Use skinless boneless chicken breasts or thighs. There is no need to precook the chicken. Just cut it into bite-size pieces. If you prefer shredded chicken, add the chicken breasts whole and remove them with one hour left in cooking and shred, then place back in the crock pot.
  • Beans—Use cannellini beans, pinto beans, black beans, kidney beans, or white beans like navy or Great Northern. All are rinsed and drained to help decrease the sodium and to help the appearance. Use any combination you want.
  • Salsa/Rotel—Use 2 cups of salsa or a 10 oz can of Rotel. This will provide most of the spices. You can use a can of diced tomatoes and bump some spices.
  • Optional Thickening—Start with two tablespoons of masa harina or cornstarch mixed with an equal amount of cool water, then mix into the chili. Add more in 10-15 minutes if needed.
  • Vegetables—Two bell peppers—the color of your choice, a large onion, and jalapeno pepper. Optionally, you can add a can of drained corn.

Can I use rotisserie chicken?

Yes, add it to the crock pot at the halfway point of cooking.

Related Recipes

We love white chicken chili, and our absolute favorite is a dump-and-go Crock Pot White Chili we have used for years. And for a change of pace, try Salsa Verde White Chicken Chili or Soup Nazi,s Mexican Chicken Chili.

If you want to stay healthy with chili try Low Fat High Taste Crock Pot White Chicken Chili or Pork Chili Verde.

How to serve

Top sour cream and shredded cheddar cheese, Monterey Jack, or Pepper Jack. Other toppings include cilantro, chopped tomatoes, green onion slices, or jalapenos.

Serve with Old Fashioned Cornbread or Cornmeal Biscuits.

Storing leftovers

Store leftovers in airtight containers. Refrigerate for 4 days or frozen for 3 months.

Reheat after thawing overnight in the refrigerator if frozen, on the stovetop, or in a microwave.

❓FAQs

How to adjust the heat level of this chili.

This is about a 4/10 heat level with the Rotel and jalapeno. If you use salsa, it will depend on your choice of salsa.

Blue ribbon divider used for visual effect

This recipe is listed in these categories. See them for more similar recipes.

Chili Recipes, Crock Pot Recipes, Healthy Recipes, Low Fat Recipes

Have you tried this recipe, or have a question? Join the community discussion in the comments.

📖The Recipe Card

southwest chicken chili in spoon
Print Recipe Add to Collection Go to Collections
4 from 5 votes

Crock Pot Southwest Chicken Chili

This Southwest Chicken Chili has beans, tender chunks of vegetables, and chicken in a spicy southwest broth. This dump-and-go recipe has excellent hardy warmth, plus it is low-fat and calories!
Prep Time15 minutes mins
Cook Time4 hours hrs
Total Time4 hours hrs 15 minutes mins
Course: Main dish
Cuisine: American
Keyword: Chicken Chili, Crock Pot Chicken Chili, Southwest Chicken Chili
Servings: 8
Calories: 208kcal
Author: Dan Mikesell AKA DrDan

Ingredients

  • 2 pounds skinless boneless chicken breasts about
  • 2 bell peppers diced, various colors
  • 1 onion large
  • 1 jalapeno pepper
  • 42 oz cannellini beans, black beans, kidney beans, or white beans drained
  • 2 cups salsa or 10 oz RoTel
  • 14 oz chicken broth decrease for thicker
  • 4 cloves garlic
  • 1 teaspoon cumin
  • 1 teaspoon oregano
  • 1 tablespoon chili powder
  • masa harina or cornstarch optional for thickening
US Customary - Convert to Metric

Instructions

  • Trim and cube (about ¾ inch) about 2 pounds of skinless boneless chicken breasts.
    trimmed and cubed chicken on board
  • Chop 1 large onion and 2 bell peppers—dice 1 jalapeno pepper.
    chopped veggies on board
  • Drain and rinse three cans of beans of your choice: cannellini beans, black beans, kidney beans, or white beans like navy or great northern.
    rinsing white beans under running water
  • Add all the ingredients except the optional thickener to a 4 quart or larger crock pot. Cook on low until the chicken is 165° which should be 3-4 hours.
    mixing all ingredients in crock pot
  • To thicken (optional), start with two tablespoons of masa harina or cornstarch whisked with an equal amount of cool water, then stir into the chili. Add more in 10-15 minutes if needed.
    adding thickener to crock pot

Notes

Pro Tips

  1. This needs a 4 quart or larger crock pot but please remember not to fill more than 75%.
  2. You can use chicken thighs.
  3. The beans can be varied to your taste.
  4. A serving size for nutrition is about 1 ½ cups.
  5. Most crockpot recipes way overcook chicken, and most recipes like this will be for 8 hours on low., way overcooked. I have 3-4 hours on low suggested but also an endpoint of 165° as the real endpoint.
  6. This is about a 4/10 heat level with the Rotel and jalapeno. Heat will vary with the salsa you choose if you use that.
  7. Good refrigerated for 3-4 days and frozen for 3-4 months.

Nutrition

Calories: 208kcal | Carbohydrates: 29g | Protein: 19g | Fat: 2g | Saturated Fat: 1g | Cholesterol: 27mg | Sodium: 467mg | Potassium: 712mg | Fiber: 9g | Sugar: 4g | Vitamin A: 377IU | Vitamin C: 9mg | Calcium: 79mg | Iron: 3mg

Editor's Note: Originally Published September 12, 2011. Updated with expanded instructions and discussion, along with updated photos.

Molly in the yard.
Molly after running.

Cinnamon Swirl Bread with Vanilla Glaze

Cinnamon Swirl Bread on borad

Delicious Cinnamon Swirl Bread is moist and bursting with cinnamon with a delicious glaze. No yeast or mixer is needed for this quick and easy recipe.

Perfect for breakfast, brunch, or just a tasty snack.

Ingredients

Dry ingredients—flour, sugar, baking powder, salt, and cinnamon
Wet ingredients—milk, vegetable oil, vanilla extract, and egg
Cinnamon sugar filling—cinnamon and sugar
Glaze—Powder sugar, vanilla extract, and milk

Cinnamon Swirl Bread on borad.
[feast_advanced_jump_to]
Blue ribbon divider used for visual effect

An easy quick bread to make in the morning before the family gets up using only ingredients you already have in the pantry. So simple enough for even the inexperienced baker.

Perfect for breakfast, brunch, or snacks—even give it as a gift. Delicious with lots of sugar, cinnamon, and vanilla. And the whole house will smell like cinnamon.

Serve for breakfast with Convection Oven Bacon or Baked Sausage Patties, Other quick bread recipes you may love: Old Fashioned Banana Bread, Apple Pie Bread, Pumpkin Bread, and Beer Bread.

Adapted from a Taste of Home, The model recipe was almost a loaf of sugar, so a few adjustments have been made. I have expanded the instructions and simplified the ingredients and directions.

👨‍🍳How to make cinnamon swirl quick bread

  1. In a large bowl, mix flour with all other dry ingredients.
  2. In a small bowl, make cinnamon sugar.
  3. In a third bowl, mix milk, oil, vanilla, and egg—whip together.
  4. Mix wet ingredients into the flour mixture. Stir well by hand or use a mixer.
  5. Pour half of the batter into the prepared pan. Spread the cinnamon-sugar mixture over the first layer, then cover with the other half of the batter.
  6. With the handle of a knife or something about ¼ inch thick, start at one corner and cut Z-like across the pan 5-6 times, then back the long way 3-4 times. Be sure to get close to the edge.
  7. Bake until a toothpick near the center comes out clean—about 45 minutes.
  8. Cool in the pan for 10 minutes, then move to a wire rack.
  9. Make the glaze and drizzle over the loaf.

This is a summary of the steps and ingredients. See the recipe card or the step-by-step photo instructions below for complete instructions.

How to make the swirl in cinnamon swirl quick bread.

The swirl is the part that has most people worried. Don't overmix this, and it is relatively easy to pull off.

Pour half the batter into the prepared loaf pan, sprinkle all the cinnamon-sugar mixture over that layer, and pour the remaining batter over the cinnamon-sugar mix.

With the handle of a knife or something about ¼ inch thick, start at one corner and cut with a Z-like motion across the pan 5-6 times and then back the long way 3-4 times. Be sure to get close to the edge.

Variations

Variations are mostly adding nuts like chopped walnuts or pecans, but raisins or dry cranberries could also be added.

Brown sugar can be used for granular sugar for a different flavor.

Storage of leftovers

Good stored in an airtight container or plastic wrap at room temperature for about two days, refrigerated for 3-4 days, and frozen for 3-4 months.

❓FAQs

How to prevent a quick bread from being dry.

Over-mixing quick bread can result in a dense, dryer texture. To keep quick bread moist and tender, do not over mix and don't decrease the oil.

How to top cinnamon swirl quick bread.

This sweet, quick bread is delicious without a topping but special with the suggested sugar glaze. You could also use a streusel topping or just a cinnamon-sugar top.

The glaze covers best when applied while the loaf is still warm but not hot. This allows the glaze to go into all the holes and spread evenly.

What is a Quick Bread?

Quick bread is a bread product that uses leavening agents other than yeast or eggs, usually baking soda or baking powder.

The texture of quick bread is very different than yeast-leavened bread. Quick bread has more of a muffin-like texture than yeast bread's gluten texture.

Common examples of quick bread include banana, soda, beer bread, biscuits, cornbread, muffins, pancakes, scones, and even cookies.

Blue ribbon divider used for visual effect
↑Jump to Table of Contents

This recipe is listed in these categories. See them for more similar recipes.

Bread Recipes, Breakfast Recipes

Have you tried this recipe, or have a question? Join the community discussion in the comments.

Step-by-Step Photo Instructions

ingredients for cinnamon quick bread.
Vanilla Extract is missing from the photo.

Preheat oven to 350°, not convection.

coating a loaf pan with butter.

Prep a loaf pan with a bit of butter.

mixing dry ingredients in a large bowl.

In a large mixing bowl, combine flour, sugar, baking powder, salt, and cinnamon—mix well.

mixing cinnamon into sugar in small bowl.

Make cinnamon sugar in a small bowl, combine ⅓ cup sugar and 1 ½ teaspoon cinnamon—mix well.

mixing an egg into milk.

In a third bowl, combine 1 cup of milk, ¼ cup of oil, 1 teaspoon of vanilla extract, and 1 egg. Whip together.

pouring wet ingredients into dry ingredients.

Mix wet egg/milk mix into the flour/sugar mix. Mix to combine completely but do not over-mix.

adding cinnamon sugar to batter.

Pour half of the batter into the prepped pan. Spread the cinnamon-sugar mixture over the first layer, then cover with the other half of the batter.

moving a handle though the dough to make swirls.

Time to swirl. With the handle of a knife or something about ¼ inch thick, start at one corner and cut Z-like across the pan 5-6 times, then back the long way 3-4 times. Be sure to get close to the edge.

mixing glaze in a white bowl.

Combine ¼ cup powdered sugar, ¼ teaspoon vanilla, 2 teaspoons milk to make the glaze. You may want more powdered sugar to make it thicker.

pouring glaze over cinnamon bread.

Bake until a toothpick near the center comes out clean. About 45 minutes. Let the loaf cool in the pan for 10 minutes, then move it to a wire rack. Drizzle the glaze over the loaf.

cinnamon swirl quick bread with glaze on a cooling rack

📖The Recipe Card

Cinnamon Swirl Bread on borad
Print Recipe Add to Collection Go to Collections
4.75 from 4 votes

Cinnamon Swirl Quick Bread with Vanilla Glaze

Delicious cinnamon swirl quick bread is perfect for breakfast, dessert, or a snack. It comes together in just a few minutes without yeast or a mixer—super moist and bursting with cinnamon and sugar, Then coated with a delicious vanilla glaze.
Prep Time15 minutes mins
Cook Time45 minutes mins
Total Time1 hour hr
Course: Sweets
Cuisine: American
Keyword: Cinnamon Quick Bread, Cinnamon Swirl Quick Bread
Servings: 12 slices
Calories: 211.3kcal
Author: Dan Mikesell AKA DrDan

Ingredients

  • 2 cups all-purpose flour
  • ¾ cups sugar
  • 1 tablespoon baking powder aluminum-free
  • ½ teaspoon salt
  • 1 teaspoons cinnamon
  • 1 cup milk
  • 1 teaspoon vanilla extract
  • ¼ cup oil
  • 1 egg

Cinnamon Sugar

  • ⅓ cup sugar
  • 1 ½ teaspoon cinnamon

Glaze

  • ¼ cup powdered sugar
  • 2 teaspoons milk
US Customary - Convert to Metric

Instructions

  • Preheat oven to 350°, not convection.
    ingredients for cinnamon quick bread
  • Prep a loaf pan with a bit of butter.
    coating a loaf pan with butter
  • In a large mixing bowl, combine 2 cups flour, ¾ cup sugar, 1 tablespoon baking powder, ½ teaspoon salt, and 1 teaspoon cinnamon—mix well.
    mixing dry ingredients in a large bowl
  • Make cinnamon sugar in a small bowl, combine ⅓ cup sugar and 1 ½ teaspoon cinnamon—mix well.
    mixing cinnamon into sugar in small bowl
  • In a third bowl, combine 1 cup of milk, ¼ cup of oil, 1 teaspoon vanilla extract, and 1 egg—whip.
    mixing an egg into milk
  • Mix wet egg/milk mix into the flour/sugar mix. Mix to combine completely but do not over mix.
    pouring wet ingredients into dry ingredients
  • Pour half of the batter into the prepped pan. Spread the cinnamon-sugar mixture over the first layer, then cover with the other half of the batter.
    adding cinnamon sugar to batter
  • Time to swirl. With the handle of a knife or something about ¼ inch thick, start at one corner and cut Z-like across the pan 5-6 times, then back the long way 3-4 times. Be sure to get close to the edge.
    moving a handle though the dough to make swirls
  • Combine ¼ cup powdered sugar, ¼ teaspoon vanilla, 2 teaspoons milk to make the glaze. You may want more powdered sugar to make it thicker.
    mixing glaze in a white bowl
  • Bake until a toothpick near the center comes out clean. About 45 minutes. Let the loaf cool in the pan for 10 minutes, then move it to a wire rack. Drizzle the glaze over the loaf.
    pouring glaze over cinnamon bread

Notes

Pro Tips

  1. This can stick to the pan. A good coat of butter on a non-stick or glass pan is best. If not non-stick or glass, then a light dusting of flour on top of the butter coat.
  2. Use aluminum-free baking soda.
  3. Do not overdo the swirl and be sure the layer of cinnamon sugar is covered by batter.
  4. Apply the glaze when the bread is still a bit warm. You can thicken or increase the amount of glaze if you want.
  5. Good at stored airtight at room temperature for about 2 days. Refrigerated for 3-4 days and frozen for 3-4 months.

Nutrition

Calories: 211.3kcal | Carbohydrates: 38.1g | Protein: 3.4g | Fat: 5.3g | Saturated Fat: 0.5g | Polyunsaturated Fat: 1.5g | Monounsaturated Fat: 3.1g | Trans Fat: 0.02g | Cholesterol: 14.3mg | Sodium: 217.5mg | Potassium: 65.8mg | Fiber: 0.8g | Sugar: 21.7g | Vitamin A: 64.4IU | Vitamin C: 0.02mg | Calcium: 96.5mg | Iron: 1.2mg

Editor's Note: Originally Published February 6, 2013. Updated with expanded discussion and updated photos.

Lilly chewing a stick.

Garlic Butter Stuffed Chicken Breast

chicken breast on white plate

Garlic butter stuffed chicken breast starts with a bone-in split chicken breast that's filled with garlic butter before baking. As the garlic butter melts into the chicken meat, it helps keep the meat moist while the skin turns golden and crispy.

Split chicken breasts are an economical cut that's full of flavor, making this an easy baked chicken recipe that's perfect for a family dinner or whenever you want something a little special without spending a lot.

⏱️ Quick Answer: How Long to Bake Garlic Butter Stuffed Chicken Breast

It takes about 45 minutes to bake garlic butter stuffed split chicken breasts at 400°F (375°F convection).

  • Most split chicken breasts take about 45 minutes, but it depends on size.
  • Cook to a safe internal temperature of 165°F in the thickest part of the meat.
Garlic butter stuffed chicken breast on a white plate.
[feast_advanced_jump_to]

quote mark
Featured Comment by Paula:
"Can't tell you how awesome this recipe was! I have tried SO many baked chicken recipes, even from the Food TV chefs and Bon Appetit and Epicurious, yours is by far the best! Thanks so much…"

🤔 TL;DR — Recipe Summary

✔️ What: Garlic butter stuffed chicken breast is a bone-in split chicken breast with a pocket cut into the meat and filled with garlic butter before baking.

✔️ Why: The garlic butter melts into the chicken meat as it bakes, keeping it moist while the skin turns golden and crispy.

✔️ How: Stuff the pocket with garlic butter, bake at 400°F until the thickest part reaches 165°F, then rest for a few minutes before serving.

🐓 Ingredients

  • Split chicken breast – Bone-in, skin-on split chicken breasts work best. I usually remove the rib section to make them easier to handle and serve.
  • Garlic – Fresh garlic flavors the butter. Garlic powder may be substituted, but fresh is better.
  • Butter – Softened butter mixes with the garlic and melts into the chicken for moisture and flavor as it bakes.
  • Olive oil – Used to gently cook the fresh garlic and help brown and crisp the skin.
  • Seasoning – Salt, black pepper, and garlic powder keep the flavors simple without overpowering the garlic butter.

👨‍🍳 Quick Overview: Garlic Butter Stuffed Chicken Breasts

Preheat oven to 400°F (375°F convection). Trim any extra fat and remove the rib section from the split chicken breasts.

trimmed chicken breast on black board.

Cook the crushed garlic in olive oil for 1–2 minutes. Let it cool, then mix with the softened butter.

mix butter and garlic.

Cut a 1-inch opening into the side of each chicken breast, then use your finger to create a large pocket for the garlic butter.

Cutting a pocket into a split chicken breast.

Stuff the pocket with about half of the garlic butter. Brush the remaining garlic butter over the skin.

Adding garlic butter into the pocked in a split chicken breast.

Season the skin with garlic powder, salt, and black pepper (or All-Purpose Seasoning).

sprinkle chicken with seasoning.

Bake until the thickest part reaches 165°F, about 45 minutes depending on the size of the chicken breasts. Rest for 10 minutes before serving.

Browned chicken breast on a baking rack.

This is a summary of the steps. See the recipe card or the complete step-by-step photo instructions.

🧂 The Seasoning

I prefer salted butter for the garlic butter instead of unsalted. The salt helps season the chicken from the inside as the butter melts during baking.

Cook the fresh garlic in a little olive oil for 1–2 minutes before mixing it with the butter. This mellows the garlic flavor so it doesn't have a harsh, raw bite.

For the outside, I use my 7:2:1 or 7:2:2 All-Purpose Seasoning, which contains salt, pepper, and garlic powder. Any favorite chicken seasoning or a simple mix of salt, black pepper, and garlic powder will also work.

🍽️ Serving

Serve with a fresh salad like Simple Spinach Salad with Bacon or your favorite garden salad.

Add a potato side such as Roasted Small Potatoes or Twice Baked Potatoes, and a green vegetable like Roasted Parmesan Asparagus or Parmesan Roasted Cauliflower.

Finish with Old Fashioned Apple Crisp for dessert.

❄️ Storage of Leftovers

Store leftovers in an airtight container in the refrigerator for up to 4 days or freeze for up to 4 months.

Thaw overnight in the refrigerator if frozen. Reheat covered in the oven for the best texture, although the microwave works if you're short on time.

📝 Other Split Chicken Breast Recipes

If you enjoy split chicken breasts, try my Chicken Cordon Bleu, Crispy Split Chicken Breasts, or Grilled Split Chicken Breasts.

❓ FAQs

Why are they called split chicken breasts?

They are called split chicken breasts because a whole bone-in chicken breast is split down the breastbone into two pieces during processing. They include the skin, breast meat, wing joint, and part of the ribs.

Must I remove the rib section from split chicken breasts?

No. The rib section is safe to cook and eat, but I usually remove it because it has very little meat, tends to overcook, and makes the chicken breast easier to handle and serve. Simply cut it off with a sharp, heavy knife before cooking.

What is the safe internal temperature for split chicken breasts?

Cook split chicken breasts to 165°F in the thickest part of the meat. Check the temperature with an instant-read thermometer instead of relying on cooking time alone.

📖The Recipe Card

chicken breast on white plate
Print Recipe Add to Collection Go to Collections
5 from 1 vote

Garlic Butter Stuffed Split Chicken Breast

A bone-in split chicken breast stuffed with homemade garlic butter and baked until juicy with crispy skin. An easy family dinner recipe.
Prep Time15 minutes mins
Cook Time45 minutes mins
Total Time1 hour hr
Course: Main Course
Cuisine: American
Keyword: Baked Stuffed Chicken Breast, Split Chicken Breast, Stuffed Chicken Breast
Servings: 2 servings
Calories: 431kcal
Author: Dan Mikesell AKA DrDan

Ingredients

  • 2 split chicken breast with ribs removed
  • 2 cloves garlic
  • 1 teaspoon olive oil
  • 2 tablespoons butter
  • to taste 7:2:1 or 7:2:2 seasoning
US Customary - Convert to Metric

Instructions

  • Preheat oven to 400°F (375°F convection). Trim two split chicken breasts of any extra fat and trim off the rib section if you desire. Pat dry.
    trimmed chicken breast on black board
  • Crush two large cloves of garlic. In a small skillet, heat 1 teaspoon olive oil over medium heat. Add the garlic and cook until fragrant and just beginning to turn translucent, about 1–2 minutes.
    cooking garlic in fry pan
  • Place 2 tablespoons butter in a small bowl and microwave for 10 seconds to soften. Add the cooked garlic.
    mix butter and garlic
  • Prep a baking pan by lining it with aluminum foil and a baking rack sprayed with PAM. You may cook without a rack if you don't have one.
    Spraying PAM on a tray with a rack
  • Make the pocket:
    1) In the thicker side of the chicken breast, cut a 1-inch slot
    2) With your finger create a pocket inside the breast without causing another hole.
    3) Reserve about 1 teaspoon of the garlic butter. Divide the remaining butter evenly between the two pockets, spreading it inside each pocket.
    stuffing chicken breast
  • Brush the reserved garlic butter over the skin. Season with 7:2:2 seasoning, or use garlic powder, salt, and black pepper.
    sprinkle chicken with seasoning
  • Bake until an internal temperature of 165°F, about 45 minutes depending on the size of the chicken breasts. Rest for 10 minutes before serving.
    brownd chicken breast on rack

Notes

Pro Tips;

  1. An easy recipe to scale up or down. If cooking more than two, arrange on the tray with the thicker end towards the outside.
  2. Choose chicken breasts that are similar in size so they cook evenly.
  3. I prefer to use salted butter.
  4. A rack isn't required, but it is recommended.
  5. Cook the garlic for 1–2 minutes before mixing it with the butter to prevent a harsh, raw garlic flavor.
  6. If browning too much towards the end of cooking, tent lightly with foil like you would a turkey.
  7. Store leftovers refrigerated for up to 4 days or frozen for up to 4 months.

Nutrition

Calories: 431kcal | Carbohydrates: 1g | Protein: 38g | Fat: 30g | Saturated Fat: 12g | Cholesterol: 146mg | Sodium: 1377mg | Potassium: 398mg | Sugar: 1g | Vitamin A: 500IU | Vitamin C: 1mg | Calcium: 20mg | Iron: 1mg


Originally Published: October 15, 2011. Updated with expanded options, refreshed photos, and a table of contents to help navigation.

Lilly and Molly jumping in the yard.

Blueberry Crumble Muffins

whole wheat blueberry muffin

Start the day off right with Blueberry Crumble Muffins. Infused with oats, loaded with juicy blueberries, and 50/50 whole wheat for a delicious nutty taste.

🫐Ingredients

Flour—whole wheat and all-purpose flour.
Quick oats
Blueberries—fresh or frozen
Pantry ingredients—eggs, milk, salt, cinnamon, vanilla extract, butter, brown sugar, baking powder

whole wheat blueberry muffin.
[feast_advanced_jump_to]
Blue ribbon divider used for visual effect

Ready in only 40 minutes, this easy blueberry muffin recipe is perfect for breakfast, brunch, or snacks. Everybody will love this delicious recipe.

This recipe is not too sweet like many of their commercial cousins. Use either fresh or frozen blueberries and pantry ingredients—no mix needed.

Check out other muffin recipes like Banana Nut Muffins, Cinnamon Roll Muffins, Apple Cinnamon Muffins, or Strawberry Muffins.

👨‍🍳How to make blueberry muffins with crumb topping

  1. Mix whole wheat flour, AP flour, brown sugar, baking powder, salt, cinnamon, and quick oats in a large bowl.
  2. Mix the topping: Chopped quick oats, AP flour, butter, cinnamon, and brown sugar. Cut in the butter with a large fork.
  3. Mix wet ingredients: oil, milk, eggs, and vanilla extract.
  4. Mix wet into dry and stir well until combined, but do not over-mix. Mix in blueberries (fresh or frozen) by folding them in gently.
  5. Fill a muffin tin with batter to about ⅔ to ¾ full. If you pick ⅔ full, you will get 12 slightly smaller muffins.
  6. Add the topping or sprinkle with granular sugar.
  7. Bake the muffins for about 20 minutes until golden brown and a toothpick inserted into a muffin comes out clean. Cool on a rack.

This is a summary of the steps and ingredients. See the recipe card or the step-by-step photo instructions below for complete instructions.

Other Breakfast Recipes

on't miss these other top recipes, like Blueberry Cream Cheese Bars, Blueberry Cobbler, or Blueberry Cream Cheese Coffee Cake.

Serving

Breakfast meat is a must at our house. If you have not tried it, learn how to bake bacon in the oven or how to cook sausage in the oven.

How to store leftover muffins

Store leftover muffins covered at room temperature for 2-3 days. If refrigerated, up to a week. It also can be frozen for three months.

Why not 100% whole wheat?

100% whole wheat baked goods are usually heavy, and I need a glass of water or milk when I eat them—they seem to scream for liquids. Fifty percent whole-wheat has a nice nutty flavor but still a fluffy and moist texture.

If you want an excellent 100% whole wheat recipe, please check King Arthur Flour's Recipe.

FAQs

What is a streusel crumble topping

The streusel crumb topping is made with chopped oats, cinnamon, brown sugar, and butter. It adds a lot of texture and flavor.

The topping is optional, but I suggest

You could go without topping since these taste so good, or a simple sprinkle of white granular sugar would also be nice.

Blue ribbon divider used for visual effect

This recipe is listed in these categories. See them for more similar recipes.

Breakfast Recipes, Dessert Recipes

Have you tried this recipe, or have a question? Join the community discussion in the comments.

Step-by-Step Photo Instructions

coating muffin tin with butter.

Preheat oven to 375° convection or 400°conventional. Prep muffin pan with either paper liners or cover inside with butter using wax paper.

mix dry ingredients in bowl.

Mix all dry ingredients in a large bowl: ¾ cups each of AP flour, whole wheat flour, brown sugar, 2 teaspoons of aluminum-free baking powder, ½ teaspoon salt, 1 teaspoon cinnamon, and 3 tablespoons of quick oats.

chopping oats for topping.

Start the topping by chopping 2 tablespoons of quick oats.

cut butter into topping.

In a small bowl, combine the chopped oats, ¼ cup AP flour, 2 tablespoons butter, ½ teaspoon cinnamon, and 4 tablespoons brown sugar. Cut butter in with a large fork.

mix wet into dry ingredients.

Mix wet ingredients: ⅓ cup each of oil and milk, 2 eggs, and 1 teaspoon of vanilla extract. Mix well, then add the wet liquid ingredients to the dry ingredients and mix well.

add blueberries into dough.

Add 2 cups of blueberries and fold in gently.

adding muffin dough to pan.

Fill the muffin tin with dough to about ¾ full for larger muffins. If you fill ⅔ full, you can make 12 smaller muffins that cook a little faster.

sprinkle with topping.

Add optional topping or sprinkle with granular sugar.

blueberry muffins cooling on rack.

Bake the muffins for about 20 minutes until golden brown and a toothpick inserted into a muffin comes out clean. Then cool on a rack.

📖The Recipe Card

whole wheat blueberry muffin
Print Recipe Add to Collection Go to Collections
5 from 3 votes

Blueberry Crumble Muffins

Start the day off right with Blueberry Crumble Muffins. Infused with oats, loaded with juicy blueberries, and 50/50 whole wheat for a delicious nutty taste.
Prep Time15 minutes mins
Cook Time25 minutes mins
Total Time40 minutes mins
Course: Breakfast
Cuisine: American
Keyword: Blueberry Muffins, Muffins
Servings: 10
Calories: 286kcal
Author: Dan Mikesell AKA DrDan

Ingredients

Dry ingredients

  • ¾ cup whole wheat flour
  • ¾ cup all purpose flour
  • ¾ cup brown sugar
  • 2 teaspoons baking powder aluminum-free
  • ½ teaspoon salt
  • 1 teaspoon cinnamon
  • 3 tablespoons quick oats

Wet ingredients

  • ⅓ cup milk
  • ⅓ cup vegetable oil
  • 2 eggs
  • 1 teaspoon vanilla
  • 2 cup blueberries fresh or frozen

Optional toppings

  • 2 tablespoons butter
  • ¼ cup AP flour
  • 4 tablespoons brown sugar
  • 2 tablespoons Quick oats chopped
  • ½ teaspoon cinnamon
US Customary - Convert to Metric

Instructions

  • Preheat oven to 375° convection or 400°conventional. Prep muffin pan with either paper liners or cover inside with butter using wax paper.
    coating muffin tin with butter
  • Mix all dry ingredients in a large bowl: ¾ cups each of AP flour, whole wheat flour, and brown sugar, 2 teaspoons of aluminum-free baking powder, ½ teaspoon salt, 1 teaspoon cinnamon, and 3 tablespoons of quick oats.
    mix dry ingredients in bowl
  • For the optional topping: Chop 2 tablespoons of quick oats. Add ¼ cup AP flour, 2 tablespoons butter, ½ tsp cinnamon, and 4 tablespoons brown sugar. Cut in the butter with a large fork.
    cut butter into topping
  • Mix wet ingredients: ⅓ cup each of oil and milk, 2 eggs, and 1 teaspoon of vanilla extract. Mix well, then add the wet liquid ingredients to the dry ingredients and mix well.
    mix wet into dry ingredients
  • Add 2 cups of blueberries and fold in gently.
    add blueberries into dough
  • Fill the muffin tin with dough to about ¾ full for larger muffins. If you fill ⅔ full, you can make 12 slightly smaller muffins, and they will cook slightly faster.
    adding muffin dough to pan
  • Add optional topping or sprinkle with granular sugar.
    sprinkle with topping
  • Bake the muffins for about 20 minutes until golden brown and a toothpick inserted into a muffin come out clean. Then cool on a rack.
    whole wheat blueberry muffin cooling on rack

Notes

Pro Tips:

  1. I wrote this for ten, not 12 muffins. I like a little bigger muffin. You can make 12 by filling the baking tin to ⅔ full instead of ¾ full. They will cook a bit faster.
  2. As always, NEVER COOK BY TIME ALONE. Watch the color and do the toothpick test for the endpoint. Ovens and especially pans vary.
  3. Use fresh or frozen berries.
  4. If your berries are dropping to the bottom of the muffins, dust the berries with flour before adding
  5. My topping is optional. These are good enough for no topping, or just a sprinkle of sugar is fine.
  6. Never use baking powder with aluminum for anything. It leaves an aftertaste.
  7. Good for 3 days at room temperature 7 days refrigerated and 3 months frozen.

Nutrition

Calories: 286kcal | Carbohydrates: 44g | Protein: 5g | Fat: 11g | Saturated Fat: 8g | Cholesterol: 39mg | Sodium: 160mg | Potassium: 210mg | Fiber: 2g | Sugar: 24g | Vitamin A: 150IU | Vitamin C: 3mg | Calcium: 75mg | Iron: 1mg

Editors note: Originally Published September 27, 2011. Updated with expanded options, refreshed photos, and a table of contents to help navigation.

Molly at 14 months old.

  • « Previous Page
  • 1
  • …
  • 6
  • 7
  • 8
  • 9
  • 10
  • Next Page »

DrDan imageHi, I'm DrDan.
Welcome to 101 Cooking for Two, the home of great everyday recipes with easy step-by-step photo instructions.
About DrDan

Top THANKSGIVING RECIPES

  • turkey slice with gravy on orange plate.
    How to Roast a Turkey Breast in the Oven
  • Cut ham with pineapple honey glaze on a white plate
    Small Ham in a Crock Pot (2–4 lb Boneless Ham)
  • slice of Ribeye Roast on a white plate
    Small Boneless Prime Rib (Ribeye) Roast
  • Sausage dressing on a white plate.
    Old Fashioned Sausage Dressing Recipe
  • A spoonful of green bean casserole.
    Green Bean Casserole Without Mushroom Soup
  • Sweet potato casserole on a white plate
    Old Fashioned Sweet Potato Casserole
SITES THAT I WORK WITH OR HAVE HAD RECIPES FEATURED OR REFERENCED.

Footer

BACK TO TOP
OF PAGE
Join the club
SUBSCRIBE TODAY

About

  • About DrDan and the Blog
  • Contact Me
  • Comment Policy
  • Guest Posts, Partnering, and Business Questions

Content

  • Food FAQ
  • Kitchen Reference Sheets
  • Recipes Featured in the Videos
  • Guide To Cooking for Two
  • Old Saved Recipes Collections

dogs by the pond

↑ back to top ↑a

Privacy Policy | Terms of Service | Contact

COPYRIGHT © 2010-2026 101 COOKING FOR TWO. ALL RIGHTS RESERVED | BASED ON FOODIE PRO THEME