101 Cooking For Two

  • Recipes
  • About
  • FAQs/Help
  • Shop
  • 📖Emails
menu icon
go to homepage
  • Recipes
  • About
  • FAQs/Help
  • Shop
  • 📖Emails
subscribe
search icon
Homepage link
  • Recipes
  • About
  • FAQs/Help
  • Shop
  • 📖Emails
×
🏠Home » Recipes

Chicken Carnitas (Carnitas de Pollo)

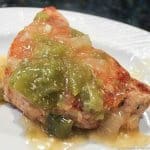
chicken carnitas on white plate

Make healthy Chicken Carnitas (Carnitas de Pollo), but keep the traditional stovetop method using chunks of tender chicken with citrus and other spices for that deep flavor.

🐓Ingredients

Chicken—skinless boneless chicken breasts or thighs
Seasonings—paprika, cumin
Aromatics—garlic and onion
Citrus—fresh orange and lime. But lime juice and orange juice can be used.
Chicken broth
Vegetables—red and green pepper
Pantry ingredients—vegetable oil, salt, black pepper


chicken carnitas on white plate.
[feast_advanced_jump_to]
Blue ribbon divider used for visual effect

Using the traditional stovetop method of making carnitas at home, you can make these delicious, citrus-infused, fall-apart tender chicken carnitas with 10 minutes of prep and about 20 minutes reducing to crispy goodness.

Then, make the optional vegetables that will pick up all the remaining flavor in the pan, making them a co-star of this recipe. And you will have a complete dinner on the table in an hour, complete with tender and flavorful vegetables.

This quick and easy recipe is perfect for healthy diets like low-caloric, low-fat diets, or even low-carb or keto diets.

Based on my own Healthier Pork Tenderloin Carnitas. Check out my other carnitas, Pork Carnitas in the Oven and Crock Pot Carnitas from Pork Butt.

👨‍🍳How to Make Healthy Chicken Carnitas

  1. Trim and cube skinless boneless chicken breast or thighs into 1 to 1 ½ inch cubes and coat with spices.
  2. Brown the chicken in hot oil, adding minced jalapeño and garlic near the end of cooking.
  3. Add chicken broth and the juice of an orange, and a lime.
  4. Bring to a firm boil. Do not cover and do not stir. Just let it reduce to almost nothing—about 20 minutes.
  5. When the pan is almost dry, move the chicken to a plate and tent with foil.
  6. Add sliced onion and pepper to the pan and cook until tender.
  7. Serve hot with tortillas and toppings or in many other ways.

This is a summary of the steps and ingredients. See the recipe card or the step-by-step photo instructions below for complete instructions.

🍴How to serve chicken carnitas?

Shred the crispy chicken carnitas with a fork. Serve with flour or corn tortillas, a fresh salad, burritos, quesadillas, or carnitas bowls.

Top with traditional taco toppings: cheddar or Mexican cheeses, diced tomatoes, slices of jalapeno or green onions, cilantro, sour cream, and many more.

Serve with corn chips with Pineapple Salsa, refried beans, Easy Guacamole, or Mexican Rice.

Storage of leftovers

Store leftovers sealed airtight and refrigerated for 4 days or frozen for 4 months.

Reheat, after thawing overnight in the refrigerator if frozen, on the stovetop, in the oven, or in the microwave.

❓FAQs

Can I use a cast iron Dutch oven for this recipe?

Yes, but only if it is enamel-coated. Raw cast iron should not be used to cook acidy products like citrus in this recipe. Some of the metal will go into the dish.

Blue ribbon divider used for visual effect
↑Jump to Table of Contents

This recipe is listed in these categories. See them for more similar recipes.

101's Best Recipes, Healthy Recipes, Low Carb/Keto Recipes, Low Fat Recipes, Mexican Recipes

Have you tried this recipe, or have a question? Join the community discussion in the comments.

Step-by-Step Photo Instructions

ingredients for Chicken Carnitas.

Heat oil in a large pan over medium-high heat. A heavy pan, like an enamel-coated Dutch oven, is recommended.

trimmed chicken on red board.

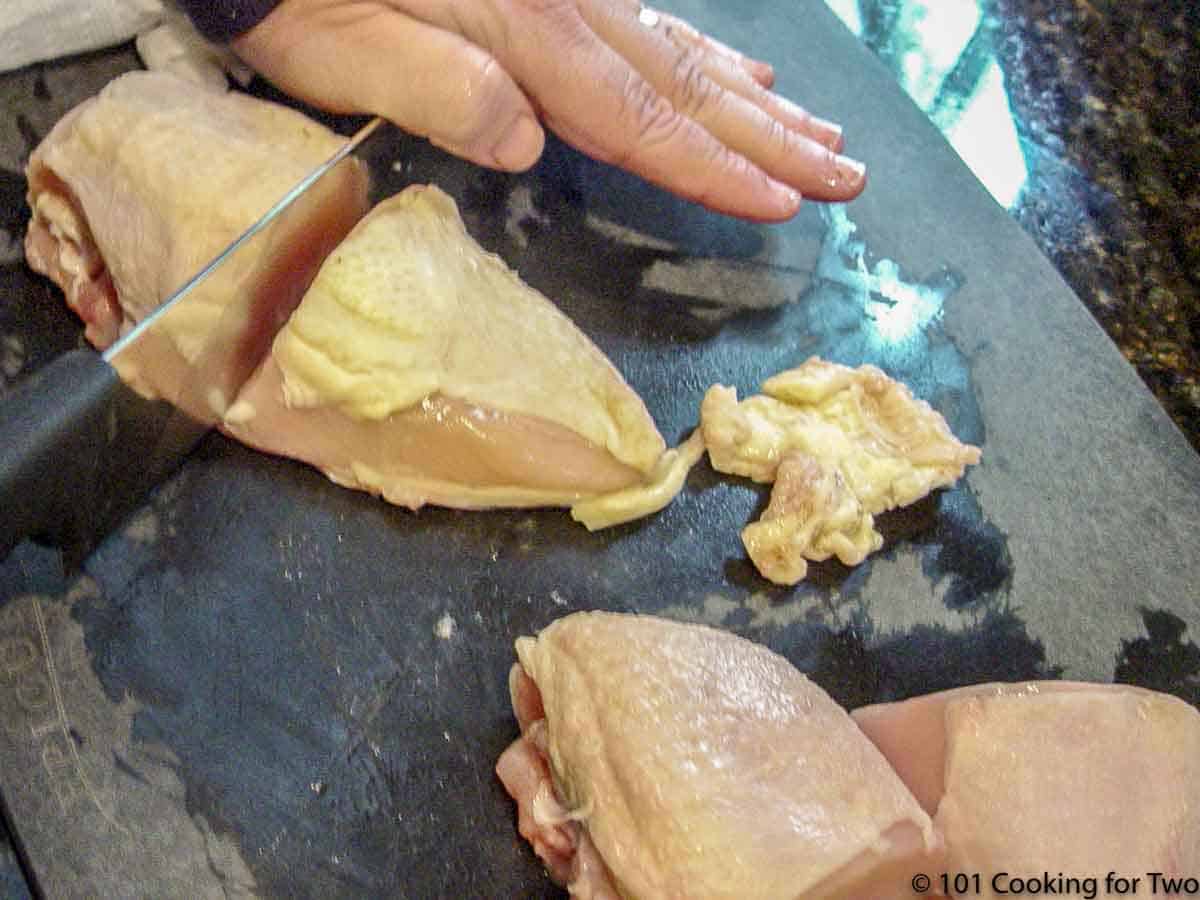
Trim and cut about 2 pounds of skinless boneless chicken breast (or thighs) into 1 to `1 ½ inch cubes.

mixing chicken with spice in bowl.

Mix the chicken with kosher salt, paprika, cumin, and pepper—stir well to coat.

adding chicken to pan.

Add the chicken to the hot oil and occasionally stir until browning well — about 7 minutes. You do not need to cook completely; just brown.

chop jalapeno pepper.

While the chicken is cooking, mince 1 jalapeno and 2 cloves of garlic.

adding chopped veggies to chicken.

After the chicken is browned well (about 7 minutes), add the jalapeno and garlic and cook for two more minutes.

adding orange to chicken.

Add one 14 oz can of chicken broth and the juice of 1 orange and 1 lime.

canritas in pot boiling.

Adjust the temperature to get a firm boil. Do not cover and do not stir. Just let it reduce to almost nothing — about 20 minutes. Your house will smell wonderful.

browning chicken in Dutch oven.

While the chicken is reducing, clean and slice one red pepper, one green pepper, and a large onion. When the pan is almost dry and the chicken is getting crispy edges, move it to a plate and tent it with foil.

cooking vegetables in a dirty pot.

Add the veggies to the pan over medium-high heat and cook until tender—about 7-8 minutes. Stir frequently and scrape some of the fond off the bottom of the pan.

bowl full of cooked veggies.

If needed, add a couple of tablespoons of chicken broth for moisture—lots of great flavors here.

chicken carnitas on a tortilla with toppings.

Serve hot on tortillas with toppings or use in many other ways.

📖The Recipe Card

chicken carnitas on white plate
Print Recipe Add to Collection Go to Collections
4.50 from 12 votes

Healthy Chicken Carnitas

Make Healthy Chicken Carnitas, AKA Carnitas do Pollo, but keep the traditional stovetop method using chunks of tender chicken with citrus and other spices for that deep flavor.
Prep Time10 minutes mins
Cook Time40 minutes mins
Total Time50 minutes mins
Course: Main dish
Cuisine: Mexican
Keyword: Baked Carnitas, Chicken Carnitas, Healthier Carnitas, Low Fat Carnitas
Servings: 8 servings
Calories: 179kcal
Author: Dan Mikesell AKA DrDan

Ingredients

  • 2 pounds skinless boneless chicken breasts or thighs
  • 1 tablespoon vegetable oil
  • 1 teaspoon paprika
  • 1 teaspoon cumin
  • ½ teaspoon pepper
  • 1 jalapeno
  • 2 cloves garlic
  • 14 oz chicken broth
  • 1 orange juice only
  • 1 lime juice only
  • 1 green pepper
  • 1 red pepper
  • 1 onion large
  • tortillas and toppings
US Customary - Convert to Metric

Instructions

  • Heat oil in a large pan over medium-high heat. A heavy pan, like an enamel-coated Dutch oven, is recommended.
    ingredients for Chicken Carnitas
  • Trim and cut about 2 pounds of skinless boneless chicken breast (or thighs) into 1 to `1 ½ inch cubes.
    trimmed chicken on red board
  • Mix the chicken with kosher salt, paprika, cumin, and pepper—stir well to coat.
    mixing chicken with spice in bowl
  • Add the chicken to the hot oil and occasionally stir until browning well — about 7 minutes. You do not need to cook completely; just brown.
    adding chicken to pan
  • While the chicken is cooking, mince 1 jalapeno and 2 cloves of garlic.
    chopped jalapeno on a black board
  • After the chicken is browned well (about 7 minutes), add the jalapeno and garlic and cook for two more minutes.
    adding chopped veggies to chicken
  • Add one 14 oz can of chicken broth and the juice of 1 orange and 1 lime.
    adding orange to chicken
  • Adjust the temperature to get a firm boil. Do not cover and do not stir. Just let it reduce to almost nothing — about 20 minutes. Your house will smell wonderful.
    carnitas in pot boiling
  • While the chicken is reducing, clean and slice one red pepper, one green pepper, and a large onion. When the pan is almost dry and the chicken is getting crispy edges, move it to a plate and tent it with foil.
    browning chicken in Dutch oven
  • Add the veggies to the pan over medium-high heat and cook until tender—about 7-8 minutes. Stir frequently and scrape some of the fond off the bottom of the pan.
    cooking vegetables in a dirty pot
  • If needed, add a couple of tablespoons of chicken broth for moisture—lots of great flavors here.
    bowl full of cooked veggies
  • Serve hot on tortillas with toppings or use in many other ways.
    chicken carnitas on a tortilla with toppings

Notes

Pro Tips:

  1. Use skinless chicken breasts or thighs if you wish.
  2. Please do not skip the orange and lime.
  3. When cooking the peppers and onion, be sure to scrape the bottom of the pan frequently.
  4. Cut the jalapeno if you want, but it is not a very hot dish, and it adds some nice taste.
  5. Nutrition is for everything listed in the ingredients but not for tortillas or toppings.
  6. Store leftovers airtight in the refrigerator for 3 days.

Nutrition

Calories: 179kcal | Carbohydrates: 7g | Protein: 26g | Fat: 5g | Saturated Fat: 2g | Cholesterol: 73mg | Sodium: 149mg | Potassium: 588mg | Fiber: 2g | Sugar: 3g | Vitamin A: 734IU | Vitamin C: 47mg | Calcium: 25mg | Iron: 1mg

Editor's Note: Originally Published October 19, 2013. Updated with expanded options, refreshed photos, and a table of contents to help navigation.

Lilly dog head shot with toy.

Easy Chicken Stir Fry Recipe

stirring the stir fry

Our Easy Chicken Stir-fry Recipe is a basic recipe that uses pantry ingredients to make a tasty, healthy meal with tender chicken and fresh vegetables coated with a delicious sauce.

Ingredients

Chicken—chicken tenders, skinless boneless breasts, or thighs
Vegetables—broccoli, celery, carrots, bell peppers
Aromatics—onion and garlic
Chicken broth
Pantry ingredients—soy sauce, ground ginger, garlic powder, corn starch, and vegetable oil

stirring the stir fry.
[feast_advanced_jump_to]
Blue ribbon divider used for visual effect

Featured comment from Patty C:
"Made this tonight…I have to rate this one a solid 5! Thanks Dr D!"

Our basic chicken stir-fry recipe is super easy and can be adjusted to what you have on hand. No need for special stir-fry sauce or other special ingredients. A quick and easy weeknight dinner—done in about 30 minutes.

Check out these other easy General Tso Chicken, Beef and Broccoli, Cashew Chicken, and Slow Cooker Honey Garlic Chicken.

👨‍🍳How to Make Chicken Stir Fry—Step-by-Step

Note: images are for a double batch.

trim and sliced chicken breast on a white board.

1. Trim and slice about 1 pound of skinless boneless chicken breast into thin slices or cubes.

pouring trimmed raw chicken into black skillet with oil.

2. Heat 2 tablespoons oil in a nonstick large skillet, or wok over medium-high heat and add the chicken when hot—stir frequently.

soy sauce with ginger and garlic powder.

3. Combine soy sauce, ground ginger, and garlic powder in a small bowl—mix well. For a touch of heat, add a pinch of red pepper flakes.

addomg saice tp cooked chicken.

4. After the chicken is cooked for about 5 minutes, add the soy sauce mixture and continue to cook until tender (about 6-8 minutes additional) and break it into bite-size pieces with a wooden spoon.

chopped vegetables on black board.

5, While the chicken is cooking, chop two stalks of celery, two medium carrots, and a medium onion. Prep 2 cups broccoli florets.

stirring the stir fry.

6. Add all the veggies to the pan. Add an 8 oz can of drained water chestnuts if you want. Stir and cook for about 5 minutes.

adding corn starch mixture to stir fry.

7. While the dish is cooking, whisk together 8 oz of chicken broth with 2-3 tablespoons of cornstarch until dissolved. After about 5 minutes of cooking, add the chicken broth/ cornstarch mixture.

stir fry ready to serve on a spoon.

8. Stir continuously until thickened and the vegetables are tender—about 5 minutes.

For more details, keep reading. See the Recipe Card below for complete instructions and to print.

Ingredient options and variations

There are not a lot of rules about what you can put in stir fry, so it is an excellent way to use up some of your “must-go” ingredients.

Chicken—skinless boneless chicken breast, skinless boneless chicken thighs, or chicken tenders.

Vegetables—broccoli, celery, carrots, bell peppers, but add other vegetables like water chestnuts, snow peas, snap peas, mushrooms, baby corn, frozen stir fry mix, or almost any vegetable you have on hand.

Aromatics—both onion and garlic, are needed but don't have to be fresh. If you don't have them, powder will do. I find using garlic powder works better than fresh for me to avoid that raw garlic flavor.

🥣What is Stir Fry?

Stir fry is an ancient Chinese cooking technique that uses a small amount of very hot oil in a wok to quickly cook ingredients that are added while being stirred. So, it is very similar to sauteing.

While stir-frying is an ancient Chinese technique, it has spread worldwide and has been known in the West as stir fry since the middle of the last century.

🍴How to serve stir fry

Generally, rice of some type—oven baked rice, cauliflower rice, and quinoa. And Chinese noodles and top with toasted Sesame seeds. Easy Egg Fried Rice is also a tasty companion dish.

Storage of leftovers and reheating

Store leftovers sealed airtight and refrigerated for 4 days or frozen for 3 months. By the way, you can freeze rice.

Reheat, after thawing overnight in the refrigerator if frozen, on the stovetop, or in the microwave.

❓FAQs

Can I add more flavors?

Optional for more flavor—a dash of honey for sweetness. Toasted Sesame Oil for a more Asian taste—it is strong, so just a pinch.

Add a little tang with a touch of apple cider or rice vinegar.

Add a little heat with a pinch of crushed red peppers.

Blue ribbon divider used for visual effect

This recipe is listed in these categories. See them for more similar recipes.

30-Minute Dinner Recipes, Chinese Recipes

Have you tried this recipe, or have a question? Join the community discussion in the comments.

Step-by-Step Photo Instructions

📖The Recipe Card

Chicken Stir Fry in pan
Print Recipe Add to Collection Go to Collections
3 from 1 vote

Easy Chicken Stir Fry Recipe

This Easy Chicken Stir-fry Recipe is a basic recipe that uses pantry ingredients to make a tasty, healthy meal with tender chicken and fresh vegetables coated with a delicious sauce.
Prep Time10 minutes mins
Cook Time25 minutes mins
Total Time35 minutes mins
Course: Main Course
Cuisine: Chinese
Keyword: Chicken Stir Fry, Stir Fry
Servings: 4 servings
Calories: 239kcal
Author: Dan Mikesell AKA DrDan

Ingredients

  • 1 pound skinless boneless chicken breasts cut into thin slices or cubes
  • 2 tablespoons oil
  • 2 tablespoons soy sauce
  • ½ teaspoon ground ginger
  • ½ teaspoon garlic powder
  • 2 stalks celery
  • 1 bell pepper chopped
  • 2 carrots medium
  • 1 onion medium
  • 2 cups broccoli florets
  • 8 oz chicken broth
  • 3 tablespoons corn starch

Options

  • Other Vegetables suggestions in the tips
  • Options for more flavor in the tips

Instructions

  • Trim and slice about 1 pound of skinless boneless chicken breast into thin slices or cubes.
    trim and sliced chicken breast on a white board
  • Heat 2 tablespoons oil in a nonstick large skillet, or wok over medium-high heat and add the chicken when hot—stir frequently.
    pouring trimmed raw chicken into black skillet with oil
  • Combine soy sauce, ground ginger, and garlic powder in a small bowl—mix well. For a touch of heat, add a pinch of red pepper flakes.
    soy sauce with ginger and garlic powder
  • After the chicken is cooked for about 5 minutes, add the soy sauce mixture and continue to cook until tender (about 6-8 minutes additional) and break it into bite-size pieces with a wooden spoon.
    addomg saice tp cooked chicken
  • While the chicken is cooking, chop two stalks of celery, two medium carrots, and a medium onion. Prep 2 cups broccoli florets.
    chopped vegetables on black board
  • Add all the veggies you are using to the pan. Stir and cook for about 5 minutes.
    stirring the stir fry
  • While the dish is cooking, whisk together 8 oz of chicken broth with 2-3 tablespoons of cornstarch until dissolved. After about 5 minutes of cooking, add the chicken broth/ cornstarch mixture and stir continuously until thickened and the vegetables are tender—about 5 minutes.
    adding corn starch mixture to stir fry

Notes

Pro Tips:

  1. This is just a basic recipe to get you started. Add or subtract what you want.
  2. I used skinless boneless chicken breast, but thighs would work well. Also, change it out for different meat or fish. Add a bit more or less. Skip the meat if you want.
  3. All amounts of meat and veggies are just for reference. Adjust to what you have or want.
  4. Two cups of broccoli is about a medium head of broccoli.
  5. Other Vegetables—water chestnuts, snow peas, snap peas, mushrooms, baby corn, frozen stir fry mix. Or almost any vegetable you have on hand.
  6. Optional for more flavor—a dash of honey for sweetness. Toasted Sesame Oil for a more Asian taste—it is strong, so just a pinch. Some crushed red pepper for some heat.
  7. Good in the refrigerator for a few days. But due to the corn starch, the texture will be a bit different, and I do not suggest freezing.

Nutrition

Calories: 239kcal | Carbohydrates: 15g | Protein: 27g | Fat: 9g | Saturated Fat: 1g | Polyunsaturated Fat: 1g | Monounsaturated Fat: 5g | Cholesterol: 72mg | Sodium: 619mg | Potassium: 267mg | Fiber: 3g | Sugar: 4g | Vitamin A: 5250IU | Vitamin C: 26.4mg | Calcium: 40mg | Iron: 0.2mg

The recipe is based on one from Allrecipes. I did simplify and used chicken broth to replace some water and bouillon.

Editor's Note: Originally published December 17, 2011. Updated with expanded options, refreshed photos, and a table of contents to help navigation.

Molly and Lilly standing in a yard.

Grilled Chicken Fajitas

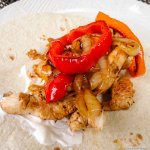
chicken fajitas on tortilla

Grilled Chicken Fajitas with charred chicken, caramelized onion, and bell peppers. The fajita marinade brings this easy recipe restaurant-quality flavor.

🐓Ingredients

  • Chicken —Skinless boneless chicken breast or thighs cut cross grain about ½ inch thick
  • Aromatics—garlic and onion
  • Lime—fresh or lime juice
  • Vegetables—bell peppers
  • Pantry ingredients—chili powder, black pepper, salt, vegetable oil, olive oil, vinegar (red wine preferred)
  • Optional spices—cumin, cayenne pepper, fajita seasoning
  • For serving—corn or flour tortillas, salsa, guacamole, cheese, and more
chicken fajitas on tortilla.
[feast_advanced_jump_to]
Blue ribbon divider used for visual effect

Featured comment from Charlene:
"Love this recipe!"

Grilled fajitas have a special flavor from the char by cooking on the grill. Using a flat top surface like a griddle, this chicken fajitas on the grill is easy to make at home with these step-by-step photo instructions for better than restaurant results in 30 minutes.

With a great-tasting chicken fajitas marinade that works in only a few minutes, serve them hot off the griddle with the toppings of your choice.

These fajitas can fit a healthy diet, like a low-calorie and low-fat diet. It can also work in a low-carb or keto diet.

👨‍🍳How to make Grilled Chicken Fajitas

  1. Trim and cut chicken breasts or thighs into strips across the grain.
  2. Mix the marinade and add the chicken for 10 to 30 minutes.
  3. Cut onion and peppers and coat with olive oil and salt.
  4. Grill the vegetables first on a preheated griddle with vegetable oil.
  5. Push the vegetables to the side, place the chicken on the griddle, and cook for about 6-8 minutes to an internal temperature of 165°.
  6. Mix the vegetables and chicken and serve.

This is a summary of the steps and ingredients. See the recipe card or the step-by-step photo instructions below for full instructions.

When are chicken fajitas done and ready to serve?

To be safe, the internal temperature of the chicken needs to reach 165° internal temperature when measured with an instant-read thermometer, and the vegetables should be tender with some char.

Chicken Fajita Recipes

Check out other options for excellent chicken fajitas, like Easy Chicken Fajitas, Sheet Pan Chicken Fajitas, and Chicken Fajita Quesadillas. Or try some easy Marinated Steak Fajitas or Pork Tenderloin Fajitas.

🍽️Serving suggestions

Serve with flour or corn tortillas with traditional toppings: cheddar or Mexican cheeses, diced tomatoes, slices of jalapeno or green onions, cilantro, sour cream, and many more.

Side dishes: Corn chips with Pineapple Mango Salsa, refried beans, Easy Guacamole, or Mexican Rice.

How to store and reheat leftover fajitas

Store leftovers airtight in the refrigerator for 3 days. Freezing is not recommended due to texture issues with the cooked vegetables.

Reheat leftover fajitas on the stovetop with a covered skillet over medium heat. Add a bit of vegetable oil and stir occasionally. It will take about 5 minutes or a bit more.

❓FAQs

What can I use for the red wine vinegar?

Red wine vinegar may not be in your pantry. It has a pleasant, not-in-your-face taste for things like salads.

If you don't have red wine vinegar, you can substitute some apple cider or rice vinegar, but not at the same volume. Do about a third to half the volume and taste test it. Vinegar can overwhelm a dish quickly.

Can I use rotisserie chicken?

No, not a good idea. It will dry out during cooking, and we want the marinade with the raw chicken.

Can I cook grilled chicken fajitas on the stovetop?

Yes, use a large skillet or griddle over medium-high or high heat.

Blue ribbon divider used for visual effect
↑Jump to Table of Contents

This recipe is listed in these categories. See them for more similar recipes.

30-Minute Dinner Recipes, Grill Recipes, Mexican Recipes

Have you tried this recipe, or have a question? Join the community discussion in the comments.

Step-by-Step Photo Instructions

preheat the grill on high with griddle in place.

Preheat the grill with a griddle or large grill pan in place on high. Add vegetable oil just before cooking. The grill lid should be open for this entire recipe.

mix seasoning in white bowl.

In a medium bowl, whisk all marinade ingredients together.

trim chicken breasts into strips,

Clean and cut the chicken into strips across the grain.

mix chicken into marinade,

Add chicken to the marinade for 10 to 30 minutes. Mix well and let sit at room temp while dealing with veggies.

sliced peppers and onion on wood board.

Cut onion and peppers and coat with 1 tablespoon olive oil and ¼ teaspoon salt.

add veggies to the hot griddle,

After the grill is preheated for at least 10 minutes, add oil and place vegetables on the griddle. Stir occasionally and cook for about 6 minutes until it starts to brown and soften. If browning too fast, turn down the heat or move to a cooler part of the grill.

adding raw chicken to griddle.

Push the veggies to the side and place the chicken on the griddle, stirring both the chicken and vegetables occasionally. Cook for about 6-8 minutes until you can cut the chicken with a wooden spoon and an internal temperature of 165°. The exact time will vary with the grill, the griddle, and the thickness of the chicken.

chicken fajitas hot off the grill.

Mix in vegetables back into the chicken and stir well.

chicken fajitas on tortilla.

Serve with tortillas and traditional toppings.

📖The Recipe Card

chicken fajitas on tortilla
Print Recipe Add to Collection Go to Collections
5 from 4 votes

Grilled Chicken Fajitas—Quick & Easy

Grilled Chicken Fajitas with charred chicken and caramelized onion, and bell peppers. The fajita marinade brings this easy recipe restaurant-quality flavor.
Prep Time10 minutes mins
Cook Time15 minutes mins
Total Time25 minutes mins
Course: Main Course
Cuisine: Mexican
Keyword: Chicken Fajitas, Grilled Chicken Fajitas
Servings: 4
Calories: 202kcal
Author: Dan Mikesell AKA DrDan

Ingredients

  • 2 Skinless boneless chicken breast cut cross grain about ½ inch thick

Marinade

  • 2 tablespoons oil
  • 1 cloves garlic minced
  • ½ tablespoon red wine vinegar see notes for substitute
  • 1 lime or 2 tablespoons juice - Optional
  • ½ teaspoon chili powder
  • ½ teaspoon black pepper
  • ½ teaspoon salt

Vegetables

  • 1 onion sliced large yellow ½ inch thick
  • 2 peppers seeded and sliced about ½ inch thick
  • 1-2 tablespoons olive oil enough to coat the peppers and onion
  • ½ teaspoon salt

For serving:

  • tortillas and toppings
US Customary - Convert to Metric

Instructions

  • Preheat the grill with a griddle or large grill pan in place on high. Add vegetable oil just before cooking. The grill lid should be open for this entire recipe.
    pouring oil on griddle
  • In a medium bowl, whisk all marinade ingredients together.
    mix seasoning in white bowl
  • Clean and cut chicken into strips across the grain.
    trim chicken breasts into strips
  • Add chicken to the marinade for 10 to 30 minutes. Mix well and let sit at room temp while dealing with veggies.
    mix chicken into marinade
  • Cut onion and peppers and coat with 1 tablespoon olive oil and ¼ teaspoon salt.
    sliced peppers and onion on wood board
  • After the grill is preheated for at least 10 minutes, add oil to the griddle and place vegetables on the griddle. Stir occasionally and cook for about 6 minutes until starting to brown and soften. If browning too fast, turn down the heat or move to a cooler part of the grill.
    add veggies to the hot griddle
  • Push the veggies to the side and place the chicken on the griddle, stir both the chicken and vegetables occasionally. Cook for about 6-8 minutes until you are able to cut the chicken with a wooden spoon and an internal temperature of 165°. The exact time will vary with the grill, the griddle, and the thickness of the chicken.
    adding raw chicken to griddle
  • Mix in vegetables back into the chicken and stir well.
    chicken fajitas hot off the grill
  • Serve with tortillas and traditional toppings.
    chicken carnitas on a tortilla with toppings

Notes

Pro Tips:

  1. This recipe is unusual in that the grill lid is left open.
  2. This needs about 1 ½ pounds of chicken, I chose skinless boneless chicken breasts, but thighs would work great.
  3. Cut across the grain of the meat as much as possible.
  4. If you don't have red wine vinegar, you can substitute some apple cider or rice vinegar but not at the same volume. Do about a third to half the volume and taste test it. Vinegar can overwhelm the taste quickly.
  5. I buy limes frequently for recipes, but I do not normally keep them around. So I do usually keep some lime juice in the refrigerator. Or you can just slip it.
  6. Add a little heat with ½ teaspoon of cumin.
  7. Good refrigerated for 3-4 days.
  8. Nutrition does not include serving ingredients.

Nutrition

Calories: 202kcal | Carbohydrates: 6g | Protein: 24g | Fat: 10g | Saturated Fat: 2g | Polyunsaturated Fat: 1g | Monounsaturated Fat: 6g | Cholesterol: 65mg | Sodium: 670mg | Potassium: 157mg | Fiber: 2g | Sugar: 3g | Vitamin A: 300IU | Vitamin C: 70.1mg | Calcium: 20mg | Iron: 1.1mg

Editor's Note: Originally Published June 14, 2010. Updated with expanded options, refreshed photos, and a table of contents to help navigation.

dogs int the yard with their favorite trees.

Originally Published June 14, 2010.

Easy Mexican Shredded Beef

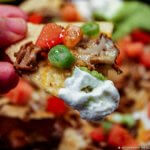
shredded beef nacho

Shredded Mexican Beef is tender and flavorful, using a beef roast and a few pantry ingredients. It's super easy to make on the stovetop or in your crock pot. It makes fantastic tacos, burritos, and quesadillas.

🐄Ingredients

Beef roast—a well-marbled chuck roast is preferred
Beef broth
Tomato paste
Spices—chili powder, cumin, salt, black pepper, and garlic powder
Onion—chopped
Jalapeno—optional but recommended

shredded beef nacho.
[feast_advanced_jump_to]
Blue ribbon divider used for visual effect

Featured comment from VaBelle:
"The recipe turned out great. Love the flavor and the spices and amounts are spot on."

This Mexican shredded beef recipe (AKA barbacoa) will deliver some of the best Mexican flavors you can make at home. This fork-tender beef is cooked in your crock pot and is perfect for any Mexican dish.

This shredded beef can be used almost anywhere you use Homemade Taco Meat. Use it in tacos, nachos, burritos, quesadillas, or enchiladas. It is perfect for a casual dinner or a taco buffet for a party or game day.

Try other Mexican crockpot dishes like Fiesta Chicken, Chicken Nachos, or Pork Butt Carnitas. Try some helpful side dishes like Mexican Rice, Guacamole, or Pineapple Mango Salsa.

👨‍🍳How to make Mexican Shredded Beef

  1. Trim and brown a beef roast.
  2. Add beef broth, chopped onion, spices, and optional jalapeno to a smaller crock pot or Dutch oven. Mix well and add the beef.
  3. Cook on low in the crock pot for 6 hours or place the Dutch oven in a 300° oven for 2 ½ to 3 hours.
  4. It is done when fall-apart tender. Add more cooking time if needed.
  5. Remove the meat, and reserve all the braising fluid for later.
  6. Hand shred and discard any waste when the meat has cooled enough to handle.
  7. Add some of the fluid back into the meat but keep it light. It is easy to add more but hard to remove.
  8. Refrigerate for later or place back into the crock pot on the "keep warm" setting.

This is a summary of the steps and ingredients. See the recipe card or the step-by-step photo instructions below for complete instructions.

🐄What beef roast to use

The best choice is a cheaper cut of beef, a well-marbleized chuck roast. You could use a leaner cut of beef, and the last step of adding some braising fluid back in will help a lot, but not quite the same.

How to use Mexican shredded beef

The obvious uses are the standard Mexican dishes: tacos, nachos, burritos, burritos bowls, enchiladas, and quesadilas

Perfect on a taco salad or in a taco buffet for parties and game days. Or use it in a casserole like Easy Taco Casserole and replace the taco ground beef.

For tacos, serve with warm flour or corn tortillas with traditional toppings: cheddar or Mexican cheeses, diced tomatoes, jalapeno slices or green onions, cilantro, sour cream, and many more.

Side dishes: Corn chips with salsa, refried beans, guacamole, or Mexican rice.

Storage of leftovers

Store sealed airtight in the refrigerator for 3 days or frozen in an airtight container like a ziplock bag for 3 months.

Reheat in a microwave. You can use a skillet over medium heat. Or in a 250° oven on a tray covered tightly with foil. Always thaw if frozen before reheating.

❓FAQs

What other flavors can be added to shredded beef?

I have kept this recipe with the minimum ingredients to get a great taste. Common Mexican seasonings like oregano and paprika. Other ingredients like adobo sauce, citrus-like limes or oranges, and various fresh chilis.

What can I use to moisturize the beef if I run out of braising fluid?

Beef broth or stock, or if it is only a little, use water.

Blue ribbon divider used for visual effect
↑Jump to Table of Contents

This recipe is listed in these categories. See them for more similar recipes.

Crock Pot Recipes, Mexican Recipes, Small Crock Pots Recipes

Have you tried this recipe, or have a question? Join the community discussion in the comments.

Step-by-Step Photo Instructions

chuck roast with other ingredients.

Start with an approx 2 ½ to 3 pound chuck roast.

chuck roast cut into pieces.

Trim a beef roast of excess fat and cut it into quarters. If you have time, brown all sides of the beef in oil over medium-high heat before proceeding.

pouring beef broth into crock pot.

Add one small chopped onion, one can of beef broth, chili powder, ground cumin, tomato paste, salt, garlic powder, and pepper in a smaller crock pot or a Dutch oven.

adding chuck roast to crock pot.

Add beef roast. If the braising fluid is not near the top of the beef, add more broth. If you need more than 1 cup more broth, add proportionally more spices.

shredding beef on black board.

Cook on low in the crock pot for 6 hours or place the Dutch oven in a 300° oven for 2 ½ to 3 hours. Check the meat—it is done when fall-apart tender. Add more cooking time if needed.

add some fluid back to beef in crock pot.

Add about 1 cup of braising fluid back to the beef.

shredded beef on a fork.

Return to the slow cooker on warm until needed for serving. Or refrigerate the moisturized meat and the remaining braising fluid for later.

shredded beef on tortilla

📖The Recipe Card

shredded beef nacho
Print Recipe Add to Collection Go to Collections
4.45 from 9 votes

Easy Mexican Shredded Beef

Shredded Mexican Beef is tender and flavorful, using a beef roast and a few pantry ingredients. It's super easy to make on the stovetop or in your crock pot. It makes fantastic tacos, burritos, and quesadillas.
Prep Time5 minutes mins
Cook Time4 hours hrs
Total Time4 hours hrs 5 minutes mins
Course: Main Course
Cuisine: Mexican
Keyword: Shredded Beef, Shredded Beef Tacos, Tex-Mex Shredded Beef
Servings: 8 servings
Calories: 231kcal
Author: Dan Mikesell AKA DrDan

Ingredients

  • 2 pounds beef roast chuck preferred upto 3 lbs
  • ¼ oz beef broth
  • 2 tablespoons chili powder
  • 2 teaspoons cumin
  • 1 onion small chopped
  • 3 oz tomato paste
  • 1 teaspoon salt
  • 1 teaspoon garlic powder
  • ⅓ teaspoon pepper
  • 1 jalapeno Optional, minced
US Customary - Convert to Metric

Instructions

  • Start with an approx 2 ½ to 3 pound chuck roast.
    chuck roast with other ingredients
  • Trim a beef roast of excess fat and cut it into quarters. If you have time, brown all sides of the beef in oil over medium-high heat before proceeding.
    chuck roast cut into pieces
  • Add one small chopped onion, one can of beef broth, chili powder, ground cumin, tomato paste, salt, garlic powder, and pepper in a smaller crock pot or a Dutch oven.
    pouring beef broth into crock pot
  • Add beef roast. If the braising fluid is not near the top of the beef, add more broth. If you need more than 1 cup more broth, add proportionally more spices.
    adding chuck roast to crock pot
  • Cook on low in the crock pot for 6 hours or place the Dutch oven in a 300° oven for 2 ½ to 3 hours. Check the meat—it is done when fall-apart tender. Add more cooking time if needed. Remove the meat from the pot. Shred and remove any fat. Remove the braising liquid from the crock pot and set aside.
    shredding beef on black board
  • Add about 1 cup of braising fluid back to the beef.
    add some fluid back to beef in crock pot
  • Return to the slow cooker on warm until needed for serving. Or refrigerate the moisturized meat and the remaining braising fluid for later.
    shredded beef on a fork

Notes

Pro Tips

  1. A nicely marbled top round roast or an eye of round would work. But I prefer a chuck roast which will always be fall-apart tender.
  2. Decrease the sodium by using low-sodium broth and cutting the salt.
  3. Do not add too much fluid back into the shredded beef. It is much easier to add more than take it out.
  4. Store sealed airtight in the refrigerator for 3 days or frozen in an airtight container like a ziplock bag for 3 months.
  5. Reheat in a microwave. You can use a skillet over medium heat. or in a 250° oven on a tray covered tightly with foil. Always thaw if frozen before reheating.

Nutrition

Serving: 4ozs | Calories: 231kcal | Carbohydrates: 5g | Protein: 24g | Fat: 13g | Saturated Fat: 6g | Cholesterol: 78mg | Sodium: 592mg | Potassium: 656mg | Fiber: 2g | Sugar: 2g | Vitamin A: 795IU | Vitamin C: 5mg | Calcium: 38mg | Iron: 3mg

Editor's Note: Originally Published December 26, 2012. Updated with expanded options, refreshed photos, and a table of contents to help navigation.

Molly and Lilly with a stick

Lemon Butter Tilapia

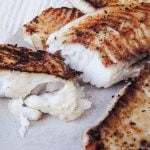
grilled lemon butter tilapia

Lemon Butter Tilapia is flaky, tender, and incredibly flavorful. This is an easy and fast tilapia recipe using fresh or frozen tilapia coated with lemon, butter, and garlic. Make it in the oven or on your grill with a griddle.

🐟Ingredients

Tilapia fillets
Butter
Lemon or lemon juice
Pantry ingredients—garlic powder, vegetable oil, salt, and black pepper

Flakey tilapia with grill marks.
[feast_advanced_jump_to]
Blue ribbon divider used for visual effect

Featured comment from Corey:
"I've made this incredibly easy and delicious fish twice in the past 2 weeks, with plans to make it again this weekend."

A quick and easy oven-baked or grilled tilapia recipe done in well under 30 minutes. Follow these easy step-by-step photo instructions for a great meal using fresh or frozen tilapia.

The classic taste of lemon butter with garlic, then adding some char from the grill, makes the taste unique. Or you can bake it in the oven.

It fits a healthy diet, like a low-calorie and low-fat diet. It also works in a low-carb or keto diet.

Check out my other tilapia recipes like Parmesan Crusted Tilapia, Grilled Blackened Tilapia, or Baked Blackened Tilapia. Or try Garlic Butter Salmon in a Convection Oven.

👨‍🍳How to Cook Lemon Butter Tilapia

  1. For Oven Baking: Preheat oven to 400°
  2. For Grilling: Preheat the grill on high with a griddle or grill-safe pan in place. Apply a liberal coat of vegetable oil.
  3. Mix well with butter, lemon juice, and garlic powder and microwave for 10 seconds.
  4. Pat dry fillets, and brush both sides of the fillets with the butter mixture. Lightly salt and pepper to taste.
  5. Bake for 10-12 minutes until an internal temperature of 145° or grill for about 4 minutes per side on a griddle or grill pan with an open lid.

This is a summary of the steps and ingredients. See the recipe card or the step-by-step photo instructions below for complete instructions.

When is tilapia done and safe to eat?

An internal temperature of 145° is the minimum safe temperature. It is flakey at that point.

♨️Should I grill or use the oven

To oven bake, preheat the oven to 400°—it needs to be fully preheated before baking.

On the grill, this recipe uses a hot grill with a griddle or grill pan preheated on high. A large grill basket may be used if you flip the fish. The fish is thin, and this is one of the few recipes to grill with the lid open.

🍴How to serve tilapia

Garnish with fresh parsley and lemon slices before serving. Serve with lemon juice or tartar sauce.

Serve with Spinach Salad with bacon or hot side dishes like Grilled Asparagus, Grilled Mixed Vegetables, or Green Beans with Almonds. Starches, like Baked Rice, low-caloric biscuits, scalloped potatoes for two, or cornmeal drop biscuits, are also good additions.

Leftover tilapia

Store leftovers airtight in the refrigerator for 2-3 days or frozen for 2-3 months.

To reheat, a stovetop skillet or in the oven is preferred. Microwaves can affect the texture but can be used on half power.

❓FAQs

Can other fish be used?

Yes, other fish, like cod, can be used. Cooking time varies by the thickness of the fish.

Can I spice it up some with some paprika?

You can use a seasoning of 2 teaspoons of paprika, 1 teaspoon of garlic powder, 1 teaspoon of salt, and ½ teaspoon of pepper. Bush the tilapia with melted butter and then apply the seasoning.

🐟 About Tilapia

Tilapia is frequently called "the chicken of fish" due to its mild taste and ease of mass production on farms. And tilapia is a good source of low-fat protein.

Tilapia is a native freshwater fish from Africa and the Middle East but has been distributed worldwide. They’re farmed almost everywhere since they can tolerate a wide range of temperatures and are very hardy.

Blue ribbon divider used for visual effect
↑Jump to Table of Contents

This recipe is listed in these categories. See them for more similar recipes.

30-Minute Dinner Recipes, Fish Recipes, Grill Recipes, Healthy Recipes, Low Carb/Keto Recipes, Low Fat Recipes

Have you tried this recipe, or have a question? Join the community discussion in the comments.

Step-by-Step Photo Instructions

pouring oil on griddle on grill.

If grilling, preheat the grill on high with an oiled griddle or grill-safe pan. If baking, preheat the oven to 400°.

butter with lemon juice and gralic powder in small bowl.

Put butter, lemon juice, and garlic powder in a small bowl. Microwave for 10 seconds and mix well.

drying tilapia with paper towels.

Pat dry fillets with a paper towel.

brushing tilapia with lemon butter.

Brush both sides of the fillets with the butter mixture. Do this quickly before the solution firms up.

salting tilapia on white plate.

Lightly salt and pepper to taste.

pile of grilled tilapia on white plate.

Grill for about 4 minutes per side with an open lid or bake for 10-12 minutes until an internal temperature of 145°. Serve hot.

📖The Recipe Card

grilled lemon butter tilapia
Print Recipe Add to Collection Go to Collections
4.67 from 3 votes

Lemon Butter Tilapia

Lemon Butter Tilapia is flaky, tender, and incredibly flavorful. This is an easy and fast tilapia recipe using fresh or frozen tilapia coated with lemon, butter, and garlic. Make it in the oven or on your grill with a griddle.
Prep Time3 minutes mins
Cook Time8 minutes mins
Total Time11 minutes mins
Course: Fish
Cuisine: American
Keyword: Grilled Fish, Grilled Tilapia, Tilapia
Servings: 6 servings
Calories: 85kcal
Author: Dan Mikesell AKA DrDan

Ingredients

  • 1 lb Tilapia fillets 6 medium fillets
  • 2 teaspoon butter
  • 2 teaspoon ReaLemon or about the juice of ½ lemon
  • ½ teaspoon garlic powder
  • salt and pepper
US Customary - Convert to Metric

Instructions

  • If grilling, preheat the grill on high with an oiled griddle or grill-safe pan. If baking, preheat the oven to 400°.
    pouring oil on griddle on grill
  • Put butter, lemon juice, and garlic powder in a small bowl. Microwave for 10 seconds and mix well.
    butter with lemon juice and gralic powder in small bowl
  • Pat dry fillets with a paper towel.
    drying tilapia with paper towels
  • Brush both sides of the fillets with the butter mixture. Do this quickly before the solution firms up.
    brushing tilapia with lemon butter
  • Lightly salt and pepper to taste.
    salting tilapia on white plate
  • Grill for about 4 minutes per side with an open lid or bake for 10-12 minutes until an internal temperature of 145°. Serve hot.
    pile of grilled tilapia on white plate

Notes

Pro Tips:

  1. Any grill pan, griddle, or even a grill basket will work as long as you can flip the fish.
  2. Preheat a griddle or grill pan with the grill on high. A grill basket does not need to be preheated. For oven baking, preheat to 400° completely before baking.
  3. If frozen, the tilapia needs to be completely thawed. Just moving the frozen tilapia from the freezer to the refrigerator overnight will do.
  4. This is one of the few recipes that I grill with an open lid.

Nutrition

Serving: 1filet | Calories: 85kcal | Carbohydrates: 1g | Protein: 15g | Fat: 3g | Saturated Fat: 1g | Cholesterol: 41mg | Sodium: 51mg | Potassium: 228mg | Sugar: 1g | Vitamin A: 42IU | Calcium: 8mg | Iron: 1mg

Originally Published August 17, 2010. Updated with expanded options, refreshed photos, and a table of contents to help navigation.

dogs standing in the yard

Chipotle Lime Grilled Pork Tenderloin a la Alton Brown

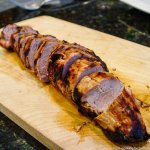
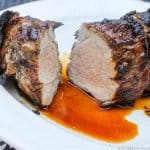
sliced pork tenderloin on wood

An Alton Brown-inspired pork tenderloin infused with a chipotle lime marinade will leave them asking for more. Just follow these easy step-by-step photo instructions.

sliced pork tenderloin on wood
[feast_advanced_jump_to]
Blue ribbon divider used for visual effect

👍Why you should make this recipe

  • A great-tasting marinated pork tenderloin for one of the masters.
  • The marinade has honey, lime, garlic, and chipotle—used both before cooking and after.
  • An easy grilling technique to get a perfectly grilled pork tenderloin every time.
  • Easy to double or triple with about the same amount of work.
  • A great Mexican tasting change of pace meal everybody will love.

A different taste from your usual tenderloin and a much different technique. You can check the inspiration recipe at Food Network / Alton Brown version. I added a few options and simplified the cooking method with my usual gas grill technique.

🐖Ingredients

  • Pork tenderloin—trimmed and remove the silverskin
  • Lime juice—if you use fresh limes, add the zest of one lime. One medium-size lime contains 2 tablespoons of juice but ranges from 1 to 3.
  • Honey
  • Salt—kosher
  • Garlic—One clove of fresh garlic equals ¼ teaspoon of granulated garlic powder.
  • Chipotle—chipotle chile pepper in adobo sauce or substitute ground chipotle powder.

👨‍🍳How to Make Alton Brown's Chipotle Lime Marinated Pork Tenderloin

  1. Mix marinade: garlic powder, Chipotle, lime juice, and honey.
  2. Add half the mixture to a Ziploc with a trimmed pork tenderloin—refrigerate for 1 to 3 hours.
  3. After marinating, rest the tenderloin at room temp for 30 minutes while preheating the grill to 450°.
  4. Grill with direct heat for about 20-25 minutes.
  5. Add the reserved marinade to a foil boat with the tenderloin. Seal tight and allow to rest at room temperature for 10 minutes.

✔️Tips

  • Be sure you are using a pork tenderloin and not a pork loin. They are very different and cook differently. Most pork tenderloins will be between 1 and 1 ½ pounds. A very large tenderloin may come close to 2 pounds.
  • One of the keys to grilling a pork tenderloin correctly is to realize it is not round, flat, or even square. It is a triangle, so there are three sides. When you rotate, you do so by thirds.
  • Chipotle in adobe is always a problem for me. It is hard to find around here, and to open a can and trash the rest bothers me. I suggest Penzey Chipotle powder, and I had good results with that here and in many other recipes.
  • The amount of honey in the original recipe was too sweet and dominated the taste. I have suggested a range; I use the low-end or brown sugar.
  • The garlic is doubled in my version—we like garlic.
  • Marinade time is 1-3 hours, but up to 24 is fine. As little as 30 minutes will get reasonably good results.
  • You can use either a gas or charcoal grill. You need a grill surface temperature of about 450° to a maximum of 500°. Most grills will be about medium-high heat

❓FAQs

What is grill surface temperature, and how to measure it?

Grill surface temperature is the temperature on the grill's surface where your meat is cooking. The grill equalivent to the oven temperature. Grill hood thermometers are not near that location, heat rises, and they are cheap and inaccurate.

You should be using a grill surface thermometer. Please see my guide to BBQ temperature for more information.

How to store leftovers.

Seal leftovers in an airtight container and refrigerate for 4 days or freeze for 3 months.

📖Grilled Pork Tenderloin Recipes

ooHow to Grill a Pork Tenderloin on a Gas Grill

Balsamic Pork Tenderloin

Grilled Honey Garlic Pork Tenderloin

The Best Grilled Pork Tenderloin - Memphis Style

Blue ribbon divider used for visual effect
↑Jump to Table of Contents

This recipe is listed in these categories. See them for more similar recipes.

Grill Recipes, Pork Recipes, Pork Tenderloin Recipes

Have you tried this recipe, or have a question? Join the community discussion in the comments.

Step-by-Step Photo Instructions

trimmed pork tenderloin on a white board

Trim the pork tenderloin and remove the silverskin.

ingredients for marinade including honey

Combine spices with lime juice and honey.

potk tenderloin sealed in bag

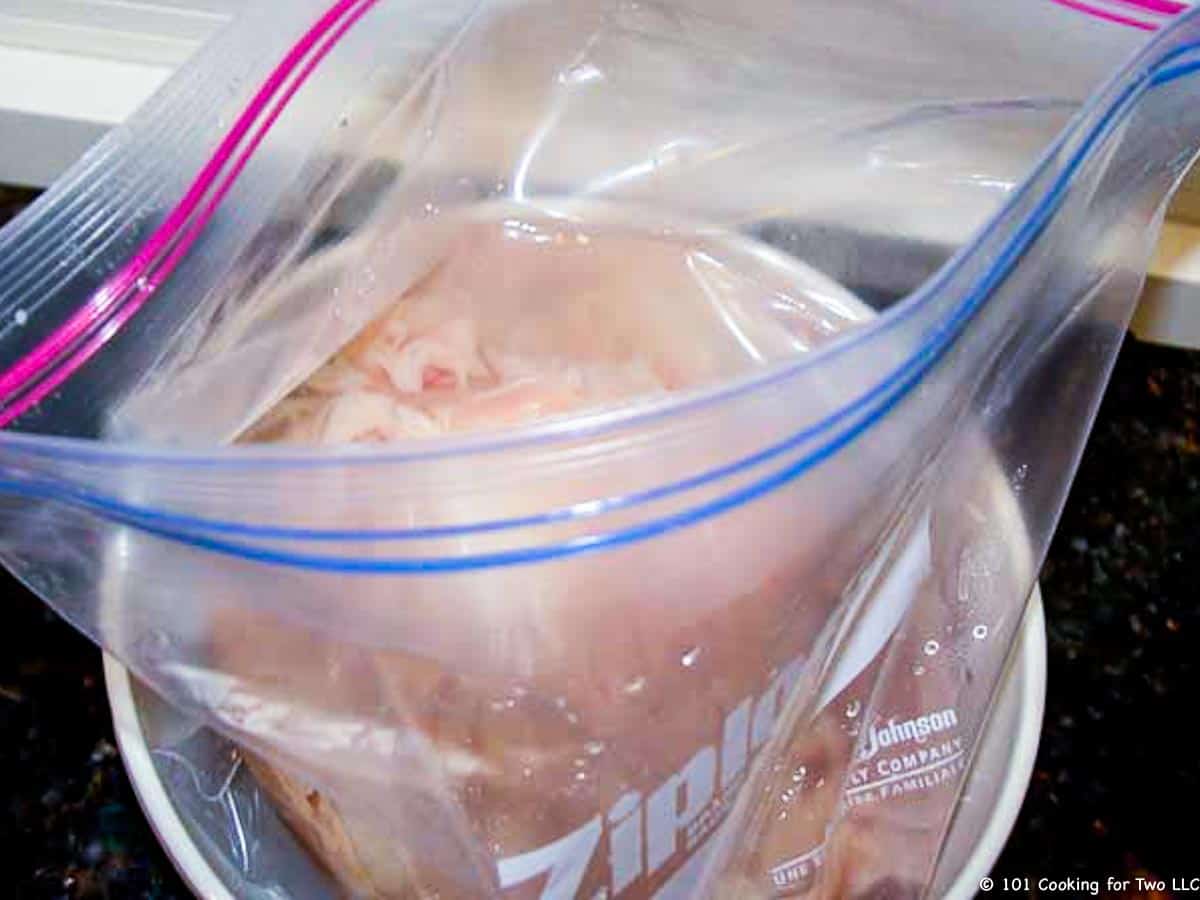
Add half the marinade to a 1-gallon Ziploc, add the tenderloin, and remove as much air as possible. Seal and refrigerate for 1 to 3 hours. But up to 24 hours is fine. Refrigerate the second half of the marinade mixture for later.

Clean and oil grill grates

Remove the tenderloin from the refrigerator and allow it to rest at room temp for 30 minutes—clean and oil grill grates. Preheat the grill to a surface temperature of about 450°. On most grills will be medium-high.

placeing the tenderloin on the grill

Place over direct heat. Cook with a closed lid. Rotate the tenderloin ⅓ every 5 minutes for about 20-25 minutes until an internal temperature of 140°. Please never cook on time alone. Use an instant-read thermometer.

tenderloin in foil boat adding marinade

Make an aluminum foil "boat." Add reserved marinade and grilled tenderloin to the foil boat and seal the foil tightly for 10 minutes.

sliced tenderloin on white plater

Slice, garnish with cilantro, and serve.

↑Jump to Table of Contents

📖The Recipe Card

sliced pork tenderloin on wood
Print Recipe Add to Collection Go to Collections
5 from 1 vote

Chipotle Lime Pork Tenderloin a la Alton Brown

An Alton Brown-inspired pork tenderloin infused with a chipotle lime marinade will leave them asking for more. Just follow these easy step-by-step photo instructions.
Prep Time10 minutes mins
Cook Time35 minutes mins
Marinade time1 hour hr
Total Time6 hours hrs 40 minutes mins
Course: Main Course
Cuisine: American
Keyword: chipotle pork tenderloin, Grilled Pork Tenderloin
Servings: 4
Calories: 563kcal
Author: Dan Mikesell AKA DrDan

Ingredients

  • 1 pork tenderloin
  • ½ cup lime juice about 4 medium limes
  • 2-4 tablespoons honey
  • 1 teaspoon kosher salt
  • ½ teaspoon garlic powder Or 2 crushed cloves
  • ½ teaspoon Penzy Chipotle powder or one chopped chipotle pepper
US Customary - Convert to Metric

Instructions

  • Trim the pork tenderloin and remove the silverskin.
  • Combine spices with lime juice and honey.
  • Add half the marinade to a 1-gallon Ziploc, add the tenderloin, and remove as much air as possible. Seal and refrigerate for 1 to 3 hours. But up to 24 hours is fine. Refrigerate the second half of the marinade mixture for later.
  • Remove the tenderloin from the refrigerator and allow it to rest at room temp for 30 minutes—clean and oil grill grates. Preheat the grill to a surface temperature of about 450°. On most grills will be medium-high.
  • Place over direct heat. Cook with a closed lid. Rotate the tenderloin ⅓ every 5 minutes for about 20-25 minutes until an internal temperature of 140°. Please never cook on time alone. Use an instant-read thermometer.
  • Make an aluminum foil "boat." Add reserved marinade and grilled tenderloin to the foil boat and seal the foil tightly for 10 minutes.
  • Slice, garnish with cilantro, and serve.

Notes

Pro Tips

  1. One medium lime will have about 2 tablespoons of juice but can vary from 1 to 3.
  2. The originally recommended ¼ cup of honey is too sweet. I suggest using half that (2 tablespoons), and I also prefer brown sugar in this recipe. For 1 tablespoon of honey, use 4 teaspoons of brown sugar.
  3. Marinade time is 1-3 hours, but up to 24 is fine. As little as 30 minutes will get fairly good results.
  4. Do not rinse off the marinade.
  5. Be sure to reserve and refrigerate half the marinade at the beginning. Never reuse a marinade.
  6. To do this well, you need to know your grill surface temperature. But you must use an instant-read thermometer to determine the end-point.

Nutrition

Calories: 563kcal | Carbohydrates: 5g | Protein: 94g | Fat: 16g | Saturated Fat: 5g | Cholesterol: 295mg | Sodium: 527mg | Potassium: 1782mg | Sugar: 4g | Vitamin C: 1.8mg | Calcium: 27mg | Iron: 4.4mg

Originally Published August 13, 2011. Updated with expanded options, refreshed photos, and a table of contents to help navigation.

Molly in the yard
Molly after running.

Microwave Corn on the Cob in the Husk (Quick & Easy)

corn on the cob in serving trays B

Microwave corn on the cob in the husk for the fastest, cleanest way to cook corn—tender, hot, and ready in minutes.

With minimal prep and simple tips, you’ll get foolproof results every time—including how to pick the best corn and cook up to 4 ears easily.

⏱️ Quick Answer: How Long to Microwave Corn on the Cob in the Husk

  • Leave in the husk but trim loose silk.
  • Microwave corn in the husk for about 4 minutes per ear.
  • 2 ears = about 8 minutes, and so on.
corn on the cob in serving trays.
[feast_advanced_jump_to]

quote mark
Featured Comment by Barbara:
⭐⭐⭐⭐⭐
"Wow! I've never even thought about microwaving my corn on the cob, but now that I know better, I'll never have to boil a big pot of water on a hot summer day!"

👍 TL;DR — Recipe Summary

What it is: A quick microwave method for cooking corn in the husk—no boiling or shucking needed.

Why you’ll love it: Fast, nearly mess-free, and easy to scale from 1 to 4 ears.

How to make it: Trim loose silk, microwave in the husk, then squeeze the cooked corn out hot and ready to serve.

👨‍🍳 Quick Overview: Cooking Corn in the Microwave

1. Prepare the corn

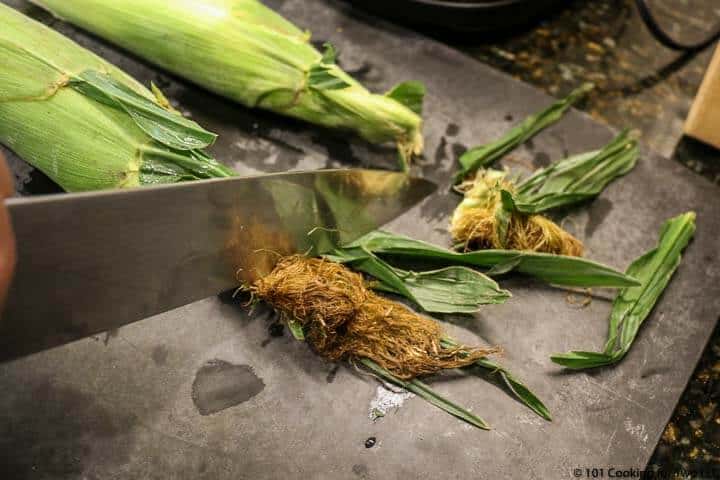
Trim back most of the stalk, then remove most of the silk and loose husk. Don’t expose the kernels—you want the corn fully wrapped, just neater.

Trimming the silk off to microwave corn on the cob in husk.

2. Microwave on high

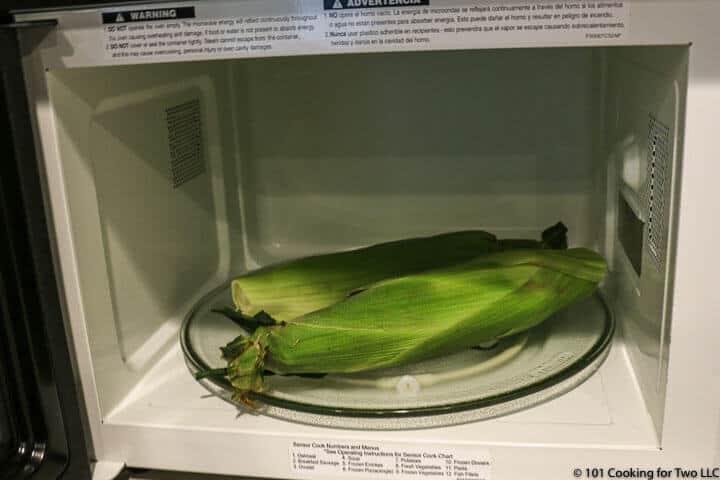
Cook for 4 minutes per ear (8 minutes for 2 ears, and so on).

two ears of corn in microwave.

3. Cut and loosen the husk

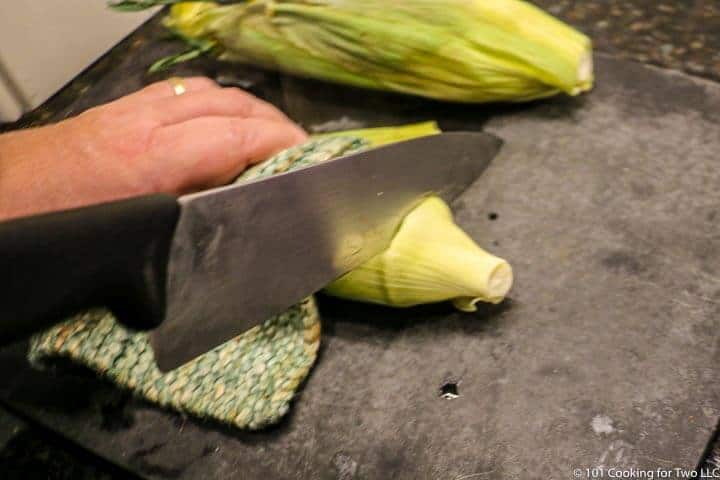
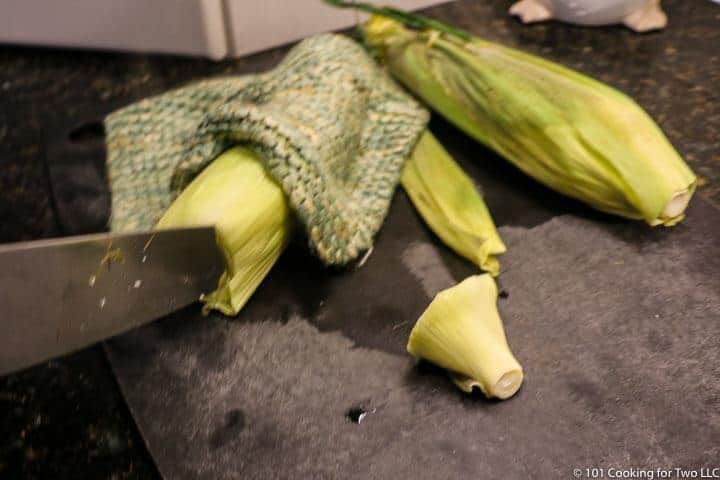
With a sharp chef’s knife, slice off the bottom of the ear, cutting through a few rows of kernels.

cut off end of corn.

Slide the knife between the corn and the husk and cut two slits about 3 to 4 inches long on opposite sides of the ear.

sliding the knife under the husk.

4. Squeeze and serve

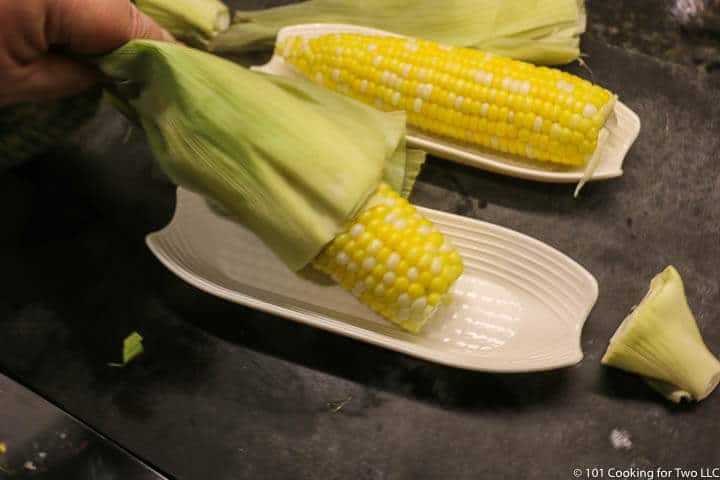
Hold the top and squeeze the corn out. The husk and silk will stay behind. Serve hot with butter, salt, and pepper to taste.

squeeze corn out of husk.

👇For complete step-by-step instructions, scroll down to the printable recipe card or keep reading for tips and serving ideas.

⏲️ How Long to Microwave Corn on the Cob in the Husk

Microwave corn on the cob in the husk for 4 minutes per ear. That’s it—easy to scale:

  • 1 ear = 4 minutes
  • 2 ears = 8 minutes
  • 3 ears = 12 minutes
  • 4 ears = 16 minutes

If you’re cooking more than 4 ears, do them in batches for the best results.

✅ Pro Tip: Microwave strength varies. If your corn isn’t steaming hot or doesn’t squeeze out easily, add 30–60 seconds more.

🌽 How to Pick the Best Corn (Without Peeking)

Want the sweetest, juiciest corn? It starts at the store—or the market. Here's how to choose the best ear without pulling back the husk.

✅ Pro Tip: Don’t peek under the husk. It may seem harmless, but it dries out the corn quickly. And if you don’t buy it, you’ve just damaged someone else’s property—and their dinner. Trust your hands and eyes instead for the best information.

Here’s what to look for:

  • The tassel (that silky top) should be brown and slightly sticky—not black or dry.
  • The husk should be bright green, tightly wrapped, and feel moist—not wilted or yellowing.
  • Check for wormholes—tiny brown holes near the top. If you see one, keep moving.
  • Feel for fullness—the kernels should be even and plump under the husk.

✅ Pro Tip: Don’t buy too far ahead. The longer corn sits, the more it deteriorates. Store at room temperature for a day, or refrigerate for a few days to preserve the sweetness.

👨‍🍳 Other Easy Ways to Cook Corn on the Cob


🔸 Oven-Roasted Corn (in the husk)

  • Prep the corn like you would for the microwave—trim loose husk and silk, but don’t peel.
  • Place directly on the oven rack at 350°F.
  • Roast for 30 minutes, leaving space between ears.

🔸 Boiled Corn (classic method)

  • Remove the husk and silks.
  • Drop into boiling water—no salt, or the kernels may toughen.
  • Cover the pot, return to a boil, and cook for 3–5 minutes until tender.

🔸 Grilled Corn

Check out my full guide to Grilled Corn on the Cob for the details.

🍽️ What to Serve With Microwave Corn

This quick corn is the perfect side for summer meals—especially anything off the grill. Pair it with grilled burgers, grilled chicken, or grilled drumsticks, and you’re set.

❓FAQs

Can I microwave corn without the husk?

Yes. If your corn is already husked, wrap each ear in a damp paper towel to keep it from drying out, then microwave about 3–4 minutes per ear.

Can I stack the corn in the microwave?

Not recommended. Microwave 1–4 ears in a single layer—do not stack them, which can cause uneven cooking. For more than 4 ears, cook in batches.

Can I store leftover cooked corn on the cob?

Yep. Let it cool, then refrigerate in an airtight container for up to 3 days. Reheat in the microwave wrapped in a damp paper towel for 30–60 seconds.

📖The Recipe Card

corn on the cob in serving trays B
Print Recipe Add to Collection Go to Collections
5 from 4 votes

Microwave Corn on the Cob in the Husk (Easy, No Shucking Needed)

Microwave corn on the cob in the husk for tender sweet corn in just minutes. No shucking, boiling, or mess—just an easy foolproof method.
Prep Time1 minute min
Cook Time4 minutes mins
Total Time9 minutes mins
Course: Vegetable
Cuisine: American
Keyword: how long to microwave corn on the cob in husk, microwave corn in husks, microwave corn on the cob in hushs
Servings: 1 servings
Calories: 77kcal
Author: Dan Mikesell AKA DrDan

Ingredients

  • 1–4 ears Corn on the cob in the husk
  • Salt and pepper to taste
  • Butter
US Customary - Convert to Metric

Instructions

Prepare the corn

  • Start with 1 to 4 ears. Trim back the stalk—not too much, just enough to clean it up while keeping the husk intact.
    trim stalk off corn
  • Trim off most of the silk and loose outer husk at the top, but keep the corn husk intact.
    trimming the slik off the top

Microwave on high

  • Place the ears in a single layer in the microwave. Cook on high for 4 minutes per ear (2 ears = 8 minutes, etc.).
    two ears of corn in microwave

Cut and loosen the husk

  • Carefully remove with a hot pad. Using a sharp chef’s knife, cut off the bottom of the ear, including a row or two of kernels, to fully detach the husk. The husk must not have any attachment left to the bottom of the ear of corn.
    cut off end of corn
  • Slide the knife between the ear of corn and the husk and cut two slits opposite each other through the husk 3 inches long.
    sliding the knife under the husk

Squeeze and serve

  • Squeeze the corn out of the husk. The silk will stay with the husk.
    squeeze corn out of husk 2
  • Serve hot with salt, pepper, and butter to taste.
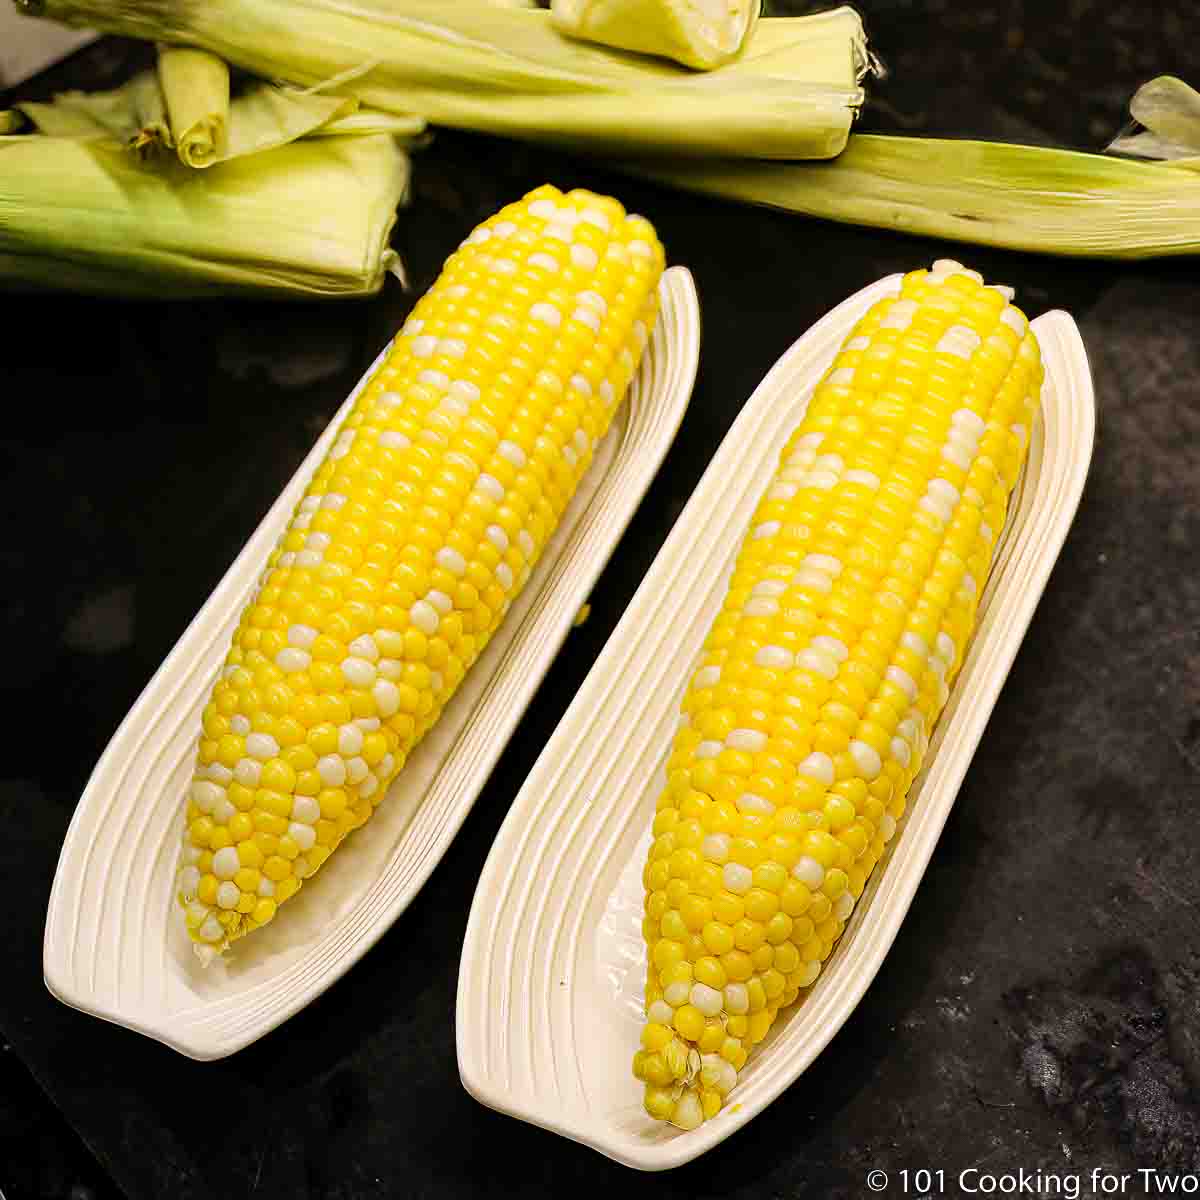
    two ears of corn in trays

Notes

Pro Tips

  1. This technique is good for 1-4 ears of corn. If you need more, you can batch-cook them or use the oven.
  2. Calculate the time at 4 minutes per ear. So one ear is 4 minutes, and 3 ears would be 12 minutes.
  3. Use a microwave with a turntable and do not stack the ears.
  4. Use hot pads to handle the hot corn.
  5. Fresh corn can be stored at room temperature for a day or refrigerated for several days.
  6. The key to silk-free corn is: cut far enough into the base and make long side slits.
  7. The silk will come off with the husk.
Nutrition Note: The value given is for the corn. ½ teaspoon of butter and ¼ teaspoon of salt would add 18 calories and about 600 mg of sodium.


Nutrition

Calories: 77kcal | Carbohydrates: 17g | Protein: 3g | Fat: 1g | Saturated Fat: 1g | Sodium: 14mg | Potassium: 243mg | Fiber: 2g | Sugar: 6g | Vitamin A: 170IU | Vitamin C: 6.1mg | Iron: 0.5mg

Editor's Note: Originally published July 19, 2012. A guide to picking the best corn has been added and updated with expanded options, refreshed photos, and a table of contents to help navigation.

dogs on the deck.

Grilled Pork Tenderloin Sandwiches

Grilled pork tenderloin sandwich on a plate.

These easy and quick grilled pork tenderloin sandwiches are a great change of pace for a family lunch or dinner. It takes only a few minutes to make pork tenderloin cutlets, season them, and grill them. They're a perfect change of pace from burgers or chicken on the grill.

🐖Ingredients

Pork tenderloin—not pork loin
Dry rub—a Memphis dry rub is in the recipe but use the dry rub or seasoning of your choice.
Serving—buns, BBQ sauce, cheese, red onion

Grilled pork tenderloin sandwich on a plate.
[feast_advanced_jump_to]

I love pork tenderloin sandwiches. I'm from Iowa, and it is in our blood. However, Iowa Pork Tenderloin sandwiches are not grill-friendly due to the breading. It is time for a change-up by using pork tenderloin cutlets and seasoning for a quick and easy lunch or dinner.

👨‍🍳How to Make Grilled Pork Tenderloin Sandwiches—Step-by-Step Photo Instructions

Trimmed pork tenderloin on a black board.

1. Trim a pork tenderloin and cut into 6 to 8 slices of 1 to 1¼ inch, except the thin tail should be about twice as long and the thick end a little less.

Flattening pork tenderloin with a meat mallet.

2. Flattern to slices of pork tenderloin into fillets about ¼ to ½ inch thick. Butterfly the thin tail before thinning.

ingredients for Memphis rub.

3. Mix the Memphis Dry Rub or other seasoning.

Sprinkling seasoning on the pork slices.

4. Apply seasoning liberally to both sides of the filets.

Flattened pork tenderloin on a gas grill.

5. Grill at 450°, flipping every 4-5 minutes.

A pile of pork tenderloin fillets.

6. Cook to an internal temperature of 145°-150°—about 10 minutes.

For more details, keep reading. See the Recipe Card below for complete instructions and to print.

🔪Preparing the pork tenderloin cutlets

Slice the trimmed pork tenderloin into 1-inch slices–you should have 6-8, depending on the size. The thin tail end should be cut 2 inches, then cut part way through in the middle and folded over before flattening. Try to keep the amount of meat in each piece about equal.

Flatten the slices of pork tenderloin with a meat mallet in a thick bag to prevent splatter. Be sure the cut edges are up or down so the cutlet is "across the grain."

I suggest a thickness of ¼ to ½ inches. Thicker may take longer to cook, but it gives more surface area for seasoning and grilling taste.

🤔Tips and options

This recipe needs a medium grill surface temperature of 450°-500°, about medium or a bit more on a gas grill. You can also use a charcoal grill but must control the temperature—please check my tutorial about Grill Temperature.

Place over direct heat and cook for about 4-5 minutes per side to an internal temperature of 145°-150°. Always cook to a final temperature, not by time.

A closed grill lid is preferred, but if you know your surface temperature, you can use an open lid since the cultets are thin.

🧂Season the pork tenderloin filets.

I highly suggest the custom Memphis rub covered in the recipe card, but any rub or seasoning will work. Some rubs to try are my BBQ Dry Rub for Ribs, Pork, Beef, and More and Chipotle Seasoning Recipe.

Since it is pork, you can season it like pork chops or pork tenderloin with other herbs and spices.

😊Other Sandwich Recipes

Check out some other sandwiches, such as Grilled Chicken Sandwiches, Leftover Beef Tenderloin Philly Sandwiches, How to Cook Ham Steak, Iowa Breaded Pork Tenderloin Sandwiches, and Oven Fried Pork Tenderloin Sandwiches.

🍽️Serving

Like its breaded cousin, a hamburger bun with some mayonnaise goes well with the spice, as do other burger toppings like pickles or tomato slices.

I love to match the Memphis rub with thicker and sweeter BBQ sauce. You can use the barbecue sauce of your choice, but I use my sweet and tangy Memphis-style BBQ Sauce.

Side dishes should be traditional picnic dishes. Try some Baked Beans, Baked French Fries, Cold Macaroni Salad, Microwave Corn on the Cob, or Mac and Cheese.

❄️Storing leftovers

After cooking, refrigerate for up to 4 days and freeze for 3-4 months. Reheat in a convection oven or air fryer. A microwave could be used, but it will affect the texture, so I do not recommend it.

❓FAQs

How to make the cutlets ahead.

The cutlets can be made ahead for cooking later. They can be stored in an airtight container for 2 days in the refrigerator or 3 months in the freezer. To cook, thaw overnight in the fridge. If frozen, season and cook according to the recipe.

Can I use pork loin?

Thin slices of pork loin could also be called pork chops. So, yes, you can grill them, and if thin, they would cook about the same as pork tenderloin cutlets.

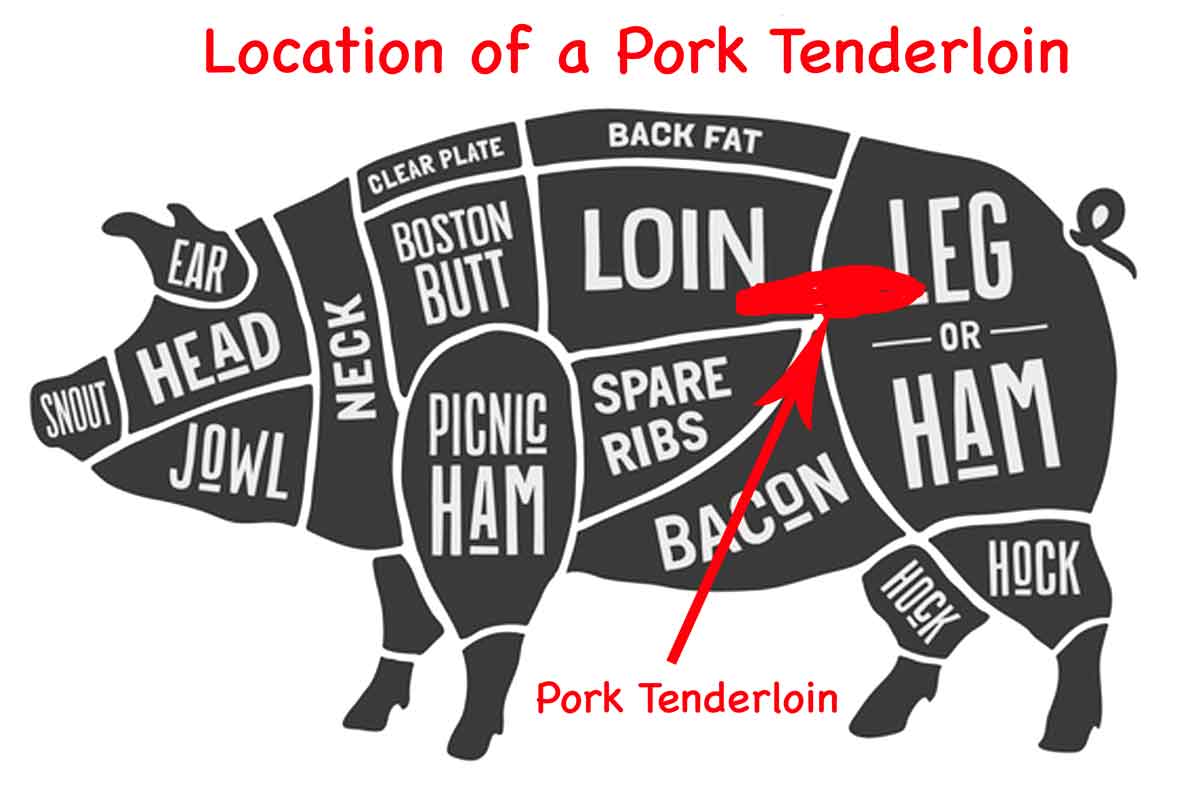
🐖Pork Tenderloin is Not Pork Loin

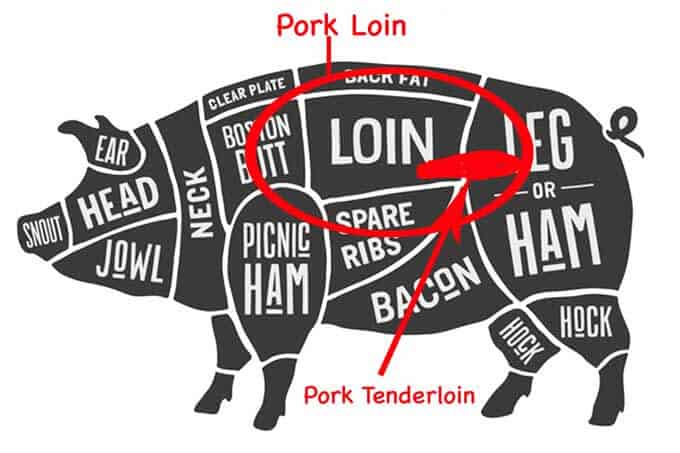
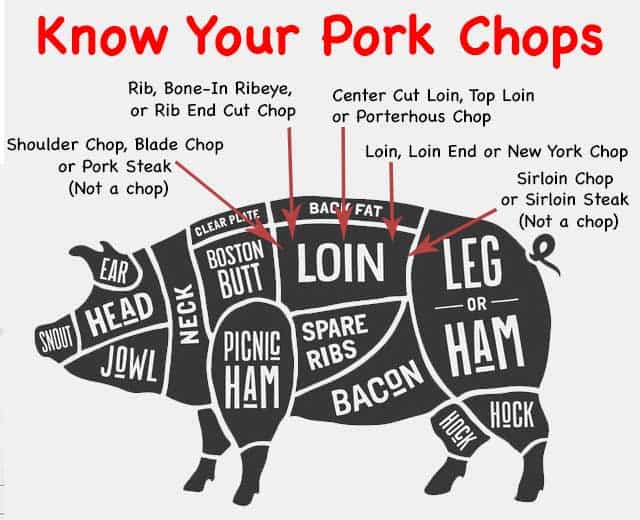
First, be sure you have pork tenderloin, not pork loin. For some reason, this is a common confusion. Pork tenderloin and pork loins are different cuts of pork.

A single tenderloin is usually about 1½ pounds. Some are 1 pound, but I don't think I have seen a 2-pound tenderloin. Also, the diameter is about 1½ inches.

graph showing pork loin vs tenderloin- licensed from Fotolia May 16,2017. Copyright foxysgraphic - Fotolia. Modifed per allow by licensed.
Showing pork loin vs. tenderloin- licensed from Fotolia May 16, 2017. Copyright foxysgraphic - Fotolia. Modified per allow by licensed.

📖The Recipe Card

Grilled pork tenderloin sandwich on a plate.
Print Recipe Add to Collection Go to Collections

Grilled Pork Tenderloin Sandwiches

These easy and quick grilled pork tenderloin sandwiches are a great change of pace for a family lunch or dinner. It takes only a few minutes to make pork tenderloin cutlets, season them, and grill them. They're a perfect change of pace from burgers or chicken on the grill.
Prep Time15 minutes mins
Cook Time10 minutes mins
Total Time25 minutes mins
Course: Main Course
Cuisine: American
Keyword: Grilled Pork Cutlets, Grilled Pork Tenderloin Sandwiches
Servings: 6
Calories: 167kcal
Author: Dan Mikesell AKA DrDan

Ingredients

  • 1 pork tenderloin trimmed

Memphis Dry Rub- you may have leftover.

  • 2 tablespoons paprika
  • 1 tablespoon brown sugar
  • 1 tablespoon kosher salt
  • 1 teaspoon black pepper
  • ½ teaspoon chili powder
  • ¼-1/2 teaspoon cayenne pepper
  • ½ teaspoon dry mustard
  • ½ teaspoon garlic powder
  • ½ teaspoon onion powder
US Customary - Convert to Metric

Instructions

  • Preheat grill to 450° which is medium to medium-high on most grills. Clean and oil grill.
    clean and oil grill crates
  • Trim any fat and silver skin from the tenderloin. Cut into 6 to 8 slices of 1 to 1¼ inches, except the thin tail should be about twice as long and the thick end a little less.
    trimmed pork tenderloin on a black board
  • Place the pieces one at a time into a thick plastic freezer bag, place on a solid surface with the cut edge facing up/down, and pound into flat cutlets about ¼-½ inch thick. With the thin end, place the cut edge down and hand press down on the piece to flatten, then pound into shape.
    flattening pork tenderloin with a meat mallet
  • Mix the Memphis Dry Rub: 2 tablespoons paprika, 1 tablespoon brown sugar, 1 tablespoon kosher salt, 1 teaspoon black pepper, ⅓ teaspoon chili powder, ¼-½ teaspoon cayenne pepper, ½ teaspoon dry mustard, ½ teaspoon garlic powder, and ½ teaspoon onion powder.
    ingredients for Memphis rub
  • Apply the spice mix (or seasoning of your choice) liberally to both sides of the cutlets. You will have some seasoning leftover, which you can store airtight for later use.
    sprinkling seasoning on the pork slices
  • Place over direct heat and cook for about 4-5 minutes per side to an internal temp of 145°-150°. Always cook to a final temperature and not by time.
    flattened pork tenderloin on a gas grill

Notes

Pro Tips:

  1. This recipe uses a medium grill with a surface temperature of 450°F. It still cooks fast, so watch closely.
  2. Be sure you are using pork tenderloin and not pork loin. It will be very tough with pork loin.
  3. When cutting the pieces of pork, try to keep the amount of meat about equal.
  4. Flatten with a meat mallet in a thick bag to prevent splatter. I suggest a thickness of ¼ to ½ inch. Thicker takes longer to cook, thinner gives more surface area for seasoning and grilling taste.
  5. Use the seasoning you want.
  6. Cook to 145° to 150°. Over that will dry and under does not meet FDA safety standards.
  7. Store uncooked leftovers refrigerated for up to 2 days or frozen for 2-3 months. After cooking, refrigerate for 3-4 days or freeze for 3 months.

Nutrition

Calories: 167kcal | Carbohydrates: 2g | Protein: 20g | Fat: 3g | Saturated Fat: 1g | Polyunsaturated Fat: 0.4g | Monounsaturated Fat: 2g | Cholesterol: 63mg | Sodium: 896mg | Potassium: 372mg | Fiber: 0.2g | Sugar: 2g | Vitamin A: 4200IU | Vitamin C: 1.7mg | Calcium: 10mg | Iron: 1.3mg

Based on my Memphis pork tenderloin, which has been one of my top recipes for years. This is a quick version of that recipe that will leave them all begging for more.

Originally Published March 25, 2011. Updated with expanded options, refreshed photos, and a table of contents to help navigation.

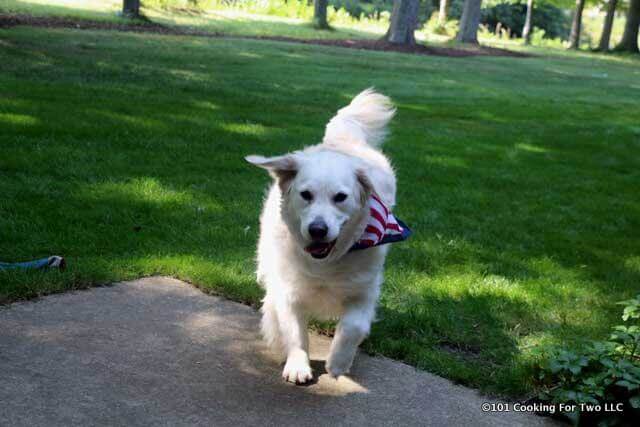
Molly Dog Running with a flag bandana in the green grass.

Dogs in Snow - Just for Fun

Dogs in Snow 1
Dogs in Snow 1 running hard
Blue ribbon divider used for visual effect

After a month of 21 posts (I usually do 4-6), it is time for a little fun. I was getting ready for the Valentine's Day post with recipe recommendations and started to look for a dog picture from the last few weeks. The best was this series of puppy play. I could not pick just one. So you get a series of nine all in order just for fun.

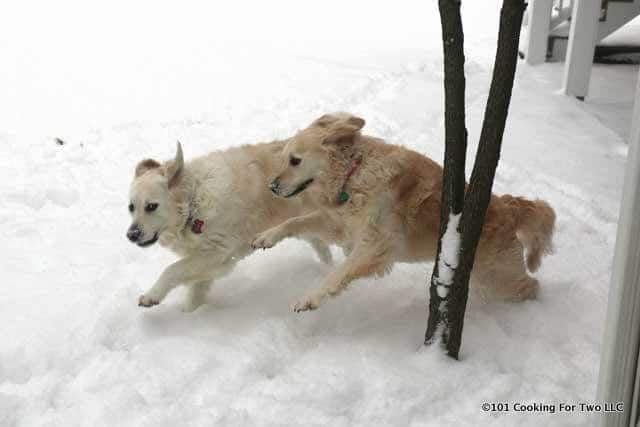
Please enjoy Lilly and Molly romping in the snow.

Dogs in Snow 2
Dogs in Snow 3
Dogs in Snow 4
Dogs in Snow 5
Dogs in Snow 6
Dogs in Snow 7
Dogs in Snow 8
Dogs in Snow 9

Watch for the Valentine Day post coming tomorrow.

Last updated

February 10, 2018

Retirement

Dog walking with dogs on leash

Well, it is a change of life stage time. It is with mixed emotions that I retired from the practice of pediatrics today. While I have greatly enjoyed my 38 years of working with children, there comes a time to move on. I set the date five years ago with my wife, it turns out it is the correct time for many more reasons.

Dog walking time DrDan with Lilly and Molly Dogs on Leash
Dog walking time. Into the sunset so to speak.
Blue ribbon divider used for visual effect

I'm looking forward to sleeping past 6:30, not having late quick dinners due to being tied up at the office. But mostly I look forward to time with the love of my life, my wife. And having the energy to do things with her and the family.

For you the readers, I will still be around... maybe more. I have been posting about one recipe per week for the last year due to time and energy restrictions. I think it will increase, but there will also be some pauses with a skipped week occasionally. As they say, it will be what it will be.

image of Shoreline Plate

Blogging is still enjoyable and a great hobby for me. So I'm now a "full-time" food blogger. Now that was not in my high school aptitude testing.

Molly and Lilly dogs with bows
It is dog training time too.
heading home with the dogs on leash

Last updated

August 31, 2016

Homemade Blackened Seasoning Recipe

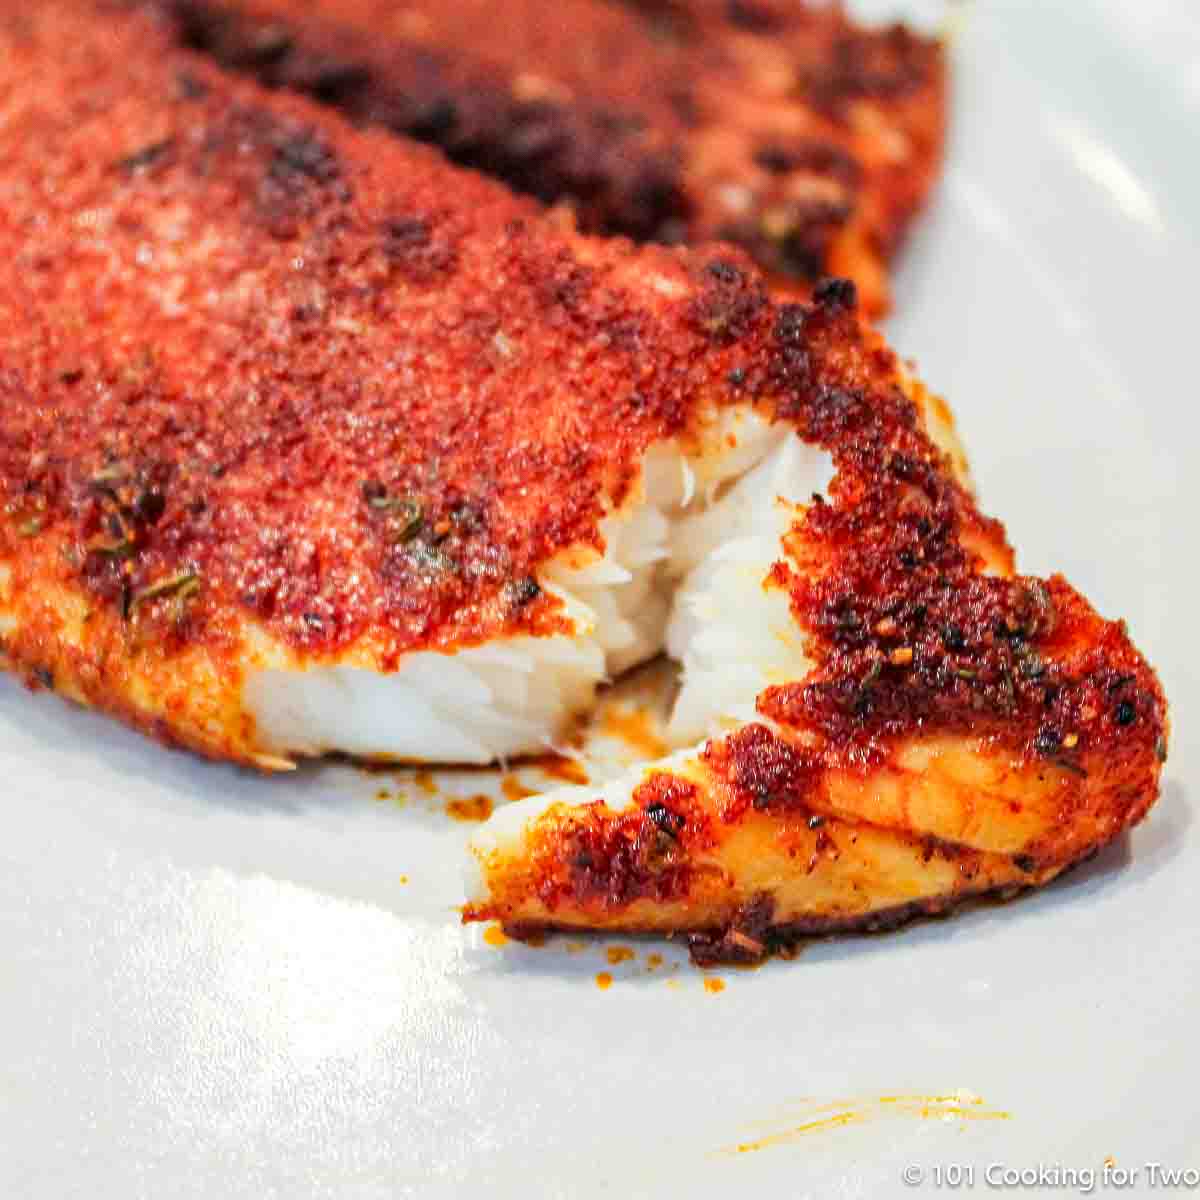
A pile of blackened tilapia on a white plate.

Why buy an expensive bottle of blackened seasoning when you can make your own with pantry spices in just a few minutes for pennies?

This homemade blackened seasoning recipe is perfect for fish, chicken, shrimp, vegetables, and more. Adjust the heat, herbs, and spices to fit your taste and make it exactly the way you like it.

🤔 Quick Answer: What Is Blackened Seasoning?

Blackened seasoning is a savory and spicy spice blend used to season fish, chicken, vegetables, and more before cooking.

  • Common ingredients: Paprika, garlic powder, onion powder, thyme, oregano, pepper, cayenne pepper, and salt. Adjust ingredients to fit your taste.
  • Heat level: Can range from mild to very spicy depending on the amount of cayenne pepper.
  • Common uses: Fish, chicken, shrimp, steak, and vegetables.
A pile of blackened tilapia on a white plate.
Grilled Blackened Tilapia
[feast_advanced_jump_to]

quote mark
Featured Comment from Vonnie :
⭐⭐⭐⭐⭐
"Great flavor!! I added more heat and less salt, but dang this was yummy! Thank you for this recipe!!"

🤔 TL;DR—Recipe Summary

What is it? A homemade blackened seasoning recipe made with pantry spices for fish, chicken, vegetables, and more.

Why you'll love it? Costs much less than store-bought seasoning blends, lets you control the heat level, and allows you to adjust the herbs and spices to make it your own.

How to make it? Measure the spices, mix them together, adjust the cayenne pepper if desired, and store in an airtight container.

🧂Ingredients

spices for blackening seasoning.
  • Paprika — sweet or smoked paprika
  • Onion powder
  • Garlic powder
  • Oregano
  • Thyme
  • Cayenne pepper — adjust for mild or spicy heat
  • Kosher salt
  • Black pepper — white pepper may also be used

♨️ What Is Blackened Seasoning and Blackening?

Blackened seasoning is a savory, spicy blend of common spices. While there is no single "correct" blackened seasoning recipe, most include paprika, garlic powder, onion powder, oregano, thyme, pepper, cayenne pepper, and salt.

Blackening is more than just a spice mix. It is a high-heat cooking technique that uses a generous coating of seasoning and usually butter to create a flavorful, dark crust. While you may enjoy sprinkling blackened seasoning on a salad, that is not blackening.

Blackened seasoning overlaps with both Cajun and Creole seasoning blends, and they are often considered variations of the same thing. In general, Cajun blends tend to be spicier, Creole blends often contain more herbs, and blackened seasoning falls somewhere in the middle.

Blackened seasoning is commonly used with fish, shrimp, chicken, and vegetables.

👨‍🍳 Adjust the Heat and Flavor

The main variable is the cayenne pepper. I suggest a range of ¼ to 1 teaspoon. About ¼ teaspoon gives mild heat (2/10), ½ teaspoon is medium (5/10), and 1 teaspoon is moderately hot (7–8/10). I usually use ½ teaspoon.

Making your own blackened seasoning lets you customize it to your taste. Use smoked paprika for a smoky flavor, add extra garlic or pepper, substitute white pepper for black pepper, or increase the cayenne for more heat. If you don't like oregano or thyme, reduce them or leave them out.

Store the seasoning in an airtight container in a cool, dark place. A spice shaker works well for easy use.

🥣 Ways to Use Blackened Seasoning

The most common uses for blackened seasoning are fish, shrimp, chicken, and vegetables. It also works well on salmon, pork, and beef, including steaks.

For traditional blackening, coat the food generously with butter and seasoning, then cook over high heat to create a flavorful crust.

But don't limit yourself to blackening—you can use this seasoning blend anywhere you want a savory, spicy flavor boost.

baked Blackened Tilapia.
Oven-Baked Blackened Tilapia

👍 Storage

Store homemade blackened seasoning in an airtight container, such as a spice jar or shaker bottle, in a cool, dark place.

  • A smaller container leaves less air around the spices and helps preserve flavor.
  • Heat, light, and moisture will shorten the life of the seasoning.
  • For the best flavor, use within 6 months, although it will usually remain usable longer.
  • Do not refrigerate or freeze. Condensation can introduce moisture and reduce quality.

📖 Other Homemade Spice Mixes

I love homemade seasoning blends. We use All Purpose Seasoning every day. My Chipotle Seasoning Recipe is a versatile season for chicken, salad, and more. Marlowe's Black Magic Seasoning is a classic Southern seasoning. We also use homemade dry rubs, like 8:3:1:1 Dry Rub and Memphis Dry Rub.

📖The Recipe Card

A pile of blackened tilapia on a white plate.
Print Recipe Add to Collection Go to Collections
5 from 1 vote

Homemade Blackened Seasoning Recipe

Homemade blackened seasoning uses pantry spices to create a flavorful blend for fish, chicken, vegetables, and more. Adjust the cayenne pepper to make it mild or spicy.
Prep Time10 minutes mins
Cook Time0 minutes mins
Total Time10 minutes mins
Course: American
Cuisine: American
Keyword: Blackening Seasoning, Cajun Seasoning, Homemade Blackening Seasoning
Servings: 18 teaspoons
Calories: 5kcal
Author: Dan Mikesell AKA DrDan

Ingredients

  • 2 tablespoons paprika
  • 2 teaspoons onion powder
  • 1 ⅓ teaspoon kosher salt
  • 1 teaspoon pepper
  • 1 teaspoon garlic powder
  • 1 teaspoon oregano
  • 1 teaspoon thyme
  • ¼-1 teaspoon cayenne pepper
US Customary - Convert to Metric

Instructions

  • Mix two tablespoons paprika, two teaspoon onion powder, 1 ½ teaspoons of kosher salt, and one teaspoon each of garlic powder, thyme, oregano, and black pepper. The range for cayenne pepper is ¼ to 1 teaspoon.
    Homemade Blackened Seasoning from 101 Cooking for Two
  • Store in an airtight container.

Notes

Pro Tips

  1. Great for fish, chicken, or vegetables. Can be used any place you want an nice spicy taste.
  2. By doing this yourself, you get to make the adjustments you want. Use smoked paprika, more garlic, or white pepper. Don't like oregano or thyme, take them out.
  3. The main variable is the cayenne pepper. I offer a suggested range of ¼ to 1 teaspoon. My estimate is ¼ teaspoon is about 2/10 heat. While ½ teaspoon will be about 4-5/10. A full teaspoon will be 7-8/10. I generally use ½ teaspoon.
  4. I put mine in an airtight shaker from Penzeys Spices. Be sure to seal tight.
  5. It should be good if sealed well for months like normal spices.

Nutrition

Calories: 5kcal | Carbohydrates: 0.3g | Protein: 0.05g | Fat: 0.01g | Saturated Fat: 0.004g | Polyunsaturated Fat: 0.004g | Monounsaturated Fat: 0.002g | Sodium: 89mg | Potassium: 5mg | Fiber: 0.1g | Sugar: 0.1g | Vitamin A: 400IU | Vitamin C: 0.2mg | Calcium: 3mg | Iron: 0.2mg

Based on an Aaron MaCorgo Jr (Food Networks “Big Daddy”) recipe.

Editor's Note: Originally Published May 18, 2016. Updated with expanded options, refreshed photos, and a table of contents to help navigation.

Happy dogs walking in grass.

Grilled Apricot-Glazed Pork Chops

Apricot Glazed Grilled Pork Chops on blue plate

These Grilled Apricot Glazed Pork Chops are moist and tender with a tangy apricot balsamic glaze you will love—a perfect easy change of pace weeknight dinner.

🐖Ingredients

Pork chops—boneless or bone-in, one inch thick
Optional Brine—water and salt
Apricot Glaze—apricot jam, balsamic vinegar. olive oil
Salt and pepper

Apricot Glazed Grilled Pork Chop with green beans.
[feast_advanced_jump_to]
Blue ribbon divider used for visual effect

Featured Comment from Erin: "Five stares. Great and very easy glaze recipe."

I love a nice grilled pork chop. But pork can lack a little taste, so these apricot pork chops with a fruity balsamic glaze are a great change of pace.

A simple optional brine made the chops super moist and tender. Use either boneless or bone-in chops and either a gas or charcoal grill.

👨‍🍳How to Make Apricot Glazed Pork Chops—Step-by-Step

thick pork chops with apricot jam and seasonings,

1. Only a few ingredients. My wife likes garlic in the brine. It is not in the recipe, but add ½ teaspoon to the brine if you want to try it.

adding a pork chop to a bag of brine.

2. Start with a brine of two cups of cold water and one tablespoon of salt. Add pork chops and refrigerate for 1-2 hours.

mixing apricot glaze in small bowl.

3. Preheat the grill to a surface temperature of 450°. Clean and oil well. Mix the glaze of two tablespoons of apricot jam, one teaspoon of good-quality balsamic vinegar, and one teaspoon of olive oil.

brusing glaze on raw pork chops on gray plate.

4. Remove pork from the brine, rinse under running water, and pat dry. Give them a light sprinkle of pepper, then brush lightly with the glaze if you skipped the brine and a bit of salt.

brushing pork chops with more glaze while on the grill.

5. Place over direct heat for five minutes, then flip. Flip again in 5 minutes and brush with glaze. Flip every 5 minutes and brush with glaze until an internal temperature of 140°-145°—about 15-20 minutes.

tenting pork chops on orange plate with foil.

6. Remove from grill, tent lightly with foil, and allow to rest 5 minutes before serving.

For more details, keep reading. See the Recipe Card below for complete instructions and to print.

⏰How long does it take to grill pork chops

Grilling time is mostly thickness-related. A ¾ inch thick chop may only be about 10 minutes on a grill surface of about 450°. A 1-inch thick chop takes about 12-14 minutes, and a 1 ½ inch may take up to 20 minutes.

I like to cook pork chops to 145°-150°. My wife dislikes pink pork, so I tend to go a little higher to 155°. The FDA recommends a minimum of 145 ° with a 3-minute rest.

A bone-in chop may take a bit longer than a boneless one. Also, the starting temp of the chop and the exact grill temperature will have large effects. As always,

COOK TO THE FINAL INTERNAL TEMPERATURE AND NEVER BY TIME ALONE.

piece of pork chop on a fork.

Pork Chop Recipes

While this is a great-tasting recipe, if it is not what you need on the grill, check out How to Grill Pork Chops. Or fire up the slow cooker for Crock Pot Pork Chops or Crock Pot Apple Pork Chops.

If you prefer the great taste of stovetop or baked chops, check out Pan Seared Oven Roasted Pork Chops, Fried Pork Chops with Gravy, or Breaded Pork Chops in the Oven. And for those 2-inch or thicker chops, use How to Cook Thick Pork Chops.

Should I brine pork chops?

Brine is used to add moisture to many types of meat. While brining is optional, it is highly recommended for grilled pork chops.

A standard pork brine is 2 cups of water with 1 tablespoon of table salt. 1 teaspoon table salt = 1 ½ teaspoon Morton kosher salt = 2 teaspoons Diamond Crystal kosher salt.

Most will add sugar to the brine at about the same amount as the salt. Other flavors, like garlic, can be added.

Be sure to rinse the meat under running water after the brine. Never add seasoning with more salt if the meat has been brined.

You can skip the brine for speed, but it does add some moisture and avoids that "dry pork" thing that is easy to get. But you can still get moist results if you grill carefully and don't overcook or use too high of a temperature.

Apricot Glaze

The simple apricot glaze combines apricot jam, balsamic vinegar, and some olive oil. All the ingredients must be of good quality, especially the balsamic, since poor quality in the glaze will ruin the meal.

This recipe uses apricot jam, but you can use a different flavor. Jam usually has a lot more sugar than preserves. If you use preserves, add some brown sugar to the glaze.

Serving

Serve with grilled side dishes, like Corn on the Cob, Grilled Baby Potatoes, Grilled Biscuits, and Grilled Mixed Vegetables.

Storage of leftovers

Store leftovers in an airtight container. Refrigerate for 4 days or freeze for 3 months.

FAQs

Should I trim the fat on pork chops?

There is usually a layer of fat on the edge of a chop. You can trim it if you want, but many think it adds some flavor and helps prevent drying.

If it is over ¼ inch, I suggest trimming it to ¼ inch thick. Also, it should be scored every inch to prevent cupping.

What grill temperature to use for grilling pork chops?

The grill should be 450°-500° surface temperature. That is usually a bit above medium on most gas grills. If you have questions about grill setup, see my guide to controlling your grill temperature.

This should work fine on a charcoal grill and a gas grill. Just get the heat down a little from the maximum.

🐖About Pork Chops

Pork chop choices can be a bit confusing. I have listed five types of chops, but only the middle three should be considered "real" chops and will all cook the same. The other two "chops," the shoulder and the sirloin chop, do not cook the same and, to me, should be avoided.

graphic for pork chop location - Image licensed May 17, 2017, from Fotolia. Copyright by foxysgraphic - Fotolia. Image modified in accordance with the license.
Image licensed from Fotolia. Copyright by foxysgraphic - Fotolia. The image was modified under the license.

Bone-in or boneless chops are both good. So people think bone-in will be moister and taste better. I don't feel there is a significant difference. But bone-in does take a bit longer to cook.

Blue ribbon divider used for visual effect

This recipe is listed in these categories. See them for more similar recipes.

Grill Recipes, Pork Chop and Loin Recipes, Pork Recipes

Have you tried this recipe, or have a question? Join the community discussion in the comments.

📖The Recipe Card

Apricot Glazed Grilled Pork Chops on blue plate
Print Recipe Add to Collection Go to Collections
4.50 from 4 votes

Grilled Apricot Glazed Pork Chops

These Grilled Apricot Glazed Pork Chops are moist and tender with a tangy apricot balsamic glaze you will love—a perfect easy change of pace weeknight dinner.
Prep Time10 minutes mins
Cook Time18 minutes mins
Total Time28 minutes mins
Course: Main Course
Cuisine: American
Keyword: Apricot Pork Chops, Glazed pork chops
Servings: 2
Calories: 281kcal
Author: Dan Mikesell AKA DrDan

Ingredients

  • 2 pork chops one inch thick

Optional Brine

  • 2 cups water
  • 1 tablespoons salt

Apricot Glaze

  • 2 tablespoons apricot jam
  • 1 teaspoon balsamic vinegar
  • 1 teaspoon olive oil

Instructions

  • Start with a brine of 2 cups cold water and one tablespoon salt. You can add other things to the brine if you want. Add pork chops and refrigerate for 1-2 hours.
    adding a pork chop to a bag of brine
  • Preheat the grill to a surface temperature of 450°. Just above medium, usually. Clean and oil well.
    clean and oil grill crates
  • Mix the glaze of two tablespoons of apricot jam, one teaspoon of good-quality balsamic vinegar, and one teaspoon of olive oil.
    mixing apricot glaze in small bowl
  • Remove pork from the brine, rinse under running water, and pat dry. Give them a light sprinkle of pepper, then brush lightly with the glaze if you skipped the brine and a bit of salt.
    brusing glaze on raw pork chops on gray plate
  • Place over direct heat for five minutes, then flip. Flip again in 5 minutes and brush with glaze. Continue to flip every 5 minutes and brush with glaze until an internal temperature of 140°-145°—about 15-20 minutes.
    brushing pork chops with more glaze while on the grill
  • Remove from grill, tent lightly with foil, and allow to rest 5 minutes before serving.
    tenting pork chops on orange plate with foil

Notes

Pro Tips

  1. A brine will add moisture but is optional. You can have good results without it if you don’t overcook and don’t have your grill too hot.
  2. I prefer a pork chop that is about 1-inch thick. Either bone-in or boneless is fine. Bone-in may take a few minutes more to cook.
  3. If there is a rim of fat around the chop, trim it down to about ½ inch thick and score it all the way through about every inch.
  4. Cook to 145°-150° internal temperature.
  5. If you use preserves instead of jam, you will want to add a bit of brown sugar to the glaze.

Nutrition

Calories: 281kcal | Carbohydrates: 14g | Protein: 29g | Fat: 11g | Saturated Fat: 4g | Cholesterol: 90mg | Sodium: 771mg | Potassium: 518mg | Fiber: 1g | Sugar: 9g | Vitamin A: 41IU | Vitamin C: 2mg | Calcium: 9mg | Iron: 1mg

Editor's Note: Originally Published July 18, 2015. Updated with expanded options, refreshed photos, and a table of contents to help navigation.

Can Luke come out to play.
Can Luke come out to play

Crock Pot Mexican Casserole with Chicken

Mexican pasta casserole on a spoon.

This easy Crock Pot Mexican Casserole is packed with tender pasta, chicken, black beans, and a spicy Southwest sauce loaded with cheese. Easy to make in almost any size crock pot with raw chicken, dry pasta, and pantry ingredients.

Ingredients

Chicken breasts
Pasta
Shredded cheese—Mexican blend or cheddar cheese
Spices—chili powder, garlic powder, salt, pepper
Pantry—tomato sauce, black beans, RoTel

Mexican pasta casserole on a spoon.
[feast_advanced_jump_to]
Blue ribbon divider used for visual effect

We all need a few easy meals we can make and get a few meals. It is even better if it has excellent Southwest flavors and is a healthy meal that is low in calories and fat.

This Tex-Mex crock pot chicken pasta casserole takes almost no skill. Just open a few cans and shred a chicken breast. Or you can even skip the shredding by using rotisserie chicken or try my freezer burn chicken recipe.

How to Make Mexican Casserole in a Crock Pot—Step-by-Step

ingredients for Southwest Chicken Casserole.

1. Trim two skinless boneless chicken breasts of any visible fat.

adding dry pasta to a crock pot with tomato sauce.

2. Add one 14 oz can tomato sauce, 14 oz can black beans rinsed, 10.5 oz can of Rotel, 1 teaspoon chili powder, ½ teaspoon garlic powder, ½ teaspoon salt, ¼ teaspoon pepper, and 1 cup dry pasta (uncooked) to a 3 to 4 quart or larger crock pot.

adding pieces of raw chicken to the cork pot with sauce and pasta.

3. Add two trimmed chicken breasts. Push down into the liquid until covered.

shredded chicken on a black board.

4. Cook on low for 4 hours total. At 3 hours into the cooking, remove the chicken and shred.

mixing shredded chicken and cheese into crock pot.

5. Add chicken with ¾ cup shredded Mexican mix or cheddar cheese to the crock pot. Mix well, then top with ¼ cup of the cheese.

cheesy chicken casserole on a large spoon over the crock pot.

6. Cook for the final hour, or the pasta is tender but not overcooked.

For more details, keep reading. See the Recipe Card below for complete instructions and to print.

🐓Can I use rotisserie or other chicken?

You could use previously cooked chicken like a rotisserie chicken. You need about 2-3 cups of shredded chicken. It is a casserole, so you can vary that amount for your tastes and the amount you have.

You do not want that already cooked chicken cooking for an additional 4 hours—it will dry out. Add it near the end with the cheese.

I suggest two raw, boneless skinless chicken breasts. They can go into the dish raw and be shredded near the end of cooking. You could use chicken thighs also.

cheesy chicken casserole on a white plate.

Mexican Casserole Recipes

Don't miss these other delicious Mexican casseroles. Start with one of my favorite beef recipes, Taco Casserole. For other chicken recipes, see Sour Cream Chicken Enchiladas, Chicken Enchilada Casserole, or Crock Pot Chicken Enchilada Casserole.

↕️How to make this a "for two" or "family size " recipe

This recipe will make 6 servings of about 1 ½ cups in my 3 ½ quart crock pot. I suggest a 3 to 4-quart crock pot, but a larger crock pot may be used, but it may cook a little faster.

A half recipe may be made in a 2-quart mini crock pot, and a double recipe needs 6 quarts or larger.

  1. Use the recipe card and adjust the number of servings to half or double.
  2. Use the amount of ingredients in the ingredient list, not the instructions—those do not adjust.
  3. The half recipe will fit in a 2-quart mini crock pot.
  4. A double recipe fits in a 6-quart or larger crock pot.
  5. Cook until the pasta is tender, probably longer for double and less for mini crock pot size.

How to adjust the heat

As written, the heat is about 3-4 out of 10—a little too spicy for little ones.

Most of the heat comes from the Rotel. You may use a can of drained diced tomatoes or mild salsa to replace it. That will leave the dish a bit bland, so add a small can of diced mild green chilies, add some onion or onion powder, and increase the other spices to taste.

Serving

Top with more shredded cheese, fresh cilantro, and a dab of sour cream. Slices of jalapeno, black olives, green onion, and avocado make good additions. Serve with Mexican rice, Guacamole, refried beans, corn chips, and salsa.

Storage of leftovers

Seal leftovers in an airtight container. Good refrigerated for 4 days and can be frozen for 4 months.

To reheat leftovers, thaw first overnight in the refrigerator if frozen. Reheat covered in an air fryer or oven. A microwave may be used, but it may affect the texture of the chicken.

FAQs

My chicken does not want to shred well. What can I do?

To shred easily, chicken needs to be 165°; be sure to reach it before shredding. Be sure not to use frozen chicken. Thick chicken may take longer, and some crock pots cook slower.

Blue ribbon divider used for visual effect

This recipe is listed in these categories. See them for more similar recipes.

Casserole Recipes, Crock Pot Recipes, Mexican Recipes, Mini Crock Pot Recipes, Pasta Recipes, Small Crock Pots Recipes

Have you tried this recipe, or have a question? Join the community discussion in the comments.

📖The Recipe Card

Mexican pasta casserole on a spoon.
Print Recipe Add to Collection Go to Collections
4.05 from 22 votes

Crock Pot Mexican Casserole with Chicken

This easy Crock Pot Mexican Casserole is packed with tender pasta, chicken, black beans, and a spicy Southwest sauce loaded with cheese. Easy to make in almost any size crock pot with raw chicken, dry pasta, and pantry ingredients.
Prep Time10 minutes mins
Cook Time4 hours hrs
Total Time4 hours hrs 10 minutes mins
Course: Main Course
Cuisine: Mexican, Southwest
Keyword: Chicken Casserole, Crockpot casserole, Mexican Chicken Casserole, Southwest Chicken Casserole
Servings: 6
Calories: 249kcal
Author: Dan Mikesell AKA DrDan

Ingredients

  • 2 skinless boneless chicken breasts
  • 14 oz tomato sauce
  • 14 oz black beans low sodium, rinsed
  • 10 oz RoTel
  • 1 teaspoon chili powder
  • ½ teaspoon garlic powder
  • ½ teaspoon kosher salt
  • ¼ teaspoon pepper
  • 1 cup dry pasta
  • 1 cup shredded cheese like Cheddar or a Mexican blend
US Customary - Convert to Metric

Instructions

  • Trim two skinless boneless chicken breasts of any visible fat.
    trimming chicken breasts on a white board
  • Add one 14 oz can tomato sauce, 14 oz can black beans rinsed, 10.5 oz can of Rotel, 1 teaspoon chili powder, ½ teaspoon garlic powder, ½ teaspoon salt, ¼ teaspoon pepper, and 1 cup dry pasta (uncooked) to a 3 to 4 quart or larger crock pot.
    adding dry pasta to a crock pot with tomato sauce
  • Add two trimmed chicken breasts. Push down into the liquid until covered.
    adding pieces of raw chicken to the cork pot with sauce and pasta
  • Cook on low for 4 hours total. At 3 hours into the cooking, remove the chicken and shred.
    shredded chicken on a black board
  • Add chicken with ¾ cup shredded Mexican mix or cheddar cheese to the crock pot. Mix well, then top with ¼ cup of the cheese.
    mixing shredded chicken and cheese into crock pot
  • Cook for the final hour, or the pasta is tender but not overcooked.
    cheesy chicken casserole on a large spoon over the crock pot

Notes

Pro Tips

  1. Instructions for a half recipe in a 2-quart mini crock pot or a double recipe in a 6-quart crock pot are in the post.
  2. You need about 1 to 1 ½ pounds of shredded chicken. You can use precooked chicken if you want, but the pasta will still take about 4 hours on low. Add the precooked chicken in the last hour of cooking, not at the beginning.
  3. Dry pasta in crock pot dishes is generally standard American dry pasta. Whole wheat pasta has less gluten and is more likely to turn to mush. Gluten-free even more so. So, if you use a non-standard pasta, the results may not be good. Also, since crock pots vary, the cooking time of the pasta may vary some, so check it a few times.
  4. I use the Rotel for both some tomato and spicing. It provides most of the heat. If you don't want that, use a drained can of diced tomatoes. Be sure to drain. You probably will want to up the other spices a bit and consider a small can of chopped mild chilies.
  5. This is already low-fat and low-calorie. You can skip the cheese if you want even lower numbers, but you want the cheese.
  6. Good refrigerated for 3-4 days and can be frozen for 3-4 months.

Nutrition

Calories: 249kcal | Carbohydrates: 29g | Protein: 21g | Fat: 6g | Saturated Fat: 3g | Cholesterol: 39mg | Sodium: 862mg | Potassium: 725mg | Fiber: 8g | Sugar: 4g | Vitamin A: 578IU | Vitamin C: 9mg | Calcium: 139mg | Iron: 3mg

Originally published November 23, 2014. Updated with expanded options, refreshed photos, and a table of contents to help navigation.

dogs in snow.

Introducing Molly and Lilly

Molly and Lilly playing tug

Today was a very big day here at the "cooking for two" household. The new baby girls arrived. They are English Golden Retrievers. Their bloodlines are excellent but we are not breeding or showing. The temperament and health are what we were looking for and we believe we have found that.

Molly and Lilly playing tug
My Toy
Blue ribbon divider used for visual effect

This is the start of "Bow Wow Wednesday" even though it is Thursday and I edited the title and inserted this paragraph later.

the ride home

So we trucked over to Bennington Hills Kennels in Fenton Michigan about 2 ½ hours away for puppy choosing time. We had the #1 and #3 girls reserved and believe we chose wisely... but really it would be impossible to make a mistake. On to the introductions.

Molly

Molly is lighter and will be dressed in purple.

Molly 7 weeks

Lilly

Lilly is a little more golden and will be dressed in pink.

Lilly 7 weeks

Too much cuteness not to share... more to come.

Updated
September 4, 2014

The Puppies are Coming

Jake in flowers

This is a hard post to write. We lost a much-loved member of the family last month when Jake, our 12 ½-year-old golden retrievers died of osteosarcoma of the jaw. Jake had served as the unofficial mascot of this blog, and you will find his pictures scattered around where I needed a picture for various reasons.

Jake+flowers
Blue ribbon divider used for visual effect

Jake had a hard life in many ways. He had a congenital eye issue that eventually after multiple surgeries left him blind. While going blind, he tore his ACL and needed that repaired. But ultimately he was done in by cancer. He lived an average life span for a golden and died of a common cause for golden retrievers.

We bought Jake from a back yard breeder. We were unaware of many the health problems associated with the breed and were overruled by puppy love. We have paid the price with both emotional and financial pain. Jake received all possible treatments for his ailments but better not to have the ailments to begin with.

His death has left a huge hole in our "for two" household hearts that we needed to fill. We are a "dog" house, and we are not ready to give that up. While there will never be another Jake, we are moving on. We have done our research on the health issues and have checked breeding lines. Jake's personality and temperament have converted us to golden retriever people for life.

Golden Retriver Puppies

So the puppies are on the way. Two English Golden Retriever puppies, Lilly and Molly, will arrive home in a few days. We are busy getting cages, puppy toys, dog food, dog treats and the list goes on and on. It takes a lot of energy and time to raise one dog and more than double that initially for two. But we are determined to have two wonderful dogs with separate personalities.

So to our local friends, it is socialization time. Visit this summer, just drop by for a puppy fix and some great pond fishing for the kids. Visiting dogs welcome after we are fully vaccinated.

To my blog friends and readers, you get puppy pictures... lots of puppy pictures. On one of my favorite blogs, Plain Chicken, Stephanie has Meow Monday every week. While I may not do Bow Wow Wednesday (or maybe I will), it may seem like it. Puppies and pictures do go together.

Blog notes: there may be fewer recipes for a while.

Updated
March 14, 2017

Twice Baked Potatoes for Two

twice baked potato on white plate

Simple and delicious, Twice Bake Potatoes are perfect for two or more. Creamy, cheesy, and packed with bacon and things you love—a great side dish for any meal or date night.

Easy to make ahead and freeze for later. Perfect for steak or many other meals or load on the topping, and it can be the main course.

🥔Ingredients

Potatoes—large russet only
Dairy—butter, sour cream, milk, shredded cheese
Seasoning salt and black pepper
Optional ingredients—bacon, green onion, chives, broccoli, or anything else.

twice baked potato on white plate with meal.
[feast_advanced_jump_to]
Blue ribbon divider used for visual effect

This easy twice-baked potato recipe is delicious with cheesy potatoes and your choice of additives or toppings. Make them for two or a crowd.

Take your baked potatoes to the next level with simple step-by-step photo instructions. Make them loaded twice-baked potatoes with bacon, cheese, and onion.

👨‍🍳How to Make Twice-Baked Potatoes

Special note: Pictures are for eight servings, but instructions and recipe card are written for 2 servings (one potato.) Use the serving adjustment in the recipe care to adjust for larger amounts.

potatoes with other ingredients.

Preheat oven to 400° convection or 425° conventional.

scrubing a potato under running water.

Scrub the skin well.

brushing cleaned potatoes with oil.

Brush the skin with a light coat of oil. This will help the skin not dry out and break as you scoop.

potatoes on the oven rack.

Bake for 1 hour or a little more. Be sure they are well done. If unsure, check for an internal temperature of 200° to 210°.

butter chopped up on black board.

While potatoes are cooking, combine butter, sour cream, milk, shredded cheese, seasoning salt, and pepper in a large bowl. Add optional ingredients, but do not add onion if storing for later. Mash them together and set them aside.

scooping potato out of the skins.

Remove from oven and let cool for a few minutes; cut in half, then scoop out most of the potato with a large spoon, leaving a ¼ inch rim of potato.

mixing potato with ingredients in a glass bowl.

Add the potato to the butter mixture and mash together—no need to over-mix. Rough is fine. You could add other things at this point. Bacon bits would be about 2 tablespoons or 1 slice of bacon per half of the potato. The green onion is about one onion per whole potato. If freezing or storing, do not use green onion.

stuffed potatoes with cheese on top.

Scoop the potato mixture back into the skins and top with shredded cheese. You could refrigerate or freeze them at this point.

four potatoes browned on baking tray.

You can add more optional ingredients before baking. Place on a baking tray sprayed with PAM and bake at 375° for about 20 minutes until hot and browning.

bite of twice baked potato on a fork.

For more details, keep reading. See the Recipe Card below for complete instructions and to print.

✔️Tips to make it right every time

  • Use only russet potatoes for twice-baked potatoes. You need the starchy center and the thicker skin to hold it together.
  • While still warm, the potato should be mixed with the sour cream or the texture may be gummy.
  • Do not over-mix the potato mixture. Mix by hand or gently with the mixer unless you want a fluffy mashed potato texture.
  • Be careful to spoon out the potato, leaving about ¼ inch to protect the skin.
  • Do not use onion if you plan to store or freeze the potatoes. The taste will dominate.
  • Most optional ingredients may be added to the potatoes or on top before baking.

Serving

We use twice-baked potatoes with steak recipes, like Pan Seared New York Strip or Pan Seared Filet Mignon. But they are also exceptional with Convection Baked Chicken or Pan Seared Pork Tenderloin.

Other potato recipes

Check out these other easy potato recipes, like Oven Roasted Red Potatoes, Parmesan Baked Potatoes, and Crispy Smashed Potatoes.

❓How to make them ahead

Once stuffed, the potatoes can be sealed airtight and refrigerated for 3 days or frozen for 3 months. If doing either, do not add onion, which will dominate the flavors.

Generally, frozen potatoes would be thawed first, but frozen twice-baked potatoes can be cooked without thawing. Remove from the freezer and unwrap. Place in a baking dish and cover tightly with foil. Bake covered for about 30 minutes at 425°, then uncover and bake another 15-20 minutes until hot.

Storage and reheating leftovers

Store leftovers sealed in an airtight container in the refrigerator for 4 days. Leftovers can be frozen depending on your optional ingredients.

Reheating in the oven, air fryer, or microwave.

FAQs

How to prevent "gummy" twice-baked potatoes?

The gummy texture comes from mixing cold ingredients after the starch has fully formed. To prevent this, mix the filled while the potato is still warm, don't over-mix, and with a hand mixer to fluf a little.

Blue ribbon divider used for visual effect

This recipe is listed in these categories. See them for more similar recipes.

Potato Recipes, Side Dish Recipes

Have you tried this recipe, or have a question? Join the community discussion in the comments.

📖The Recipe Card

twice baked potato on white plate
Print Recipe Add to Collection Go to Collections

Twice Baked Potatoes for Two

Simple and delicious, Twice Bake Potatoes are perfect for two or more. Creamy, cheesy, and packed with bacon and things you love—a great side dish for any meal or date night.
Prep Time1 hour hr 15 minutes mins
Cook Time20 minutes mins
Total Time1 hour hr 35 minutes mins
Course: Potato
Cuisine: American
Keyword: Baked Potato, Twice Baked Potato
Servings: 2 servings
Calories: 241kcal
Author: Dan Mikesell AKA DrDan

Ingredients

  • 1 russet potato larger
  • 2 tablespoons butter
  • 2 tablespoons sour cream
  • 2 tablespoons milk
  • ¼ cup shredded cheddar cheese plus a little for topping
  • ¼ teaspoon seasoning salt I used Lowry's
  • ⅛ teaspoon pepper
  • 1-2 strips bacon 8 Tbsp or 4 strips, optional
  • 1 green onion One per potato - optional
  • anything else you want optional
US Customary - Convert to Metric

Instructions

  • Preheat oven to 400° convection or 425° conventional.
    potatoes with other ingredients
  • Scrub the potato skin well.
    scrubing a potato under running water
  • Brush the skin with a light coat of oil. This will help the skin not dry out and break as you scoop.
    brushing cleaned potatoes with oil
  • Bake for 1 hour or a little more. Be sure they are well done. If unsure, check for an internal temperature of 200° to 210°.
    potatoes on the oven rack
  • While potatoes are cooking, combine butter, sour cream, milk, shredded cheese, seasoning salt, and pepper in a large bowl. Add optional ingredients but do not add onion if storing for later. Mash them together and set them aside.
    butter chopped up on black board
  • Remove from oven and let cool for a few minutes; cut in half, then scoop out most of the potato with a large spoon leaving a ¼ inch rim of potato.
    scooping potato out of the skins
  • Add the potato to the butter mixture and mash together—no need to over-mix. Rough is fine. You could add other things at this point. Bacon bits would be about 2 tablespoons or 1 slice of bacon per half of the potato. The green onion is about one onion per whole potato. If freezing or storing, do not use green onion.
    mixing potato with ingredients in a glass bowl
  • Scoop the potato mixture back into the skins and top with a little shredded cheese. You could refrigerate or freeze them at this point.
    stuffed potatoes with cheese on top
  • You can add more optional ingredients before baking. Place on baking tray sprayed with PAM and bake at 375° for about 20 minutes until hot and browning.
    baked potato halves on a pan

Notes

Pro Tips

  1. This is only for mature Russet potatoes.
  2. The recipe is for one potato which makes two servings. You can easily adjust the ingredients in this recipe card by changing the number of servings.
  3. I find half of a potato is a good serving.
  4. The milk, sour cream, cheese, and usually bacon are basic. So is the green onion usually, but I would skip it if refrigerating or freezing.
  5. Good sealed tightly in the refrigerator for 3-4 days and frozen for 2-3 months. So make them ahead.
  6. You can cook a still-frozen twice baked potato. Instructions are in the post. But generally, you would though first.

Nutrition

Calories: 241kcal | Carbohydrates: 21g | Protein: 5g | Fat: 16g | Saturated Fat: 10g | Cholesterol: 44mg | Sodium: 211mg | Potassium: 493mg | Fiber: 1g | Sugar: 2g | Vitamin A: 505IU | Vitamin C: 6mg | Calcium: 110mg | Iron: 1mg

Inspired by Pioneer Woman since she keeps it basic.

Editor's Note: Originally published January 6, 2014. Updated with expanded discussion and options. Photos have been refreshed, and a table of contents has been added to aid navigation.

Lilly running hard in snow.

30-Minute Mexican Chicken and Rice

chicken and rice on white plate

30 minutes, one pan, and minimal skill will get you a tasty, healthy weeknight dinner. A complete meal all in one bursting with tender chicken, tasty rice, and a great Mexican attitude.

chicken and rice on white plate

[feast_advanced_jump_to]

Blue ribbon divider used for visual effect

Introduction

This is my quick and easy version of a Mexican flavored chicken and rice dinner. By using Minute Rice as the base and Rotel for most of the flavoring, it comes together in under 30 minutes.

What I wanted:

  1. I didn't want that bland white rice taste. The rice needed some "pop" to it.
  2. I wanted chicken included in the cooking method. Precooked chicken would work, but the is planning ahead, and I don't usually have that.
  3. Some great taste with a little spice.
  4. Easy and quick enough, I can do it after a 12 hour day.
  5. It must use things I always have — no special trip to the store.

Start with a couple of skinless boneless chicken breasts then add some onion, garlic, a few spices, a can each of RoTel and chicken broth. Finally, some minute rice and you are done. Really good.

I have no inspiration recipe for this. I wanted to do a stovetop chicken and rice, but Google was not my friend this time. Way too many recipes with cans of soup again. And again, I refuse to participate in that farce. I wanted tasty rice with a little spice.

My Rating

My rating system of a 4 out of 5 so very nice.

High 4 or low 5.

🐓The Chicken

While I chose skinless boneless chicken breast, you can use chicken tenders or skinless thighs. This is not a recipe that will produce wonderful skin on the chicken. But bone-in thighs are OK.

Precooked chicken, like rotisserie chicken, would work well for this recipe. Add about 3 cups of shredded chicken after cooking the onion along with the chicken broth.

🌶️The Rotel

Rotel is diced tomatoes with some mild green chilies along with a few spices. It comes in various heat levels, so use the version you want.

If you don't have, or don't want to use Rotel, then drain a 14-15 oz. can of diced tomatoes. A can of mild chilies would be nice to add, also.

📖Tex-Mex Casseroles

Easy Taco Casserole

Easy Sour Cream Chicken Enchiladas

Blue ribbon divider used for visual effect
↑Jump to Table of Contents

This recipe is listed in these categories. See them for more similar recipes.

30-Minute Dinner Recipes, Casserole Recipes, Low Fat Recipes, Mexican Recipes

Have you tried this recipe, or have a question? Join the community discussion in the comments.

Step-by-Step Photo Instructions

raw chicken, rice and other ingredients

Start with things I always have on hand.

raw chicken trimmed on red board with knife

Trim and cut two skinless boneless chicken breasts. Cut into convent size pieces.

butter melting in large fry pan

Take 1 tablespoon butter and melt over medium-high heat.

frying pieces of chicken in black pan

When the butter is starting to bubble, add the chicken. Cook about 5 minutes per side initially. While the chicken is cooking, dice a small or ½ medium onion and crush two large cloves of garlic.

browned chicken with onion in black pan

After the chicken has cooked 10 minutes, add the onion and garlic. Cook until chicken has an internal temp of 160°. About five more minutes. (a total of 15 minutes)

adding rice to skillet with chicken and liquid

Add one 14.5 oz can chicken broth, a 10.5 oz can RoTel, ½ teaspoon salt, ¼ teaspoon pepper, and 1 teaspoon chili powder. Mix well and bring to boil over medium-high heat.

adding rice to skillet with chicken and liquid

Add 2 cup Minute Rice and stir in well and get most of the rice off the top of the chicken.

rice and chicken on large spoon over pan

Cover and remove from heat. In 5 minutes, stir well, and serve. It is done in 25 minutes.

↑Jump to Table of Contents

📖The Recipe Card

chicken and rice on white plate
Print Recipe Add to Collection Go to Collections

30-Minute Mexican Chicken and Rice

30 minutes, one pan, and minimal skill will get you a tasty, healthy weeknight dinner. A complete meal all in one bursting with tender chicken, tasty rice, and a great Mexican attitude.
Prep Time2 minutes mins
Cook Time23 minutes mins
Total Time25 minutes mins
Course: Main dish
Cuisine: Mexican
Keyword: Easy Chicken and Rice, Mexican Chicken and Rice, Mexican Rice, Tex-Mex
Servings: 4 servings
Calories: 297kcal
Author: Dan Mikesell AKA DrDan

Ingredients

  • 2 skinless boneless chicken breasts
  • 1 tablespoons butter
  • 14.5 oz chicken broth
  • 10.5 oz RoTel
  • 1 onion small or ½ medium
  • 2 cloves garlic large crushed
  • ½ teaspoon salt
  • ¼ teaspoon pepper
  • 1 teaspoon chili powder
  • 2 cups Minute Rice
US Customary - Convert to Metric

Instructions

  • Take 1 tablespoon butter and melt over medium-high heat.
  • When the butter is starting to bubble, add the chicken. Cook about 5 minutes per side initially. While the chicken is cooking, dice a small or ½ medium onion, and crush two large cloves of garlic.
    raw chicken, rice and other ingredients
  • After the chicken has cooked 10 minutes, add the onion and garlic. Cook until chicken has an internal temp of 160°. About five more minutes. (a total of 15 minutes)
    frying pieces of chicken in black pan
  • Add one 14.5 oz can chicken broth, a 10.5 oz can RoTel, ½ teaspoon salt, ¼ teaspoon pepper, and 1 teaspoon chili powder. Mix well and bring to boil over medium-high heat.
    adding rotel to pan with chicken
  • Add 2 cup Minute Rice and stir in well and get most of the rice off the top of the chicken.
    adding rice to skillet with chicken and liquid
  • Cover and remove from heat. In 5 minutes, stir well, and serve. Done in 25 minutes.
    rice and chicken on large spoon over pan

Notes

Pro Tips

  1. You can use chicken thighs if you wish, and even bone-in should be fine.
  2. You can use precooked chicken, like a rotisserie chicken. Cook the onion, then add with the broth.
  3. This is made for Minute Rice, simmering for other rice will overcook everything else.
  4. Good refrigerated for 3-4 days. I never recommend freezing rice.

Nutrition

Calories: 297kcal | Carbohydrates: 43g | Protein: 19g | Fat: 6g | Saturated Fat: 2g | Cholesterol: 44mg | Sodium: 433mg | Potassium: 499mg | Fiber: 2g | Sugar: 3g | Vitamin A: 340IU | Vitamin C: 10mg | Calcium: 49mg | Iron: 4mg

Originally Published September 10, 2013. Updated with expanded options, refreshed photos, and a table of contents to help navigation.

dogs with purple puppy

Pork Chops in the Crock Pot

Pork Chop on white plate

Fall-apart tender Pork Chops in the Crock Pot will make your mouth water. Nothing is more comforting than boneless pork chops with creamy gravy.

Nothing is more comforting than gravy-covered pork chops. Add in some green pepper for flavor, and you have a recipe you will repeat repeatedly.

🐖Ingredients

Pork chops
Optional vegetables—green pepper, onion
Garlic
Chicken broth
Pantry ingredients—AP flour, Worcestershire sauce, salt, and pepper to taste

pork chop on white plate with pepper and gravy.
[feast_advanced_jump_to]
Blue ribbon divider used for visual effect

Use a short pan searing to add great flavor, then load them into a crock pot with onion, green pepper, garlic, and some broth for moisture. Cook until fall-apart tender and make a simple gravy for a great weeknight dinner.

👨‍🍳How to Make Crock Pot Pork Chops and Gravy

raw pork chops with onion, pepper and seasonings.

1. Use two 1-inch boneless or bone-in pork chops—salt and pepper to taste.

browning pork chops in fry pan.

2. Heat one teaspoon of oil over medium-high heat. When hot, add the chops and brown each side for 3-4 minutes to get the color you like and add some taste.

chopped onion and pepper on wooden board.

3. While the pork is browning, optionally slice one medium onion and one green pepper. Also, crush 1-2 cloves of garlic. You only need half the pepper and onion for the two pork chop versions.

adding chicken broth to crock pot with chops and veggies.

4. Add half the veggies and garlic to the bottom of a small crock pot. Add the pork on top, and add the remaining veggies and garlic. Add 1 cup of chicken broth and ½ teaspoon Worcestershire sauce.

cooked pork chops in crock pot.

5. Cook on high for 2 hours or 4 hours on low.

thickening liquid from crock pot in sauce pan with flour.

6. For gravy, mix 4 tablespoons flour in 1 cup of chicken broth until smooth. Move the chops to a plate, pour the liquid into a pan over medium-high heat, and bring to a light boil. Slowly pour in the thickening liquid while stirring vigorously until starting to thicken. At that point, stop adding the thickener and continue to stir and simmer for a few minutes until the gravy is done. Add salt and pepper to taste.

For more details, keep reading. See the Recipe Card below for complete instructions and to print.

Pork chop recipes

Apples and pork got together. Try Crock Pot Apple Pork Chops and Baked Apple Pork Chops with Vegetables.

Fire up the grill for Grilled Apricot-Glazed Pork Chops or How to Grill Pork Chops. For inside-cooked chops, try Pan Seared Oven Roasted Pork Chops or a personal favorite of mine, Breaded Pork Chops in the Oven. And for the 2-inch thick chops, try Cooking Thick Pork Chops.

bite of pork chop on a fork.

♨️Making Gravy with Crock Pot Recipes

The issue of making gravy for crock pot recipes is why you see so many cans of soup and envelopes of gravy mix. If you want fewer chemicals, you need to adapt.

I don't feel there is a good way to make acceptable gravy in the crock pot. I suggest moving the liquid to a saucepan and using cornstarch slurry or a flour roux. For more information on making gravy, please see How To Make Gravy at Home.

How to serve

Serve with oven baked rice, egg noodles, mashed potatoes, and a hot vegetable like broccoli, asparagus, Baked Parmesan Green Beans, or Corn on the Cob.

How to store leftovers

Store leftovers in the refrigerator in an airtight container for 4 days. Store the gravy and chops separately. Only store gravy made with flour since cornstarch does not store well.

❓FAQs

Why are my pork chops dry?

Most commonly, it is due to overcooking. The minimum safe temperature is 145° in the thickest part, measured with an instant-read thermometer. 145° to 155° is the best temp for most people. The chops will lose moisture as you get to 160° or above.

Other factors can be cooking thinner chops or previously frozen chops. A brine will help with most dryness issues.

🐖About Pork Chops

Real pork chops are the middle three in the above diagram. The ones on the ends are frequently sold as chops, but I don't believe them.

graphic for pork chop location- licensed from Fotolia May 16,2017. Copyright foxysgraphic - Fotolia. Modified per allow by licensed.
Image licensed from Fotolia May 16, 2017. Copyright foxysgraphic - Fotolia. Modified per allowed by the license.

I frequently pick up a whole pork loin and cut it myself when they are on sale. Half the price, and they will freeze great for 3-4 months. But the biggest plus is I always have them on hand.

For this recipe, bone-in or boneless is fine, and any reasonable thickness should work, but it will affect the cooking time.

Blue ribbon divider used for visual effect

This recipe is listed in these categories. See them for more similar recipes.

Crock Pot Recipes, Healthy Recipes, Low Fat Recipes, Pork Chop and Loin Recipes, Pork Recipes, Small Crock Pots Recipes

Have you tried this recipe, or have a question? Join the community discussion in the comments.

📖The Recipe Card

pork chop on white plate with pepper and gravy
Print Recipe Add to Collection Go to Collections

Pork Chops in the Crock Pot

Fall-apart tender Pork Chops in the Crock Pot will make your mouth water. Nothing is more comforting than boneless pork chops with creamy gravy.
Prep Time10 minutes mins
Cook Time2 hours hrs 10 minutes mins
Total Time2 hours hrs 20 minutes mins
Course: Main Course
Cuisine: American
Keyword: Crock Pot Pork Chops, Pork Chops with Gravy
Servings: 2 chops
Calories: 643kcal
Author: Dan Mikesell AKA DrDan

Ingredients

  • 2 pork chops—boneless or bone-in one inch thick
  • ½ onion optional
  • ½ green pepper optional
  • 1 minced or crushed garlic
  • ½ teaspoon Worcestershire sauce
  • salt and pepper to taste
  • 2 cup chicken broth divided
  • 6 tablespoons AP flour
US Customary - Convert to Metric

Instructions

  • Use two of 1-inch boneless or bone-in pork chops. Salt and pepper to taste.
    raw pork chops with onion, pepper and seasonings
  • Heat one teaspoon oil over medium-high heat. When hot, add the chops and brown each side for 3-4 minutes to get the color you like and add some taste.
    browning pork chops in fry pan
  • While the pork is browning, optionally slice one medium onion and one green pepper. And crush 1 clove of garlic. For the two pork chop versions, you only need half the pepper and onion.
    chopped onion and pepper on wooden board
  • Add half the veggies and garlic to the bottom of a small crock pot. Add the pork on top, add the remaining of the veggies and garlic. Add 1 cup of chicken broth and ½ teaspoon Worcestershire sauce.
    adding browned pork chops to crock pot with veggies
  • Cook on high for 2 hours or 4 hours on low.
    cooked pork chops in crock pot
  • For gravy, mix 6 tablespoons flour in 1 cup of chicken broth until smooth. Move the chops to a plate and pour the liquid in a pan over medium-high heat and bring to a light boil. Slowly pour in the thickening liquid while stirring vigorously until starting to thicken. At that point, stop adding the thickener and continue to stir and simmer for a few minutes until gravy is done. Add salt and pepper to taste.
    thickening liquid from crock pot in sauce pan with flour

Notes

Pro Tips

  1. You can use bone-in or boneless pork chops. Thickness is up to you but not extra thick.
  2. Fits well in a crock pot of 3 quarts or more.
  3. I suggest half an onion and pepper for a 2 chop version. The amount of garlic is per taste. My wife wants double garlic.
  4. The best way to make gravy with a crock pot meal is to move the fluid to a saucepan and use flour.
  5. There is a bit more flour in the slurry to make the gravy than you probably need. That is to account for any release of liquids from the ingredients. So when the fluid starts to thicken. Stop adding to flour and wait a minute or two to see if you need more,
  6. Good refrigerated for 3-4 days and frozen for 3-4 months.

Nutrition

Calories: 643kcal | Carbohydrates: 33g | Protein: 77g | Fat: 21g | Saturated Fat: 7g | Polyunsaturated Fat: 1g | Monounsaturated Fat: 8g | Trans Fat: 0.2g | Cholesterol: 195mg | Sodium: 2051mg | Potassium: 1754mg | Fiber: 3g | Sugar: 5g | Vitamin A: 250IU | Vitamin C: 72.6mg | Calcium: 50mg | Iron: 3.6mg

Originally Published July 20, 2013. Updated with expanded discussion, refreshed photos, and a table of contents to help navigation.

Dogs by the pond.

Balsamic Pork Tenderloin

Grilled Balsamic Pork Tenderloin on white plate

Balsamic pork tenderloin has the savory balsamic flavor you love from a simple marinade made with balsamic vinegar and garlic. After marinating, cook this tender and moist pork tenderloin on the grill or in the oven for about 30 minutes.

🐖Ingredients

Pork tenderloin
Balsamic Marinade—Balsamic vinegar, olive oil, crushed garlic, kosher salt, black pepper

A cut pork tenderloin on a white plate.
[feast_advanced_jump_to]
Blue ribbon divider used for visual effect

quote mark
Featured Comment by Chris:
"Love this one, so simple yet perfectly flavored. Can't wait to try it on the next pork tenderloin that I do."

Pork tenderloin is always moist and tender—the perfect meat for a smaller household due to its size. Add the savory goodness of balsamic vinegar, and you have a classic dinner everybody will love.

This recipe will fit a healthy diet like a low-calorie or low-fat diet or even a low-carb keto diet.

👨‍🍳How to Grill Balsamic Marinaded Pork Tenderloin—Step-by-Step Photo Instructions

Raw pork tenderloin with other ingredients.
Start with a nice pork tenderloin. The quality of balsamic vinegar is very important.
Trimmed pork tenderloin on white board.

1. Trim the tenderloin of fat and the silver skin.

Pork tenderloin in bag with marinade.

2. Mix marinade ingredients, add the tenderloin, and refrigerate for 1 hour, which is enough, but overnight is fine. Do not rinse

Placing pork tenderloin on grill surface.

3. Grill on a medium hot grill (surface temperature of 400° to 450°).

Cooked pork tenderloin on white plate.

4. Pork tenderloin is three-sided. Grill about 4-5 minutes per side, then rotate every 3-4 minutes until an internal temperature of about 145°—about 25 minutes.

For more details, keep reading. See the Recipe Card below for complete instructions and to print.

⏲️How long to grill pork tenderloin

The recommended medium rare internal temp of 145° will take about 25 minutes on a 450° grill surface.

  • Rare(less than 145°)—Not recommended due to USDA safety recommendations
  • Medium-Rare (145°-150°) will take about 22-27 minutes
  • Medium (150°-155°) will take about 27-30 minutes
  • Medium-Well(155°-160°) will take about 29+ minutes
  • Well Done(160°+)—Not recommended due to dryness and texture.

Times are provided to help with planning only. Be sure to check the final internal temperature with an instant-read thermometer and allow for a few degrees of increase in the temperature when removed from heat.

♨️Grilling Tips

  • Realize that pork tenderloins are triangular, so a "flip" on the grill is a one-third rotation.
  • Grill surface temperature must be in the range of 400°-450°. You need a grill surface thermometer. Never trust a hood thermometer. See my discussion about BBQ Temperature for a detailed discussion.
  • Cook to the correct final internal temperature—145° minimum.

♨️How to Oven Bake Balsamic Marinade Pork Tenderloin

Even though this is a grilling recipe, it can be easily done in the oven after a short searing on the stovetop.

When ready to cook after the marinade (do not rinse or pat dry.)

  1. Preheat your oven to 375° convection or 400° conventional oven.
  2. Over medium-high heat, add 2 teaspoons of oil to an oven-safe pan. When hot, sear all sides of the tenderloin for about 2-3 minutes each to get a nice color. Remember, it has three sides.
  3. Move to the preheated oven and roast until an internal temperature of 145°—about 15-20 minutes.

🍽️Serving

Serve with Green Bean Almondine, Roasted Cauliflower, Parmesan Baked Potatoes, or Oven Roasted Red Potatoes.

🐖Pork Tenderloin Recipes

For other variations, see Chipotle Lime Pork Tenderloin, Honey Garlic Pork Tenderloin, Memphis BBQ Pork Tenderloin, and Grilled Pork Tenderloin Medallions.

Grilling Pork Tenderloin

My complete tutorial for grilling pork tenderloin on a gas grill. With a touch of char outside and juicy and tender meat inside, we love this fool-proof recipe, and so will you.

pork tenderloin on blue platter

❄️Storage of leftovers

Leftover pork tenderloin can be stored in an airtight container, refrigerated for 4 days, and frozen for 3 months.

❓FAQs

Can I use the marinade to baste?

Yes, if you reserve some before adding the meat to the marinade. But any used marinade should be considered commentated.

When is pork tenderloin done and safe to eat?

Pork tenderloin is safe to eat when cooked to 145° in the thickest part, measured with an instant-read meat thermometer, according to the USDA.

What balsamic vinegar to use?

Balsamic vinegar varies widely. Supermarket-quality balsamic can be acceptable but is usually poor quality. You need to use vinegar you like. If available in your area, go to a specialty store, which also will have oils and cheese, for taste testing.

🐖A pork loin is not a pork tenderloin

Over the years on this blog, many commenters have confused pork loin and tenderloin. It is obvious when they have a “4-pound pork tenderloin”. No, they do not.

loacation of pork tenderloin - Image licensed May 17, 2017, from Fotolia. Copyright by foxysgraphic - Fotolia. Image modified in accordance with the license.
Image licensed from Fotolia. Copyright by foxysgraphic - Fotolia. The image was modified in accordance with the license.

The tenderloin refers to the psoas muscle along the lower back. It is chicken tenders in the chicken or beef tenderloin (filet mignon) in cattle. The psoas is generally the most tender cut since it is not used for movement.

Blue ribbon divider used for visual effect

📖The Recipe Card

Grilled Balsamic Pork Tenderloin on white plate
Print Recipe Add to Collection Go to Collections

Balsamic Pork Tenderloin

Balsamic pork tenderloin has the savory balsamic flavor you love from a simple marinade made with balsamic vinegar and garlic. After marinating, cook this tender and moist pork tenderloin on the grill or in the oven for about 30 minutes.
Prep Time5 minutes mins
Cook Time25 minutes mins
Marinade1 hour hr
Total Time30 minutes mins
Course: Main Course
Cuisine: American
Keyword: Balsamic Pork Tenderloin, balsmic marinade, Balsmic marinade for pork tenderloin
Servings: 4 servings
Calories: 220kcal
Author: Dan Mikesell AKA DrDan

Ingredients

  • 1 ½ pound pork tenderloin

Balsamic Marinade Ingredients

  • 1 tablespoon balsamic vinegar
  • 1 tablespoon olive oil
  • 2 cloves crushed garlic
  • 1 teaspoon kosher salt
  • ¼ teaspoon pepper

Instructions

  • Start with a nice pork tenderloin. The quality of balsamic vinegar is very important.
    raw pork tenderloin with other ingredients
  • Trim the tenderloin of fat and the silver skin.
    trimmed pork tenderloin on white board
  • To a 1-gallon zip lock bag, add 1 tablespoon of olive oil, 1 tablespoon of good balsamic vinegar, 2 cloves of garlic - crushed, 1 teaspoon of kosher salt, and ¼ teaspoon of pepper. Add the tenderloin and refrigerate for 1 hour is enough, but overnight is fine.
    pork tenderloin in a balsamic marinade
  • Preheat grill to medium (surface temperature of 400° to 450°). Move tenderloin from the bag to a well-cleaned ad oiled grill. Do not rinse.
    clean and oil grill crates
  • Pork tenderloin is three-sided. Grill about 4-5 minutes per side, then rotate every 3-4 minutes until an internal temperature of about 145°—about 25 minutes. Let rest for 10 minutes before serving.
    Grilled Balsamic Pork Tenderloin on white plate
  • Oven instructions are in the recipe notes below.

Notes

Pro Tips:

  1. The quality of the balsamic vinegar makes this recipe. DO NOT use the cheap stuff.
  2. Be sure you are using pork tenderloin and not pork loin.
  3. Remember, it is triangular meat, not round. So a flip is ⅓ of a rotation.
  4. A final internal temperature of 145° is medium rare with a bit of pink. See the post for more options.

Oven Instructions are in the post

Nutrition

Calories: 220kcal | Carbohydrates: 1g | Protein: 36g | Fat: 7g | Saturated Fat: 2g | Cholesterol: 111mg | Sodium: 673mg | Potassium: 679mg | Sugar: 1g | Calcium: 9mg | Iron: 2mg

Originally Published July 13, 2013. Updated with expanded options, refreshed photos, and a table of contents to help navigation.

Lilly with purple puppy.

Quick and Easy Tartar Sauce

tarter sauce on blackened tilapia

Quick and Easy Tartar Sauce uses only four ingredients you already have in your kitchen. A small homemade version that is better than the store-bought version.

Ingredients

Mayonnaise
Lemon juice
Dill or sweet pickle relish
Onion powder
Optional—capers, dill, yellow or Dijon mustard

tarter sauce on blackened tilapia.
[feast_advanced_jump_to]
Blue ribbon divider used for visual effect

This simple sauce is great with baked or fried fish, oysters, fish sticks, and salmon or crab cakes. This smaller recipe is easy to double or triple for your needs.

Very nice for what it is. It's much better than the store-bought variety, and you can whip this up in a few minutes with pantry staples. Add some creamy, tangy flavor to your fish tonight.

👨‍🍳How to make homemade tartar sauce

  1. Combine mayo, lemon juice, dill or sweet pickle relish, and onion powder. Mix well.
  2. It is better if cooled for 20-30 minutes before serving for the best flavor.
  3. Refrigerate until needed.

For more details, keep reading. See the Recipe Card below for complete instructions and to print.

✔️Tips to make it your way

  • Use full-fat or lower-fat mayonnaise, but please avoid the fat-free.
  • Avoid Miracle Whip™ or flavored mayonnaise since they will add other tastes unless that is what you want.
  • The onion powder and lemon juice may switch those out for fresh, but you will be tossing leftover lemon or onion.
  • Use either dill or sweet pickle relish—your choice.

When to use tartar sauce

Excellent with Baked Blackened Tilapia or Grilled Blackened Tilapia. And don't miss these other uses, like Grilled Blackened Tilapia, Grilled Lemon Butter Tilapia, Parmesan Crusted Tilapia, and Garlic Butter Salmon.

Variations

The other commonly added flavors are capers, dill, and mustard.

Capers

This recipe is without capers, which I never have when I want them. Most current recipes do not include capers, but they are traditionally used.

To make tartar sauce with capers in my small recipe, drain and finely chop 1 teaspoon of capers. Increase proportionately for larger amounts.

One final note on capers, general they are combined with a dill flavor.

Dill

There are several ways to make this a dill tartar sauce. First, skip the sweet pickle relish, then try one of these options.

-Dill relish: 1 teaspoon (the suggested method)
or
-Dill Weed: 1 tablespoon fresh dill chopped or 1 teaspoon dried dill
or
-Dill Pickle: 1 tablespoon chopped

Mustard

Use ⅓ teaspoon of Dijon or yellow mustard if you wish.

❓FAQs

What is tartar sauce?

Tartar sauce is a creamy condiment dipping sauce with a mayonnaise base, usually served with fish or other seafood dishes. It's creamy with rich and tangy flavors that you can vary.

How to store leftover tartar sauce.

The leftover tartar sauce should be sealed in an airtight container for a week. Do not freeze.

Blue ribbon divider used for visual effect
↑Jump to Table of Contents

This recipe is listed in these categories. See them for more similar recipes.

Fish Recipes, Sauces, Rubs, and Seasonings Recipes

Have you tried this recipe, or have a question? Join the community discussion in the comments.

Step-by-Step Photo Instructions

mayo with lemon juice and rellish.

Stir in a small bowl ⅓ cup mayo, 2 teaspoons lemon juice, 1 teaspoon sweet pickle relish, and ¼ teaspoon onion powder.

mixing tarter sauce in white bowl.

Better if cooled for 20-30 minutes before serving for the best flavor.

📖The Recipe Card

tarter sauce on blackened tilapia
Print Recipe Add to Collection Go to Collections

Quick and Easy Tartar Sauce

Quick and Easy Tartar Sauce uses only four ingredients you already have in your kitchen. A small homemade version that is better than the store-bought version.
Prep Time5 minutes mins
Cook Time0 minutes mins
Total Time5 minutes mins
Course: Rubs and Sauces
Cuisine: American
Keyword: Fish, Tartar Sauce
Servings: 4 servings
Calories: 78kcal
Author: Dan Mikesell AKA DrDan

Ingredients

  • ⅓ cup mayonnaise
  • 2 teaspoons lemon juice
  • 1 teaspoon dill or sweet pickle relish
  • ¼ teaspoon onion powder

Options

  • 1 teaspoon Capers drained and finely chopped
  • Dill
  • 1 teaspoon yellow or dijon mustard
US Customary - Convert to Metric

Instructions

  • Stir in a small bowl ⅓ cup mayo, 2 teaspoons lemon juice, 1 teaspoon sweet pickle relish, and ¼ teaspoon onion powder.
    mayo with lemon juice and rellish
  • Better if cooled for 20-30 minutes before serving for the best flavor.
    mixing tarter sauce in white bowl

Notes

Pro Tips:

  1. This is a very small recipe making only 6 tablespoons, which I’m calling 4 servings. Most recipes will make three times that amount. So adjust to the amount you need.
  2. The quality of the ingredients is essential.
  3. If you add the optional capers, use a dill option and skip the sweet pickle relish.
  4. Dill options: Switch out the sweet relish for: 1 teaspoon of dill relish. Or add 1 teaspoon of dry dill weed or 1 tablespoon of fresh dill. Or add 1 tablespoon of chopped dill pickle.
  5. It should be sealed well without air. Good refrigerated for 1 week. Do not freeze.

Nutrition

Calories: 78kcal | Carbohydrates: 6g | Protein: 0.2g | Fat: 7g | Saturated Fat: 1g | Polyunsaturated Fat: 4g | Monounsaturated Fat: 2g | Cholesterol: 5mg | Sodium: 152mg | Potassium: 3mg | Fiber: 0.01g | Sugar: 2g | Vitamin A: 50IU | Vitamin C: 0.1mg | Calcium: 1mg

Editor's Note: Originally Published May 11, 2013. Updated with expanded discussion with options and re-edited photos. Table of contents added for navigation.

Smiling dogs in the yard.

Grilled Baked Potatoes without Foil

grilled potatoes on white plate

Crispy on the outside with fluffy insides, Grilled Baked Potatoes are an excellent side dish for most grilled meals. Learn how to grill a whole potato without aluminum foil easily.

🥔Ingredients

Russet potatoes
Olive oil
Salt and pepper

grilled potatoes on white plate.
[feast_advanced_jump_to]
Blue ribbon divider used for visual effect

Featured Comment from Dale:
"5 stars—my new way of baking pots on a gas grill. I put a grill mat between the potatoes and the flame, and they came out perfect."

A great grilled side for the summer that's cheap, easy, and delicious. Grilled baked potatoes have the most wonderful crispy skin you will love as much as the fluffy interior.

It's so simple: Wash the potato, stick it with a fork a few times, brush it with oil, and season it. Then microwave for 2-3 minutes and grill over direct heat until done. The grill time and temperature fit nicely with grilled chicken and pork recipes.

There are only a few secrets to getting that whole baked potato grilled to perfection, and it does not involve aluminum foil.

👨‍🍳How to Grill Whole Baked Potatoes Without Foil

  1. Use a grill with a surface in the range of 450°-500°—this is the temperature range for most chicken and pork recipes.
  2. Clean and brush medium-sized russet potatoes.
  3. Oil, season, and pierce the skin with a fork a few times.
  4. Microwave on high for about 2 to 2 ½ minutes per potato, flipping over halfway through.
  5. Grill over direct heat, flipping every 4-5 minutes until the outside is nicely brown and an internal temp 200°-210°—total grill time 12-14 minutes.

For more details, keep reading. See the Recipe Card below for complete instructions and to print.

✔️Tips to get it right every time

  • Russets are picked when mature and tend to have more starch. They make great bakers, and the thick skin is great for this recipe.
  • The potato needs to be partly cooked (heated) before grilling. You can not get the inside done otherwise.
  • You need to use an instant-read thermometer to check the internal temperature. A fully baked potato is 200°-210° internal. Cook’s Illustrated recommends 205° to 212°. Potatoes are very forgiving, so a little over is better than under. 200° is usually ok, but 190° is not done.
  • The grill time and temperature fit nicely with grilled chicken and pork recipes. To use it with steaks, you must set up a cooler zone for the potatoes.
  • Please do not overcook it in the microwave, or it will fade. But microwaves vary some, and potato size varies. A little under is better than over, and make it up on the grill.

Serving

Serve with butter, salt, and pepper. I like adding sour cream and a good sprinkle of shredded cheddar cheese.

You can kick it up to the loaded potato range with bacon bits and sliced green onions. Or add other potato toppings like chives.

Serve as a grilled side to steak recipes like Grilled New York Strip Steaks or Grilled Filet Mignon. But also great with Grilled Pork Tenderloin, Grilled Loin Pork Chops, Grilled Chicken Breasts on a Gas Grill, or Grilled Boneless Pork Ribs.

And don't miss these other grilled side dishes, like Grilled Red Potatoes, Grilling Asparagus, Grilled Mixed Vegetables, and Grilled Stuffed Tomatoes.

Storage of leftovers

Store airtight in the refrigerator for 4 days. Reheat in the microwave, but it will reheat quicker and easier if cut in half.

FAQs

Do I have to precook the potatoes?

No, but it will be very hard to get a fully-cooked baking potato on the grill without it. So partially cooking by parboiling or a short time in the microwave will significantly decrease the cooking time.

Why not use foil?

The foil will not affect the total cooking time significantly but will trap the moisture from the cooking and "steam" the potatoes. For great crispy skin and better flavor, direct grilling is preferred.

For more discussion, see the Idaho Potato Commission.

Blue ribbon divider used for visual effect
↑Jump to Table of Contents

This recipe is listed in these categories. See them for more similar recipes.

Grill Side Dish Recipes, Potato Recipes, Side Dish Recipes

Have you tried this recipe, or have a question? Join the community discussion in the comments.

Step-by-Step Photo Instructions

clean and oil grill crates.

Preheat the grill to a surface temperature of 450°-500°—medium-high heat on most grills.

clean potato under running water.

Clean and brush well under running water. You want to eat the skin, so get it clean.

poking a potato with a fork on a black board.

Pierce the skin with a fork a few times on each side.

seasoning oiled potatoes.

Give them a nice brush of olive oil. Sprinkle with coarse salt and pepper. I use my 7:2:2 seasoning that also adds some garlic. Microwave on high for 2 to 2 ½ minutes per potato, flipping halfway through. This can vary some with the strength of your microwave and the size of the potatoes. DO NOT overcook in the microwave.

placing potatoes on grill with tongs.

Transfer the potatoes to the grill over direct heat. Flip every 4-5 minutes. Grill until the outside is nicely brown and has an internal temp of 200° to 210°. The total grill time is 12-14 minutes.

potato on plate seasoned with butter

📖The Recipe Card

grilled potatoes on white plate
Print Recipe Add to Collection Go to Collections
4.34 from 3 votes

Grilled Baked Potatoes without Foil

Crispy on the outside with fluffy insides, Grilled Baked Potatoes are an excellent side dish for most grilled meals. Learn how to grill a whole potato without aluminum foil easily.
Prep Time10 minutes mins
Cook Time14 minutes mins
Total Time24 minutes mins
Course: Potato
Cuisine: American
Keyword: baked potato on the grill without foil, grilled baked potatoes with no foil, potatoes on the grill without foil
Servings: 2 potatoes
Calories: 112kcal
Author: Dan Mikesell AKA DrDan

Ingredients

  • 2 potatoes medium russet
  • olive oil for brushing
  • salt and pepper to taste
US Customary - Convert to Metric

Instructions

  • Preheat the grill to a surface temperature of 450°-500°—medium-high heat on most grills.
    clean and oil grill crates
  • Clean and brush well under running water. You want to eat the skin, so get it clean.
    clean potato under running water
  • Pierce the skin with a fork a few times on each side.
    poking a potato with a fork on a black board
  • Give them a nice brush of olive oil. Sprinkle with coarse salt and pepper. I use my 7:2:2 seasoning that also adds some garlic. Microwave on high for 2 to 2 ½ minutes per potato, flipping halfway through. This can vary some with the strength of your microwave and the size of the potatoes. DO NOT overcook in the microwave.
    brushing potatoes with oil
  • Transfer the potatoes to the grill over direct heat. Flip every 4-5 minutes. Grill until the outside is nicely brown and an internal temp of 200° to 210°—total grill time 12-14 minutes.
    placing potatoes on the grill

Notes

Pro Tips

  1. Cook the number of potatoes you need.
  2. Do not do this with huge potatoes.
  3. Precook in the microwave for a few minutes. A little short is better than too long in the microwave.
  4. Oil before microwaving— it seems to help the potatoes not to shrivel up as microwave potatoes do.
  5. A done potato should be 200°+. A little too high is better than not enough. Do not stop under 190°.
  6. Huge variables due to the size of the potatoes, the microwave, and the grill.
  7. Times are provided as general guidelines only. GO BY INTERNAL TEMPERATURE ONLY.

Nutrition

Calories: 112kcal | Carbohydrates: 14g | Protein: 2g | Fat: 6g | Saturated Fat: 1g | Polyunsaturated Fat: 2g | Monounsaturated Fat: 2g | Sodium: 319mg | Potassium: 329mg | Fiber: 2g | Sugar: 1g | Vitamin C: 17.3mg | Calcium: 10mg | Iron: 0.7mg

Editor's Note: Originally Published May 9, 2013. Updated with expanded options, refreshed photos, and a table of contents to help navigation.

Molly and Lilly sharing a good stick.

Healthier Carrot Cake

healthy carrot cake on white plate

This Healthier Carrot Cake is better than many full-fat versions. With only about 270 calories and 7 grams of fat, it fits low-fat and low-calorie diets. You can have your cake and eat it too.

You would think carrot cake is beyond most home cooks, but the skill level here is only about 3/10. Just work through the easy step-by-step photo instructions, and there are no odd, hard-to-find ingredients.

🥕Ingredients

Flour—AP and whole wheat flour
Eggs
Crushed pineapple
Carrots
Walnuts—or pecans, chopped
Coconut—Optional, flaked sweetened
Raisins—optional
Pantry ingredients—vegetable oil, sugar, baking soda, ground cinnamon, vanilla extract, salt
Frosting—cream cheese, vanilla, milk, powdered sugar

healthy carrot cake on white plate.
[feast_advanced_jump_to]
Blue ribbon divider used for visual effect

Featured comment from Gs:
"Awesome recipe. I was so surprised to read the recipe… a cake without butter or much fat!"

This healthier carrot cake is one of the best carrot cakes you will ever eat, plus it won't leave a pool of oil on the plate. It is wonderfully moist and tender crumb—unexpected for a low-fat cake, which is usually much denser.

It has about 270 calories and 7 grams of fat per serving and will fit a healthy diet like a low-calorie or low-fat diet.

👨‍🍳How to Make Healthy Carrot Cake—Step-by-Step

Carrots and cake ingredients.

1. Preheat the oven to 350°, not convection.

Coating baking pans with PAM.

2. Spray two 9-inch round baking pans with a good coat of PAM cooking spray.

shredding raw carrots.

3. Peel and shred 3-4 medium carrots to get about 2 cups of carrots. A little more or less should be okay.

chopped walnuts on a black board.

4. Chop ½ cup of walnuts or pecans. Double if you like nuts.

draining pineapple over a sink.

5. Drain one 20 oz can of crushed pineapple.

mixing shredded carrots into wet ingredients.

6. In a medium bowl, combine 2 eggs, 2 tablespoons oil, and 2 teaspoons vanilla. Mix well, then add the carrots, pineapple, and ¼ cup of nuts. Optionally, also add ½ to 1 cup of raisins.

mixing wet ingredient with carrots into dry ingredients.

7. In a large bowl, mix  1 ½ cups flour (I suggest ¾ cups each of AP flour and whole wheat flour), 1 cup sugar, ½ to 1 cup flaked sweetened coconut, 2 teaspoons baking soda, 1 teaspoon salt, and 1 tablespoon cinnamon. Mix well. Now fold the wet into the dry and keep folding until all is incorporated.

adding the batter into the prepared pans.

8. Divide into two baking pans and spread reasonably smooth. Bake until a toothpick comes out clean—about 30-35 minutes. Remove and allow to cool in the pan for about 5 minutes. Then, invert the pans on a cooling rack, remove them from the pans, and allow them to cool completely (at least 30 minutes).

cream cheese with frosting ingredients.

9. While the cake is cooling, it is cream cheese frosting time.

mixing cream cheese frosting in a white bowl with electric mixer.

10. Mix 8 oz of reduced-fat cream cheese (not fat-free), 1 teaspoon of vanilla extract, and 1 tablespoon of milk. Beat until smooth, then slowly add 2 cups of powdered sugar while continuing to beat. You may need 1-2 more teaspoons of milk to get the desired texture.

spreading frosting over the cake.

11. Place the first layer on a plate. Cover with about ⅓ of the frosting and spread evenly. Add the second layer and use about ⅓ on top and ⅓ on the sides.

.whole llayered carrot cake with nuts.

12. Add the final ¼ cup of chopped nuts to the top.

For more details, keep reading. See the Recipe Card below for complete instructions and to print.

✔️Tips to get it right every time

  • You can use cake flour or all-purpose flour. You can substitute up to 50% of the flour with whole wheat flour.
  • The crushed pineapple is used to replace most of the oil. It has minimal effect on the taste but adds some nice texture.
  • Do not use fat-free cream cheese. You do need a little fat in the frosting.
  • Nuts are optional, or you can use either walnuts or pecans.
  • The coconut adds some traditional texture, but skip it if you don't want a bag of coconut in the pantry.
  • You can make a single-layer cake in a standard 9X13 cake pan with the same ingredients, but cooking takes 5-10 minutes longer.

Carrot and Low-fat Recipes

Try Baked Carrot Cake Pancakes with Cream Cheese Glaze for a carrot cake taste made quick and easy. Or try some so Glazed Carrots,

For other low-fat recipes you will love, check out Low-Fat Biscuits, Low-Fat Blueberry Scones, Healthier Chicken Enchilada Casserole, Healthier Low-Fat Sausage Gravy and Biscuits, and Lower Fat Spicy Chicken Alfredo.

Treat the dog with Low-Fat Homemade Dog Treats.

⬇️How to make this a "for two" friendlier recipe

This recipe is easy to cut in half, making a single-layer cake using only one 9-inch round pan.

  1. Use the recipe card and adjust the servings from 16 to 8.
  2. Use the amount of ingredients in the ingredient list, not the instructions—those do not adjust.
  3. Cook for the same amount of time.

❓FAQs

Does carrot cake need to be refrigerated?

Due to the frosting, this cake should be refrigerated for up to 3 days or frozen for 2-3 months.

Blue ribbon divider used for visual effect

This recipe is listed in these categories. See them for more similar recipes.

101's Best Recipes, Dessert Recipes, Healthy Recipes, Low Fat Recipes

Have you tried this recipe, or have a question? Join the community discussion in the comments.

📖The Recipe Card

healthy carrot cake on white plate
Print Recipe Add to Collection Go to Collections
4.82 from 11 votes

Healthier Carrot Cake

This Healthier Carrot Cake is better than many full-fat versions. With only about 270 calories and 7 grams of fat, it fits low-fat and low-calorie diets. You can have your cake and eat it too.
Prep Time10 minutes mins
Cook Time35 minutes mins
Total Time45 minutes mins
Course: Dessert
Cuisine: American
Keyword: Carrot Cake, Low Fat Carrot Cake
Servings: 16 servings
Calories: 260kcal
Author: Dan Mikesell AKA DrDan

Ingredients

  • 1 ½ cup flour all AP flour or half whole wheat
  • 1 cup sugar
  • 2 teaspoons baking soda
  • 1 teaspoon salt
  • ½-1 cup flaked sweetened coconut Optional
  • ½ -1 cup walnuts or pecans divided chopped
  • ½-1 cup raisins optional
  • 2 teaspoons cinnamon
  • 2 eggs large
  • 2 tablespoons oil
  • 2 teaspoons vanilla
  • 3-4 carrots about 2 cups shredded
  • 20 oz crushed pineapple drained

Frosting

  • 8 oz lower fat cream cheese not fat free
  • 1 teaspoon vanilla
  • 1 tablespoon milk and a little more
  • 2 cups powdered sugar
US Customary - Convert to Metric

Instructions

  • Preheat the oven to 350°, not convection.
    Carrots and cake ingredients
  • Spray two 9-inch round baking pans with a good coat of PAM cooking spray.
    Coating baking pans with PAM
  • Peel and shred 3-4 medium carrots to get about 2 cups of carrots. A little more or less should be okay.
    shredding raw carrots
  • Chop ½ cup of walnuts or pecans. Double if you like nuts.
    chopped walnuts on a black board
  • Drain one 20 oz can of crushed pineapple.
    draining pineapple over a sink
  • In a medium bowl, combine 2 eggs, 2 tablespoons oil, and 2 teaspoons vanilla. Mix well, then add the carrots, pineapple, and ¼ cup of nuts. Optionally, also add ½ to 1 cup of raisins.
    mixing shredded carrots into wet ingredients
  • In a large bowl, mix  1 ½ cup flour (I suggest ¾ cups each of AP flour and whole wheat flour), 1 cup sugar, ½ to 1 cup flaked sweetened coconut, 2 teaspoons baking soda, 1 teaspoon salt, and 1 tablespoon cinnamon. Mix well. Now fold the wet into the dry and keep folding until all is incorporated.
    mixing wet ingredient with carrots into dry ingredients
  • Divide into two baking pans and spread reasonably smooth. Bake until a toothpick comes out clean—about 30-35 minutes. Remove and allow to cool in the pan for about 5 minutes. Then invert the pans on a cooling rack and remove them from the pans and allow them to cool completely (at least 30 minutes).
    adding the batter into the prepared pans
  • While the cake is cooling, it is cream cheese frosting time.
    cream cheese with frosting ingredients
  • Mix 8 oz of reduced-fat cream cheese (not fat-free), 1 teaspoon of vanilla extract, and 1 tablespoon of milk. Beat until smooth, then slowly add 2 cups of powdered sugar while continuing to beat. You may need 1-2 more teaspoons of milk to get the desired texture.
    mixing cream cheese frosting in a white bowl with electric mixer
  • Place the first layer on a plate. Cover with about ⅓ of the frosting and spread evenly. Add the second layer and use about ⅓ on top and ⅓ on the sides.
    spreading frosting over the cake
  • Add the final ¼ cup of chopped nuts to the top.
    whole llayered carrot cake with nuts

Notes

Pro Tips

  1. Cut in half and make only one layer.
  2. You can make this in a standard 9X13 cake pan. It will take 5-10 minutes longer to cook. The endpoint is the toothpick test.
  3. Use the flour you have. I suggest half AP flour and half whole wheat.
  4. The pineapple only adds a minimal taste, and it is nice. Some recipes use applesauce, and you can Google those.
  5. Due to the frosting, this cake should be stored refrigerated for up to 3 days. Or frozen for 2-3 months.

Nutrition

Calories: 260kcal | Carbohydrates: 46g | Protein: 4g | Fat: 7g | Saturated Fat: 2g | Trans Fat: 1g | Cholesterol: 28mg | Sodium: 370mg | Potassium: 161mg | Fiber: 2g | Sugar: 34g | Vitamin A: 2040IU | Vitamin C: 4mg | Calcium: 43mg | Iron: 1mg

Inspired by Super Moist Carrot Cake with Cream Cheese Frosting by Gina at Skinnytaste.com.

Originally Published March 27, 2013. Updated with expanded options, refreshed photos, and a table of contents to help navigation.

Dogs in yard with patches of snow.

Crock Pot Chicken Cacciatore

chicken cacciatore on pasta and on white plate

Crock Pot Chicken Cacciatore is a healthy, hardy recipe with tender chicken, vegetables, and rich tomato sauce—an easy dump-and-go weeknight dinner recipe.

This is an ultra-simple recipe with easy step-by-step photo instructions. Only 10 minutes of prep and let your crock pot do the work.

🐓Ingredients

Chicken breasts or thighs
Aromatics—onion and garlic
Vegetables—bell pepper, mushrooms optional
Tomatoes—crushed and paste
Pantry ingredients—dry basil, optional red pepper, salt, and black pepper

chicken cacciatore on pasta and on white plate.
[feast_advanced_jump_to]
Blue ribbon divider used for visual effect

It's an easy chicken cacciatore recipe full of great Italian flavors, a great family dinner recipe, but special enough for a dinner party. With this classic Italian dish, your home will have a wonderful aroma of tomatoes and peppers all day.

It's easy and economical to make with wonderful homemade sauce and tender chicken and vegetables. With under 200 calories and 3 grams of fat, it will fit a healthy diet like a low-calorie or low-fat diet.

👨‍🍳How to Make Chicken Cacciatore in a Crock Pot

raw chicken with spices and veggies.

Start by chopping 1 medium onion and 1 green pepper. Crush 3 cloves of garlic.

trimmed raw chicken on a white board.

Trim about 2 pounds of chicken. Use skinless boneless chicken breasts or thighs. Cut into 3-4 pieces each for better serving.

adding chicken and veggies to the crock pot.

In a 3 quart or larger crock pot, combine the chicken and vegetables with one 6 oz can tomato paste, one 28 oz can crushed tomatoes, 2 teaspoons dry basil, 1 teaspoon salt, ½ teaspoon pepper, and ¼ teaspoon crushed red pepper (optional).

chicken cacciatore on a ladle.

Cook for 6 hours on low. If you want shredded chicken, remove the cooked chicken shortly before it is finished, shred it, and return it to the crock pot.

For more details, keep reading. See the Recipe Card below for complete instructions and to print.

↕️How to make this a "for two" or "family size" recipe

This recipe will fit as written in a 3-quart crock pot. Using a larger one may cook a bit faster, so check at 4-5 hours.

This recipe can be cut in half easily and then fit in a 2-quart crock pot. You won't be able to find 14 oz cans of crushed tomatoes, so use diced tomatoes and freeze the half can of tomato paste.

  1. Use the recipe card and adjust the number of servings to half or double.
  2. Use the amount of ingredients in the ingredient list, not the instructions—those do not adjust.
  3. The half recipe will fit in a 2-quart mini crock pot
  4. A double recipe fits in a 6-quart or larger crock pot.
  5. Cook for the same amount of time.

Serving

Serve with pasta or rice sprinkled with Parmesan cheese. Add homemade bread like Julia Child's French Bread or Easy Dinner Rolls.

Add a green garden salad and some crusty bread for a complete meal.

Crock pot Italian recipes

Check out these other recipes you may like: Italian Sausage Marinara Sauce, Baked Italian Meatballs, Crock Pot Chicken Baked Ziti, Crock Pot Pizza Casserole, or my personal favorite, Crock Pot Baked Ziti.

Storing leftovers

Good refrigerated for 3-4 days. It will do well frozen for 3-4 months. Reheat on the stovetop or in a microwave.

❓FAQ

Can I add wine?

Yes, but only a tablespoon or two. It will not cook off in a crock pot like on the stovetop.

👨‍🍳What is Chicken Cacciatore?

It’s an old Italian dish. Cacciatore means “hunter” in Italian, and to prepare something, cacciatora style refers to preparing a meal “hunter-style” or sometimes called "hunter stew."

The meat is generally braised chicken, but rabbit is also acceptable. While I suggest skinless chicken, chicken with skin and bone is commonly used.

The sauce is generally onions, spices, tomatoes, bell peppers, and sometimes wine or mushrooms.

Blue ribbon divider used for visual effect

This recipe is listed in these categories. See them for more similar recipes.

Crock Pot Recipes, Healthy Recipes, Italian Recipes, Low Fat Recipes, Mini Crock Pot Recipes, Small Crock Pots Recipes

Have you tried this recipe, or have a question? Join the community discussion in the comments.

📖The Recipe Card

chicken cacciatore on pasta and on white plate
Print Recipe Add to Collection Go to Collections
4 from 15 votes

Crock Pot Chicken Cacciatore

Crock Pot Chicken Cacciatore is a healthy, hardy recipe with tender chicken, vegetables, and rich tomato sauce—an easy dump-and-go weeknight dinner recipe.
Prep Time10 minutes mins
Cook Time6 hours hrs
Total Time6 hours hrs 10 minutes mins
Course: Main Course
Cuisine: American
Keyword: Chicken Cacciatore, Crock Pot Chicken Cacciatore, Crock Pot Italian Soup
Servings: 8 servings
Calories: 189kcal
Author: Dan Mikesell AKA DrDan

Ingredients

  • 2 pounds chicken skinless boneless breasts or thighs
  • 1 onion medium chopped
  • 3 cloves garlic minced or crushed
  • 1 green pepper chopped
  • 6 oz tomato paste
  • 28 oz crushed tomatoes
  • 2 teaspoons dry basil
  • 1 teaspoon salt
  • ½ teaspoon pepper
  • ¼ teaspoons crushed red pepper optional
  • 2 cups slices mushrooms optional
US Customary - Convert to Metric

Instructions

  • Start by chopping 1 medium onion and 1 green pepper—crush 3 cloves garlic.
    chopped onions and peppers on a black board
  • Trim about 2 pounds of chicken. Use skinless boneless chicken breasts or thighs. Cut into 3-4 pieces each for better serving.
    trimmed raw chicken on a white board
  • In a 3 quart or larger crock pot, combine the chicken and vegetables with one 6 oz can tomato paste, one 28 oz can crushed tomatoes, 2 teaspoons dry basil, 1 teaspoon salt, ½ teaspoon pepper, and ¼ teaspoon crushed red pepper (optional).
    adding chicken and veggies to the crock pot
  • Cook for 6 hours on low. If you want shredded chicken, remove the cooked chicken shortly before finished, shred it, and return it to the crock pot.
    chicken cacciatore on a ladel

Notes

Pro Tips

  1. This fits in a 3-quart crock pot. Cut it in half, and it will fit in a 2-quart crock pot. You can use a larger crock pot but it will cook faster. Details are in the post above.
  2. Use chicken breast or thighs.
  3. Add mushrooms if you wish.
  4. Good in the refrigerator for 3-4 days or frozen for 3-4 months.

Nutrition

Calories: 189kcal | Carbohydrates: 14g | Protein: 27g | Fat: 3g | Saturated Fat: 1g | Cholesterol: 73mg | Sodium: 723mg | Potassium: 977mg | Fiber: 3g | Sugar: 8g | Vitamin A: 645IU | Vitamin C: 28mg | Calcium: 54mg | Iron: 2mg

Editor's Note: Originally published February 2, 2013. Updated with expanded options, refreshed photos, and a table of contents to help navigation.

Molly setting after a run.

Crock Pot Mac and Cheese with Uncooked Pasta

Mac and Cheese on Spoon

Make creamy crock pot mac and cheese with uncooked pasta—no boiling required. This easy homemade recipe uses simple ingredients and makes a small batch of delicious mac and cheese.

The uncooked pasta cooks right in the crock pot with milk and seasonings. Add the cheese near the end for a creamy sauce without canned soup or evaporated milk.

mac and cheese on a spoon over a bowl.
[feast_advanced_jump_to]

quote mark
Featured Comment from John:
⭐⭐⭐⭐⭐
"Great recipe, fantastic flavor. I doubled it and followed your advice and really kept an eye on the dish at the end"

🤔 TL;DR — Recipe Summary

What: Creamy homemade crock pot mac and cheese made with uncooked elbow macaroni. No boiling or canned soup needed.

Why: An easy comfort food recipe that starts with 4 servings and scales easily for larger batches in a 2-quart or larger crock pot.

How: Cook the pasta in seasoned milk on LOW until al dente, about 2 hours. Drain excess liquid, add shredded cheese, and cook another 5–15 minutes until creamy.

Important: Crock pots vary. Check the pasta for doneness rather than relying on cooking time. Overcooking will make it mushy.

🧀 Ingredients

Macarroni and cheese ingredients.
  • Elbow macaroni—Use standard uncooked pasta for the most predictable results.
  • Milk—The pasta cooks directly in the milk.
  • Butter—Adds richness and helps make the sauce creamy.
  • Cheese—Sharp cheddar is recommended, but other cheeses will work.
  • Pantry ingredients—Dry mustard, garlic powder, paprika, salt, and pepper add flavor.

👨‍🍳 Quick Overview: Crock Pot Mac and Cheese with Uncooked Pasta

1. Add the uncooked macaroni, milk, butter, and seasonings to the crock pot. Mix well.

adding dry macarroni to milk in crock pot.

2. Cook on LOW until the pasta is al dente, about 2 hours. Stir and check after 1 hour, then every 30 minutes or more often as needed. Drain excess liquid. Do not cook by time alone.

mixing macarroni and sauce in crock pot.

3. Stir in the shredded cheese. Continue cooking on LOW for 5–15 minutes until the cheese is melted and creamy and the pasta is tender.

adding cheese to cooked macaroni.

For more details, keep reading. See the recipe card below for complete instructions and to print.

♨️ Crock Pot Size and Scaling

This recipe makes 4 servings and fits in a 2-quart or larger crock pot. You can double the recipe in a 3½-quart crock pot or use a larger one for bigger batches.

  • Crock pot size: The milk must completely cover the pasta during the first stage of cooking.
  • Scaling: Increase all ingredients proportionally, but don't assume the cooking time will stay the same.
  • Cooking temperature: Use LOW. Large crock pots with smaller batches may cook faster.

Important: Check the pasta for al dente rather than relying on cooking time, especially when changing batch sizes.

🍝 Choosing the Right Pasta

Standard uncooked elbow macaroni gives the most predictable results. Different pasta shapes and brands absorb milk at different rates, so cooking times and leftover liquid may vary.

Whole wheat and gluten-free pasta can behave differently and may become mushy more easily. If you substitute another pasta, check for al dente frequently and remove any excess liquid before adding the cheese.

🧀 Choosing the Best Cheese

Sharp cheddar is my favorite for this recipe, but American, Colby Jack, Gouda, Gruyère, or Velveeta will also work.

  • Freshly shredded cheese melts more smoothly than most packaged shredded cheese.
  • Add the cheese near the end. Cooking cheese too long or at high temperatures can cause the sauce to separate.
  • Adjust to your taste. You can use one cheese or combine several varieties.

❓ Troubleshooting Crock Pot Mac and Cheese

Why is there extra liquid when the pasta is done?

Different pasta brands and shapes absorb different amounts of milk. Once the pasta is al dente, remove any excess liquid before adding the cheese. You don't need to drain every drop—just remove the free liquid with a cup or spoon.

Why is my macaroni mushy?

The pasta cooked too long or too quickly. Cook on LOW, stir and check after 1 hour, and continue checking until the macaroni is al dente. Do not rely on cooking time alone.

Can I use other types of pasta?

Standard elbow macaroni works best. Other shapes, whole wheat, and gluten-free pasta may need different cooking times and amounts of liquid. Check frequently for al dente and drain excess liquid before adding the cheese.

Why did my cheese separate or become grainy?

Cheese can separate when overheated or cooked too long. Add it near the end, use LOW, and cook just until melted. Freshly shredded cheese generally melts more smoothly than packaged shredded cheese.

Why does my crock pot mac and cheese cook faster or slower than 2 hours?

Crock pots vary in cooking temperature, and batch size and pasta type also affect cooking time. A large crock pot with a small batch may cook faster. Start checking after 1 hour and use the pasta's texture—not the clock—to determine when to add the cheese.

❄️ Storage and Reheating

Store leftovers in an airtight container in the refrigerator for up to 4 days or freeze for 2–3 months.

To reheat: Add a splash of milk and warm gently in the microwave or on the stovetop, stirring occasionally until heated through. Avoid overheating, which can cause the cheese sauce to separate.

📝 More Mac and Cheese Recipes

My Creamy Crock Pot Mac and Cheese uses precooked pasta for more predictable cooking times. It's another delicious option for homemade mac and cheese.

  • Homemade Stovetop Mac and Cheese
  • Baked Mac and Cheese with Breadcrumb Topping
  • Roadhouse Fried Mac and Cheese

📖The Recipe Card

Mac and Cheese on Spoon
Print Recipe Add to Collection Go to Collections
4.86 from 14 votes

Crock Pot Mac and Cheese with Uncooked Pasta

Creamy crock pot mac and cheese made with uncooked macaroni, milk, and cheddar cheese. No boiling or canned soup needed. Perfect for a small batch.
Prep Time5 minutes mins
Cook Time2 hours hrs 20 minutes mins
Total Time2 hours hrs 25 minutes mins
Course: Comfort Food, Crock Pot
Cuisine: American
Keyword: crock pot mac and cheese, Mac and Cheese
Servings: 4 servings
Calories: 274kcal
Author: Dan Mikesell AKA DrDan

Ingredients

  • 1 cup elbow macaroni
  • 2 cups milk
  • ⅓ teaspoon salt
  • ½ teaspoon dry mustard
  • ¼ teaspoon black pepper
  • ¼ teaspoon garlic powder
  • ¼ teaspoon paprika
  • 1 tablespoon butter
  • 1 cup cheese of your choice I used sharp cheddar
US Customary - Convert to Metric

Instructions

  • Combine. Add the uncooked elbow macaroni, milk, butter, and seasonings to a 2-quart or larger crock pot. Mix well.
    macarroni and cheese ingredients
  • Cook the pasta. Cook on LOW, stirring and checking the pasta after 1 hour, then every 30 minutes or more frequently as needed. Cook until al dente, about 2 hours. Do not cook by time alone.
    mixing macarroni and sauce in crock pot
  • Add the cheese. Remove any excess liquid, then stir in the shredded cheese until well combined.
    adding cheese to cooked macarroni
  • Finish. Continue cooking on LOW for 5–15 minutes, until the cheese is melted and creamy and the pasta is tender. Serve promptly.
    Mac and cheese on fork over crock pot-2

Notes

Recipe Notes

  • Use standard dry elbow macaroni for the most predictable results.
  • Cook on LOW. Crock pots vary, so check the pasta for al dente instead of relying on cooking time.
  • Drain excess liquid before adding the cheese. Do not cook longer to "cook off" the fluid.
  • Add the cheese near the end to prevent separation.
  • When scaling, use a crock pot large enough for the milk to cover the pasta. Larger batches may leave extra liquid to drain.

Nutrition

Calories: 274kcal | Carbohydrates: 29g | Protein: 14g | Fat: 11g | Saturated Fat: 7g | Polyunsaturated Fat: 1g | Monounsaturated Fat: 3g | Cholesterol: 34mg | Sodium: 566mg | Potassium: 294mg | Fiber: 1g | Sugar: 8g | Vitamin A: 550IU | Vitamin C: 0.1mg | Calcium: 350mg | Iron: 1.3mg

Originally published January 13, 2013. Updated with improved instructions, cooking tips, and troubleshooting guidance.

9 Golden Retriver Puppies.

Cinnamon Streusel Coffee Cake

Cinnamon Streusel Coffee Cake on white plate

This Old Fashioned Betty Crocker Cinnamon Streusel Coffee Cake recipe features a great streusel topping and loads of cinnamon. Quick and easy to make to the home.

Great old-fashioned coffee cake like grandma made adapted from the 1972 edition of Betty Crocker's Cookbook.

🥣Ingredients

All-purpose flour
Milk
Vegetable oil
Egg
Pantry ingredients—sugar, baking powder, salt, ground cinnamon
Optional—chopped walnuts or pecans
Topping—brown sugar, flour, butter, cinnamon

Cinnamon Streusel Coffee Cake on white plate.
[feast_advanced_jump_to]
Blue ribbon divider used for visual effect

Featured Comment from Judy Melton:
"5 stars. I have made hundreds of coffee cakes and this is the first one in years that I have told friends is a keeper."

This quick and easy coffee cake recipe comes together quickly with just pantry ingredients. Usually, it takes 40 minutes from start to eating.

Simple to follow step-by-step photo instructions—I always made two 9-inch round cakes for leftovers.

1972 Betty Crocker's Cookbook.

👨‍🍳How to Make Cinnamon Streusel Coffee Cake

coffee cake ingredients with egg and milk.

Preheat oven to 375°, not convection.

spraying PAM into baking pan.

Spray a 9-inch baking pan with PAM or grease with butter.

mixing the topping with a fork.

In a small mixing bowl, combine ⅓ cup brown sugar, ¼ cup flour, and ½ teaspoon cinnamon. Cut 3 tablespoons of cold butter into the dry ingredients with a large fork until crumbly.

mixing milk with egg in a measuring cup.

Mix the wet ingredients: ¾ cup milk, ¼ cup oil, and 1 egg.

adding wet ingredients into dry in a white bowl.

In a large mixing bowl, combine 1 ½ cups all-purpose flour, ¾ cup white sugar, 1 tablespoon baking powder, ¾ teaspoon salt, and ½ teaspoon cinnamon. Combine well, add the wet into the dry, and mix until combined, but do not overmix.

pouring batter into prepared pan.

Pour the batter into the prepared pan.

adding topping to coffeecake.

Sprinkle on the crumb topping. Bake until golden brown and a toothpick comes out clean—about 25 minutes.

cooked coffee cake in black pan.

Try to let the coffee cake cool for 10 minutes before cutting.

For more details, keep reading. See the Recipe Card below for complete instructions and to print.

↕️How to make this a "for two" or "family size" recipe

The full recipe fits in a 9-inch round, 8-inch square, or a 6 by 9 pan.

  1. Use the recipe card and adjust the number of servings to half or double.
  2. Use the amount of ingredients in the ingredient list, not the instructions—those do not adjust.
  3. Finding the proper baking pan will be hard for a half recipe. A 6-inch round or another shape with about 30 square inches of surface area will work.
  4. A double recipe fits perfectly in a 9 by 13 cake pan or two 9-inch round pans.
  5. Cooking a double recipe in one pan will take a few minutes longer. A half recipe should cook a bit faster.

Serving

Serve with breakfast meats like Convection Oven Bacon or Baked Breakfast Sausage.

Breakfast recipes

Check out other breakfast recipes, like Cinnamon Coffee Cake, Blueberry Cream Cheese Coffee Cake, French Toast Casserole, and Glazed Cinnamon Biscuits.

❄️Storage and Reheating

To store this coffee cake, seal it tightly with plastic wrap or aluminum foil at room temperature. Better at 1 day than two. You can refrigerate and double the storage time. Store airtight in the freezer for 3 months.

To reheat, use a microwave on high for 10-15 seconds; it will be much better than cold. Almost as good as fresh.

FAQ

What is the difference between a coffee cake with streusel topping and streusel or crumb cake?

The main difference is the amount of that delicious streusel topping. Coffee cake has a sprinkle, but streusel or crumb cake has chunks. of streusel.

Blue ribbon divider used for visual effect

📖The Recipe Card

Cinnamon Streusel Coffee Cake on white plate
Print Recipe Add to Collection Go to Collections
4.75 from 4 votes

Cinnamon Streusel Coffee Cake

This Old Fashioned Betty Crocker Cinnamon Streusel Coffee Cake recipe features a great streusel topping and loads of cinnamon. Quick and easy to make to the home without planning.
Prep Time15 minutes mins
Cook Time25 minutes mins
Total Time40 minutes mins
Course: Breakfast
Cuisine: American
Keyword: Coffee Cake, Streusel Coffee Cake
Servings: 8 servings
Calories: 324kcal
Author: Dan Mikesell AKA DrDan

Ingredients

Topping

  • ⅓ cup brown sugar Light or Dark
  • ¼ cup all purpose flour
  • 3 tablespoons butter cold
  • ½ teaspoon ground cinnamon

Wet

  • ¾ cup milk
  • ¼ cup vegetable oil
  • 1 egg

Dry

  • 1 ½ cup all purpose flour
  • ¾ cup white sugar
  • 1 tablespoon baking powder
  • ¾ teaspoon salt
  • ½ teaspoon ground Preheat oven to 375°, not convection.

    cinnamon

US Customary - Convert to Metric

Instructions

  • Preheat oven to 375°, not convection. Spray a 9-inch baking pan with PAM or grease with butter.
    coffee cake ingredients with egg and milk
  • In a small mixing bowl, combine ⅓ cup brown sugar, ¼ cup flour, and ½ teaspoon cinnamon. Cut 3 tablespoons cold butter into the dry ingredients with a large fork until crumbly.
    mixing the topping with a fork
  • Mix the wet ingredients: ¾ cup milk, ¼ cup oil, and 1 egg.
    mixing milk with egg in a measuring cup
  • In a large mixing bowl, combine 1 ½ cups all-purpose flour, ¾ cup white sugar, 1 tablespoon baking powder, ¾ teaspoon salt, and ½ teaspoon cinnamon. Combine well, then add the wet into the dry and mix until combined but do not overmix.
    adding wet ingredients into dry in a white bowl
  • Pour the batter into the prepared pan.
    pouring batter into prepared pan
  • Sprinkle on the crumb topping.
    adding topping to coffeecake
  • Bake until golden brown and a toothpick comes out clean—about 25 minutes. Try to let the coffee cake cool for 10 minutes before cutting.
    cooked coffee cake in black pan

Notes

Pro Tips

  1. The suggested pan size is a 9-inch round pan. But this will work fine in a variety of sizes. An 8 by 8 square or a 6 by 9  pan are good alternatives.
  2. A double batch will fit well in a 9 by 13 cake pan.
  3. Never use aluminum-containing baking powder.
  4. Chopped nuts are a good addition to the topping.
  5. To store this coffee cake, seal it tightly. It is ok at room temperature for 1-2 days. Better at 1 day than two. You can refrigerate and double the storage time. It will freeze well for 3 months.
  6. To reheat, use a microwave on high for 10-15 seconds, and it will be much better than cold. Almost as good as fresh.

Nutrition

Calories: 324kcal | Carbohydrates: 51g | Protein: 4g | Fat: 12g | Saturated Fat: 3g | Cholesterol: 32mg | Sodium: 278mg | Potassium: 232mg | Fiber: 1g | Sugar: 29g | Vitamin A: 208IU | Calcium: 108mg | Iron: 2mg

Editor's note: Originally Published January 1, 2013. Updated with expanded options, refreshed photos, and a table of contents to help navigation.

Molly is dog in charge.

How to Brine a Turkey—A Basic Brine with Enhancements

brining a turkey in a bag

Learn how simple it is to brine a turkey correctly and then expand on that to add flavors that will make this year's feast outstanding. Do it simple, or kick it up a few notches with these easy-to-follow step-by-step instructions.

You should use this recipe only for unbrined and uninjected turkeys. If injected, it is with a salt-containing solution for tenderness and flavor. Do not add more salt by brining.

Ingredients

Turkey—12-20 lbs. whole and not brined or injected with anything!
Water and ice
Salt

Optional Ingredients—all recommended
Apple cider or juice—substitute for an equal amount of water
Sugar
Oranges
Pantry ingredients—Peppercorns, Allspice, Ginger(fresh or powder), Whole cloves

brining a turkey in a bag.
[feast_advanced_jump_to]
Blue ribbon divider used for visual effect

Featured Comment from Mary:
"5 stars I am very happy with your Turkey brine suggestions."

Learn how to brine a turkey the right way and then expand on that to add flavors that will make this year's feast outstanding. All you need is a food-safe bag or other container and simple pantry ingredients.

A brine for your holiday bird will add a lot of moisture and tenderness. And you can add your custom flavors. But you can easily make mistakes.

The fancy technique is from Christine at 15 Minute Beauty Fanatic aka Little Miss Martha, for her love of everything Martha Stewart—there is a lot of Martha Stewart in this method.

🦃How to brine a turkey

basic brine ingredients along with extras.

Basic Turkey Brine is 2 gallons (8 quarts or 16 cups) of water and 1 ½ cups of Diamond Crystal kosher salt (use 1 cup if using Mortan or ¾ cup table salt).
Optional ingredients (all recommended):
2 quarts apple juice or cider to substitute for an equal amount of water.
2 tablespoons peppercorns and 2 tablespoons allspice combine and coarsely crush. ½ cup sugar, 6 slices ginger( or 2 teaspoons powdered), 8 whole cloves.

brine ingrediients in a stock pot.

Combine all ingredients you are using except the oranges or other fresh fruit into a stockpot and boil for 10 minutes, then cool completely before proceeding.

a box of very large food bags.

Trim and place turkey in a brining container (I love big plastic bags; the Ziplocs are great). See Chicken... To Rinse or Not To Rinse? about handling poultry.

brining turkey in a large bag.

Add the cooled brine and enough water/ice to cover the turkey. Note the large pan in the picture to support the bag. It will help you handle the hefty bag better. Also, if using fresh fruit, add it at this time.

rinsing a brined turkey under running water.

Seal and refrigerate for 12-24 hours. Be sure to keep the turkey under 40° for food safety. Carefully rinse the bird inside and out when removed from the brine. Pat dry and proceed with the cooking. Clean the whole area after rinsing off the brine and wash your hands and arms for food safety.

For more details, keep reading. See the Recipe Card below for complete instructions and to print.

How long to brine?

Generally, 8 to 18 hours with an absolute maximum of 24 hours. You can over-brining making the turkey too salty and the texture spongy.

***Here is a reminder I will put in this post several times: NEVER BRINE AN INJECTED OR PREVIOUSLY BRINED TURKEY***

🧂Basic Simple Brine

Basic brines for turkey will be about a cup of kosher salt to one gallon of fluid. This can be a little less to prevent over-salting. Here, we are using ¾ cup per gallon.

The salt-to-fluid ratio is the main work of a brine. The salt and water get into the meat and say. It then breaks down some of the proteins and makes more tender meat.

The rest of the components add flavor and make the brine even better for taste but not texture, so they are optional.

Safe Brining

You need a large bag. Fortunately, these are easier to find, but large oven-roasting bags will do if you can't.

Garbage bags are NOT a good choice since they are not designed for food storage, and the chemicals may not be safe.

To brine a turkey, the bird must be thawed and kept under 40°. I have always had a second refrigerator, but if it is not available, many people use a large cooler and lots of ice.

The turkey should still be in a food-safe bag and sealed to prevent the brine from being diluted. This is poultry, so let's be careful out there.

See the USDA Food Safety Page and Chicken... To Rinse or Not To Rinse? for safety recommendations.

🦃Turkey Recipes

Check out some of my favorite turkey recipes like Roasted Turkey Breast—The Easy Way, Butter Turkey Tenderloin, Grilled Turkey Breast, and Easy Turkey Tetrazzini. To make homemade gravy, see How to Make Gravy from Scratch—Quick & Easy.

🦃Which turkey to brine

The turkey should have no additives, brine, or anything else injected or added in any way. If the bird is frozen, then thaw completely according to package directions.

But be aware that almost ALL frozen turkeys have some salt injection and should not be used for brining unless you are SURE it has not been injected or brined.

Remove any giblets from the neck and body cavities. We generally special order a fresh turkey from the meat department. It's just one phone call.

Tell them the size you want and the date you want to pick it up. You can do it. You generally need a good pound plus per person. We love leftovers, so we up that.

NEVER BRINE AN INJECTED OR PREVIOUSLY BRINED TURKEY

👨‍🍳How brining works

The brine is a salty water "marinade." The salt and water will absorb and cause the breakdown of the proteins in the meat. This will give you a more tender, moist, and flavorful turkey.

Adding other things like spices can also add tons of flavor. So this is a buffed-up brine.

❓Brining FAQs

What salt to use for brining?

The type of salt Kosher salt here means Diamond Crystal or the equivalent of other salts. 1 teaspoon table salt = 1 ¼ teaspoon Morton kosher salt = 2 teaspoons Diamond Crystal kosher salt.does not matter in brine, but the amount of sodium does.

Can I decrease the salt in the brine?

A little, maybe, depending on the original recommendations. For this recipe, I have already decreased to a "light" amount of salt by decreasing the sodium by 25% from many recommendations.

The salt does the work and can not be omitted. It breaks down some tissue in the bird and brings water into the turkey.

How much sodium is absorbed by the turkey?

There are only a few studies on the amount of salt absorbed by brining a whole turkey. It seems that about 200 mg is added per 4 oz. But there are lots of variables here, and it could be higher. Please don't quote me on this. If you are watching sodium intake, you should not be brining it.

Blue ribbon divider used for visual effect
↑Jump to Table of Contents

This recipe is listed in these categories. See them for more similar recipes.

Cooking Techniques, Holiday Recipes, Turkey Recipes

Have you tried this recipe, or have a question? Join the community discussion in the comments.

Step-by-Step Photo Instructions

📖The Recipe Card

brining a turkey in a bag
Print Recipe Add to Collection Go to Collections
4.34 from 3 votes

How to Brine a Turkey—A Basic Brine with Enhancements

Learn how simple it is to brine a turkey the right way and then expand on that to add flavors that will make this year's feast outstanding. Do it simple or kick it up a few notches with these easy to follow step by step instructions.
Prep Time30 minutes mins
Cook Time12 hours hrs
Total Time12 hours hrs 30 minutes mins
Course: Main Course
Cuisine: American
Keyword: Brining a Turkey, How to Brine, Turkey
Servings: 1 8 oz serving of breast
Calories: 227kcal
Author: Dan Mikesell AKA DrDan

Ingredients

The Basic Ingredients for Brining a Turkey

  • 1 turkey Whole and not brined or injected 12-20 pounds
  • 2 gallons water
  • 1½ cup Diamond Crystal kosher salt
  • enough ice and water to cover the bird in the bag.

Optional / To Taste Ingredients (all recommended)

  • 2 quarts apple cider or juice substitute for an equal amount of water
  • ½ cup sugar
  • 2 tablespoons peppercorns
  • 2 tablespoons allspice
  • 6 slices fresh ginger or 2 teaspoons powder
  • 8 whole cloves
  • 3 oranges cut in quarters

Instructions

  • Combine all ingredients you are using except the oranges or other fresh fruit into a stockpot and boil for 10 minutes, then cool completely before proceeding.
    brine ingrediients in a stock pot
  • Trim and place turkey in a brining container (I love big plastic bags; the Ziplocs are great). Add the cooled brine and enough water/ice to cover the turkey. Note—use a large pan to support the bag. Also, if using fresh fruit, add it at this time.
    a box of very large food bags
  • Seal and refrigerate for 12-24 hours. Be sure to keep the turkey under 40° for food safety.
    brining a turkey in a bag
  • Carefully rinse the bird inside and out when removed from the brine. Pat dry and proceed with the cooking. Clean the whole area after rinsing off the brine and wash your hands and arms for food safety.
    rinsing a brined turkey under running water
  • Gatherings are ready-made for food safety issues and leftovers at the party. Let's plan for food safety and get it right. Check out the USDA Food Safety recommendations.

Notes

Pro Tips:

  1. The ratio of 1 gallon of fluid to about ¾ cup of kosher salt is a good basic ratio for a wet-brining turkey.
  2. Whenever kosher salt is called for, it will mean Diamond Crystal or the equivalent of other salts. Approximate equivalents are  1 teaspoon table salt = 1 ¼ teaspoon Morton kosher salt = 2 teaspoons Diamond Crystal kosher salt.
  3. All the other ingredients are for taste.
  4. Be sure to use a food-safe bag, not a garbage bag.
  5. Brine for 12-24 hours.
  6. The salt needs to be rinsed off after a brine before cooking. This is a food safety issue, so let's be careful. Wash everything and your hands both before and after rinsing.
  7. Do not add any more salt to the turkey.
  8. This recipe is a 2-gallon recipe and is good for 12-20 pounds. You can adjust from there.
  9. PLEASE REVIEW FOOD SAFETY: Chicken… To Rinse or Not To Rinse? and the USDA Food Safety Page.
  10. Nutrition is for 8 oz of white meat with 200 mg of sodium added per 4 oz., which is an estimate of sodium transfer to the turkey. It may or may not be accurate.
  11. If you have sodium concerns, brining is not for you.
  12. Final Tip: NEVER BRINE AN INJECTED OR PREVIOUSLY BRINED TURKEY- and somebody will still do it.

Nutrition

Serving: 8oz | Calories: 227kcal | Protein: 35g | Fat: 9g | Saturated Fat: 2g | Cholesterol: 116mg | Sodium: 580mg | Potassium: 361mg | Sugar: 1g | Vitamin A: 90IU | Calcium: 18mg | Iron: 1mg

Editor's Note: Originally Published November 11, 2012. Updated with expanded options, refreshed photos, and a table of contents to help navigation.

Lilly and Molly dogs in the snow.

Peasant Bread with a Stand Mixer

peasent bread with butter

Peasant bread is a rustic artisan bread with a soft grain, crispy crust, and nutty flavor. It is an excellent beginner bread recipe because it is easy and quick to make with simple ingredients. While a stand mixer is not required, it will give you a head start on gluten formation without hand kneading. You can also make it entirely no-knead bread.

🍞Ingredients

Flour—all-purpose and whole wheat
Yeast—rapid rise
Sugar
Salt

Peasant bread with butter.
[feast_advanced_jump_to]
Blue ribbon divider used for visual effect

quote mark
Featured Comment from Kate:
⭐⭐⭐⭐⭐
"This came out beautiful & so good! Will definitely make again."

I love rustic bread with a soft grain, crunchy crust, and incredible taste. It is perfect for serving with Italian comfort foods, soups, and chili recipes.

Quick and easy, with no hand kneading, we let the stand mixer do the mixing and a little kneading for faster gluten formation. Just follow these easy step-by-step photo instructions—ready in about 2 hours.

The basics of any peasant bread recipe are the ingredients peasants could afford in the Middle Ages: flour, yeast, salt, and water. I added a little whole wheat flour, which will be more like the flour that would have been used and provide a nutty flavor. The sugar enhances the whole wheat.

👨‍🍳How to Make Peasant Bread—Step-by-Step Photo Instructions

Proofing yeast in glass bowl.

1. In warm (110°) water, dissolve sugar and rapid-rise yeast. Wait for some bubbles to prove the yeast is good.

Kneading dough in a stand mixer.

2. Add the yeast mixture to the stand mixer bowl. With the mixer on the 2 setting, slowly add the AP flour, whole wheat flour, and salt. Allow the dough to mix for 10 minutes.

Dough rising in a bowl.

3. Move the dough to a lightly oiled bowl, form it into a ball, cover it with plastic wrap, and place it in a warm spot for about 60 minutes until about tripled in size.

Moving dough into Dutch oven.

4. "Preheat" a Dutch oven with hot water, then dry and lightly coat with oil and move the dough into it. Cover and place in a warm spot and allow to double in size — about 30-45 minutes.

Brushing dough with water.

5. Preheat oven to 450°. Brush the top with some water.

Peasant bread with butter over a plate.

6. Bake for about 25-30 minutes until an internal temp of about 200°, a nice crust, and a hollow sound.

For more details, keep reading. See the Recipe Card below for complete instructions and to print.

😊Make it right every time

I like to "proof" yeast for two reasons. I have been burnt by bad yeast in the past (not a common thing now). I also like the yeast to dissolve in warm water for the most even distribution throughout the dough.

Keep everything warm. Use warm water, and heat all bowls and pans with hot water before using. If possible, don't expose the dough to cold air. This not only speeds things up but also helps the gluten form.

For best results, the oven needs to be at a high temperature (450° is suggested) and fully preheated, with the rack slightly below the middle.

This is a very soft dough and will not hold its shape during baking with the help of a baking pan. I used a Dutch oven to bake the bread. With this recipe, the smooth, rounded bottom gives a much nicer look, and I usually use it as the top side.

The size of the pan you use can affect the cooking time. This will not rise much with baking, and the dough is not very strong, so a deeper pan is good.

Smaller pans, like loaf pans, will yield a thicker loaf that may take a few more minutes to cook.

Brushing the top with water will help create a crunchy crust. Please put it in any pan, brush it with water, and bake until the internal temperature reaches 200°. The dough is not strong enough to be baked outside of a pan.

🥣Making it without a stand mixer

This is simple: mix by hand until everything is incorporated and skip any kneading. This is a very wet dough; you will only make a mess.

Coat your hands with oil and form the dough into a ball. Then, transfer the ball to an oiled dish and cover it for the first rise.

📖Other bread recipes you will love

I'm a lover of homemade bread. Start with this Basic White Stand Mixer Bread—perfect for almost any use. Or try my Easy English Muffin Bread.

Julia Child's French Bread

Julia Child's French Bread recipe is the ultimate crusty artisan French bread. An excellent round bread, simplified to the essentials to get it done with less fuss. While speed was not a goal, it was 5 hours from the start to the cooling rack.

Julia Child's French Bread on wooden peel.

❄️Storage of leftovers

Store sealed aWnd airtight at room temperature for 3-4 days. Since it does not contain preservatives, mold may be an issue. Like most breads, it will freeze but will lose some texture and taste.

❓FAQ

Why is it called Peasant bread?

Peasant bread was traditionally made by peasants in the Middle Ages, who had limited resources, using simple, readily available ingredients. Essentially, it's the bread of the poor farmer. 

Blue ribbon divider used for visual effect

📖The Recipe Card

Peasant bread with butter.
Print Recipe Add to Collection Go to Collections
5 from 2 votes

Peasant Bread with a Stand Mixer

Peasant bread is a rustic artisan bread with a soft grain, crispy crust, and nutty flavor. It is an excellent beginner bread recipe because it is easy and quick to make with simple ingredients. While a stand mixer is not required, it will give you a head start on gluten formation without hand kneading. You can also make it entirely no-knead bread.
Prep Time1 hour hr 45 minutes mins
Cook Time30 minutes mins
Total Time2 hours hrs 15 minutes mins
Course: Bread
Cuisine: American
Keyword: French Peasent Bread, No Knead Peasent Bread, Peasant Bread, Stand Mixer Bread
Servings: 16 slices
Calories: 139kcal
Author: Dan Mikesell AKA DrDan

Ingredients

  • 4 ½ cup AP flour
  • ¼ cup whole wheat flour
  • 1 package yeast a light tablespoon
  • 1 teaspoons salt
  • 1 teaspoon sugar
  • 1 ¾ cup water 110°
US Customary - Convert to Metric

Instructions

  • In 1 ¾ cups of warm (110°) water, dissolve 1 teaspoon of sugar and 1 package of rapid-rise yeast. Wait for some bubbles to prove the yeast is good.
    proofing yeast in glass bowl
  • Add the yeast mixture to a preheated stand mixer bowl. With a dough hook and the mixer on "2", slowly add 4 ½ cups AP flour, ¼ cup whole wheat flour, and 1 teaspoon salt. Allow the dough to mix for 10 minutes.
    kneading dough in stand mixer
  • Move the dough to a lightly oiled bowl, form into a bowl, cover with plastic wrap, and place in a warm spot for about 60 minutes until about tripled in size.sound.
    dough rising in a bowl
  • "Preheat" a Dutch oven with hot water, then dry and lightly coat with oil and move the dough into it. Cover and place in a warm spot and allow to double in size — about 30-45 minutes.
    moving dough into Dutch oven
  • Preheat oven to 450° conventional. Brush the top with some water. Bake for about 25-30 minutes until internal temp of about 200°, a nice crust, and a hollow sound.
    Peasant bread with butter over a plate.

Notes

Pro Tips

  1. This is an "ugly" bread, but it makes up for that in taste and texture. If you have a heavier pan with a smaller diameter, it will look better and be less flat.
  2. It is not a strong dough, so you need to use a pan with high enough sides to contain it.
  3. You can change the proportions of different flours.
  4. Cooking time will vary depending on the pan used and its thickness, so it's a good idea to check the internal temperature to determine the endpoint.
  5. I like to use a Dutch oven, but other pans can be used. I usually use a six-quart Dutch oven that will give about a 2-inch high loaf. A smaller pan will yield a thicker loaf but will take longer to cook.
  6. Cook UNCOVERED.
  7. The water on the crust will help crustiness.
  8. It is good for 3 days but will mold fast due to no preservatives.

Nutrition

Calories: 139kcal | Carbohydrates: 29g | Protein: 4g | Fat: 1g | Saturated Fat: 1g | Sodium: 148mg | Potassium: 49mg | Fiber: 1g | Sugar: 1g | Calcium: 7mg | Iron: 2mg

Editor's Note: Originally published November 12, 2011. Updated with expanded options, refreshed photos, and a table of contents to help navigation.

Jake chewing a ball,

Baked Mayonnaise Split Chicken Breasts

Oven Baked Mayonnaise Parmesan Split Chicken Breast on plate

Baked Mayonnaise Split Chicken Breasts is a simple recipe that starts with a spicy mayonnaise base, adds a Parmesan Panko topping, and bakes in the oven for an easy and economical dinner that takes about an hour.

🐓Ingredients

Split chicken breasts
Mayonnaise
Panko bread crumbs
Parmesan cheese
Pantry ingredients—paprika, garlic powder, cayenne pepper (optional), salt, and black pepper.

Oven Baked Mayonnaise Parmesan Split Chicken Breast on plate.
[feast_advanced_jump_to]
Blue ribbon divider used for visual effect

quote mark
Featured Comment by Tami:
⭐⭐⭐⭐⭐
"Love this chicken. We have it at least once a month!"

So, what is better than one Paula Deen recipe? Well, the answer is two Paula Deen recipes. And neither one had butter. Amazing.

I was looking for an oven-fried chicken recipe. Paula Deen had a couple, and I combined them for a great topping and a spicy mayo base.

👨‍🍳How to Make Baked Mayonnaise Split Chicken Breasts—Step-by-Step Photo Instructions

Spray rack on tray and foil with PAM.

1. Preheat the oven to 375° convection. Line a baking pan with aluminum foil and, if you have one, top it with a rack. Spray the pan well with PAM.

Cut a split chicken breast in half with a knife.

2. Dry and split the chicken breast in half.

Spices with mayo.

3. Mix mayonnaise, paprika, salt, pepper, and garlic powder. Add optional cayenne and mix well.

Bread crumbs with Parmesan in the tray.

4. Combine panko breadcrumbs and Parmesan in a dredging pan or on a large plate.

Brushing pieces of chicken with spicy mayonnaise.

5. Paint the breasts on all sides with the mayo paste.

Dipping chicken in the coating mixture.

6. Roll in the breadcrumb mixture and place on the prepared pan.

Adding more topping to the chicken on the rack.

7. Sprinkle the top with a little of the leftover breading mix and pat it on a little.

Four pieces of chicken on a white plate.

8. Bake at 375° for about 50 minutes to an internal temp of 165°.

For more details, keep reading. See the Recipe Card below for complete instructions and to print.

🐓What chicken to use

In this recipe, I was aiming for a skin-on bone-in split chicken breast. It will work fine with skinless boneless chicken breasts but the cooking time will be a bit less. However, I have a specific recipe for the skinless boneless chicken breast that is what I would recommend you try Baked Chicken with Mayonnaise.

🤔How to best prepare split chicken breast for cooking

The main issue most people have cooking split chicken breast is the size they now come in. They are so big; you almost need to rest them like a turkey breast.  Which makes them a non-weeknight recipe.

My solution is simple. We cut them up. Suddenly cooking is easier and quicker. The serving size is more appropriate and there is more surface area for seasonings and coatings.

  1. Start with patting the chicken breast dry. We no longer rinse chicken. See Chicken… To Rinse or Not To Rinse?
  2. Cut off the rib section.
  3. Cut into 2 or 3 equal size pieces.

🐓Other split chicken breast recipe

I do love bone-in (Split) chicken breast recipes, they are economical, easy to bake or grill and packed with flavor. You may also like one of my all-time favores, Baking Bone-In Chicken Breasts or try some others variations like Herbs de Provence Chicken.

Or fire up the grill for Grilled Split Chicken Breasts,

🍽️How to serve chicken breasts

Serve with a starch vegetable, such as Oven Roasted Red Potatoes or a Cheesy Cauliflower Casserole. For a great finishing touch, add some dinner rolls and a fresh strawberry pie with Jello .

❄️Store leftovers

Leftovers can be refrigerated in an airtight container for 3-4 days, but the skin texture will deteriorate. You can also freeze leftovers for 3 months.

Use the leftovers by just reheating, preferably in the oven covered. The microwave will affect the meat's texture. Also, leftovers are an excellent cut-up to top salads or make my basic chicken salad recipe or Waldorf Chicken Salad.

❓FAQs

What are split chicken breasts?

Split chicken breasts are also known as bone-in chicken breasts.

Technically, bone-in chicken breast should include both sides of the chicken in one piece, but the breast bone is split during processing, creating two pieces. So they are called split or bone-in.

For years, they were called skin-on bone-in chicken breasts, but since they are not generally sold without the skin, the "skin-on" part is frequently dropped. Most cooks feel they have more taste and moisture than the more popular boneless skinless chicken breasts.

⚕️Chicken food safety tips

Raw chicken and other poultry should be considered contaminated and handled with care. Wash your hands carefully before and after touching raw chicken. We do NOT wash raw chicken routinely due to water splatter. See Chicken… To Rinse or Not To Rinse? for more information.

You must cook chicken to an internal temperature of 165° for safety—see the USDA for more information. You need to check this with an instant-read thermometer.

Blue ribbon divider used for visual effect

📖The Recipe Card

Oven Baked Mayonnaise Parmesan Split Chicken Breast on plate
Print Recipe Add to Collection Go to Collections
5 from 4 votes

Baked Mayonnaise Split Chicken Breasts

Baked Mayonnaise Split Chicken Breasts is a simple recipe that starts with a spicy mayonnaise base, adds a Parmesan Panko topping, and bakes in the oven for an easy and economical dinner that takes about an hour.
Prep Time10 minutes mins
Cook Time50 minutes mins
Total Time1 hour hr
Course: Main Course
Cuisine: American
Keyword: Bake mayonase chicken breasts, bone in chicken breast recipes with mayonnaise, Split chicken breast recipe
Servings: 4 servings
Calories: 332kcal
Author: Dan Mikesell AKA DrDan

Ingredients

  • 2 bone-in skin-on chicken breasts with ribs removed AKA split chicken breast
  • ¼ cup mayonnaise
  • ½ teaspoon paprika
  • ¼ teaspoon salt
  • ¼ teaspoon pepper
  • ¼ teaspoon garlic powder
  • ⅕ teaspoon cayenne optional
  • ½ cup Panko bread crumbs
  • ¼ cup Parmesan cheese
US Customary - Convert to Metric

Instructions

  • Preheat oven to 375° convection or 400° for a regular oven. Prepare a baking pan by lining it with aluminum foil and topping it with a rack if you have one. Spray the rack with PAM.
    spary rack on tray and foil with pam
  • Pat dry chicken breast.
    pat dry chicken breasts with paper towels
  • Trim off ribs. Split the chicken breast in half
    cutting a split chicken breast in half with knife
  • Mix ¼ cup mayonnaise, ½ teaspoon paprika, ¼ teaspoon each of salt, pepper, and garlic powder. Add ⅛ teaspoon cayenne and mix well.
    spices with mayo
  • Combine ½ cup panko breadcrumbs and ¼ cup Parmesan in a dredging pan or on a large plate.
    bread crumbs with Parmesan in tray
  • Paint the breasts on all sides with the mayo paste.
    brushing pieces of chicken with spicy mayo
  • Roll in the breadcrumb mixture and place on the prepared pan. Sprinkle the top with a little of the leftover breading mix and pat it on a little.
    dipping chicken in the coating mixture
  • Bake at 375° for about 50 minutes to an internal temp of 165°.
    four pieces of chicken on white plate

Notes

Pro Tips:

  1. Don't rinse chicken due to safety issues.
  2. Trim chicken by cutting off the rib section and then cutting it into 2-3 equal pieces.
  3. Elevation on a rack helps with even cooking.
  4. When placing on the baking tray or rack, put the thicker ends towards the outside of the tray.
  5. The minimum safe internal temperature is 165°. Please do not cut it short. But if you go much longer, it will dry out.

Nutrition

Calories: 332kcal | Carbohydrates: 14g | Protein: 34g | Fat: 15g | Saturated Fat: 4g | Polyunsaturated Fat: 4g | Monounsaturated Fat: 5g | Cholesterol: 92mg | Sodium: 743mg | Potassium: 255mg | Fiber: 0.1g | Sugar: 2g | Vitamin A: 450IU | Vitamin C: 0.1mg | Calcium: 80mg | Iron: 1.4mg

Editor's Note: Originally Published September 18, 2011. Updated with expanded options, refreshed photos, and a table of contents to help navigation.
Molly dog walking on a green lawn.

Grilled French Fries

Grilled French Fries in a bowl

French fries and the grill are not something most people do. But with the right technique, this can be standard with these easy-to-follow step-by-step photo instructions.

fries in white bowl with towels
[feast_advanced_jump_to]
Blue ribbon divider used for visual effect

There are only a few instructions, and they vary a lot. So I always like to experiment, and this is the 5th try in 2 weeks, and I now have it right.

They are not your basic fast food-tasting fry. They are a cross between a fast-food fry and a hash brown. And a great reason to buy that 10 or 12-inch cast iron pan.

Serve grilled fries with Grilled Pineapple making the perfect side dishes for Burgers on the Grill, Juicy Lucy Burgers, Grilled Pork Tenderloin, Grilled Chicken Breasts, or Grilled Drumsticks.

Check out these related potato recipes, like Convection Oven Baked French Fries—frozen or fresh cut, Easiest Stovetop French Fries Ever, Grilled Baby Potatoes, and Grilled Baked Potatoes without Foil.

🥔Ingredients

  • Potatoes
  • Vegetable oil
  • Salt

👨‍🍳How to Cook French Fries on the Grill

  1. Cut potatoes into ¼ inch fries.
  2. Wash and soak in cold water for 10-20 minutes, then drain and dry with paper towels.
  3. Coat fries with oil.
  4. Coat a grill-safe pan with oil. Add fries to the pan. A cast iron skillet is preferred.
  5. Place over direct heat of about 450° grill surface temperature and try to avoid any hot spots.
  6. Do not touch for 12 minutes, then flip the fries and rotate the pan. Flip and rotates every 4 to 6 minutes.
  7. Cooking about 30-35 minutes total until well browned. Salt and server hot.

♨️The Grill

The grill should be 450°-500° surface temperature. That is usually a bit above medium on most gas grills. It is also the grill temperature I usually recommend for most chicken and pork recipes.

If you have questions about grill setup, see my discussion about controlling Grill Temperature.

Try to avoid any "hot spots" you have on your grill. A heavier pan like cast iron will help even out any hot spots. The larger the pan, the better.

🥔Potatoes

Russet or Yukon Gold potatoes are a good choice, but most potatoes should work. You can leave the skin, but I suggest peeling if using Russets. Other potatoes have thinner skin, and peeling is more of a personal choice.

I suggest ¼ inch fries. The thicker the fries, the longer and harder the cooking. I use a mandolin, but please follow the safety recommendations of the manufacturer if you do. Otherwise, just a good knife will do.

The potatoes need to be soaked for 10-20 minutes in cold water and then dried well before proceeding. If you skip this still, you will have a mushy mess.

✔️Grilling Tips

  • Try to avoid any hot spots on your grill.
  • Do thin fries-They need to cook entirely on the grill. Thicker than ⅜ inch will not do.
  • Rotate the pan every time you touch the fries. Hot spots will do you in.
  • Keep your hands off a lot more than you want. You will just break them up.
  • A well-seasoned cast-iron skillet is almost a must for best results.

It is another KISS recipe that is easily scalable to the size you need, but you will have difficulty doing a large batch. More than 2-3 pounds of potatoes should be a practical limit in a very large pan.

❓FAQs

Can I grill frozen French fries?

Yes, they will work. Pick thin fries; they go on frozen and will take longer. Don't forget the oil and do not presoak in cold water.

Should I precook the potatoes?

No. They go on raw, not pre-cooked. I tried to do various precooking, and they became too weak to work. They become mush.

Why soak raw potatoes?

It is important to presoak and dry. The soaking removes starch that will cause the fries to stick, and the drying promotes crispiness.

Blue ribbon divider used for visual effect
↑Jump to Table of Contents

This recipe is listed in these categories. See them for more similar recipes.

Grill Recipes, Grill Side Dish Recipes, Potato Recipes, Side Dish Recipes

Have you tried this recipe, or have a question? Join the community discussion in the comments.

Step-by-Step Photo Instructions

slicing potatoes with a mandolin

Preheat grill to 450°-500° grill surface temperature. Scrub the potatoes—about 1 pound for two servings. Cut into ¼ inch fries. I used a mandolin.

rinsing fries under running water

Wash the fries in cold water. Soak for 10-20 minutes and drain. Place on paper towels and pat dry.

mix fries with oil in a white bowl

Add ¼ cup of oil to the fries and mix well. Do not use olive oil.

adding fries to grill pan

Coat grill-safe pan with oil. Add fries to the pan. Cast iron is preferred.

cast iron pan with fries over direct heat

Place over direct heat and try to avoid any hot spots.

using a metal spatula to flip fries

Do not touch for 12 minutes, then flip the fries and rotate the pan. Flip every 4 to 6  minutes. Use a shorter duration near the end of cooking. Be sure to scrape the bottom to prevent sticking, and rotate the pan with every flip.

adding salt to fries in bowl

Cooking about 30-35 minutes total until well browned. Remove from grill. Place on a paper towel-lined bowl and sprinkle with coarse salt.

↑Jump to Table of Contents

📖The Recipe Card

French fries on bowl with white towels
Print Recipe Add to Collection Go to Collections
4.50 from 2 votes

Grilled French Fries

French fries and the grill are not something most people do. But with the right technique, this can be a standard with these easy-to-follow step-by-step photo instructions. They are not your basic fast food-tasting fry. They are a cross between a fast food fry and a hash brown.
Prep Time10 minutes mins
Cook Time30 minutes mins
Total Time40 minutes mins
Course: Potato
Cuisine: American
Keyword: French fries on the grill, Grilled French Fries, Grilled Fries
Servings: 2
Calories: 575kcal
Author: Dan Mikesell AKA DrDan

Ingredients

  • 1 to 1 ¼ pounds potatoes about two medium
  • ¼ cup vegetable oil
  • kosher salt to taste
US Customary - Convert to Metric

Instructions

  • Preheat grill to 450°-500° grill surface temperature. Scrub the potatoes. About 1 pound for two servings. Cut into ¼ inch fries. I used a mandolin.
  • Wash the fries in cold water. Soak for 10-20 minutes and drain. Place on paper towels and pat dry.
  • Add ¼ cup of oil to the fries and mix well. Do not use olive oil.
  • Coat a grill-safe pan with oil. Add fries to the pan. Cast iron is preferred.
  • Place over direct heat and try to avoid any hot spots.
  • Do not touch for 12 minutes, then flip the fries, and rotate the pan. Flip and rotate every 4 to 6  minutes. Use a shorter duration near the end of cooking. Be sure to scrape the bottom to prevent sticking and rotate the pan with every flip.
  • Cooking about 30-35 minutes total until well browned. Remove from grill. Place on a paper towel-lined bowl and sprinkle with coarse salt.

Notes

Pro Tips

  1. I prefer russet potatoes, but others work.
  2. Try to avoid any hot spots on your grill.
  3. Do thin fries-They need to cook completely on the grill. Thicker than ⅜ inch will not do.
  4. They go on raw, not pre-cooked. I tried to a varying amount of precooking, and they became too weak to work.
  5. Wash and soak them after cutting. The starch will stick them together. Then pat dry (important.)
  6. Rotate the pan every time you touch the fries. Hot spots will do you in.
  7. Keep your hands off a lot more than you want. You will just break them up.
  8. A well-seasoned cast-iron pan is almost a must.

Nutrition

Calories: 575kcal | Carbohydrates: 45g | Protein: 5g | Fat: 43g | Saturated Fat: 6g | Polyunsaturated Fat: 24g | Monounsaturated Fat: 11g | Sodium: 1198mg | Potassium: 1096mg | Fiber: 6g | Sugar: 2g | Vitamin C: 56.1mg | Calcium: 30mg | Iron: 2.2mg

Editor's note: Originally published July 3, 2011. Updated with expanded options, refreshed photos, and a table of contents to help navigation.

Dogs on the run

Grilled Biscuits

grill biscuits in a cast iron skillet

It's time for some tasty, flaky biscuits on the grill with these easy-to-follow photo instructions. Grill on and enjoy a biscuit on me.

🥣Ingredients

Flour—all-purpose flour
Baking powder
Salt
Butter
Buttermilk—or substitute

grill biscuits in a cast iron skillet.
[feast_advanced_jump_to]
Blue ribbon divider used for visual effect

Everybody, including me, is searching for more grilled side dishes. Grill biscuits go with almost any grilled meal. They have a great grilled taste on top of that buttermilk biscuit texture. Everybody will love them.

We all have extra space on the grill for an easy side like this—a very nice standard biscuit. All you need to do is turn down the heat and rotate the pan. The grill temperature goes nicely with most chicken and pork recipes.

Uses everyday pantry ingredients. You can use my biscuit, your biscuit recipe, or even refrigerated biscuits. It's easy to make as few or as many as you want.

👨‍🍳How to cook biscuits on a grill

cleaning and oiling grill grates.

If the grill is not already on, preheat to medium, which is a grill surface temperature of 400°-450°. If the grill is on, then adjust the temperature to 400°-450°.

cutting butter into flour mixture.

Combine  2 cups flour, 1 tablespoon baking powder, and 1 teaspoon salt. Mix well. Using the fork, cut in 6 tablespoons of butter.

brushing oil coating in a cast iron pan.

Brush a cast-iron skillet with 1-2 teaspoons of oil. You may use any grill-safe pan with a solid bottom, but cast iron is preferred and will minimize the effect of hot spots on the grill.

adding liquid mixture to flour mixture in white bowl.

Mix ¾ cup buttermilk into dry. Mix until moist, and do not over-mix.

eight raw biscuits in a cast iron pan.

Using a large tablespoon heaped with dough, make eight biscuits and place them in a pan.

skillet with biscuits on grill.

Place on grill over medium heat. Rotate the pan every 5-6 minutes.

Grilled Biscuits in cast iron pan.

Cook until browning nicely—about 15-18 minutes, but somewhat variable due to the grill and pan.

bisciut with butter on plate.

If unsure, you can check for an internal temperature of 200°-210° with an instant-read thermometer.

For more details, keep reading. See the Recipe Card below for complete instructions and to print.

✔️Tips to make them right every time

  • Use any drop biscuit recipe you want. I went with a simple one from an old Betty Crocker Cookbook I have used for years.
  • Grill temperature is important. You usually think of doing biscuits at a high temperature in the oven. But high in the oven is 425° while high on a grill is usually 550° to 700°. Not the same.
  • I use a 10-inch cast iron pan, but any solid bottom grill pan or griddle would work.
  • Cast iron is preferred since it will distribute the heat well, and hot spots on the grill will have less effect.

Other grilled side dishes

And don't forget to check out some other grilled side dishes, like Grilled Pineapple, Grilled Peaches, Grilled Stuffed Tomatoes, Grilled Carrots, or Grilled Baked Potatoes without Foil.

Serving suggestions

The cooking time and temperature work well on a gas grill while grilling pork tenderloin, grilled chicken breasts, or grilled pork loin chops.

You can also adjust the temperature on part of the gas grill while cooking Grilled Whole Chicken, Grilled NY Strip Steak, Boneless Pork Ribs on the Grill, or Grilled Tilapia.

❓FAQs

How to make a buttermilk substitute.

If you don't have buttermilk, you can substitute by adding 2 teaspoons of vinegar or lemon juice to ¾ cup of milk and let it sit for a few minutes.

Can refrigerated biscuits be cooked on the grill?

Yes, the method will be the same, but the timing will vary by the size and thickness of the biscuits. Use color and internal temperature to test for doneness.

What is the final internal temperature of a fully cooked biscuit?

While we usually cook biscuits by color, if you are unsure, use an instant-read thermometer. The suggested internal temperature is 200°-210°.

Blue ribbon divider used for visual effect

This recipe is listed in these categories. See them for more similar recipes.

Bread Recipes, Grill Recipes, Grill Side Dish Recipes

Have you tried this recipe, or have a question? Join the community discussion in the comments.

📖The Recipe Card

grill biscuits in a cast iron skillet
Print Recipe Add to Collection Go to Collections
4.72 from 14 votes

Grilled Biscuits

It's time for some tasty flaky biscuits on the grill with these easy to follow photo instructions. Grill on and enjoy a biscuit on me.
Prep Time5 minutes mins
Cook Time15 minutes mins
Total Time20 minutes mins
Course: Bread
Cuisine: American
Keyword: grilled biscuits, Grilled Side Dish
Servings: 8
Calories: 204kcal
Author: Dan Mikesell AKA DrDan

Ingredients

  • 2 cups AP flour
  • 1 tablespoon baking powder
  • 1 teaspoon salt
  • 6 tablespoons butter
  • ¾ cup buttermilk
US Customary - Convert to Metric

Instructions

  • If the grill is not already on, preheat to medium, which is a grill surface temperature of 400°-450°. If the grill is on, then adjust the temperature to 400°-450°.
    clean and oil grill crates
  • Combine  2 cups flour, 1 tablespoon baking powder, and 1 teaspoon salt. Mix well. Using the fork, cut in 6 tablespoons of butter.
    cutting butter into flour mixture
  • Brush a cast-iron skillet with 1-2 teaspoons of oil. You may use any grill-safe pan with a solid bottom, but cast iron is preferred and will minimize the effect of hot spots on the grill.
    brushing oil coating in a cast iron pan
  • Mix ¾ cup buttermilk into dry. Mix until moist and do not over-mix.
    adding liquid mixture to flour mixture in white bowl
  • Using a large tablespoon heaped with dough, make eight biscuits and place them in a pan.
    eight raw biscuits in a cast iron pan
  • Place on grill over medium heat. Rotate the pan every 5-6 minutes.
    skillet with biscuits on grill
  • Cook until browning nicely—about 15-18 minutes, but somewhat variable due to the grill and pan. If unsure, you can check for an internal temperature of 200°-210° with an instant-read thermometer
    Grilled Biscuits in cast iron pan

Notes

Pro Tips

  1. I have provided my own buttermilk biscuit recipe from a 1972 Betty Crocker cookbook, but you may use any biscuit recipe.
  2. I like to use my 10-inch cast-iron skillet for this recipe but any solid bottom grill pan or griddle should work. Cast iron will help even out hot spots on the grill.
  3. If you don't have buttermilk, you can substitute by adding 2 teaspoons of vinegar or lemon juice to ¾ cup of milk and let it sit for a few minutes.
  4. You should know your grill enough to know any hot spots. Avoid those for this recipe.
  5. Use a grill surface temperature of 400°-450°.
  6. Cook until golden brown, which will vary by the pan and grill. A cooked biscuit should have an internal temperature of 200° to 210°.

Trouble Shooting Tips

  1. If one area is burnt on the bottom, you have a hot spot on the grill that you should avoid in the future.
  2. If you cook at too high of a temperature, the outside will get done, but the inside will not be done.
  3. If the size of your biscuits is too large, the outside will get done, but the inside will not be done.

Nutrition

Calories: 204kcal | Carbohydrates: 26g | Protein: 4g | Fat: 10g | Saturated Fat: 6g | Cholesterol: 25mg | Sodium: 391mg | Potassium: 215mg | Fiber: 1g | Sugar: 1g | Vitamin A: 300IU | Calcium: 98mg | Iron: 2mg

Editor's note: Originally Published June 1, 2011. Updated with expanded options, refreshed photos, a slight update to technique to reflect current practice, and a table of contents to help navigation.

Lilly as a deck puppy.
Lilly's first begging

Easy Baked BBQ Split Chicken Breasts

BBQ chicken breast on white plate

Baked BBQ Split Chicken Breasts only take 2 ingredients and a few knife skills. This is an economical recipe for moist and tender chicken with a wonderful taste.

Ingredients

Split (skin-on-bone-in) chicken breasts
BBQ sauce of your choice.

a piece of BBQ Split Chicken Breast on a white plate.
[feast_advanced_jump_to]
Blue ribbon divider used for visual effect

Featured Comment from Deborah:
"Chicken barbecue is an art that even competition grillers hate. I was lazy and wanted to cook indoors. This is awesome. Perfect consistency and moisture."

Split chicken breasts are very economical, but most people have no idea how to cook them. It doesn't get simpler than this. Cut up the chicken, bake, and then baste a few times—a cooking skill level of 2/10. You can do it.

This easy step-by-step recipe for BBQ chicken produces moist and tender results with no skill. It only needs two ingredients—the chicken and BBQ sauce.

The most important part of this recipe is trimming the chicken into serving-size pieces, which aids in cooking and serving.

The quality of your results is also dependent on your BBQ sauce. If you have a sauce you love, use it. If not, use my Memphis BBQ Sauce, which you will love.

👨‍🍳How to Cook Baked BBQ Split Chicken Breasts

  1. Preheat the oven and prepare a baking tray with foil, a rack (optional), and a coat of PAM cooking spray.
  2. Trim skin-on-bone-in chicken breasts (split breasts) by removing the rib section and cutting it into serving-size pieces.
  3. Bake the chicken for about 35-40 minutes and an internal temperature of 155° to 160°.
  4. Brush the chicken with BBQ sauce and bake until 165°.
  5. Remove from the oven and brush with sauce again. Rest for 5 minutes and serve.

For more details, keep reading. See the Recipe Card below for complete instructions and to print.

✔️Tips to get it right every time

  • Be sure to cut the chicken into more reasonable-sized pieces for cooking and serving reasons.
  • Since the sauce provides all the seasoning, there is no reason for another seasoning. Also, oil is not needed.
  • We no longer recommend washing chicken; just a good pat dry is all that is needed. For more information, please see Chicken... To Rinse or Not To Rinse?

Serving

Serve with Cornmeal Biscuits, Broccoli Slaw Salad, or Microwave Corn on the Cob. Add in some Convection Oven French Fries using fresh homemade or frozen French fries. Or try some easy Roasted Small Potatoes.

Related recipes

Check out some other great split chicken recipes, like Baked Split Chicken Breasts, Herbs de Provence Chicken, and Baked Mayonnaise Split Chicken Breasts.

For some excellent crock pot BBQ recipes, try Baby Back Ribs in the crock pot, Crock Pot Shredded Pork Tenderloin, and Crock Pot Pulled Pork.

❄️Leftover storage and reheating

Store leftovers in an airtight container, then refrigerate for 3 days or freeze for 3 months.

I like my leftover BBQ chicken cold, but reheating it in the oven in a covered dish is preferred. A microwave will change the texture of the chicken and its skin.

❓FAQs

Why cut up the split chicken breasts?

If there is a “secret,” it is how to prepare a split chicken breast for cooking. Trimming into smaller pieces makes it much easier to get a safe final internal temperature of 165° without overcooking to the surface (good). It makes more surface area for seasoning (good). And makes more reasonably sized servings (also good).

Step one is cutting off the attached rib section. There is no meat; it takes seasoning and tends to burn. It is not a must-do, but a nice touch.

Step two is to cut it into two or three equal pieces. Trying to cook the whole thing at once will almost always burn it on the outside before reaching a safe 165° internal temperature.

What is the best BBQ sauce to use for BBQ chicken?

Chicken tastes best with a BBQ sauce with some sweetness. That is usually a Memphis or Kansas City sauce.

I prefer my Gate's BBQ sauce from Kansas City or my homemade Memphis Barbecue Sauce. Cooks Illustrated like Bull's-eye Original or Sweet Baby Ray's Barbecue Sauce. But use the sauce you love.

🐓About Skin-on Bone-in (Split) Chicken Breasts

Skin-on-bone-in chicken breasts are also known as split chicken breasts. They are called split chicken breasts because, during processing, the entire breast is removed with some ribs. It is then "split" down the middle of the breast bone to produce two pieces.

Many people feel they have more taste and moisture than the skinless boneless variety.

Blue ribbon divider used for visual effect
↑Jump to Table of Contents

This recipe is listed in these categories. See them for more similar recipes.

BBQ Recipes, Chicken Recipes

Have you tried this recipe, or have a question? Join the community discussion in the comments.

Step-by-Step Photo Instructions

Trimming ribs off split chicken breasts on black board.

Start with preheating the oven to 400° convection or 425° conventional.

cutting a split chicken breast in half with knife.

Trim the rib section off the chicken breasts (optional) and divide the chicken breasts into 2-3 equal size pieces each—pat dry.

spraying a rack on baking sheet with PAM.

Prepare a smaller baking pan with aluminum foil (to help clean up) and a cooking rack sprayed with PAM. If you don't have a rack, you can skip it.

chicken breast halves on rack.

Arrange the breast with the thicker parts of each piece to the outside of the pan.

brushing sauce on cooked chicken.

Bake until internal temp of 155° to 160°. That will be about 35 to 40 minutes, depending on your oven and the size of the breasts. Remove from oven and brush on a coat of sauce. Place the chicken back in the oven until it is at least 165° before removing it—about 5 minutes.

BBQ chicken breasts on white plate.

After removing from the oven, apply another coat of sauce.

📖The Recipe Card

BBQ chicken breast on white plate
Print Recipe Add to Collection Go to Collections
4.07 from 78 votes

Easy Baked BBQ Split (Bone-in Skin-on) Chicken Breasts

Baked BBQ Split (Bone-in Skin-on) Chicken Breasts only takes 2 ingredients and a few knife skills. This is an economical recipe for moist and tender chicken.
Prep Time5 minutes mins
Cook Time45 minutes mins
Total Time50 minutes mins
Course: Main, Main Course
Cuisine: American
Keyword: Baked Chicken Breast, BBQ Chicken, Split Chicken Breasts
Servings: 4 servings
Calories: 217kcal
Author: Dan Mikesell AKA DrDan

Ingredients

  • 2 split chicken breast
  • ½ cup BBQ sauce of choice
US Customary - Convert to Metric

Instructions

  • Start with preheating the oven to 400° convection or 425° conventional. Trim the rib section off the chicken breasts
    cutting ribs off a split chicken breast
  • Divide the chicken breasts into 2-3 equal size pieces each—pat dry.
    cutting a split chicken breast in half with knife
  • Prepare a smaller baking pan with aluminum foil (to help clean up) and a cooking rack sprayed with PAM. If you don't have a rack, you can skip it.
    spraying a rack on baking sheet with PAM
  • Arrange the breast with the thicker parts of each piece to the outside of the pan.
    chicken breast halves on rack
  • Bake until internal temp of 155° to 160°. That will be about 35 to 40 minutes, depending on your oven and the size of the breasts. Remove from oven and brush on a coat of sauce. Place back in the oven until the chicken is at least 165° before removing—about 5 minutes.
    brushing sauce on cooked chicken
  • Remove from oven and apply another coat of sauce.
    BBQ chicken breasts on white plate

Notes

Pro Tips

  1. Scale to the amount you need.
  2. Use a sauce you love. I usually use my Memphis sauce.
  3. No other seasoning is needed.
  4. The rack is nice to use but not required. Just a good coat of PAM on the foil will do.
  5. Arrange the chicken with the thickest part to the outside of the tray. This will help a lot in even cooking.
  6. Good refrigerated for 3-4 days.
  7. I never brine skin-on chicken breasts. They stay very moist anyway.
  8. Just pat dry the breasts. For safety, we do not recommend rinsing chicken.

Nutrition

Serving: 100g | Calories: 217kcal | Carbohydrates: 15g | Protein: 19g | Fat: 9g | Saturated Fat: 2g | Cholesterol: 58mg | Sodium: 424mg | Potassium: 282mg | Fiber: 1g | Sugar: 12g | Vitamin A: 155IU | Vitamin C: 1mg | Calcium: 22mg | Iron: 1mg

Editor's note: Originally published May 21, 2011. Updated with expanded options, refreshed photos, and a table of contents to help navigation.

Molly in the yard.

Grilled Memphis Boneless Pork Ribs

boneless ribs on plate with sauce

Get the best boneless country-style ribs ever, Memphis style, with these easy-to-follow step-by-step photo instructions. Try these moist and tasty grilled boneless ribs today.

boneless ribs on plate with sauce
[feast_advanced_jump_to]
Blue ribbon divider used for visual effect

👍Why you will love this recipe

  • This recipe has the tasty classic sweet heat of Memphis BBQ.
  • Country-style pork ribs are a perfect "for two" meat due to their size.
  • Boneless ribs are tender and moist, but the brine brings extra moisture to these grilled ribs.
  • An easy grilled dinner with great flavor.
  • Combine it will Memphis BBQ Sauce for a wonderful tasting experience. I can taste Memphis just reading this.

🐖Ingredients

  • Country-style boneless pork ribs
  • Memphis Dry Rub—paprika, brown sugar, black pepper, chili powder, cayenne pepper, dry mustard, garlic powder, onion powder, salt
  • Optional brine—salt, brown sugar

👨‍🍳How to Grill Memphis Boneless Pork Ribs

  1. Trim ribs of any fat cap and deepen the preexisting cross cuts.
  2. Do optional brine if you have time.
  3. Mix my suggested dry rub. Eliminate the salt if you did the brine.
  4. Apply the rub and wrap it in plastic wrap. Refrigerate for 1-4 hours or overnight.
  5. Preheat the grill to a surface temperature of about 450°
  6. Place over direct heat, flip about every 5 minutes, and grill until an internal temperature of about 145°-150°—about 20 minutes.
  7. During the last few minutes of grilling, you may wish to brush with the sauce of your choice.

🧂Brining country-style boneless pork ribs

The brine is optional but highly recommended. Brining the ribs will help prevent most of the dryness associated with lean pork. This is a standard brine for ribs, pork tenderloin, or pork chops.

Use 2 cups of water, 1 tablespoon salt, and 1 tablespoon brown sugar. Be sure the brine covers the ribs. Refrigerate for 1-4 hours, then rinse well under running water before proceeding. Also, leave the salt out of any rub or seasoning.

Related Posts

Guide to Grill Temperature- Always get the right grill temperature.

Boneless Pork Ribs on the Grill - My complete guide to grill this cut of meat.

Memphis Barbecue Sauce - The best BBQ Sauce for this recipe.

Baked Boneless Pork Ribs

❓FAQs

Are boneless country-style pork ribs the same as country-style ribs?

No, they are different cuts. The bone-in variety is cut from the area between the pork loin and the Boston butt. It is generally a mixture of various muscles and some bones from the butt area. It is fatty and should usually be cooked low and slow, like pork butt.

The boneless variety is from the other end of the pork loin. It is the skinny tail of the loin, cut in half the long way and then scored into rib sections across the grain. So it is a pork chop in a different shape. So they are lean and should be cooked quickly, and brining them can help with any dryness.

Image licensed May 17, 2017, from Fontolia—copyright by foxysgraphic - Fotolia. The image was modified in accordance with the license.
What is the best final internal temperature for boneless pork ribs?

The minimum safe internal temperature for boneless ribs is 145°, according to the USDA. It is the same for any pork that is not ground.

How to store leftovers?

Leftovers should be sealed airtight and refrigerated for 3-4 days or frozen for 3 months.

Step-by-Step Photo Instructions

deepening the rib cuts

Trim ribs of any fat cap and cut the preexisting cross cuts about ¾ of the way through.

adding boneless ribs to brine

The brine is optional but highly recommended. Use 2 cups of water, 1 tablespoon salt, and 1 tablespoon brown sugar. Refrigerate for 1-4 hours, then rinse well under running water before proceeding. Also, leave the salt out of the Memphis Rub.

Memphis dry rub ingredients

Mix the Memphis Dry Rub: 2 tablespoons paprika, 1 tablespoon brown sugar, 1 tablespoon kosher salt, 1 teaspoon black pepper, ½ teaspoon chili powder, ¼-1/2 teaspoon cayenne pepper, ½ teaspoon dry mustard, ½ teaspoon garlic powder, and ½ teaspoon onion powder. Leave the salt out if you brine.

adding rub to boneless ribs

Rub both sides and groves with the rub. Wrap tightly with plastic wrap and refrigerate for 1-4 hours, but overnight is fine.

clean and oil grill crates

Rest at room temp while you preheat the grill to 450°-500° surface temperature. Clean and oil the grill grates.

placing boneless ribs on grill

Place over direct heat and close the lid. Flip about every 5 minutes and grill until an internal temperature of about 145°-150°—about 20 minutes, depending on the grill and the thickness of the meat.

slab of boneless ribs on white plate

In the last few minutes of grilling, you may wish to brush with the sauce of your choice. Rest for at least 5 minutes before serving.

📖The Recipe Card

boneless ribs on plate with sauce
Print Recipe Add to Collection Go to Collections

Grilled Memphis Boneless Pork Ribs

Get the best boneless country-style ribs ever, Memphis style, with these easy-to-follow step-by-step photo instructions. Try these moist and tasty grilled boneless ribs today.
Prep Time1 hour hr 10 minutes mins
Cook Time20 minutes mins
Total Time1 hour hr 30 minutes mins
Course: Main, Main Course
Cuisine: American
Keyword: BBQ Ribs, country style ribs, grilled boneless pork ribs
Servings: 4 servings
Calories: 259kcal
Author: Dan Mikesell AKA DrDan

Ingredients

  • 1 slab country style boneless pork ribs

Memphis Dry Rub

  • 2 tablespoons paprika
  • 1 tablespoon brown sugar
  • 1 teaspoon black pepper
  • ½ teaspoon chili powder
  • ¼ to ½ teaspoon cayenne pepper
  • ½ teaspoon dry mustard
  • ½ teaspoon garlic powder
  • ½ teaspoon onion powder
  • 1 tablespoon kosher salt

Optional Brine

  • 2 cups cold water
  • 1 tablespoon table salt
  • 1 tablespoon brown sugar
US Customary - Convert to Metric

Instructions

  • Trim ribs of any fat cap and cut the preexisting cross cuts about ¾ of the way through.
    deepening the rib cuts
  • The brine is optional but highly recommended. Use 2 cups of water, 1 tablespoon salt, and 1 tablespoon brown sugar. Refrigerate for 1-4 hours, then rinse well under running water before proceeding. Also, leave the salt out of the Memphis Rub.
    adding boneless ribs to brine
  • Mix the Memphis Dry Rub: 2 tablespoons paprika, 1 tablespoon brown sugar, 1 tablespoon kosher salt, 1 teaspoon black pepper, ½ teaspoon chili powder, ¼-1/2 teaspoon cayenne pepper, ½ teaspoon dry mustard, ½ teaspoon garlic powder, and ½ teaspoon onion powder. Leave the salt out if you brine.
    Memphis dry rub ingredients
  • Rub both sides and groves with the rub. Wrap tightly with plastic wrap and refrigerate for 1-4 hours, but overnight is fine.
    adding rub to boneless ribs
  • Rest at room temp while you preheat the grill to 450°-500° surface temperature. Clean and oil the grill grates.
    clean and oil grill crates
  • Place over direct heat and close the lid. Flip about every 5 minutes and grill until an internal temperature of about 145°-150°—about 20 minutes, depending on the grill and the thickness of the meat.
    placing boneless ribs on grill
  • In the last few minutes of grilling, you may wish to brush with the sauce of your choice. Rest for at least 5 minutes before serving.
    slab of boneless ribs on white plate

Notes

Pro Tips

  1. Deepen the cuts on the slab of ribs to increase the surface area for rub.
  2. Get the grill surface temperature correct.
  3. The brine is optional but highly recommended.
  4. DO NOT confuse the boneless version with the bone-in version of country ribs. The are totally different and not cooked the same.

Nutrition

Calories: 259kcal | Carbohydrates: 5g | Protein: 36g | Fat: 8g | Saturated Fat: 3g | Polyunsaturated Fat: 0.05g | Monounsaturated Fat: 0.02g | Cholesterol: 83mg | Sodium: 1801mg | Potassium: 33mg | Fiber: 0.3g | Sugar: 4g | Vitamin A: 3300IU | Vitamin C: 0.8mg | Calcium: 10mg | Iron: 1.3mg

Originally published April 14, 2011. Updated with expanded options, refreshed photos, and a table of contents to help navigation.

Molly and Lilly running for a treat

Grilled Split Chicken Breasts—Crispy and Delicious

Grilled split chicken breasts on a plate.

Grilled split chicken breasts (bone-in skin-on) can be tricky—but not with this method. Start with a little trimming, add a quick seasoning rub, and you’ll get juicy, crispy chicken every time. Want that sticky BBQ finish? Just brush on your favorite sauce near the end—no separate recipe needed.

❓ Quick Answer: Why Should I Trim Split Chicken Breasts?

  • Split chicken breasts are large—they usually cook unevenly, and the skin will usually burn before the inside reaches a safe 165°F.
  • Remove the rib section—it has little meat and usually burns first.
  • Cut into 2–3 serving-size pieces—they cook more evenly, season better, and give you crispier skin.
Grilled split chicken breasts on a plate.
[feast_advanced_jump_to]

🤔 TL;DR – Recipe Summary

What: Turn economical split (bone-in, skin-on) chicken breasts into a juicy, crispy grilled chicken dinner.

Why: Trimming helps them cook evenly with no marinade or brine needed.

How: Trim, season, and grill over medium-high heat (about 450°F) until the thickest piece reaches 165°F. Brush with BBQ sauce during the last few minutes if desired.

🐓 Ingredients

  • Split chicken breasts—also called bone-in, skin-on chicken breasts. The skin gets crispy, and the bone keeps the meat juicy.
  • Pantry ingredients—garlic powder, kosher salt, black pepper, and a little cayenne if you want some heat
  • Baking powder (optional)—helps dry the skin for extra crispiness
  • BBQ sauce (optional)—for a sticky finish near the end of grilling

👨‍🍳 Quick Overview: Grilled Bone-In Split Chicken Breasts

1. Trimming Split Chicken Breasts

Cut off the rib section from the bone-in chicken breasts and divide each into 2–3 serving-size pieces. Pat dry with paper towels.

cutting ribs off a split chicken breast

2. Seasoning

Use your favorite seasoning. For the BBQ version, just brush with olive oil and sprinkle with salt and pepper.

cut chicken breasts with seononing on white board.

✅ Pro Tip: Add a little baking powder to the rub for crispier skin. Let the chicken rest at room temp for 20–30 minutes before grilling.

3. Setup the Grill

Clean and oil the grates on a gas grill. While keeping one of the outside burners on low or off to create a cooler zone, preheat the grill’s main cooking area to about 450°F surface temperature—medium-high on most gas grills.

clean and oil grill crates.

4. Grill

Start skin-side up and grill for 5–6 minutes. Flip skin-side down for about 4 minutes. Keep alternating sides with uneven timing—use the cooler zone if the skin starts to overcook.

Raw chicken on the grill with skin up,

Grill until the internal temperature reaches 165°F, about 30 minutes total depending on your grill and the size of the pieces.

Grilled split chicken on a plate.

5. 🔥 BBQ Split Chicken Breasts Option

For a sticky finish, brush all sides with BBQ sauce during the last 5 minutes of grilling.

Bbq bone-in chicken breast on a blue plate.

👇 Scroll down for the printable recipe card and full step-by-step photo instructions—or keep reading for tips, veggie options, and serving ideas.

⏱️ How Long to Grill Split Bone-In Chicken Breasts

When properly trimmed, split bone-in chicken breasts take about 30 minutes on a 450°F grill to reach the safe internal temperature of 165°F, measured with an instant-read thermometer.

According to the USDA, 165°F is the minimum safe temperature for all poultry, including bone-in chicken breasts. Always check the thickest part of the meat.

🔥 Tips for Grilling Bone-In Split Chicken Breasts

  • Trim them down first. Large bone-in split breasts won’t cook evenly unless you cut them into smaller pieces. Learn how to trim split chicken breasts.
  • Use a surface thermometer. The hood thermometer lies. You want 450°F where the chicken is actually cooking.
  • Create a cooler zone. On a gas grill, keep one burner low or off so you have a place to move chicken if the skin starts to burn.
  • Pat the skin dry. No rinsing—just blot with paper towels so the seasoning sticks and the skin crisps.
  • Use kosher salt. It’s coarse and works better in rubs—but go light if you’re watching sodium.
  • Let it rest. Rest seasoned chicken at room temp for 15–20 minutes while the grill preheats.
  • Add heat if you want. A bit of cayenne in the rub gives it a little kick.
  • Want even crispier skin? Mix a little baking powder into the rub—it helps dry out the skin before grilling.

🍽️ Serving Suggestions

Serve with Grilled Corn on the Cob, Grilled Mixed Vegetables, or Grilled Baby Potatoes. Add Cornmeal Biscuits or Grilled Pineapple Slices for a sweet finish—and don't forget a summer classic Homemade Lemonade.

❓FAQs

What is a split chicken breast?

Split chicken breasts are bone-in, skin-on chicken breasts. They're called "split" because they’re separated down the breastbone into halves. They include part of the breastbone, a section of ribs, and the skin.

They have more flavor and moisture than skinless chicken, but they're large and cook unevenly unless trimmed properly.

Why is there baking powder in the rub?

Baking powder helps dry out the chicken skin for extra crispiness. Use aluminum-free baking powder to avoid an off taste. While some recipes suggest hours of resting time, this method gets good results in about 20–30 minutes. Totally optional—skip it if you’d rather not use it.

How long does it take to grill properly trimmed split chicken breasts on a gas grill?

Properly trimmed split chicken breasts take about 30 minutes on a medium-high gas grill (around 450°F). Always cook to an internal temperature of 165°F in the thickest part for safety.

Can you grill bone-in chicken breasts without marinade?

Yes. Bone-in split chicken breasts stay juicy without marinating. Just trim, season, and grill — the bone helps keep the meat moist, and the skin crisps nicely on its own.

Can I make BBQ split chicken breasts with this recipe?

Yes. For a BBQ finish, brush on your favorite sauce during the last 5 minutes of grilling. It gives properly trimmed split chicken breasts a sticky, flavorful glaze.

🔪 How to Trim Split Chicken Breasts

Chicken breasts just keep getting bigger—and harder to cook evenly. Trimming bone-in split breasts down gives you better serving sizes, more even cooking, and crispier skin.

Remove the rib section. It adds bulk but no meat, and it usually burns.

cutting ribs off a split chicken breast

Cut into 2–3 pieces. Smaller pieces cook faster, get seasoned better, and don’t burn on the outside before they’re done inside.

cutting a split chicken breast in half with knife

🔁 More Split Chicken Breast Recipes

Looking for more ways to use split chicken breasts? Try these favorites:

  • Crispy Baked Split Chicken Breasts
  • Herbs de Provence Chicken
  • Garlic Butter Stuffed Chicken Breast.

📖The Recipe Card

Grilled split chicken breasts on a plate.
Print Recipe Add to Collection Go to Collections
5 from 1 vote

Grilled Split Chicken Breasts—Juicy and Crispy Every Time

Properly trimmed split, bone-in chicken breasts grilled to juicy perfection with crispy skin. No brine, no marinade—just a simple trim-and-season method that works every time.
Prep Time1 hour hr
Cook Time30 minutes mins
Total Time1 hour hr 30 minutes mins
Course: Main Course
Cuisine: American
Keyword: BBQ split chicken breasts, Grilled bone-in chicken breasts, grillled split chicken breasts
Servings: 4
Calories: 196kcal
Author: Dan Mikesell AKA DrDan

Ingredients

  • 2 bone-in, skin-on chicken breasts (aka split chicken breasts)
  • 1 teaspoon kosher salt
  • ½ teaspoon black pepper
  • ½ teaspoon garlic powder
  • ¼ teaspoon cayenne pepper optional
  • 1 teaspoon aluminum free baking powder optional
  • BBQ sauce, for BBQ option
US Customary - Convert to Metric

Instructions

Trim the chicken

  • Trim chicken breasts by removing excess fat, loose skin, and the rib section. Cut each breast in half or thirds depending on size. Pat dry with paper towels.
    trimmed chicken breasts on black board

Seasoning

  • Mix the rub ingredients well.
    seasoning and baking powder to coat chicken
  • Apply rub to the skin side and lightly to the cut edges. Shake off excess—don’t try to use all the rub.
    For the BBQ version, just brush with olive oil and sprinkle with salt and pepper.
    cut chicken breasts with seononing on white board

Setup the grill

  • Clean and oil the grates. While keeping one of the outside burners on low or off to create a cooler zone, preheat the main cooking area to about 450°F surface temperature—medium-high on most gas grills.
    clean and oil grill crates

Grill

  • Place the chicken pieces over direct heat with the skin-side up. Grill for 5–6 minutes, then flip skin-side down for 3–4 minutes. Continue flipping, always keeping the skin-side down time shorter. If the skin is getting too dark, use the cooler zone.
    Raw chicken on the grill with skin up,
  • Grill until the internal temperature reaches 165°F, about 30 minutes total depending on your grill and the size of the pieces.
    Grilled split chicken on a plate.

BBQ option

  • For a sticky BBQ finish, brush all sides with BBQ sauce during the last 5 minutes of grilling.
    Bbq bone-in chicken breast on a blue plate.

Notes

Pro Tips

  1. Trimming and grill setup are the keys to success.
  2. Preheat the main cooking area of the grill to 450°F, and create a cooler zone by keeping one burner off or on low.
  3. Let the chicken rest at room temperature for 15–20 minutes after seasoning.
  4. Flip often during grilling, but keep skin-side down time short to avoid burning.
  5. Optional: Baking powder helps crisp the skin. Use aluminum-free to avoid aftertaste.
  6. Pat the skin dry before seasoning.
  7. Add ¼ teaspoon cayenne for a little heat.
  8. Always cook to 165°F in the thickest part for safety.

Nutrition

Calories: 196kcal | Carbohydrates: 0.4g | Protein: 30g | Fat: 8g | Saturated Fat: 2g | Polyunsaturated Fat: 2g | Monounsaturated Fat: 3g | Cholesterol: 83mg | Sodium: 1179mg | Potassium: 250mg | Fiber: 0.2g | Sugar: 0.003g | Vitamin A: 100IU | Vitamin C: 0.2mg | Calcium: 10mg | Iron: 1.3mg

Originally Published March 20, 2011. Updated with expanded options, refreshed photos, and a table of contents to help navigation. Also, the method is modified slightly to my current technique.

Roadhouse Fried Mac and Cheese

Browned fried mac and cheese on a fork.

This pan fried mac and cheese recipe has it all: tender elbow macaroni, delicious cheesy sauce, and crispy browned edges that add extra flavor. Adapted from Zingerman's Roadhouse in Ann Arbor, Alton Brown named it one of the top ten comfort foods in 2010.

🧀Ingredients

Macaroni—elbow
Onion
Dairy—whole milk, heavy cream, butter, the best cheddar cheese you can find
Pantry—bay leaf, all purpose flour, Dijon mustard, olive oil, sea or kosher salt

Fried mac and cheese on a fork.
[feast_advanced_jump_to]
Blue ribbon divider used for visual effect

This is a very special, top-of-the-line mac and cheese recipe. It starts with the best ingredients, is nicely seasoned, and then browns for a Maillard reaction that makes all that great taste just pop.

Based on the Zingerman's Roadhouse recipe, I have simplified, expanded the instructions, and changed out the raw milk cheese.

👨‍🍳How to Make Roadhouse Fried Mac and Cheese—Step-by-Step Photo Instructions

Cooking elbow macaroni.

1. Cook pasta according to box instructions. Drain and set aside.

Chopping a small onion.

2. Chop an onion.

Cooking chopped onion with a bay leaf in butter.

3. Saute the onion in melted butter with a bay leaf until it starts to clear—about 5 minutes. Remove the bay leaf.

Sprinkling flour into a pan of cooked onion and butter.

4. Sprinkle flour into the butter and onion. Stir continuously to form a roux.

Thickening liquid with the roux.

5. Now, slowly add the whole milk and then the heavy cream while stirring continuously. Continue to stir until thickened—about 3 minutes.

Mixing cheese into the roux thickened sauce.

6. Reduce the heat and add Dijon mustard, salt, and cheddar cheese. Stir well and continue to simmer for about 5 minutes. Add the pasta and stir to combine.

Frying mac and cheese in a large skillet.

7. Add olive oil to a large pan and heat over high heat until it starts to smoke. Add the pasta and cheese mixture.

Browned fried mac and cheese on a fork.

8. Stir every few minutes until about 15-20% is dark brown. Do not stir continuously; give it some time to brown. Be sure to scrape any browned cheese off the bottom of the pan for serving.

For more details, keep reading. See the Recipe Card below for complete instructions and to print.

✔️Tips—making it right every time

Use the best ingredients to make the best mac and cheese. Although this is initially a fairly typical recipe, it uses quality ingredients. The final step is frying, which creates the Maillard reaction, which is the key to elevating this recipe above all others.

Use a large skill to have a large, hot surface area. Cast iron is an excellent choice, but it needs to be large. Get the pan and the oil very hot before adding the mac and cheese. Don't be shy; get it hot.

Pay attention not to burn, but don't stir continuously. Give the dish some time to brown between stirs.

Get at least 15-20% of the dish browned to your liking. I suggest very brown. The images don't quite convey that.

Be sure to scrape any browned cheese off the bottom of the pan. It is so good.

🧀What cheese to use

Quality matters throughout this recipe. Great cheddar cheese goes a long way toward making this dish special, so get the best you can.

I generally use sharp Cabot's Cheddar, which is relatively cheap at Sam's. Similarly to cooking with wine, you shouldn't make this dish with cheese that does not bring a smile to your face when you eat it.

The restaurant uses aged raw milk cheddar. Since the doctor in me can not endorse raw milk for any reason, I recommend Cabot's.

📖Mac and Cheese Recipes

Check out my classic mac and cheese recipes, like One-Pot Mac and Cheese on the stovetop or Mac and Cheese with egg in the oven.

And don't miss my slow cooker mac and cheese recipes such as Uncooked Macaroni Crock Pot Mac and Cheese or Creamiest Crock Pot Macaroni and Cheese.

↕️How to make this a "for two" or "family size" recipe

The full recipe makes about four servings, perfect for our "for two" household as a main dish or four side dish servings.

  1. Use the recipe card and adjust the number of servings from 4 to the number desired.
  2. Use the amount of ingredients in the ingredient list, not the instructions—those do not adjust.
  3. Cook for the same amount of time.

❄️Storage and reheating leftovers

Store sealed in an airtight container. Refrigerate for 3-4 days, or freeze for 4 months. 

If frozen, thaw it overnight in the refrigerator before reheating it covered in the oven or the microwave.

Blue ribbon divider used for visual effect

📖The Recipe Card

Fried mac and cheese on a fork.
Print Recipe Add to Collection Go to Collections

Roadhouse Fried Mac and Cheese

This pan fried mac and cheese recipe has it all: tender elbow macaroni, delicious cheesy sauce, and crispy browned edges that add extra flavor. Adapted from Zingerman's Roadhouse in Ann Arbor, Alton Brown named it one of the top ten comfort foods in 2010.
Prep Time5 minutes mins
Cook Time25 minutes mins
Total Time30 minutes mins
Course: Main Course
Cuisine: American
Keyword: #EasyChili, Fried Mac and Cheese, Roadhouse Mac and Cheese, Zingerman's Roadhouse
Servings: 6
Calories: 728kcal
Author: Dan Mikesell AKA DrDan

Ingredients

  • 1 lb macaroni your choice
  • 2 tablespoons sea or kosher salt in water cooking pasta

Cheese Sauce

  • 2 tablespoons butter
  • 1 onion small diced
  • 1 bay leaf
  • 2 tablespoons AP flour
  • 1 ½ cups whole milk
  • ¼ cup heavy cream
  • 1 pound cheddar cheese the best you can get
  • 1 teaspoon Dijon mustard
  • 1 teaspoon sea or kosher salt

For frying

  • 1 tablespoon olive oil
US Customary - Convert to Metric

Instructions

  • Cook 1 pound of pasta according to box instructions with 2 tablespoons sea salt. Drain and set aside.
    Cooking elbow macaroni.
  • Dice a small onion.
    Chopping a small onion.
  • In a heavy saucepan, melt 2 tablespoons butter over medium-high heat, then add one small chopped onion and one bay leaf. Cook until onion is soft and getting transparent. About 5 minutes. Remove the bay leaf.
    Cooking chopped onion with a bay leaf in butter.
  • Slowly add 2 tablespoons flour to onion for about 1 minute while stirring continuously.
    Sprinkling flour into a pan of cooked onion and butter.
  • Slowly add 1 ½ cups of whole milk while stirring continuously to avoid lumps. Now add ¼ cup of heavy cream in the same manner. Simmer for 2-3 minutes until thickening.
    Thickening liquid with the roux.
  • Reduce heat to medium. Add 1 teaspoon of Dijon mustard, 1 teaspoon of kosher or sea salt, and 1 pound of excellent cheddar cheese. Stir well and continue to simmer for about 5 minutes. Mix in the pasta and stir to combine well.
    Mixing cheese into the roux thickened sauce.
  • Now, add 1 tablespoon olive oil to a large pan and heat over high heat until the oil starts to smoke. Add the pasta and cheese mixture and stir until about 15-20% is dark brown. Do not stir continuously; give it a few moments to brown between stirs, and be sure to use a metal spatula to scrape the bottom during stirs.
    Frying mac and cheese in a large skillet.

Notes

Pro Tips

  1. Use the best ingredients you can get. This is not the time for cheap cheese.
  2. This is not a low-fat recipe; please use whole milk, heavy cream, and real butter.

The key points about frying:

  1. Use a large skill to have a large, hot surface area.
  2. Get the pan and oil very hot before adding the mac and cheese. Don't be shy; get it hot.
  3. Pay attention not to burn, but don't stir continuously. Give the dish a few minutes to brown between stirs. Be sure to use a metal spatula to scrape the bottom of the pot during stirs.
  4. Get at least 15-20% of the dish browned to your liking. I suggest very brown.

Nutrition

Calories: 728kcal | Carbohydrates: 64g | Protein: 31g | Fat: 38g | Saturated Fat: 22g | Cholesterol: 109mg | Sodium: 935mg | Potassium: 357mg | Fiber: 3g | Sugar: 6g | Vitamin A: 1119IU | Vitamin C: 1mg | Calcium: 641mg | Iron: 2mg

Listed as the top Mac and Cheese by Alton Brown on Food Network's "America's Best: Top 10 Comfort Foods". I have based this recipe on the original recipe from Zingerman's Roadhouse.

Editor's Note: Originally Published October 15, 2010. Updated with expanded options, refreshed photos, and a table of contents to help navigation.

Dogs in Leaves 2017 #8

Leftover Beef Tenderloin Sandwiches

What to do with leftover beef tenderloin? Philly Sandwich a la grill from 101 Cooking for Two

It's time to use up that leftover beef tenderloin or steak. Make delicious steak sandwiches with sauteed onions and peppers on your grill or stovetop. Add some melted provolone cheese for a touch of Philly cheesesteak.

It's good enough to purposely cook too much to make these subs for lunch the next day.

🐄Ingredients

Beef—pre-cooked leftover tenderloin or steak
Aromatics—onion, garlic
Bell peppers—green and red
Pantry ingredients—vegetable oil, Worcestershire sauce, salt, black pepper, and crushed red pepper (optional)
Serving—sub or hoagie buns, Provolone cheese

Philly sandwich on plate with fries.
[feast_advanced_jump_to]
Blue ribbon divider used for visual effect

Featured Comment from Amy:
"This was delicious! Great use of leftover tenderloin and seasonings were perfect."

We frequently cook a whole beef tenderloin or steaks for company. We knew we made too much, but we never like coming short.

Let's put that leftover beef tenderloin or steak to good use other than topping a salad with these delicious easy hoagies.

👨‍🍳How to make leftover beef tenderloin or steak sandwiches

pouring oil on griddle.

Preheat the grill on high with the griddle for 10-15 minutes. Or if doing stovetop, use a large skillet over medium-high heat. Add 1 tablespoon of vegetable oil.

cut up beef on a black board.

Cut meat across the grain about ¼ inch thick and trim while you do the cutting.

seasoning beef in white bowl.

Add 1 tablespoon Worcestershire sauce, 3-4 cloves crushed or minced garlic, ½ teaspoon salt, ½ teaspoon pepper, and ¼ -½ teaspoon crushed red pepper (optional) to the meat in a medium bowl and mix well.

sliced peppers and onion on black board.

Cut a medium onion into ¼ inch disks and then cut them in half. Then cut two peppers into ¼ inch slices.

raw vegetables on griddle.

Add onion and peppers to the griddle or skillet when the oil is shimmering hot. Stir every 2-3 minutes.

adding beef to griddle with veggies.

After 5 minutes of cooking the vegetables, add the meat.

cooked meat and vegetables on griddle.

Stir every 2-3 minutes for a total of 10 minutes from the start of the vegetables.

Philly sandwich on plate with fries.

Serve on a toasted sub bun and add provolone cheese.

For more details, keep reading. See the Recipe Card below for complete instructions and to print.

✔️Tips to get it right

Assume about ¼ pound of meat per sandwich.

If your griddle or pan is not large enough to hold all the meat and vegetables, thoroughly cook the vegetables, move them to a covered plate, heat the meat, then combine to serve.

How to serve

Serve with Easiest French Fries, Spinach Salad with Bacon, Grilled Corn on the Cob, or Grilled Pineapple. Check out some other leftover recipes like What to Do With Leftover Ham and Easy Turkey Tetrazzini.

FAQs

How to make Philly Cheesesteaks.

For a Philly Cheesesteak version, melt provolone cheese into the hot meat and vegetable mixture before adding it to the sandwiches.

Can I use other beef?

Sure, any fully cooked beef will work. It is best to be cut across the grain for better tenderness.

How to store leftovers?

Leftovers can be stored for up to 4 days, but you need to count any days the leftovers were stored before cooking this recipe. Seal in an airtight container and refrigerate. You can also freeze for 3 months.

Reheat on the stovetop.

Blue ribbon divider used for visual effect

This recipe is listed in these categories. See them for more similar recipes.

Beef Recipes, Grill Recipes

Have you tried this recipe, or have a question? Join the community discussion in the comments.

📖The Recipe Card

What to do with leftover beef tenderloin? Philly Sandwich a la grill from 101 Cooking for Two
Print Recipe Add to Collection Go to Collections
5 from 3 votes

Leftover Beef Tenderloin Sandwiches

Time to use up that leftover beef tenderloin or steak. Make delicious steak sandwiches with sauteed onions and peppers on your grill or stovetop. Add some melted provolone cheese for a touch of Philly cheesesteak.
Prep Time10 minutes mins
Cook Time10 minutes mins
Total Time20 minutes mins
Course: Main Course
Cuisine: American
Keyword: Leftover Beef, Philly Sandwiches, Sub Sandwiches
Servings: 4 servings
Calories: 318kcal
Author: Dan Mikesell AKA DrDan

Ingredients

  • 1 to 1 ½ pound cooked beef tenderloin or steak slice thin
  • 1 onion medium sliced ¼ inch slices and cut in half
  • 1 green pepper cut into ½ inch slices
  • 1 red pepper cut into ½ inch slices
  • 1 tablespoon vegetable oil
  • 1 tablespoon Worcestershire sauce
  • ½ teaspoon salt
  • ½ teaspoon pepper
  • ¼-1/2 teaspoon crushed red pepper optional
  • 1 tablespoon garlic about 3-4 cloves

Serving

  • toasted sub or hoagie buns
  • provolone cheese

Instructions

  • Preheat the grill on high with the griddle for 10-15 minutes. Or if doing stovetop, use a large skillet over medium-high heat. Add 1 tablespoon of vegetable oil.
  • Cut meat across the grain about ¼ inch thick and trim while you do the cutting.
  • Add 1 tablespoon Worcestershire sauce, 3-4 cloves crushed or minced garlic, ½ teaspoon salt, ½ teaspoon pepper, and ¼ -½ teaspoon crushed red pepper (optional) to the meat in a medium bowl and mix well.
  • Cut a medium onion into ¼ inch disks and then cut them in half. Then cut two peppers into ¼ inch slices.
  • Add onion and peppers to the griddle or skillet when the oil is shimmering hot. Stir every 2-3 minutes.
  • After 5 minutes of cooking the vegetables, add meat and stir every 2-3 minutes for a total of 10 minutes from the start of the vegetables.
  • Serve on a toasted sub bun and add provolone cheese.

Notes

Pro Tips

  1. This recipe is for 1 to 1 ½ pounds of cooked beef tenderloin or steak. Trim and cut across the grain.
  2. If you have more beef, add another pepper and use a large onion.
  3. Do not use olive oil. Use an oil with a higher smoke point like corn or canola.
  4. The red pepper is optional.
  5. Stovetop instructions below.
  6. Serve as you want, I suggest topped with cheese on a toasted bun.
  7. Nutrition does not include serving items

Nutrition

Calories: 318kcal | Carbohydrates: 7g | Protein: 24g | Fat: 21g | Saturated Fat: 10g | Cholesterol: 91mg | Sodium: 397mg | Potassium: 544mg | Fiber: 2g | Sugar: 4g | Vitamin A: 1079IU | Vitamin C: 65mg | Calcium: 44mg | Iron: 2mg

Originally Published August 11, 2010. Updated with expanded options, refreshed photos, and a table of contents to help navigation.

Lilly and Molly sharing a stick.

Italian Grilled Chicken Breasts

Italian Grilled Chicken Breast from 101 Cooking for Two

This simple Italian Grilled Chicken Breast recipe has great Italian flavor with a tender and moist chicken—a quick and easy weeknight grilling recipe.

Everybody needs great chicken recipes, and this one is a keeper.

🐓Ingredients

Chicken breasts—skinless, boneless
Olive oil
Salt and pepper
Italian seasoning—or basil, oregano, marjoram, rosemary, thyme

two Italian grilled chicken breast on a white plate
[feast_advanced_jump_to]
Blue ribbon divider used for visual effect

These juicy and flavorful chicken breasts will be your new favorite dinner idea. Pair it with a simple salad and a white wine for an eloquent Italian dinner.

These flavorful and tender chicken breasts fit a healthy diet like a low-calorie or low-fat diet or even a low-carb keto diet.

👨‍🍳How to Cook Italian Grilled Chicken Breasts—Step-by-Step

trimming chicken breasts on a white board.

1. Trim the chicken breasts. If the thickness is over ¾ inches, flatten it with a meat mallet.

adding chicken to the brine.

2. Optional: In a ziplock bag, mix a brine of 3 cups water, 3 tablespoons table salt, 3 tablespoons brown sugar, and ½ to 1 teaspoon cayenne pepper (optional). Add chicken, submerge, and refrigerate for 30 minutes to 2 hours.

cleaning and oiling grill grates..

3. Clean and oil grill grates and preheat to a surface temperature of about 450°, which is about medium-high on most grills. I recommend a surface thermometer to be able to control your grill well.

spices for Italian seasoning.

4. If making your seasoning, use equal parts dried basil, oregano, marjoram, rosemary, and thyme. I used one tablespoon each and saved the extra in a small airtight container suitable for storage.

Mixing Italian seasoning into oil in white bowl.

5. Mix oil and 1 tablespoon of Italian seasoning.

brushing chicken breast with seasoning on white board.

6. Pepper lightly on both sides and salt if not brined. Then, brush both sides with the oil mixture.

raw seasoned chicken on the grill.

7. Place on the grill over direct heat with the grill lid closed. Flip about every 5 minutes until the internal temp is 165°.

Italian Chicken Breast on white plate.

8. It takes about 25-30 minutes in total on the grill. Rest for 5 minutes before serving.

For more details, keep reading. See the Recipe Card below for complete instructions and to print.

👨‍🍳How to Oven Bake Italian Chicken Breasts

To oven-bake Italian chicken breasts, preheat the oven to 400° convection or 425° conventional.

Prepare the breasts like the grilling recipe, but at the point of placing them on the grill, place them on a prepared tray and bake to an internal temperature of 165°—about 25 minutes.

✔️Tips to get it right every time

When you pick your chicken breasts, try to get approximately the same size and thickness. If thicker than ¾ inch, flatten it out some with a meat mallet or the bottom of a heavy pan.

Brining is always good if you have time for chicken breast to prevent drying. I suggest a brine of 2 cups of water, 2 tablespoons salt, and 2 tablespoons sugar for 30 minutes to 2 hours.

Grill temperature is very important when cooking skinless boneless chicken breasts. You generally want a surface temperature of about 450° for chicken. See my discussion about controlling Grill Temperature for more details.

Chicken breast recipes

Check out my tutorial about chicken breasts at How to Grill Chicken Breasts. Or see for other specific options see Blackened Chicken Breasts, Honey Glazed Grilled Chicken Breasts, Grilled Buttermilk Chicken, or Lemon Chicken Marinade.

🇮🇹 Homemade Italian Seasoning

I believe in individual herbs and spices for the best freshness and taste. This recipe includes instructions for individual spices, but you may use a commercial Italian spice mix.

Italian Chicken Breast on white plate

What to serve with grilled Italian chicken breasts?

Serve with a garden salad or hot side dishes of Stuffed Tomatoes, Grilled Mixed Vegetables, or Grilled Corn on the Cob. And a nice bread like Julia Child French Bread or Easy Dinner Rolls.

Storing leftovers

Seal leftovers in an airtight container. Refrigerate for 4 days or freeze for 4 months.

To reheat, thaw overnight in the refrigerator if frozen. Reheat in an oven or air fryer. A microwave may be used but may affect the texture.

❓FAQs

How do you prevent grilled chicken breasts from drying?

Chicken breasts are very lean meat that will tend to dry quickly during cooking. Previously frozen chicken breasts are more prone to drying since freeze will force some moisture out of the cells.

The first is not to overcook the chicken. 165° is the minimum safe internal temperature, and you should reach it, but try not to overcook the breasts.

The second, especially if previously frozen, is to brine the chicken to add moisture before cooking.

Chicken Safety Tips

We no longer rinse chicken ( see  Chicken… To Rinse or Not To Rinse? ) except, after a brine, the breast should be rinsed with great care to remove extra salt.

To be safe to eat, all chicken must reach 165° according to the USDA guidelines.

Blue ribbon divider used for visual effect

This recipe is listed in these categories. See them for more similar recipes.

Chicken Breast Recipes, Chicken Recipes, Grill Recipes, Italian Recipes

Have you tried this recipe, or have a question? Join the community discussion in the comments.

📖The Recipe Card

Italian Grilled Chicken Breast from 101 Cooking for Two
Print Recipe Add to Collection Go to Collections
5 from 1 vote

Italian Grilled Chicken Breasts

This simple Italian Grilled Chicken Breast recipe has great Italian flavor with a tender and moist chicken—a quick and easy weeknight grilling recipe.
Prep Time10 minutes mins
Cook Time25 minutes mins
Total Time35 minutes mins
Course: Main Course
Cuisine: Italian
Keyword: Grilled Italian Chicken Breasts, Italian Chicken, Italian Chicken Breasts
Servings: 2
Calories: 197.3kcal
Author: Dan Mikesell AKA DrDan

Ingredients

  • 2 skinless boneless chicken breasts
  • 1 tablespoon olive oil
  • salt and pepper
  • 1 tablespoon Italian seasoning

Homemade Italian Seasoning (will be almost a tablespoon, enough for this recipe but I make more for later.)

  • ½ teaspoon dried basil
  • ½ teaspoon oregano
  • ½ teaspoon marjoram
  • ½ teaspoon rosemary
  • ½ teaspoon thyme
US Customary - Convert to Metric

Instructions

  • Trim the chicken breasts. If the thickness is over ¾ inches, flatten it with a meat mallet.
  • Optional: In a ziplock bag, mix a brine of 3 cups water, 3 tablespoons table salt, 3 tablespoons brown sugar, and ½ to 1 teaspoon cayenne pepper (optional). Add chicken and submerge and refrigerate for 30 minutes to 2 hours.
  • Clean and oil grill grates and preheat to a surface temperature of about 450°, which is about medium-high on most grills. I recommend a surface thermometer to be able to control your grill well.
  • If making your seasoning, use equal parts dried basil, oregano, marjoram, rosemary, and thyme. I used one tablespoon each and saved the extra in a small airtight container suitable for storage.
  • Mix oil and 1 tablespoon Italian seasoning.
  • Pepper lightly on both sides and salt if not brined. Then brush both sides with the oil mixture. Place on the grill over direct heat with the grill lid closed.
  • Flip about every 5 minutes until the internal temp is 165°. About 25-30 minutes total on the grill. Rest for 5 minutes before serving.

Notes

Pro Tips

  1. Brining is optional but recommended. If you brine, rinse carefully after and do not add any more salt.
  2. Try to get approximately the same size and thickness of chicken breasts. If one is significantly thicker, flatten it out some with a meat mallet or bottom of a heavy pan.
  3. As with all grilled chicken, you need to get the surface temperature correct, or you will have poor results.
  4. Use the Italian season you want, or I have included a recommended homemade version.
  5. Grill to 165°, and be sure to rest for 5 minutes before serving.
  6. Serve with salad or pasta—other suggestions in the post.

Nutrition

Calories: 197.3kcal | Carbohydrates: 1.7g | Protein: 24.2g | Fat: 10g | Saturated Fat: 1.6g | Polyunsaturated Fat: 1.2g | Monounsaturated Fat: 6g | Trans Fat: 0.01g | Cholesterol: 72.3mg | Sodium: 131.8mg | Potassium: 449.7mg | Fiber: 1.1g | Sugar: 0.1g | Vitamin A: 76.4IU | Vitamin C: 1.4mg | Calcium: 45.6mg | Iron: 1.4mg

Editor's Note: Originally published July 16, 2010. Updated with expanded options, refreshed photos, and a table of contents to help navigation.

Molly looking good.

Memphis Dry Rub Recipe

Applying Memphis dry rub to baby back ribs

A classic sweet and spicy Memphis Dry Rub Recipe from Marlowes of Memphis. Bring the great taste of Memphis to your grilled ribs or other BBQ recipes.

The recipe is now right-sized for the home cook and adjustable to your needs, using only pantry ingredients for great taste.

🥣Ingredients

Sugar—white, but I frequently use brown sugar
Paprika
Seasoned salt—Lowery's or similar
Pantry ingredients—garlic powder, onion powder, chili powder, salt, black pepper
Black Magic seasoning —optional. See discussion in the FAQs.

Applying Memphis dry rub to baby back ribs.
[feast_advanced_jump_to]
Blue ribbon divider used for visual effect

Memphis Dry Rub is sweet and full of spices, perfect for smoked ribs, but works well for other pork, brisket, and chicken. Or for any other smoked meat.

Check out other rubs like Chipotle Dry Rub, Black Magic Seasoning, BBQ Dry Rub, and Homemade Blackened Seasoning.

Marlowe's trailer that is a decorated as a pink pig.
Marlowe's Restaurant in Memphis

This recipe is from the famous Marlowe Restaurant in Memphis (on Elvis Presley Boulevard). The restaurant gave the recipes to Guy Fieri, but adjustments were needed since the original recipe (apparently already cut down) produced 11 ½ cups of rub.

When to use this rub

Use this rub on ribs like Grilled Baby Back Ribs, Crock Pot Baby Back Ribs, Ribs in the Oven, or Grilled Boneless Pork Ribs. Or pulled pork like Pork Butt in the Oven, Crock Pot Pulled Pork, or Pork Butt on Gas Grill.

This rub has been the base recipe for some of my favorite recipes, which will also become some of your favorites. Start with a favorite for many people, The Memphis Grilled Pork Tenderloin, and try Grilled Memphis Boneless Country Style Pork Ribs. Serve them both with Memphis Style Barbecue Sauce.

⏰How long to leave dry rub on meat?

As little as 30 minutes will infuse many flavors into meat, but up to 24 hours is the maximum. Longer will allow the salt in the rub to change the meat texture.

spices with sugar and salt for Memphis dry rub.
Ingredients for Memphis Dry Rub—optional Black Magic Seasoning not pictured

✔️Tips to get it right every time

  • This rub is good enough; you don't need a sauce. If you use a rub, serve BBQ sauce on the side; do not apply it during cooking.
  • Dry rubs and the sauce you use should complement each other. I suggest my Memphis sauce listed below or another sweeter sauce like a Kansas City or St. Louis sauce. Not a Carolina vinegar-based sauce.
  • This is generally a rub for ribs, but you can use it anywhere that a dry rub is needed.
  • There is not much sugar in this rub, so don't pack it on as much as the higher sugar-based rubs.
  • I like to use dark brown sugar instead of white sugar.
  • There is also a large amount of salt between the seasoning salt and regular salt in the recipe. I usually use half the salt and use coarse salt that cuts it even more.

↕️How to adjust the recipe size

Even though the original recipe was "cut down," I would say it was not really "Cooking For Two" friendly nor home cooking friendly as originally published. The rub was 11 cups, and the Black Magic was 12 cups. So, I cut it down to a more reasonable size.

The recipe is now set to make ½ cup (8 tablespoons) of dry rub, which is the amount for one slab of baby back ribs. I always make double or more and store it for later.

Use the recipe card and adjust the number of tablespoons. Remember 3 teaspoons equals 1 tablespoon. 1 cup is 16 tablespoons.

How to store dry rub

Like all spices, dry rub loses flavor over time. But we can minimize it. If stored correctly, you will still have a good flavor for up to 6 months.

  1. Store airtight in a glass container.
  2. Store in a "right-sized" container that has no more air than needed.
  3. Store away from light.
  4. A cool area is best, but do not refrigerate or freeze.

❓FAQs

What is Black Magic Seasoning

Several different seasonings are called Black Magic, but we are referring to Marlowe's version of a classic Southern seasoning mixture here.

It brings a spicy Creole flavor that is similar to blackening seasoning. It is commonly added to fish, chicken, or steak.

Do I have to use Black Magic Seasoning?

No, it is your rub—you will still have a great rub without it. The seasoning shares several spices with this rub but does add a touch of other flavors and some heat, but it is not mandatory.

As a substitute, you can add a pinch of cayenne pepper, blackening, or Creole seasoning to replace it.

baby back ribs with rub.
closeup of cooked ribs.

📖The Recipe Card

Applying Memphis dry rub to baby back ribs
Print Recipe Add to Collection Go to Collections
5 from 1 vote

Memphis Dry Rub Recipe

A classic sweet and spicy Memphis Dry Rub Recipe from Marlowes of Memphis. Bring the great taste of Memphis to your grilled ribs or other BBQ recipes.
Prep Time10 minutes mins
Total Time10 minutes mins
Course: Rubs and Sauces
Cuisine: American
Keyword: BBQ Dry Rub, Memphis Dry Rub, Memphis Seasoning
Servings: 8 tablespoons
Calories: 20.6kcal
Author: Dan Mikesell AKA DrDan

Ingredients

  • 2 tablespoons paprika
  • 4 teaspoons sugar or brown sugar
  • 4 teaspoons garlic powder
  • 2 teaspoons salt
  • 2 teaspoons onion powder
  • 2 teaspoons seasoned salt Lowery's
  • 1 teaspoon chili powder
  • 1 teaspoon black pepper
  • 1 teaspoon Black Magic seasoning skip if you don't have
US Customary - Convert to Metric

Instructions

  • Mix well.
  • Store in an airtight container.

Notes

Pro Tips

  1. This recipe makes ½ cup (8 tablespoons) of rub, the amount used on one slab of baby back ribs.
  2. Use the recipe card and adjust the number of tablespoons. Remember 3 teaspoons equals 1 tablespoon. 1 cup is 16 tablespoons.
  3. The original recipe uses Black Magic seasoning. The post discusses this, but skip it if you don't have it. A few substitutes are discussed in the post.
  4. I usually use brown sugar instead of white sugar.
  5. Dry rubs and the sauce you use should complement each other. I suggest my Memphis sauce or another sweeter sauce like a Kansas City or St. Louis sauce. Not a Carolina vinegar-based sauce.
  6. This is generally a rub for ribs, but you can use it anywhere a dry rub is needed, like pulled pork or chicken.
  7. This rub has very little sugar, so don't pack it on as much as the high-sugar rubs.
  8. There is also a large amount of salt between the seasoning salt and regular salt in the recipe. I usually use half the salt and coarse salt that cuts it even more.
  9. This will keep fresh in tightly closed containers for up to 6 months. More storage tips in the post.

Nutrition

Calories: 20.6kcal | Carbohydrates: 4.7g | Protein: 0.6g | Fat: 0.3g | Saturated Fat: 0.1g | Polyunsaturated Fat: 0.2g | Monounsaturated Fat: 0.04g | Sodium: 1169.4mg | Potassium: 71.2mg | Fiber: 1g | Sugar: 2.3g | Vitamin A: 937.4IU | Vitamin C: 0.2mg | Calcium: 9.8mg | Iron: 0.6mg

Publisher's Note: Originally published June 26, 2010. Updated with expanded options, refreshed photos, and a table of contents to help navigation.

Molly running in a green yard.

Black Magic Seasoning Recipe

spices and salt for Black Magic seasoning

Black Magic Seasoning is excellent if you like spicy but not too hot seasoning to use on steaks, chicken, or fish. It delivers a Southern blackened seasoning flavor with a Creole flair.

Ingredients

Pantry ingredients—onion powder, garlic powder, thyme, oregano, paprika, cumin, salt, black pepper
Cayenne pepper—adjust to your taste
White pepper—use more black pepper if you don't have

spices and salt for Black Magic seasoning.
[feast_advanced_jump_to]
Blue ribbon divider used for visual effect

It is a tremendous full-flavor season with some heat. While they describe it as a classic southern seasoning mixture, it is more of a creole blackening seasoning mix. It is excellent on fish, steak, burgers, or chicken but works well on pork. It is also used to flavor other recipes.

I make up a batch at the start of grill season for many uses. It uses only pantry ingredients for a great classic taste.

Marlow's of Memphis.

This recipe is from the famous Marlowe Restaurant in Memphis (on Elvis Presley Boulevard). If you watch a lot of Food Network, you have seen them. It is the mandatory stop in Memphis for ribs.

When to Use Black Magic Seasoning

This seasoning should be used like a blackening seasoning with Creole flavors. It can be sprinkled on chicken, burgers, or fish. Or use it more as a light rub on steaks.

Use this versatile seasoning on your gas grill while grilling New York strip steaks, grilling chicken breasts, grilled burgers, or grilling pork tenderloin. You can also replace the seasoning on Grilled Blackened Tilapia.

Other Memphis Recipes

And don't miss any of my Memphis recipes, like Memphis Dry Rub, Memphis Barbecue Sauce, Memphis Grilled Pork Tenderloin, Grilled Memphis Boneless Country Style Pork Ribs, and Grilled Pork Tenderloin Sandwiches.

↕️How to make this recipe bigger or smaller

This recipe was not "Cooking For Two" or home cooking friendly as published initially—it made 12 cups of seasoning.

I cut the recipe by 1 teaspoon for each cup of recommended seasoning. A 1:48 reduction was making about 12 teaspoons. It is now home-friendly and fits nicely in my 2-ounce shaker bottles.

This recipe is easy to adjust up or down to fit your needs. Use the recipe card and change the 12 teaspoons to your desired amount.

How to Store Black Magic Seasoning

Like all spices, this spice mix loses flavor over time. But we can minimize it. If stored, it will still have a good taste for up to 6 months.

  1. Store airtight in a glass container.
  2. Store in a "right-sized" container that has no more air than needed.
  3. Store away from light.
  4. A cool area is best, but do not refrigerate or freeze.

FAQs

What is Black Magic Seasoning?

Black magic is a Cajun spice mix that is used for blacking fish, chicken, and other meats. Sometimes called Black Magic dust, use it to add a spicy kick by replacing the common salt and pepper on steak and any place else.

sprnkling spice mix on chicken breasts.
This has just started to be seasoned. Use more than this.

📖The Recipe Card

spices and salt for Black Magic seasoning
Print Recipe Add to Collection Go to Collections
4.35 from 20 votes

Black Magic Seasoning

Black Magic Seasoning is excellent if you like spicy but not too hot seasoning to use on steaks, chicken, or fish. It delivers a Southern blackened seasoning flavor with a Creole flair. 
Prep Time10 minutes mins
Total Time10 minutes mins
Course: Seasoning
Cuisine: American
Keyword: Black Magic Seasoning, Memphis Seasoning, Spice Seasoning
Servings: 12 teaspoons
Calories: 4kcal
Author: Dan Mikesell AKA DrDan

Ingredients

  • 2 teaspoons onion powder
  • 2 teaspoons garlic powder
  • 1 teaspoon cayenne pepper Adjust to your taste
  • ½ teaspoon white pepper
  • ½ teaspoon black pepper
  • 1 teaspoon dried thyme
  • 1 teaspoon dried oregano
  • 2 teaspoons salt
  • 1 teaspoon paprika
  • 1 teaspoon ground cumin
US Customary - Convert to Metric

Instructions

  • Mix well.
  • Store in an airtight container.

Notes

Pro Tips

  1. This recipe has been cut down in size for home use. It is a 1 to 48 reduction. A cup of a spice became a teaspoon.
  2. Adjust to the amount you want.
  3. Adjust the cayenne pepper to your taste.
  4. This will keep fresh in tightly closed containers for up to 6 months. See the post for more tips on storage.
  5. Use like a blackening seasoning on fish, chicken, or burgers. It also makes an excellent rub for steaks.

Nutrition

Calories: 4kcal | Carbohydrates: 1g | Protein: 0.1g | Fat: 0.03g | Saturated Fat: 0.01g | Polyunsaturated Fat: 0.01g | Monounsaturated Fat: 0.004g | Sodium: 323mg | Potassium: 8mg | Fiber: 0.2g | Sugar: 0.1g | Vitamin A: 300IU | Vitamin C: 0.4mg | Calcium: 10mg | Iron: 0.4mg

Editor's Note: Originally published June 26, 2010. Updated with expanded options, refreshed photos, and a table of contents to help navigation.

dogs standing in the yard.

Baked Ziti with Chicken and Homemade Sauce

Chicken pasta bake on a plate.

Easy baked ziti with chicken in a delicious homemade sauce that's quick to make from scratch with pantry ingredients. A classic Italian baked pasta recipe.

Make it with raw or precooked chicken, a quick homemade or jarred sauce, and optional ricotta or cottage cheese.

Baked ziti with chicken on a plate.
[feast_advanced_jump_to]

🤔 TL;DR: Recipe Summary

What: Easy baked ziti with chicken made with raw or precooked chicken, a quick homemade sauce, mozzarella, and Parmesan.

Why: A hearty Italian pasta bake that's easy enough for weeknights and great for make-ahead dinners.

How: Cook the chicken or use precooked chicken, make the quick homemade sauce, stir with cooked ziti and cheese, then bake until hot, bubbly, and lightly browned.

🐓 Ingredients

  • Chicken—raw chicken breasts or precooked chicken
  • Homemade sauce—garlic, onion, crushed tomatoes, diced tomatoes, tomato paste, olive oil, basil, optional crushed red pepper, salt, and black pepper (or use about 7 cups of your favorite jarred pasta sauce)
  • Pasta—ziti, penne, or other dry pasta
  • Cheese—mozzarella and Parmesan, with optional ricotta or cottage cheese

👨‍🍳 Quick Overview: How to Make Baked Ziti with Chicken

Brown trimmed raw chicken (or use precooked chicken) with the onion and garlic.

Browning the chicken.

Make the quick homemade sauce (or use jarred sauce) and simmer with the chicken while the pasta cooks.

Mixing sauce ingredients with the cooked chicken.

Stir the cooked pasta and mozzarella into the sauce. If using ricotta or cottage cheese, dollop it throughout the casserole. Finally, top with Parmesan cheese.

Raw casserole with shredded Parmesan cheese.

Bake at 375°F until hot, bubbly, and lightly browned.

Baked ziti with chicken.

For more details, keep reading. See the Recipe Card below for complete instructions and to print.

🥣 Options and Variations

  • Chicken: Use about 1½ pounds of boneless skinless chicken breasts, thighs, or about 3 to 4 cups of precooked chicken, including rotisserie chicken.
  • Sauce: The quick homemade, from-scratch sauce is recommended, but you can substitute about 7 cups of your favorite jarred pasta sauce.
  • Cheese: The mozzarella can be cubed for pockets of melted cheese or shredded for more even coverage. Add dollops of ricotta or cottage cheese throughout the casserole before topping with Parmesan for a more traditional baked ziti.
  • Pasta: Ziti is traditional, but penne, rigatoni, farfalle, or other medium pasta shapes work well.
  • Meat: Substitute Italian sausage, ground beef, ground chicken, or ground turkey for the chicken.
  • Heat: Add the optional crushed red pepper flakes for a little heat, or leave them out.

🤔 How to Use Ricotta or Cottage Cheese

For a more traditional baked ziti, add dollops of ricotta or cottage cheese throughout the casserole after transferring it to the baking dish.

For extra flavor and a creamier texture, combine 1 cup (8 ounces) of ricotta or cottage cheese with 1 egg white, ¼ cup grated Parmesan cheese, ½ teaspoon dried parsley, and ½ teaspoon salt. Mix gently, then dollop it throughout the casserole before topping with Parmesan cheese.

⬇️ How to Make a Half Recipe

The full recipe makes about 8 servings. A half recipe fits nicely in a 6×9-inch baking dish and makes about 4 servings.

  1. Use the recipe card and adjust the servings from 8 to 4.
  2. Use the ingredient amounts in the recipe card ingredient list, not the instructions—they do not adjust.
  3. Bake for about 25 to 30 minutes until hot, bubbly, and lightly browned. If needed, use the broiler for a minute or two for additional browning.

📅 Make Ahead and Bake Later

Assemble the casserole, cover tightly, and refrigerate for up to 24 hours before baking.

Freezing: Only freeze unbaked if no egg is used.
For longer storage, wrap well and freeze for up to 3 months. Thaw overnight in the refrigerator before baking. If baking straight from the refrigerator, allow about 10 extra minutes of baking time.

🍽️ Serving

Serve with a garden salad and crusty bread like Basic White Stand Mixer Bread or Julia Child's French Bread.

❄️ Storing and Reheating Leftovers

Store leftovers in an airtight container in the refrigerator for up to 4 days or freeze for up to 3 months.

Thaw frozen leftovers overnight in the refrigerator. Reheat in the microwave, covered in the oven, or in an air fryer until hot throughout.

❓ FAQs

Can I use jarred pasta sauce instead of the homemade sauce?

Yes. The quick homemade sauce is recommended, but you can substitute about 7 cups of your favorite jarred pasta sauce.

Do I have to use ziti pasta?

No. Ziti is traditional, but penne, rigatoni, farfalle, or other medium pasta shapes work well.

Can I use precooked or rotisserie chicken?

Yes. Use about 3 to 4 cups of precooked chicken, including rotisserie chicken. It is a great way to save time.

Do I have to use ricotta or cottage cheese?

No. They are completely optional. The recipe is delicious with just mozzarella and Parmesan, but ricotta or cottage cheese gives it a more traditional baked ziti texture.

📋 Other Pasta Recipes

Check out other great pasta dishes such as Baked Chicken Spaghetti, Baked Pasta and Sausage, Creamy Smoked Sausage Pasta, and Parmesan Chicken Alfredo.

Crock Pot Chicken Baked Ziti

Delicious Crock Pot Chicken Ziti is loaded with mozzarella and Parmesan cheese, tender chicken, and pasta. It is cooked in an easy homemade marinara sauce that cooks the dry pasta and chicken while it simmers.

Crock pot Italian chicken pasta on a spoon.

📖The Recipe Card

Chicken pasta bake on a plate.
Print Recipe Add to Collection Go to Collections

Easy Baked Ziti with Chicken

Easy baked ziti with chicken in a quick homemade sauce with mozzarella and Parmesan. Perfect for a hearty family dinner or make-ahead meal.
Prep Time30 minutes mins
Cook Time50 minutes mins
Total Time1 hour hr 20 minutes mins
Course: Main, Main Course
Cuisine: Italian
Keyword: baked ziti with chicken, chicken and pasta bake, Chicken Baked Ziti
Servings: 8 servings
Calories: 506kcal
Author: Dan Mikesell AKA DrDan

Ingredients

  • 1½ pounds raw skinless boneless chicken breasts or thighs 3-4 cups shredded precooked chicken
  • 1 pound dry pasta
  • ¼ cup Parmesan cheese shredded
  • 1 pound mozzarella cubed or shredded
  • 1 cup ricotta or cottage cheese (optional)

Sauce Ingredients

  • 1 tablespoon olive oil
  • 1 onion medium
  • 4-6 cloves garlic crushed
  • 1 tablespoon basil
  • 1 teaspoon salt
  • ¼-½ teaspoon crushed red pepper optional
  • ½ teaspoon black pepper
  • 28 oz crushed tomatoes
  • 14 oz diced tomatoes
  • 6 oz tomato paste
  • 6 oz water
US Customary - Convert to Metric

Instructions

  • Trim and dice 1½ pounds skinless boneless chicken breasts or thighs into approximately ½ inch cubes. Or use 3-4 cups of shredded precooked chicken.
    Trimming chicken into cubes.
  • Chop one medium onion.
    Chopped onion on a white board.
  • In a large pan over medium-high heat, add 1 tablespoon of olive oil. When shimmering, add the chicken. Sauté raw chicken for 3 minutes, or just add precooked chicken, then add onion and continue to saute for 5-6 minutes more until onion is clear. Add 4-6 cloves crushed or minced garlic and saute for 1 minute until fragrant. Remove from heat.
    Browning the chicken.
  • Add 1 tablespoon basil, 1 teaspoon salt, ¼-½ teaspoon crushed red pepper (optional), ½ teaspoon black pepper, 28 oz crushed tomatoes, 14 oz diced tomatoes, 6 oz tomato paste, and 6 oz water. Simmer on low while cooking pasta and cubing mozzarella.
    Mixing sauce ingredients with the cooked chicken.
  • Cook the pasta al dente according to package instructions. Cube mozzarella cheese into ½ inch cubes or use shredded cheese.
    Cubes of mozzarella cheese.
  • Remove the sauce from the heat and stir in the pasta and mozzarella.
    Mixing pasta and cheese cubes into the sauce.
  • Pour into a prepared baking dish, 9×13 or 12-inch round. If using ricotta or cottage cheese, combine with the optional ingredients below and dollop throughout the casserole. Top with ¼ cup Parmesan, then refrigerate or bake.
    Raw casserole with shredded Parmesan cheese.
  • Place in a preheated 375° convection oven until bubbling and browning—about 30-40 minutes.
    Baked chicken and pasta bake.

Video

Notes

Pro Tips:

  1. This is an easy recipe to cut in half. Adjust the ingredients in the servings area of the recipe card. It will change the ingredients but not the instructions. You will need to adjust those yourself.
  2. For a full recipe, use a 12-inch round or 13X9 casserole dish. For a half recipe, use a 9X6 casserole dish.
  3. Use the pasta of your choice. I prefer smaller pasta, so I use penne.
  4. Adjust your red pepper to taste.
  5. You can save some time using jarred sauce, but you really don't want to do that. It will not be as flavorful, and it will cost more.
  6. Store refrigerated for 3–4 days or freeze for up to 3 months
Optional ricotta or cottage cheese: Combine 1 cup ricotta or cottage cheese with 1 egg white, ¼ cup grated Parmesan, ½ teaspoon dried parsley, and ½ teaspoon salt. Mix gently and dollop throughout the casserole before topping with Parmesan.
 

Nutrition

Calories: 506kcal | Carbohydrates: 59g | Protein: 30g | Fat: 17g | Saturated Fat: 9g | Cholesterol: 65mg | Sodium: 1039mg | Potassium: 900mg | Fiber: 5g | Sugar: 11g | Vitamin A: 1044IU | Vitamin C: 20mg | Calcium: 399mg | Iron: 4mg

Editor's Note: Originally Published May 13, 2010. Updated with expanded options, refreshed photos, and a table of contents to help navigation.

Jake dog hanging out on a sofa.
Jake is just hanging out.
Hogie dog visiting for the weekend.
Hogie is visiting today.

Julia Child's French Bread - Simplified

Julia Child's French Bread on wooden peel.

Julia Child's French Bread recipe is the ultimate crusty artisan French bread. An excellent round bread, simplified to the essentials to get it done with less fuss. While speed was not a goal, it was 5 hours from the start to the cooling rack.

Ingredients

All-purpose flour
Yeast
Salt

Julia Child's French Bread on a wooden peal.
[feast_advanced_jump_to]
Blue ribbon divider used for visual effect

quote mark
Featured Comment from wefishallday :
"Your loaf is beautiful. I have this exact formula in my old Julia Child cookbooks. Your shorter version is certainly easier to follow, and I like the round loaf…"
⭐⭐⭐⭐⭐

I love a loaf of round French bread, and nobody does it better than Julia Child and her book The Art of French Cooking.

Her classic round French bread recipe was nine pages long. After multiple attempts, I felt I had modernized it, including a stand mixer, and cut down to only the essential points, eliminating things that were "just the way it was done." I now had just over a page of instructions.

Julia Child sanding with pot from KUHT, CC0, via Wikimedia Commons.
KUHT, CC0, via Wikimedia Commons

The essential points of this recipe you should not skip.

  1. The rest of the dough before kneading.
  2. The short amount of hand kneading.
  3. The large initial rise.
  4. The use of tripling, not doubling, in size for all dough rises.
  5. And finally, the baking method. While you could cook in a Dutch oven, the pizza/baking stone is better but fussier. The moisture with the pan and brushing is critical to the crust.

Try some other useful bread recipes, such as Basic White Stand Mixer Bread or Stand Mixer Rustic Peasant Bread. Or this easy English Muffin Bread is a great way to start the day.

👨‍🍳How to Make Julia Child French Bread—Step by Step

flour salt and yeast for bread.

1. Preheat the stand mixer bowl with warm water. Dry bowl and add 3 ½ cups AP flour and 2 ¼ teaspoon salt. Mix well.

yeast proofing in mixing bowl.

2. Combine 1 ½ cups 105° water with yeast and mix well. Wait for the yeast to "proof." Those are the bubbles that prove your yeast is good.

adding yeast mixture to stand mixer.

3. Add the yeast mixture to the mixer and uses one additional tablespoon of water to rinse the measuring cup and add that water to the mixer. With the dough hook, mix on "2". Continue to mix until the ball forms. Be sure to scrape the sides and bottom. The dough should pull away from the sides and have about 2 inches sticking in the bottom. Add flour 1 tablespoon at a time if needed. Time: about 2 minutes.

kneading dough in the stand mixer.

4. Stop the mixer and allow the dough to rest for 2 minutes, then restart kneading on 2. At 5 minutes into kneading, stop the mixer and check for "spring" by pressing your finger on the dough. It is done when this springs back. Keep checking every 2 minutes of kneading. It will usually take 5-7 minutes in total.

bowl of water with PAM.

5. While the dough kneads, measure 10 ½ cups of warm water into the large bowl with straight sides. Mark the top of the water for reference and pour out the water, dry the bowl, and spray lightly with Pam, oil, or butter.

Collage 1 for the initial kneading of the bread dough.

6. Place on a floured surface and hand knead for 2 minutes. Place dough in the bowl. Cover with plastic and a towel. Place in a warm spot until raised to your mark. It takes about 2-3 hours.

Collage 2 moving raised dough to mat and starting second kneading

7. Turn dough onto a lightly floured surface with a rubber spatula sprayed with Pam. If the dough seems very wet, sprinkle it with a tablespoon of flour. Press to somewhat flatten and form about 12-inch square. Fold the lower-left corner to the upper right.

Collage 3 finishing second kneading and starting second rise

8. Lower right to the upper left. Fold on itself several more folds. Then form into a rounded ball with folds underneath, and the top rounded like a cushion. Respray the large mixing bowl with Pam, place dough, and cover again with plastic wrap and a towel. Place in a warm spot to rise to about triple in size. About 1 hour.

9a raised doubh and starting to knead.

9a. Turn the risen dough onto a lightly floured surface again. Flatten slightly and gently into a round loaf. Start turning edges underneath, forming a rounded ball, stretching the "skin" to form a firmer ball of dough but not deflating the rise completely.

9b dough ball on parchment and under bowl.

9b. Place a square of parchment paper on a large wooden peel or a cookie sheet with no edge. Place dough in the center and cover (I used the bowl I used for raising after you respray it with Pam to prevent any sticking if it touches the dough). Allow rising until approximately triple in size again.

Collage 5 adding water to the oven and doing release cuts in dough and a brush of water before the oven.

10. Preheat oven to 450° (not convection) with a baking stone on the middle rack and pan for water on the bottom rack for at least 30 minutes.

Score the top of the dough about ¼ inch deep with three cuts. Brush the top liberally with water. Transfer on parchment paper to the baking stone.

brushing the loaf with water during the baking.

11. Brush the dough with water at 3, 6, and 9 minutes. Add 1 cup of water to the pan at 6 minutes. Continue to bake until the top is browned, thumping produces a hollow sound, and the internal temp 200°-205°. It takes about 25-30 minutes in total. Note: A spray bottle would work great instead of a brush for watering the dough in the oven.

Julia Child's French Bread on wooden peel.

12. Continue to bake until the top is browned, thumping produces a hollow sound, and the internal temp 200°-205°. It takes about 25-30 minutes in total. Note: A spray bottle would work great instead of a brush for watering the dough in the oven.

A loaf of Julia Child French bread cut on a wooden board.

13. Remove from oven and cool on a rack for 2 hours before cutting.

For more details, keep reading. See the Recipe Card below for complete instructions and to print.

🥣Dough Tips

  1. Keep everything warm, heating the mixing bowls with warm water.
  2. Mix the yeast with warm water before adding it. I like this because it distributes the yeast throughout the dough with water and proves it is good.
  3. Use rapid-rise or instant yeast. It's the same organism as active dry yeast but produced differently, and more organisms are alive. This will somewhat speed up a slow process.
  4. A large glass serving bowl was used for the rising bowl. The straight sides and larger volume are necessary to judge the rise, and it was convenient to cover the last rise so nothing stuck to the dough. Also, keep the bowl coated with cooking spray to keep the side of the dough from sticking.

♨️Baking Tips

I used a sheet of parchment paper to make the dough transfer easier. A large pizza stone was my baking stone. We all have one of those.

I have a large pizza peel handy to slide the loaf and parchment paper onto the stone, but a baking sheet without an edge should work, or pick up the raised dough by the parchment paper edges and move it that way.

Brushing with water and having moisture in the oven helps a crispy crust.

FAQs

Can this French bread be baked as a batard or baguette?

Sure, you will need to divide the dough into equal pieces before the final rise and use a canvas or linen dough cloth. Baking time will be a bit less.

Blue ribbon divider used for visual effect

This recipe is listed in these categories. See them for more similar recipes.

101's Best Recipes, Bread Recipes

Have you tried this recipe, or have a question? Join the community discussion in the comments.

📖The Recipe Card

Julia Child's French Bread on wooden peel.
Print Recipe Add to Collection Go to Collections
5 from 3 votes

Julia Child's French Bread - Simplified

Julia Child's French Bread recipe is the ultimate crusty artisan French bread. An excellent round bread, simplified to the essentials to get it done with less fuss. While speed was not a goal, it was 5 hours from the start to the cooling rack.
Prep Time4 hours hrs 30 minutes mins
Cook Time30 minutes mins
Total Time5 hours hrs
Course: Bread
Cuisine: French
Keyword: Julia Child French bread, Round bread, Round French bread
Servings: 8
Calories: 179kcal
Author: Dan Mikesell AKA DrDan

Ingredients

  • 3 ½ cup flour
  • 2 ¼ teaspoon salt
  • 1 ½ cup water at 105 degree
  • 1 pack instant dry yeast
  • 1 tablespoon water
US Customary - Convert to Metric

Instructions

  • Preheat the stand mixer bowl with warm water. Dry bowl and add 3 ½ cups AP flour and 2 ¼ teaspoon salt. Mix well.
    flour salt and yeast for bread
  • Combine 1 ½ cups 105° water with yeast and mix well. Wait for the yeast to "proof." Those are the bubbles that prove your yeast is good.
    proofing yeast in glass bowl
  • Add the yeast mixture to the mixer and uses one additional tablespoon of water to rinse the measuring cup and add that water to the mixer. With the dough hook, mix on "2". Continue to mix until the ball forms. Be sure to scrape the sides and bottom. The dough should pull away from the sides and have about 2 inches sticking in the bottom. Add flour 1 tablespoon at a time if needed. Time: about 2 minutes.
    adding yeast mixture to stand mixer
  • Stop the mixer and allow the dough to rest for 2 minutes, then restart kneading on 2. At 5 minutes into kneading, stop the mixer and check for "spring" by pressing your finger on the dough. It is done when this springs back. Keep checking every 2 minutes of kneading. It will usually take 5-7 minutes in total.
    Collage 1 for the initial kneading of the bread dough
  • While the dough kneads, measure 10 ½ cups of warm water into the large bowl with straight sides. Mark the top of the water for reference and pour out the water, dry the bowl, and spray lightly with Pam, oil, or butter.
    bowl of water with PAM
  • Place on a floured surface and hand knead for 2 minutes. Place dough in the bowl. Cover with plastic and a towel. Place in a warm spot until raised to your mark. It takes about 2-3 hours.
    Collage 1 for the initial kneading of the bread dough
  • Turn dough onto a lightly floured surface with a rubber spatula sprayed with Pam. If the dough seems very wet, sprinkle it with a tablespoon of flour. Press to somewhat flatten and form about 12-inch square. Fold the lower-left corner to the upper right.
    Collage 2 moving raised dough to mat and starting second kneading
  • Lower right to the upper left. Fold on itself several more folds. Then form into a rounded ball with folds underneath, and the top rounded like a cushion. Respray the large mixing bowl with Pam, place dough, and cover again with plastic wrap and a towel. Place in a warm spot to rise to about triple in size. About 1 hour.
    Collage 2 moving raised dough to mat and starting second kneading
  • Turn the risen dough onto a lightly floured surface again. Flatten slightly and gently into a round loaf. Start turning edges underneath, forming a rounded ball, stretching the "skin" to form a firmer ball of dough but not deflating the rise completely.
    Collage 3 finishing second kneading and starting second rise
  • Place a square of parchment paper on a large wooden peel or a cookie sheet with no edge. Place dough in the center and cover (I used the bowl I used for raising after you respray it with Pam to prevent any sticking if it touches the dough). Allow rising until approximately triple in size again.
    Collage 4 with the third kneading and starting last rise under a bowl
  • Preheat oven to 450° (not convection) with a baking stone on the middle rack and pan for water on the bottom rack for at least 30 minutes.
    Collage 5 adding water to the oven and doing release cuts in dough and a brush of water before the oven
  • Score the top of the dough about ¼ inch deep with three cuts. Brush the top liberally with water. Transfer on parchment paper to the baking stone.
    Collage 5 adding water to the oven and doing release cuts in dough and a brush of water before the oven
  • Brush the dough with water at 3, 6, and 9 minutes. Add 1 cup of water to the pan at 6 minutes. Continue to bake until the top is browned, thumping produces a hollow sound, and the internal temp 200°-205°. It takes about 25-30 minutes in total. Note: A spray bottle would work great instead of a brush for watering the dough in the oven.
    brushing the loaf with water during the baking
  • Remove from oven and cool on a rack for 2 hours before cutting.
    loaf of Julia bread on a cooling rack

Notes

Pro Tips

  1. This is not a recipe where you can just read the recipe card and do it. Please review the step-by-step photo instructions in the recipe post to get this right. I have now included the photos in the recipe card to help.
  2. Never do a recipe like this by time. If it says triple in size, then wait for it.
  3. This must be kept in a warm environment to rise correctly.
  4. Store at room temperature for 2-3 days in an airtight container. There are no preservatives, so it will mold quickly.

Nutrition

Calories: 179kcal | Carbohydrates: 39g | Protein: 6g | Fat: 0.1g | Saturated Fat: 0.01g | Polyunsaturated Fat: 0.0001g | Monounsaturated Fat: 0.04g | Sodium: 548mg | Potassium: 100mg | Fiber: 2g | Calcium: 1mg | Iron: 2.2mg

Editor note: This recipe was first published on April 4, 2010. I was a "baby blogger" with only three months of blogging. This was my first adventure into a major project. It is still one of my favorite recipes but has been long neglected by me—time to fix that. I have updated the text, clarified some wording, re-edited and added some photos (some backgrounds may not match), and added a dog photo. Please enjoy this "simplified" version of a classic Julia Child recipe.

Molly and Lilly in leafy yard

  • « Previous Page
  • 1
  • …
  • 7
  • 8
  • 9
  • 10
  • Next Page »

DrDan imageHi, I'm DrDan.
Welcome to 101 Cooking for Two, the home of great everyday recipes with easy step-by-step photo instructions.
About DrDan

Top THANKSGIVING RECIPES

  • turkey slice with gravy on orange plate.
    How to Roast a Turkey Breast in the Oven
  • Cut ham with pineapple honey glaze on a white plate
    Small Ham in a Crock Pot (2–4 lb Boneless Ham)
  • slice of Ribeye Roast on a white plate
    Small Boneless Prime Rib (Ribeye) Roast
  • Sausage dressing on a white plate.
    Old Fashioned Sausage Dressing Recipe
  • A spoonful of green bean casserole.
    Green Bean Casserole Without Mushroom Soup
  • Sweet potato casserole on a white plate
    Old Fashioned Sweet Potato Casserole
SITES THAT I WORK WITH OR HAVE HAD RECIPES FEATURED OR REFERENCED.

Footer

BACK TO TOP
OF PAGE
Join the club
SUBSCRIBE TODAY

About

  • About DrDan and the Blog
  • Contact Me
  • Comment Policy
  • Guest Posts, Partnering, and Business Questions

Content

  • Food FAQ
  • Kitchen Reference Sheets
  • Recipes Featured in the Videos
  • Guide To Cooking for Two
  • Old Saved Recipes Collections

dogs by the pond

↑ back to top ↑a

Privacy Policy | Terms of Service | Contact

COPYRIGHT © 2010-2026 101 COOKING FOR TWO. ALL RIGHTS RESERVED | BASED ON FOODIE PRO THEME