
101 Cooking For Two

  • Recipes
  • About
  • FAQs/Help
  • Shop
  • 📖Emails
menu icon
go to homepage
  • Recipes
  • About
  • FAQs/Help
  • Shop
  • 📖Emails
subscribe
search icon
Homepage link
  • Recipes
  • About
  • FAQs/Help
  • Shop
  • 📖Emails
×
🏠Home » Recipes

Low Fat Biscuits (Low Calorie and Healthy)

Healthy, low-calorie cut biscuits.

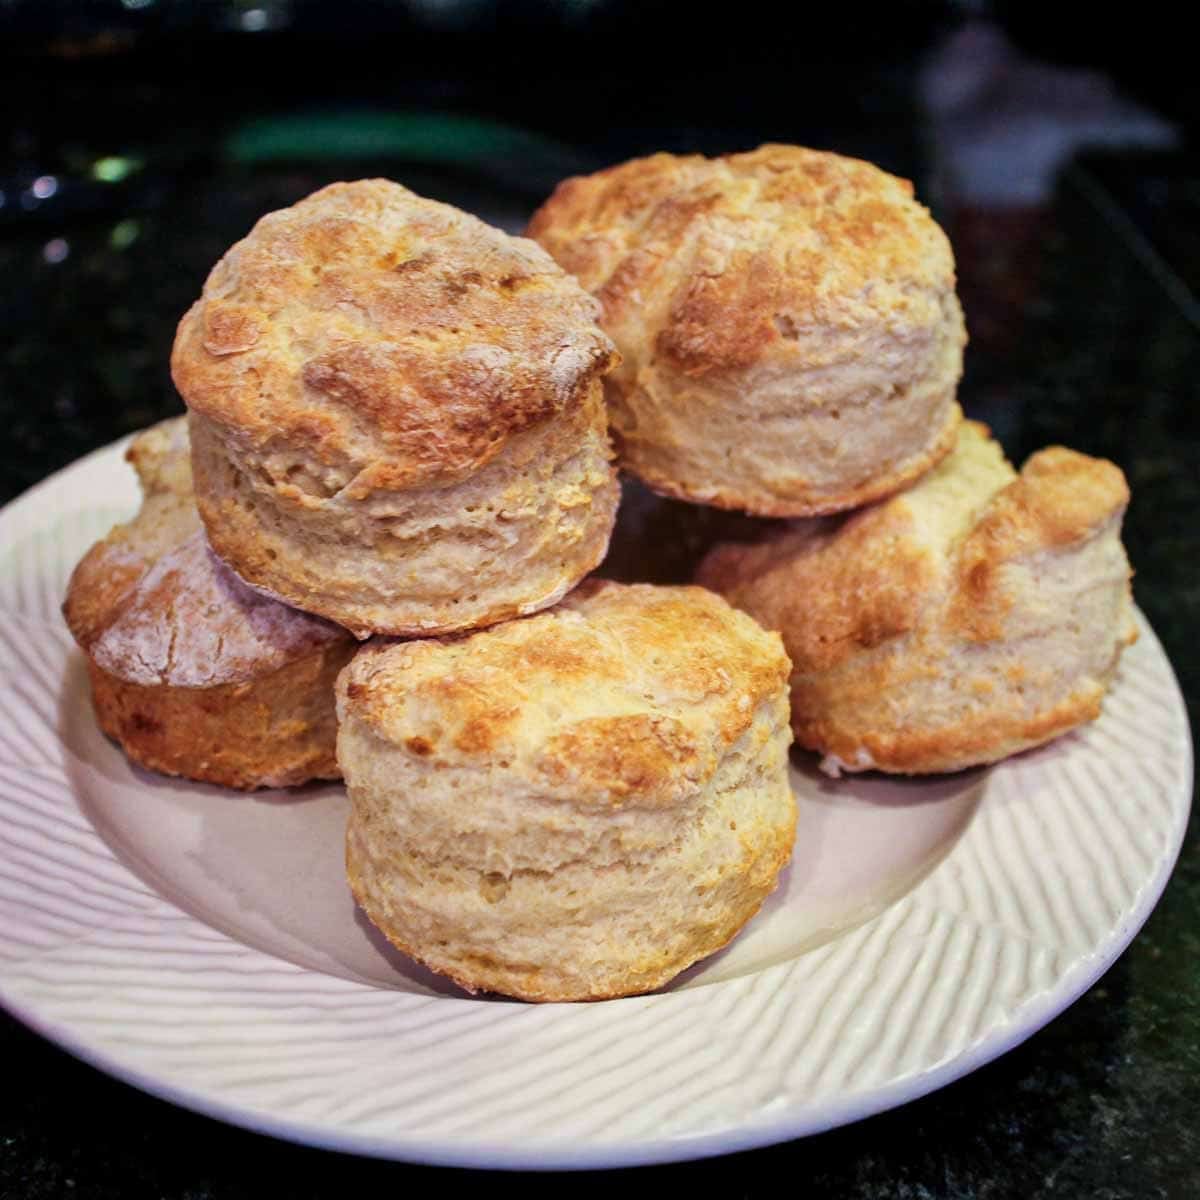
These easy low-fat biscuits are fluffy and tender. They’re low-calorie, healthy biscuits with almost no fat and far fewer calories than traditional biscuits. Homemade with only 2 ingredients and ready in under 25 minutes.

🤔 Quick Answer: How many calories are in these low-calorie biscuits?

Per biscuit (can vary by ingredient brands)

Calories: about 135 calories

Fat: about 0.3 grams
[feast_advanced_jump_to]

quote mark
Featured Comment by Linda in Boston:
⭐⭐⭐⭐⭐
"This was a great recipe, and easy. I have struggled for years with butter-based recipes and was never satisfied. But these are great - soft and slightly chewy... "

📝 TL;DR (Recipe Summary)

What: Homemade low-fat biscuits made with just two ingredients—nonfat yogurt and self-rising flour (or an easy substitute).

Why: A low-calorie, healthy biscuit recipe that’s fluffy and tender with almost no fat.

How: Mix the yogurt and self-rising flour, shape into drop or cut biscuits, and bake until golden.

🥣 Ingredients for Low-Calorie Biscuits

Yogurt with flour and no-fat yogurt biscuit ingredients—Labeled.

Nonfat yogurt: Use plain regular or Greek nonfat yogurt. Greek yogurt is thicker, so you may need a little extra yogurt or a splash of milk. Do not use flavored or sweetened yogurt.

Self-rising flour: Use store-bought or make your own:

  • 2 cups all-purpose flour
  • 1 tablespoon baking powder
  • ½ teaspoon salt

👨‍🍳 Quick Overview: How to Make These Healthy Biscuits

1. Mix the Dough: Mix nonfat yogurt with self-rising flour (or the homemade substitute) just until combined.

Mixing yogurt into flour mixture.

2. Shape the Biscuits: Make cut or drop biscuits and place them on a prepared baking sheet.

Uncooked drop biscuits on a tray.

3. Bake Until Golden: Bake in a fully preheated oven until golden brown.

Cut healthy low-fat biscuits on a plate.

👇 For full instructions, scroll down to the printable recipe card—or keep reading for tips, options, and storage.

👍 Tips for the Best Low-Fat Biscuits

  • Don't overmix: Mix just until the dough comes together. Overmixing can make the biscuits tough.
  • For cut biscuits: Pat the dough about ¾-inch thick and press the cutter straight down without twisting for the best rise.
  • Preheat the oven: A fully preheated oven helps the biscuits rise and brown properly.
  • For more browning: A light spray of cooking oil before baking is optional but helps brown the tops.

🤔 Options

  • Sweet: Add a little sugar or honey to the dough.
  • Savory: Add herbs or garlic. Shredded cheese also works but increases the fat and calories.

Healthy Sausage Gravy and Biscuits ⭐️⭐️⭐️⭐️⭐️

This healthy, low-calorie version of Biscuits and Gravy uses low-fat sausage gravy with these yogurt biscuits, so you can now enjoy your favorite breakfast.

biscuit and sausage gravy on a white plate

↕️ Adjusting the Recipe Size

In the recipe card, change the number of servings to adjust the ingredients. The instructions do not adjust, and the baking time stays about the same.

❄️ Storage

  • Room temperature: Store airtight for 2–3 days.
  • Refrigerator: Store airtight for 3–4 days.
  • Freezer: Freeze airtight for up to 3 months. Thaw overnight in the refrigerator.

For the best texture, reheat in an oven or toaster oven; microwaving will soften the outside.

❓FAQs

Are these biscuits good for a healthy diet?

Yes, they can fit most healthy diets that are low-calorie or low-fat. These low-calorie biscuits have about 135 calories and 0.3 grams of fat each, with no butter or oil.

How are yogurt biscuits different from regular biscuits?

Yogurt biscuits are soft and fluffy rather than flaky, with a slight tang from the yogurt. 

Are these fat-free biscuits?

Not quite. They contain about 0.3 grams of fat per biscuit, mostly from the flour, so they are very low-fat rather than truly fat-free.

📖The Recipe Card

Healthy, low-calorie cut biscuits.
Print Recipe Add to Collection Go to Collections
4.72 from 38 votes

Low Fat Biscuits (Low Calorie & Healthy Recipe)

Easy homemade low-fat biscuits made with nonfat yogurt and flour. These low-calorie, healthy biscuits are soft and tender, almost fat-free, and ready in about 25 minutes.
Prep Time10 minutes mins
Cook Time12 minutes mins
Total Time22 minutes mins
Course: Bread
Cuisine: American
Keyword: biscuits for diet, Healthy Biscuits, low calorie biscuits, Low Fat Biscuits
Servings: 8 biscuit
Calories: 136kcal
Author: Dan Mikesell AKA DrDan

Ingredients

  • 1¼ cup non-fat yogurt
  • 2 cups self-rising flour

DIY substitute for self-rising flour

  • 2 cups all-purpose flour
  • 1 tablespoon baking powder
  • ½ teaspoon salt
US Customary - Convert to Metric

Instructions

  • Preheat oven to 400° convection or 425° regular. Prepare a baking sheet with parchment paper, a silicon mat, or a light coat of PAM cooking spray.
    Yogurt with flour and biscuit ingredients—Labeled.

Mixing the Dough

  • Use 2 cups of self-rising flour, or make your own with 2 cups all-purpose flour, 1 tablespoon baking powder, and ½ teaspoon salt.
    Adding salt to the flour mixture.
  • dd 1¼ cups nonfat yogurt and mix just until combined—do not overmix. If using Greek yogurt, add 1–2 tablespoons of milk or additional yogurt if needed to loosen the dough.
    Mixing yogurt into flour mixture with spatula.

Shaping the Biscuits

  • For drop biscuits, divide the dough into 8 equal portions on the prepared baking sheet.
    Uncooked drop biscuits on a tray.
  • For cut biscuits, pat the dough ¾-inch thick on a floured surface. Cut 8 biscuits with a 2-inch cutter or 6 with a 2½-inch cutter. Gather and re-roll scraps as needed. Larger biscuits may need 1–2 additional minutes.
    Cutting biscuits and placing them on a baking tray.

Bake until Golden Brown

  • Bake in the fully preheated oven for 12–15 minutes, until golden brown.
    Cooked drop biscuits on a baking tray.

Video

Notes

Pro Tips

Nutrition varies with the brands of yogurt and flour used.
Store airtight at room temperature for 2–3 days, refrigerate for 3–4 days, or freeze for up to 3 months.
 

Nutrition

Calories: 136kcal | Carbohydrates: 27.2g | Protein: 5.4g | Fat: 0.3g | Saturated Fat: 0.1g | Polyunsaturated Fat: 0.1g | Monounsaturated Fat: 0.05g | Cholesterol: 0.8mg | Sodium: 321.4mg | Potassium: 131.4mg | Fiber: 0.8g | Sugar: 3g | Vitamin A: 2.7IU | Vitamin C: 0.3mg | Calcium: 169.1mg | Iron: 1.7mg

Editor's Note: This article was originally published on March 16, 2013. It has been updated with expanded options, refreshed photos, and a table of contents to help with navigation.
Molly and Lilly with pink puppy.

General Tso Chicken Recipe

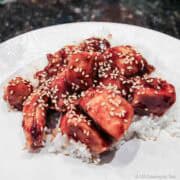
General Tse chicken on rice.

This General Tso Chicken Recipe is an easy homemade version of the classic Chinese takeout dish. It's a lighter version with tender chicken with a crispy crust in sweet, tangy, and spicy General Tso sauce. This 30-minute one-pan recipe has become a standard at our house and will at yours, too.

🐓Ingredients

Chicken
Vegetable oil
Corn starch
Egg
Hoisin sauce
Pantry—soy sauce, ketchup, brown sugar, dry ginger, crushed red pepper, salt, pepper
Serving—toasted sesame seeds, sliced green onion, cooked rice, steamed vegetables

General Tse chicken on rice.
[feast_advanced_jump_to]
Blue ribbon divider used for visual effect

quote mark
Featured Comment by Alby C.:
"Wow! This recipe was so delicious and so easy to make. I can't believe a novice cook like me was able to make a dish that rivaled most restaurants I've been to! Signature dish! Thank you so much!"

In the past, I have destroyed my kitchen with other General Tao recipes, but this one-pan recipe, adapted from a Martha Stewart recipe, is much easier and faster to make at home.

A lighter, healthier General Tso recipe with the same great taste as the full-fat takeout version. However, it fits healthy low-fat diets and can easily be adapted to a gluten-free diet. Now, everybody can make General Tso Chicken at home.

For more Chinese takeout-at-home recipes, try Chicken Stir Fry, Crock Pot Cashew Chicken, or Crock Pot Beef and Broccoli.

👨‍🍳How to Make General Tso Chicken—Step-by-Step Photo Instructions

Raw chicken with ingredients for General Tso Chicken—Labeled.

Preparing and Cooking the Chicken

Cubes of trimmed chicken breast.

1. Trim chicken into 1-inch cubes. Dry with paper towels.

Whisking breading ingredients.

2. Whisk together egg whites, cornstarch, salt, and pepper.

Coating the chicken with breading.

3. Coat the chicken with the egg mixture and shake off the excess. Let it rest for 5 minutes, then add it to a large nonstick pan with hot oil.

Cooked chicken in black skillet.

4. Cook to 165° over medium-high heat, stirring or flipping occasionally, for about 8-10 minutes—longer if the pan is crowded. Transfer to a bowl.

Making General Tso Sauce

Mixing sauce for General Tso chicken.

5. To make General Tso sauce, whisk together cornstarch and water. Then, add brown sugar, Hoisin sauce, ketchup, soy sauce, dry ginger, and crushed red pepper.

Whisking sauce until thickened.

6. With medium-low heat, add the sauce to the pan and whisk until thickened—about 2-3 minutes.

Finishing and Serving

Adding cooked chicken into the sauce.

7. Add the chicken back into the sauce and stir to coat.

General Tso Chicken on white rice.

8. Transfer to the serving dish. Garnish with the toasted sesame seeds.

For more details, keep reading. See the Recipe Card below for complete instructions and to print.

👨‍🍳Make it right every time—tips for success

Patting the chicken cubes dry before coating and resting them for 5 minutes after coating will help the coating stick.

Please use the Hoisin sauce; there is no good substitute.

Add the chicken to the hot oil one piece at a time. You can cook it in two batches of 8 to 10 minutes each or cook it all at once for about 12 to 14 minutes.

Officially, you should flip each piece individually with a fork. However, if you dry the chicken well and give the coating time to adhere before cooking, an occasional gentle stir works well.

Check multiple pieces to ensure the internal temperature reaches 165° for safety.

I love General Tso sauce, so I usually double it for the rice and vegetables. After thickening the sauce, but before adding the chicken, I remove the extra sauce and serve it on the side.

🤔Ingredient options and variations

If you use thighs, the cooking temperature should be 180°-185° for tenderness. It is safe at 165°.

You can use a whole egg instead of two whites. The whites are used to continue the "lighter" theme by decreasing the fat.

The Hoisin sauce provides a vinegar flavor for this dish, but you may want to add some rice wine vinegar. Likewise, garlic is in the Hoisin, but add more if you wish.

Dry ginger is used, but you may use 1 teaspoon of freshly grated ginger for each ¼ teaspoon of ground ginger.

Brown sugar adds sweetness to the sauce but can be cut in half without much effect.

🔥How to adjust the spiciness

The red pepper flakes are "to taste." ¼ teaspoon has minimal heat (1/10)  but some pleasant taste. ½ teaspoon is what you typically have in a restaurant (3/10), but 1 teaspoon is more for the heat lover (7/10).

Dried Chinese chilies, such as Tien Tsin peppers, can be used, but be careful—they can be very hot.

✔️About Hoisin sauce

Hoisin sauce is a sweet, salty, tangy Chinese condiment commonly used in Chinese and other Asian cuisines. It is made with fermented soybeans, sugar, vinegar, garlic, spices, and dried chilies.

It is thick, red, and full of flavors. It is commonly used in various dishes, including stir-fries, marinades, glazes, and dipping sauces, but it has many other uses.

Due to the complexity of flavors, a substitute is impossible to recommend.

🤔To make Gluten-Free General Tso's Chicken

General Tso's is not naturally gluten-free, but it can be with a few easy adaptions.

  • Hoisin sauce is usually thickened with wheat, but gluten-free versions are available.
  • Soy sauce is packed with gluten, but Tamari is a good substitute and is generally gluten-free, but read the label.
  • Ketchup is usually gluten-free, but some have gluten, so read the labels.

↕️How to make this a "for two" or "family size" recipe

This recipe is very easy to make smaller or bigger to fit your needs.

The full recipe makes 4 large servings. Perfect for our "for two" household for two meals.

  1. Use the recipe card and adjust the number of servings.
  2. Use the amount of ingredients in the ingredient list, not the instructions—those do not adjust.
  3. You will need to cook the coated chicken in batches in a double recipe.

🍽️Serving General Tso's

Garnish with toasted sesame seeds and slices of green onions. For rice, try Baked Rice or Egg Fried Rice. Serve with steamed vegetables to complete the meal.

Baked Rice

Cook perfect, tender, fluffy rice every time with this easy oven-baked rice recipe. Combine rice, butter, and salt with boiling water, seal tight, and oven-bake. Make delicious rice for two or a crowd in 30 minutes!

Rice on a fork over a bowl.

❄️Storage of leftovers

Store leftovers in an airtight container refrigerated for 3 days. The longer you store coating made with cornstarch, the more it will break apart.

Also, the sauce is made with cornstarch and may become "jelly-like " when refrigerated. It will still taste good and is safe, but the texture may be off.

❓FAQs

What is the difference between General Tso Chicken and Sesame Chicken?

General Tso chicken and Sesame Chicken are similar, with a sweet and savory sauce. General Tso's is usually spicier, while Sesame Chicken is typically sweeter, with a heavy coat of toasted sesame seeds and no heat.

How do I get the breading to stick better?

First, dry the chicken as much as possible with paper towels before coating.
Second, let the coating set on the chicken for 5-10 minutes before cooking.
Third, flip gently in the skillet with a fork.
Fourth, cook the chicken in several batches so as not to crowd the pan.

🇨🇳What is General Tso Chicken

General Tso's chicken is a sweet, tangy, and somewhat spicy deep-fried chicken dish served in most North American Chinese restaurants.

Although it is probably some basis in standard Chinese fare, it is not a traditional Chinese dish. Most likely, what we now know as General Tso Chicken originated in New York City in the 1970s, but there are many conflicting claims about who and where.

Wherever it started, it is now standard fare in almost every North American Chinese restaurant—and has always been one of the most popular dishes.

Blue ribbon divider used for visual effect

📖The Recipe Card

General Tse chicken on rice.
Print Recipe Add to Collection Go to Collections
4.70 from 13 votes

General Tso Chicken Recipe

This General Tso Chicken Recipe is an easy homemade version of the classic Chinese takeout dish. It's a lighter version with tender chicken with a crispy crust in sweet, tangy, and spicy General Tso sauce. This 30-minute one-pan recipe has become a standard at our house and will at yours, too.
Prep Time10 minutes mins
Cook Time20 minutes mins
Total Time30 minutes mins
Course: Main Course
Cuisine: Chinese
Keyword: Easy, General Tso Chicken Recipe, General Tso Chicken Sauce, Homemade, How to make General Tso Chicken
Servings: 4 servings
Calories: 267.9kcal
Author: Dan Mikesell AKA DrDan

Ingredients

  • 2 skinless boneless chicken breasts about 10-12 oz. each.
  • 2 teaspoons oil

Coating

  • 3 tablespoons corn starch
  • 1 egg or two egg whites
  • ½ teaspoon salt
  • ¼ teaspoons pepper

General Tso Sauce

  • ½ cup water
  • 1 tablespoon corn starch
  • 3 tablespoons Hoisin sauce
  • 2 tablespoons soy sauce
  • ½ cup brown sugar or less
  • 3 tablespoons ketchup
  • ¼ teaspoon dry ginger
  • ¼ to 1 teaspoon crushed red pepper See recipe notes below

Serving options

  • toasted sesame seeds
  • sliced green onion
  • cooked rice
  • steamed vegetables
US Customary - Convert to Metric

Instructions

  • Trim two skinless boneless chicken breasts, then cube them into about 1-inch pieces—pat dry with paper towels.
    Cubes of trimmed chicken breast.
  • Whisk together 2 egg whites or one whole egg, cornstarch, salt, and pepper.
    Whisking breading ingredients.
  • Add chicken to the egg mixture and stir to coat. Shake the excess coating and let set for 5 minutes if you have the time to help the coating adhere better. Heat 2 teaspoons vegetable oil over medium-high heat in a large nonstick skillet or a wok.
    Coating the chicken with breading.
  • Add the chicken one piece at a time to the hot oil. You can be a perfectionist, half-turn them nicely for 8 to 10 minutes, and repeat. OR put them all in and occasionally stir for about 12 to 14 minutes. Be sure the internal temp gets to 165° by checking multiple pieces.
    Cooking chunks of coated chicken in a pan.
  • Start the General Tso sauce while the chicken is cooking—whisk cornstarch into ½ cup of cool water. Then add brown sugar, Hoisin sauce, ketchup, soy sauce, dry ginger, and crushed red pepper.
    Mixing sauce for General Tso chicken.
  • When the chicken is done, transfer it to a bowl and decrease the heat to medium-low. Add the sauce and whisk continuously while boiling until well thickened, 2-3 minutes.
    Whisking sauce until thickened.
  • Add the chicken back into the sauce and stir to coat. Transfer to the serving dish. Garnish with the toasted sesame seeds and slices of green onion. Serve with sides of rice and steamed vegetables.
    General Tso Chicken on white rice.

Video

Notes

Pro Tips

  1. You can use chicken thighs, but they should be cooked to 180° to 185° for a better texture. They are safe at 165°.
  2. The Hoisin sauce is needed—do not skip it.
  3. The sweetness is on the high side. Decrease the brown sugar if you want.
  4. I used two egg whites to make this "lighter," but you may use one whole egg.
  5. The red pepper is "to taste". ¼ teaspoon has minimal heat (1/10)  but some nice taste. ½ teaspoon is what you would normally have in a restaurant (3/10), but 1 teaspoon is more for the heat lover (7/10).
  6. To decrease the sodium, cut out the salt and use low-sodium soy sauce.
  7. Good refrigerated for  3 to 4 days. I don't see this freezing well.

Nutrition

Calories: 267.9kcal | Carbohydrates: 43.4g | Protein: 15g | Fat: 4g | Saturated Fat: 0.5g | Polyunsaturated Fat: 1g | Monounsaturated Fat: 1.8g | Trans Fat: 0.01g | Cholesterol: 36.5mg | Sodium: 977.5mg | Potassium: 348.5mg | Fiber: 0.6g | Sugar: 32.5g | Vitamin A: 113.1IU | Vitamin C: 1.2mg | Calcium: 36.8mg | Iron: 0.8mg

Editor's Note: Originally Published October 17, 2012. Updated with expanded options, refreshed photos, and a table of contents to help navigation.

Molly and Lilly in the Kitchen.

Creamy Smoked Sausage Pasta

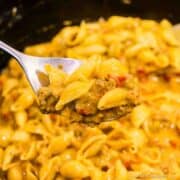
spicy sausage pasta on fork 1200

This creamy smoked sausage pasta recipe is ready in only 30 minutes. It is a one-pan recipe for easy meals with smoked sausage and tender pasta cooked in a creamy tomato sauce and loaded with cheese. Make it lower-fat for a healthier diet or spicy for your taste, all by the choice of ingredients.

🥣Ingredient

Smoked sausage—or kielbasa, andouille, or other precooked sausage
Aromatics—onion, garlic, and green onion
Tomatoes—diced or RoTel
Dairy—sour cream and shredded cheese
Dry pasta or noodles
Salt and black pepper

spicy smoked sausage pasta on a fork.
[feast_advanced_jump_to]
Blue ribbon divider used for visual effect

quote mark
Featured Comment by Jon Eric:
⭐⭐⭐⭐⭐"Doc! Another favorite of mine, this recipe and the Cheesy Jambalaya, have been my after-work go-to's for a while now. Quick, easy, and, of course, delicious. Thanks for the 30-minute recipes!"

I have written this recipe as a light version of smoked sausage paste with a full taste and creaminess. It is suitable for healthy diets, such as low-calorie and low-fat diets.

Check out some other must-try easy casserole dishes: Chicken and Sausage Jambalaya, Chili Mac, and Cheesy American Goulash.

👨‍🍳How to Make Smoked Sausage Pasta—Step-by-Step Photo Instructions

Smoked sausage with pasta and casserole ingredients—labeled.
Chopped onion and sliced smoked sausage.

1. Chop an onion and cut the smoked sausage into ¼ inch medallions.

Cooking smoked sausage and onion in a pan.

2. Cook the sausage and onion in a large oven-safe skillet until the onion is clearing then add garlic for the last 30 seconds.—about 5 minutes.

Mixing in sour cream into casserole.

3. Add chicken broth, salt, black pepper, RoTel (or drained diced tomatoes.

Adding bowtie pasta to the pan.

4. Add dry pasta of your choice.

Covering the pan with a lid to simmer.

5. Bring to a boil, then lower to a simmer and cover. Stir occasionally and cook until the pasta is tender—about 15 minutes for standard pasta.

Adding cheese to the casserole.

6. Add shredded cheese and mix in.

Add more shredded cheese to the top.

7. Sprinkle more shredded cheese on top.

Brown the casserole under a broiler.

8. Place under broiler until cheese is melted and browned.

Spoonful of sausage casserole with toppings.

9. Garnish with chopped green onions if desired.

For more details, keep reading. See the Recipe Card below for complete instructions and to print.

🥣Ingredient options and variations

Sausage: I suggest turkey smoked sausage or kielbasa, which provides excellent taste and decreases fat. Any sausage can be used, but it should be thoroughly cooked before being used in this recipe if it is uncooked.

Pasta: Use a bite-sized standard commercial-type pasta or noodles. I used bowtie pasta, but rigatoni, ziti, penne, or egg noodles would be good choices. This choice determines the length of the simmering phase of the recipe—it needs to cook until al dente.

Cheese: I like Monterey Jack cheese in this casserole, but Pepper Jack, mozzarella, or cheddar cheese are also excellent choices.

Tomatoes: If you want no heat, use diced tomatoes that have been drained. Alternatively, use tomatoes with green chilis added (Rotel). These chilis come in various heat levels and should be added undrained.

Spices: No additional spices are suggested, but you can add other flavors. Red pepper flakes or cayenne pepper can adjust the spiciness.

You can adjust the heat easily with the Rotel™, which comes with various spice levels.

Optional vegetables: Diced bell pepper, mushrooms, or zucchini can be added to the dry pasta. Other vegetables, like broccoli, can be added fully cooked when the cheese is added.

👍Make a lighter version.

For my lighter, skinny version of this sausage pasta, I used lighter ingredients: turkey or chicken sausage, 2% cheese, and lower-fat sour cream. And I sauteed the onion and sausage with the minimum amount of oil.

Never use non-fat cheese or sour cream—you will have poorer results.

Using full-fat products, one serving is 562 calories and 36 grams of fat. By switching to lower-fat products, one serving is 374 calories and 12.5 grams of fat. Since this is how I usually cook this recipe, this is what appears in the nutrition calculations.

🤔Variations to try

Cajun sausage pasta: Start with andouille sausage. Use the drained diced tomatoes and cajun seasoning.

Italian sausage pasta: Start by browning Italian sausage with onion and garlic. Use rigatoni, ziti, or penne for the pasta. Then, add drained diced tomatoes with Italian seasoning or basil. Finally, add mozzarella and Parmesan cheeses.

🍲Other casserole recipes

Check out some easy-to-make Italian casseroles, like Baked Chicken and Spaghetti, Sausage Pasta Bake, and Chicken and Pasta Bake.

🍽️What to serve with smoked sausage pasta

Serve with a fresh green like a garden salad or a plate of cut fresh vegetables.

Add a contrasting bread like Old Fashioned Cornbread, Cornbread Drop Biscuits, Healthy Biscuits, or Cheddar Bay Biscuits (Red Lobster Copycat).

❄️How to store and reheat leftovers

Store leftovers sealed airtight and refrigerated for 4 days or frozen for 4 months.

Reheat, after thawing overnight in the refrigerator if frozen, on the stovetop with a bit of oil, in the oven, or in the microwave. The pasta may have absorbed some of the moisture; a splash of water or milk may be needed.

❓FAQs

What makes this recipe lower sodium?

The sodium can be decreased by using low-sodium broth and cutting the added salt in half to save 200 mg of sodium per serving.

How to make this pasta casserole gluten-free?

If using gluten-free pasta, it is best to precook the pasta to al dente before adding it since cooking uncooked gluten-free pasta in a dish is unpredictable.

And don't forget to check the labels on all the other ingredients since there is variability between brands.

Blue ribbon divider used for visual effect

📖The Recipe Card

spicy sausage pasta on fork 1200
Print Recipe Add to Collection Go to Collections
5 from 2 votes

Creamy Smoked Sausage Pasta

This creamy smoked sausage pasta recipe is ready in only 30 minutes. It is a one-pan recipe for easy meals with smoked sausage and tender pasta cooked in a creamy tomato sauce and loaded with cheese. Make it lower-fat for a healthier diet or spicy for your taste, all by the choice of ingredients.
Prep Time5 minutes mins
Cook Time25 minutes mins
Total Time30 minutes mins
Course: Main Course
Cuisine: American
Keyword: creamy sausage pasta, Sausage Pasta, smoked sausage pasta, smoked sausage recipe
Servings: 6 servings
Calories: 373.7kcal
Author: Dan Mikesell AKA DrDan

Ingredients

  • 1 pound smoked sausage turkey sausage suggested
  • 1 onion medium chopped
  • 2 teaspoons oil
  • 2 cloves garlic minced or crushed
  • 14 oz chicken broth Low sodium suggested
  • 14 oz drained diced tomatoes or undrained RoTel
  • ½ cup sour cream low fat suggested
  • ½ teaspoon salt
  • ½ teaspoon pepper
  • 8 oz dry pasta of choice
  • 1 ½ cup shredded cheese Monterey, cheddar, or mozzarella. Low fat suggested.
  • 2 green onion sliced to garnish optional
US Customary - Convert to Metric

Instructions

  • Preheat 1 ½ teaspoons oil over medium-high heat in a large oven-safe skillet.
    Smoked sausage with pasta and casserole ingredients—labeled.
  • Chop 1 medium onion and 1 pound of cooked sausage of your choice into ¼ inch medallions. I suggest turkey smoked sausage.
    Chopped onion and sliced smoked sausage.
  • Add the onion and sausage to the pan. Cook until onion is clearing nicely and sausage is browning—about 5 minutes. Add two cloves of minced garlic and cook another 30 seconds.
    Cooking smoked sausage and onion in a pan.
  • Add a 14 oz can low sodium chicken broth, 14 oz drained diced tomatoes or RoTel, ½ cup low-fat sour cream, ½ teaspoon salt, and ½ teaspoon pepper. Mix well.
    Mixing in sour cream into casserole.
  • Add 8 oz.(2 cups) of dry pasta of your choice.
    Adding bowtie pasta to the pan.
  • Bring to a boil over medium-high heat, then decrease the heat to low: cover and simmer. Stir occasionally and cook until pasta is tender — about 15 minutes for standard pasta. If you are approaching the endpoint for the pasta and too much fluid is present, uncover and increase heat to medium-high for the last few minutes.
    Covering the pan with a lid to simmer.
  • Add ½ cup of shredded cheese of your choice and mix in.
    Adding cheese to the casserole.
  • Sprinkle 1 cup of shredded cheese on top.
    Add more shredded cheese to the top.
  • Place under broiler until cheese is melted and browned.
    Brown the casserole under a broiler.
  • Garnish with chopped green onions if desired.
    Spoonful of sausage casserole with toppings.

Video

Notes

Pro Tips

  1. This is an easy recipe to modify to your taste. You can use the sausage, pasta, and cheese of your choice. The recipe post provides many variations and options.
  2. The uncooked pasta works well if you use standard commercial pasta, but always be aware of the endpoint you want and watch for it.
  3. If you want to use a non-standard type of pasta, you need to cook it until al dente or cook it separately and add it near the end when mixing in the cheese.
  4. I like to use precooked turkey sausage, but you can use any sausage of your choice. You can even use bulk sausage as long as you cook it to a safe 165°.
  5. You can also use the cheese of your choice. I suspect most will use cheddar, but I like Monterey. Even mozzarella would be good. To decrease fat, you can use 2% milk cheese. Please do not use non-fat cheese.
  6. Good refrigerated for 3-4 days and will freeze well for 3-4 months.

Nutrition

Calories: 373.7kcal | Carbohydrates: 35.7g | Protein: 28.7g | Fat: 12.5g | Saturated Fat: 4.3g | Polyunsaturated Fat: 2.6g | Monounsaturated Fat: 4.3g | Trans Fat: 0.3g | Cholesterol: 69.3mg | Sodium: 859.5mg | Potassium: 535.9mg | Fiber: 2.2g | Sugar: 3.3g | Vitamin A: 277.3IU | Vitamin C: 8.9mg | Calcium: 194.4mg | Iron: 2.3mg

This is a skinny version of an American Test Kitchen Spicy Sausage Pasta recipe (subscription required) from their The Best Simple Recipes cookbook.

Editor's Note: Originally Published September 28, 2013. Updated with expanded options, refreshed photos, and a table of contents to help navigation.

Dogs with a kitty toy.

Cornmeal Biscuits—Easy Cornbread Biscuits for Chili

Cornbread biscuit with butter on a plate.

This easy cornmeal biscuit recipe is made with simple ingredients and a touch of honey for a delicious corn flavor. These drop biscuits are ready in just 25 minutes.

The result is tender homemade cornbread biscuits that are perfect with chili, soups, stews, or almost any comfort food dinner.

Cornbread biscuit with butter on a plate.
[feast_advanced_jump_to]

quote mark
Featured Comment by ANon:
⭐⭐⭐⭐⭐"Wow! Delicious recipe and one that will hopefully be used for years to come!"

📝 TL — Recipe Summary

  • What: Homemade cornbread biscuits for chili, soups, stews, or almost any comfort food dinner.
  • Why: An easy recipe for cornmeal drop biscuits with honey and simple pantry ingredients on the table in 25 minutes.
  • How: Mix the ingredients, form drop biscuits, and bake in a preheated oven for 12–14 minutes until browned and tender.

🌽 Ingredients

Cornmeal with biscuit ingredients-labeled.
  • Cornmeal: Yellow or white.
  • Flour: All-purpose flour.
  • Honey
  • Milk: Regular milk or buttermilk.
  • Pantry ingredients: Baking powder, baking soda, salt, and butter.

👨‍🍳 Quick Overview: Cornmeal Biscuits

1. Mix cornmeal, flour, baking powder, baking soda, and salt. Cut in cold butter.

Cutting butter into a dry mixture with cornmeal.

2. Combine warmed honey and milk. Add to the dry ingredients and mix just until combined.

Mixing honey into buttermilk.

3. Bake — Form drop biscuits on a prepared tray. Bake at 425°F (400°F convection) for 12–14 minutes, until golden.

Baked corn biscuits on the tray.

For more details, keep reading. See the Recipe Card below for complete instructions and to print.

👍 Cornmeal Biscuit Options and Variations

  • Flour: All-purpose flour works best. Whole wheat flour with cornmeal can make the biscuits dense.
  • Honey: Adds sweetness and brings out the corn flavor.
  • Milk or buttermilk: Regular milk works well, but buttermilk makes the biscuits fluffier.
  • Finishing: Brush the tops with melted butter before or after baking.
  • Add-ins: Try cheddar cheese, jalapeños, or chives.

✅ Pro Tip: To make a buttermilk substitute, mix 1 cup of milk with 1 tablespoon of vinegar or lemon juice and let it sit for 5–10 minutes.

🤔 Why Are My Cornmeal Biscuits Flat?

  • Oven temperature: Start with a fully preheated oven. If your oven runs cool, check it with an oven thermometer.
  • Dough texture: The dough should be slightly sticky. If too wet, add a little flour; if too dry, add a splash of milk.
  • Baking powder: Old baking powder loses its strength and can prevent the biscuits from rising.

🍽️ Serving Cornbread Biscuits

Serve these cornbread biscuits warm with butter or honey. They are especially good with chili, soups, stews, and other comfort food dinners.

Try them with Crock Pot Chili, Beef Stew or Beef Barley Soup.

❄️ Storage and Reheating

  • Room temperature: Store in an airtight container for 1–2 days.
  • Refrigerated: Up to 7 days.
  • Frozen: 2–3 months.
  • Reheating: Use the oven or air fryer for crisp edges. The microwave works but makes the biscuits softer.

❓ FAQs

Can I make cut biscuits instead of drop biscuits?

Yes. Pat the dough about 1 inch thick, cut into 2- to 2½-inch rounds, and bake as directed. They will be taller and more uniform than drop biscuits.

Can I use more cornmeal and less flour?

Somewhat. Flour provides the structure, so too much cornmeal can make the biscuits dense and crumbly. I don’t recommend making them with all cornmeal.

📚 Related Recipes

  • Old Fashioned Cornbread
  • Cheddar Bay Biscuits
  • Low-Fat Biscuits
  • Grilled Biscuits

📖The Recipe Card

Cornbread biscuit with butter on a plate.
Print Recipe Add to Collection Go to Collections
5 from 2 votes

Cornmeal Biscuits (Easy Cornbread Biscuits)

Easy homemade cornmeal biscuits with a touch of honey and tender cornbread texture. These quick drop biscuits are perfect with chili, soups, stews, or comfort food dinners.
Prep Time10 minutes mins
Cook Time13 minutes mins
Total Time23 minutes mins
Course: Bread
Cuisine: American
Keyword: Cornbread Biscuits, Cornmeal Biscuits
Servings: 8 biscuits
Calories: 198kcal
Author: Dan Mikesell AKA DrDan

Ingredients

  • 1½ cup all-purpose flour
  • ½ cup cornmeal, yellow or white
  • 1 tablespoon aluminum-free baking powder
  • ¼ teaspoon baking soda
  • ½ teaspoon salt
  • 4 tablespoons butter, cold
  • ¾ cup milk or buttermilk
  • 2 tablespoons honey
US Customary - Convert to Metric

Instructions

  • Preheat oven to 425°F (400°F convection).
    Cornmeal with biscuit ingredients-labeled.
  • Combine 1½ cups flour, ½ cup cornmeal, 1 tablespoon baking powder, ¼ teaspoon baking soda, and ½ teaspoon salt. Cut up or shred ½ stick (4 tablespoons) of cold butter. Cut the butter into the flour mixture with a fork or pastry blender
    Cutting butter into a dry mixture with cornmeal.
  • In a separate bowl, add 2 tablespoons of honey to ¾ cup of milk. Mix well. Honey dissolves better if warmed slightly.
    mixing honey into buttermilk.
  • Add the wet ingredients to the dry ingredients and mix just until combined. Do not overmix.
    Mixing wet ingredients into dry.
  • Prep a baking sheet with a good coating of PAM cooking spray or parchment paper. Make 8 drop biscuits.
    Eight cornmeal drop biscuits on a tray.
  • Bake until golden brown, about 12–14 minutes.
    Baked corn biscuits on the tray.

Video

Notes

Pro Tips:

Buttermilk will give a fluffier texture. Make a substitute by adding 1 tablespoon of vinegar or lemon juice to 1 cup of milk, then rest for 5–10 minutes before use.
Dough should be slightly sticky, not dry. Add a touch more flour or milk if needed.
Use aluminum-free baking powder to avoid an aftertaste.
Bake until the tops are golden brown – that’s your true endpoint.
See the troubleshooting section in the post if your biscuits come out flat.
Storage: wrap in plastic or foil. Room temperature for 2 days, refrigerated for up to 7 days, frozen for 3 months.

Nutrition

Calories: 198kcal | Carbohydrates: 31g | Protein: 4g | Fat: 7g | Saturated Fat: 4g | Trans Fat: 1g | Cholesterol: 16mg | Sodium: 359mg | Potassium: 97mg | Fiber: 2g | Sugar: 6g | Vitamin A: 222IU | Vitamin C: 1mg | Calcium: 145mg | Iron: 2mg

Editor’s Note: Originally published January 21, 2018. Updated with refreshed photos and improved recipe instructions.

Dogs with purple puppy toy.

Pasta e Fagioli Recipe (Pasta and Bean Soup)

Pasta E Fagioli Soup in spoon

This easy Pasta e Fagioli Soup Recipe is loaded with ground beef, beans, vegetables, and pasta in a flavorful tomato broth. Inspired by Olive Garden's popular soup, it's a hearty Italian meal you can make in a crock pot or on the stovetop with common pantry ingredients.

Pasta e Fagioli Soup on a spoon.
[feast_advanced_jump_to]

quote mark
Featured Comment from Brian:
⭐⭐⭐⭐⭐ "Yet another lovely recipe in this amazing collection of wonderful recipes."

📝 TL;DR — Recipe Summary

  • What: A hearty Italian pasta and bean soup with ground beef, vegetables, and a rich tomato broth.
  • Why: Easy to make with pantry ingredients and perfect for leftovers.
  • How: Simmer on the stovetop for about an hour or cook in a crock pot on LOW for 6 hours. Add cooked pasta near the end.

🥣 Ingredients

Ground beef with vegetables and pasta—labeled.
  • Ground beef
  • Pasta—Small pasta, such as ditalini
  • Vegetables—Onion, celery, carrot, garlic
  • Tomatoes—Diced tomatoes, tomato sauce, tomato juice or V8
  • Beans—Red kidney beans and white beans (Great Northern, Navy, or cannellini)
  • Seasoning—Oregano, basil, thyme, salt, and pepper
  • Pantry—Beef broth and optional white vinegar

👨‍🍳 Quick Overview: Making Pasta e Fagioli Soup

1. Chop the onion, celery, and carrot. Mince the garlic.

Prepared onion with celery, carrot and garlic.

2. Brown the ground beef with the onion, celery, and carrot. Add the garlic during the last minute, then drain excess fat.

Cooking vegetables with browned meat.

3. Add the beef mixture and remaining ingredients, except the pasta and optional vinegar, to a large pot or crock pot.

Adding rinsed beans to the soup.

4. Simmer covered on the stovetop for about 1 hour or cook on LOW in a crock pot for 6 hours, until the vegetables are tender. Stir in cooked pasta and optional vinegar near the end.

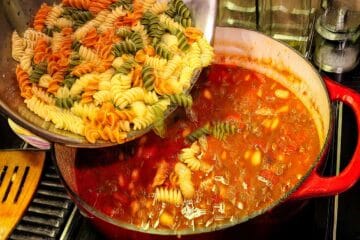
Pouring pasta into soup.

For more details, keep reading. See the recipe card below for complete instructions and to print.

🤔 Options and Variations

  • Meat—Ground beef gives this Olive Garden-style soup its hearty flavor. Substitute ground turkey, Italian sausage, or chicken, or leave out the meat for a vegetarian version.
  • Pasta—Ditalini is the traditional choice, but any small pasta works. I like tri-color rotini for a little extra color.
  • Broth—Use beef broth with ground beef, chicken broth with poultry, or vegetable broth for a vegetarian soup.
  • Seasoning—Substitute 1 tablespoon of Italian seasoning for the oregano, basil, and thyme.
  • Vinegar—Optional, but a teaspoon of white vinegar added near the end brightens the flavor.

❄️ Storage and Reheating

Pasta absorbs broth during storage, making the soup thicker and the pasta softer. For the best leftovers, store the soup without pasta and add freshly cooked pasta when reheating.

  • Refrigerate: Store in an airtight container for up to 4 days.
  • Freeze: Freeze in airtight containers for 3–4 months, preferably without pasta.
  • Reheat: Warm on the stovetop over medium heat or in the microwave. Add broth or water as needed to adjust the thickness.

📖 Other Italian Recipes

  • Crock Pot Baked Ziti
  • Crock Pot Chicken Baked Ziti
  • Chicken Parmesan Soup (Crock Pot or Stovetop)

❓FAQs

What is the difference between Pasta e Fagioli and Minestrone soup?

Both are Italian soups, but Pasta e Fagioli focuses on pasta and beans and is usually thicker. Minestrone generally has more vegetables and a thinner broth.

Can I make Pasta e Fagioli Soup without meat?

Yes. Omit the ground beef and use vegetable broth for a hearty vegetarian soup.

How do I keep the pasta from getting mushy?

Cook the pasta separately until al dente and add it near the end of cooking. If planning leftovers, add the cooked pasta to individual servings and store any remaining soup without pasta.

📖The Recipe Card

Pasta e Fagioli Soup on a spoon.
Print Recipe Add to Collection Go to Collections
5 from 1 vote

Pasta e Fagioli Recipe (Pasta and Bean Soup)

Make this hearty Italian pasta and bean soup with ground beef, vegetables, and a flavorful tomato broth. An easy Olive Garden-inspired recipe with stovetop and crock pot instructions.
Prep Time20 minutes mins
Cook Time1 hour hr 10 minutes mins
Total Time1 hour hr 30 minutes mins
Course: Soup
Cuisine: Italian
Keyword: italian pasta fagioli, Pasta e Fagioli Recipe
Servings: 8 servings
Calories: 261kcal
Author: Dan Mikesell AKA DrDan

Ingredients

  • 1 pound Ground beef Lean preferred
  • 1 medium Onion Diced
  • 3 stalks Celery Chopped
  • 1 Carrot Large or 2 medium julienned
  • 2 cloves Garlic Minced
  • 28 oz Diced tomatoes Undrained
  • 15 oz Tomato sauce
  • 12 oz Tomato juice Or V8 vegetable juice
  • 1 teaspoons Salt
  • 1 teaspoon Dried oregano
  • 1 teaspoon Dried basil
  • ½ teaspoon Dried thyme
  • ½ teaspoon Pepper
  • 14 oz Light or dark red kidney beans Low sodium, drained and rinsed
  • 14 oz Great Northern or Navy beans Low sodium, drained and rinsed
  • 14-28 oz Low-sodium beef broth Adjust for thickness
  • ½ pound Small pasta Such as ditalini
  • 1 teaspoon White vinegar Optional
US Customary - Convert to Metric

Instructions

  • Prepare the vegetables. Dice 1 medium onion, chop 3 stalks of celery, julienne 1 large carrot (or 2 medium carrots), and mince 2 cloves of garlic.
    Prepared onion with celery, carrot and garlic.
  • Brown the beef and vegetables. In a large Dutch oven over medium-high heat, start browning 1 pound of ground beef. Add the onion, celery, and carrot. Cook for about 10 minutes, until the beef is browned and the vegetables begin to soften. Add the garlic for the last minute, then drain excess fat.
    Cooking vegetables with browned meat.
  • Add the tomatoes and seasonings. Stir in 28 ounces of undrained diced tomatoes, 15 ounces of tomato sauce, 12 ounces of tomato juice or V8, 1 teaspoon each of salt, oregano, and basil, and ½ teaspoon each of thyme and black pepper.
  • Add the beans and broth. Drain and rinse 14 ounces each of red kidney beans and white beans. Add them to the soup with 14–28 ounces of low-sodium beef broth, depending on your preferred thickness
    Adding rinsed beans to the soup.
  • Cook the soup. Cover and simmer on the stovetop for about 1 hour, until the vegetables are tender. For the crock pot method, transfer the mixture to a 5-quart or larger crock pot and cook on LOW for 6 hours.
  • Add the pasta. Cook ½ pound of small pasta separately until al dente. Stir it into the soup with 1 teaspoon of white vinegar, if using.
  • Finish cooking. Simmer for another 10 minutes on the stovetop or 15 minutes in the crock pot before serving.
    Pasta e Fagioli Soup on a spoon over the bowl.

Video

Notes

Pro Tips:

1. Variations: Substitute 1 tablespoon of Italian seasoning for the individual herbs. Ground beef is optional; you can substitute other ground meats or make the soup vegetarian with vegetable broth.
2. Thickness: This is a thick soup with 14 ounces of broth. I prefer using 28 ounces for a more soup-like consistency.
3. Pasta: Cook separately until al dente. If planning leftovers, add pasta to individual bowls when serving to prevent it from becoming mushy during storage.
4. Storage: Refrigerate for up to 4 days or freeze for 3–4 months in airtight containers. Add broth or water when reheating if needed.
 

Nutrition

Calories: 261kcal | Carbohydrates: 33g | Protein: 18g | Fat: 6g | Saturated Fat: 2g | Cholesterol: 37mg | Sodium: 731mg | Potassium: 902mg | Fiber: 4g | Sugar: 8g | Vitamin A: 1879IU | Vitamin C: 23mg | Calcium: 70mg | Iron: 4mg

My version is adapted from the Food.com recipe Olive Garden Pasta E Fagioli with a few changes to simplify the preparation and provide more options.

Originally Published January 5, 2013.

Dogs running in the snow.

Stew Meat Chili (Crock Pot or Stovetop)

Stew Meat Chili in a spoon over a blue bowl

This stew meat chili recipe has tender beef chunks, beans, and peppers in a rich tomato base for big flavor. Make it in the crock pot or on the stovetop — either way, it’s hearty and simple.

⏰ Quick Answer: How Long to Cook Stew Meat Chili?

  • Crock pot: 7–8 hours on LOW or about 4 hours on HIGH.
  • Stovetop: simmer 1½–2 hours until the beef is tender.
Stew Meat Chili in a spoon.
[feast_advanced_jump_to]

quote mark
Featured Comment by Steve:
⭐⭐⭐⭐⭐"This is one of the best crock pot meals I have ever fixed; simply delicious."

📝 TL; DR — Recipe Summary

What: Stew meat chili with beef chunks, beans, peppers, and a rich tomato base.
Why: A hearty alternative to ground beef chili that’s easy to make and scales well.
How: Make stew meat chili in a crock pot or quicker on the stovetop.

🐄 Ingredients

Stew meat with chili ingredients—labeled.
  • Beef chunks – use precut stew meat or cube your own from a chuck roast.
  • Red kidney beans – classic for chili with beans, though other beans work too.
  • Onion – the base for flavor along with peppers.
  • Peppers – jalapeño for heat, poblano for depth (or swap in what you like).
  • Tomato products – diced tomatoes plus tomato paste for a rich, thick base.
  • Seasonings – chili powder, cumin, garlic powder, salt, and pepper.

👨‍🍳 Quick Overview: Making Stew Meat Chili

Prep the beef – use precut stew meat or trim a chuck roast into equal-sized beef chunks.

Trimmed chuck roast for stew meat.

Brown (optional, but tasty) – in a little vegetable oil, dusted with flour for extra browning and flavor.

Browning stew meat in a Dutch oven.

Chop the veggies – onion, poblano, and jalapeño (or swap peppers to your taste).

Chopped onion with poblano and jalapeno pepper.

Rinse the beans – drain and rinse kidney beans or your preferred beans.

Rinsing kidney beans with running water.

Combine everything – add beef, beans, onion, peppers, tomato products, and spices to a crock pot or Dutch oven. Mix well.

Adding all ingredients to the pot.

Cook low and slow – crock pot: 7–8 hours on LOW or ~4 hours on HIGH. Stovetop: covered simmer for 1½–2 hours.

Stew meat chili ladled over the crockpot.

👇 Scroll down for the printable recipe card and complete step-by-step photo instructions—or keep reading for tips, options, and serving ideas.

🐂 Ingredient Options & Variations

  • Beef choices – use precut stew meat for convenience or cut beef chunks from a well-marbled chuck roast. Avoid lean cuts, which can become tough.
  • Beans – kidney beans are traditional, but black beans or pinto beans work too.
  • Peppers – poblano and jalapeño add flavor and mild heat. Swap in Anaheim for something lighter, or double the jalapeño for more spice.
  • Cowboy chili style – add extra heat, and you may keep or skip the beans; both are acceptable.

👍 Pro Tips for Success

  • Cut your own beef chunks – trimming a chuck roast gives you more even pieces and lets you remove excess fat.
  • Browning builds flavor – optional, but a quick sear with a light dusting of flour adds extra flavor and helps thicken the chili.
  • Dump-and-go works too – if you’re pressed for time, you have full permission to just add everything to the crock pot and let it cook.
  • Thick vs. thin – this makes a thick chili. Add a little beef broth near the end if you prefer it thinner.
  • Crock pot tip – smaller crock pots may cook faster. Check the beef for tenderness early the first time you make it.

↕️ Scaling for Two or a Crowd

This recipe makes about 6 cups of chili (four 1½-cup servings).

  • Half recipe: About 3 cups (2 servings), perfect for two.
  • Full recipe: About 6 cups (4 servings) and fits a 2-quart mini crock pot.
  • Double recipe: 8 servings; use at least a 4-quart crock pot.
  • Triple recipe: 12 servings; use a 6-quart or larger crock pot.

✅ Cooking time: Use the same general cooking times, but cook until the beef is tender.

Scaling the ingredients: In the recipe card, change the number of servings. Use the amounts in the ingredient list; the instructions do not adjust.

🍽️ Serving Suggestions

Top with sour cream, shredded cheddar, or cilantro. Serve with tortilla chips, salsa, or guacamole. It’s also great over rice, baked potatoes, or chili dogs. For a classic side, serve with Old Fashioned Cornbread or Cornbread Drop Biscuits.

❄️ Storage & Leftovers

  • Refrigerate in an airtight container for up to 4 days.
  • Freeze for up to 3 months in portion-sized containers.
  • Reheat on the stovetop or in the microwave. If frozen, thaw overnight in the fridge before reheating.

📌 Related Chili Recipes

If you like this stew meat chili, try these other reader favorites:

  • Small Crock Pot Chili – classic ground beef chili, easy for weeknights.
  • Small Crock Pot White Chicken Chili – super easy, award-winning, dump-and-go with 5 ingredients.
  • Salsa Verde Chicken Chili – a lighter, tangy twist.

Texas Chili (No Beans)

No beans – just chuck roast, broth, and chili peppers like authentic Texas chili. Make this Texas no-bean chili low and slow for tender, bold flavor in your slow cooker or on the stovetop.

Texas chili without beans on a spoon.

❓FAQs

Should I brown the beef chunks first?

It’s optional. Browning with a light dusting of flour adds flavor through the Maillard reaction, and if you use a Dutch oven you can keep it one-pot.

But if you’re short on time, you have full permission to just dump everything in the crock pot and let it cook — it will still turn out delicious.

How long does stew meat take to get tender in chili?

Stew meat becomes tender after about 7–8 hours on LOW or 4 hours on HIGH in a crock pot. On the stovetop, plan 1½–2 hours of gentle simmering until it breaks apart easily with a fork.

Is this chili con carne or Texas chili with beans?

Chili con carne means “chili with meat” and is what most people think of as classic beef-and-beans chili. Texas chili is traditionally beans-free, but since this recipe uses beef chunks and beans, it’s best described as chili con carne or Texas chili with beans — hearty, simple, and crock pot–friendly.

📖The Recipe Card

Stew Meat Chili in a spoon over a blue bowl
Print Recipe Add to Collection Go to Collections
5 from 6 votes

Stew Meat Chili (Crock Pot or Stovetop)

This hearty stew meat chili has tender beef chunks, beans, and peppers in a rich tomato base. Make it in the crock pot or on the stovetop.
Prep Time20 minutes mins
Cook Time8 hours hrs
Total Time8 hours hrs 20 minutes mins
Course: Main Course
Cuisine: American
Keyword: Chili with stew meat, crock pot stew meat chili*, Stew Meat Chili
Servings: 4 Servings of 1 ½ cups
Calories: 194kcal
Author: Dan Mikesell AKA DrDan

Ingredients

  • 1–1½ pounds stew meat or trimmed chuck roast
  • ½ large onion
  • ½ jalapeno pepper
  • ½ poblano pepper optional
  • 14 oz light kidney beans rinsed and drained
  • 14 oz diced tomatoes
  • 3 oz tomato paste
  • 1 tablespoon chili powder
  • 1 teaspoon cumin
  • ½ teaspoon garlic powder
  • ½ teaspoon salt
  • ¼ teaspoon pepper
  • low sodium beef broth to thin if desired.
  • optional flour and oil for browning
US Customary - Convert to Metric

Instructions

  • Prep the beef – use 1–1½ pounds of precut stew meat or trim a chuck roast into equal-sized beef chunks.
    Trimmed chuck roast for stew meat.
  • Brown (optional, but tasty) – in a little vegetable oil, dusted with flour for extra browning and flavor.
    Browning stew meat in a Dutch oven.
  • Chop the vegetables – ½ large onion: Dice ½ Poblano pepper and mince ½ jalapeno pepper. You can skip the Poblano pepper or add an Anaheim if you wish.
    Chopped onion with poblano and jalapeno pepper.
  • Drain and rinse 1 can of kidney beans (or beans of your choice).
    Rinsing kidney beans with running water.
  • Combine everything in a small crock pot or Dutch oven – add beef, beans, onion, peppers, one 14-oz can of diced tomatoes, 3 oz of tomato paste, 1 tablespoon chili powder, 1 teaspoon cumin, ½ teaspoon garlic powder, ½ teaspoon salt, and ¼ teaspoon pepper.
    Adding all ingredients to the pot.
  • Cook low and slow. Crock pot: 7–8 hours on LOW or about 4 hours on HIGH. Stovetop: simmer covered for 1½–2 hours.
    chili on a ladle over the crock pot.

Video

Notes

Pro Tips:

A full-size recipe needs a 2-quart mini crock pot or bigger. A double recipe fits nicely in a 4-quart or larger. A triple recipe needs 6 quarts or larger.
Buy a well-marbled chuck roast if you don’t have a good source of quality pre-cut stew meat.
Adjust the chili peppers to your taste. This is about a 3/10 heat, as written. Many will want to double the jalapeno or add a little cayenne pepper.
This is a thick chili, and you may thin it with 4 to 8 oz of low-sodium beef broth or beer if you wish. Add at the end of cooking to avoid overfilling your crock pot.
This is good in the refrigerator for 4 days and the freezer for 3 months.
This stew meat chili with beans recipe makes about 6 cups. Most people will eat a serving size of about 1½ cups.

Nutrition

Serving: 240g | Calories: 194kcal | Carbohydrates: 18g | Protein: 22g | Fat: 4g | Saturated Fat: 1g | Cholesterol: 47mg | Sodium: 547mg | Potassium: 768mg | Fiber: 6g | Sugar: 5g | Vitamin A: 743IU | Vitamin C: 20mg | Calcium: 71mg | Iron: 4mg

Editor's Note: Originally Published February 15, 2018. Updated with expanded options, refreshed photos, and a table of contents to help navigation.

Happy Lilly dog.

Crockpot French Onion Soup Recipe

French Onion in a bowl covered with browned cheese

French onion soup feels fancy, but it doesn’t need to mean standing over the stove all day. This Crockpot French Onion Soup Recipe gives you deeply caramelized onions, rich beef broth, and melted cheese over toasted bread.

The crockpot does the onion work for you—no babysitting a soup pot. It works in any size crockpot, from a 2-quart mini to a full-size slow cooker, and honestly, it beats most restaurant versions.

⏰ Quick Answer: How Long to Cook French Onion Soup in a Crockpot

  • Cook the onions: 9–10 hours on high or 10–11 hours on low, until soft and deeply caramelized.
  • Finish the soup: Add the beef broth and cook for 1 more hour.

Go by the onions, not just the clock—they should be deeply golden brown before adding the broth.

Crockpot French Onion Soup with melted cheese and toasted bread.
[feast_advanced_jump_to]

quote mark
Featured Comment by Judith:
⭐⭐⭐⭐⭐
"Will definitely be making again! It tastes just like the French onion soup from our favorite restaurant!! Thanks for a great recipe!"

📝 TL;DR — Recipe Summary

What: Classic French onion soup with caramelized onions, beef broth, toasted bread, and melted cheese.

Why: The crockpot caramelizes the onions without standing over the stove all day.

How: Cook the onions with butter and seasoning until deeply golden, add the broth for the final hour, then top with toasted bread and cheese and broil.


🧅 Ingredients

Onions with broth and seasonings for soup—labeled.
  • Onions — Yellow or white onions work best. Sweet onions like Vidalia, Maui, or Walla Walla can also be used.
  • Beef broth or stock — Use a good-quality broth or stock since it provides most of the soup's liquid and flavor.
  • Butter — Salted or unsalted.
  • Seasoning — Thyme, salt, and black pepper.
  • Worcestershire sauce — Adds savory depth to the broth.
  • Bread and cheese — Toasted crusty bread topped with provolone, Gruyère, or Swiss cheese gives French onion soup its classic finish.

👨‍🍳 Quick Overview: How to Make French Onion Soup in a Crockpot

Prep the onions: Chop the onions into petals or rings and separate them.

Chopping onions into petals.

Caramelize: Add the onions, butter, thyme, salt, pepper, and Worcestershire to the crockpot. Cook until the onions are soft and deeply golden brown—about 9–10 hours on high or 10–11 hours on low. Go by color, not just time.

Adding onion and other ingredients to the crockpot.

✅ Pro Tip: Always check a few hours early and give it a stir while you are there.

Add the broth: Add the beef broth and cook for 1 more hour to blend the flavors. For a 2-quart crockpot, add half the broth first and the rest near the end.


Adding broth to onions caramelizing in crockpot with butter and thyme.

Finish and serve: Ladle into oven-safe bowls, top with toasted crusty bread and provolone, Gruyère, or Swiss cheese, then broil until bubbly and golden, about 2–4 minutes.

Adding toasted crusty bread to onion soup.

👇 Scroll for the printable recipe card and complete photo instructions—or keep reading for tips, variations, and serving ideas.

⏱️ How Long to Cook Onions in a Crockpot

The onions are ready when they are soft and deeply caramelized to a golden brown. Cooking time varies between crockpots, so go by color, not just the clock.

Plan on about 9–10 hours on high or 10–11 hours on low, but check a few hours early to prevent overcooking. Once the onions are ready, add the beef broth and cook for 1 more hour to blend the flavors.

👨‍🍳 Options and Variations

  • Garlic: Add a clove or two with the onions if you want a little garlic flavor.
  • Wine: Add dry sherry, dry white wine, or red wine with the broth for additional flavor.

↕️ Changing the Recipe Size and Crockpot Size

This recipe makes about 7 cups or 4 servings and is best suited to a 3–4 quart crockpot.

  • Half recipe: About 2 servings; use a 2-quart mini crockpot.
  • Full recipe: About 4 servings; a 3–4 quart crockpot is the best fit.
  • Double recipe: Use a full-size 6-quart or larger crockpot.

For a full recipe in a 2-quart crockpot: It will be very full. After caramelizing the onions, add half the broth, then add the remaining broth near the end.

✅ Use the serving adjustment feature in the recipe card to adjust the ingredient amounts. Use the amounts in the ingredients list, not the instructions.

📋 Crockpot Soup Recipes

  • Ham and Bean Soup
  • Crock Pot Broccoli Cheese Soup
  • Crock Pot Cheeseburger Soup

🍽️ How to serve French onion soup

Serve French onion soup as a main dish, appetizer, or side. Ladle into oven-safe bowls, top with toasted French or other crusty bread, then add provolone, Gruyère, or Swiss cheese and broil until browned and bubbly.

Slices of cheese are easiest for covering the bread, but shredded cheese also works. Large croutons can replace the toasted bread.

If serving it as a main dish, a simple salad and bread are plenty.

❄️ Storage & Reheating

  • Refrigerate: Store leftover soup without the bread or cheese in an airtight container for up to 4 days.
  • Freeze: Freeze in meal-size portions for up to 3 months. Thaw overnight in the refrigerator.
  • Reheat: Warm on the stovetop or in the microwave, then add fresh toasted bread and cheese and broil until melted and bubbly.

❓ FAQs

Can I make French onion soup in a 2-quart crock pot?

Yes. A half recipe fits easily. For a full recipe, caramelize the onions first, add half the broth, then add the remaining broth near the end to prevent overflowing.

Is wine needed for French onion soup?

No. Wine is optional in this crockpot recipe. For additional flavor, add a little dry sherry, dry white wine, or red wine with the broth.

What is caramelizing onions?

Caramelization is the slow browning of the natural sugars in onions, producing a deep golden color and richer flavor.
For this recipe, the onions should be soft and deeply golden before you add the broth. The deeper the color without burning, the better the flavor.

📖The Recipe Card

French onion soup with browned cheese.
Print Recipe Add to Collection Go to Collections
4.82 from 16 votes

Crockpot French Onion Soup Recipe

Make classic French onion soup without standing over the stove all day. The crockpot caramelizes the onions, then add rich beef broth and finish with toasted bread and melted cheese.
Prep Time10 minutes mins
Cook Time10 hours hrs 15 minutes mins
Total Time10 hours hrs 25 minutes mins
Course: Soup
Cuisine: French
Keyword: Crock Pot French Onion Soup, French onion soup recipe, Slow Cooker French Onion Soup
Servings: 4
Calories: 278kcal
Author: Dan Mikesell AKA DrDan

Ingredients

  • 1½ pounds onions—white or yellow (about 3 medium onions)
  • 1 teaspoon coarse salt
  • 2 tablespoons butter
  • ½ teaspoon pepper
  • 1½ teaspoons Worcestershire sauce
  • ½ teaspoon thyme
  • 4 cups beef broth
  • ¼ cup wine-optional

Finishing then serving

  • Crusty bread
  • Provolone, Gruyère, or Swiss cheese
US Customary - Convert to Metric

Instructions

  • Prep onions: Slice 1½ pounds of onions into petals or rings and separate into individual pieces (about 5–6 cups raw). Add to a 2-quart or larger crock pot.
    Chopping onions into petals.
  • Season: Add 1 teaspoon of coarse salt, 2 tablespoons of butter, ½ teaspoon of black pepper, 1½ teaspoons of Worcestershire sauce, and ½ teaspoon of thyme. Stir to combine. (Butter may go in unmelted; stir after 1 hour or melt first.)
    Adding onion and other ingredients to the crock pot.
  • Caramelize: Cook with the lid on for 9–10 hours on HIGH or 10–11 hours on LOW, until the onions are softened and deeply golden brown. Check a few hours early and go by color, not just time—stir when checking. Then add 4 cups of beef broth—if using a 2-quart crock pot, add only 2 cups now.
    Adding broth to the caramelized onion.
  • Simmer: Cook on high for at least 1 hour to allow the flavors to combine. If using a 2-quart, add the remaining 2 cups of broth about 15 minutes before the end.
    Onion soup in a ladle.
  • Toast & assemble: Toast crusty bread (brushed with butter) in the oven or a frying pan. Arrange ramekins or other oven-safe bowls on a sheet pan. Ladle hot soup into bowls and float the toasted bread on top.
    Adding toasted crusty bread to onion soup.
  • Cheese: Cover each bowl with provolone, Gruyère, or Swiss cheese.
    Adding cheese on the toasted bread.
  • Broil until the cheese is bubbly and golden, 2–4 minutes.
    Spoonful of French Onion soup.

Video

Notes

Pro Tips

Doneness: The onions are ready when softened and deeply golden brown. Check a few hours early and go by color, not just the clock.
Crockpot size: As written, a 3–4-quart crockpot is best. A half recipe fits a 2-quart mini; use a 6-quart or larger crockpot for a double recipe.
2-quart crockpot: For a full recipe, add only half the broth after the onions caramelize, then add the rest near the end.
Bread and cheese: A crusty French baguette or large croutons work well. Provolone, Gruyère, or Swiss cheese are good choices.
Broth: Use good-quality beef broth or stock since it provides much of the soup's flavor.
Wine: Optional—add ¼ cup dry sherry, dry white wine, or red wine with the broth.
Storage: Refrigerate without bread and cheese for up to 4 days or freeze for 3-4 months.
 

Nutrition

Calories: 278kcal | Carbohydrates: 33g | Protein: 11g | Fat: 12g | Saturated Fat: 7g | Polyunsaturated Fat: 1g | Monounsaturated Fat: 2g | Cholesterol: 31mg | Sodium: 807mg | Potassium: 284mg | Fiber: 3g | Sugar: 9g | Vitamin A: 400IU | Vitamin C: 15.7mg | Calcium: 240mg | Iron: 2.7mg

Editors Note: Originally published July 12, 2015. Updated with expanded options, refreshed photos, and a table of contents to help navigation.

Dogs in the green yard.

Easy Lemon Bars

Two lemon squares on a gray plate.

Easy lemon bars are delicious and simple to make in under an hour. These homemade lemon squares are a perfect dessert treat with a crispy, buttery shortbread crust and tangy and sweet lemon filling—a small batch 8X8 recipe you can scale to your needs.

🍋Ingredients

Lemon—lemons or lemon juice
Sugar—white granular sugar
All-purpose flour
Egg
Butter
Powdered sugar for topping

Two lemon squares on a gray plate.
[feast_advanced_jump_to]
Blue ribbon divider used for visual effect

quote mark
Featured Comment by Nancy:
"Delicious! Quick & easy. It's citrus season here. I had to make two pans of it this week to keep up with family demand."

We frequently make these homemade lemon bars the day ahead as a treat for small groups, such as coffee meetups, bake sales, or special family meals. Give your friends some great old-fashioned goodness with a delicious shortbread crust and a tangy, sweet custard filling.

👨‍🍳How to Make Lemon Bars—Step-by-Step Photo Instructions

Lemon with eggs and lemon bar ingredients—labeled.
Mixing shortbread crust.
(Process images are a double batch.)

1. Mix the shortbread crust of softened butter with sugar and flour.

Pressing the crust into a pan.

2. Press the crust into a prepared 8X8 pan and bake for 17 to 20 minutes until light brown.

Whisking eggs into the batter.

3. Mix the custard filling with sugar, flour, eggs, and lemon juice. Add lemon zest if available.

Pouring lemon custard over the baked crust.

4. Pour the filling into the baking dish after the crust is cool and bake at 350° for 20 to 22 minutes until the center is set.

Shake powdered sugar into lemon bars before baking.

5. Remove from oven, cool for 1 hour at room temperature, then dust with powdered sugar.

Cutting the baked dish into lemon squares.

6. Cool in the refrigerator for 1 to 2 hours before cutting with a sharp knife into about 2-inch squares.

For more details, keep reading. See the Recipe Card below for complete instructions and to print.

🤔When are lemon bars done?

They are done when the edge is "set," and the center has just set with no jiggle—it will finish setting during cooling. You can give them a few more minutes, but look at that center jiggle.

👍Make it right every time

Add a sheet of parchment paper to the bottom of the pan to help release the shortbread crust. You can cover the bottom or use two sheets of parchment paper, which will help lift the bars out of the pan more easily.

You can use some butter on the baking dish to help parchment paper stay in place.

You can easily mix the crust by hand if you soften the butter.

Fresh lemon is preferred, but buy the brand name if you must use juice.

Bake the crust until lightly brown—about 17-20 minutes if your oven is preheated well, but check it early. Do not skip cooking the crust.

Dust with powdered sugar while still warm. But get it completely cold before cutting.

Be sure they are cooled before cutting. Use a sharp, long knife that is slightly moist, and keep it clean between cuts.

👍Easy cheesecake dessert recipes

For other easy recipes for small groups, see Blueberry Cream Cheese Bars, Chocolate Chip Cheesecake Bars, Cream Cheese Cupcakes, and New York Cheesecake Bars.

🍋About the Lemons and Lemon Juice

A medium lemon will have 2 ½ to 3 tablespoons of juice. Fresh lemons are preferred for freshness. Plus, you can add some optional zest using fresh fruit.

An advantage of bottled lemon juice is that this recipe becomes a complete pantry recipe with ingredients I always have on hand.

Other Juice: You can get different flavors using orange or other juices.

🥣How to Make the Optional Graham Cracker Crust

If you wish, a Graham cracker crust can be used instead of the shortcake crust.

Crush 8-9 sheets of Graham crackers to make about 1 ⅓ cups of crumbs. Add 2 tablespoons of powdered sugar, ½ teaspoon cinnamon, and ⅛ teaspoon salt if using unsalted butter. Mix to combine. Melt 5 tablespoons of butter and mix in well.

Press into the bottom of the properly prepared dish and run up the side about ¼ inch. Bake at 350° for 8 to 10 to firm up.

↕️How to make a half or double size recipe

A full recipe (already a small batch recipe) makes 12 two-inch lemon squares in an 8X8 or similar pan. A double recipe needs a full-size 9X13 cake pan for 24 lemon squares. A half recipe needs a 5X5 or 6-inch round pan for 6 lemon bars.

  1. Use the recipe card and adjust the number of servings to double or half.
  2. Use the amount of ingredients in the ingredient list, not the instructions—those do not adjust.
  3. A half recipe needs a 5X5 or 6-inch round baking pan, while a double recipe fits in a 9X13 baking pan.
  4. Bake until the edge is set, and then the center has no jiggle. For a half recipe, about 15 minutes, or for a double recipe, about 25 minutes.

❄️How to store lemon bars

Do not store leftovers at room temperature. They may be at room temperature for a few hours but should otherwise be refrigerated.

Refrigerate for 3 days in an airtight container. On the 4th day, they start to lose texture.

To freeze, skip the dusting of powdered sugar, if possible. Cut into serving pieces and freeze for a few hours, separated on a tray. After the initial freeze, wrap tightly in plastic wrap and seal in a Zip-Lock bag. They should be good for 3-4 months.

❓FAQs

What baking dish to use for lemon bars?

A full recipe, which is what I usually make, uses an 8X8 or 6X9 dish. A 9-inch round will also work. I prefer glass or good non-stick.

A double recipe fits a 9X13 baking pan or cake pan.

How to prepare the baking dish.

Use parchment on the bottom and butter the sides. You will still need a knife around the outside to remove it.

Helpful Tip: Putting a few dots of butter in the corners of the bottom of the pan will keep the parchment from shifting.

Can I make them the day ahead?

Sure. That is where this recipe shines. Make them the day ahead and refrigerate. They will still look great the next day. Get a good sharp cut on them the day ahead or the day of serving with a sharp, moist knife you clean between cuts.

Blue ribbon divider used for visual effect

📖The Recipe Card

Two lemon squares on a gray plate.
Print Recipe Add to Collection Go to Collections

Easy Lemon Bars

Easy lemon bars are delicious and simple to make in under an hour. These homemade lemon squares are a perfect dessert treat with a crispy, buttery shortbread crust and tangy and sweet lemon filling—a small batch 8X8 recipe you can scale to your needs.
Prep Time15 minutes mins
Cook Time40 minutes mins
Total Time55 minutes mins
Course: Dessert
Cuisine: American
Keyword: Easy Lemon Bars, Lemon Bar Recipe, Lemon Squares
Servings: 16
Calories: 142.1kcal
Author: Dan Mikesell AKA DrDan

Ingredients

Crust

  • ½ cup butter 1 stick
  • ¼ cup sugar
  • 1 cup all-purpose flour
  • ⅛ teaspoon salt if using unsalted butter

Filling

  • ¾ cup sugar
  • 2 tablespoons all-purpose flour
  • 2 large eggs
  • 1 medium lemon 3 tablespoons of lemon juice
  • 1 tablespoons lemon zest optional

Topping

  • 1 tablespoons powdered sugar
US Customary - Convert to Metric

Instructions

  • NOTE: The images are for a double recipe. Preheat the oven to 350°. Prepare an 8 by 8 baking dish by lightly brushing it with butter, then cover the bottom with parchment paper. You may also use crossed sheets of parchment paper.
    Covering baking pan with parchment paper.
  • Soften ½ cup (one stick) of butter in the microwave. Mix the softened butter, 1 cup of all-purpose flour, and ¼ cup of sugar. If unsalted butter, add ⅛ teaspoon salt. It will look crumbly. You can mix by hand, but it is easier with a small mixer.
    Mixing shortbread crust.
  • Press the dough into the bottom of the prepared pan. Bake for 17 to 20 minutes until firm and lightly brown.
    Pressing the shortbread into a baking dish to make the crust.
  • Whisk together ¾ cup of sugar and 2 tablespoons of flour. Add 2 eggs and the juice of 1 medium lemon or 3 tablespoons of lemon juice. Add lemon zest if available. Mix well.
    Whisking eggs into the batter.
  • Pour the lemon custard mixture over the cooled baked crust. Bake for 20-22 minutes until the filling is set.
    Pouring lemon custard over the baked crust.
  • Remove from oven, cool for 1 hour at room temperature, and dust with powdered sugar.
    Shake powdered sugar into lemon bars before baking.
  • Cool in the refrigerator for 1 to 2 hours before cutting with a sharp knife into about 2-inch squares.
    Cutting the baked dish into lemon squares.

Video

Notes

Pro Tips

  1. You may use fresh lemons or lemon juice.
  2. If you would like a Graham cracker crust instead of shortbread, please see the details in the post.
  3. Adjustments for a half or double recipe are in the recipe post.
  4. If using fresh lemon, add some lemon zest for more taste–about 1 tablespoon will do.
  5. Be sure to cool completely before cutting.
  6. The bars should be refrigerated for storage and should be good for 3-4 days. 

Nutrition

Calories: 142.1kcal | Carbohydrates: 19.8g | Protein: 1.8g | Fat: 6.5g | Saturated Fat: 3.9g | Polyunsaturated Fat: 0.4g | Monounsaturated Fat: 1.7g | Trans Fat: 0.2g | Cholesterol: 38.5mg | Sodium: 54.8mg | Potassium: 21.9mg | Fiber: 0.2g | Sugar: 13.1g | Vitamin A: 211.1IU | Vitamin C: 0.7mg | Calcium: 6.8mg | Iron: 0.5mg

Based on All Recipes - The Best Lemon Bars, with a few modifications and simplifications.

Editors Note: Originally published February 7, 2017. Updated with expanded options, refreshed photos, and a table of contents to help navigation.

dogs running in fall leaves.

Small Cinnamon Coffee Cake

Piece of cinnamon coffee cake on a spatula.

With the great taste of Cinnabon cinnamon rolls, this quick and easy Cinnamon Coffee Cake recipe has it all, from buttery and tender cinnamon-swirled cake with carmalized streusel topping and a sweet glaze. An 8X8 small batch recipe that is simple to make smaller or bigger, it is the perfect breakfast, brunch, or dessert recipe for a holiday or everyday.

🥮Ingredients

Flour
Sugar—white, brown, and powdered
Cinnamon
Vanilla extract
Milk, butter, and egg
Pantry ingredients—salt, baking powder
Optional nuts—walnuts or pecans

Piece of cinnamon coffee cake on a spatula.
[feast_advanced_jump_to]
Blue ribbon divider used for visual effect

quote mark
Featured Comment by Beth:
⭐⭐⭐⭐⭐
"Best Cinnamon Roll Cake EVER!!! It is so moist! It's hard to stop at one piece."

This wonderful Cinnamon Coffee Cake recipe is made from scratch with pantry ingredients. Loaded with butter, sugar, and gooey cinnamon swirls, it's topped with a glaze for that great cinnamon roll taste; it will be your new favorite dessert recipe.

Serve with baked sausage patties or crispy baked bacon.

👨‍🍳How to Make Cinnamon Coffee Cake—Step-by-Step Photo Instructions

Cinnamon with butter and baking ingredients—labeled.
Sifting flour into a clear bowl

1. Add the flour to a large bowl with cinnamon, sugar, salt, and baking powder. Optional—sift the flour for more tender results.

Mixing milk and egg into dry ingredients.

2. Add the wet ingredients: an egg, milk, and vanilla. Mix well.

Adding melted butter to the batter.

3. Mix the melted butter into the cake batter.

Pouring batter into the baking dish.

4. Pour into a prepared 6X9, 8X8, or 9-inch round baking dish.

Mixing topping in a glass bowl.

5. Mix topping by cutting cold butter into brown sugar, cinnamon, and flour. Add nut is you wish.

Using a knife to swirl topping into the batter.

6. Add the topping to the batter. Cut it into the batter with a knife to make swirls. Bake at 350° until a toothpick comes out clean—about 30 minutes.

Mixing the glaze of powdered sugar, vanilla and milk.

7. Mix a glaze of powdered sugar, vanilla, and milk.

Pouring glaze over coffee cake.

8. After the cake is partially cooled, drizzle the glaze over the warm cake and evenly spread it over the cake.

For more details, keep reading. See the Recipe Card below for complete instructions and to print.

🤔When is the cinnamon coffee cake done?

Your cinnamon cake is done when it is browned nicely, and the cake starts pulling away from the sides. And a toothpick or narrow knife will come out clean.

If unsure, the internal temperature of the cake should be 200° to 210° when checked with an instant-read thermometer.

Time estimates for baking recipes are estimated for planning, but there are many variables, like the oven and thickness, which depend on the pan

Cinnamon coffee cake on a fork.

👍Tips to make it perfect every time

Standard white all-purpose flour is fine. Cake or bread flour is unnecessary, and whole wheat will fight the taste and texture.

Sifting the flour will add lightness to the coffee cake. It is optional but suggested. If you don't have a sifter, use a large strainer instead.

Add the optional nuts to get the full cinnamon roll experience when they sink into the cake with the crumb topping when baked after cutting the knife through the batter, making the swirl effect.

🍽️How to serve

I suggest a smaller serving. There is so much butter and sweetness that a smaller serving will make most people happy. But, I have set the nutrition to six relatively large servings.

Serve with American Fries. Breakfast meat is a must at our house. If you have not tried it, check out how to bake bacon or baked breakfast sausage.

Bacon Baked in a Convection Oven

The easiest way to cook crispy bacon is in a convection oven on aluminum foil for easy cleanup of the bacon grease. Use standard or thick-cut bacon to make great crispy bacon strips for breakfast or other uses.

Pile of cooked bacon on a white plate.

↕️How to make this recipe smaller or bigger

This small recipe is already "for two with leftovers". If you decide to make a half recipe, you need to use a 6-inch round or 5-inch square pan and will cook 5-10 minutes quicker depending on the pan.

A double recipe uses a 9 by 13-inch cake pan and will take about 10 minutes longer to cook. Use the same endpoints.

  1. Use the recipe card and adjust the number of servings to half or double.
  2. Use the amount of ingredients in the ingredient list, not the instructions—those do not adjust.

📋Other breakfast and dessert recipes

Check out other breakfast baked goods recipes, like Small French Toast Casserole, Glazed Cinnamon Biscuits, Cinnamon Streusel Coffee Cake, and Baked Blueberry Pancakes. Or some delicious dessert recipes like my Flourless Chocolate Cake Recipe and Old Fashioned Apple Crisp.

This recipe is featured in Mother's Day Recipes, Valentine's Day Recipes, and Christmas Recipes roundups.

❄️Storage of leftovers

The cake is best served warm out of the oven. Store tightly covered at room temperature for up to 3 days but best if only one day. If you add the optional cream cheese to the frosting, you should store in the refrigerator and not at room temperature.

Freezing is acceptable for up to 3 months, but I suggest freezing without the glaze and adding it later.

Reheat in the microwave. If you want to reheat in the oven, it should be covered.

❓FAQs

Can I use cream cheese frosting?

You may add 2 tablespoons of cream cheese to the frosting glaze for great cream cheese flavor. If you add cream cheese, the cinnamon cake must be refrigerated and not left at room temperature for more than 2 hours.

Should I use a convection oven?

No. The top may overcook before the batter is cooked. This is true of most baking, only use convection if instructed.

Blue ribbon divider used for visual effect

📖The Recipe Card

Piece of cinnamon coffee cake on a spatula.
Print Recipe Add to Collection Go to Collections
5 from 5 votes

Small Cinnamon Coffee Cake

With the great taste of Cinnabon cinnamon rolls, this quick and easy Cinnamon Coffee Cake recipe has it all, from buttery and tender cinnamon-swirled cake with carmalized streusel topping and a sweet glaze. An 8X8 small batch recipe that is simple to make smaller or bigger, it is the perfect breakfast, brunch, or dessert recipe for a holiday or everyday.
Prep Time15 minutes mins
Cook Time30 minutes mins
Total Time45 minutes mins
Course: Breakfast
Cuisine: American
Keyword: cinnamon coffee cake, cinnamon roll cake
Servings: 6
Calories: 553kcal
Author: Dan Mikesell AKA DrDan

Ingredients

  • 1 ½ cups flour sifting suggested
  • ½ cup sugar
  • ½ teaspoon cinnamon
  • ⅓ teaspoon salt
  • 2 teaspoons baking powder
  • 1 egg
  • ¾ cup milk
  • 1 teaspoon vanilla
  • ¼ cup butter

Topping

  • ½ cup butter cold
  • ½ cup brown sugar
  • 1 tablespoon cinnamon
  • 1 tablespoon flour
  • ⅔ cup chopped nuts optional. Walnuts or Pecans.

Glaze

  • 1 cup powder sugar
  • ½ teaspoon vanilla
  • 2 tablespoons milk
US Customary - Convert to Metric

Instructions

  • Preheat oven to 350° conventional.
    Cinnamon with butter and baking ingredients—labeled.
  • Sift 1 ½ cups flour into a large mixing bowl. You could skip the sifting, but it will improve the texture. You can also strain or whisk the flour for a few seconds.
    Sifting flour into a clear bowl
  • Add ½ cup sugar, ½ teaspoon cinnamon, ¼ teaspoon salt, and 2 teaspoons baking powder to the flour in the large bowl. Mix dry ingredients. Add the wet ingredients: 1 egg, ¾ cup milk, and 1 teaspoon vanilla. Mix well.
    Mixing milk and egg into dry ingredients.
  • Melt ¼ cup butter in a microwave. Mix the melted butter into the cake batter.
    Adding melted butter to the batter.
  • Prep an 8X8, 9X6, or 9-inch round baking dish with PAM cooking spray. Pour the batter into the prepared pan.
    Pouring batter into the baking dish.
  • Mix the topping in a medium bowl: cut ½ cup cold butter into a mixture of ½ cup brown sugar, 1 tablespoon cinnamon, and 1 tablespoon flour. Mix until crumbly. If you wish, add ⅓ cup chopped pecans or walnuts.
    Using a knife to swirl topping into the batter.
  • Add the cinnamon topping to the cake batter. Cut it into the batter with a knife. Move a butter knife in 1-inch segments in both directions several times. Bake until a toothpick comes out clean, about 30 minutes.
    Cutting topping into the cake.
  • Mix the glaze of 1 cup of powdered sugar, ½ teaspoon vanilla, and 2 tablespoons of milk.
    Mixing the glaze of powdered sugar, vanilla and milk.
  • After the cake is partially cooled, drizzle the glaze over the warm cake and evenly spread it over the cake.
    Pouring glaze over coffee cake.
  • Serve warm.
    cinnamon roll cake on a fork new

Video

Notes

Pro Tips

  1. An easy recipe to double using a 9 X 13 standard cake pan. Cooking time will increase a bit to 35-40 minutes. A half recipe will fit in a 6-inch round pan and will cook 5-10 minutes faster.
  2. Butter is a key component of this cake. Please use real butter.
  3. Sifting flour will make your flour "lighter" and your final results lighter and less dense. I think this is quite noticeable in this recipe. If you don't have a sifter, running the flour through a strainer will work. If you don't have that, a whisk or fork can help. Or you can skip it.
  4. You can add 2 tablespoons of cream cheese to the frosting glaze for more taste, but because of the cream cheese, you MUST refrigerate leftovers.
  5. Best warm out of the oven but otherwise store at room temperature covered tightly for up to 3 days, but only one day is better.
  6. It can be frozen for up to three months, but I suggest freezing it without the glaze and adding it before serving.

Nutrition

Calories: 553kcal | Carbohydrates: 83g | Protein: 5g | Fat: 23g | Saturated Fat: 15g | Cholesterol: 62mg | Sodium: 322mg | Potassium: 248mg | Fiber: 2g | Sugar: 56g | Vitamin A: 782IU | Calcium: 141mg | Iron: 2mg

Based on Cinnabon Cake on Food.com.

Editor's Note: Originally Published December 12, 2015. Updated with expanded options, refreshed photos, and a table of contents to help navigation.

Molly and Lilly dogs with a toy raccoon.

Baby Back Ribs in the Oven

Full slab of back ribs.

Learn how to cook baby back ribs in the oven that are fall-off-the-bone tender. Wrap them in foil, bake low and slow, then finish with BBQ sauce under the broiler—no smoker or grill needed.

⏱️ Quick Answer: How Long to Cook Baby Back Ribs in the Oven

Bake ribs tightly wrapped in foil at 275°F (250°F convection).

  • Baby back ribs: 2½ to 3 hours
  • Other pork ribs: For spare or St. Louis ribs, add about 30 minutes
  • Done: 200°–205°F for fall-off-the-bone tenderness
  • Brown: Brush with BBQ sauce and broil briefly
Full slab of back ribs.
[feast_advanced_jump_to]

quote mark
Featured Comment by Jamie:
⭐⭐⭐⭐⭐ "The rub was great and they cooked perfectly. Best ribs I’ve ever cooked myself. Thank you!"

🤔 TL;DR — Recipe Summary

  • What: Tender, fall-off-the-bone BBQ baby back ribs cooked low and slow in the oven.
  • Why: The foil-wrapped method is easy, reliable, and requires no smoker or grill.
  • How: Apply the dry rub, wrap tightly in foil, and bake at 275°F for 2½ to 3 hours. Brush with BBQ sauce and broil briefly to brown.

🐖 Ingredients & Options

Baby back ribs and dry rub ingredients with BBQ sauce—labeled.
  • Pork ribs: Baby back ribs are the main choice. Spare or St. Louis ribs also work but require about 30 minutes longer. This method is not for beef or boneless pork ribs.
  • BBQ dry rub: Use your favorite rub or the simple homemade version in the recipe card.
  • BBQ sauce: Use any sauce you enjoy, either store-bought or homemade.
  • Liquid smoke: Optional for a mild smoky taste. Choose one containing only water and smoke; Wright’s® is my usual choice.

👨‍🍳 Quick Overview: How to Bake Baby Back Ribs in the Oven

1. Prepare the ribs: Trim loose fat and remove any bone fragments. Remove the membrane from the back of the ribs, if present.

Removing the membrane from the ribs.

2. Rub and wrap: Pat the ribs dry, optionally brush with liquid smoke, then coat all sides with the rub. Wrap tightly in foil—heavy-duty foil is best to prevent leaks.

Dry rub applied to baby back ribs.

3. Bake low and slow: Place on an oven rack and bake at 275°F for 2½ to 3 hours, until tender and approximately 200°–205°F internally.

Foil-wrapped ribs on an oven rack with a tray on the lower rack.

✅ Pro Tip: Pork spare ribs, including St. Louis-style ribs, usually need about 30 minutes longer than baby back ribs.

4. Drain: Carefully open one end of the foil and drain the hot liquid.

Draining hot liquid from the foil package of cooked ribs.

5. Brown: Brush with BBQ sauce and brown briefly under the broiler or on a hot grill. Rest for 5–10 minutes, then slice and serve.

Baked baby back ribs brushed with BBQ sauce.

👇 For complete step-by-step instructions, scroll down to the printable recipe card or keep reading for tips, flavor options, and serving ideas.

⏰ How Long to Cook Ribs in the Oven

A 3-pound rack of baby back ribs takes about 2½ to 3 hours at 275°F. Larger racks and pork spare ribs may need about 30 minutes longer. When cooking already-wrapped frozen ribs, add about 30 minutes—no thawing needed.

Approximate cooking times for baby back ribs:

  • 250°F: 2¾ to 3 hours
  • 275°F: 2½ to 3 hours (recommended)
  • 300°F: 2 to 2¼ hours
  • 325°F: 1½ to 2 hours (not recommended)

For a convection oven, reduce the temperature by 25°F and use the same approximate cooking time.

🌡️ When Are Ribs Done?

Pork is safe to eat at a lower temperature, but ribs will still be tough. They become tender around 190°F; for fall-off-the-bone ribs, aim for 200°–205°F in the thickest meat without touching the bone.

Also look for about ¼ inch of exposed rib ends and meat that pulls apart easily. Use these signs with the temperature rather than relying only on cooking time.

Exposed bone ends are another sign that the ribs are tender.

🌶️ Flavor Options

Dry rub: Use the rub in the recipe card, your favorite store-bought blend, or try my BBQ Dry Rub for Ribs, Memphis Dry Rub, or Chipotle BBQ Dry Rub.

BBQ sauce: Use your favorite sauce or try my Memphis BBQ Sauce.

Dry ribs (Memphis-style): “Dry” means the ribs are seasoned with a dry rub and served without a coating of BBQ sauce—not that the meat is dry. Skip the sauce, brown briefly under the broiler, and serve the sauce on the side for dipping.

📅 Make Ahead and Freezer Options

Before Baking

To freeze, prepare the ribs with the rub, then double-wrap tightly in heavy-duty foil. Add several layers of plastic wrap and freeze for up to 3–4 months. Remove the plastic wrap, then bake in the foil directly from frozen, adding about 30 minutes to the cooking time.

After Baking but Before Browning

Drain the liquid and rewrap the ribs tightly. Refrigerate for up to 4 days or freeze for 3–4 months.

Thaw frozen ribs overnight in the refrigerator. Reheat them wrapped at 350°F for about 15–20 minutes, then brush with BBQ sauce and broil briefly to brown.

🍽️ Serving BBQ Ribs

Serve the ribs hot with extra BBQ sauce on the side, plenty of napkins, and a bowl for the bones.

Classic side dishes include:

  • Creamy mac and cheese
  • French fries or potato chips
  • Baked beans, coleslaw, or corn on the cob
  • Old-fashioned cornbread or cornmeal biscuits

❄️ Storing and Reheating Leftover Ribs

  • Refrigerate: Store in an airtight container for up to 4 days.
  • Freeze: Wrap tightly and freeze for up to 3–4 months.
  • Reheat: Thaw frozen ribs overnight in the refrigerator. Reheat covered at 350°F until hot, then add BBQ sauce and broil briefly to brown.

For one or two ribs, the microwave or air fryer is fine, but the covered oven is best for reheating a larger portion without drying it out.

📖 More BBQ Recipes

  • Baby Back Ribs on a Gas Grill
  • Crock Pot Baby Back Ribs
  • Baked Boneless Pork Ribs
  • Pork Butt in the Oven
  • Oven-Baked BBQ Beef Brisket

❓ FAQs

Do I have to remove the membrane from the ribs?

No, but I recommend it. The membrane does not break down during cooking and can make the ribs chewy.

Can I use pork spare ribs or St. Louis ribs?

Yes. Use the same method, but allow about 30 minutes longer than for baby back ribs.

Can I bake ribs without foil?

Yes, but this recipe is designed for foil-wrapped ribs. Foil holds in moisture during low-and-slow baking and helps prevent the ribs from drying out.

What are baby back ribs?

Baby back ribs come from the upper rib cage next to the loin. They are smaller, more curved, and usually more tender than spare ribs. St. Louis ribs are spare ribs trimmed into a more uniform shape.
(Illustration © foxysgraphic/Fotolia. Licensed May 16, 2017, and modified as permitted by the license.)
Diagram showing the location of baby back ribs on a pig—Licensed from Fotolia May 16,2017. Copyright foxysgraphic - Fotolia. Modified per allow by licensed.

📖The Recipe Card

Full slab of back ribs.
Print Recipe Add to Collection Go to Collections
5 from 4 votes

Baby Back Ribs in the Oven

Bake tender, fall-off-the-bone BBQ baby back ribs with this easy low-and-slow oven method. The foil-wrapped recipe also works for pork spare ribs.
Prep Time5 minutes mins
Cook Time2 hours hrs 30 minutes mins
Total Time2 hours hrs 40 minutes mins
Course: Main Course
Cuisine: American
Keyword: Baked Baby Back Ribs, oven ribs, ribs in the oven
Servings: 4
Calories: 389.7kcal
Author: Dan Mikesell AKA DrDan

Ingredients

  • 1 slab baby back ribs may use pork spare or St. Louis ribs
  • ½ cup BBQ dry rub use the suggested rub below or another rub
  • 2 tablespoons BBQ sauce
  • good quality liquid smoke optional

Suggested BBQ dry rub—or use ½ cup of another rub

  • ¼ cup brown sugar
  • 4½ teaspoons Diamond Crystal kosher salt see salt note below
  • 1½ teaspoons chili powder
  • ½ teaspoon garlic powder
  • ½ teaspoon onion powder
  • ½ teaspoon black pepper
US Customary - Convert to Metric

Instructions

Prepare the Ribs

  • Remove the membrane from the bone side of the ribs, if present. Trim excess fat and remove any bone fragments.
    Removing the membrane from the ribs.

Rub and wrap

  • You may use the rub of your choice or make the suggested rub. ¼ cup brown sugar, 4½ teaspoons diamond crystal kosher salt, 1½ teaspoons chili powder, ½ teaspoon garlic powder, ½ teaspoon onion powder, and ½ teaspoon black pepper. Stir together in a small bowl.
    mixing 8311 dry rub in small bowl
  • Pat the ribs dry. Optionally, apply a light coating of liquid smoke, then coat all sides with the dry rub.
    dry rub applied to baby back ribs

Bake low and slow

  • Seal tight in aluminum foil (heavy-duty is better). If you have time, refrigerate at this point for 2 hours or even overnight.
    Wrapping ribs with foil and sealing well.
  • Place the wrapped ribs on the oven rack, with a rimmed baking sheet on the rack below to catch any leaks and prevent smoking. Bake at 275°F (250°F convection) for 2½ to 3 hours, until tender and approximately 200°–205°F internally.
    Foil wrapped ribs on a oven rack with a tray on the lower rack.

Drain and brown

  • Carefully open one end of the foil packet and drain the hot liquid and fat.
    Pouring fluid out to the foil package with cooked ribs.
  • Open the foil and brush the ribs lightly with BBQ sauce.
    Brushing sauce on the baked ribs.
  • Broil for 4–5 minutes, watching closely, until browned. Alternatively, brown briefly on a hot grill. Rest for 5–10 minutes, then slice between the bones and serve.
    Cutting cooked baby back ribs into individual ribs.

Video

Notes

Pro Tips:

  1. Cook as many racks as will fit without stacking.
  2. Pork spare and St. Louis ribs generally need about 30 minutes longer.
  3. Prepared foil-wrapped ribs may be frozen for up to 3–4 months. Remove any outer plastic and bake directly from frozen, adding about 30 minutes.
  4. To remove the membrane, loosen it at the narrow end with a butter knife, grip it with a paper towel, and pull steadily.
 
Nutrition assumes all of the dry rub is consumed; actual sodium will usually be lower.
  1. Additional oven temperatures and approximate cooking times are provided in the post.
  2. Ribs become tender around 190°F; for fall-off-the-bone ribs, aim for 200°–205°F and exposed bone ends.
  3. For the homemade rub: 1 teaspoon table salt = 1¼ teaspoons Morton kosher salt = 2 teaspoons Diamond Crystal kosher salt.

Nutrition

Calories: 389.7kcal | Carbohydrates: 18.1g | Protein: 27.3g | Fat: 23.3g | Saturated Fat: 8.2g | Polyunsaturated Fat: 3.9g | Monounsaturated Fat: 9.8g | Trans Fat: 0.2g | Cholesterol: 97.8mg | Sodium: 1683.5mg | Potassium: 413.9mg | Fiber: 0.5g | Sugar: 16.3g | Vitamin A: 274.5IU | Vitamin C: 0.1mg | Calcium: 64mg | Iron: 1.4mg

Editor's Note: This recipe was originally published on January 10, 2010, which was the second week of the blog. Updated with expanded options, refreshed photos, and a table of contents to help navigation.

Molly and Lilly with a ball.

Chili Mac

chili mac on a spoon

It's time to break the bland mac and cheese habit with Chili Mac, a 1950s Midwest lunchroom classic. This economical and easy homemade comfort food uses pantry ingredients. You can make classic chili macaroni and cheese in one pot with elbow macaroni and cheddar cheese or Velveeta chili mac as a modern version with shells.

🧀Ingredients

Ground beef—or ground turkey or chicken
Onion
Dry pasta
Diced tomatoes or RoTel
Spices—chili powder, garlic powder, cumin, salt, black pepper
Milk
Cheese—usually mild cheddar or Velveeta

Chili mac on a spoon.
[feast_advanced_jump_to]
Blue ribbon divider used for visual effect

This easy Chili Mac recipe is a one-pot comfort food that can be prepared in 30 minutes with pantry ingredients. It features tender noodles, tasty ground beef chili, and creamy Velveeta or cheddar cheese.

Most chili mac recipes use simple chili and add cooked pasta. However, this recipe simmers the chili ingredients with milk and uncooked pasta to cook both simultaneously. Then, for maximum creaminess, add the cheese at the end.

👨‍🍳How to Make Chili Mac—Step-by-Step Photo Instructions

Raw burger with pasta and chili mac ingredients—labeled.
Chopping onion on a black board.

1. Chop an onion.

Browing burger with chopped onion.

2. In a large skillet or Dutch oven, brown ground meat with chopped onion until brown and onion clearing.

Adding tomato to the sauce.

3. Drain the meat and mix in the spices, milk, and diced tomatoes.

Adding dry pasta to the sauce.

4. Bring to a boil, then add uncooked pasta—shells or elbow macaroni.

Cover and simmer until the pasta is tender.

5. Decrease to simmer and cover. Cook until pasta is tender—12-15 minutes.

Adding cheese to the cooked chili mac.

6. Remove from heat and add two cups of cheese of your choice. Mix in well and serve.

For more details, keep reading. See the Recipe Card below for complete instructions and to print.

✔️Options and variations

Ground Meat: Use standard 80/20 ground beef, ground turkey, or ground chicken.

Tomatoes: Diced tomatoes are the traditional ingredients. The dish will taste somewhat bland, so you may want to add more chili powder or a touch of cayenne pepper.

Uning RoTel instead of diced tomatoes will solve the bland issue some will have with this classic recipe. Choose the version of Rotel that best suits your heat level.

Cheese—Velveeta, cheddar, Monterey jack, or Mexican blend

If you want a more baked casserole dish, cover the top with cheese at the end and broil it for a few minutes.

Dry pasta: Use bit-size standard pasta, such as elbow or shells. The cooking time of the pasta will tend to be a little longer than the recommended time on the package but check with each stir.

Optional ingredients: Drained kidney or black beans, frozen corn

👩‍🍳Other Lunch Lady recipes

You can also try these other cafeteria recipes from the 1950s and 1960s, like Lunch Lady Rolls, Tuna Noodle Casserole, and Chicken Broccoli Rice Casserole.

You will love these other comfort food casseroles like Chicken and Sausage Jambalaya and Creamy Smoked Sausage Pasta.

Cheesy American Goulash

Cheesy American Goulash is a hearty old-fashioned baked casserole that's easy to make with ground beef, spicy tomato sauce, and pasta casserole with lots of cheese. One of my favorite classic cafeteria comfort foods from the 1950s is economical and made with pantry ingredients.

Cheesy goulash on a spoon.

🍽️Serving

Serve in a bowl like chili—top like chili with shredded cheese, diced onion, pickled jalapenos, or sour cream.

It is traditionally served with old-fashioned cornbread, cornmeal biscuits, or stand mixer bread. A simple salad, cole slaw, or roasted vegetables will be good side dishes.

❄️How to store and reheat leftover chili mac.

Chili mac can be stored in an airtight container in the refrigerator for three days. However, as the pasta absorbs fluid from the casserole, it will become softer, so it is best to eat it within the first two days.

Alternatively, you can freeze individual servings for three months.

Reheat in the microwave or on the stovetop on medium heat. Thaw before reheating if frozen.

❓FAQ

What is the difference between chili mac and goulash?

They are very similar, but chili mac strives for a cheese sauce like mac and cheese, while goulash will lack the cheesy sauce and will have more of a paprika spicing true to its mid-European roots.

Blue ribbon divider used for visual effect

📖The Recipe Card

Chili mac on a spoon.
Print Recipe Add to Collection Go to Collections
3.50 from 2 votes

Chili Mac

It's time to break the bland mac and cheese habit with Chili Mac, a 1950s Midwest lunchroom classic. This economical and easy homemade comfort food uses pantry ingredients. You can make classic chili macaroni and cheese in one pot with elbow macaroni and cheddar cheese or Velveeta chili mac as a modern version with shells.
Prep Time5 minutes mins
Cook Time25 minutes mins
Total Time30 minutes mins
Course: Casserole
Cuisine: American
Keyword: Chili Mac, Chili Mac and Cheese, Easy Chili Mac
Servings: 6 servings
Calories: 459kcal
Author: Dan Mikesell AKA DrDan

Ingredients

  • 1 pound ground beef ground turkey or chicken will work
  • 1 onion small
  • 2 teaspoons chili powder
  • 1 teaspoon garlic powder
  • ½ teaspoon cumin
  • ½ teaspoon salt
  • ½ teaspoon pepper
  • 14 oz diced tomatoes drained or substitute 1 can of RoTel™
  • 2 ½ cups milk
  • 2 cups smaller dry pasta elbow macaroni or shells
  • 2 cups cheese of your choice usually mild cheddar
US Customary - Convert to Metric

Instructions

  • Chop one small onion.
    Chopping onion on a black board.
  • Brown meat over medium-high heat in a large pan or Dutch oven—non-stick preferred. After the meat is browned and the onion translucent, drain the fat.
    Browing burger with chopped onion.
  • Add 2 teaspoons chili powder, 1 teaspoon garlic powder, ½ teaspoon ground cumin, ½ teaspoon salt, and ½ teaspoon pepper. Mix in drained diced tomatoes or Rotel.
    Adding tomato to the sauce.
  • Stir in 2 ½ cups milk, bring to a boil, and add two cups of uncooked dry pasta.
    Adding dry pasta to the sauce.
  • Lower to simmer and cover. Cook until pasta is tender. This will vary by pasta type but will generally be 12-15 minutes.
    Cover and simmer until the pasta is tender.
  • Remove from heat and add 2 cups of cheddar or Velveeta cheese. Mix well and serve.
    Adding cheese to the cooked chili mac.

Video

Notes

Pro Tips

  1. You can use ground turkey or chicken if you want.
  2. If you want a chili-like flavor, add some drained kidney beans to the uncooked pasta. Other options are in the post.
  3. The RoTel will kick up the heat, but it is optional. The dish with drained diced tomatoes is a bit bland, so consider adding one teaspoon more chili powder.
  4. If you want a more baked casserole dish, cover the top with cheese at the end and broil it for a few minutes.
  5. Good refrigerated for 3 days and frozen for 3 months.

Nutrition

Calories: 459kcal | Carbohydrates: 26g | Protein: 35g | Fat: 24g | Saturated Fat: 12g | Cholesterol: 107mg | Sodium: 550mg | Potassium: 675mg | Fiber: 2g | Sugar: 8g | Vitamin A: 861IU | Vitamin C: 8mg | Calcium: 442mg | Iron: 3mg

Editor's Note: Originally Published September 28, 2015. Updated with expanded options, refreshed photos, and a table of contents to help navigation.

Molly on kitchen rug.

23 Recipes for the Smaller Christmas Table

My favorite Christmas recipes are simple to make and ideal for smaller households, so you don't have to eat leftovers all week. You don't want to spend the entire day cooking like on Thanksgiving, so plan the day around spending time with friends and family with recipes that suit your needs.

College image of Christmas Recipe roundup.
[feast_advanced_jump_to]

Gatherings are ready-made for food safety issues. Let's plan for food safety and get it right. Check out the USDA Food Safety recommendations.

Small Breakfast Recipes

A great breakfast is a beautiful way to start the holiday morning. Let's do something special with very little work on Christmas morning.

Small French Toast Casserole (Easy Small-Batch Recipe)
Easy small-batch French toast casserole with a soft, custardy center and cinnamon top. Make it overnight in an 8x8 pan, scale it down for two, or make almost any size.
Small French Toast Casserole
French Toast Casserole on orange plate with syrup.
Small Cinnamon Coffee Cake
With the great taste of Cinnabon cinnamon rolls, this quick and easy Cinnamon Coffee Cake recipe has it all, from buttery and tender cinnamon-swirled cake with carmalized streusel topping and a sweet glaze. An 8X8 small batch recipe that is simple to make smaller or bigger, it is the perfect breakfast, brunch, or dessert recipe for a holiday or everyday.
Small Cinnamon Coffee Cake Recipe
Piece of cinnamon coffee cake on a spatula.
Convection Oven Bacon (Crispy & Easy)
Cook crispy bacon in a convection oven in about 20 minutes. This easy, mess-free method cooks bacon evenly with no flipping. A regular oven may also be used.
Convection Oven Bacon
pile of cooked bacon on a white plate
How to Cook Breakfast Sausage in the Oven (Patties or Links)
Bake breakfast sausage patties or links in the oven for evenly browned, juicy results in about 15 minutes—no splatter and easy cleanup. Larger sausages like Italian or brats cook the same way with a longer time.
Bake Breakfast Sausage Patties
baked sausage on a white plate.

Smaller Main Dish Recipes

These recipes are for special, memorable meals that keep you out of the kitchen and yield manageable leftovers.

Small Boneless Prime Rib (Ribeye) Roast
Juicy, tender boneless prime rib (ribeye roast) coated in garlic butter and roasted to perfection. Easy to cook at home for smaller gatherings or holiday dinners.
Small Prime Rib Roast Recipe
slice of Ribeye Roast on a white plate
Roasted Turkey Breast Recipe
Learn how to roast a bone-in turkey breast in the oven using one steady 350°F temperature. This easy method gives you juicy, tender meat and golden-brown skin without changing oven temperatures.
Oven Roasted Turlkey Breast Recipe
turkey slice with gravy on orange plate.
Small Crock Pot Ham with Brown Sugar-Honey Glaze
Cook a small 2–4 lb boneless ham in your crock pot with a brown sugar-honey glaze and pineapple. Easy, juicy, and perfect for holidays or smaller gatherings.
Small Honey Glazed Ham Recipe
slices of ham with pineapple on white plater
Filet Mignon in the Oven (Pan-Seared and Oven-Baked Method)
Juicy filet mignon cooked in the oven with a pan-sear for a perfect crust and tender center. Ready in about 20 minutes with simple steps.
How to Cook Filet Mignon
seared filet on a white plate with potatoes
Pan Seared New York Strip Steak (Oven Finish Method)
Pan sear New York strip steaks for a browned crust, then finish in the oven for juicy, tender steakhouse results.
Pan Seared Strip Steak
NY strip steak cut on an orange plate

Side Dish Recipes

Finish your holiday feast with delicious side dishes. Here are some great options that are simple to prepare or can be made in advance.

Cheesy Potatoes with Real Potatoes (No Soup, From Scratch)
Creamy, cheesy comfort food made from scratch—no canned soup or frozen hash browns. Real potatoes, sour cream, and cheddar baked until golden and bubbly.
Cheesy Potatoes with Real Potatoes
Cheesy potato casserole on a white plate.
Broccoli Slaw Recipe
This easy broccoli slaw recipe combines crunchy vegetables, almonds, sunflower seeds, and crispy rice or ramen noodles with a tangy homemade vinaigrette. A quick, make-ahead salad for picnics, potlucks, and holiday meals.
Broccoli Slaw Salad Recipe
broccoli slaw salad in a metal bowl
Baked Green Beans with Bacon
Baked Green Beans with Bacon are the perfect side dish with any meal—an easy green bean recipe with brown sugar, garlic, bacon, and tender green beans.
Baked Green Beans with Bacon
green beans with bacon on an orange plate
Old-Fashioned Scalloped Potatoes
Easy old-fashioned scalloped potatoes with tender potatoes in a creamy sauce and cheesy topping. Make 2, 4, or 8 servings for any size dinner.
Old Fashioned Scalloped Potatoes
Scalloped potatoes in a casserole dish.
Parmesan Roasted Cauliflower
This caramelized Parmesan roasted cauliflower recipe will become your favorite way to cook cauliflower. Using fresh or frozen, it makes a great hot baked side dish.
Roasted Cauliflower
Parmesan Roasted Cauliflower from 101 Cooking for Two
Old Fashioned Sweet Potato Casserole
Old fashioned sweet potato casserole is a Thanksgiving favorite with a creamy sweet potato filling and your choice of pecan or marshmallow topping. Make a full casserole or scale it down for two.
Sweet Potato Casserole Recipe
Sweet potato casserole on a white plate
Easy 60-Minute Yeast Dinner Rolls
Soft and fluffy homemade yeast dinner rolls in about 60 minutes. This easy recipe is perfect for beginners; it makes 12 rolls, or scale down to a small batch of 6.
Dinner Roll Recipe
Bowl of dinner rolls.

Dessert Recipes

Let's end the family feast on a sweet note. You want a memorable dessert to top off the day. All of these recipes are guaranteed to satisfy.

Small Batch Apple Crisp (Easy Recipe for Two or More)
Make an easy small batch apple crisp with only 2 or 3 apples and a buttery crumb topping. A perfect old-fashioned dessert for two or more.
Small Batch Apple Crisp
apple crisp on a white plate.
Apple and Berry Crumble
This easy apple and berry crumble combines tender apples, juicy berries, and a buttery crumb topping. Use fresh fruit or make a quick version with frozen berries and apple pie filling.
Apple Berry Crumble
blue bowl of apple berry crumble with ice cream
Small Batch Crock Pot Apple Crisp
An easy small batch crock pot apple crisp with fresh apples and a crisp oat topping. Make it in a 2-quart mini crock pot or scale it up for a larger slow cooker.
Crock Pot Apple Crisp
Apple crisp with ice cream.

Holiday Candy

Homemade candy is great around the house for the holidays and makes terrific house gifts.

Crock Pot Peanut Clusters (Easy Chocolate Recipe)
Easy crock pot peanut clusters with chocolate and just 4 ingredients. Sweet, salty, and crunchy homemade candy for holidays, gifts, or parties.
Chocolate Peanut Cluster Recipe
Crock pot chocolate peanut clusters on parchment paper.
Easy 5-Minute Fudge (3 Ingredient Recipe)
Foolproof 5-minute chocolate fudge made with only 3 ingredients: chips, sweetened condensed milk, and vanilla. Great for holidays, gifts, or anytime you need chocolate.
5-Minute Fudge
pile of fudge on a white plate.
Crock Pot White Chocolate Almond Clusters
Super easy and delicious white chocolate almond clusters are the perfect gift for the holidays or for any special occasion. Simple with these step by step photo instruction for the perfect white chocolate candy.
White Chocolate Almond Cluster Recipe
white chocolate almond clusters on a white plate
graphic for holiday candy roundup

🐕 For the party animals

Don't forget the dog treats.

Low-Fat Homemade Dog Treats—Healthy & Delicious
Low Fat Homemade Dog Treats are the perfect low-calorie treat for your dog. With only five ingredients, your dog will love the peanut butter and pumpkin taste. Much healthier than commercial treats—any veterinarian would approve.
Low Fat Dog Treat Recipe
Pile of homemade dog treats on a wire rack
Molly and Lilly with stuffed cats and the Christmas tree

Have a great holiday.

Molly, Lilly, Wifo, and DrDan

Editor's Note: Originally Published December 20, 2017. It is one of my recurring posts that will be updated and republished about this time yearly

Crock Pot Ham and Bean Soup with a Ham Bone

spoon full of ham and bean soup

Use that leftover holiday ham bone to make this hearty, old-fashioned Crock Pot ham and bean soup. This classic slow cooker recipe cooks all day with dry or canned white beans, a meaty ham bone (or some diced ham), and veggies. Perfect slow cooker comfort food after the holidays.

spoonful of ham and bean soup
[feast_advanced_jump_to]

quote mark
Featured Comment by Andie:
⭐⭐⭐⭐⭐
"I am making this for the third time today! This is my go to for ham bone bean soup. I follow the recipe and use dry beans. Perfect every time! So tasty! Thank you!"

📝 TL;DR — Recipe Summary

What: An old-fashioned crock pot ham and bean soup made with a ham bone, white beans, and simple vegetables.

Why: The ham bone builds a rich broth for an easy, hearty comfort-food soup.

How: Use canned beans for the easiest preparation, or soak dry beans first, then cook everything on low until tender.

🐷 Ingredients for Crock Pot Ham and Bean Soup

Ham bone with veggies and soup ingredients—labeled.
  • 🐖 Ham Bone – Use a ham bone with some meat remaining. Or use diced ham if you don't have a bone.
  • 🫘 White Beans – Navy, Great Northern, or Cannellini. Use soaked dry beans or drained and rinsed canned beans.
  • 🥕 Vegetables – Onion, carrot, and celery. Carrots and celery are optional but recommended.
  • 🧂 Seasoning – Garlic powder, black pepper, and an optional bay leaf. Hold the salt until the end.
  • 💧 Liquid – Water to cover, or low-sodium broth if you're not using a ham bone.

👨‍🍳 How to Make Ham and Bean Soup in a Crock Pot

1. Rinse a meaty ham bone under running water and scrape off any surface fat or coating.

Rinsing a hambone under running water.

2. Dice the carrots, celery, and onion. If using dry beans, soak them properly before cooking—see the bean section below.

Chopped carrots, onion, and celery.

3. Add the beans, ham bone, and remaining ingredients to the crock pot. Cover with water (about 6–8 cups) and cook on low for 8 hours with canned beans or 10 hours with soaked dry beans.

Adding water to the crock pot with ham.

✅ Pro Tip: A slow cooker works best when no more than about ¾ full. Remove a little liquid if needed.

4. During the last 1–2 hours, remove the ham bone. Remove the meat from the bone and return it to the soup.

Stripping meat from the ham bone.

5. Finish cooking, then adjust the seasoning and thickness if needed. Serve hot, or refrigerate overnight to skim off the fat before reheating.

Ham and Bean Soup on a spoon.

👇 Scroll to the recipe card for complete step-by-step photo instructions, or keep reading for pro tips, FAQs, and serving ideas.

😊 Tips for Crock Pot Success

  • Don’t overdo the liquid: Add just enough water to cover everything—usually about 6 cups and no more than 8. If the ham bone sticks out too far, trim it down.
  • Broth: Use low-sodium chicken broth instead of some or all of the water for more flavor, with or without a ham bone.
  • Hold the salt: The ham and broth may already provide plenty of salt, so wait until the end to add any.
  • Vegetables are flexible: Add potatoes, green beans, or other vegetables you like. Add delicate vegetables later so they don't overcook.
  • Bad ham = bad soup: If your ham lacked flavor to begin with, it won’t magically improve in the crock pot. The texture won’t get better either. If the soup tastes flat, try a little ham bouillon or ham soup base to boost the flavor.
  • Make it today, eat it tomorrow: The soup is great day one, but chilling overnight lets you skim the fat and brings the flavors together even better.

🐖 Ham Bone Options

A ham bone with some meat left on it gives the soup the best ham flavor.

Remove extra fat and any glaze: Trim off any thick fat. If your leftover ham came from a sweet glazed spiral ham, rinse well and scrape off the glaze—it can make the soup too sweet.

Not much meat on the bone? Add 1–2 cups of diced ham.

No ham bone? Use 2–4 cups of diced ham. Since you won't get as much flavor from the bone, use low-sodium chicken broth instead of water. A little ham bouillon or ham soup base can also boost the flavor, but add carefully because they can be salty.

🫘 Beans—Types, Prep, and Tips

White beans: Navy beans are traditional, but Great Northern or Cannellini beans also work well.

15-bean soup mix: You can substitute a 15-bean mix, but discard the seasoning packet and soak the beans according to the package directions.

Dry or canned: Dry beans need to be soaked before cooking. Drain and rinse canned beans before adding them directly to the crock pot.

Quick soak: Cover the beans with water, boil for 2 minutes, remove from the heat, cover, and let stand for 1 hour. Drain and rinse before using. Quicker and more effective than an overnight soak.

Classic overnight soak: Cover dry beans with plenty of water and soak for 8–12 hours. Drain and rinse before adding them to the crock pot. 

🍽️ How to Serve

This hearty soup is great with something to mop up the bowl:

  • Cornmeal Biscuits
  • Old Fashioned Cornbread
  • Basic Homemade Bread

❄️ Leftovers and Storage

Refrigerate in an airtight container for 3–4 days, or freeze for 3–4 months. Thaw overnight in the refrigerator before reheating.

To reduce the fat: Chill the soup overnight, then skim off the solidified fat before reheating.

📖 More Ham Bone Recipes

  • Ham and Vegetable Soup — A lighter ham bone soup packed with vegetables.
  • Puerto Rican Chuletón Soup AKA Xmas Ham Bone Soup — Our Christmas tradition and a delicious change from traditional ham soups.

❓ FAQs

How can I thicken ham and bean soup in the crock pot?

Mash or blend about a cup of the cooked beans and stir them back into the soup, or stir in ¼ to ½ cup of potato flakes near the end. I don't recommend cornstarch because it can gel when cooled and change the texture.

Why soak dry beans?

Soaking improves texture and helps remove some of the indigestible carbohydrates that can cause gas or GI upset. You can use a traditional overnight soak, but the quick soak is faster and more effective.

📖The Recipe Card

Ham and bean soup on spoon
Print Recipe Add to Collection Go to Collections
4.88 from 8 votes

Crock Pot Ham and Bean Soup (With Ham Bone)

An old-fashioned ham and bean soup made easy in the crock pot. Just white beans, a meaty ham bone (or diced ham), and simple seasoning.
Prep Time15 minutes mins
Cook Time8 hours hrs
Total Time8 hours hrs 15 minutes mins
Course: Soup
Cuisine: American
Keyword: crockpot ham and bean soup, ham and bean soup with ham bone, slow cooker ham and bean soup
Servings: 8
Calories: 410kcal
Author: Dan Mikesell AKA DrDan

Ingredients

  • 1 ham bone meaty
  • 48 ounces Canned Navy, Great Northern, or Cannellini beans—drained and rinsed (may use 1 pound dry beans, properly prepared)
  • 2 carrots medium, diced (optional)
  • 2 ribs celery diced (optional)
  • 1 onion medium, diced
  • ½ teaspoon garlic powder
  • ½ teaspoon black pepper
  • 1 bay leaf optional
  • 6 to 8 cups water or low-sodium chicken broth enough to cover ingredients
US Customary - Convert to Metric

Instructions

Prepare the beans, ham bone, and veggies

  • If using canned beans, drain and rinse 48 oz. (about 3 cans).
    Ham bone with veggies and soup ingredients—labeled.
  • If using dry beans, rinse 1 pound of beans. Cover with plenty of water, boil for 2 minutes, remove from the heat, cover, and let sit for 1 hour. Drain and rinse.
    Soaking dry beans in water.
  • Rinse a meaty ham bone under running water to remove any coating or glaze. Scrape off excess surface fat.
    Rinsing a hambone under running water.
  • Dice two medium carrots, two celery ribs, and one medium onion. Carrots and celery are options, but recommended.
    Chopped carrots, onion, and celery.

Load the crock pot and cook

  • Add the beans, ham bone, diced vegetables, garlic powder, pepper, and bay leaf to a large crock pot. Add just enough water or broth to cover the ingredients—usually about 6 to 8 cups. Cook on low for 8 hours (canned beans) or 10 hours (dry beans).
    Pouring chopped veggies into crock pot with a ham bone.

Strip the ham bone

  • About 2 hours before the end of cooking, remove the ham bone to a cutting board and let it cool 5–10 minutes. Remove the meat, discard the bone, fat, and other waste
    Stripping meat from the ham bone.

Finish and serve

  • Return the meat to the crock pot and finish cooking. Taste and add salt only if needed.
    Ham and bean soup in a ladle.
  • Serve hot, or refrigerate overnight and skim the fat off the top before reheating.
    Ham and Bean Soup on a spoon.

Video

Notes

Pro Tips:

  • Use a 6-quart or larger crock pot.
  • Ham bones and hams vary, so amounts are guidelines.
  • For glazed ham, rinse well and scrape off the glaze.
  • Ham is salty. Use low-sodium broth and canned beans, and add salt only at the end if needed.
  • For easier fat removal, refrigerate overnight and skim off the solidified fat.
  • No ham bone? Use 2–4 cups diced ham and low-sodium broth; add ham bouillon or soup base if needed.
  • Refrigerate for 3–4 days or freeze for 3–4 months.
Nutrition information is an estimate and will vary depending on the salt and fat content of your ham.

Nutrition

Calories: 410kcal | Carbohydrates: 38g | Protein: 25g | Fat: 17g | Saturated Fat: 4g | Cholesterol: 35mg | Sodium: 695mg | Potassium: 929mg | Fiber: 15g | Sugar: 4g | Vitamin A: 2593IU | Vitamin C: 2mg | Calcium: 100mg | Iron: 4mg

Editor's Note: Originally Published December 13, 2014. Updated with expanded options, refreshed photos, and improved organization for easier navigation.

Molly and Lilly dogs playing in the snow.

Oreo Fudge (White Chocolate Recipe)

pile of oreo fudge

This easy Oreo Fudge recipe combines creamy white chocolate fudge with crunchy Oreo cookies. Made with just 4 ingredients and 5 minutes on the stovetop, it's a simple, no-thermometer candy that's perfect for holiday treats, gifts, or anytime you need something sweet.

pile of oreo fudge squares
[feast_advanced_jump_to]

quote mark
Featured Comment by Nebuchadnezzar :
⭐⭐⭐⭐⭐"Delicious! I would definitely make this again"

📝 TL;DR — Recipe Summary

What: Creamy white chocolate Oreo Fudge, also known as cookies and cream fudge, with crunchy Oreo pieces.

Why: Just 4 ingredients, 5 minutes on the stovetop, and no candy thermometer needed.

How: Melt white chocolate chips with sweetened condensed milk, stir in vanilla and chopped Oreos, then spread in a prepared pan and refrigerate for 1–2 hours until firm.

🥣 Ingredients for Oreo Fudge

White chocolate chips with Oreos and other ingredients—labeled.
  • White chocolate chips: Use good-quality chips for a smooth, creamy fudge. Ghirardelli is preferred.
  • Sweetened condensed milk: Use a standard 14-ounce can, not evaporated milk.
  • Oreo cookies: Use original Oreos, roughly chopped to retain some crunch. Double Stuf is not recommended.
  • Vanilla extract: Adds flavor to the white chocolate fudge.

👨‍🍳 Quick Overview: How to Make Oreo Fudge

1. Line a pan with parchment paper and roughly chop the Oreo cookies.

Chopping Oreo cookies with a knife.

2. Combine white chocolate chips and sweetened condensed milk in a nonstick saucepan. Stir frequently over medium-low heat until melted and smooth, about 4–5 minutes.

Stirring the melting chocolate in the sauce pan.

3. Remove from heat and stir in the vanilla and most of the chopped Oreos. Spread in the prepared pan, top with the remaining Oreos, and gently press them into the fudge.

patting more Oreo into the top.

4. Refrigerate for 1–2 hours until firm, then cut into pieces.

pile of Oreo fudge on a red plate.

For more details, keep reading. See the recipe card below for complete instructions and to print.

🍫 Choosing White Chocolate for Fudge

White chocolate chips are convenient and work well in this recipe. I prefer Ghirardelli, but Nestlé usually works, too.

For the richest, creamiest fudge, use good-quality white chocolate baking bars with cocoa butter. Substitute by weight—1 cup of white chocolate chips weighs about 6 ounces.

Avoid almond bark, candy melts, and candy coating wafers. These use vegetable fats and are designed to form a firmer candy coating rather than creamy fudge.

✔️ Tips for Perfect Oreo Fudge

  • Use original Oreo cookies. Avoid Double Stuf Oreos—you want more crunchy cookie and less filling. Other Oreo flavors work well for variations.
  • Roughly chop the Oreos. Leave some larger pieces for crunch rather than crushing them into fine crumbs.
  • Keep the heat low. Use a nonstick saucepan over medium-low heat, stirring frequently. White chocolate can scorch or seize if overheated.
  • Line the pan with parchment paper. Two crossing strips make lifting the fudge out easy. A little butter underneath helps hold the parchment in place.
  • Cool completely before cutting. Refrigerate until firm, then use a sharp knife warmed under hot water for clean cuts.

👨‍🍳 Oreo Fudge Variations

Mint Oreo Fudge: Use Mint Creme Oreos and add ½ teaspoon of peppermint extract. A drop or two of green food coloring is optional.

Double Chocolate Oreo Fudge: Replace the white chocolate chips with milk, semisweet, or dark chocolate chips, and use Chocolate Oreos.

Holiday Oreo Fudge: Add seasonal sprinkles or a few drops of food coloring to match Christmas, Valentine's Day, St. Patrick's Day, or other occasions.

❄️ Storage of Oreo Fudge

Store Oreo Fudge in an airtight container at room temperature for up to 1 week or refrigerate for up to 2 weeks.

Freezing: Freeze in an airtight container for 2–3 months. Separate layers with parchment paper to prevent sticking.

For the best texture, let refrigerated or frozen fudge come to room temperature before serving.

👍 Other candy recipes

  • Easy 5-Minute Chocolate Fudge — the original recipe behind this variation.
  • Crock Pot Fudge
  • Crock Pot White Chocolate Almond Clusters
  • Cinnamon Candied Almonds

❓FAQs

Can I make Oreo fudge in the microwave?

Yes. Combine the white chocolate chips and sweetened condensed milk in a microwave-safe bowl. Microwave in 20-second intervals, stirring between each, until melted and smooth. Stir in the vanilla and chopped Oreos, then finish the recipe as directed.
I find it harder than the stovetop method because of the repeated stopping and stirring.

📖The Recipe Card

pile of oreo fudge
Print Recipe Add to Collection Go to Collections
5 from 3 votes

Oreo Fudge (White Chocolate Recipe)

Creamy white chocolate Oreo Fudge with crunchy cookie pieces. This easy 4-ingredient stovetop recipe takes just 5 minutes to cook, with no candy thermometer needed.
Prep Time5 minutes mins
Cook Time5 minutes mins
Cooling time2 hours hrs
Total Time2 hours hrs 10 minutes mins
Course: Sweets
Cuisine: American
Keyword: Easy, Oreo chocolate fudge, Oreo Fudge, recipe, white chocolate fudge
Servings: 36
Calories: 149kcal
Author: Dan Mikesell AKA DrDan

Ingredients

  • 3 cups white chocolate chips (18 ounces, or 1½ standard 12-ounce bags)
  • 14 oz sweetened condensed milk
  • 1 teaspoon vanilla
  • 20 Oreo cookies (roughly chopped)
US Customary - Convert to Metric

Instructions

  • Prepare the pan. Line an 8×8-inch pan with two crossing strips of parchment paper. A few dots of butter underneath will hold the parchment in place.
    8X8 pan with parchment paper.
  • Chop the Oreos. Roughly chop 20 Oreo cookies into about 2½–3 cups of pieces. Reserve 1 cup for topping the fudge.
    Chopping Oreo cookies with a knife.
  • Combine the ingredients. Add 3 cups (18 ounces) of white chocolate chips and one 14-ounce can of sweetened condensed milk to a nonstick saucepan.
    Pouring white chocolate chips into a non-stick sauce pan.
  • Melt the chocolate. Cook over medium-low heat, stirring frequently, until melted and smooth, about 4–5 minutes. Do not leave unattended.
    Stirring the melting chocolate in the sauce pan.
  • Add the Oreos. Remove from the heat. Stir in 1 teaspoon of vanilla extract and the chopped Oreos, except for the reserved cup.
    mixing chopped oreos into melted fudge
  • Fill the pan. Spread the fudge evenly in the prepared pan. Sprinkle with the reserved Oreos and gently press them into the surface.
    patting more Oreo into the top.
  • Cool and cut. Refrigerate for 1–2 hours until firm. Lift the fudge out using the parchment paper and cut into 36 pieces with a sharp knife.
    Pile of Oreo fudge on a red plate.

Video

Notes

Pro Tips

  1. White chocolate: Use good-quality white chocolate chips, preferably Ghirardelli. White chocolate baking bars can be substituted by weight. Avoid almond bark and candy melts.
  2. Oreo cookies: Use original Oreos, not Double Stuf. Roughly chop them rather than crushing them into crumbs.
  3. Prevent scorching: Use a nonstick saucepan over medium-low heat and stir frequently. Do not leave the melting chocolate unattended.
  4. Pan and cutting: An 8×8-inch pan makes 36 pieces. Line it with crossing strips of parchment paper for easy removal. Use a warm, sharp knife for clean cuts.
  5. Storage: Store airtight for up to 1 week at room temperature or 2 weeks refrigerated. Freeze for 2–3 months.

Nutrition

Calories: 149kcal | Carbohydrates: 20g | Protein: 2g | Fat: 7g | Saturated Fat: 4g | Cholesterol: 7mg | Sodium: 51mg | Potassium: 90mg | Fiber: 1g | Sugar: 17g | Vitamin A: 34IU | Vitamin C: 1mg | Calcium: 63mg | Iron: 1mg

Originally Published December 6, 2015. Updated with expanded options, refreshed photos, and edited for clarity.

Molly and Lilly dogs supervising in kitchen.

Small French Toast Casserole

French Toast Casserole on orange plate with syrup.

This easy small French toast casserole is made for holiday morning brunches—soft and custardy inside with a crisp cinnamon-sugar top.

Make it overnight for an effortless breakfast, or bake it fresh in about an hour. This small-batch recipe makes 4–6 servings in an 8x8 pan, but scales down for two or up for almost any size.

French Toast Casserole on orange plate.
[feast_advanced_jump_to]

quote mark
Featured Comment by :
⭐⭐⭐⭐⭐"This one is a winner, Dr. Dan! Very easy to put together the night before, dead simple to finish in the morning, with a great presentation. Thank you!"

❤️ Why You’ll Love This Small French Toast Casserole

  • Small batch: Bakes perfectly in an 8x8 pan for 4–6 servings—no giant casserole or soggy middle.
  • Scales to any size: Cut it in half for two, or double it for a family breakfast or brunch.
  • Make it overnight: Prep the night before for an easy holiday morning, or bake it the same day.
  • Simple and forgiving: Pantry staples, flexible bread choices, and no tricky steps.
  • Perfect texture: Soft and custardy inside with a crisp cinnamon-sugar top.

🍞 Ingredients

Bread with eggs and casserole ingredients—Labeled.
  • Bread — French bread is classic for texture, but brioche, sourdough, or Italian bread all work. Softer bread may be adapted—see the bread section below.
  • Eggs — The base for the custard mixture.
  • Milk — Whole milk gives the richest flavor, but 2% or half & half are fine.
  • Pantry staples — Sugar, cinnamon, vanilla extract, and a pinch of salt.
  • Topping — Melted butter mixed with cinnamon-sugar for a crisp golden crust.

👨‍🍳 Quick Overview: Small French Toast Casserole

1. Cut crusty French bread into 1-inch cubes and add to a buttered 8x8 or 6x9-inch baking dish.

Cubes of bread in a small casserole dish.

2. Whisk together the custard (eggs, milk, sugar, salt, vanilla, cinnamon) and pour it over the bread cubes. Cover and refrigerate overnight, or bake right away.

Pouring egg mixture over the bread cubes.

✅ Pro Tip: Cover with plastic wrap and refrigerate up to 24 hours. Before baking, let sit at room temperature for 15–30 minutes while the oven preheats.

3. Brush the top with melted butter, then sprinkle with cinnamon-sugar.

Sprinkling casserole with cinnamon sugar.

4. Bake at 350°F until golden brown and the center reaches 165°F—about 40–45 minutes. Let rest 5–10 minutes, then serve with butter, maple syrup, fresh fruit, or powdered sugar.

Cooked French toast casserole.

✅ Pro Tip: The bread will puff up near the end of baking—that’s the earliest you could pull it, but it will still be soft. Bake a few minutes longer for a drier, more set casserole.

For more details, keep reading. See the Recipe Card below for complete instructions and to print.

⏲️ How Long to Cook French Toast Casserole

French toast casserole should reach 165°F in the center for safety. A small batch in an 8x8 pan takes about 40–45 minutes, while a half batch for two will take about 25–30 minutes and a double about 50–60 minutes.

Baking time varies with the thickness of the casserole, so always check the center temperature for doneness.

🥖 What Type of Bread to Use

French bread is the classic choice for texture, but sourdough, Italian, or brioche also work well. If you're buying bread just for this recipe, grab a small loaf or baguette.

Day-old, crusty bread works best because it absorbs the custard without becoming mushy. Softer or fresh bread will also work—dry the cubes in a 200°F oven for about 10 minutes first.


👍 Tips for Perfect French Toast Casserole

  • Overnight or same day: Bake right away, or chill overnight for the best custard texture and easy mornings.
  • Milk flexibility: Whole milk tastes best, but any milk—even non-dairy—works fine.
  • Choose your texture: Bake uncovered for a crisp top and firmer casserole. Bake covered for a softer, more custardy texture.

🥣 Options and Variations

  • Berries: Add ½ cup fresh or frozen blueberries before baking (mixed berries work too).
  • Apples: Toss chopped apples with brown sugar and cinnamon, then layer with the bread.
  • Nuts: Pecans or walnuts add crunch—mix in or sprinkle on top.
  • Streusel topping: Combine brown sugar, cinnamon, and nuts for a sweet, crunchy crust.

📆 Making Ahead

  • Overnight (best option): According to the USDA, you can safely assemble the casserole up to 24 hours ahead. Cover tightly with foil or plastic wrap and refrigerate. When ready to bake, let it sit at room temperature for 15-30 minutes while the oven preheats. (Some folks will tell you longer, but 24 hours is the food-safety line.)
  • Freezer option: You can freeze the fully baked casserole for up to 3 months, but the texture may be softer or slightly mushier after thawing. Cool completely, then wrap well in plastic and foil. Thaw in the refrigerator for about 24 hours, then reheat uncovered in a 350°F oven for about 30 minutes.

↕️ Scaling: French Toast Casserole for Two or More

This recipe is written for a small batch—an 8x8, 6x9, or 9-inch round baking dish makes about 4–6 servings. But it scales easily down for two or up for a family.

  • For Two (half recipe 2–3 servings): Use a 6-inch round (or similar small dish). Bake 25–30 minutes, until golden and the center is 165°F.
  • Original recipe (4–6 servings): Use an 8x8, 6x9, or 9-inch round dish. Bake 40–45 minutes.
  • Double recipe (8–12 servings): Use a 9x13 casserole or cake pan. Bake 50–60 minutes, until browned and the center is 165°F.

✅ Tips for scaling:

  • Use the recipe card to adjust the servings—ingredient amounts change, but the instructions do not.
  • Always bake to 165°F for food safety.

🤔 How to Prevent Soggy French Toast Casserole

Nobody wants a soggy casserole. Here’s how to keep it firm and custardy every time:

  • Use sturdy bread: Day-old French, sourdough, or brioche holds up best.
  • Size matters: A too-thick casserole can stay wet in the middle. When scaling the recipe, it’s better to use a slightly larger pan than to crowd the bread into one that’s too small.
  • Preheat fully: Always start with a fully heated oven for even baking.
  • Bake until set: Don't stop just because the casserole puffs. The center should reach 165°F and look set.
  • Rescue a soggy casserole: If it's still too wet after baking, spread individual pieces on a rimmed baking sheet and return them to the oven for a few minutes to dry.

🍴 How to Serve French Toast Casserole

Serve warm with butter and maple syrup, plus toppings like fresh fruit or powdered sugar.

It also pairs perfectly with breakfast meats:

  • Crispy Baked Bacon
  • Ham steak, slices, or other breakfast favorites

Baked Breakfast Sausage

The best and easiest way to cook crispy and juicy sausage is in the oven. We always bake breakfast sausage patties or links, Italian sausages, or other full-size sausages for perfect sausages every time without the mess.

cooked sausage patties.

❄️ Storing and Reheating Leftovers

  • Refrigerate: Cover and store in the refrigerator for 2–3 days.
  • Freeze: Wrap tightly in plastic and foil, or use a freezer-safe container. Freeze for up to 3 months, but expect the texture to be somewhat softer after thawing. Thaw overnight in the refrigerator.
  • Reheat: For best texture, warm uncovered in a 350°F oven for about 30 minutes. An air fryer works too. Microwaving is quicker, but the top will be soft.
    👉 For small households: Individual servings reheat faster—about 10–15 minutes in the oven.

📋 Other Breakfast Recipes

Looking for more breakfast ideas? Try:

  • Small Cinnamon Coffee Cake
  • Healthier Sausage Gravy and Biscuits
  • Baked Blueberry Pancakes
  • Baked English Muffins

❓ FAQs

How do I make French toast casserole gluten-free?

Use gluten-free bread. The other ingredients are usually gluten-free, but always check the labels to be safe.

What’s the difference between French toast casserole and bread pudding?

Bread pudding uses more milk than eggs, is generally sweeter, often includes raisins, and is usually served as a dessert with a sauce. French toast casserole is less sweet and made for breakfast. 

Can I make French toast casserole ahead more than 24 hours?

For food safety, don't refrigerate the assembled casserole for more than 24 hours before baking. For longer storage, bake it completely, cool it, then freeze it. The texture may be softer after freezing and thawing.

Can I make French toast casserole without refrigerating it overnight?

Yes. Assemble the casserole and bake it right away. Refrigerating overnight gives the bread more time to absorb the custard and makes breakfast easier, but it isn't required.

📖The Recipe Card

French Toast Casserole on orange plate with syrup.
Print Recipe Add to Collection Go to Collections
4.82 from 11 votes

Small French Toast Casserole (Easy Small-Batch Recipe)

Easy small-batch French toast casserole with a soft, custardy center and cinnamon top. Make it overnight in an 8x8 pan, scale it down for two, or make almost any size.
Prep Time10 minutes mins
Cook Time40 minutes mins
Total Time8 hours hrs 50 minutes mins
Course: Breakfast
Cuisine: American
Keyword: easy french toast casserole, French Toast Casserole, overnight french toast casserole, Small French Toast Casserole
Servings: 6 servings
Calories: 191kcal
Author: Dan Mikesell AKA DrDan

Ingredients

  • 8 oz French bread (1-inch cubes) other crusty bread would work
  • 4 eggs large
  • 1 ½ cups milk
  • ½ teaspoon salt
  • ½ teaspoon cinnamon
  • 2 teaspoons sugar
  • ½ teaspoon vanilla extract

Topping

  • 1 tablespoon butter
  • 2 tablespoons sugar
  • 1 teaspoon cinnamon
US Customary - Convert to Metric

Instructions

  • Butter an 8x8 or 6x9-inch baking dish
    Bread with eggs and casserole ingredients—Labeled.
  • Cut 8 oz of crusty French bread into 1-inch cubes and add to the pan.
    Cubes of bread in a small casserole dish.
  • Whisk 4 eggs, 1 ½ cups milk, 2 teaspoons sugar, ½ teaspoon salt, ½ teaspoon vanilla, and ½ teaspoon cinnamon. Mix lightly.
    Whisking eggs with milk and seasonings.
  • Pour the egg mixture over the bread cubes, cover with foil or plastic wrap, and refrigerate overnight, or you can proceed to the next step and cook now.
    Pouring egg mixture over the bread cubes.
  • If refrigerated overnight, remove it from the refrigerator, uncover, and let it rest at room temperature for 15–30 minutes while the oven preheats to 350°F. Melt 1 tablespoon of butter in the microwave and brush the top.
    Brushing the casserole with butter.
  • Mix 2 tablespoons of sugar with 1 teaspoon of cinnamon and sprinkle on top.
    Sprinkling casserole with cinnamon sugar.
  • Bake until golden brown and an internal temperature of 165°F—about 40–45 minutes.
    French toast casserole on a spatula.
  • Allow to cool for 5–10 minutes before serving.
    Pouring syrup on French toast casserole.

Video

Notes

Pro Tips

I suggest a crusty bread; if it is a little stale, that is good. If you opt for softer bread, you might want to dry it out a bit in a 200°F oven for about 10 minutes.
This recipe uses an 8x8, 6x9, or 9-inch round baking dish.
The full recipe makes about 4–6 servings. See the post for half and double recipe pan sizes and baking times.
Bake until nicely browned with an internal temperature of 165°F in the center.
The bread will puff near the end. When the center is puffed, it may still be quite soft. Bake a little longer for a drier, more set casserole.
Storage before cooking is limited to 24 hours for safety due to the eggs.
Storage after cooking: refrigerate covered for 2–3 days or freeze for up to 3 months. The texture may be softer or slightly mushier after freezing and thawing.
It is best if reheated in the oven or air fryer at 350° for 15–30 minutes. This will help crisp up the crust, whereas reheating with a microwave will make it soft.

Nutrition

Calories: 191kcal | Carbohydrates: 27g | Protein: 8g | Fat: 5g | Saturated Fat: 2g | Cholesterol: 114mg | Sodium: 446mg | Potassium: 89mg | Fiber: 1g | Sugar: 6g | Vitamin A: 217IU | Calcium: 36mg | Iron: 2mg

Editor's Note: Originally Published December 22, 2016. Updated with expanded options, refreshed photos, and a table of contents to help navigation.

Lilly running hard in snow.

Easy Crock Pot Peanut Clusters

Crock pot chocolate peanut clusters on parchment paper.

These easy crock pot peanut clusters have a rich chocolate coating. With only 4 ingredients, anybody can make this sweet-and-salty homemade candy—perfect for Christmas candy, gifts, or a delicious chocolate treat.


Chocolate peanut cluster being held in a hand.
[feast_advanced_jump_to]

quote mark
Featured Comment by Jan:
⭐⭐⭐⭐⭐"Oh my gosh! Seriously, the best chocolate-covered peanuts I have ever made! I really don't know if they will last until Christmas at the rate we are "testing" them.."

😊 TL;DR (quick answers)

What: Easy crock pot peanut clusters with peanuts and a rich chocolate coating.

Why: Only 4 ingredients, mostly hands-off, and perfect for holiday candy or gifts.

How: Melt on LOW for 90–120 minutes, stir until smooth, scoop onto parchment, and cool until firm.

🍫 Ingredients

Ingredients for crock pot peanut clusters with peanuts, chocolate, and almond bark.
  • Peanuts: Dry-roasted, lightly salted or unsalted, and skinless. Other dry-roasted nuts—almonds, pecans, cashews, or walnuts—may be used alone or in a mixture.
  • Chocolate chips: Semi-sweet, milk, or dark. Don’t use “baking chips.”
  • Vanilla candy melts (or almond bark): Firms and smooths the coating.
  • Baker’s German chocolate: Adds richness.
  • Options: Add shredded coconut, mini marshmallows, crushed pretzels, or holiday sprinkles.

👨‍🍳 Quick Overview: How to Make Crock Pot Peanut Clusters

1. In a crock pot, layer the peanuts, chocolate chips, Baker’s chocolate, and candy melts (almond bark).

Adding peanut cluster ingredients to the crock pot.

✅ Pro Tip: Never cook on high — it overheats and ruins the chocolate.

2. Cover and cook on LOW. At 90 minutes, stir and check. It’s ready when everything mixes smoothly, usually in about 2 hours.

Mixing melted ingredients of chocolate peanut clusters.

3. Let the mixture firm for a few minutes, then drop heaping teaspoons onto parchment paper.

Using spoons to make individual peanut clusters.

4. Cool for about 2 hours or until the chocolate is firm.

Chocolate peanut clusters are cooling on parchment paper.

For more details, keep reading. See the Recipe Card below for complete instructions and to print.

↕️ Crock Pot Size & Scaling

  • Crock pot size: A 3-quart or larger crock pot works well. For a half batch, use a 2-quart mini; for a double batch, use a 6-quart.
  • Large crock pots: Smaller batches may melt faster in a large crock pot, so start checking at about 60 minutes.
  • Scaling: Use the recipe card serving adjustment to change the ingredient amounts.

❄️ Storage

Store peanut clusters in an airtight container at room temperature. For longer storage, refrigerate for up to 1 month or freeze for up to 3 months.

🎅 More Easy Christmas Candy Recipes

  • 5-Minute Fudge — fast, foolproof, and chocolatey.
  • Crock Pot White Chocolate Almond Clusters — the sweet companion to this recipe.
  • Cinnamon Candied Almonds — a holiday classic with warm spice.
  • Christmas Crack Candy — salty, sweet, and addictive.
  • Pretzel Candies — festive and kid-friendly.

❓ FAQs

Why do the nuts need to be dry-roasted?

Moisture and chocolate don’t mix—it can cause the chocolate to seize and ruin the smooth coating. Dry-roasted nuts help keep the chocolate smooth.

Do I have to use Baker’s Chocolate or Baker’s German Chocolate?

No, but it adds cocoa butter and extra richness. If you skip it, replace it with an equal amount of chocolate chips.

Can I cook the peanut clusters on HIGH?

No. HIGH heat can overheat or scorch the chocolate and cause it to seize. Always use LOW for gentle melting.

📖The Recipe Card

Crock pot chocolate peanut clusters on parchment paper.
Print Recipe Add to Collection Go to Collections
5 from 9 votes

Crock Pot Peanut Clusters (Easy Chocolate Recipe)

Easy crock pot peanut clusters with chocolate and just 4 ingredients. Sweet, salty, and crunchy homemade candy for holidays, gifts, or parties.
Prep Time5 minutes mins
Cook Time2 hours hrs
Total Time2 hours hrs 5 minutes mins
Course: Appetizer
Cuisine: American
Keyword: chocolate covered peanut clusters, Chocolate Peanut Clusters, Crock pot chocolate peanut clusters
Servings: 48
Calories: 109kcal
Author: Dan Mikesell AKA DrDan

Ingredients

  • 1 pound dry roasted peanuts lightly salted or unsalted
  • 1 pound vanilla candy melts or almond bark
  • 12 oz good quality chocolate chips
  • 4 oz Baker's German chocolate
US Customary - Convert to Metric

Instructions

  • In a 3-quart (or larger) crock pot, add 1 pound of dry roasted peanuts. Top with 12 oz of chocolate chips, 4 oz of broken-up Baker’s chocolate, and candy melts (or almond bark).
    adding peanut cluster ingredients to crock pot
  • Cook on low with the lid on. Do not cook on high. At 90 minutes, stir and check. It’s ready when everything mixes smoothly — usually about 2 hours.
    mixing melted ingredients of chocolate peanut clusters_
  • Scoop clusters — let the mixture firm for a few minutes, then drop heaping teaspoons onto parchment paper.
    using spoons to make individule candy pieces
  • Cool for about 2 hours or until the chocolate is firm.
    chocolate peanut clusters cooling on parchment paper

Video

Notes

Pro Tips:

Use good-quality semi-sweet, milk, or dark chocolate chips. Don't use baking chips.
Use only dry-roasted nuts.
A 3-quart or larger crock pot works well. Use a 2-quart mini for a half batch or a 6-quart for a double batch.
Crock pots vary. Check at 90 minutes; it's done when everything mixes smoothly. For a smaller batch in a large crock pot, start checking at 60 minutes.
Make clusters about 1 tablespoon each; smaller is better.
Storage: Store in an airtight container at room temperature. For longer storage, refrigerate for up to 1 month or freeze for up to 3 months.

Nutrition

Calories: 109kcal | Carbohydrates: 9g | Protein: 2g | Fat: 7g | Saturated Fat: 3g | Sodium: 67mg | Potassium: 62mg | Fiber: 1g | Sugar: 7g | Calcium: 5mg | Iron: 1mg

Originally published November 25, 2016. Updated with new photos, streamlined instructions, and extra tips for success.

Lilly running hard in the snow.
Lilly in light early snow.

9 Easy Christmas Candy Recipes

graphic for holiday candy roundup

Give the gift of homemade love. Show them they are worth your time; it means more than you realize. These simple candy recipes are perfect—delicious, festive, and budget-friendly—so you can have treats for everyone on your list.

Holiday candy recipe graphic with multiple pictures.
[feast_advanced_jump_to]

🍫 Fudge, Fudge, and More Fudge

Nothing says Christmas like a plate of fudge from friends and family. Be the giver this year. It is so easy to do.

Easy 5-Minute Fudge (3 Ingredient Recipe)
Foolproof 5-minute chocolate fudge made with only 3 ingredients: chips, sweetened condensed milk, and vanilla. Great for holidays, gifts, or anytime you need chocolate.
5 Minute Fudge Recipe
pile of fudge on a white plate.
Oreo Fudge (White Chocolate Recipe)
Creamy white chocolate Oreo Fudge with crunchy cookie pieces. This easy 4-ingredient stovetop recipe takes just 5 minutes to cook, with no candy thermometer needed.
Oreo Fudge Recipe
pile of oreo fudge
Crock Pot Fudge
Make easy Crock Pot Fudge with chocolate chips, sweetened condensed milk, and vanilla. Just 5 minutes of prep makes this a fun holiday candy recipe to make with kids.
Crock Pot Fudge
pieces of fudge with nuts on a red plate

🥜 Nut Recipes

Everybody loves nuts, add chocolate or sugar, and you have something special for the holidays.

Crock Pot Peanut Clusters (Easy Chocolate Recipe)
Easy crock pot peanut clusters with chocolate and just 4 ingredients. Sweet, salty, and crunchy homemade candy for holidays, gifts, or parties.
Chocolate Peanut Cluster Recipe
Crock pot chocolate peanut clusters on parchment paper.
Cinnamon Candied Almonds (Easy Oven-Roasted Nuts)
Delicious cinnamon-sugar candied almonds roasted in the oven until crisp and golden. Easy to make and perfect for snacks, parties, or holiday gifts.
Candied Almonds recipe
Roasted candied almonds fresh out of the oven.
Crock Pot White Chocolate Almond Clusters
Super easy and delicious white chocolate almond clusters are the perfect gift for the holidays or for any special occasion. Simple with these step by step photo instruction for the perfect white chocolate candy.
White Clocolate Almond Cluster Recipe
white chocolate almond clusters on a white plate

♨️ Oven-Made Candy Recipes

Simple baked candy treats to share with family and friends.

Candied Bacon Recipe
Make crispy, sweet-and-salty candied bacon in the oven with just bacon and brown sugar. Add optional spices for a sweet and spicy treat that's perfect for parties, snacks, or holiday gifts.
Candied Bacon Recipe
candied bacon on a tray
Pretzel Candies
Super easy chocolate pretzel candies are a great sweet and salty combo. They are perfect for "take a treat" to school, an office party, or even giving as gifts. Just three ingredients and no skill will get you these delicious candies.
Pretzel Candies
Chocolate Pretzel Buttons from 101 Cooking For Two
Saltine Cracker Toffee
Saltine Cracker Toffee is a wonderful combination of sweet, salty, and crunching, with easy homemade toffee candy on saltine crackers and then melted chocolate. It can be topped with chopped pecans or other seasonal toppings, making it Christmas Crack candy.
Saltine Cracker Toffee
Pieces of Saltine Cracker Toffee with Christmas crack toppings.

Have a great holiday season.

From Wifo, Molly, Lilly, and DrDan

Lilly dog dressed for the holiday 2015.

Originally Published November 24, 2017. Updated yearly for the holiday season.

Old-Fashioned Crock Pot Vegetable Beef Soup

Vegetable Beef Soup in a spoon.

This is the vegetable beef soup your grandmother made—tender chunks of chuck roast, classic vegetables, and a rich tomato-beef broth.

Adapted from the original 1972 Betty Crocker stovetop recipe for any-size crock pot, with scaling for 2, 4, or 8 servings—faster stovetop instructions included.

closeup image of vegetable beef soup in a large spoon.
[feast_advanced_jump_to]

quote mark
Featured Comment from Dorothy:
"Made you veg. Beef soup today. It was delicious! Easy to follow step-by-step instructions, and I liked how you gave suggestions."

🤔 TL;DR — Recipe Summary

What: Old-fashioned crock pot vegetable beef soup with tender chuck roast, vegetables, and rich tomato-beef broth.

Why: Easy, flexible, freezer-friendly, and simple to scale for 2, 4, or 8 servings.

How: Add the beef, vegetables, tomatoes, broth, and seasonings, then cook for 6–8 hours on LOW. Brown the beef first for extra flavor if desired. Use the stovetop method for quicker cooking.

🐄 Ingredients

Trimmed chuck roast with veggies and soup ingredients—labeled.
  • Beef: Chuck roast is the best choice, but sirloin tip or stew meat also works. Cut into 1-inch cubes.
  • Vegetables: Carrots, celery, green beans, and onion. Use fresh carrots and celery; green beans may be fresh or frozen.
  • Beef broth: Low-sodium preferred so you can adjust the salt near the end.
  • Tomatoes: Canned diced tomatoes, undrained.
  • Seasoning: Salt and pepper, with optional thyme, marjoram, and bay leaf.

👨‍🍳 Quick Overview: How to Make Crock Pot Vegetable Beef Soup

1. Prep the vegetables: Chop carrots, celery, green beans, and onion.

Chopped vegetables on a black board.

2. Trim and cube the beef: Cut chuck roast into 1-inch cubes (or use stew meat). For extra flavor, optionally dust with flour and brown in hot oil.

Trimming a chuck roast into cubes.

3. Add everything to the crock pot: Add the beef, vegetables, diced tomatoes, beef broth, and seasonings.

Adding browned meat to the crock pot.

4. Cook until tender: Cook for 6–8 hours on LOW, until the beef and carrots are tender.

Crock pot vegetable beef soup on a ladle 2

For more details, keep reading. See the Recipe Card below for complete instructions and to print.

⏰ How Long to Cook Crock Pot Vegetable Beef Soup

Cook for 6–8 hours on LOW or 3–4 hours on HIGH. LOW is preferred for more tender beef.

Cooking time varies with the crock pot and the size of the beef cubes. Start checking early—the soup is done when the beef and carrots are tender.

♨️ Stovetop Vegetable Beef Soup

  1. Prepare the vegetables.
  2. Cut the beef into 1-inch cubes. Optionally dust with flour, then brown in oil in a Dutch oven or large pan.
  3. Add the remaining ingredients and bring to a gentle simmer.
  4. Simmer until the beef and vegetables are tender, about 60–90 minutes.

🐄 Ingredient Options & Tips

  • Beef: Chuck roast is the best choice for tender beef. Sirloin tip or stew meat also works. Cut into about 1-inch cubes. Browning in hot oil adds flavor; a light flour dusting before browning is optional.
  • Vegetables: Carrots, celery, green beans, and onion are the standard combination. You can also add potatoes, corn, or frozen peas. Add peas near the end so they don't overcook.
  • Tomatoes: Use canned diced tomatoes with their liquid.
  • Seasoning: Salt and pepper are enough, or add thyme, marjoram, and a bay leaf for more old-fashioned flavor.

⬇️ Scaling for 2, 4, or 8 Servings

The full recipe makes 8 servings and fits a 4-quart or larger crock pot.

  • For 2 servings: Make a quarter recipe in a 2-quart mini crock pot.
  • For 4 servings: Make a half recipe in a 2-quart mini crock pot.
  • For 8 servings: Make the full recipe in a 4-quart or larger crock pot.

Scaling the ingredients: Adjust the number of servings in the recipe card. The ingredient amounts will change, but the instructions do not.


♨️ Other Crock Pot Soup Recipes

  • Crock Pot Ham and Bean Soup
  • Crock Pot Chicken Noodle Soup
  • Cheeseburger Soup
  • Crock Pot Broccoli Cheese Soup

Beef Barley Soup

An easy and delicious dump-and-go crock pot beef barley soup recipe with tender stew meat, beef broth, vegetables, and plump barley. Use any size slow cooker, from mini crock pots to full-size.

beef barley soup on a spoon-Edit

❄️ Storage of Leftovers

  • Refrigerate: Store covered for up to 4 days.
  • Freeze: Cool completely and freeze airtight for up to 4 months.
  • Reheat: Warm on the stovetop or in the microwave. Add a little broth or water if the soup has thickened.

📖The Recipe Card

Vegetable Beef Soup in a spoon.
Print Recipe Add to Collection Go to Collections

Old-Fashioned Crock Pot Vegetable Beef Soup

Easy old-fashioned vegetable beef soup with tender chuck roast, vegetables, and rich tomato-beef broth. Make it in any size crock pot or on the stovetop.
Prep Time15 minutes mins
Cook Time4 hours hrs
Total Time4 hours hrs 15 minutes mins
Course: Soup
Cuisine: American
Keyword: Betty Crocker, Crock Pot, Easy Vegetable Beef Soup, Vegetable Beef Soup
Servings: 8 servings
Calories: 184.6kcal
Author: Dan Mikesell AKA DrDan

Ingredients

  • 2 pounds chuck roast trimmed and cubed or stew meat
  • 4-6 cups beef broth low sodium preferred
  • 2 cups diced tomatoes undrained
  • 1 teaspoon salt
  • ½ teaspoon pepper
  • 1–2 carrot, peeled and sliced
  • 1–2 rib celery, sliced
  • ½ pound green beans, fresh or frozen cut into ¾ inch pieces
  • 1 medium onion chopped
  • Optional oil and flour — for browning the beef

Optional Spices

  • ¼–½ teaspoon thyme
  • ¼–½ teaspoon marjoram seen notes
  • 1–2 bay leaf
US Customary - Convert to Metric

Instructions

  • Prep the beef: Trim and cube about 2 pounds of chuck roast or use pre-cut stew meat. Cut into 1-inch cubes.
    Trimming a chuck roast into cubes.
  • Prep the vegetables: Chop 1 medium onion. Peel and slice 1–2 carrots into ¼-inch slices. Slice 1–2 ribs of celery into ½-inch pieces. Cut ½ pound of green beans (fresh or frozen) into ¾-inch pieces.
    Chopped vegetables on a black board.
  • Brown the beef: Heat 1 teaspoon of oil in a large pan over medium-high heat. Optionally, dust the beef with flour, then brown well for about 10 minutes. Transfer to the crock pot.
    Browning cubes of chuck roast in a skilletBrowning cubes of chuck roast in a skillet
  • Build the soup: Add the vegetables, beef broth, salt, pepper, optional spices, and undrained tomatoes to the crock pot.
    Adding browned meat to the crock pot.
  • 5. Cook: Cook 6–8 hours on LOW or 3–4 hours on HIGH, until the beef and carrots are tender.
    Stovetop: After browning the beef, add the remaining ingredients to the pan. Cover and simmer gently for 60–90 minutes, until the beef and vegetables are tender.
    Vegetable beef soup in a ladle.

Video

Notes

Pro Tips

Chuck roast gives the best tenderness, but sirloin tip or stew meat works well.
The full recipe makes about 12 cups (8 servings) and needs a 4-quart or larger crock pot.
For 2 or 4 servings, use the recipe-card serving adjustment; either fits a 2-quart mini crock pot.
Add frozen peas or corn near the end if desired.
Refrigerate for 4 days or freeze for 4 months.

Nutrition

Calories: 184.6kcal | Carbohydrates: 4.4g | Protein: 27.8g | Fat: 5.7g | Saturated Fat: 1.9g | Polyunsaturated Fat: 0.3g | Monounsaturated Fat: 2.4g | Cholesterol: 70.3mg | Sodium: 577.2mg | Potassium: 773.1mg | Fiber: 1.1g | Sugar: 2.3g | Vitamin A: 1363.4IU | Vitamin C: 6.7mg | Calcium: 46.9mg | Iron: 2.9mg

This recipe is highly adapted from the 1972 Betty Crocker's Cookbook, with a crock pot method added.

Editor Note: Originally published October 11, 2011. This was my favorite soup as a child, and this is a beautiful rendition. It is updated with expanded options and refreshed photos.

Lilly running in the snow.

Beef Tips and Gravy

Beef tips with gravy on mashed potatoes.

Beef tips and gravy is old-fashioned comfort food at its best. Tender beef is simmered until fork-tender in a flavorful braising liquid, then the cooking liquid is thickened with flour into a rich brown gravy. It's an easy one-pan dinner that's perfect over mashed potatoes, egg noodles, or rice.

🤔 What is the Best Meat for Beef Tips and Gravy?

  • Chuck roast is my favorite because it becomes fork tender after braising.
  • Sirloin cooks a little faster and stays leaner but isn't quite as rich.
  • Stew meat is a convenient option and usually works well, but it may be tougher if cut from round or other lean cuts.
Beef tips with gravy on mashed potatoes.
[feast_advanced_jump_to]

quote mark
Featured Comment by Keven:
⭐⭐⭐⭐⭐"Thanks, Dr. Dan, for another excellent recipe like the beef tips and gravy."

😊 TL;DR — Recipe Summary

What: Old-fashioned beef tips and gravy made with tender braised beef and rich brown gravy.

Why: A classic comfort food that's easy to make in one pan with chuck roast, sirloin, or stew meat.

How: Brown the beef, simmer until fork tender, then thicken the flavorful cooking liquid into rich brown gravy and serve over mashed potatoes, noodles, or rice.

🐄 Ingredients

Chuck roast with broth and other ingredients for gravy—labeled.
  • Beef— Chuck roast is my favorite because it becomes fork tender while braising. Sirloin is a leaner option that cooks a little faster. Prepared stew meat also works but may vary in tenderness depending on the cuts included.
  • Onion— Yellow or white onion adds flavor and sweetness to the gravy.
  • Beef broth— Forms the base of the rich brown gravy.
  • Worcestershire sauce— Adds deep savory umami flavor that makes the beef taste even beefier without standing out on its own.
  • Pantry ingredients— Garlic powder, black pepper, flour, and oil round out the gravy and thicken it to the perfect consistency.
  • Serving suggestions— Serve over egg noodles, mashed potatoes, or rice to soak up every bit of the gravy.

👨‍🍳 Quick Overview: Cooking Beef Tips and Gravy

Trim the chuck roast into bite-sized, 1-inch cubes.

Trimming a chuck roast into cubes.

Brown the beef and chopped onion over medium-high heat until the beef is well browned, about 10 minutes.

Adding meat and onion to a pan to brown

Add all the other ingredients except the flour to the pan. Bring to a boil, then decrease the heat to simmer. Cover and simmer for 1½ hours.

Adding beef broth to browned meat.

Bring back to a boil and slowly whisk in the flour slurry until the brown gravy thickens.

Adding a flour slurry to the simmering beef.

Serve over mashed potatoes, egg noodles, or rice.

Ladle of beef and gravy.

For more details, keep reading. See the Recipe Card below for complete instructions and to print.

⏲️ How Long to Cook Beef Tips and Gravy?

The beef is done when it is fork-tender. Cook longer if needed.

  • Slow cooker: Cook on Low for 6–8 hours or High for 3–4 hours.
  • Stovetop: Simmer for about 90 minutes.

💡 Tips and Variations

  • Optional: Dust the beef lightly with flour before browning for deeper browning.
  • Adjust the garlic to your taste, or substitute fresh garlic.
  • Add 1–2 teaspoons dried thyme for another flavor variation.
  • Low-sodium soy sauce may replace Worcestershire sauce if desired.
  • Gluten-free: Use tamari and thicken with cornstarch or arrowroot instead of flour.
  • Adjust the gravy thickness— Slowly stir in the flour slurry until the gravy reaches your preferred thickness. It will usually thicken in 2 to 5 minutes.

⬇️ Make It Small Batch

This recipe is easy to cut in half for about 3 servings, perfect for a household of two.

Use the recipe card to adjust the servings to half. The ingredient amounts will update automatically, but the instructions do not.

Cook for the same amount of time until the beef is fork tender.

🍽️ How to Serve Beef Tips and Gravy

Serve over mashed potatoes, egg noodles, or rice with a side of vegetables or a fresh salad.

❄️ Storage

Store leftovers in an airtight container for 4 days in the refrigerator or 4 months in the freezer.

Reheat on the stovetop over medium-low heat or in the microwave. Add a splash of beef broth if the gravy is too thick.

❓ FAQs

Can I make beef tips and gravy in a crock pot?

Yes. Brown the beef and onion first for the best flavor, then transfer everything except the thickener to a slow cooker. Cook on Low for 6–8 hours or High for 3–4 hours, until the beef is fork tender. During the last 15–30 minutes, stir in a cornstarch slurry until the gravy reaches your desired thickness.

Can I use cornstarch to thicken the gravy?

Yes, but I prefer flour for this stovetop recipe because the gravy stays smoother after refrigeration and reheating. Cornstarch-thickened gravy can become gelatinized when chilled, although the flavor is unchanged. Cornstarch works better in a crock pot because it thickens more reliably at the lower cooking temperature.

To substitute cornstarch, use 1 tablespoon of cornstarch for every 2 tablespoons of flour. Mix the cornstarch with an equal amount of cold water to make a smooth slurry before stirring it into the cooking liquid.

How can I reduce the sodium in beef tips and gravy?

This recipe has no added salt because the Worcestershire sauce and beef broth provide plenty of seasoning. To reduce the sodium, use low-sodium beef broth and low-sodium Worcestershire sauce. Taste before serving and add salt only if needed.

📖 Comfort Food Recipes

Looking for more comfort food?

  • Salisbury Steak Recipe
  • Pot Roast with Gravy
  • Chicken Fried Steak with Gravy
  • Old Fashioned Meatloaf
  • American Goulash

📖The Recipe Card

Beef tips with gravy on mashed potatoes.
Print Recipe Add to Collection Go to Collections
4.80 from 5 votes

Beef Tips and Gravy

Tender beef tips in rich brown gravy made on the stovetop with chuck roast, sirloin, or stew meat. Serve over mashed potatoes, noodles, or rice.
Prep Time15 minutes mins
Cook Time1 hour hr 35 minutes mins
Total Time1 hour hr 50 minutes mins
Course: Main Course
Cuisine: American
Keyword: Beef tips and gravy, Best beef tips and gravy, easy beef tips and gravy
Servings: 6 servings
Calories: 481.6kcal
Author: Dan Mikesell AKA DrDan

Ingredients

  • 2 tablespoons oil
  • 2 pounds beef trimmed and cubed
  • 1 onion medium - diced
  • 14-28 oz low-sodium beef broth
  • 2 tablespoons Worcestershire sauce
  • 1 teaspoon garlic powder
  • 1 teaspoon black pepper
  • ½ cup flour may take a bit more
  • noodles or mashed potatoes to serve
US Customary - Convert to Metric

Instructions

  • You will need 2 pounds of trimmed and cubed beef. A nicely marbled chuck roast or top sirloin are good choices. You can also use premade stew meat.
    Chuck roast with broth and other ingredients for gravy—labeled.
  • Trim and cut the beef into bite-size pieces of about 1 inch.
    Trimming a chuck roast into cubes.
  • Chop one medium onion.
    Chopping onion on a white board.
  • Add 2 tablespoons of vegetable oil to a large skillet or Dutch oven over medium-high heat. When the oil shimmers, add the onion and beef.
    Adding meat and onion to a pan to brown
  • Brown the beef and onion for about 10 minutes. Then add 2 tablespoons of Worcestershire sauce, 1 teaspoon of garlic powder, and 1 teaspoon of black pepper. Add a 14-oz can of low-sodium beef broth.
    Adding beef broth to browned meat.
  • Bring to a boil, then decrease the heat to simmer and cover. After about 90 minutes, the meat should be fork-tender. Whisk together ½ cup flour and enough beef broth or water to make about 2 cups of slurry.
    Covering simmering meat.
  • Uncover and turn the heat back to medium-high. When the mixture is boiling well, slowly add part of the flour slurry. Mix continuously and slowly add more every few minutes until the gravy reaches your desired thickness.
    Adding a flour slurry to the simmering beef.
  • Cook a few more minutes. Serve over mashed potatoes or noodles.
    Ladle of beef and gravy.

Video

Notes

Pro Tips:

  1. The recipe is easy to cut in half, but the leftovers freeze well, so I usually cook the full batch.
  2. You can use "stew meat" from your local store. I prefer a nicely marbled chuck roast or top sirloin.
  3. Dusting the meat with flour before browning will add some flavor.
  4. Cover and simmer for about 90 minutes. The meat needs to be "fork tender" before proceeding to the gravy stage.
  5. Make up a little extra of the flour slurry. Add most of it and add more later if you need thicker.
  6. Gravy made with cornstarch will not store well for leftovers.
  7. Good in the refrigerator for 4 days. It will freeze well for 4 months.

Nutrition

Calories: 481.6kcal | Carbohydrates: 11.3g | Protein: 28.5g | Fat: 35g | Saturated Fat: 12g | Trans Fat: 1.9g | Cholesterol: 107.4mg | Sodium: 279.4mg | Potassium: 634.2mg | Fiber: 0.7g | Sugar: 1.4g | Vitamin A: 6.7IU | Vitamin C: 2.1mg | Calcium: 40.9mg | Iron: 3.8mg

Editor's Note: Originally Published October 15, 2017. Updated with expanded options, refreshed photos, and a table of contents to help navigation.

Molly and Lilly dogs running in the snow.

Chocolate Chip Cheesecake or Cheesecake Bars

Chocolate chip cheesecake bars on a platter square view.

This easy Chocolate Chip Cheesecake recipe can be made as a whole cheesecake or, as we prefer, impressive Chocolate Chip Cheesecake Bars or Bites. It is simple and almost foolproof, using cream cheese, sweetened condensed milk, chocolate chips, and an Oreo crust. Please try our go-to recipe for parties or take-a-dish occasions.

🥣Ingredients

Cream Cheese
Eggs
Mini-chocolate chips
Sweetened condensed milk
Oreo Crust—Oreo cookies, butter

Chocolate chip cheesecake bars on a platter square view.
Chocolate Chip Cheesecake Bars or Bites
[feast_advanced_jump_to]
Blue ribbon divider used for visual effect

quote mark
Featured Comment by LisaA:
"Delicious!!!! Thank you!"
⭐⭐⭐⭐⭐

This recipe has made the rounds among staff and parents at my wife's grade school for years. We have often made it as a full-size cheesecake and, more recently, as cheesecake bites for parties.

With six common ingredients, you will be amazed at how easy it is to make a real Philidelphia cheesecake with the same amount of work as the no-bake variety. It will leave them asking for the recipe—it has happened to me many times.

👨‍🍳How to Make Chocolate Chip Cheesecake—Step-by-Step Photo Instructions

chocolate chip cheesecake ingredients.

1. Allow the cream cheese and eggs to rest for about 60 minutes at room temperature.

coating springform pan with butter
For a full-size cheesecake
line pan with parchment paper.
For cheesecake bars.

2. Butter a 9-inch springform pan for a full-size cheesecake. For cheesecake bars, line a 9 by 9 pan with crossed pieces of parchment paper.

pouring melted butter into chopped Oreos

3. Crush Oreo cookies and mix them with melted butter.

making oreo crust
Pressing to Oreo crust into the 9X9 pan.

4. Crush the crust mixture into the prepared pan—no need to bake.

cream cheese in the stand mixer

5. Using a hand or stand mixer, beat cream cheese until creamy—2 to 3 minutes. DO NOT over-mix.

pouring sweetened condensed milk into stand mixer

6. Mix in the sweetened condensed milk and then the eggs, one at a time. Fold in half of the mini chocolate chips at the end of mixing.

sprinkling the top of the batter with mini chocolate chips
Sprinkle the top of the cheesecake with mini chocolate chips.

7. Pour cheesecake batter into the prepared pan and sprinkle the top with the remaining chocolate chips.

cooked cheesecake out of the oven

8. Bake for 1 hour in a 300° oven until the edges are browning some, but the center may not look set. Turn off the oven and crack open the door for one hour.

Slice of chocolate chip cheesecake on a spatula over the cheesecake.
Philadelphia Chocolate Chip Cheesecake
Chocolate chip cheesecake bars on platter.
Philadelphia Chocolate Chip Cheesecake Bars/Bites

9. Transfer to the refrigerator for cooling for at least six hours before cutting.

For more details, keep reading. See the Recipe Card below for complete instructions and to print.

🌡️When is a cheesecake done?

The edges will be slightly puffed and brown. There will still be a 2-inch to 3-inch wobbly spot in the center.

If you don’t mind a hole in the surface, the internal temperature should be 150° when done. Never over 160°, or it will crack.

Slice of chocolate chip cheesecake on a spatula over the cheesecake.
Chocolate Chip Cheesecake

✔️Make it right every time

The cream cheese and the eggs must be at room temperature before starting, or they will not combine easily. Remove the cardboard box from the cream cheese. I recommend 60 to 90 minutes, but approaching 2 hours makes the doctor in my worry. If you use cold ingredients, you will see more cracks and are more likely to have the center fall.

Sweetened condensed milk adds more creaminess and sweetness and helps the cream cheese set, making this recipe even more foolproof.

Cheesecake is not low-fat. Use full-fat cream cheese.

DO NOT over-mix. It will add tiny air bubbles, which will expand and cause cracks.

Quality matters—use good quality materials.

✔️Special tips for cheesecake bars

A few dots of butter will help hold the parchment in place. Keep the sheets long to pick up the cheesecake and remove it from the pan after cooling.

If the cheesecake sticks in the pan, put an inch of hot water in the kitchen sink and set the pan in it for a few minutes. It will come right out.

Cut just before taking to the party with a long sharp knife. Warm the knife with hot running water and rinse off every few cuts.

The bars, sometimes called squares or fingers, can be any size you want, but they are very rich, so smaller is a good idea.

For finger food at parties, I suggest cutting it into 64 one-inch square cheesecake bites.

👨‍🍳Options and variations

To make vanilla cheesecake

To make a vanilla Philadelphia cheesecake, add 2 teaspoons of vanilla extract to replace the chocolate chips and use the Graham crackers crust.

Graham cracker crust option

For Graham cracker crust: Crush about 12 whole sheets of Graham crackers to make about 1 ½ cups of graham cracker crumbs, and add 4 tablespoons of sugar and 5 tablespoons of melted butter.

Spread into the prepared baking pan. Bake for 10 minutes in a 350° oven until browning some. Remove to cool. Turn the oven down to 300° for the cheesecake.

📋Other Cream Cheese Recipes

Check out these other cheesecake recipes, like Easy Cheesecake Bars, Cream Cheese Cupcakes, Blueberry Cream Cheese Coffee Cake, and Blueberry Cream Cheese Bars.

🍴How to serve and store cheesecake

Allow the slices to rest at room temperature for 10 minutes before serving. Top the vanilla cheesecake with fresh fruit like strawberries or blueberries.

You can store it refrigerated and covered with plastic wrap for 4 days or in the freezer, sealed airtight, for 3 months. I suggest cutting it into individual slices, freezing them solid, and then wrapping them tightly.

❓FAQs

The crust appears a bit sparse; can I increase it?

The crust will seem like it is not enough, but it is. If you want it to go up the side more, increase the amount by about 25%.

What is the difference between Philadelphia and New York Cheesecake?

This is a Philadelphia-style cheesecake, which is mainly cream cheese with additives. New York-style cheesecake usually has sour cream or heavy cream mixed in the batter.

Why does the center sink on my cheesecake?

There are several reasons.

1) Having the ingredients too cold at the start. This will prevent the ingredients from coming together smoothly, leading to over-mixing.
2) Just over mixing.
3) Undercooking.

These are some of the same issues that cause cracks. A water bath will help, but it will not totally prevent sinking. For instructions on using a water bath, see the section on crack prevention.

👨‍🍳How to Prevent Cracks in Cheesecake

First, cracks in the cheesecake happen. I have rarely had many issues; it is not the end of the world if it does happen. In addition to cooling carefully, here are some more tips.

  1. Air bubbles in the batter can cause cracks, so don’t overmix. Please make sure the cream cheese is warm to mix it easier and has no lumps. Add the eggs carefully, and don’t overmix since the eggs trap air easily.
  2. When it cools, the cheesecake will shrink slightly. If it sticks to the side while that happens, it will crack. So, be sure to grease the pan well and run a knife around the edge of the cake about 15 minutes after turning off the heat.
  3. Using a water bath is optional for me. Humidity can help avoid cracks and stabilize the temperature. I don’t usually do this. It is not complicated but can be a bit messy if you are not careful; just set the springform pan in a large pan of water during baking with the water coming up to ⅔ of the height of the cake pan.
  4. Avoid opening the oven door to keep checking the cake. Drafts and temperature changes can cause cracking.
  5. In general, an oven temperature for cheesecake should never be over 325°. This recipe uses 300°; if you are unsure of your oven's accuracy, check it with an oven thermometer.
  6. Overcooking is probably the most common cause of cracking.
Blue ribbon divider used for visual effect

📖The Recipe Card

Chocolate chip cheesecake bars on a platter square view.
Print Recipe Add to Collection Go to Collections
5 from 3 votes

Chocolate Chip Cheesecake or Cheesecake Bars

This easy Chocolate Chip Cheesecake recipe can be made as a whole cheesecake or, as we prefer, impressive Chocolate Chip Cheesecake Bars. It is simple and almost foolproof, using cream cheese, sweetened condensed milk, chocolate chips, and an Oreo crust. Please try our go-to recipe for parties or take-a-dish occasions.
Prep Time20 minutes mins
Cook Time1 hour hr
Total Time1 hour hr 20 minutes mins
Course: Dessert
Cuisine: American
Keyword: Chocolate chip cheesecake bars, chocolate chip cheesecake with sweetened condensed milk, Easy chocolate chip cheesecake
Servings: 12 servings
Calories: 666kcal
Author: Dan Mikesell AKA DrDan

Ingredients

  • 24 oz cream cheese room temperature
  • 3 eggs room temperature
  • 14 oz sweetened condensed milk
  • 12 oz mini-chocolate chips

Oreo Crust

  • 18 Oreo cookies crushed for about 1 ½ cups of crumbs
  • 4 tablespoons butter
US Customary - Convert to Metric

Instructions

  • Remove the boxes from the cream cheese. Allow the cream cheese and eggs to rest at room temperature for 60 to 90 minutes. Then, preheat the oven to 300°.
    Chocolate chip cheesecake ingredients-labeled.
  • Butter a 9-inch springform pan for a full-size cheesecake. For cheesecake bars, line a 9 by 9 pan with crossed pieces of parchment paper. Dots of butter in the corners will help hold the parchment in place.
    Preparing a springform pan and square pan for baking.
  • Crush 18 standard Oreo cookies (about 1 ½ cups).
    Crushing Oreo cookies in a plastic bag.
  • Melt 4 tablespoons of butter.
    melting butter in a small bowl in a microwave
  • In a medium bowl, mix the melted butter into crushed Oreos.
    pouring melted butter into chopped Oreos
  • Crush the crust mixture into the bottom of the prepared pan using a fork. Break up any remaining larger pieces, and be sure to get complete coverage. It will not look like enough, but it is. Do not bake the Oreo crust.
    Smashing Oreo crust into the bottom of the prepared pans.
  • Start the filling with 24 ounces of cream cheese. Beat at a medium speed with a stand or hand mixer for 2-3 minutes to make it a little fluffy and creamy texture. DO NOT over-mix.
    cream cheese in a stand mixer
  • Add one 14-oz can of sweetened condensed milk. Mix at a slower speed until combined. Now, add 3 eggs one at a time until smooth, but do not overbeat. At the end of mixing, fold in half the 12-oz pack of mini chocolate chips.
    adding sweetened condenced milk to the cream cheese in a stand mixer
  • Pour cheesecake filling into the prepared pan and top with remaining chocolate chips.
    Topping the raw cheesecake with more mini chocolate chips.
  • Bake for 1 hour until edges begin to brown, but the center may not look set. Do not go poking it with toothpicks or anything else to check for done. 
    The cheesecake with browned edges.
  • Turn off the oven and crack open the door to cool. About 15 minutes into cooling, run a knife around the edge of a full cheesecake to help release it from the pan. Cool in the oven for 1 hour before transferring to the refrigerator for 6 hours more. After refrigerating, you may remove the cheesecake from the pan and cut.
    A slice of chocolate chip cheesecake and a plate full of chocolate chip cheesecake bars.

Video

Notes

Pro Tips

Instru
  1. This is not a "for two" recipe and will not scale down well.
  2. Allow the eggs and cream cheese to rest at room temperature for at least 60 minutes before starting.
  3. The crust will seem like it is not enough, but it is. If you want it to go up the side more, increase the amount by about 25%.
  4. Watch the edge to tell if this is done. The edge will be browning some, but the center may not look set. Do not go poking it with toothpicks or anything else to check for done. 
  5. If you don’t mind a hole in the surface, the internal temperature should be 150° when done. Never over 160°, or it will crack.
  6. Be sure to run a knife around the pan to release the cake from the pan about 15 minutes into cooling.
  7. Cool it in the oven with the door partly open.
  8. Cool for at least 6 hours in the refrigerator. DO NOT cut this before properly cooling.
  9. Store refrigerated for 4 days. Also, it will freeze very well for about 3 months.

Nutrition

Calories: 666kcal | Carbohydrates: 61g | Protein: 11g | Fat: 48g | Saturated Fat: 24g | Polyunsaturated Fat: 1g | Monounsaturated Fat: 4g | Cholesterol: 97mg | Sodium: 381mg | Potassium: 66mg | Fiber: 3g | Sugar: 48g | Vitamin A: 850IU | Calcium: 180mg | Iron: 3.2mg

Editor's Note: Originally Published December 20, 2013. Updated with expanded options, refreshed photos, and a table of contents to help navigation.

dogs running slowly in the yard

Cinnamon Candied Almonds Recipe

Roasted candied almonds fresh out of the oven.

Bring the carnival aroma home with these mouth-watering good cinnamon-sugar candied almonds. This simple recipe roasts them in the oven until sweet, crisp, and golden—just like the paper cones from the fair.

Great for economical Christmas gifting and flexible enough for any nut mix.

⏰ Quick Answer: How Long to Roast Candied Almonds

  • Roast at 250°F
  • Time: About 1 hour, stirring every 15 minutes
  • Done: When the coating looks dry and crisp
Cinnamon candied almonds on a parchment-lined baking sheet.
[feast_advanced_jump_to]

quote mark
Featured Comment by Michelle:
⭐⭐⭐⭐⭐"My first try. Turned out perfect. I used 3 diff nuts combined. Nice light taste."

📝 TL;DR — Recipe Summary

What: Cinnamon-sugar candied almonds with the mouth-watering aroma and taste of fair and carnival nuts.
Why: A simple, economical recipe for Christmas gifts, parties, or snacking—and it works with almost any nut.
How: Coat almonds with egg white, cinnamon, and sugar, then roast at 250°F for about 1 hour, stirring every 15 minutes.

🥣 Ingredients

Almonds with sugar and coating ingredients—labeled.
  • Almonds (or other nuts) – Raw almonds are classic, but this works with pecans, walnuts, hazelnuts, cashews, peanuts, or mixed nuts. Almost any nut you like will do.
  • Egg white – Creates the sticky base so the coating clings.
  • Sugar + cinnamon + vanilla – The signature carnival flavor—sweet with warm cinnamon spice.
  • Salt – Just enough to balance the sweetness.

💡 Tip: Use unsalted or lightly salted nuts. Red-skinned peanuts and heavily roasted nuts can affect texture and coating.

👨‍🍳 Quick Overview: Making Cinnamon Candied Almonds

Prep the coating: Whisk egg white, water, and vanilla until foamy. In a separate bowl, mix sugar, cinnamon, and salt.

Whisking coating in a large bowl.

Coat the nuts: Toss almonds in the egg wash, then add the cinnamon-sugar mixture and stir until evenly coated.

pouring cinnamon sugar over nuts.

Roast: Spread in a single layer on a parchment-lined pan and roast at 250°F for about 1 hour, stirring every 15 minutes.

spread the almonds over a parchment cover baking tray.

Cool: Let them cool on the pan so the coating hardens and turns crisp.

stirring nuts on tray with a spatula.

✅ Pro Tip: Don’t skip the stirring—keep the nuts in a single flat layer after each stir for the crunchiest results.

💡 Quick overview only—see the recipe card below for complete instructions and ingredient amounts.

🥜 What Nuts to Use

  • Almost any nut works; I prefer almonds, but pecans, walnuts, cashews, hazelnuts, or mixed nuts.
  • Use unsalted or lightly salted nuts.
  • Raw gives the crispiest coating, but pre-roasted works fine too.
  • If using roasted nuts: use only dry-roasted, don’t overcook, and expect them to be a little softer depending on the brand.
  • Keep the same roasting time—about 1 hour at 250°F—no matter which nut you choose.

👨‍🍳 Options & Variations

  • Spiced: Add pumpkin pie spice or a pinch of cayenne for a different flavor.
  • Brown sugar: Replace half the white sugar with brown sugar for a deeper caramel flavor.

🧊 Moisture & Storage Tips

  • Moisture softens the coating, so cool the nuts completely before sealing.
  • Store in an airtight container at room temperature for up to 1 week, in the fridge for 2 weeks, or freeze for 2 months.

✅ Pro Tip: If the candied nuts lose their crunch, spread them on a baking sheet and reheat at 200°F for 5–10 minutes to crisp them again.

🍬 Easy Homemade Candy Recipes

Try a few more reader favorites from the Christmas Candy Roundup:

  • 5-Minute Fudge
  • Crock Pot Chocolate Peanut Clusters
  • Crock Pot Fudge
  • White Oreo Fudge
  • Pretzel Candies

🥨 Ways to Use Candied Almonds

  • Sprinkle over ice cream or yogurt.
  • Add to salads for crunch.
  • Mix into granola or snack bars.

❓ FAQs

What size pan should I use?

Use an 18×13-inch rimmed baking sheet lined with parchment or a silicone mat. Flat cookie sheets don’t work well—the sugar can slide off.

Can I make my candied almonds crunchy again?

Yes. Spread them on a baking sheet and reheat at 200°F for 5–10 minutes, then let them cool completely. The coating will crisp as it cools.

Are these the same as carnival, fair, and German nuts?

Yes. Fair and carnival nuts are the same. They are a version of German candied nuts from Christmas markets—just made easier with simple oven roasting at home.

📖The Recipe Card

Roasted candied almonds fresh out of the oven.
Print Recipe Add to Collection Go to Collections
5 from 1 vote

Cinnamon Candied Almonds (Easy Oven-Roasted Nuts)

Delicious cinnamon-sugar candied almonds roasted in the oven until crisp and golden. Easy to make and perfect for snacks, parties, or holiday gifts.
Prep Time10 minutes mins
Cook Time1 hour hr
Total Time1 hour hr 10 minutes mins
Course: Snacks
Cuisine: American
Keyword: candied almonds recipe, homemade candied nuts, how to make candied almonds
Servings: 24 2 tablespoon servings
Calories: 134.2kcal
Author: Dan Mikesell AKA DrDan

Ingredients

  • 1 pound Almonds raw preferred; mixed or other nuts may be used
  • 1 egg white
  • 1 teaspoon vanilla
  • 1 tablespoon water
  • ¾ cup white sugar half can be brown sugar
  • 1 teaspoon cinnamon
  • ½ teaspoon coarse salt
US Customary - Convert to Metric

Instructions

  • Preheat oven to 250°F. Line a half-size sheet pan (18 × 13) with parchment paper or a silicone baking mat. Spray lightly with cooking spray.
    Almonds with sugar and coating ingredients—labeled.
  • In a small bowl, mix ¾ cup white granular sugar or a combination of white and brown, 1 teaspoon of cinnamon, and ½ teaspoon of coarse salt.
    Mixing cinnamon sugar coating.
  • In a large bowl, whisk together 1 egg white, 1 teaspoon of vanilla, and 1 tablespoon of water. Whisk until foamy, about 1 minute.
    Whisking coating in a large bowl.
  • Add the nuts and stir until well coated.
    Coating the nuts with the egg mixture.
  • Add the sugar mixture to the nuts and mix to coat.
    Adding the cinnamon sugar to the coated nuts.
  • Spread the nuts in a single layer on the prepared pan.
    Raw candied almonds on a tray with parchment paper.
  • Roast at 250°F for 1 hour, stirring and flattening into a single layer every 15 minutes.
    Mixing the nuts on the tray during cooking.
  • Cool completely on the pan before serving or storing
    Cooked candied nuts on the tray.

Video

Notes

Pro Tips

Use raw unsalted nuts if possible. Dry-roasted unsalted or lightly salted nuts will also work.
Always use parchment or a silicone mat, sprayed lightly with cooking spray. Without it, the nuts will stick.
Double the cinnamon and vanilla if you like. Other seasoning options are in the recipe post.
Roast for the full hour—the coating may stay soft if you stop early.
Storage: Store airtight. 1 week at room temperature, 2 weeks refrigerated, or 2 months frozen.
One pound of nuts will be about 3 cups. I set the serving size to 2 tablespoons, making about 24 servings in this recipe.

Nutrition

Calories: 134.2kcal | Carbohydrates: 10.4g | Protein: 4.1g | Fat: 9.3g | Saturated Fat: 0.7g | Polyunsaturated Fat: 2.3g | Monounsaturated Fat: 5.8g | Trans Fat: 0.1g | Sodium: 50.8mg | Potassium: 136mg | Fiber: 2.4g | Sugar: 7g | Vitamin A: 0.4IU | Vitamin C: 0.1mg | Calcium: 50.9mg | Iron: 0.7mg

Originally Published December 1, 2012. Updated with expanded options and refreshed photos.

Molly with toy Santa and a rawhide.

Easy Crock Pot Chicken Stew Recipe

Chicken stew in a ladle.

This crock pot chicken stew is an easy, old-fashioned-style recipe with tender chicken, potatoes, and vegetables in a hearty broth. It’s a small-batch recipe for 4 that scales easily—from 2 servings in a 2-quart mini crock pot to a double recipe in a full-size cooker.

With about 10 minutes of prep, this is a true dump-and-go slow cooker recipe—add everything and let the crock pot do the work while you get on with your day (and take all the credit later).

Quick Answer: How Long to Cook Chicken Stew in a Crock Pot

  • On LOW: 6–8 hours
  • On HIGH: 3–4 hours
  • Done when: chicken is 165°F and potatoes are tender
Slow cooker chicken stew with potatoes and carrots in a crock pot.
[feast_advanced_jump_to]

quote mark
Featured Comment by Kristen:
"I always feel guilty when something so easy to cook tastes good. You feel like you should have worked much harder for such a great result."

📋 TL;DR — Recipe Summary

What: Easy, old-fashioned-style crock pot chicken stew with chicken, potatoes, and vegetables in a hearty broth.
Why: A simple dump-and-go recipe with about 10 minutes of prep that scales easily for small or larger crock pots.
How: Add everything to the crock pot and cook 6–8 hours on LOW or 3–4 hours on HIGH until the chicken and potatoes are tender.

What to make next: Try my Best Crock Pot Beef Stew – Easy Any Size Recipe for another hearty slow-cooked classic.

🐓 Ingredients for Crock Pot Chicken Stew

  • Chicken – boneless, skinless breasts or thighs
  • Potatoes – red or Yukon gold; russets also work if peeled
  • Vegetables – carrots, celery, optional mushrooms, green beans, corn, and peas
  • Aromatics – garlic and onion
  • Chicken broth – low-sodium
  • Seasonings – salt and pepper, with optional poultry seasoning, celery seed, thyme, or rosemary
  • Optional additions – diced tomatoes, Worcestershire sauce, or cream
  • Cornstarch – optional, for thickening

👨‍🍳 Quick Overview: How to Make Crock Pot Chicken Stew

1. Prep potatoes, carrots, celery, and optional mushrooms.

trimmed carrots and potatoes on a board.

2. Trim and cube the chicken breasts or thighs.

two chicken breasts trimmed into chunks

3. Add chicken, potatoes, vegetables, broth, garlic, seasonings, and optional additions to the crock pot.

adding trimmed chicken to the crock pot.

4. Cook on LOW 6–8 hours or HIGH 3–4 hours. Add peas in the last 30 minutes. Cook until the chicken reaches 165°F and the potatoes are tender.

Optional finish: stir in cream at the end for a creamy chicken stew.

Chicken stew in a ladle over the crock pot.

👇 Scroll down for the printable recipe card and complete step-by-step photo instructions—or keep reading for tips, veggie options, and serving ideas.

✅ Pro Tips for the Best Stew

  • Add peas in the last 30 minutes so they stay bright and firm.
  • Use chicken thighs if you want meat that stays juicy, even with longer cooking.
  • Stir in cream at the end – never early – or it may curdle during cooking.
  • For thicker stew, use a cornstarch slurry (1 Tbsp per 2–4 cups stew) during the last 30 minutes.
  • Chicken stew is mild by design, so don’t hesitate to make it your own. Check out the tomato and Worcestershire sauce options.

🥣 Chicken, Potatoes, Vegetables & Thickening

  • Chicken – Breasts are lean and done at 165°F. Thighs are juicier and more forgiving, cooking nicely up to 180°F. Or use rotisserie chicken—just stir it in near the end so it doesn’t dry out.
  • Potatoes & Veggies – Red or Yukon gold hold their shape without peeling. Russets work fine if peeled. Frozen peas go in at the end to stay bright. Add mushrooms, green beans, or bell peppers if you like.
  • Thickening – Keep it brothy, or use a cornstarch slurry: 1 tablespoon cornstarch per 2–4 cups of stew (mix with cold water first). Add during the last 30 minutes. Potato flakes also work for a quick fix.

🌿 Flavor & Finish Options for Chicken Stew

Chicken stew is mild by design, so don’t hesitate to make it your own. Try layering in herbs, tomatoes, or Worcestershire sauce to boost flavor and make it uniquely yours.

  • Herbs & spices – Add rosemary, thyme, a bay leaf, or poultry seasoning for depth.
  • Flavor boosters – A splash of Worcestershire sauce or white wine gives the broth more punch.
  • Tomatoes – Diced tomatoes brighten the stew with a tangy edge.
  • Creamy vs brothy – For a creamy slow cooker chicken stew, stir in milk or cream at the end. Keep it broth-based for a lighter, classic version.

♨️ How to Cook Chicken Stew on the Stovetop

  1. Heat a Dutch oven or heavy pan with a little oil over medium-high heat.
  2. Add the chicken and cook until it just starts to brown, about 4–5 minutes.
  3. Stir in the carrots, potatoes, celery, onion, and (optional) corn or green beans. Cook another 4–5 minutes.
  4. Add broth, garlic, seasonings, and any extras (except peas). Bring to a simmer, cover, and cook 45–60 minutes until the chicken reaches 165°F and the vegetables are tender.
  5. Stir in peas during the last 10–15 minutes so they stay bright and firm.

↕️ Scaling the Recipe and Crock Pot Size

This recipe makes about 4 servings (roughly 2 cups each) in a 3–4 quart crock pot. It’s easy to scale down or up:

  • Half batch – Fits in a 2-quart mini crock pot. Perfect for cooking for two with minimal leftovers.
  • Full batch – Works in a 3–4 quart crock pot. About 4 servings.
  • Double batch – Needs a 6-quart or larger crock pot. Great for families or freezing extras.

👉 Thickening tip: Use 1 tablespoon of cornstarch per 2–4 cups of stew (mixed with cold water first). Scale the slurry up or down to match your batch size and thickening needs.

🍽️ Serving Suggestions

Serve this stew with bread or biscuits for dipping. Try:

  • Cornmeal Drop Biscuits
  • Old Fashioned Cornbread
  • Low Fat Biscuits

🐔 More Crock Pot Chicken Recipes

For more easy crock pot chicken dinners, try:

  • Crock Pot White Chicken Chili
  • Crock Pot Italian Chicken Pasta
  • Crock Pot Chicken Fajitas

❄️ Leftovers—Storage & Reheating

  • Refrigerator: Store in an airtight container up to 4 days.
  • Freezer: Up to 3 months.
  • Reheat: Thaw overnight if frozen. Warm on the stovetop over medium heat for the best texture. The microwave works, but it may toughen the chicken.

❓FAQs

What makes stew different from soup?

Stew is thicker, with potatoes or other starches, while soup is usually brothier.

Can you freeze chicken stew?

Yes. Cool completely before freezing in airtight containers for up to 3 months. Thaw overnight in the refrigerator before reheating on the stovetop or in the microwave.

How do I thicken stew in a crock pot?

The easiest way is with a cornstarch slurry—mix 1 tablespoon cornstarch with 1 tablespoon cold water for every 2–4 cups of stew. Stir it in during the last 30 minutes of cooking. Potato flakes also work for a quick fix.

Is stew gluten-free?

Most stews, including this one, are naturally gluten free if you thicken them without flour. Use cornstarch or potato flakes instead of a flour roux, and check your broth label to be sure it’s marked gluten free.

Can I make it creamy?

Yes. Stir in milk or cream at the end for a creamy slow cooker chicken stew.

📖The Recipe Card

Chicken stew in a ladle.
Print Recipe Add to Collection Go to Collections
4.88 from 8 votes

Crock Pot Chicken Stew (Old-Fashioned Style)

Easy crock pot chicken stew with tender chicken, potatoes, and vegetables in a hearty broth. An old-fashioned style recipe that scales from a 2-qt mini to full size.
Prep Time10 minutes mins
Cook Time8 hours hrs
Total Time8 hours hrs 10 minutes mins
Course: Main Course
Cuisine: American
Keyword: Crock Pot Chicken Stew, Easy chicken stew recipe, slow cooker chicken stew
Servings: 4 serving
Calories: 345.9kcal
Author: Dan Mikesell AKA DrDan

Ingredients

  • 1–1½ pounds boneless skinless chicken breast trimmed and cut into 1-inch cubes
  • 1 medium onion diced
  • 1–2 cloves garlic crushed or minced
  • 2–3 carrots peeled and cut into 1 inch slices
  • 1–2 stalks celery diced
  • 2 cups potatoes peeled and cut into ¾–1-inch cubes (about 2 medium)
  • ½ cup frozen corn
  • ½ cup frozen green beans
  • ½ cup frozen peas add near the end
  • 14 oz low-sodium chicken broth
  • ½ teaspoon poultry seasoning skip if you don't have
  • ½ teaspoon salt
  • ¼ teaspoon black pepper
  • ½ teaspoon celery seed skip if you don't have
  • ¼–½ teaspoon dry thyme to taste. Optional
  • cornstarch optional for thickening-in cold water
  • 1 cup diced tomatoes Optional, add if you want a tomato-based stew
  • 4 oz mushrooms cleaned and halved (optional)
  • 1-2 tablespoons cornstarch optional for thickening
US Customary - Convert to Metric

Instructions

Prepare vegetables

  • Prepare vegetables—chop 1 medium onion, 2–3 peeled carrots, and 1–2 ribs of celery. Next, prep the potatoes by peeling and cutting into ¾-1-inch cubes – about 2 medium potatoes for about 2 cups. Optional – 4 oz. of cleaned and halved mushrooms.
    trimmed carrots and potatoes on a board.

Prepare chicken

  • Clean, trim, and cube 2 skinless boneless chicken breasts—about 1–1½ pounds.
    trimmed and chopped chicken on red board

Load the crock pot

  • Add the chicken, prepared veggies, ½ cup each frozen corn and beans, 14 oz of chicken broth, 1–2 crushed or minced cloves of garlic, ½ teaspoon celery seed, ¼ to ½ teaspoon thyme (optional), ½ teaspoon poultry seasoning, ½ teaspoon salt, ¼ teaspoon pepper, and optionally 1 cup of diced tomatoes.
    adding trimmed chicken to the crock pot.

Cook

  • On LOW 6–8 hours or HIGH 3–4 hours. Add peas during the last 30 minutes. The stew is done when the chicken reaches 165°F and the potatoes are tender. For a thicker stew, stir in a cornstarch slurry (1–2 tablespoons of cornstarch mixed with an equal amount of cold water) during the last 30 minutes. If vegetables aren’t fully tender, cook a bit longer.
    Chicken stew in a ladle over the crock pot.

Notes

Pro Tips:

  1. Set for a 3–4 quart crock pot and about 4 servings of about 2 cups each. Double for a 6-quart (about 8 servings) or make a half batch in a 2-quart mini crock pot.
  2. Like most ingredients in soups and stews, the amount of chicken can vary. A range of 1–1½ pounds is fine. Use either breasts or thighs.
  3. Other ingredients like celery, carrots, and potatoes can also vary by the amount you have.
  4. Chicken stew is mild by design; season to taste. Thyme is optional. Tomatoes add a nice tang but may need a pinch more salt/pepper.
  5. This is a thinner stew by default. To thicken, use a cornstarch slurry. A good guide is 1 tablespoon of cornstarch per 2–4 cups of stew, added in the last 30 minutes.
  6. If the vegetables are not tender at the end of cooking, go a bit longer.
  7. Good refrigerated for 4 days and frozen for 3 months.

Nutrition

Calories: 345.9kcal | Carbohydrates: 31.3g | Protein: 43g | Fat: 5.6g | Saturated Fat: 1.3g | Polyunsaturated Fat: 1g | Monounsaturated Fat: 1.7g | Trans Fat: 0.02g | Cholesterol: 108.9mg | Sodium: 555.8mg | Potassium: 1396.2mg | Fiber: 4.5g | Sugar: 4.9g | Vitamin A: 5339.5IU | Vitamin C: 20.1mg | Calcium: 57.9mg | Iron: 2.4mg

Originally published January 12, 2011. Updated with new photos, improved structure, and clearer instructions for any slow cooker size.

Lilly is running hard in the snow.

Turkey Tetrazzini Recipe

large serving of turkey tetrazzini on a blue plate

This turkey tetrazzini recipe is a creamy baked pasta casserole with tender turkey, pasta, peas, and a homemade Parmesan sauce. It’s made from scratch with simple ingredients and no canned soup, then finished with a crispy Parmesan breadcrumb topping.

Use leftover turkey or freshly cooked turkey, and easily scale the full-size recipe to half or quarter size (for two). It’s an easy, delicious way to turn leftover turkey into a comforting family dinner.

A large serving of turkey tetrazzini on a blue plate.
[feast_advanced_jump_to]

quote mark
Featured Comment by CG:
⭐⭐⭐⭐⭐
" I really enjoyed this easy recipe. It is a great way to use up leftover items and very family friendly."

📌 TL;DR — Recipe Summary

What: Turkey tetrazzini is a creamy baked pasta casserole with turkey, peas, homemade sauce, and a breadcrumb topping.

Why: Made from scratch, perfect for leftover turkey, and easily scaled down for two.

How: Cook the pasta, make a roux-based sauce, combine with turkey and peas, top with Parmesan breadcrumbs, and bake until golden.

🦃 Turkey Tetrazzini Ingredients

Cubed turkey with pasta and casserole ingredients—labeled.
  • Turkey: Cooked turkey—breast or dark meat, cubed or shredded. Perfect for holiday leftovers. Other meats are discussed in the “Meat Options” section below.
  • Pasta: Linguine is classic for tetrazzini, but spaghetti, egg noodles, or bow-ties all work. Cook al dente since the casserole bakes further.
  • Vegetables: Onion, celery, garlic, and peas are the base. Mushrooms are optional but add flavor and texture.
  • Sauce: Butter, flour, milk, broth, and Parmesan cheese for the roux-based sauce. Season with salt and black pepper.
  • Topping: A mix of Italian Panko breadcrumbs and Parmesan cheese gives the golden, crispy finish. Mozzarella is a common variation.

👨‍🍳 Quick Overview: Making Turkey Tetrazzini

1. Prepare: Cook pasta al dente. Cube or shred the turkey and prep the vegetables.

Chopped onion and celery on black board with a knife.

2. Cook: Cook onion, celery, and optional mushrooms in butter. Add garlic and seasonings.

Adding chopped celery to the roux.

3. Make the sauce: Add flour, then whisk in broth, milk, and Parmesan until thickened.

Adding broth to the sauce.

4. Combine: Stir in pasta, turkey, and peas. Transfer to a prepared baking dish.

Adding frozen peas and turkey to the sauce.

5. Top: Add Parmesan and Panko breadcrumbs.

sprinkling cheese and bread crumbs over the casserole.

6. Bake: Bake until bubbling and golden.

turkey tetrazzini casserole with a brown top.

👇 Scroll down for the printable recipe card and complete step-by-step photo instructions—or keep reading for tips and options.

🦃 Meat Options

  • Chicken: Substitute cooked chicken, including rotisserie or baked chicken. No other recipe changes are needed.
  • Ham: Cooked ham is an easy substitute for turkey.

🍝 Pasta, Vegetable, and Topping Options

  • Pasta: Linguine is classic, but spaghetti, egg noodles, or bow-ties work well. Cook al dente since the pasta cooks more while baking.
  • Vegetables: Peas are traditional. Mushrooms are optional; spinach, broccoli, green beans, or peppers also work.
  • Topping: Parmesan and Panko breadcrumbs give a crispy topping. Regular breadcrumbs also work.
  • Cheese: Add mozzarella on top for a cheesier casserole.

📅 Make Ahead – Refrigerate or Freeze

  • Assemble ahead: Prepare the casserole without baking or adding the topping. Cover tightly.
  • Refrigerate: Store unbaked for up to 2 days. Add the topping just before baking.
  • Freeze: Freeze unbaked for up to 3–4 months. Thaw overnight in the refrigerator, then add the topping and bake.

↕️ Scaling Turkey Tetrazzini for Two or a Family

This full-size recipe scales easily for smaller meals.

  • Full recipe: 12 standard or 8 large servings. Use a 9×13 casserole dish.
  • Half recipe: 6 standard or 4 large servings. Use a 6×9 or 8×8 baking dish.
  • Quarter recipe—for two: 3 standard or 2 large servings. Use a 6-inch round, 5×5, or similar small baking dish.

Scaling the ingredients: In the recipe card, change the number of servings to 3, 6, or 12. Use the adjusted ingredient amounts; the instructions do not automatically adjust.

Bake until the topping is lightly browned and the edges are bubbling. Smaller casseroles may cook faster, so check early.

❄️ Storing Turkey Tetrazzini

  • Refrigerate: Store in an airtight container for up to 4 days.
  • Freeze: Freeze airtight for up to 3 months.
  • Reheat: Thaw frozen portions overnight in the refrigerator. Reheat in the oven or microwave until hot.

❓ FAQs

How is the turkey tetrazzini sauce thickened?

The sauce is thickened with a traditional roux. Cook flour briefly in butter, then whisk in broth and milk until thickened. No canned soup or cream cheese is needed.

What is turkey tetrazzini?

Turkey tetrazzini is an American baked pasta casserole made with cooked turkey and a creamy sauce. Most versions include mushrooms and Parmesan cheese and are baked until hot and bubbling.

📖 More Leftover Turkey Recipes

Looking for more ways to use Thanksgiving turkey? Try these reader favorites:

  • 🥧 Simple Chicken (or Turkey) Pot Pie
  • 🥦 Cheesy Chicken, Broccoli, and Rice Casserole
  • 🌶 Crock Pot Three Bean Turkey Chili

📖The Recipe Card

large serving of turkey tetrazzini on a blue plate
Print Recipe Add to Collection Go to Collections
4.86 from 7 votes

Turkey Tetrazzini Recipe (Easy Creamy Casserole)

Make this turkey tetrazzini recipe with tender turkey, pasta, peas, and a creamy Parmesan sauce from scratch. Perfect for leftovers and easy to scale.
Prep Time30 minutes mins
Cook Time35 minutes mins
Total Time1 hour hr 5 minutes mins
Course: Casserole, Main Course
Cuisine: Italian
Keyword: Easy Turkey Tetrazzini, Leftover Turkey Tetrazzini, Turkey tetrazzini casserole
Servings: 12
Calories: 390kcal
Author: Dan Mikesell AKA DrDan

Ingredients

  • 3-4 cups diced or shredded cooked turkey (flexible—a little more is fine)
  • 1 pound pasta (spaghetti or linguine preferred)
  • 1 small onion
  • 2 stalks celery
  • 1 cup sliced mushrooms (optional)
  • 4 cloves crushed or minced garlic
  • ½ cup butter (1 stick = ½ cup)
  • ½ cup all-purpose flour
  • 14 oz chicken broth
  • 3 cups milk
  • 1 teaspoon salt
  • ½ teaspoon black pepper
  • 1 cup Parmesan cheese (shredded or grated)
  • 1 cup frozen peas

Topping

  • 1 cup Italian Panko bread crumbs
  • ½ cup Parmesan cheese (shredded or grated)
US Customary - Convert to Metric

Instructions

  • Preheat the oven to 350° convection or 375° conventional.
    Cubed turkey with pasta and casserole ingredients—labeled.
  • Cook 1 pound of linguine or spaghetti to al dente according to the package instructions.
    Cube or shred about 3-4 cups of cooked turkey.
    Draining cooked pasta.
  • Dice 1 small onion, crush 4 cloves of garlic, and dice 2 ribs of celery.
    Chopped onion and celery on black board with a knife.
  • Melt 1 stick of butter (½ cup) over medium heat and add onion, celery, and mushrooms. Cook for 3–4 minutes until the celery begins to soften. Add 4 cloves of crushed garlic. Cook one more minute. Add 1 teaspoon of salt and ½ teaspoon of black pepper.
    Adding chopped celery to the roux.
  • Add ½ cup of flour by sprinkling it over the pan. Stir until lightly browned, about 2 minutes.
    Sprinkling flour into the liquid to make a roux.
  • Slowly add 14 oz chicken or turkey broth while stirring continuously. Bring to a simmer. When it begins to thicken, slowly add 3 cups of milk and 1 cup of Parmesan cheese. Continue stirring and simmering until thickened, about 3 minutes.
    Adding broth to the sauce.
  • Remove from heat, and add four cups of cubed or shredded cooked turkey, one pound of cooked pasta, and one cup of frozen peas. Mix well and pour into a 9 by 13 inch baking dish coated with PAM or butter.
    Adding frozen peas and turkey to the sauce.
  • Mix one cup of Italian Panko breadcrumbs with ½ cup of shredded or grated Parmesan cheese and sprinkle over the top of the casserole.
    Sprinkling topping onto the casserole.
  • Bake for about 35 minutes until golden brown and bubbling.
    Baked turkey tetrazzini.

Video

Notes

Pro Tips

This recipe moves quickly. Read through the instructions and have the ingredients prepared before starting.
Use light or dark turkey meat, cubed or shredded. Cooked chicken or ham also works.
Spaghetti or linguine are preferred, but other pasta may be used. Cook it only to al dente.
The recipe scales easily to half or quarter size. See the post for pan sizes and instructions.
  1.  

Nutrition

Calories: 390kcal | Carbohydrates: 43g | Protein: 25g | Fat: 13g | Saturated Fat: 7g | Cholesterol: 61mg | Sodium: 598mg | Potassium: 409mg | Fiber: 2g | Sugar: 6g | Vitamin A: 595IU | Vitamin C: 6mg | Calcium: 258mg | Iron: 2mg

Adapted from Turkey Tetrazzini on Allrecipes.com.

Publisher's Note: Originally published November 29, 2015. Updated with expanded options, refreshed photos, and a table of contents to help navigation.

Dogs with small sticks.

Old Fashioned Sausage Dressing Recipe

Sausage dressing on a white plate.

This old fashioned sausage dressing recipe tastes just like Thanksgiving. Made with breakfast sausage, white bread, and celery, this classic bread stuffing is crispy on top, tender in the middle, and full of savory holiday flavor.

We’ve been serving it for over 40 years, and it remains unchanged. Baked outside the turkey for safer, more reliable cooking, it’s a classic holiday side dish we make year after year.

Sausage dressing on a white plate.
[feast_advanced_jump_to]

quote mark
Featured Comment by Fae:
⭐⭐⭐⭐⭐
"Did you peek in my Moms recipe box??? This is my family's recipe too! I have been fussing with trying to reduce this to a small recipe! So many thanks to you for doing this!!"

⚡ TL;DR—Recipe Summary

  • What: Old fashioned sausage dressing made with white bread, breakfast sausage, celery, onion, and classic herbs.
  • Why: Crispy on top, tender inside, easy to scale, and baked outside the turkey for safer, more reliable results.
  • How: Brown the sausage and vegetables, combine with the bread, eggs, and liquid, then bake at 350°F for about 1 hour to 165°F in the center.

🍞 Ingredients for Sausage Dressing

Ingredients for sausage dressing recipe—labeled.
  • Bread – Plain white sandwich bread works best.
  • Breakfast sausage – We use Bob Evans, but any seasoned breakfast sausage will work.
  • Eggs – Bind everything together so the dressing holds its shape.
  • Milk or broth – Chicken or turkey broth adds flavor; milk works too.
  • Onion & celery – Classic vegetables for flavor and texture.
  • Seasonings – Thyme, sage, parsley, salt, and black pepper.

👨‍🍳 Quick Overview: Making Sausage Dressing

1. Prepare the ingredients

  • Tear bread into small pieces.
  • Brown sausage and set aside.
  • Chop celery and onion.
Ripping bread into small pieces.

2. Cook the vegetables

  • Sauté celery and onion in the sausage fat (or butter).
Browning onion and celery in sausage fat.

3. Assemble

  • Whisk eggs with broth or milk and seasonings.
Whisking herbs with eggs.
  • Mix with bread, sausage, and vegetables until coated.
Mix the dressing ingredients together.

4. Bake

  • Spread into a casserole dish.
Spreading the dressing into a bowl.
  • Bake at 350°F for about 1 hour, until browned and the center reaches 165°F.
Sausage dressing casserole cooked.

👇 Scroll down for the full printable recipe card and step-by-step photos. Keep reading here for extra tips, veggie swaps, and serving ideas.

⏲️ How Long to Cook Sausage Dressing

Sausage dressing usually takes about 1 hour at 350°F. The top should be golden brown, but don’t rely on color alone—check the center with a thermometer. For safety, the internal temperature must reach 165°F.

Cooking time can vary based on pan depth and batch size. A shallow layer cooks faster, while a thicker casserole may take longer. Smaller batches finish sooner; larger pans need extra time.

🥄 Variations & Substitutions

  • Bread – Plain white sandwich bread is the classic. Other breads work, but “stuffing mixes” are often pre-seasoned, so adjust spices if you use them. Tear or cube the bread and let it air-dry a bit—no need for an overnight dry.
  • Sausage – Breakfast pork sausage gives the best flavor. Italian sausage, turkey sausage, or your favorite brand (we’re a Bob Evans house) also work. Avoid unseasoned ground pork.
  • Seasonings – Salt, pepper, thyme, sage, and parsley are the base. Add rosemary or poultry seasoning if you like. Fresh herbs are great, but dried work fine.
  • Vegetables – Onion and celery are standard. Sauté briefly in sausage fat (or butter) before baking for best flavor.
  • Liquid – Eggs provide structure, while a splash of milk or broth keeps the bread moist. Turkey broth (or chicken broth) is best—coat the bread, but don’t overmix.

↕️ Small Batch Sausage Dressing for Two or a Crowd

  • A full recipe makes 6–8 servings. Double it for a crowd, or halve it for a small batch dressing for two.
  • Pan sizes are flexible:
    • Full recipe → 1½ quart casserole or 6x9 pan
    • Double recipe → 2½ quart dish or 9x13 pan
    • Half recipe → 6-inch round or other small dish
  • The dressing should be about 1–2 inches thick. A shallower layer cooks faster; a deeper casserole takes longer, and larger amounts tend to take longer.


  • Always bake to 165°F in the center for safety due to the eggs. Round up to the next whole egg if scaling leads to a fraction. And don’t be shy with extra sausage.

👨‍🍳 Dressing vs. Stuffing — What’s the Difference?

  • What’s the difference? Traditionally, “stuffing” was cooked inside the turkey and “dressing” was baked in a pan.
  • What about now? These days the terms are used interchangeably—even the National Turkey Federation doesn’t separate them.
  • I grew up calling it stuffing, but since we bake it outside the bird, I usually say dressing. Whatever you call it, it’s the same classic mix of bread, sausage, vegetables, and herbs.

📅 How to Make Dressing Ahead

For safety, the USDA recommends not mixing and refrigerating uncooked dressing. Once combined, it should be baked right away.

What you can do: prep the parts. Cut the bread, chop the vegetables, and cook the sausage ahead of time. Store each separately, then assemble and bake when you’re ready. If you need to make it fully ahead, bake it, cool, and reheat later to 165°F.

⚕️ Food Safety for Dressing

  • Dressing contains eggs and sausage → it must reach 165°F in the center.
  • Never refrigerate uncooked, mixed dressing. Bake right after assembly.
  • Stuffing inside the turkey is unsafe: if the bird is cooked right, the stuffing won’t be; if the stuffing is safe, the bird will be dry.
  • Cook’s Illustrated method: Place stuffing in cheesecloth inside the cavity, then remove it halfway and finish baking separately. Safer than stuffing alone, but still fussy.

🍽️ Serving

This sausage dressing is a natural partner for  Roasted Bone-in Turkey Breast with Homemade Gravy. It is a classic holiday side dish for Thanksgiving or Christmas dinner, along with Sweet Potato Casserole and Green Bean Casserole.

We always serve it for Thanksgiving, but it’s just as good for Christmas dinner if your family insists on a second round of turkey. Pair it with ham, roast chicken, or even prime rib roast – it holds its own on any holiday table.

👉 For more inspiration, check out my Thanksgiving Recipe Roundup.

❄️ Storage & Reheating

  • Refrigerator: Store cooked sausage dressing in an airtight container for 3–4 days.
  • Freezer: Freeze airtight for up to 3 months. Thaw overnight in the fridge before reheating.
  • Reheating: Warm in the oven or microwave until hot. Serving leftovers with gravy makes a great main course all on its own.

❓FAQs

Why are eggs in sausage stuffing?

Eggs act as a binder. Without them, the bread and sausage won’t hold together and the dressing will fall apart.

Why shouldn’t dressing or stuffing be cooked inside the turkey?

For safety, the center must reach 165°F. If the turkey is done, the stuffing won’t be safe; if the stuffing is safe, the turkey will be overcooked and dry. That’s why it’s best baked in a casserole dish.

What is the best bread for sausage dressing?

Plain white sandwich bread is the classic choice and gives the best texture. Stuffing mixes or heavily seasoned breads can throw off the flavor.

Can I freeze sausage dressing?

Yes — but only after it’s fully cooked. Cool completely, then seal airtight and freeze for up to 3 months. Thaw overnight in the refrigerator and reheat until hot in the center.

📖The Recipe Card

Sausage dressing on a white plate.
Print Recipe Add to Collection Go to Collections
5 from 2 votes

Old Fashioned Sausage Dressing Recipe

Homemade sausage dressing with white bread, breakfast sausage, celery, and classic seasonings. Crispy on top and tender inside—perfect with turkey or chicken.
Prep Time30 minutes mins
Cook Time1 hour hr
Total Time1 hour hr 30 minutes mins
Course: Casserole
Cuisine: American
Keyword: Old Fashioned Sausage Stuffing, Sausage Dressing Recipe, Thanksgiving Side Dish
Servings: 6 serving
Calories: 453kcal
Author: Dan Mikesell AKA DrDan

Ingredients

  • 15 slices bread about a loaf, have a few extra slices available
  • 1 lb breakfast sausage
  • 2 ribs celery diced
  • 1 onion small
  • ¾ teaspoon dry thyme
  • ¾ teaspoon dry sage
  • 3 tablespoons dry parsley
  • 2 eggs slightly beaten
  • ¼ cup milk or broth
  • ½ teaspoon salt
  • ¼ teaspoon pepper
US Customary - Convert to Metric

Instructions

Prepare the ingredients

  • Tear or cut about 15 slices of bread into small pieces or cubes. Dice 2 ribs of celery (about 1 cup) and 1 small onion.
    Ripping bread into small pieces.
  • Prepare spices—¾ teaspoon dry thyme leaves, ¾ teaspoon dry sage, and 3 tablespoons dry parsley. If using fresh herbs, use about 3 times the dried thyme and parsley and twice the dried sage.
    Fresh herbs on a board.
  • In a Dutch oven or large skillet over medium heat, cook 1 lb sausage until brown. With a slotted spoon, remove the sausage into a medium bowl and set aside.
    Cooked sausage in a white bowl.

Cook the vegetables

  • Pour out all but 2 tablespoons of the pan's sausage drippings. In the remaining drippings, cook the onion and celery over medium-high heat until tender (about ten minutes), stirring occasionally.
    Browning onion and celery in sausage fat.

Assemble

  • In a separate bowl, beat 2 eggs, ¼ cup of milk (or broth), parsley, thyme, sage, ½ teaspoon of salt, and ¼ teaspoon of black pepper. You can use turkey or chicken broth instead of milk if you wish.
    Whisking herbs with eggs.
  • Mix until the bread is fully coated but not soggy. Add the reserved bread as needed; if the mixture becomes too dry, add a splash of milk or broth.
    Mixing the dressing ingredients togethrer.

Bake

  • Place in an oven-safe 6X9 baking dish or 1½ quart casserole.
    Spreading the dressing into a bowl.
  • Bake at 350°F for about 1 hour until golden brown and 165°F internal temperature.
    Sausage dressing casserole cooked.

Video

Notes

Pro Tips

  1. You can use the bread and sausage you like, or you can change the ingredients to suit your taste. We use only white bread and Bob Evans breakfast sausage.
  2. Do a little extra bread; you may want it.
  3. The pan size should allow for a 1–2-inch thick casserole – if it fits, it will cook fine. A single recipe usually fits in a 1½-quart casserole dish or a 6X9 dish. A double recipe needs a 2½-quart dish or a 9X13 dish. The type of bread used will affect the pan size.
  4. Do not try to cook inside the turkey. It is not safe.
  5. You can cook the giblets on the stovetop ahead of time, add the broth for the milk, and add the cooked meat.
  6. I prefer to dice the bread first and let it dry while I cook the sausage, cut the veggies, and mix the wet components.
  7. Cook until golden brown and 165°F internal temperature (for food safety).
  8. Leftovers are good refrigerated for 3-4 days or frozen for about 3 months.

Nutrition

Calories: 453kcal | Carbohydrates: 37g | Protein: 21g | Fat: 24g | Saturated Fat: 8g | Cholesterol: 109mg | Sodium: 1074mg | Potassium: 412mg | Fiber: 3g | Sugar: 6g | Vitamin A: 217IU | Vitamin C: 2mg | Calcium: 134mg | Iron: 4mg

Editor's note: Originally published November 29, 2011. Updated with expanded options, refreshed photos, and a table of contents to help with navigation. Enjoy this Thanksgiving Classic.

Molly and Lilly running in the snow

Easy Yeast Rolls

Brushing baked rolls with butter.

These easy yeast rolls are soft and fluffy with a quick 60-minute recipe that’s perfect for beginners. They make 12 homemade dinner rolls or scale down easily to a small batch of 6.

Bowl of dinner rolls.
[feast_advanced_jump_to]

quote mark
Featured Comment by Elina:
⭐⭐⭐⭐⭐
"This was my first time making rolls. Thank you so much for all your included tips, all your posts are so well thought out and I love that it shows you keep beginners in mind. The rolls turned out great, it's a 5 star for me!"

🥖 TL;DR—Recipe Summary

What: Soft, fluffy homemade yeast rolls using rapid-rise yeast and a streamlined 60-minute method.

Why: Beginner-friendly with simple steps, short rise times, and forgiving dough. Make 12 rolls or scale down to a small batch of 6.

How: Mix and knead for 5–10 minutes, let the dough rise twice, then bake at 425°F until golden brown.

🥣 Ingredients

Ingredients for quick and easy dinner rolls — flour, yeast, egg, butter, sugar, and salt, labeled.
  • Flour: All-purpose works best. Bread flour adds softness; skip whole wheat.
  • Yeast: Rapid-rise or instant yeast. Don’t use active dry—it rises too slowly.
  • Egg, butter, sugar, and salt: Simple pantry staples for flavor and texture.
  • Milk option: Swap water for milk if you want an even softer crumb.
  • Flavor add-ins: Mix in or top with cheese, garlic powder, or herbs.

👨‍🍳 Quick Overview: How to Make Easy Yeast Rolls

1. Mix: Combine warm water (105–110°F), sugar, and rapid-rise yeast. Stir in flour, salt, egg, and melted butter to form a soft dough.

Pour the yeast mixture into the flour mixture to make the dinner roll dough.

2. Knead: By hand or with a stand mixer for 5–10 minutes until smooth. Cover and let rise about 15 minutes.

Hand-kneading dinner roll dough ball on a floured surface.

✅ Pro Tip: Yeast dough won’t rise well in cool conditions. Place it in a warm, draft-free spot, or use an oven’s proofing setting if available.

3. Shape: Punch down and divide into 12 pieces. For a half recipe, divide into 6 for a small batch.

Dough log being cut into 12 even pieces for shaping dinner rolls.

4. Second Rise: Cover and let rise again for about 15 minutes.

Dough balls arranged in a baking pan before the second rise.

5. Bake: 425°F for 12–15 minutes until golden. Brush with butter while hot.

Freshly baked dinner rolls are being brushed with melted butter in the pan.

This is the quick overview — see the printable recipe card at the bottom of the post for exact amounts and full instructions.

🌡️ When Are Yeast Rolls Done?

They should be golden brown on top. If you’re unsure, check with an instant-read thermometer — the center should be 190–195°F.

📅 Make These Yeast Rolls Ahead

  1. Follow the recipe through shaping the rolls in the pan.
  2. Cover tightly with plastic wrap and refrigerate for up to 24 hours.
  3. Before baking, bring to room temperature while still covered and let rise until puffy.
  4. Bake as directed.

⬇️ Small Batch Dinner Rolls (Half Recipe)

Cutting the recipe in half makes 6 rolls instead of 12—perfect for smaller needs or everyday dinners.

How to make a half batch:

  1. Adjust servings in the recipe card from 12 to 6.
  2. Follow the ingredient list amounts, not the instructions.
  3. Use a whole egg or just the white.
  4. Bake in a 6×9, 9-inch round, or 8×8 square pan.

❄️ How to Store Dinner Rolls

Fresh rolls are best within a couple of days, so plan to enjoy them while they’re at their peak.

Storage tips:

  • Keep airtight at room temperature for 2–3 days.
  • Avoid refrigeration—it dries bread out.
  • Freeze up to 3 months; wrap tightly in plastic and foil for best texture.

📋 Other Roll and Bread Recipes

Try these other easy yeast bread recipes:

  • Lunch Lady Rolls – scaled down from the classic cafeteria version to make 10–12 soft rolls.
  • Honey Wheat Rolls – a small-batch whole-wheat twist that makes 6 rolls.

For larger loaves, check out:

  • Basic White Stand Mixer Bread.
  • Julia Child’s French Bread (Simplified) or

❓ FAQs

Do I need a stand mixer?

No. A stand mixer just makes kneading easier. You can mix and knead by hand for 5–10 minutes, until the dough is smooth and elastic.

Why aren't my yeast rolls rising?

Usually, the yeast is old or the dough is too cool. Check that your yeast is fresh and let the dough rise in a warm, draft-free spot around 80–90°F.

Can I make these yeast rolls faster?

Yes. After kneading, shape the rolls and place them in the pan. Let them rise for 10–15 minutes, then bake. The rolls will have a slightly rougher, more homemade texture but will still be soft and fresh.

📖The Recipe Card

Bowl of dinner rolls.
Print Recipe Add to Collection Go to Collections
4.34 from 3 votes

Easy 60-Minute Yeast Dinner Rolls

Soft and fluffy homemade yeast dinner rolls in about 60 minutes. This easy recipe is perfect for beginners; it makes 12 rolls, or scale down to a small batch of 6.
Prep Time45 minutes mins
Cook Time12 minutes mins
Total Time57 minutes mins
Course: Bread
Cuisine: American
Keyword: 60-Minute Dinner Rolls, Easy Dinner Rolls, Quick Dinner Rolls
Servings: 12
Calories: 233kcal
Author: Dan Mikesell AKA DrDan

Ingredients

  • 4-5 cups flour
  • 2 packets rapid or instant yeast
  • 2 tablespoons sugar
  • 1½ cup water (110°F)
  • 1 teaspoon salt
  • 1 egg
  • 4 tablespoons butter
US Customary - Convert to Metric

Instructions

Mix the Dough and Knead

  • To 1½ cups of 105°–110°F water, add 2 tablespoons of sugar and 2 packets of rapid or instant dry yeast. Mix well and allow to proof for a few minutes. While yeast is proofing, add 4 cups of flour and 1 teaspoon of salt to the stand mixer or large bowl and mix.
    Proofing yeast in a measuring cup.
  • Add the yeast mixture, 1 egg, and 4 tablespoons of melted butter to the flour mixture.
    Stand Mixer: Mix on 2 with the dough hook for 5–10 minutes. Slowly add additional flour until the dough is dry enough to climb the hook and pull away from the side. Do it in small amounts at a time. It will generally need most of the remaining cup of flour. Turn onto a floured surface and knead a few times to check the texture. Add more flour if it is very sticky.
    Hand Mixing: Mix all the ingredients in a large bowl using a wooden spoon or rubber spatula. The dough will be sticky, and as you work with it, add more flour a bit at a time until the dough is only slightly sticky but still soft. Knead by hand for 5–10 minutes.
    Pouring the yeast mixture into the flour mixture.

First Rise

  • Form into a ball and place in an oiled pan, cover with plastic wrap, and allow to rise in a warm spot for 15 minutes until about doubled in size.
    hand-kneading dough ball on a floured surface.

Shape and Second Rise

  • Place the dough back on the floured surface, "punch down," and roll it into a 2-inch diameter log. Cut into 12 even pieces.
    Cutting dough into rolls.
  • Prep a 9X13-inch cake pan with cooking spray. Form the dough into balls and place them in the pan. Cover with plastic wrap and let rise in a warm place until almost doubled in size, about 15 minutes.
    Dough balls in the baking pan with plastic wrap.

Bake

  • Bake at 425°F for 12–15 minutes until nicely browned. Cooking time may vary slightly depending on the oven and pan. Darker pans cook faster. Remove from the oven, brush lightly with butter, and cool for a few minutes. If unsure, the internal temperature should be 190°–195°F.
    Brushing baked rolls with butter.

Video

Notes

Pro Tips

  1. An easy recipe to cut in half. Use a 6X9-inch, 8X8-inch, or 9-inch round pan. If half, you can still use a whole egg.
  2. If these homemade dinner rolls are new to you, please conduct a trial cooking session to ensure it suits you before serving it at a holiday or company meal.
  3. While mixing by hand is possible, the stand mixer earns its place in a recipe like this. If you must do this by hand, knead for at least 5 minutes.
  4. "Proof" the yeast to ensure it is good and distribute it through the dough better.
  5. If you keep your home cool, you will need to use a slightly warmed oven to raise the dough. This must be kept warm—this is the most common failure issue. If you are having issues, stop looking at the clock and go by the amount of rise.
  6. They’ll keep at room temperature for a few days. Without preservatives, they mold quickly.
  7. Freeze for up to 3 months.

Nutrition

Calories: 233kcal | Carbohydrates: 42g | Protein: 7g | Fat: 5g | Saturated Fat: 3g | Polyunsaturated Fat: 0.2g | Monounsaturated Fat: 1g | Cholesterol: 28mg | Sodium: 170mg | Potassium: 118mg | Fiber: 2g | Sugar: 2g | Vitamin A: 150IU | Calcium: 4mg | Iron: 2.3mg

Originally published September 10, 2016. Updated with expanded options, refreshed photos, and a table of contents to help navigation.

Image of Molly and Lilly dogs as Sous Chefs in Training.

Small Thanksgiving Dinner Recipes for Two or More

Graphic for Thanksgivings Recipe roundup - Image licensed from Fotolia November 20, 2017. Copyright ©TeddyandMia - stock.adobe.com. Modifed per allow by licensed.

Planning a small Thanksgiving dinner doesn't mean giving up your favorite holiday dishes. Whether you're cooking for two, hosting a small family gathering, or bringing a dish to share, these easy Thanksgiving recipes will help you create a delicious holiday meal without cooking for an army.

Enjoy traditional favorites in smaller portions, with plenty of options for scaling up when needed. No 20-pound turkeys need apply.

Graphic for Thanksgivings Recipe roundup - Image licensed from Fotolia November 20, 2017. Copyright ©TeddyandMia - stock.adobe.com. Modified  per allow by licensed.
Image licensed from Fotolia November 20, 2017. Copyright ©TeddyandMia - stock.adobe.com. Modified as allowed by the license.
[feast_advanced_jump_to]

🦃 Planning a Small Thanksgiving Dinner

A smaller Thanksgiving dinner can still have all the traditional foods without days of cooking or a refrigerator overflowing with leftovers.

To keep it manageable, plan ahead, shop ahead, and prepare ahead. And don't overbuy.

  1. Start with a smaller entrée; the recipes below have many choices, including turkey, ham, or beef.
  2. Add two or three favorite sides.
  3. Finish with a favorite dessert—something that means Thanksgiving to you.

And remember, a few Thanksgiving leftovers are a good thing. You just don't need enough for the rest of November.

🦃 Smaller Entrée

Smaller meals begin with a smaller entrée, and you have many options with these small or scalable recipes.

Roasted Turkey Breast Recipe
Learn how to roast a bone-in turkey breast in the oven using one steady 350°F temperature. This easy method gives you juicy, tender meat and golden-brown skin without changing oven temperatures.
Oven Roasted Turkey Breast
turkey slice with gravy on orange plate.
Small Boneless Prime Rib (Ribeye) Roast
Juicy, tender boneless prime rib (ribeye roast) coated in garlic butter and roasted to perfection. Easy to cook at home for smaller gatherings or holiday dinners.
How to Cook a Small Prime Rib Roast
slice of Ribeye Roast on a white plate
Small Crock Pot Ham with Brown Sugar-Honey Glaze
Cook a small 2–4 lb boneless ham in your crock pot with a brown sugar-honey glaze and pineapple. Easy, juicy, and perfect for holidays or smaller gatherings.
Small Honey Ham Recipe
slices of ham with pineapple on white plater
Oven-Baked Turkey Tenderloin with Gravy
Juicy turkey tenderloin with a quick pan sear, oven-roasted finish, and easy homemade gravy. A simple turkey dinner for weeknights or a small holiday meal.
Turkey Tenderloin Recipe
image of cut turkey with gravy on plate
Grilled Turkey Breast
Grilled Turkey Breast is perfect for a smaller Thanksgiving or a healthier year-round change of pace. Use traditional seasoning or make BBQ with the recommended brown sugar dry rub.
Grilled Turkey Breast
Sliced turkey breast on a board.
How to Cook Ham Steak (Grill,Pan-Fry, or Oven)
This quick recipe shows you how to cook ham steak on the grill, pan-fry, or under the oven-broiler. Optional brown sugar glaze and tips included.
How to Cook Ham Steak
grilled ham steak on a sandwich with a tomato slice.

🍠 Side Dishes for Your Feast

Every family has its traditions, so here are some of ours and hopefully some of yours. This recipe group is full-size, but most include specific small-batch instructions for making it smaller (except the last one).

Green Bean Casserole Without Mushroom Soup
This green bean casserole without mushroom soup is made from scratch with an easy roux-based creamy sauce. Use fresh, frozen, or canned green beans and your favorite crunchy topping for an easy Thanksgiving or Christmas side dish.
Green Bean Casserole without Soup
A spoonful of green bean casserole.
Old Fashioned Sweet Potato Casserole
Old fashioned sweet potato casserole is a Thanksgiving favorite with a creamy sweet potato filling and your choice of pecan or marshmallow topping. Make a full casserole or scale it down for two.
Sweet Potato Casserole Recipe
Sweet potato casserole on a white plate
Old Fashioned Sausage Dressing Recipe
Homemade sausage dressing with white bread, breakfast sausage, celery, and classic seasonings. Crispy on top and tender inside—perfect with turkey or chicken.
Sausage Dressing Recipe
Sausage dressing on a white plate.
Homemade Gravy with Flour
Learn how to make homemade gravy with all-purpose flour using two simple methods—a classic roux or an easy slurry. Use drippings, broth, water, or other liquids.
How To Make Gravy
pouring gravy on turkey and potatoes

This delicious salad is already as small as it can be (8 servings) without much waste.

Broccoli Slaw Recipe
This easy broccoli slaw recipe combines crunchy vegetables, almonds, sunflower seeds, and crispy rice or ramen noodles with a tangy homemade vinaigrette. A quick, make-ahead salad for picnics, potlucks, and holiday meals.
Broccoli Slaw Recipe
broccoli slaw salad in a metal bowl

🍞 Bread Recipes You Will Love

I do love great bread. Here are some easy homemade options—except for Julia Child's bread, but it's worth the effort.

Easy Dinner Rolls
Soft and fluffy homemade yeast dinner rolls in about 60 minutes. This easy recipe is perfect for beginners; it makes 12 rolls, or scale down to a small batch of 6.
Easy Dinner Rolls
Bowl of dinner rolls.
Lunch Lady Rolls—Small Batch Version
Old fashioned 60s school Lunch Lady Rolls, those wonderful hot rolls everybody loved in the cafeteria. You can now be made with this small batch recipe mixed by hand or in a stand mixer at home.
Lunch Lady Roll Recipe
Stand Mixer Lunch Lady Rolls from 101 Cooking for Two
Honey Wheat Dinner Rolls
These soft, homemade Honey Wheat Dinner Rolls are perfect for everyday or special dinners. Vary the amount of whole wheat flour to your taste and add a touch of honey—quick to make in about an hour.
Honey Wheat Roll Recipe
the soft inside of a wheat dinner roll.

Now, a full-size choice, but it is worth trying at least once.

Julia Child's French Bread - Simplified
Julia Child's French Bread recipe is the ultimate crusty artisan French bread. An excellent round bread, simplified to the essentials to get it done with less fuss. While speed was not a goal, it was 5 hours from the start to the cooling rack.
Julia Child's French Bread
Julia Child's French Bread on wooden peel.

🥧 Easy Dessert Recipes – From Small to Large

We need something sweet to end the feast. Here are some simple treats.

Small Batch Apple Crisp (Easy Recipe for Two or More)
Make an easy small batch apple crisp with only 2 or 3 apples and a buttery crumb topping. A perfect old-fashioned dessert for two or more.
Apple Crisp—Any Size
apple crisp on a white plate.
Small Batch Crock Pot Apple Crisp
An easy small batch crock pot apple crisp with fresh apples and a crisp oat topping. Make it in a 2-quart mini crock pot or scale it up for a larger slow cooker.
Small Crock Pot Apple Crisp
Apple crisp with ice cream.
New York Cheesecake Bars
Rich and creamy New York Cheesecake Bars with a buttery graham cracker crust. This easy small-batch recipe is baked in an 8X8 pan and easily doubles to a 9X13 pan.
Cheesecake Bar Recipe
Cheesecake bars on a blue plate.
Apple and Berry Crumble
This easy apple and berry crumble combines tender apples, juicy berries, and a buttery crumb topping. Use fresh fruit or make a quick version with frozen berries and apple pie filling.
Apple Berry Crumble
blue bowl of apple berry crumble with ice cream

Full-size Dessert Recipes

If you need to bring a dish to a bigger gathering, I’ve included these larger recipes that are easier than they seem.

Chocolate Chip Cheesecake or Cheesecake Bars
This easy Chocolate Chip Cheesecake recipe can be made as a whole cheesecake or, as we prefer, impressive Chocolate Chip Cheesecake Bars. It is simple and almost foolproof, using cream cheese, sweetened condensed milk, chocolate chips, and an Oreo crust. Please try our go-to recipe for parties or take-a-dish occasions.
Chocolate Chip Cheesecake and Bars
Chocolate chip cheesecake bars on a platter square view.
Simple Cinnamon Apple Cake
A moist, delicious cinnamon apple cake made with two fresh apples, cinnamon, and simple pantry ingredients. This old-fashioned family recipe makes 8 servings and is easy to prepare and scale.
Easy Apple Cake
Apple cake on a white plate.
Easy Apple Crumb Pie with Crumble Topping
Easy apple crumb pie with fresh apples, a premade crust, and a buttery homemade crumble topping. Ready to bake in just 15 minutes.
Apple Crumble Pie Recipe
Slice of apple crumble pie.

🍬 Candy Recipes – Make a Little or a Lot

It's time to embrace the holiday spirit. Serve at the gathering or give gifts of love.

Easy 5-Minute Fudge (3 Ingredient Recipe)
Foolproof 5-minute chocolate fudge made with only 3 ingredients: chips, sweetened condensed milk, and vanilla. Great for holidays, gifts, or anytime you need chocolate.
5-Minute Fudge
pile of fudge on a white plate.
Crock Pot Peanut Clusters (Easy Chocolate Recipe)
Easy crock pot peanut clusters with chocolate and just 4 ingredients. Sweet, salty, and crunchy homemade candy for holidays, gifts, or parties.
Chocolate Peanut Cluster Recipe
Crock pot chocolate peanut clusters on parchment paper.
Oreo Fudge (White Chocolate Recipe)
Creamy white chocolate Oreo Fudge with crunchy cookie pieces. This easy 4-ingredient stovetop recipe takes just 5 minutes to cook, with no candy thermometer needed.
Oreo Fudge Recipe
pile of oreo fudge
Crock Pot Fudge
Make easy Crock Pot Fudge with chocolate chips, sweetened condensed milk, and vanilla. Just 5 minutes of prep makes this a fun holiday candy recipe to make with kids.
Crock Pot Fudge
pieces of fudge with nuts on a red plate
Cinnamon Candied Almonds
Delicious cinnamon-sugar candied almonds roasted in the oven until crisp and golden. Easy to make and perfect for snacks, parties, or holiday gifts.
Cinnamon Candied Almonds
Roasted candied almonds fresh out of the oven.

⚕️ Food Safety

When I was still practicing medicine, I saw several kids with food poisoning, primarily minor after every major holiday. After only a few questions, the cause was almost always apparent and preventable with little care.

Gatherings are ready-made for food safety issues and leftovers at the party. Let's plan for food safety and get it right. Check out the USDA Food Safety recommendations.

🐕 Don't forget the dogs

Low-Fat Homemade Dog Treats—Healthy & Delicious
Low Fat Homemade Dog Treats are the perfect low-calorie treat for your dog. With only five ingredients, your dog will love the peanut butter and pumpkin taste. Much healthier than commercial treats—any veterinarian would approve.
Healthier Dog Treat Recipe
Pile of homemade dog treats on a wire rack

Have a great Thanksgiving from Wifo, Molly, Lilly, and DrDan!

Molly and Lilly running in a row

Editor's Note: Originally Published November 17, 2016. Updated yearly with current recommendations and discussion.

Old Fashioned Sweet Potato Casserole

Sweet potato casserole on a white plate

This easy old fashioned sweet potato casserole recipe is a Thanksgiving side dish made with fresh sweet potatoes and topped with crunchy pecans or marshmallows. It’s creamy, sweet, and easy to make ahead.

This recipe makes 8 servings but scales easily to a small batch or for two, making it practical for a small holiday dinner or the whole Thanksgiving crowd.

Sweet potato casserole on a plate.
[feast_advanced_jump_to]

quote mark
Featured Comment by Ellen:
⭐⭐⭐⭐⭐"Just made this for Thanksgiving dinner, and I'm blown away by how good it is! ….Turned out fabulous, my favorite dish this year!"

📝 TL;DR — Recipe Summary

What: A classic holiday recipe made with fresh sweet potatoes, a creamy custard filling, and your choice of pecan or marshmallow topping.

Why: Easy to make ahead over a few days. Makes 8 servings but scales easily to a small batch or for two.

How: Bake and peel the sweet potatoes, mash and mix with the custard ingredients, then top and bake for about 30 minutes.

🍠 Ingredients

Sweet potatoes with ingredients for casserole-labeled.
  • Fresh sweet potatoes – the star of the dish. Skip the canned for the best results.
  • Custard ingredients – eggs, sugar, vanilla, salt, butter, and milk.
  • Pecan topping – chopped pecans, brown sugar, butter, and a little flour for that crunchy finish.
  • Optional marshmallow topping – mini marshmallows (or chopped larger ones) for the traditional sweet Thanksgiving twist.

👨‍🍳 Quick Overview: Old Fashioned Sweet Potato Casserole

The photos show my daughter making a double batch; the same steps are used for a full 8-serving casserole, a small-batch for 4, or a casserole for 2.

1. Prepare the sweet potatoes & custard

Scrub and bake sweet potatoes 1–1½ hours until soft. Cool, peel by hand, and mash until smooth.

Peeling a cooked sweet potato by hand.

Whisk the custard: eggs, sugar, salt, melted butter, vanilla, and milk.

Whisking egg mixture.

2. Mix the casserole base

Mix the custard with the mashed sweet potatoes, then spoon into the casserole dish.

Pouring batter into a casserole dish.

3. Make & add topping

Chop pecans; mix with brown sugar, melted butter, and flour.

Mixing pecan topping.

Spread the topping evenly over the casserole.

Adding topping to the casserole.

4. Bake until golden

Bake at 350°F for about 30 minutes, until golden brown and the center reaches 165°F.

Cooked sweet potato casserole.

👇 Scroll down for the printable recipe card and complete step-by-step photo instructions—or keep reading for tips and variations.

📅 Make Ahead

Assemble the casserole base without the topping, cover, and refrigerate for up to 24 hours. Add the topping just before baking, then bake to 165°F in the center.

Do not freeze uncooked — the guidance on this is inconsistent, and it’s not worth the risk. If you want to freeze, bake it fully, cool, then freeze.

✅ Pro Tip: Bake the sweet potatoes a few days ahead (that’s the most time- and oven-consuming part). Then assemble and refrigerate within the 24-hour window, adding the topping just before baking.

😊 Marshmallow Topping for Sweet Potato Casserole

For a marshmallow topping, skip the brown sugar–pecan mixture. Sprinkle ½ cup of chopped pecans over the casserole before baking. Bake for about 20 minutes, then add 1½ cups of marshmallows for the last 10 minutes.

You can use mini marshmallows or cut up larger ones.

✅ Pro Tip: Some minis don’t melt or brown well. Unless you’re confident in your brand, cut full-size marshmallows into smaller pieces — they brown more evenly and look better on the finished casserole.

🥘 Small-Batch Sweet Potato Casserole & Baking Dish Options

This recipe is written as a full-size casserole with about 8 servings. You can also make a half recipe for 4 servings or a quarter recipe for two servings.

  • Baking dishes – Full recipe fits in a 2½-quart casserole or 9×12 baking dish. Half recipe: 6×9, 8-inch square, or 9-inch round. Quarter recipe: 6-inch round or 5-inch square (or whatever small dish you have that fits).
  • Scaling tips – Adjust servings in the recipe card to 4 or 2. Use the ingredient list amounts (the step instructions don’t auto-adjust). Round the egg to a whole number.
  • Cooking time – Bake until browned on top and the center reaches 165°F. Time will vary depending on dish size and casserole thickness.

✅ Pro Tip: The leftovers are wonderful. A quarter batch is a lot of work for only two servings, so I usually suggest making a half batch and enjoying a few leftovers or freezing some.

🍽️ Other Small-Batch Holiday Recipes

Sweet potato casserole is an essential part of our Thanksgiving dinner spread — right alongside Roasted Turkey Breast, Green Bean Casserole, Sausage Dressing, and Easy Dinner Rolls.

❄️ Storage

Refrigerate cooked leftovers for up to 4 days or freeze for up to 3 months. Thaw overnight in the refrigerator before reheating.

Small portions – Reheat in the microwave.

Larger amounts – Cover with foil and warm in a 325°F–350°F oven for 20–25 minutes.

❓ FAQs

Are sweet potatoes and yams the same thing?

Not exactly. True yams are different from sweet potatoes and are uncommon in most U.S. grocery stores. What Americans commonly see labeled as “yams” are usually varieties of sweet potato and should be labeled “yam sweet potatoes.”

What internal temperature should sweet potato casserole be?

The USDA recommends that casseroles with eggs be cooked to 165°F in the center before serving.

Can I use canned sweet potatoes?

Not recommended. The texture is too soft and won’t give the same flavor or consistency as using fresh sweet potatoes.

📖The Recipe Card

Sweet potato casserole on a white plate
Print Recipe Add to Collection Go to Collections
5 from 1 vote

Old Fashioned Sweet Potato Casserole

Old fashioned sweet potato casserole is a Thanksgiving favorite with a creamy sweet potato filling and your choice of pecan or marshmallow topping. Make a full casserole or scale it down for two.
Prep Time45 minutes mins
Cook Time1 hour hr 45 minutes mins
Total Time2 hours hrs 30 minutes mins
Course: Casserole
Cuisine: American
Keyword: old fashioned sweet potato casserole*, Sweet Potato Casserole, sweet potato casserole for two*, Thanksgiving Side Dish
Servings: 8 serving
Calories: 403kcal
Author: Dan Mikesell AKA DrDan

Ingredients

  • 3 cups sweet potatoes about 3-4 medium
  • 2 eggs
  • ¼ cup sugar
  • ½ teaspoon salt
  • ½ stick butter melted
  • 1½ teaspoon vanilla
  • ½ cup milk

Pecan Topping Option

  • ½ cup pecans chopped
  • 1½ cups brown sugar
  • ½ cup flour
  • ⅓ stick butter melted

Marshmellow Topping Option

  • 1½ cup mini-marshmallows or chopped large marshmallows
  • ½ cup chopped pecans optional
US Customary - Convert to Metric

Instructions

Prepare the sweet potatoes & custard

  • Scrub and bake sweet potatoes. Give them a good scrub and poke with a fork a few times to vent steam. You will need about 3 cups, so 3-4 medium sweet potatoes. Bake at 375° for 1 to 1 ½ hours until very soft.
    Raw sweet potatoes on a foil tray.
  • Allow the sweet potatoes to cool, then peel them by hand—they will peel easily. You can refrigerate them before or after peeling until needed, up to three days.
    Peeling a cooked sweet potato by hand.
  • In a large mixing bowl, beat 3 cups of sweet potatoes until smooth. A stand or hand mixer works, but you can also do this by hand. A bit more sweet potato is fine.
    Mashing cooked sweet potatoes in a stand mixer.
  • In a separate bowl, beat 2 eggs, ¼ cup of sugar, ½ teaspoon of salt, ½ stick of melted butter, 1 ½ teaspoon of vanilla, and ½ cup of milk.
    Whisking egg mixture.

Mix the casserole base

  • Add to mashed sweet potatoes and mix well.
    Pouring egg mixture into the sweet potatoes.
  • Pour into a well-oiled (using Pam or butter) oven-safe casserole dish of 2½ quarts or larger. You may cover and refrigerate at this point for 24 hours.
    Pouring batter into a casserole dish.

Brown Sugar Pecan Topping

  • Chop the pecans.
    Chopping pecans with a knife.
  • Mix topping in a medium bowl. 1½ cup of brown sugar, ½ cup of flour, ⅓ stick melted butter, and ½ cup of chopped pecans.
    Mixing pecan topping.
  • Add topping to sweet potatoes. You may cover and refrigerate at this point for 24 hours.
    Adding topping to the casserole.

Bake until golden brown

  • Bake at 350° for about 30 minutes until golden brown and 165°F minimum internal temperature.
    Cooked sweet potato casserole.

Marshmallow Topping Option

  • Skip the above topping. Top with ½ cup of chopped pecans before baking. With about 10 minutes left in baking, add 1½ cups of mini marshmallows or chopped full-size marshmallows.

Video

Notes

Pro Tips:

Precook the sweet potatoes up to 3 days ahead.
The recipe calls for 3 cups of sweet potatoes, but a bit more is fine. That will be 3-4 medium potatoes.
This fits in a 2½-quart or larger casserole dish. You can use a 9x12 baking dish if you want.
Instructions for making this old fashioned sweet potato casserole as a half or quarter batch are in the post.
Cook to a nice brown with an internal temperature of at least 165°F.
If the top browns too quickly but the temperature is still too low, tent lightly with foil until done.
Make-ahead options are in the post.
  1. After cooking, store refrigerated for up to 4 days or frozen for up to 3 months.

Nutrition

Calories: 403kcal | Carbohydrates: 65g | Protein: 4g | Fat: 15g | Saturated Fat: 7g | Cholesterol: 67mg | Sodium: 291mg | Potassium: 296mg | Fiber: 2g | Sugar: 50g | Vitamin A: 7461IU | Vitamin C: 1mg | Calcium: 80mg | Iron: 1mg

This wonderful recipe was brought into our family from our son-in-law's family for our first Thanksgiving together and has been a staple ever since.

Editor's Note: Originally Published December 3, 2011. Updated with expanded options, improved instructions, and refreshed photos.

two dogs with a stick.

Small Boneless Prime Rib (Ribeye) Roast

slice of Ribeye Roast on a white plate

Want prime rib without buying a huge roast? Learn how to cook a small boneless prime rib (ribeye roast)—the same juicy, tender flavor in a 2–4 lb rib roast. With a simple garlic-butter crust and an easy time-and-temp method, it’s perfect for Christmas or any smaller holiday meal.

Quick Answer: ⏱️ How Long to Cook a Small Boneless Prime Rib Roast

Sear 20 minutes at 500°F, then roast at 325°F until the internal temperature reaches 130°–135°F for medium-rare. Always check early.

Approximate Times (Including Sear):

  • 2 lb: 65–75 minutes
  • 3 lb: 85–105 minutes
  • 4 lb: 90–115 minutes
Slice of prime rib roast.
[feast_advanced_jump_to]

quote mark
Featured Comment by Suzi :
⭐⭐⭐⭐⭐"OMG! My first time making a rib roast, and it is beyond delicious. An almost 3 lb roast cooked perfectly according to your directions. I may eat the entire thing. Thank you!"

📝TL;DR — Recipe Summary

  • What: A small 2–4 lb boneless prime rib (ribeye) roast with a simple garlic-butter crust, perfect for smaller holiday dinners.
  • Why: An easy, beginner-friendly recipe for tender, juicy prime rib without buying a huge roast. Bone-in also works with this method.
  • How: Start at 500°F for 20 minutes, then reduce to 325°F and roast to your desired internal temperature.

🤔 Terminology: Prime Rib vs Ribeye

The names can be confusing. A rib roast may be bone-in or boneless, and labeled prime rib, ribeye roast, or simply rib roast — they are all the same cut of beef.

Rib Roast = Prime Rib Roast = Ribeye Roast
Boneless and bone-in can apply to any of the three names.
Standing Rib Roast = Bone-in Rib Roast

And don’t be fooled — prime rib refers to the cut of meat, not the USDA grade. Choice-grade roasts are most common and still excellent.

🐄 Ingredients

Small rib roast with seasoning—Labeled
  • Rib Roast – 2 to 4 pounds, boneless. Bone-in also works. Prime grade is excellent if available, but Choice is more common and still great. “Prime rib” refers to the cut, not the USDA grade.
  • Fresh garlic — crushed or minced.
  • Butter — softened for mixing with garlic.
  • Salt and pepper — to taste.

👨‍🍳 Quick Overview: How to Cook a Small Boneless Prime Rib Roast

1. Prep: Rest the roast at room temperature, preheat the oven to 500°F, and prep the pan and garlic butter.

Rib roast resting at room temperature.

2. Slather & season: Spread the garlic-butter mixture over all sides and season with salt and pepper.

Coat the prime rib roast with the butter mixture.

3. Sear, then roast: Roast 20 minutes at 500°F, reduce to 325°F, and cook to 130°–135°F for medium-rare.

Cooked beef roast on a rack.

4. Rest & slice: Tent with foil for 15–20 minutes, then slice across the grain.

Slicing a prime rib after a rest.

✅ Pro Tip: Temp rises 5°–10° while resting — cook to temp, not time.

👇 Scroll down for the printable recipe card and complete step-by-step photo instructions—or keep reading for temperature guidance, au jus, and tips.

⏰ How Long to Cook a Small Prime Rib (Time & Temperature Guide)

Rule of Thumb: About 15–20 minutes per pound for larger roasts, but small 2–4 lb roasts usually take longer per pound, and larger ones tend to fall toward the lower end of the range. Always check early.

Doneness Guide (for a 2-lb boneless roast):

  • Rare – cold red center (125°-130°F): About 60-65 minutes total (20 min sear + 40-45 min roast).
  • Medium-rare – warm red center (130°-135°F): About 65-75 minutes (20 + 45-55 min).
  • Medium – pink and firm (140°-150°F): About 75-85 minutes (20 + 55-65 min).
  • Medium-well / Well: Not recommended — the roast will dry out.

Thinner roasts cook faster; bone-in roasts usually need a little extra time since bones absorb heat.

Size Adjustments:

  • 2 lb roast: Use the chart above; check temp early.
  • 3 lb roast: Add 20–30 minutes; check early.
  • 4 lb roast: Add 25–40 minutes; check early.

✅ Pro Tip: Cooking times are for planning only — always use a thermometer and cook to final internal temp, allowing a 5°–10° rise while resting.

👍 Pro Tips for Perfect Prime Rib

  • Rest before roasting: Let the roast sit at room temperature 30–90 minutes for more even cooking.
  • Use a thermometer, not the clock: Roasts vary; always check temp early.
  • Fat side up: Whether boneless or bone-in, keep the fat cap on top so it bastes as it cooks.
  • Use a rack if you can: Helps fat drain and heat circulate, but the recipe still works without one.
  • Don’t skip the final rest: Tent with foil 15–20 minutes before slicing. This locks in juices.
  • Meat quality matters: Prime grade is outstanding, but Choice is more common and still excellent. What matters most is how you cook it.

🥣 Making Au Jus from the Drippings

Making homemade au jus is easy. Use a saucepan on the stovetop.

  • ¼ cup meat drippings (drain off the fat if you prefer; if not available, use extra broth)
  • 2 cups beef broth (if you placed broth under the meat to prevent smoking while roasting, you can reuse it here)
  • 1 tablespoon Worcestershire or soy sauce — or 2–4 tablespoons bold red wine
  • Salt and cracked black pepper to taste

Simmer on low heat for 10–15 minutes until slightly reduced.

👉 If you want to thicken the au jus, near the end of simmering, slowly whisk in a slurry of cold water and 2 teaspoons of cornstarch.

🛒Shopping

Here are some suggestions I like, but you can find many more good products that will work at your local big-box store. All links below are affiliate links, meaning I make a small profit from your purchases. This commission does not affect your price. We are a participant in the Amazon Services LLC Associates Program. As an Amazon associate, I earn from qualifying purchases.

Image for Maverick xr-50 remote thermometer from Maverick

Maverick XR-50 4 Probe Remote Thermometer

Maverick Adrenaline Barbecue Company XR-50 Extended Range Digital Remote Wireless 4 Probe. Highly Rated.
Shop at Amazon
baking racks

Oven Safe Racks

Similar to the racks I use. Be sure to get the right size.
Shop at Amazon
Red Thermapen One

Thermapen™ One from Thermoworks™

My personal favorite cooking tool. It will make your a better cook today. More expensive but will last for years.
Shop at Amazon
TP19 from the manufacture..

ThermoPro TP19 Instant Read Thermometer

Fast and accurate instant read thermometer at a lower price perfect for any use.
Shop at Amazon

📋 Related Recipes

Looking for more Holiday entrées? Try these:

  • Roasted Bone-in Turkey Breast
  • Crock Pot Glazed Ham
  • Pan Seared Filet Mignon
  • Pan Seared New York Strip Steak

Grilled Ribeye Steaks

Grill juicy, tender ribeye steaks with this beginner-friendly gas grill method. No marinade—just salt, heat, and a few smart steps.

Grilled ribeye steak with potatoes.

🔥 How to Prevent a Smoking Oven

Expect smoke during the 500° sear — fat from the roast and butter will hit hot metal.

Ways to reduce it:

  • Pan liquid (best option): Add beef broth (great if making Au Jus) or water under the rack so drippings hit liquid (212°) instead of the hot pan.
  • Lower sear temp: Try 450° instead of 500° — less smoke, nearly the same crust.
  • Use oil instead of butter: Higher-temp oils smoke less, but flavor suffers.
  • Vent it out: Fans on, windows open, accept the smoke.
  • Skip the sear: Go straight at 350°. Cooking time will be longer, and you’ll get more gray edge around the pink center.

🍽️ What to Serve with Prime Rib

Pair your roast with a fresh salad and roasted vegetables like Baked Green Beans with Bacon or Roasted Parmesan Asparagus . For a starch, Roasted Small Potatoes work beautifully. And don’t forget a crusty loaf like Julia Child's French Bread.

For a wine pairing, we prefer Cabernet Sauvignon, Merlot, or Pinot Noir.

❄️ Storage and Reheating Leftovers

Store leftovers tightly covered in the refrigerator for 3–4 days, or freeze airtight for 3–4 months.

To reheat, thaw overnight in the refrigerator if frozen. Warm in the oven, covered with moisture such as au jus or beef broth to prevent drying out.

❓FAQs

Which is better, bone-in or boneless prime rib roast?

Both are excellent. Bone-in may add a touch more flavor and moisture. Boneless cooks more evenly, has more surface area for the garlic butter, and is easier to carve. If you prefer bone-in, use the same method and simply allow a bit more roasting time.

How much prime rib to buy per serving?

Plan on about ½–¾ pound of boneless per serving. Add a little more for big appetites or fewer sides. For bone-in, add 20%+, for waste, so about a pound± per serving.

How to slice prime rib?

Slice across the grain into ½- to ¾-inch thick pieces. Think of it like cutting round slices from a log for even, juicy servings.

📖The Recipe Card

slice of Ribeye Roast on a white plate
Print Recipe Add to Collection Go to Collections
4.79 from 23 votes

Small Boneless Prime Rib (Ribeye) Roast

Juicy, tender boneless prime rib (ribeye roast) coated in garlic butter and roasted to perfection. Easy to cook at home for smaller gatherings or holiday dinners.
Prep Time5 minutes mins
Cook Time1 hour hr 20 minutes mins
Total Time1 hour hr 40 minutes mins
Course: Main Course
Cuisine: American
Keyword: Boneless Prime Rib, ribeye roast recipe, Small Ribeye Roast
Servings: 6
Calories: 456kcal
Author: Dan Mikesell AKA DrDan

Ingredients

  • 2-4 pound boneless rib roast
  • 3 cloves garlic, crushed or minced
  • 3 tablespoons butter, softened
  • kosher salt and freshly ground black pepper, to taste
  • Beef broth (optional, to prevent oven smoking or for au jus)
US Customary - Convert to Metric

Instructions

  • Rest & preheat: Let roast rest at room temperature for 30–90 minutes. Preheat oven to 500°. Lower rack so roast is centered in the oven.
    Rib roast resting at room temperature.
  • Make garlic butter: Mix 3 tablespoons of softened butter with 3 cloves of crushed garlic. Poke 15-20 half-inch holes into the roast with a knife.
    Crushing garlic into butter.
  • Slather and season: Rub garlic butter all over the roast, pushing some into the holes—season with salt and pepper.
    Seasoning a butter covered roast with salt.
  • Pan & rack prep: Set a rack (optional but recommended) in a roasting pan, then spray it with cooking spray. Place the roast on the rack, fat side up.
    spraying a rack in a cake pan
  • Sear, then roast: Sear at 500° for 20 min. Reduce the oven temperature to 325°F and continue cooking until the desired internal temperature is reached, 45–90 minutes, depending on the roast size and desired doneness. Start checking the temp early. Temp will rise another 5°–10° after removal.
    Start checking the temp early, and check a few times — roasts can cook faster than you expect. Remember: temp will rise another 5°–10° after removal.
    Cooked beef roast on a rack.
  • Rest & carve: Tent loosely with foil for 15–20 minutes. Slice across the grain. Serve (au jus optional—see the post).
    Slicing a prime rib after a rest.

Video

Notes

Pro Tips

  1. A reasonable estimate of the size of the roast is ⅓ to ½ pound per serving.
  2. Check the post for approximate cooking time for various weights and doneness.
  3. Never cook by time alone. Always check with a meat thermometer a few times early. A continuous remote thermometer is recommended.
  4. If your oven smokes, see the troubleshooting tips in the full post.
  5. Homemade Au Jus instructions are in the post.
  6. Leftovers: refrigerate up to 4 days or freeze 4 months. Reheat in the oven with a splash of broth or au jus.

Nutrition

Calories: 456kcal | Protein: 39g | Fat: 32g | Saturated Fat: 14g | Polyunsaturated Fat: 1g | Monounsaturated Fat: 11g | Cholesterol: 131mg | Sodium: 710mg | Potassium: 442mg | Vitamin A: 200IU | Iron: 4mg

Editor's Note: Originally published September 17, 2017. Updated with expanded options and refreshed photos.

Molly and Lilly are standing in a green yard.

Green Bean Casserole Without Mushroom Soup

A spoonful of green bean casserole.

Green bean casserole without mushroom soup is a homemade version of the classic holiday side dish. An easy roux replaces the canned soup for a creamy sauce, and you can use fresh, frozen, or canned green beans.

Make it ahead for Thanksgiving or Christmas, then add your favorite crunchy topping before baking. It has the creamy sauce and classic green bean casserole flavor without mushrooms or canned soup.

A spoonful of green bean casserole.
[feast_advanced_jump_to]

quote mark
Featured Comment by KrissyG :
"Great recipe! Thank you:)"

📝 TL;DR — Recipe Summary

What: Green bean casserole made from scratch without mushroom soup or mushrooms, using an easy homemade roux sauce.

Beans: Use fresh, frozen, or canned green beans. Fresh beans need precooking; thaw frozen beans and drain canned beans.

Topping: Use French fried onions, Ritz crackers, or Panko for the crunchy topping.

Make ahead: Assemble without the topping and refrigerate for up to 3 days. Add the topping just before baking.

🥣 Ingredients

Fresh green beans with casserole ingredients—labeled.
  • Green beans — Fresh is best for flavor and texture, but frozen or canned work, too. Use straight-cut or French-style beans; just be sure to drain canned or thaw frozen before mixing.
  • Butter + flour + onion — The base for an easy roux that replaces the canned soup. Cook the onion in butter, then stir in flour to thicken.
  • Sour cream — Adds tang and creaminess.
  • Seasonings — Salt, black pepper, and a pinch of sugar round things out.
  • Shredded cheese — Sharp cheddar is classic, but Swiss, Colby Jack, or Gruyère all work.
  • Topping — Crushed Ritz crackers are my go-to, but Panko with Parmesan or the traditional French fried onions are great options.

✅ Note: Use the ingredients that fit your family traditions. Whether it’s cheddar vs. Swiss, Ritz vs. fried onions, or fresh vs. canned beans, this casserole works with what you like.

👨‍🍳 Quick Overview: Green Bean Casserole Without Mushroom Soup

This section isn’t the full recipe — just a short overview. Keep reading for tips, bean options, and toppings, or jump to the recipe card.

1. Prepare the green beans

Fresh beans: Clean, trim, and cook until almost tender.

Canned beans: Drain well.

Frozen beans: Thaw and drain.

Boiling fresh green beans.

2. Making a roux

Cook chopped onion in butter until just starting to clear (2–3 minutes).

Cooking the chopped onion in butter.

Stir in flour until smooth, then cook another 2–3 minutes until lightly browned. Remove from heat.

Mixing flour into the butter and onions to make a roux.

✅ Note: This quick roux is the base that replaces the canned soup and gives the casserole its creamy texture.

3. Combine and top

Mix in the seasonings, sour cream, shredded cheese, and green beans. Transfer to a casserole dish (refrigerate up to 3 days if making ahead).

Mixing green beans and sour cream into the roux.

Cover with more cheese and finish with your topping of choice.

Top the casserole with cheese and crackers.

4. Bake

Bake at 375°F (or 350°F convection) for 35–40 minutes, until the top is golden and the casserole is bubbling.

Cooked green bean casserole.

📆 How to Make Ahead (Holiday Timing Tips)

Assemble the casserole without the topping. Cover tightly with plastic wrap or foil and refrigerate for up to 3 days.

When you’re ready to bake, rest uncovered at room temperature while the oven preheats, add the topping, and bake as directed until hot and bubbly.

✅ Pro Tip: Since this recipe skips the canned soup, the homemade sauce stays creamy and fresh even after a couple of days in the fridge. If the casserole looks a little thick after chilling, stir in a splash of milk before baking.

🔪 Green Bean Options

This casserole works with fresh, frozen, or canned green beans. Use straight-cut or French-style, whichever you prefer.

  • Canned: Drain well before using.
  • Frozen: Thaw and drain before adding to the casserole.
  • Fresh (recommended): Best flavor and texture, but they must be precooked until just tender—not mushy. They’ll finish cooking in the oven. Always stop the cooking in an ice bath.

✅ Pro Tip: For Thanksgiving and Christmas, good fresh green beans may be hard to find. If they don’t look fresh and firm, use frozen green beans instead.


Precooking Fresh Green Beans

Choose beans that are bright green, smooth-skinned, and firm, without swollen seeds or wrinkles. Cook until just tender, then immediately cool in an ice bath:

  • Microwave: In a covered dish with a little water on the bottom, cook 4–6 minutes.
  • Stovetop: Boil in salted water for 4–5 minutes.

✅ Pro Tip: Slightly undercook fresh beans—you want them crisp-tender. Overcooked beans will turn soft and mushy once baked.

🥄 Sauce Variations and Add-Ins

The easy roux sauce replaces canned soup and is easy to customize. Try garlic, cooked bacon, or extra cheese. Sautéed mushrooms may be added for mushroom flavor without using canned soup.

🧀 Cheese Options

Sharp cheddar is the classic choice, but Swiss, Gruyère, or Colby Jack also work well. Parmesan may be added to the sauce or topping. For the smoothest melting, shred your own cheese instead of using pre-shredded.

🥣 Topping Options

Add a layer of shredded cheese before your topping. Choose crushed Ritz crackers, traditional French fried onions, or buttered Panko depending on the flavor and crunch you prefer.

  • Ritz Crackers — my go-to. Crush and mix with melted butter — add before baking.
  • French fried onions — the traditional choice. Skip the cracker topping and add 1 to 1½ cups for the last 5 minutes of baking so they don’t burn.
  • Panko breadcrumbs — mix 1 cup with 2–3 tablespoons of melted butter. Add ¼ cup of grated Parmesan for a golden, cheesy crust. Sprinkle on before baking.

📏 Scaling and Pan Size

This recipe makes 8 servings and fits a 2½-quart baking dish. A 9×13 pan also works, but the casserole will be thinner and needs about 50% more topping to cover the larger surface.

For a half recipe (about 4 servings—for two with leftovers), use a 1-quart dish, 8×8, 6×9, or 8–9-inch round dish. It will usually cook about 10–15 minutes faster, so watch for a golden topping and bubbling casserole.

✅ Pro Tip: When scaling, follow the ingredient list, not the step-by-step instructions, since those don't automatically adjust.

🍽️ More Small-Batch Holiday Recipes

  • Roasted Turkey Breast — juicy and simple.
  • Sausage Dressing — hearty and traditional.
  • Sweet Potato Casserole — another holiday favorite.

👉 For a full menu, see the Thanksgiving Recipe Roundup.

❄️ Storage of Leftovers

  • Refrigerate: Store airtight for 3–4 days. Reheat in a 350°F oven until hot or microwave individual servings.
  • Freeze: Freeze airtight for 3–4 months and thaw overnight in the refrigerator. The topping will lose its crunch, so add a fresh topping when reheating.

📖The Recipe Card

A spoonful of green bean casserole.
Print Recipe Add to Collection Go to Collections
5 from 1 vote

Green Bean Casserole Without Mushroom Soup

This green bean casserole without mushroom soup is made from scratch with an easy roux-based creamy sauce. Use fresh, frozen, or canned green beans and your favorite crunchy topping for an easy Thanksgiving or Christmas side dish.
Prep Time15 minutes mins
Cook Time35 minutes mins
Total Time50 minutes mins
Course: Vegetable
Cuisine: American
Keyword: Green Bean Casserole, Green Bean Casserole without Cream Soup, Green Bean Casserole without Mushroom Soup
Servings: 8
Calories: 283kcal
Author: Dan Mikesell AKA DrDan

Ingredients

  • 2 pounds green beans canned, frozen, or fresh
  • 1 small onion
  • 3 tablespoons butter divided
  • 2 tablespoons flour
  • 1 teaspoon salt
  • ½ teaspoon black pepper
  • 1 teaspoon sugar
  • 1 cup sour cream
  • 2 cups shredded cheese of choice (cheddar recommended)
  • 12 butter crackers (Ritz) crushed
US Customary - Convert to Metric

Instructions

Preheat the Oven

  • Preheat the oven to 375°F (350°F convection).
    Fresh green beans with casserole ingredients—labeled.

Prepare the Green Beans

  • Fresh green beans: Clean, trim, and precook them until slightly tender. Stovetop: Boil in salted water for 4–5 minutes. Microwave: Cook covered with a little water for 4–6 minutes. Always cool immediately in an ice bath to stop cooking
    .Canned green beans: Drain well.
    Frozen green beans: Thaw and drain.
    Boiling fresh green beans.

Make the Roux

  • Chop the onion. In a large skillet, melt 2 tablespoons of butter over medium-high heat. Add onion and cook 2–3 minutes until just clearing.
    Cooking the chopped onion in butter.
  • Stir in flour until smooth and cook 2 minutes, stirring, until lightly browned. Remove from heat.
    Mixing flour into the butter and onions to make a roux.

Combine and top

  • Stir in 1 teaspoon of salt, ½ teaspoon of black pepper, 1 teaspoon of sugar, and 1 cup of sour cream. Mix well. Add about 2 pounds of green beans and 1 cup of shredded cheese of your choice. Cheddar cheese is classic.
    Mixing green beans and sour cream into the roux.
  • Transfer mixture to a 2½-quart casserole dish. (At this point, you can cover and refrigerate up to 3 days. Add topping just before baking.)
    Pouring the green bean mixture into the baking dish.
  • Crush 12 Ritz crackers to make ½ cup of crumbs. Melt 1 tablespoon of butter in the microwave, then mix it with the crushed crackers. (Option: substitute 1 cup French-fried onions, added in the last 5 minutes of baking.)
    Mixing crushed Ritz crackers into butter.
  • Top casserole with the remaining 1 cup cheese, then sprinkle with topping of choice
    Top the casserole with cheese and crackers.

Bake

  • Bake at 350°F convection (375°F conventional) for 35–40 minutes, until the top is golden and the casserole is bubbling.
    Cooked green bean casserole.

Video

Notes

Pro Tips

  1. Test run first: Don’t make any new-to-you recipe for the first time on Thanksgiving—try it once ahead.
  2. Scaling down: Easy to cut in half for 4 servings. Use a 1-quart dish and reduce baking time by 10–15 minutes.
  3. Green bean choices: Fresh has the best texture and flavor (when in season, June–October). Frozen is the second best. Canned is softer, but it works fine—about 3 cans are needed for 2 pounds after draining.
  4. Cheese picks: Cheddar is classic, Swiss is excellent, Gruyère feels special. Shred your own for the best melt.
  5. Topping picks: Ritz cracker crumbs are my favorite. Or skip and add canned French fried onions in the last 5 minutes. The breadcrumb topping option is available in the post.
  6. Make ahead: Assemble without topping, cover, and refrigerate 1–3 days. Add topping just before baking.
  7. Leftovers: Refrigerate airtight for 3–4 days. Reheat in the oven or microwave.
  8.  

Nutrition

Calories: 283kcal | Carbohydrates: 16g | Protein: 11g | Fat: 20g | Saturated Fat: 13g | Polyunsaturated Fat: 1g | Monounsaturated Fat: 1g | Trans Fat: 0.3g | Cholesterol: 62mg | Sodium: 523mg | Potassium: 257mg | Fiber: 4g | Sugar: 4g | Vitamin A: 1450IU | Vitamin C: 26.4mg | Calcium: 270mg | Iron: 1.3mg

Adapted from Allrecipe's Grandma's Green Bean Casserole.

Originally Published November 21, 2015. Updated with expanded options, refreshed photos, and a table of contents to help navigation.

dogs in snow with sticks.
Molly and Lilly are enjoying the first snow of the season.

How to Roast a Turkey Breast in the Oven

turkey slice with gravy on orange plate.

Learn how to roast a turkey breast in the oven with juicy, tender meat and golden-brown skin. This easy method uses one steady oven temperature—no changing temperatures halfway through cooking.

I'll walk you through preparing a bone-in turkey breast, including my simple trick for keeping it stable in the roasting pan. It's perfect for a smaller holiday dinner, with a boneless option and homemade gravy, too.

🤔 Quick Answer: How Long to Roast Turkey Breast in the Oven

Roast a bone-in turkey breast in a 350°F oven until the thickest part reaches a safe 165°F.

  • 5 to 6 pounds: about 1 hour 30 minutes to 1 hour 45 minutes
  • 7 to 8 pounds: about 2 to 2 hours 15 minutes
  • 9 to 10 pounds: about 2 hours 15 minutes to 2 hours 30 minutes

Cooking times are estimates. Always check with an instant-read thermometer.

turkey slice with gravy on orange plate.
[feast_advanced_jump_to]

quote mark
Featured Comment from Norma :
⭐⭐⭐⭐⭐"This is the best, most straightforward instruction I have seen.
Thank you
."

📝 TL;DR — Recipe Summary

  • What: Learn how to roast a bone-in turkey breast with juicy, tender meat, crispy skin, and optional homemade gravy.
  • Why: An easy method for a smaller holiday meal or anytime you want turkey without roasting a whole bird.
  • How: Trim and break back the ribs to stabilize the breast, then roast at 350°F until the thickest part reaches 165°F.

🦃 Ingredients

  • Turkey breast — bone-in, 5 to 10 pounds, fully thawed. For boneless breasts, see the boneless turkey breast section below.
  • Butter or oil — for brushing before and during roasting.
  • Seasoning — kosher salt is all you need, or add herbs such as thyme, rosemary, or sage.
  • For gravy (optional) — all-purpose flour, broth, salt, and pepper. Use turkey broth if available or chicken broth.

👨‍🍳 Quick Overview: How to Roast a Bone-In Turkey Breast

1. Prep

Completely thaw the turkey breast. Preheat the oven to 350°F and prepare a roasting pan with a rack, if available.

thawing frozen breast in water.

2. Remove the Backbone and Break Back the Ribs

Cut out the backbone using a heavy knife or kitchen shears. Use firm pressure to break back the rib sections so the breast sits flat and stable.

Breaking back the ribs on both sides for stability.

✅ Pro Tip: The natural weak spot is about an inch from the breastbone. Fold the ribs back to help support the breast while roasting.

3. Season

Brush with oil or melted butter and sprinkle with kosher salt. Add herbs or other seasoning if desired.

Brushing a turkey breast on a rack with oil.

4. Roast

Roast at 350°F until the thickest part reaches 165°F—a 7-pound breast will take about 2 hours.

Roasted whole turkey breast.

✅ Pro Tip: Basting isn't required, but I like to brush on a little more butter or oil halfway through. Rotate the pan 180° to compensate for oven hot spots—most ovens have them.

5. Rest

Let rest, tented with foil, for 10–15 minutes before carving. Perfect time to make gravy—see the recipe card for instructions.

tenting turkey breast with foil on plate

👇 Scroll down for the printable recipe card and step-by-step photo instructions—or keep reading for extra tips, veggie sides, and serving ideas.

🦃 How to Roast a Boneless Turkey Breast

Most commercial boneless turkey breast roasts weigh about 2½ to 3 pounds. They are easy to prepare, but use a lower oven temperature than bone-in breasts. If yours is larger or smaller, adjust the cooking time and always cook to the final internal temperature.

  1. Thaw completely in the refrigerator for 1½ to 2 days before cooking.
  2. Preheat the oven to 325°F. Place the turkey breast on a rack in a roasting pan, if available. Brush with melted butter or oil and season to taste.
  3. Leave the netting on during roasting to help the breast hold its shape.
  4. Roast for approximately 1½ to 2 hours, until the thickest part reaches 165°F. Cooking time varies with size and thickness.
  5. Rest for 5–10 minutes before removing the netting and slicing.

🌡️ Best Oven Temperature for Bone-in Turkey Breast (350°F)

I recommend roasting bone-in turkey breast at 350°F. It gives the skin time to brown while the meat cooks evenly, without changing oven temperatures or routinely needing to tent with foil to prevent over-browning.

Starting at a higher oven temperature for browning and then reducing the heat usually just means tenting the browned skin with foil longer.

You can roast at 325°F, but it will take a little longer, and the skin may not brown as well.

🌡️ Turkey Breast Internal Temperature

A turkey breast is done when the thickest part reaches 165°F. Check with an instant-read thermometer, making sure the probe is in the meat and not touching bone. The USDA recommends a minimum internal temperature of 165°F for turkey and other poultry. 

Don't rely on a pop-up timer. Pop-up timers can be inaccurate. Cook by temperature, not estimated cooking time.

Don’t judge by color. Fully cooked turkey can still look slightly pink near the bone. That’s from natural compounds like myoglobin, not undercooking. If the internal temp is 165°F, it’s safe regardless of color.

😊 Tips for the Best Results

  • Cooking time depends on thickness as well as weight. A thicker turkey breast may take longer than another breast of the same weight. Use the estimated times for planning, but always cook to 165°F.
  • Tent only if needed. If the skin is getting too brown before the turkey reaches 165°F, loosely cover the browned area with foil for the rest of the roasting time.
  • Don’t trust the pop-up timer—but don’t pull it out either. It can be inaccurate, and removing it leaves a hole that can let juices leak out. Ignore it and use an instant-read thermometer instead.
  • Position the breast in the center of the oven. Since a turkey breast is tall, this usually means placing the oven rack one or two positions below center.

🧂 Seasoning a Turkey Breast

For a classic roasted turkey breast, all you need is kosher salt and butter or oil. Butter adds flavor, while oil helps the skin get a little crispier.

For more flavor, add sage, thyme, rosemary, garlic, or your favorite poultry seasoning. You can also put herb butter under the skin, but it isn't necessary for juicy turkey.

🦃 How Much Turkey Breast Per Person?

Plan on about ¾ to 1 pound of bone-in turkey breast per person. Use the higher end if you want generous portions or plenty of leftovers.

Remember that the bone adds to the weight, and holiday guests often have seconds. If leftovers are part of the plan—and they should be—buy a little extra.

❄️ How to Thaw a Turkey Breast

Refrigerator thawing is preferred. Leave the turkey breast unopened in its original packaging, place it on a tray, and allow about 2–3 days for a 5- to 7-pound breast. Larger breasts may need longer.

For faster thawing, keep the turkey sealed and submerge it in cold tap water, changing the water every 30 minutes. A 5- to 7-pound breast will usually take about 3–5 hours.

Never thaw turkey at room temperature or in warm water.

🧂 Should You Brine a Turkey Breast?

Frozen turkey breast with injection notice.
The label will usually say “injected” or “contains up to X% solution.” That’s your signal to skip the brine—it will be moist and flavorful if we don’t mess it up.

Usually not. Most frozen turkey breasts are already injected or pre-brined. Check the package for wording such as “injected” or “contains up to X% solution.” Don't brine these—they may become overly salty.

If you have a fresh, unbrined turkey breast, brining can help keep it moist. Use 1 gallon of water, 1 cup of salt, and ½ cup of sugar and brine for 12–24 hours.

🥣 How to Make Turkey Gravy

A turkey breast usually produces less pan drippings than a whole turkey, but you can still make excellent gravy. Combine the drippings with turkey or chicken broth, then thicken with an all-purpose flour slurry.

Full gravy instructions are in the recipe card. For more details, see How To Make Gravy at Home.

🍴 Serving and Related Recipes

Roasted turkey breast is perfect for a smaller Thanksgiving or holiday meal. We always serve it with mashed potatoes, peas, and gravy.

Other favorite sides include:

  • Easy Dinner Rolls
  • Sausage Dressing
  • Sweet Potato Casserole
  • Green Bean Casserole

❄️ Storage and Leftovers

Store leftover turkey in an airtight container in the refrigerator for up to 4 days or freeze for up to 4 months. Store leftover gravy separately.

For reheating, warm sliced or chopped turkey gently with a little gravy or broth to help keep it moist.

Recipes for Leftover Turkey

Easy Turkey Tetrazzini

Turkey Tetrazzini is the perfect leftover Thanksgiving turkey recipe. It features tender turkey, creamy sauce, pasta, vegetables, and a crispy Parmesan topping. You may want to cook extra turkey this year for this casserole.

large serving of turkey tetrazzini on a blue plate
  • Double Crust Chicken Pot Pie: Substitute leftover turkey for the chicken.
  • Chicken Broccoli Rice Casserole: Substitute chopped turkey for the chicken.

❓ FAQs

How many minutes per pound should I roast a turkey breast?

There is no reliable minutes-per-pound rule for roasting turkey breast. Thickness and shape affect cooking time more than weight.
Use the estimated times in the Quick Answer for planning, but always roast until the thickest part reaches 165°F.

Should I cover a turkey breast while roasting?

No. Roast uncovered so the skin can brown. If the skin becomes too brown before the breast reaches 165°F, loosely tent just the browned area with foil.

Can I stuff a turkey breast?

I don't recommend it. Stuffing must also reach 165°F, which can result in an overcooked turkey breast. For better control of both the turkey and stuffing, cook the stuffing separately.

⚕️ Food Safety

Treat all raw turkey as contaminated. Wash your hands and surfaces thoroughly after handling it, but don't rinse the turkey—rinsing can spread bacteria around the kitchen through splatter. For more, see Chicken… To Rinse or Not To Rinse?

Cook turkey to a safe internal temperature of 165°F in the thickest part. See the Turkey Breast Internal Temperature section above for details.

📖The Recipe Card

turkey slice with gravy on orange plate.
Print Recipe Add to Collection Go to Collections
5 from 8 votes

Roasted Turkey Breast Recipe

Learn how to roast a bone-in turkey breast in the oven using one steady 350°F temperature. This easy method gives you juicy, tender meat and golden-brown skin without changing oven temperatures.
Prep Time10 minutes mins
Cook Time2 hours hrs
Total Time2 hours hrs 10 minutes mins
Course: Main Course
Cuisine: American
Keyword: cook bone in turkey breast, how long to cook a turkey breast, how to cook bone in turkey breast, Oven Roasted Turkey Breast
Servings: 12
Calories: 294kcal
Author: Dan Mikesell AKA DrDan

Ingredients

  • 5-10 pounds bone-in turkey breast thawed
  • 1 tablespoon oil or butter
  • salt to taste or seasoning of your choice

For Gravy

  • ½ cup all-purpose flour
  • 4 cups broth turkey or chicken
  • salt to taste
US Customary - Convert to Metric

Instructions

Prep

  • Fully thaw the turkey breast before proceeding. Preheat oven to 350°F with the rack set low enough so the breast will sit in the center of the oven. Use a conventional oven setting, not convection.
    Frozen turkey breast in water.

Remove the Backbone and Break Back the Ribs

  • Remove any gravy packet or extras. Cut out the backbone if present using kitchen shears or a heavy knife. If there's a pop-up timer, ignore it—but don’t remove it (that can cause juice loss).
    Cutting out the backbone of a turkey breast.
  • Trim off any excess skin, like the neck flap, and pat the breast dry with paper towels.
    Trim of.f extra skin.

Break the rib sections

  • Break back the rib sections to create a flat base. The weak point is about an inch from the breastbone—use firm pressure or a knife if needed.
    Breaking back the ribs on both sides for stability.
  • Place the breast in a roasting pan with a rack if available. For smaller breasts, a cake pan may work; larger ones need a full roasting pan. Spray rack and pan with cooking spray. Position the rib sections to help stabilize the breast upright.
    A graphic of a turkey breast in a pan showing the ribs supporting the breast.

Season and roast

  • Brush with oil or melted butter, then season with kosher salt (and any other herbs or spices if using).
    Brushing a turkey breast on a rack with oil.
  • Roast uncovered in the center of the oven. After 1 hour, rotate the pan 180° and brush again with butter or oil. Check the color and temp at 90 minutes—if the skin is browning too fast, tent lightly with foil.
    Tenting a cooking turkey breast with foil.
  • Continue roasting until an internal temperature of 165°F is reached in the thickest part—about 2 hours for a 7-pound breast.
    Roasted turkey breast in pan.
  • Remove from the oven and tent lightly with foil. Let rest 10–15 minutes before carving.
    Tenting the cooked turkey breast.

Optional Gravy

  • While the turkey rests, whisk ½ cup flour into 2 cups of broth to make a slurry. Add the remaining 2 cups of broth to any drippings in the pan. Bring to a boil over medium-high heat.
    Pouring flour mixture into liquid.
  • Decrease the heat to medium and slowly add most of the broth-flour mixture, whisking continuously. Add more later if needed. Season with salt and pepper to taste. After thickened, simmer for a few minutes to cook the flour.
    Mixing gravy until smooth.
  • Slice the turkey and serve hot with gravy.
    Carving the baked turkey breast.

Video

Notes

Approximate roasting times at 350°F:

Times are estimates for bone-in turkey breasts. Thickness affects cooking time. Always cook to 165°F in the thickest part, using an instant-read thermometer.
  • 5 to 6 pounds: about 1 hour 30 minutes to 1 hour 45 minutes
  • 7 to 8 pounds: about 2 to 2 hours 15 minutes
  • 9 to 10 pounds: about 2 hours 15 minutes to 2 hours 30 minutes

Pro Tips:

  • Thawing: The turkey breast must be fully thawed before roasting. See the post for safe thawing methods.
  • Brining: Only brine if you're sure the turkey hasn't already been injected or pre-brined.
  • Storage: Refrigerate leftover turkey and gravy for up to 4 days or freeze for up to 4 months.
  • Nutrition: Based on a ½-pound serving of turkey and ⅓ cup gravy.

Nutrition

Calories: 294kcal | Carbohydrates: 4g | Protein: 45g | Fat: 11g | Saturated Fat: 0.2g | Polyunsaturated Fat: 0.1g | Monounsaturated Fat: 1g | Cholesterol: 142mg | Sodium: 788mg | Potassium: 7mg | Fiber: 0.2g | Sugar: 2g | Calcium: 40mg | Iron: 3.1mg

Editor's Note: First published March 25, 2018. Updated with improved cooking instructions, boneless turkey breast directions, and clearer roasting-time guidance.

Molly and Lilly in leafy yard.

Grilled Turkey Breast

Sliced turkey breast on a board.

Grilled Turkey Breast is perfect for a smaller Thanksgiving or a healthier year-round change of pace. Use traditional seasoning or make BBQ with the recommended brown sugar dry rub.

Easy to do with the simple instructions. Any turkey, fresh or frozen, skin-on-bone-in whole or half breast, or a boneless turkey breast, will work—season to your taste.

🦃Ingredients

Turkey breast—bone-in or boneless
Oil—vegetable oil, olive oil, or butter
Optional brine and rub
Other optional seasoning—
sprigs of fresh thyme, basil, rosemary, or other fresh herbs, pepper

Sliced turkey breast on a board.
[feast_advanced_jump_to]
Blue ribbon divider used for visual effect

quote mark
Featured Comment by gina:
⭐⭐⭐⭐⭐
"I have made this recipe twice within the last three months, and it is fabulous."

Fire up the backyard BBQ grill for this easy recipe. There is no need for an oven; prep the turkey, control the grill temperature, place it on the grill, and return in a few hours.

This recipe is great for any smaller gathering when you don't need a whole turkey. It's also a perfect summer change of pace or for a smaller holiday feast. Use the suggested brown sugar spice, a BBQ rub, or season like a traditional holiday bird.

👨‍🍳How to Grill a Turkey Breast—Step-by-Step Photo Instructions

Brining a turkey breast in a plastic bag.

1. Thaw if frozen, then trim and butterfly the breast if needed. Brine if not injected.

cleaning and oiling grill grates.

2. Preheat the grill to a grill surface temperature of 350° to 400°. Clean and oil grill grates well. You need to get the temperature right, so use a surface thermometer.

Rubbing the brown sugar rub on the turkey.

3. If brine was used, carefully rinse it off. Pat it dry, brush it with oil or butter, and apply the seasoning of your choice. Just butter and salt are good. I'm using the suggested brown sugar dry rub.

Grilled turkey breast on a white plate.

4. Grill skin side down for a few minutes if you want grill marks. The grill skin up only until the internal temp of 165° (about 1 ½ to 2 hours). Check the temp early since the time varies with the grill, the weight, and the thickness of the turkey breast

Slicing the grilled turkey on a board.

5. Let the turkey breast rest for 10 minutes off heat to absorb moisture back into the cells. Then slice and serve.

For more details, keep reading. See the Recipe Card below for complete instructions and to print.

⏲️How Long to Grill a turkey breast?

Total grill time will be about 15-20 minutes per pound—usually 1 ½ to 2 ½ hours, depending on weight, thickness, and the grill.

Check the internal temperature early due to the variables. You must have your final temperatures correct using an instant-read thermometer. Undercooking is not safe, and overcooking will rapidly dry the turkey.

✔️Tips to get it right every time

Use the turkey breast you want. I like to use half of a bone-in breast, which is the perfect amount as turkey for two with leftovers., but a whole breast butterflied or boneless breast works well.

You can use boneless turkey breast or turkey tenderloin with some time adjustments. You are cooking at the same temperature and to the same final temperature of 165°.

If using a two-sided breast, remove any backbone, split the breast bone from the inside, and press flat to butterfly.

You can grill over direct heat or use indirect heat at the same temperature.

I suggest a gas grill for easy temperature maintenance. A charcoal grill may be used, but it is much harder to control the temperatures.

You do need to use a grill surface thermometer and a remote or instant-read meat thermometer. The thermometer in the grill lid is useless—DO NOT depend on it. For a fuller discussion of grill surface temperature in A Beginners Guide to Grill Temperature on a Gas Grill.

🧂Seasoning options

The seasoning is entirely up to you. Just some butter with salt and a dash of pepper will be good more most people.

Other optional seasonings include pepper, fresh thyme, basil, rosemary, and other fresh herbs. There are also marinades that some recommend, but I prefer simpler.

BBQ is one of my favorites. Start with a dry rub of your choice. Or use one of my rubs, like the provided brown sugar rub, Memphis Dry Rub, Chipotle BBQ Dry Rub, or BBQ Dry Rub.

Suggested Brown Sugar BBQ Dry Rub

  • 2 tablespoons of brown sugar
  • 1 teaspoon of kosher salt
  • 1 teaspoon of chili powder
  • ½ teaspoon of oregano
  • ½ teaspoon of cumin.

Serve the BBQ version with Memphis BBQ Sauce or your favorite BBQ sauce.

🦃Other turkey recipes

Check out other turkey recipes, such as Easiest Roast Turkey Breast, Butter Turkey Tenderloin, How to Brine a Turkey, and Turkey Tetrazzini Casserole.

🍽️Serving suggestions

There are many options for serving. Do grilling side dish recipes, like Grilling Asparagus, Grilling Corn on the Cob, or Grilled Mixed Vegetables. Or do Thanksgiving dishes like Sweet Potato Casserole, Sausage Dressing, Turkey Gravy, and many more.

🌡️How to monitor temperatures

Like most recipes, your success in grilling a turkey breast will depend on your ability to control the cooking temperature and obtain the best final temperature. You must be able to control the cooking (surface) temperature and accurately monitor the end point of cooking.

Here are some suggestions I use, but there are many more good products that will work at your local big box store.

Note: All links below are affiliate links,, meaning I make a small profit from your purchases. Your price is not affected by this commission. We are a participant in the Amazon Services LLC Associates Program. As an Amazon associate, I earn from qualifying purchases.

Image for Maverick xr-50 remote thermometer from Maverick

Maverick XR-50 4 Probe Remote Thermometer

Maverick Adrenaline Barbecue Company XR-50 Extended Range Digital Remote Wireless 4 Probe. Highly Rated.
Shop at Amazon
Red Thermapen One

Thermapen™ One from Thermoworks™

My personal favorite cooking tool. It will make your a better cook today. More expensive but will last for years.
Shop at Amazon
CDN Grill Surface Thermometer

CDN Grill Surface Thermometer

Cheap and reliable—I still one mine.
Shop at Amazon

🥣How to brine a turkey breast

Grilling is very drying, so if your turkey breast is not injected or previously brined, try to brine if you have time. Almost all frozen turkey breasts, like Butterball, are injected, adding moisture and flavor.

A standard turkey brine of 2 quarts of water and about ¼ cup of table or Morton Kosher salt. If using Diamond Crystal Kosher salt, you need about ½ cup. Then add options of ¼ cup of brown sugar (suggested) and 2-3 crushed garlic cloves (depending on your other seasoning).

You can use the brine to introduce other favors that you want. Add some apple cider, perhaps a quartered orange. Go wild. But the most important thing is the salt-to-fluid ratio stays approximately the same. It is not an exact science, so keep it close. See How to Brine a Turkey—A Basic Brine with Enhancements for more discussion.

A quick salt note. 1 teaspoon table salt = 1 ¼ teaspoon Morton kosher salt = 2 teaspoons Diamond Crystal kosher salt.

Refrigerate for 3-6 hours. Be sure to rinse off any brine and pat dry carefully. Also, do not use salt in the rub if you brine.

❄️Storage of leftover turkey

Store leftovers in an airtight container. Refrigerate for 4 days or freeze for 3 months.

❓FAQs

Can I add wood smoke while grilling a turkey breast?

Yes, use a smoker box or a foil pack with holes. Use the wood flavor you prefer, but don't overdo it. Poultry will absorb smoke very well.

Can I use a foil pan for the breast?

Yes, it may extend the cooking time some. But I prefer direct exposure to the heat.

Can I use BBQ sauce in the turkey?

You can brush the skin lightly with your favorite sauce for the last 5-10 minutes of grilling. If you are planning to do this, keep the rub light.

⚕️Turkey Safety

Like any poultry, turkey must be cooked to a minimum of 165° for safety according to the USDA safety temperature guidelines.

While we don't like to rinse poultry, the brine should be rinsed off carefully— for more information, please see Chicken… To Rinse or Not To Rinse?

A frozen turkey breast should be thawed fully according to the package instructions.

Blue ribbon divider used for visual effect

📖The Recipe Card

Sliced turkey breast on a board.
Print Recipe Add to Collection Go to Collections
5 from 1 vote

Grilled Turkey Breast

Grilled Turkey Breast is perfect for a smaller Thanksgiving or a healthier year-round change of pace. Use traditional seasoning or make BBQ with the recommended brown sugar dry rub.
Prep Time10 minutes mins
Cook Time2 hours hrs
Total Time2 hours hrs 10 minutes mins
Course: Main Course
Cuisine: American
Keyword: BBQ Turkey Breast, Grilled Turkey Breast, Turkey Breast
Servings: 8 servings
Calories: 266.4kcal
Author: Dan Mikesell AKA DrDan

Ingredients

  • 4-7 pounds turkey breast whole or half

The Brine- Only if not injected or previously brined

  • 2 qts water
  • ¼ cup table salt
  • ¼ cup brown sugar optional
  • 2-3 cloves crushed garlic optional
  • 2-3 bay leafs optional

Optional brown sugar rub or use other seasoning

  • 2 tablespoons brown sugar
  • 1 teaspoon kosher salt only if not brining
  • 1 teaspoon chili powder
  • ½ teaspoon oregano
  • ½ teaspoon cumin
  • 2 teaspoons oil
US Customary - Convert to Metric

Instructions

  • Brining is an excellent idea if your turkey breast has not been injected or previously brined. Start with a brine: 2 quarts of water and ¼ cup of table or Morton Kosher salt. You can also add ¼ cup of brown sugar, 2-3 crushed garlic cloves, or 2-3 bay leaves.
    Ingredients for a simple brine.
  • Trim and clean 4-7 pound turkey breast. A half-breast is fine. If brining, add the turkey to the brine and refrigerate for 3-6 hours. Rinse the brine off the turkey breast carefully and pat dry with paper towels.
    brining turkey breast in a plastic bag
  • Preheat the grill to a grill surface temperature of 350° to 400°. Clean and oil grill grates well.
    clean and oil grill crates
  • Optional: Mix a rub of 2 tablespoons brown sugar, 1 teaspoon kosher salt, 1 teaspoon chili powder, ½ teaspoon oregano, and ½ teaspoon cumin.
    brwon sugar and seasoning for rub
  • Pat dry, then brush with oil or melted butter, and then apply the rub or seasoning of your choice. Just salt and butter are fine.
    Rubbing tthe brown sugar rub on the turkey
  • For grill marks, grill skin-side down for about 5 minutes, then flip. Keep the lid closed and your hands off as much as possible.
    Partly cooked turkey breast on the grill
  • Cook until internal temp of 165° (about 1 ½ to 2 hours). Time will vary by the weight and thickness of the turkey breast and by your grill. Please check the temperature early. DO NOT COOK BY TIME.
    grilled turkey breast on a white plate
  • Remove from heat and let rest for 10 minutes before slicing and serving.
    Slicing the grilled turkey on a board.

Notes

Pro Tips

  1. Only brine if the breast is not injected and not pre-brined. Warning: NEVER BRINE A PREVIOUSLY BRINED OR INJECTED TURKEY BREAST
  2. Do not add salt to the rub if you brine the breast.
  3. The brine can be modified for other flavors. Please take a look at the post for some suggestions.
  4. A quick salt note. 1 teaspoon table salt = 1 ¼ teaspoon Morton kosher salt = 2 teaspoons Diamond Crystal kosher salt.
  5. To do this correctly, you need to check the grill surface temperature with a surface thermometer and use an instant-read thermometer to determine the endpoint. Do not try this without both.
  6. Remember, the minimum safe internal temperature for turkey is 165° in the thickest part of the breast.
  7. You can use half a full breast, a butterflied whole breast, a boneless turkey breast, or even a turkey tenderloin. The cooking time varies greatly depending on the size of the breast.
  8. I'm using a serving size of ½ pound.

Nutrition

Serving: 8oz | Calories: 266.4kcal | Carbohydrates: 4.9g | Protein: 39.1g | Fat: 10.9g | Saturated Fat: 3.4g | Trans Fat: 0.1g | Cholesterol: 105.9mg | Sodium: 392.8mg | Potassium: 12.7mg | Fiber: 0.2g | Sugar: 2.9g | Vitamin A: 77.8IU | Vitamin C: 0.1mg | Calcium: 6.5mg | Iron: 0.2mg

I started with a recipe from the Chicago Tribune with a brown sugar brine and rub. It was a good start, but I added some modifications and options, simplified, and added more details to the instructions.

Originally Published May 1, 2012. Updated with expanded options, refreshed photos, and a table of contents to help navigation.

Molly in the yard.

Crock Pot Apple Cobbler with Cake Mix

Small crock pot apple cobbler with golden cake mix topping on a plate

Crock pot apple cobbler with cake mix turns fresh apples into a warm, gooey dessert with a golden, buttery topping. It takes only 10 minutes to prep and lets the crock pot do the rest in 2 hours.

This easy small-batch recipe scales from two servings to a full-size dessert. Serve it warm with vanilla ice cream for a simple fall dessert.

Small-batch crock pot apple cobbler with golden cake mix topping on a plate.
[feast_advanced_jump_to]

quote mark
Featured Comment by Wilma:
⭐⭐⭐⭐⭐
"I made this for Thanksgiving and WOW did it go over great…Thank you for an amazing recipe. I love simple and delicious."

📝 TL;DR — Recipe Summary

What: Crock pot apple cobbler with fresh apples and a simple cake mix topping.

Why: An easy small-batch dessert recipe that scales from two to a full-size dessert. Only 10 minutes of prep and 2 hours to cook.

How: Season the apples, cover with dry cake mix, drizzle with butter, and cook until the topping is golden and the edges are bubbling.

🍎 Ingredients

Fresh apples, cake mix, cinnamon, and sugar ready for crock pot apple cobbler.
  • Apples— Fresh apples are best. Firm apples that hold their shape during cooking work well; more about choosing apples below.
  • Sugar and cinnamon— Sweeten and season the apples.
  • Cake mix— Yellow or white cake mix makes the easy cobbler topping.
  • Butter— Melted butter moistens the cake mix and creates the golden topping.
  • Nuts— Optional. Pecans or walnuts add some crunch.

👨‍🍳 Quick Overview: How to Make Crock Pot Apple Cobbler

1. Prep: Peel and chop the fresh apples.

Chopped apples on a whiteboard.

2. Season: Add the apples to the crock pot and toss with sugar and cinnamon.

Cinnamon sugar sprinkled over apples in a crock pot.

3. Add cake mix: Sprinkle the dry cake mix evenly over the apples—do not stir.

Dry cake mix topping poured over cinnamon apples in crock pot.

4. Add butter: Drizzle melted butter evenly over the cake mix. Add optional nuts and reserved cinnamon sugar.

Melted butter drizzled over cake mix topping for crock pot apple cobbler.

5. Cook: Cook on HIGH for about 2 hours or LOW for about 4 hours, until the topping is golden and the edges are bubbling. Go by doneness, not just time.

Fully cooked crock pot apple cobbler with browned topping and bubbling edges.

👇 Scroll for the printable recipe card and complete step-by-step photos—or keep reading for tips and variations.

♨️ When Is Crock Pot Apple Cobbler Done?

Cook on HIGH for about 2 hours or LOW for about 4 hours in a 3–4 quart slow cooker. A double batch in a 6-quart pot may take closer to 3 hours on HIGH or 5–6 on LOW. A half recipe in a 2-quart mini crock pot usually cooks in under 2 hours, but minis run hot—check early.

👉 Don’t just watch the clock. Your cobbler is done when the top is golden brown and the edges are bubbling. That’s your true doneness test, no matter the crock pot size.

Golden brown slow cooker apple cobbler showing bubbling edges when done.
Fully cooked crock pot apple cobbler showing browning and boiling along the edge.

🍏 Best Apples for Crock Pot Apple Cobbler

  • Firm, slightly tart apples hold up best in the slow cooker. Great choices include Granny Smith, Honeycrisp, Gala, Jonathon, Cortland, or Ida Red. A mix of tart and sweet apples gives a good balance of flavor and texture.
  • Avoid softer apples like Red Delicious or McIntosh—they collapse into mush when cooked.
  • A medium apple yields about 1 cup once peeled and chopped. The recipe needs 3–4 medium apples for a small batch (about 3 cups) or 6–8 for a double batch.

👉 Tip: If your apples are extra tart, add a little more sugar to balance.

👨‍🍳 Options, Variations & Shortcuts

  • Cake mix: Yellow or white cake mix works well. Spice cake mix adds more fall spice. A Jiffy cake mix is conveniently sized for a small batch.
  • Other fruit: Peaches, berries, or cherries can replace the apples.
  • Pie filling: Canned apple or other fruit pie filling can replace the fresh fruit for a shortcut. With cake mix, this variation is often called a dump cake.
  • Brown sugar: Substitute brown sugar for white for a deeper caramel flavor.
  • Nuts: Add chopped pecans or walnuts for some crunch.

🥣 Biscuit Topping Option (No Cake Mix)

If you’d rather skip the cake mix, use a quick biscuit topping for a more traditional biscuit-style top. It’s easy to make from scratch with pantry basics:

Ingredients:

  • ½ cup all-purpose flour
  • ¾ teaspoon baking powder
  • ¼ teaspoon salt
  • 2 tablespoons sugar (white or brown)
  • 1½ tablespoons cold butter, cubed and cut in
  • Optional: ½ teaspoon cinnamon

Mix the dry ingredients, cut in the cold butter until crumbly, then sprinkle evenly over the apples. Cook as directed until the topping is golden and the edges are bubbling.

↕️ Scaling the Recipe and Crock Pot Size

This is a small-batch recipe for about 4 servings in a 3–4 quart crock pot.

  • For two: Make a half recipe in a 2-quart mini crock pot. Check early since mini crock pots may cook faster.
  • Small batch: Make the full recipe in a 3–4 quart crock pot.
  • Full-size: Double the recipe and use a 6-quart or larger crock pot. Cooking time will be longer.

Scaling the ingredients: In the recipe card, change the number of servings. Use the adjusted amounts in the ingredient list—the amounts in the instructions do not adjust.

Always cook to the endpoint—a golden topping with bubbling edges—not just by time.

❄️ Storage and Reheating

  • Refrigerate: Store covered or in an airtight container for up to 4 days. The topping will soften as it absorbs moisture from the apples.
  • Freeze: Freeze in an airtight container for up to 4 months. Thaw overnight in the refrigerator.
  • Reheat: Warm individual servings in the microwave or reheat larger amounts in the oven until warm.

Best served fresh: The topping has its best texture the day the cobbler is made.

🍎 Related Apple Recipes

  • Small Crock Pot Apple Crisp – A cozy, crumb-topped cousin to this recipe.
  • Apple Crumb Pie – Buttery crumbs and tender filling, great for holidays.
  • Easy Apple Crisp – Simple, classic, and quick to make anytime.

❓ FAQs

How do I serve apple cobbler?

Serve apple cobbler warm with vanilla ice cream or whipped cream.

What’s the difference between cobblers, crumbles, and crisps?

Cobblers have a biscuit or cake-like topping. Crumbles and crisps are often used interchangeably, though some say crisps always include oats while crumbles do not.

Can I make crock pot apple cobbler without cake mix?

Yes. Use the biscuit topping option above for a more traditional cobbler topping made from scratch.

📖The Recipe Card

Small crock pot apple cobbler with golden cake mix topping on a plate
Print Recipe Add to Collection Go to Collections
5 from 1 vote

Crock Pot Apple Cobbler with Cake Mix

Easy crock pot apple cobbler made with fresh apples and cake mix. A simple small-batch dessert that scales from two to a crowd.
Prep Time10 minutes mins
Cook Time2 hours hrs
Total Time2 hours hrs 10 minutes mins
Course: Dessert
Cuisine: American
Keyword: apple cobbler from cake mix, crock pot apple cobbler, slow cooker apple cobbler without cake mix
Servings: 4 servings
Calories: 593kcal
Author: Dan Mikesell AKA DrDan

Ingredients

Filling

  • 3–4 medium apples – about 3 cups or a bit more
  • ½ cup sugar
  • ⅜ teaspoon ground cinnamon

Topping

  • ½ box yellow or white cake mix – about 1½ cups
  • 4 tablespoons butter (½ stick)
  • ⅓ cup nuts optional
  • remainder of the cinnamon sugar
US Customary - Convert to Metric

Instructions

  • Mix ⅓ cup sugar with ½ teaspoon cinnamon. Reserve 1 heaping tablespoon for topping.
    Adding cinnamon to sugar.
  • Peel and chop 3–4 medium apples. Measure 1½ cups (½ of a standard box) of yellow or white cake mix.
    Chopped apples on a whiteboard.
  • Give a 3–4-quart crock pot a good spray of PAM. Add the apple slices to the crock pot. Sprinkle with the sugar/cinnamon mixture. Mix to coat.
    Cinnamon sugar sprinkled over apples in a crock pot.
  • Cover with the dry cake mix and smooth the top.
    Dry cake mix topping poured over cinnamon apples in crock pot.
  • Melt 4 tablespoons of butter in the microwave for about 20 seconds.
    Melting butter in a small glass bowl in the microwave.
  • If using nuts, sprinkle ⅓ cup over the top. Sprinkle with the melted butter. Finish by sprinkling with the reserved cinnamon sugar.
    Melted butter drizzled over cake mix topping for crock pot apple cobbler.
  • Cook on HIGH for about 2 hours or LOW for about 4 hours, until the topping is golden brown and the edges are bubbling. Go by doneness, not just time, since crock pots vary.
    Fully cooked crock pot apple cobbler with browned topping and bubbling edges.

Video

Notes

Pro Tips:

Use a 3–4-quart crock pot for the full recipe. A 6-quart for a double and a mini 2-quart for a half. Cooking time is longer for the double and less for the half.
For a no-cake-mix option, use the biscuit topping in the post.
Some good choices for fresh apples are Granny Smith, Gala, Jonathon, Honey Crisp, Ida Red, and Cortland.
The endpoint is most important: bubbling edges and a browned center.
Storage: Refrigerate for up to 4 days or freeze for up to 4 months.

Nutrition

Calories: 593kcal | Carbohydrates: 85g | Protein: 4g | Fat: 28g | Saturated Fat: 10g | Polyunsaturated Fat: 4g | Monounsaturated Fat: 8g | Cholesterol: 32mg | Sodium: 524mg | Potassium: 274mg | Fiber: 4g | Sugar: 55g | Vitamin A: 450IU | Vitamin C: 6.6mg | Calcium: 120mg | Iron: 1.8mg

Inspired by a Betty Crocker Slow Cooker Apple Cobbler recipe with a few necessary adjustments for size, flexibility, and options for you.

Originally Published September 9, 2018. Updated with expanded options, refreshed photos, and a table of contents to help navigation.

Molly with a stuffed cat.

Baked American Goulash Casserole

Cheesy American Goulash on a spoon

Baked American goulash casserole is a quick, easy, cheesy recipe with tender pasta, ground beef, a spicy tomato sauce, and gooey cheese. A simple comfort-food favorite inspired by 1950s school cafeterias.

Brown the meat while cooking the pasta. Mix everything together, stir in some cheese, and top with more. Bake until browned and bubbly—about 30 minutes. Perfect for busy weeknights and great for leftovers.

Cheesy American Goulash on a spoon
[feast_advanced_jump_to]

quote mark
Featured Comment by Anne:
⭐⭐⭐⭐⭐
"Just the greatest Dr. Dan!! The ingredients are budget-friendly, and this was an easily prepared dish...We will enjoy this many times. Thanks for sharing."

🤔 TL;DR – Recipe Summary

What: A baked American goulash casserole with ground beef, pasta, tomato sauce, and gooey melted cheese.

Why: An easy comfort-food dinner that's cheesy, hearty, and great for feeding a family.

How: Brown the meat while the pasta cooks. Mix them with the sauce, stir in some cheese, top with more, and bake until browned and bubbly.

♨️ Ingredients

Ingredients for baked American goulash casserole—labeled.

Ground beef—Lean ground beef works best. Ground turkey or chicken may be substituted.
Pasta—Elbow macaroni is traditional, but another short pasta will work.
Onion and garlic—Add flavor to the ground beef and tomato sauce.
Tomatoes—Diced tomatoes and tomato sauce form the base of the casserole.
Cheese—Cheddar is stirred into the goulash, and mozzarella is added on top. Feel free to use all cheddar or your favorite combination of cheeses.
Seasonings—Basil, seasoning salt, and black pepper.

👨‍🍳 Quick Overview: Baked American Goulash

1. While the pasta cooks to al dente, brown the ground beef with the chopped onion and garlic.

Browning burger in a skillet.

2. Mix the cooked pasta, beef mixture, tomatoes, tomato sauce, and seasonings in a casserole dish.

Mixing browned burger into the sauce.

3. Stir in some shredded cheddar cheese and top with mozzarella cheese.

Mix cheese into the casserole.

4. Bake until browned and bubbly—about 30 minutes.

Baked American goulash casserole hot from the oven.

For more details, keep reading. See the Recipe Card below for complete instructions and to print.

🥣 Variations and Options

  • For a more Hungarian-style flavor, add 1 to 2 teaspoons of paprika. There is already some paprika in the seasoning salt, so this is optional.
  • Make it Italian by using Italian sausage, jarred marinara sauce, and topping it with mozzarella and Parmesan cheese.
  • Change the seasonings with oregano, thyme, or rosemary. You can also add Worcestershire sauce or a pinch of crushed red pepper.
  • Add more vegetables by stirring in chopped bell pepper, celery, or corn. Drained black or kidney beans also work well.

👨‍🍳 Make Classic American Goulash (Stovetop)

Skip the cheese to make a classic stovetop American goulash.

  1. Cook the pasta according to the package directions while browning the ground beef with the onion and garlic. Drain any excess fat.
  2. Stir the cooked pasta into the meat along with the tomato sauce, diced tomatoes, and seasonings.
  3. Simmer for 10–15 minutes, stirring occasionally, until hot and the flavors have blended.

↕️ Adjusting the Recipe for Two or a Crowd

This recipe is easy to scale up or down. A full recipe makes just over 8 cups, enough for about 6 servings. Use the recipe card to adjust the number of servings, but always use the ingredient amounts in the recipe card—not the instructions, which do not change.

  • A full recipe fits a 2½-quart casserole dish or any larger baking dish. A standard 9×13-inch baking dish will work but the casserole will be thinner.
  • A half recipe fits a 6×8-inch baking dish, an 8-inch round baking dish, or a 1½-quart casserole dish.
  • A 1½-times recipe fits a standard 9×13-inch baking dish or full-size casserole dish. A double recipe is too large for most standard home baking dishes.

Bake until the casserole is browned and bubbly, regardless of the pan size.

📋 Other Comfort Food Recipes

For other comfort food casseroles you may enjoy Easy Chili Mac, Tuna Noodle Casserole, Baked Chicken and Spaghetti, and Cheesy Chicken, Broccoli afnd Rice Casserole.

Chicken and Sausage Jambalaya

This cheesy chicken and sausage jambalaya casserole has classic Creole flavors and is an easy one-pan dinner that's perfect for busy weeknights.

Cheesy chicken and sausage jambalaya on a fork-labeled.

❄️ Storage and reheating leftovers

  • Like many casseroles, baked American goulash tastes even better the next day.
  • Store leftovers in an airtight container in the refrigerator for 3 to 4 days or freeze for up to 4 months.
  • To reheat: Thaw overnight in the refrigerator if frozen. Reheat in the microwave or cover and warm in a 350°F oven until hot.

❓ FAQs

Are there other names for American goulash?

American goulash is also known as American chop suey, chili mac, beef with macaroni, slumgullion, and Johnny Marzetti in different parts of the United States. Some families simply call it goulash.

What is the difference between Hungarian and American goulash?

They are completely different dishes.

Hungarian goulash is a thick beef stew heavily seasoned with paprika and made with chunks of beef and vegetables.
American goulash is a casserole or skillet meal made with ground beef, elbow macaroni, tomato sauce, and seasonings. Cheese is common but optional.

📖The Recipe Card

Cheesy American Goulash on a spoon
Print Recipe Add to Collection Go to Collections
4.80 from 5 votes

Baked American Goulash Casserole

This baked American goulash casserole combines tender pasta, seasoned ground beef, tomato sauce, and plenty of gooey melted cheese into an easy comfort-food dinner.
Prep Time20 minutes mins
Cook Time30 minutes mins
Total Time50 minutes mins
Course: Main Course
Cuisine: American
Keyword: American goulash, Baked Goulash, Beef Goulash
Servings: 6 servings
Calories: 351kcal
Author: Dan Mikesell AKA DrDan

Ingredients

  • 1 pound ground beef
  • 1 cup dry elbow macaroni pasta
  • 1 onion small or ½ medium
  • 2 cloves garlic crushed or minced
  • 15 oz tomato sauce
  • 14½ oz diced tomatoes not drained
  • 1 teaspoon dry basil
  • 2 teaspoons seasoning salt Lowery’s suggested
  • ½ teaspoon black pepper
  • 1 cup shredded cheddar cheese
  • ½ cup mozzarella cheese
US Customary - Convert to Metric

Instructions

  • Preheat oven to 375°F conventional (350°F convection).
    Hamburger with pasta and ingredients for goulash—labeled.
  • Bring a pot of water to a boil and cook 1 cup of elbow macaroni to al dente.
    Pouring dry pasta into boiling water.
  • Chop 1 small or ½ medium onion and crush or mince 2 garlic cloves.
    Chopped onions on a white board.
  • Brown 1 pound of ground beef over medium-high heat. Add the onion to the ground beef about 5 minutes into cooking, and the garlic the last minute of cooking. Drain the cooked beef.
    Browning burger in a skillet.
  • Spray a 2½-quart casserole dish with cooking spray.
    spray casserole dish with PAM
  • To the baking dish, add one 15 oz can of tomato sauce, 14½ oz diced tomatoes, 1 teaspoon of basil, 2 teaspoons of seasoning salt (I used Lowery's), and ½ teaspoon of black pepper. Mix well.
    Mixing spices into tomato products.
  • Add the ground beef along with the pasta and mix well.
    Mixing browned burger into the sauce.
  • Stir in 1 cup of shredded cheddar cheese.
    Mix cheese into the casserole.
  • Top with ½ cup of shredded mozzarella.
    Sprinkle the top with mozzarella cheese.
  • Bake until browned and bubbly, about 30 minutes.
    Topping goulash with cheese.

Video

Notes

Pro Tips

  • A full recipe fits a 2½-quart casserole dish or any larger baking dish.
  • The post discusses pan size and instructions for half and larger recipes.
  • Bake until the casserole is browned and bubbly rather than relying only on the time.
  • For classic stovetop American goulash, skip the cheese and follow the stovetop variation in the post.
  • For a more Hungarian-style flavor, add 1 teaspoon of paprika.
  • Optional ingredients and seasonings are discussed in the post.
  • It is good refrigerated for 4 days and will freeze well for 4 months.
  • Nutrition is based on a serving size of about 1 ½ cups.

Nutrition

Calories: 351kcal | Carbohydrates: 17g | Protein: 29g | Fat: 19g | Saturated Fat: 9g | Cholesterol: 91mg | Sodium: 716mg | Potassium: 703mg | Fiber: 2g | Sugar: 6g | Vitamin A: 621IU | Vitamin C: 13mg | Calcium: 263mg | Iron: 4mg

Editor's Note: Originally published November 16, 2013. Updated with expanded options, refreshed photos, video, and a table of contents to help navigation.

Dogs playing with a leaf in the snow.

Old-Fashioned Scalloped Potatoes Recipe

Scalloped potatoes in a casserole dish.

Old-fashioned scalloped potatoes with tender sliced potatoes in a creamy sauce and cheesy topping. An easy scalloped potato recipe—classic comfort food that Grandma made.

The standard recipe makes 4 generous servings, but it scales easily to 2 servings for two or 8 servings for a larger dinner.

Scalloped potatoes on a spoon.
[feast_advanced_jump_to]

quote mark
Featured Comment by Kathy:
⭐⭐⭐⭐⭐
"Fantastic! The only change I made was to add some sliced onions between the first and second layers. Thank you for a great recipe. Perfect for an Easter dinner…"

TL;DR — Recipe Summary

What: Old-fashioned scalloped potatoes with thin-sliced potatoes, creamy sauce, and a cheesy topping.

Why: An easy, dependable side dish made with simple ingredients and a roux-based sauce.

How: Make a quick milk sauce, layer with the potatoes and cheese, then bake until tender.

🥔 Ingredients

Potatoes and other scalloped potato ingredients.
  • Potatoes — Russet or Yukon Gold, peeled and thin-sliced (about ⅛ inch).
  • Sauce ingredients — All-purpose flour, milk, butter, and salt.
  • Cheese — Shredded cheddar is standard; Monterey Jack or Gruyere also work.
  • Optional seasonings — Cayenne pepper and paprika.

👨‍🍳 Quick Overview: How to Make Scalloped Potatoes

1. Prepare: Thin-slice the potatoes and soak in cold water. Drain and pat dry.

Slicing potato with a mandoline.

2. Make the sauce: Make a roux with butter and flour, add milk, then stir in the cheese.

Added cheese and whisk sauce.

3. Layer: Layer half the potatoes and sauce, repeat, and top with cheese.

Adding sauce to potatoes.

4. Bake: Bake at 350°F until tender, about 60–80 minutes. Rest 5–10 minutes before serving.

Scalloped potatoes in a 2 quart dish.

For more details, keep reading. See the Recipe Card below for complete instructions and to print.

⏰ How Long to Cook Scalloped Potatoes

Bake scalloped potatoes at 350°F for 60–80 minutes, until fork-tender. For soft, creamy potatoes, cook to an internal temperature of 200°–210°F.

Pan depth, thicker potato slices, or add-ins may increase the cooking time. If the top browns too quickly, loosely cover with foil.

↕️ Scalloped Potatoes for Two, Four, or Eight

The standard recipe makes about 4 generous servings (6 cups) and uses a 6×9-inch (1½–2 quart) baking dish.

  • For two: Make a half recipe for 2 servings (about 3 cups). This small batch fits a 4×6-inch or 5–6-inch round baking dish. Start checking for doneness at about 30–40 minutes.
  • For four: Make the recipe as written for 4 servings.
  • For eight: Double the recipe to 8 servings and use a 9×13-inch baking dish. Allow about 10–20 minutes of additional baking time.

Scaling the ingredients: Change the number of servings in the recipe card. Use the adjusted ingredient amounts; the written instructions do not automatically change.

👨‍🍳 Variations and Options

  • Potatoes: Russet or Yukon Gold potatoes work best. Russets bake softer and creamier; Yukon Golds stay slightly firmer with a buttery texture. Almost any potatoes will work.
  • Cheese: Cheddar is standard, but Monterey Jack or Gruyere also work. For classic scalloped potatoes without cheese, simply leave it out.
  • Seasonings: Add garlic or onion if you like. Paprika or a little cayenne also works well.
  • Add-Ins: Diced ham is the most common addition. Add it between the potato layers and allow 10–20 minutes of extra baking time if needed.

🗓️ How to Make Scalloped Potatoes Ahead

Assemble the casserole, but do not bake it. Cover and refrigerate for up to 2 days, then bake as directed. A cold casserole may need a little extra cooking time.

You can also freeze the unbaked casserole for up to 2 months. Thaw overnight in the refrigerator before baking.

🥔 Other Potato Recipes

  • Scalloped Potatoes and Ham — a hearty, top-rated version built around diced ham.
  • Crock Pot Scalloped Potatoes — same creamy texture with slow-cooker convenience.
  • Cheesy Potatoes with Real Potatoes — classic funeral potatoes made the right way, no frozen hash browns.

❄️ Storage and Reheating Leftovers

Store leftovers refrigerated for 3–4 days or frozen for 3–4 months. Reheat in a 350°F oven until hot. The microwave also works but may soften the texture.

❓ FAQs

What is the difference between Scalloped and Au Gratin potatoes?

Scalloped potatoes are baked in a milk-based sauce, while au gratin potatoes include cheese. Since this recipe uses cheese, it overlaps both styles. Leave out the cheese for classic scalloped potatoes.

Why won't my scalloped potatoes get soft?

The most common causes are potato slices that are too thick, a casserole that is too deep, or not enough cooking time. Slice the potatoes about ⅛-inch thick and bake until fork-tender. For very soft, creamy potatoes, aim for an internal temperature of 200°–210°F.

📖The Recipe Card

Scalloped potatoes in a casserole dish.
Print Recipe Add to Collection Go to Collections
4.80 from 5 votes

Old-Fashioned Scalloped Potatoes

Easy old-fashioned scalloped potatoes with tender potatoes in a creamy sauce and cheesy topping. Make 2, 4, or 8 servings for any size dinner.
Prep Time20 minutes mins
Cook Time1 hour hr
Total Time1 hour hr 20 minutes mins
Course: Potato
Cuisine: American
Keyword: old fashioned scalloped potatoes, scalloped potatoes for two, small batch scalloped potatoes
Servings: 4 1½ cup servings
Calories: 369.5kcal
Author: Dan Mikesell AKA DrDan

Ingredients

  • 4-6 medium russet potatoes
  • 3 tablespoons butter
  • 3 tablespoons all-purpose flour
  • 1½ cups milk
  • 1 teaspoon salt
  • ⅛ teaspoon cayenne pepper optional
  • 1½ cups shredded cheddar cheese or cheese of choice
  • 1 sprinkle paprika optional
US Customary - Convert to Metric

Instructions

  • Preheat the oven to 350°F, conventional (not convection).
    potatoes and other scalloped potatoes ingredients

Prepare the potatoes

  • Slice 4–6 medium russet potatoes into slices about ⅛ inch thick. You should end up with approximately 4 cups of potato slices. Rinse in a bowl of cold water and leave them there while you make the sauce. When ready to assemble, drain well and pat dry with paper towels.
    slicing potato with a madoline

Make the roux based sauce

  • In a saucepan over medium heat, melt 3 tablespoons of butter. Whisk in 3 tablespoons of flour and cook for a couple of minutes to make a roux. Slowly whisk in 1½ cups of milk. Whisk frequently for a few more minutes, then stir in 1 teaspoon of salt and ⅛ teaspoon of cayenne pepper (if using). Bring to a light simmer; the sauce will start to thicken.
    whisking sauce in pan
  • Reduce the heat to low and add 1 cup of shredded cheese. Whisk until the cheese is fully melted and the sauce is smooth, then remove from the heat.
    added cheese and whisk sauce

Assembly

  • Lightly coat a 6×9-inch (1½ to 2-quart) casserole dish with cooking spray. Layer half of the potato slices in the dish, spreading them out individually so they’re not stuck together.
    layer potatoes into dish
  • Pour half of the cheese sauce evenly over the potatoes.
    adding sauce to potatoes
  • Add the remaining potato slices in an even layer. Pour the remaining cheese sauce over the top, then sprinkle with the remaining ½ cup of shredded cheese. Finish with a light sprinkle of paprika, if desired.
    top with cheese and paprika

Bake

  • Bake uncovered at 350°F for about 60 minutes, until fork-tender. For softer, creamier potatoes, cook up to 20 minutes longer. An internal temperature of 200°–210°F gives the creamiest texture. Rest for 5–10 minutes before serving.
    Scalloped Potatoes in casserole dish

Notes

Pro Tips

Russet potatoes are the classic choice and bake up very soft and creamy. Yukon Gold potatoes also work well and hold their shape a bit more.
The recipe scales easily to 2, 4, or 8 servings. See the post for pan sizes and adjusted baking times.
For a creamier, almost “melt-in-your-mouth” texture, we like to cook the potatoes about 20 minutes longer than just fork-tender and tent with foil near the end if the top is browning too much. Cook to your preferred texture, but aim for at least fork-tender.
Let the casserole rest for 5–10 minutes before serving. This helps the sauce thicken slightly and makes serving easier.
Store leftovers refrigerated for up to 4 days or frozen for up to 4 months. Reheat in the oven rather than the microwave to preserve the texture.
If you use a mandoline, be careful and follow the manufacturer’s instructions. They are very good at slicing potatoes—and fingers.

Nutrition

Calories: 369.5kcal | Carbohydrates: 48.3g | Protein: 18.7g | Fat: 11.8g | Saturated Fat: 7.4g | Polyunsaturated Fat: 0.6g | Monounsaturated Fat: 3.1g | Trans Fat: 0.3g | Cholesterol: 34.2mg | Sodium: 956.8mg | Potassium: 1085.2mg | Fiber: 3g | Sugar: 6.2g | Vitamin A: 688.8IU | Vitamin C: 12.2mg | Calcium: 329.2mg | Iron: 2.3mg

This is a classic, older recipe that is easy and delicious, made with simple ingredients, based on a recipe from the 1971 Florence Junior League Cookbook (not online).

Editor's Note: Originally Published January 19, 2013. Updated over the years with expanded options, refreshed photos, and a table of contents to help with navigation.

Lilly chewing a stick.

Crock Pot Italian Chicken Pasta

Crock pot Italian chicken pasta on a spoon.

Delicious Crock Pot Italian Chicken Pasta is loaded with mozzarella and Parmesan cheese, tender chicken, and pasta. It is cooked in an easy homemade marinara sauce that cooks the dry pasta and chicken while it simmers. You will love this cheesy Italian bake.

🐓Ingredients

Chicken—raw or precooked
Dry Pasta
Cheese—shredded mozzarella and grated Parmesan
Homemade marinara sauce—tomatoes(crushed or diced), basil, parsley, salt, black pepper, crushed red pepper (optional)

Crock pot Italian chicken pasta on a spoon.
[feast_advanced_jump_to]
Blue ribbon divider used for visual effect

quote mark
Featured Comment by Merri:
⭐⭐⭐⭐⭐"This was so easy to do and delicious. My picky family loved it."

Everybody loves great Italian, and this crock pot chicken casserole is a perfect weeknight dinner. Create the delicious marinara sauce with a few pantry ingredients and let it cook the chicken and pasta as it simmers.

This small crock pot recipe is perfect in our "for two" household, but you can make it smaller in a 2-quart mini crock pot or double in a full-size crock pot for more significant needs.

This is a variation of my favorite crock pot recipe, Crock Pot Baked Ziti, which uses ricotta cheese to make it lasagna-like ziti.

👨‍🍳How to Make Crock Pot Italian Chicken Pasta—Step-by-Step Photo Instructions

Raw chicken with pasta and cheese for casserole.
Chopping chicken into small bite-size pieces.

1. Trim the chicken into small bite-size pieces.

Chopped onion on a black board.

2. Chop an onion and crush or mince garlic.

Adding chicken to sauce in the crock pot.

3. In a 3-4 quart crock pot, mix the marinara ingredients, the chicken, and part of the mozzarella and Parmesan cheese.

Adding dry pasta to the crock pot.

4. Mix in the uncooked pasta of your choice, like penna.

Topping the chicken pasta with shredded mozzarella cheese.

5. Top with more shredded mozzarella and Parmesan cheese.

Italian chicken pasta on a spoon.

6. Cover and cook on low for 4 hours until the pasta is tender and chicken at 165° or more.

For more details, keep reading. See the Recipe Card below for complete instructions and to print.

🐓Ingredient options and variations

This recipe uses raw chicken breasts or thighs.

If you use precooked chicken, like rotisserie chicken, stir it into the casserole for the last hour. Don't top the casserole with cheese until you mix in the chicken. Use about 3 cups of shredded rotisserie chicken for each pound of raw chicken.

You can use your own or premade marinara sauce, but mine is better.

I love to use crushed tomatoes for sauce, but an equal amount of diced tomatoes or even tomato sauce will work. If you want to use tomato paste (for a deeper, sweeter taste), add half the volume and an equal amount of water.

Use a smaller pasta that is bite-sized.

🥣Related Recipes

For other slow cooker pasta recipes, try  Crock Pot Pizza Casserole, Crock Pot Chicken Enchiladas, Crock Pot Mexican Casserole with Chicken, or Creamy Crock Pot Mac and Cheese.

Check out these other Italian comfort food recipes, like Cheesy Chicken Pasta Bake, Sausage Pasta Bake, Baked Chicken and Spaghetti, and Crock Pot Chicken Cacciatore.

Crock Pot Baked Ziti

Delicious Crock Pot Baked Zit has delicious meat sauce, three kinds of cheese, plus uncooked pasta baked in the slow cooker. You can have the best Italian pasta for dinner tonight.

baked ziti on a white plate

👨‍🍳How to use precooked pasta

Cooking the dry pasta in a crock pot works well for most people and me, but both pasta and crock pots are variable.

If you feel your slow cooker may have temperature issues or are not using standard pasta, you should precook your pasta to al dente according to the package instructions.

The precooked pasta can be stirred into the casserole for the last hour. Don't top the casserole with cheese until you mix in the pasta.

↕️How to make this a "for two" or "family size " recipe—crock pot size

The full recipe makes six servings and fits in a 3-4 quart crock pot. It can be cooked in a full-size crock pot, but it may cook a bit faster. Watch your endpoints of chicken temp and tender pasta.

This recipe is easy to cut in half or double to fit your needs. A half recipe will fit in a 2-quart crock pot. A double recipe needs a 6-quart or larger slow cooker.

  1. Use the recipe card and adjust the number of servings to half or double.
  2. Use the amount of ingredients in the ingredient list, not the instructions—those do not adjust.
  3. Always cook until the chicken is 165° or more and the pasta is tender. The cooking time will probably be longer for double and less for mini crock pot size.
  4. Cooking a small recipe in a large crock pot may cook a little faster. Mini crock pots tend to have temperature issues and should be watched closely.

❄️Storage of leftovers

Leftovers can be stored in an airtight container in the refrigerator for 4 days or frozen for 3-4 months. Thaw frozen pasta overnight in the fridge before reheating it in the microwave or covering it in the oven.

❓FAQs

Do I need to use fresh garlic and onion?

No, you can substitute garlic powder and onion powder

How do I make this creamy marinara sauce?

You can add some cream cheese or heavy cream to the sauce.

Blue ribbon divider used for visual effect

📖The Recipe Card

Crock pot Italian chicken pasta on a spoon.
Print Recipe Add to Collection Go to Collections
5 from 1 vote

Crock Pot Italian Chicken Pasta

Delicious Crock Pot Italian Chicken Pasta is loaded with mozzarella and Parmesan cheese, tender chicken, and pasta. It is cooked in an easy homemade marinara sauce that cooks the dry pasta and chicken while it simmers. You will love this cheesy Italian bake.
Prep Time15 minutes mins
Cook Time4 hours hrs
Total Time4 hours hrs 15 minutes mins
Course: Main Course
Cuisine: Italian
Keyword: Chicken Pasta, Crock Pot Chicken Pasta, Crock Pot Pasta, Italian Chicken Pasta
Servings: 6
Calories: 336kcal
Author: Dan Mikesell AKA DrDan

Ingredients

  • 2 boneless skinless chicken breasts 1 to 1 ½ pounds
  • 2 cups ziti or penne pasta ½ of a one pound box
  • 1½ cups mozzarella shredded
  • ½ cup grated Parmesan cheese

Homemade Marinara Sauce or use your own

  • 1 small onion chopped or ½ medium
  • 2 cloves garlic crushed or minced
  • 4 cups crushed tomatoes
  • 1½ teaspoons basil
  • 1 teaspoon salt
  • ½ teaspoon dried parsley
  • ½ teaspoon black pepper
  • ⅛-¼ teaspoon crushed red pepper optional
US Customary - Convert to Metric

Instructions

  • Trim and pat dry two skinless boneless chicken breasts, about 1 to 1 ½ pounds.
    Raw chicken with pasta and cheese for casserole.
  • Cut the chicken into small bite-size pieces of about ¾ inch each.
    Chopping chicken into small bite-size pieces.
  • Chop 1 or ½ medium onion and crush or mince 2 garlic cloves.
    Chopped onion on a black board.
  • To a 3-4 quart crock pot, add 28 oz can of crushed tomatoes, 1 teaspoon salt, 1½ teaspoons basil, ½ teaspoon parsley, ½ teaspoon black pepper, ⅛ - ¼ teaspoon crushed red pepper flakes (optional), and 2 cloves crushed garlic. Add 1 cup shredded mozzarella, ¼ cup grated Parmesan cheese, the prepared onion, and chicken—mix well.
    Adding chicken to sauce in the crock pot.
  • Mix in 2 cups of uncooked pasta of your choice, like penna. Two cups is half a one-pound box of dry pasta.
    Adding dry pasta to the crock pot.
  • Smooth the top, then cover with ½ cup of shredded mozzarella and sprinkle with ¼ cup of Parmesan cheese.
    Topping the chicken pasta with shredded mozzarella cheese.
  • Cover and cook on low for 4 hours. The endpoint of cooking is tender pasta and chicken at 165° or more. Usually, the edge of the cheese topping will be browning.
    Italian chicken pasta on a spoon.

Notes

Pro Tips:

  1. You need about 1 to 1 ½ pounds of chicken. I use skinless boneless chicken breast, but skinless boneless thighs would work well.
  2. This recipe uses a smaller 3-4 qt crock pot. Instructions for double or half recipes are in the post.
  3. You may use jarred sauce, but then you only use the chicken, cheese, pasta, and sauce. But you should use mine—so much better.
  4. This recipe may cook a bit faster if your crock pot runs hotter. So if it does, check at 3 hours for a temperature over 165° and tender pasta.
  5. Options for rotisserie chicken, precooking pasta, and more are covered in the post.

Nutrition

Calories: 336kcal | Carbohydrates: 40g | Protein: 29g | Fat: 7g | Saturated Fat: 4g | Polyunsaturated Fat: 0.02g | Monounsaturated Fat: 1g | Cholesterol: 58mg | Sodium: 963mg | Potassium: 10mg | Fiber: 4g | Sugar: 5g | Vitamin A: 700IU | Vitamin C: 20.6mg | Calcium: 250mg | Iron: 2.5mg

Originally published October 7, 2018. Now updated with expanded options and improved images.

Dogs wandering in the snow.

Chicken for a Crowd

Pile of cooked chicken ready for a large party.

It is easier than you think to feed a crowd fresh baked chicken. From a small party to a large group of a hundred or more, this recipe for baked chicken is perfect for any size crowd. Start with skin-on chicken breasts and drumsticks. Trim to finger food size, season to taste, and bake. Also, learn to keep your party safe with the food safety tips.

🐓Ingredients

Chicken—Split chicken breasts and drumsticks. About ½ pounds per person.
Seasoning—of your choice. I suggest garlic powder, salt, and pepper.
Suggested equipment—½ size sheet pans, baking racks, instant-read thermometer, roaster

Pile of cooked chicken ready for a large party.
[feast_advanced_jump_to]
Blue ribbon divider used for visual effect

quote mark
Featured Comment by Patti:
⭐⭐⭐⭐⭐ "Thank you thank you….I bravely followed your directions and my homemade spice mix and just fed 90 people delicious, moist, tender chicken for a church event. I will be using this method over and over again."

Ok, it is not "Cooking For Two," but still useful, and you can do this at home. If you are having a small party of 20 or even 100 or more, you can do this safely, and it isn't that hard.

We were hosting a large retirement party for several family friends. It was a potluck-type affair, but we felt we should provide a "main course" of meat. So my "wanted" list for this recipe was to keep it safe, not too much work or time, and great taste.

I spent several weeks testing. I tried grilling, but it required too much continuous attention and had limited volume. Baking ahead worked, but the chicken was better freshly cooked, so that was the answer.

👨‍🍳How to Cook Chicken for a Crowd—Step-by-Step Photo Instructions

Cutting chicken breasts into chunks.

1. Trim the split breast by removing the rib section and cutting it into 3-4 pieces each. Check the drumsticks for loose bones and extra skin.

Pat dry drumsticks with a paper towel.

2. Pat dry the chicken. We do not wash chicken anymore. See Chicken… To Rinse or Not To Rinse?

Large bowl full of trimmed chicken.

3. At this point, you can cover and refrigerate for later or proceed to cook.

Spraying trays with racks with PAM.

4. Preheat ovens to 425°—convection is suggested. Prepare sheet pans with foil and a rack. Spray them heavily with cooking spray.

Ingredients for seasoning chicken.

5. Mix seasoning. I use garlic powder, kosher salt, and pepper, which match my Homemade Everyday Seasoning Salt. Add a touch of cayenne pepper if only serving adults.

Chunks of chicken breasts on a tray being seasoned.

6. Place on prepared pans and sprinkle seasoning on all sides. Due to the different final temperatures, use separate trays for breasts and drumsticks.

Two trays of chicken in the oven.

7. Place in the preheated oven. If using convection, you can use two racks and rotate the trays 20 minutes into cooking. Check the temperature 30 minutes. Aim for 165° internal temp with the breast pieces and 180°+ on the drumsticks—usually 35 minutes.

Electric roaster full of cooked chicken.

8. Place in a roster preheated to 150° with a rack in the bottom. See food safety tips below. You can use another method to keep the chicken above 140° if you wish.

For more details, keep reading. See the Recipe Card below for complete instructions and to print.

⏲️How long to bake chicken

Most trays of chicken will take about 35 minutes to cook. All chicken must be cooked to 165° for safety, but the drumsticks will have a better texture if baked to 180°+. The breast chunks are thicker, but the cooking time is about the same for both.

❓How much chicken to cook

Assume about 1½ to 2 pieces of trimmed chicken per person. After trimming, you will get 3 to 4 pieces per pound of raw split chicken breasts and drumsticks.

  • For 20 people, cook 30 to 40 trimmed pieces from about 8 to 10 pounds of chicken.
  • For 25 people, cook 37 to 50 trimmed pieces from about 10 to 13 pounds of chicken.
  • For 50 people, cook 75 to 100 trimmed pieces from about 20 to 25 pounds of chicken.
  • For 100 people, cook 150 to 200 trimmed pieces from about 40 to 50 pounds of chicken.

The amount you need to cook will vary depending on the number of side dishes and other options that are also served. Due to the number of other dishes, I initially cooked 150 pieces for 100 people.

👍Make it right every time

It took about ½ hour to trim and cut 50 pounds of chicken. The breast had to have the rib section cut off, any visible fat removed, and then cut into 3-4 pieces each, depending on the size.

I cooked on racks to achieve the greatest crispness. I used two pans at a time in the convection oven or one at a time in the regular oven.

I consider racks almost required for this.

See the FAQ section about using thighs. This is not a recipe for wings—see Crispy Baked Chicken Wings.

⚕️Food Safety

There are three points of food safety for this recipe. First, all poultry, including chicken, must be cooked to 165° minimum for safety.

First, raw chicken and poultry should be considered contaminated and handled carefully. Wash your hands carefully before and after touching raw chicken.

Also, do not wash raw chicken routinely, as water splatters can contaminate the area. See Chicken… To Rinse or Not to Rinse? for more information.

Second, for safety, chicken must be cooked to an internal temperature of 165° —see the USDA recommendations. You should check this with an instant-read thermometer.

Most recipes contain estimated times for cooking (including this recipe). They are provided for planning purposes. You can not cook safely by time—you must use a thermometer.

Third, once cooked, the chicken needs to be kept above 140° or below 40°, or you are risking food poisoning. If your chicken is in the food danger zone (40° to 140°) for 2 hours, it should be considered contaminated and discarded.

USDA food safety graph.
From the USDA

How do you keep the chicken warm and safe?

You need to keep the chicken above 140° for food safety. While using the oven or a crock pot with a "keep warm" setting may work for smaller groups and short parties, for larger events that may last hours, I suggest an electric roaster is the best solution.

What is an electric roaster?

Think of a roaster as a cross between a countertop oven and crockpot. Roasters are first much bigger than the crockpot. Most are 16 to 24 quarts, so they hold masses of food. The traditional picture of roasters always has a huge turkey in them cooked to perfection. Most but not all roasters go from 150° to 400° plus. Some will have an even wider range.

Most roasters cost $100± and are quite useful if you have parties. They may also be rented for about $25/day. Due to low energy consumption, you can use them as an oven during the summer. Some newer roasters don’t go under 200°, so check out the product closely before you buy.

Can I use a crock pot?

Some crockpots have a “keep warm” setting that might work, but the exact temperature varies by manufacturer. Some will be 145°-165°, which is OK. But some crock pots will be 185°, which will continue to cook the chicken. The low setting is definitely too hot.

🛒Products I Recommend

Note: All links below are affiliate links, meaning I make a small profit from your purchases. Your price is not affected by this commission. We are a participant in the Amazon Services LLC Associates Program. As an Amazon associate, I earn from qualifying purchases.

These are examples of what I use or recommend. There are many other great options.

Sheet pans.

Nortic Ware Half Sheet Pans 2 pack

Heavy duty, made in the USA, half-sheet pans.
Shop on Amazon
Proctor Silex 32211 roaster oven for company site.

Proctor Silex Turkey Roaster Oven

Perfect for keeping food warm or cooking a turkey or more.
Shop at Amazon
baking racks

Oven Safe Racks

Similar to the racks I use. Be sure to get the right size.
Shop at Amazon
Red Thermapen One

Thermapen™ One from Thermoworks™

My personal favorite cooking tool. It will make your a better cook today. More expensive but will last for years.
Shop at Amazon

📖Baked chicken recipes

My experience with cooking chicken for large groups has led to smaller recipes that are "cooking for two" friendly. For the grill, try my Grilling Chicken Drumsticks, Grilled Chicken Thighs, or Grilled Split Chicken Breasts.

In the oven, we love Oven Baked Chicken Drumsticks, Crispy Oven Baked Chicken Thighs, and Baked Bone-in Chicken Breasts.

📖Recipes for a crowd

These are recipes I have personally used for group parties. Some are smaller recipes that can easily be scaled up to large amounts.

Oven Baked BBQ Beef Brisket, Oven Pulled Pork Butt, Pulled Pork Loin in the Oven, and Taco Meat from Scratch I have used for parties of 30 to 100 before. They are delicious and can be cooked and prepared ahead.

I also recommend some crock pot recipes for smaller groups, like Crock Pot White Chicken Chili, Crock Pot Chili, and Chili Cheese Nachos. All scale up easily.

Or, for teens and kids, try masses of Pizza Dough for a Pizza Party.

❓FAQs

Can I use chicken thighs?

Yes, they will cook like drumsticks and can be cooked on the same tray at the same temperature to the same final temperature.

They weigh a bit more, which can affect your calculations of the number of pieces and weight of raw chicken.

Also, I was going for "finger eating," but thighs are less finger-friendly.

How to store leftover baked chicken?

Leftover baked chicken can be stored sealed in an airtight container for 4 days in the refrigerator or for 4 months if frozen.

But if the leftover chicken has been in the "danger zone of 40° to 140° for over 2 hours (or 1 hour if the environment is over 90°), it must be discarded for safety.

Can I make it BBQ chicken?

Sure, brush on BBQ sauce about 5 minutes before the chicken is done. I like adding a second coat before removing it from the oven. But it is messy for finger food.

Blue ribbon divider used for visual effect

📖The Recipe Card

Pile of cooked chicken ready for a large party.
Print Recipe Add to Collection Go to Collections
5 from 3 votes

Chicken for a Crowd

It is easier than you think to feed a crowd fresh baked chicken. From a small party to a large group of a hundred or more, this recipe for baked chicken is perfect for any size crowd. Start with skin-on chicken breasts and drumsticks. Trim to finger food size, season to taste, and bake. Also, learn to keep your party safe with the food safety tips.
Prep Time40 minutes mins
Cook Time2 hours hrs 20 minutes mins
Total Time3 hours hrs
Course: Main dish
Cuisine: American
Keyword: Chicken for a crowd, chicken for a crown of 50, How much chicken per person
Servings: 150
Calories: 160kcal
Author: Dan Mikesell AKA DrDan

Ingredients

  • 45-50 pounds Split chicken breasts and drumsticks
  • seasoning of your choice see notes
US Customary - Convert to Metric

Instructions

  • Trim the breast of the rib section and then cut into 3-4 pieces each. Check the drumsticks for any loose bone and extra skin.
    cutting off the rib section from split chicken breasts
  • Pat dry the chicken. We do not wash chicken anymore due to safety concerns.
    pat dry drumsticks with paper towels
  • You can cover and refrigerate for later or proceed to cook.
    large bowl full of trimmed chicken
  • Preheat ovens to 425°. Use convection if you have it, but use 425° either way. It will be a little faster with convection. Prep cooking pans. Line the pans with foil. Use a rack if you have them, and spray heavily with PAM.
    spraying trays with racks with PAM
  • Mix seasoning and place in a shaker with large holes. I  now use my Homemade Everyday Seasoning Salt. Add a touch of cayenne pepper if you want.
    ingredients for seasoning chicken
  • Place on prepared pans and sprinkle seasoning on all sides. Season to your taste. Due to the different final temperatures, use separate trays for the breasts and drumsticks.
    chunks of chicken breasts on tray being seasoned
  • Place in 425° oven. Use two trays in the convection oven and one try in the non-convection oven. If using convection, rotate the trays halfway through cooking. Check the temp at 30 minutes. Aim for 165° on the biggest breast pieces and 180°+ on the drumsticks. Most of the time about 35 minutes.
    two trays of chicken in oven
  • Place in a large roster preheated to 150° with a rack in the bottom. The post discusses alternative methods for serving safely.
    Electric roaster full of cooked chicken.

Notes

Pro Tips

  1. Chicken thighs will cook similarly to the drumsticks and are discussed in the post.
  2. To serve this safely, you must be aware of food safety. The chicken must not be in the food danger zone of 40° to 140° for 2 hours, or it should be discarded.
  3. Baked chicken is safe to eat at 165°, but you will be happier with the drumsticks at 180°+.
  4. I suggest prepping the chicken ahead and refrigerating it.
  5. Season as you want, but some salt, pepper, and garlic powder are the basic ingredients. See my Everyday Seasoning Mix.
  6. I use a large shaker for the seasoning to save time.
  7. If you use a convection oven to cook two trays, rotate them halfway through.

Nutrition

Calories: 160kcal | Protein: 13g | Fat: 9g | Saturated Fat: 3g | Polyunsaturated Fat: 1g | Monounsaturated Fat: 2g | Cholesterol: 44mg | Sodium: 470mg | Potassium: 111mg | Vitamin A: 50IU | Calcium: 10mg | Iron: 0.7mg

Editor's Note: Originally Published June 12, 2011. Updated with expanded options, refreshed photos, and a table of contents to help navigation.

Molly dog running in yard with a bandana.
Lilly dog running in the yard.

Crock Pot Pulled Pork from Pork Butt (Boston Butt)

pulled pork with sauce in a bun on a blue plate

The best crock pot pulled pork is easy to make with a pork butt (Boston butt), a simple dry rub, and low-and-slow cooking—no liquid or searing needed.

The result is tender, juicy pulled pork that shreds easily—perfect for BBQ sandwiches, tacos, or meal prep.

⏱️ How long to cook pork butt in a crock pot

For a 3–4 pound pork butt:

  • LOW: 8–10 hours
  • Done: 200°–205°F and shreds easily

Start checking at 8 hours. Larger pork butts will take longer, and crock pot cooking times vary.

BBQ pulled pork sandwich with sauce on a blue plate.
[feast_advanced_jump_to]

quote mark
Featured Comment by LK:⭐⭐⭐⭐⭐
"This is the best recipe I have ever used for pork in the crock-pot and I have tried many through the years adding liquids of all sorts. Using dry rub seasoning and the aluminum foil balls cooked the pork perfectly."

🧾 TL;DR — Recipe Summary

What: Crock pot pulled pork made with pork butt (Boston butt) and a simple dry rub.

Why: Super easy—no searing or added liquid, with tender, juicy pork that shreds easily.

How: Cook on LOW for 8–10 hours to 200°–205°F, rest, then shred hot.

🐖 Ingredients

Boston butt with dry rub ingredients—labeled.
  • Pork butt (Boston butt): Boneless or bone-in, about 3–4 pounds. Either works; just make sure it fits your crock pot without touching the sides. 
  • Liquid smoke (optional but recommended): Adds smoky flavor without a smoker. Use a brand with only water and smoke listed.
  • BBQ dry rub: Use your favorite pork rub, or make one with brown sugar, kosher salt, chili powder, garlic powder, onion powder, and black pepper.

👨‍🍳 Quick Overview: Cooking Pulled Pork in the Crock Pot

1. Add six foil balls to the bottom of a large crock pot to keep the pork elevated and out of the fat.

balls of foil in bottom of a crock pot.

✅ Pro Tip: You can skip the foil, but the pork will stew in its own juices—not ideal for texture.

2. Mix the dry rub if needed. Pat the pork dry, coat with liquid smoke (optional), and rub generously on all sides.

applying a dry rub to pork butt.

3. Place the pork butt on the foil balls without touching the sides. Cook on LOW for 8–10 hours, until the internal temperature reaches 200°–205°F.

pork butt on foil balls in a crock pot.

4. Wrap tightly in foil and towels for at least 15 minutes, or up to 2–3 hours in a small cooler. Shred while still hot—it should fall apart easily.

cooked pork butt on foil.

👇 For complete step-by-step instructions, scroll down to the printable recipe card or keep reading for tips, serving ideas, and more.

⏲️ Pork Butt Crock Pot Time Guide

Cooking time varies with the size and thickness of the pork butt and your crock pot. Use these times for planning, then confirm doneness by temperature.

  • 3–4 pounds: 8–10 hours on LOW
  • 4–5 pounds: 9–11 hours
  • 5–6 pounds: 10–12 hours
  • Bone-in: may take about 30–60 minutes longer

Best Internal Temperature for Pulled Pork

Cook to 200°–205°F for easy shredding. Start checking a 3–4 pound pork butt at about 8 hours. Don’t try to shred it below 195°F. (See the FAQs if you have trouble reaching it.)

🍽️ Serving Pulled Pork

Serve pulled pork on buns or bread with BBQ sauce, or use it for tacos, enchiladas, casseroles, or just pile it on a plate.

Good sides include coleslaw, potato salad, baked beans, mac & cheese, oven fries, or chips.

Use your favorite BBQ sauce. I usually serve mine with homemade Memphis-Style BBQ Sauce.

❄️ How to Store and Reheat Pulled Pork

Storage

Refrigerate pulled pork in an airtight container for 3–4 days, or freeze for up to 4 months.

For easy portions, vacuum-sealed or sous vide–safe bags work well and can be reheated in hot water.

Reheating

The best way to reheat pulled pork is in the oven. Spread it on a sheet pan, sprinkle lightly with water, apple juice, or broth, and cover tightly with foil. Heat at 250°–300°F until hot, usually about 30–45 minutes depending on the amount.

Once reheated, you can hold it in a crock pot on KEEP WARM. Use LOW only if needed.

✅ Pro Tip: Add BBQ sauce after reheating, not before. The sauce's acidity will affect the texture.

📝 Other Pork Butt (Boston Butt) Recipes

  • Oven Baked Pulled Pork
  • Smoked Pulled Pork on a Gas Grill
  • Pork Carnitas in the Oven

❓FAQs

Can I make pulled pork in a crock pot without liquid?

Yes. Pork butt releases plenty of liquid as it cooks, so no added liquid is needed. Keeping it elevated above the drippings gives the pork a better texture instead of letting it stew.

Do I need to use liquid smoke?

No, but I recommend it for a light smoky flavor. Use a brand with only water and smoke listed on the label.

Why is my pork butt stuck around 180°F, and what should I do?

Large pork butts can seem to stall before they reach shredding temperature. Keep cooking until the center reaches 200°–205°F and the meat is tender. If your crock pot will not get it there, move the pork to a 250°–300°F oven to finish.

What’s the difference between pork butt, Boston butt, and pork shoulder?

Pork butt and Boston butt are the same cut. They come from the upper part of the shoulder and are ideal for pulled pork because of their marbling. The full pork shoulder also includes the picnic shoulder.Image of a hog with Location of Pork Butt highlighted - Image licensed May 17, 2017, from Fotolia. Copyright by foxysgraphic - Fotolia. Image modified in accordance with the license.

📖The Recipe Card

Pulled pork with sauce in a bun on a blue plate
Print Recipe Add to Collection Go to Collections
4.86 from 14 votes

Crock Pot Pulled Pork from Pork Butt

Easy crock pot pulled pork with a simple dry rub and pork butt (Boston butt). No liquid or searing—just low and slow cooking for tender, shreddable results.
Prep Time10 minutes mins
Cook Time10 hours hrs
Total Time10 hours hrs 10 minutes mins
Course: Main Course
Cuisine: American
Keyword: boston butt crock pot, Crock Pot Pulled Pork, pork butt in crock pot, pulled pork in a crock pot
Servings: 16
Calories: 138.4kcal
Author: Dan Mikesell AKA DrDan

Ingredients

  • 3–4 pounds pork butt (Boston butt) boneless or bone-in
  • 2 tablespoons liquid smoke optional
  • ¾ cup BBQ dry rub

If you need a dry rub. try this simple version

  • ½ cup dark brown sugar light will do
  • 3 tablespoons kosher salt I tend to use a little less
  • 1 tablespoon chili powder
  • 1 teaspoon garlic powder
  • 1 teaspoon onion powder
  • 1 teaspoon black pepper
US Customary - Convert to Metric

Instructions

Prepare the Crock Pot

  • Place six foil balls in the bottom of a large slow cooker to keep the pork off the bottom. Make 2-inch balls and squish them to about 1 inch high.
    balls of foil in bottom of crock pot

Season the Pork Butt

  • You can use the dry rub of your choice or make the suggested rub: ½ cup dark brown sugar, 3 tablespoons kosher salt, 1 tablespoon chili powder, 1 teaspoon garlic powder, 1 teaspoon onion powder, and 1 teaspoon black pepper. Stir together in a small bowl.
    Mixing rub ingredients in metal bowl
  • Pat the pork dry. Coat with liquid smoke if using, then apply the dry rub generously. Cook now or refrigerate overnight.
    applying rub to pork butt

Cook Low and Slow

  • Place on the foil balls without touching the sides, and cook on low, undisturbed, for 8–10 hours, undisturbed, until the internal temperature reaches at least 195°F (200°–205°F preferred.)
    pork butt on foil balls in a crock pot

Wrap and Rest

  • Wrap tightly in foil and towels. Rest for at least 15 minutes, or hold for up to 2–3 hours in a small cooler.
    foil wrapped butt wrapping in towels

Shred and Serve

  • Shred with forks while still hot.
    shredding pork butt with forks.

Video

Notes

Pro Notes:

  • Larger pork butts take longer; the roast must fit without touching the sides.
  • Bone-in or boneless both work; fat-cap direction does not matter.
  • Use your preferred dry rub or the included homemade version.
  • If the pork will not reach shredding temperature in your crock pot, finish it in a 250°–300°F oven.
  • Refrigerate leftovers for 3–4 days or freeze for up to 4 months. See the post for reheating tips.

Nutrition

Calories: 138.4kcal | Carbohydrates: 6.7g | Protein: 15.9g | Fat: 4.9g | Saturated Fat: 1.7g | Polyunsaturated Fat: 0.5g | Monounsaturated Fat: 2.1g | Trans Fat: 0.03g | Cholesterol: 51mg | Sodium: 715.4mg | Potassium: 297.6mg | Sugar: 6.7g | Calcium: 18mg | Iron: 1.1mg

Editor's Note: Originally Published April 9, 2016. Updated with refreshed photos, clearer instructions, and edits to improve navigation.

Molly and Lilly in the yard.

Old Fashioned Popcorn Balls

pile of Popcorn Balls on an orange plate

These old fashioned popcorn balls are crisp, chewy, and coated in buttery caramel made with Karo syrup—just like the Betty Crocker classic recipe from 1972.

Learn how to make homemade popcorn balls. It's easy on the stovetop with simple pantry ingredients for a classic Halloween and party treat to remember.

Old-fashioned popcorn balls on a plate.
[feast_advanced_jump_to]

quote mark
Featured Comment by Sandra:
"The best recipe ever for popcorn balls. Crispy, tasty, not gummy or sticky."

Short Personal Story: For me, Halloween in a tiny town meant a handful of houses and one unforgettable treat—Mrs. Cackler’s popcorn balls. I’ve tried other versions over the years, but I always come back to this one. It’s simple, reliable, and tastes like childhood.

⚡ TL;DR—Recipe Summary

  • What: Classic homemade popcorn balls coated with buttery Karo caramel.
  • Why: Crisp and chewy with the old-fashioned flavor and texture of the 1972 Betty Crocker recipe.
  • How: Cook the caramel to 260°F, coat the popcorn, cool briefly, then shape into balls while still warm.

Use a candy or digital thermometer—the caramel temperature determines whether your popcorn balls are soft, chewy, or hard.

🍿 Ingredients

Popcorn and ingredients for caramel—labeled.
  • Popcorn – Freshly popped using stovetop, microwave, or an air popper.
  • Homemade caramel – White sugar, brown sugar, light Karo corn syrup, butter, vanilla, white vinegar, and salt.

👨‍🍳 Quick Overveiw: How to Make Popcorn Balls

1. Pop the popcorn

Pop with care and remove all unpopped kernels. Mix in any extras like nuts or candy now.

Bowl of freshly popped popcorn with visible removed kernels.

2. Make the caramel

In a non-stick pan, combine white sugar, brown sugar, Karo corn syrup, water, white vinegar, and salt.

Ingredients for caramel in the pan before cooking.

Cook over medium-high heat, stirring often, until the mixture reaches 260°F on a candy thermometer or digital thermometer.

Remove from heat, stir in butter and vanilla, then return to low heat until butter melts.

Caramel mixture cooking with thermometer reading visible.

✅ Pro Tip: Use a candy thermometer or a digital thermometer to make sure the caramel reaches the right temperature for the best crisp-and-chewy texture.

3. Coat the popcorn with caramel

Slowly pour the hot caramel over the popcorn while stirring with a PAM-coated spatula.


Pouring hot caramel into the popcorn.

Stir for a few minutes until slightly cooled.

Mix hot caramel into the popcorn with a spatula.

4. Forming into balls

⚕️ Safety Tip: The caramel will be hot. Let it cool briefly before shaping, protect your hands with butter or cooking spray, and do not let children help with this step.

Use a PAM-sprayed metal measuring cup to shape balls on wax paper. Work quickly, don’t overcompress.

Scooping caramel popcorn to form into popcorn balls.

Cool completely before wrapping in plastic. Store at room temperature for up to 3–4 days.

Finished popcorn balls cooling on wax paper.
Formed popcorn balls on a baking mat. Don't miss the sleeping dog in the background.

👇 This is a brief overview. Scroll down for more information and the complete recipe card.

⚕️ Safety Tips for Making Popcorn Balls

This caramel is HOT — you’ll be forming the balls while it’s still warm, so take precautions. Let the mixture cool for a few minutes before touching.

If you don’t feel safe, skip forming them by hand. Do not let children help with this step.

  • Protect your hands – Coat with butter or cooking spray.
  • Use tools – A one-cup metal measuring cup coated with butter or PAM helps with sizing and reduces contact.
  • Stay near running cool water – For quick cooling if needed.
  • Work fast – Lightly press the popcorn together; don’t over-compact or you’ll end up with a rock.

✅ Pro Tip: Work quickly — once the caramel cools and firms up, there’s no undoing it.

🥣 Popcorn Balls Variations

These caramel popcorn balls are classics, but there’s room to customize.

  • Mix-ins – About 1 cup of chopped nuts (peanuts, almonds, etc.), candy pieces, mini marshmallows, chocolate chips, or crushed pretzels for extra crunch.
  • Color & flavor – Add a few drops of food coloring, or spice it up with cinnamon.

❄️ Storing Popcorn Balls

Popcorn balls are best within 24 hours for the chewiest texture. Store airtight for up to 3–4 days at room temp.

Don’t refrigerate or freeze—the caramel from Karo gets sticky and loses its snap.

📋 Other Sweet Treat Recipes

Try more homemade candy and snack recipes for the holidays:

  • Chocolate Peanut Clusters
  • Spicy Candied Bacon
  • Cinnamon Candied Almonds
  • Chocolate Pretzel Buttons
  • 5-Minute Chocolate Fudge

❓ FAQs

Why are my popcorn balls too soft or too hard?

The caramel temperature controls the texture. Cook it to 260°F (firm-ball stage) for crisp-and-chewy popcorn balls.

Below 260°F they will be softer and may not hold together; above 260°F they become harder and crunchier.

Why are my popcorn balls sticky?

Sticky popcorn balls usually mean the caramel didn't reach 260°F or the balls were wrapped before they cooled completely. Use a candy or digital thermometer and let them cool before wrapping.

Why use Karo syrup in popcorn balls?

Karo syrup (light corn syrup) helps prevent the caramel from crystallizing, keeping it smooth so it coats the popcorn evenly. It also helps give old fashioned popcorn balls their classic chewy texture.

Can I make popcorn balls without marshmallows?

Yes. This old fashioned popcorn balls recipe uses cooked caramel made with sugar, Karo syrup, and butter instead of melted marshmallows. The caramel gives the popcorn balls their classic crisp-and-chewy texture.

📖The Recipe Card

pile of Popcorn Balls on an orange plate
Print Recipe Add to Collection Go to Collections
5 from 2 votes

Old Fashioned Popcorn Balls Recipe

Old-fashioned popcorn balls with a crisp-and-chewy caramel coating made with Karo syrup. This classic homemade popcorn balls recipe is perfect for holidays and treats.
Prep Time15 minutes mins
Cook Time10 minutes mins
Total Time25 minutes mins
Course: Appetizer
Cuisine: American
Keyword: Caramel Popcorn Balls, Old-fashioned Popcorn Balls, Popcorn Balls
Servings: 8
Calories: 408kcal
Author: Dan Mikesell AKA DrDan

Ingredients

  • 8 cups popped popcorn about ½ cup un-popped
  • vegetable oil for popping
  • cooking spray to prevent sticking

Caramel

  • ¾ cup white sugar
  • ¾ cup brown sugar
  • ½ cup corn syrup (light or dark)
  • ½ cup water
  • 1 teaspoon white vinegar
  • ½ teaspoon salt
  • ½ teaspoon vanilla
  • ¾ cup butter
US Customary - Convert to Metric

Instructions

Pop the popcorn

  • Start by popping the corn.
    Popcorn and ingredients for caramel—labeled.
  • Place ¼ cup oil over medium-high heat with three kernels. When one pops, remove from heat, add ½ cup unpopped kernels, and cover. Let sit 20–30 seconds so all kernels heat evenly, then return to medium-high and pop, shaking occasionally.
    three kernals of corn in a pan with oil
  • Measure 8 cups of popped corn. Remove unpopped kernels by shaking the container and transferring the top layer to another pan.
    Bowl of freshly popped popcorn with visible removed kernels.
  • Spray a large pan and a spatula with cooking spray. Add popcorn, optionally add 1 cup of nuts or candy if desired—mix well.
    spray large bowl with PAM

Make the caramel

  • In a non-stick pan, combine ¾ cup white sugar, ¾ cup brown sugar (light or dark), ½ cup light Karo corn syrup, ½ cup water, 1 teaspoon white vinegar, and ½ teaspoon salt.
    adding corn syrup into a sauce pan with sugar
  • Cook over medium-high heat, stirring often, until mixture reaches 260°F on a candy or digital thermometer.
    Remove from heat, stir in the butter and vanilla, then return to low heat until the butter has melted.
    Caramel mixture cooking with thermometer reading visible.
  • Pro Tip: Use a candy thermometer or digital thermometer to hit the right temperature for the best crisp-and-chewy texture.

Coat the popcorn with caramel

  • Slowly pour the hot caramel over the popcorn while stirring with the sprayed spatula. Stir for a few minutes until slightly cooled.
    mixing coating into popcorn with spatula
  • SAFETY NOTE: Coat your hands with butter or cooking spray and test the mixture before touching—it will be hot. Keep cool water running nearby in case of burns.
    Use more cooking spray as needed. See the post for more safety notes.

Forming into balls

  • Scoop about 1 cup of coated popcorn with a sprayed measuring cup. Drop onto wax paper or a silicone mat and shape quickly with sprayed hands.
    Re-spray the cup and hands about every two balls. Work in a quick rhythm: scoop → dump → shape → cool hands if needed → spray → repeat.
    Don’t over-compress—lightly pack so they hold together without becoming too hard.
    Scooping caramel popcorn to form into popcorn balls.

Cool and store

  • Cool completely before wrapping in plastic. Store airtight at room temperature for 3–4 days.
    Finished popcorn balls cooling on wax paper.

Notes

Pro Tips

  • Fresh popcorn is best—stovetop, microwave, or air-popped.
  • Always check for unpopped kernels to avoid dental surprises.
  • Add color with a few drops of food coloring, or extra flavor with cinnamon.
  • This is hot caramel—be cautious. If you don’t feel safe shaping by hand, skip it.
  • Not for children to shape.
  • Storage: Best within 24 hours for freshness, up to 3–4 days wrapped airtight. Do not freeze—caramel turns sticky.

Nutrition

Calories: 408kcal | Carbohydrates: 63g | Protein: 1g | Fat: 18g | Saturated Fat: 11g | Polyunsaturated Fat: 1g | Monounsaturated Fat: 5g | Cholesterol: 48mg | Sodium: 148mg | Potassium: 108mg | Fiber: 1g | Sugar: 46g | Vitamin A: 550IU | Calcium: 20mg | Iron: 0.5mg

Editor's Note: Originally Published October 28, 2015. Updated with expanded options, refreshed photos, and a table of contents to help navigation.

Dogs romping in leaves.

Apple Crumb Pie with Crumble Topping

Slice of apple crumble pie.

This easy apple crumb pie recipe combines fresh apples and a buttery homemade crumble topping with a premade crust. It's a semi-homemade apple pie that's ready to bake in just 15 minutes.

The fresh apple filling and crisp, buttery crumb topping give you classic homemade apple pie flavor with much less prep.

Slice of apple crumble pie.
[feast_advanced_jump_to]

quote mark
Featured Comment by Hquinzelle:
"This recipe is great. I made it twice, and it turned out fantastic both times."

❤️ Why You Will Love This Recipe

  • Beginner-friendly: No homemade crust to fuss with – just one premade crust and a crumble topping. No top crust required.
  • Real apple flavor: Uses fresh apples instead of canned filling.
  • Time-saver: About 50 minutes bake time, plus cooling, for a pie that looks homemade without the extra work.
  • Semi-homemade win: Perfect balance of convenience and from-scratch taste.
  • Want more crumble topping pie? Check out Blueberry Crumb Pie.

🥧Ingredients

Apples with pie crust and ingredients—labeled.

• Pie Crust
One refrigerated, unbaked pie crust. No need to make one from scratch – this is the easy path.

• Apple Pie Filling

  • 4 to 6 apples (depends on size; most apples will work just fine)
  • Pantry ingredients: sugar, flour, cinnamon
  • Optional: nutmeg, lemon juice

• Crumb Topping
Flour, brown sugar, cinnamon, salt, and cold butter – what you'd use for a classic streusel topping. Optional chopped nuts add crunch.


👨‍🍳 How to Make Apple Crumb Pie (Step-by-Step)

1. Prep the Crust and Topping

  • Fit the refrigerated pie crust into a 9-inch pie pan – no need to prebake.
  • Preheat the oven to 375°F.
crimping edge of pie crust.
  • Mix the crumble topping: flour, brown sugar, cinnamon, and salt. Cut in cold butter until crumbly.
Mixing crumble topping.

2. Make the Apple Filling

  • Peel and slice 4 to 6 apples (about 5–6 cups).
  • Toss with sugar, flour, and cinnamon.
coating apple slices with cinnamon sugar.

✅ Pro tip: Add lemon juice to prevent browning, or move fast and skip it.

3. Assemble and Bake

  • Pour the apple mixture into the unbaked pie crust.
  • Top evenly with the crumb topping.
top the pie with the crumble topping.

✅ Pro tip: Baking on a preheated tray will help prevent a soggy crust.

  • Bake at 375°F for 20 minutes, then check and cover the crust edge if needed – with a pie ring or a strip of foil to prevent over-browning.
protect the edge of the pie during cooking if needed.

✅ Pro Tip: A fully preheated oven helps the topping crisp and the filling set.

  • Bake for a total of about 50 minutes, until golden brown.
  • Let the pie cool and set up completely – about 3 to 4 hours before slicing.
whole apple crumb pie.

For more detail, scroll on. Full instructions and step-by-step photos are in the Recipe Card below.

🍎 What Are the Best Apples for Pie?

Most apples will work just fine, so don’t overthink it. Pie doesn’t have to be perfect to be great. But if you want the best texture and flavor, some varieties hold up better during baking.

Best choices for baking:
Granny Smith, Gala, Honeycrisp, Braeburn, Jonathon, Jazz, Winesap
A mix of tart and sweet apples gives the best results.

My go-to combo:
Granny Smith and Gala

Poorer choices:
Red Delicious and McIntosh – they tend to get mushy and won’t hold their shape well.

🥣 How to Make Crumble Topping for Apple Pie

The apples may be the star, but this crumb topping is the scene-stealer. Buttery, cinnamon-sweet, and perfectly crisp – it bakes up golden every time and works on other fruit pies, crisps, or even muffins.

What’s in it: simple pantry staples – flour, brown sugar, cinnamon, salt, and cold butter. White sugar works too, but brown sugar adds more flavor. Optional nuts (walnuts, pecans, almonds) add crunch.

Cold butter is key. That’s what gives you a crumbly texture instead of a paste. Cube or shred it, then cut it in with a pastry cutter or fork until you’ve got loose, buttery crumbles – not dough.

✅ Pro Tip: Classic crumble ratio: 1 cup flour, ½ cup brown sugar, ½ teaspoon cinnamon, ¼ teaspoon salt, 6 tablespoons cold butter.

💡 Pro Tips for Easy Apple Crumb Pie

  • Don’t skip the apples – you’ll need 4 to 6, depending on size (about 5–6 cups when sliced).
  • Lemon juice helps prevent browning, but moving quickly works too.
  • Any pie crust works – refrigerated, frozen, or homemade.
  • Premade crusts bake up crisp if you start on a fully preheated sheet or stone.
  • A little nutmeg ( ½ teaspoon) adds warmth, but it’s totally optional.

🤔 How to Prevent a Soggy Bottom Crust

Nobody wants a soggy bottom, and your apples and baking setup can make a big difference.

  • Use firmer apples. Softer varieties release more liquid when baked. Granny Smith and Honeycrisp are great choices because they hold their shape and don’t get too juicy.
  • Bake on a fully preheated surface.
    Set your pie dish on a preheated baking sheet or pizza stone. It helps melt the crust fat faster, sealing the bottom and keeping the filling from soaking in. Just place the sheet or stone in the oven while it fully preheats – before the pie goes in.

📖 Other Apple Recipes

Looking for more apple desserts? Try one of these easy favorites:

  • Small Crock Pot Apple Crisp
  • Easy Old Fashioned Apple Crisp
  • Crock Pot Apple Cobbler
  • Apple Cinnamon Bread

🍽️ How to Serve Fresh Apple Pie

Apple pie is best served warm. Add a scoop of vanilla ice cream and a drizzle of caramel sauce for the full experience.

To reheat a slice, microwave it for 20 to 30 seconds until warm.

❄️ Pie Storage

Keep your apple pie loosely covered with foil or plastic wrap.

  • Room temperature: up to 2 days
  • Refrigerated: 3 to 4 days
  • Frozen: up to 4 months—slice, cool completely, and wrap tightly in plastic wrap and foil before freezing

❓FAQs

Can I use apple pie filling instead of fresh apples?

Yes. You can replace the fresh apples and their coating ingredients with one can of apple pie filling. It’s a shortcut, but it’ll still get the job done.

What size pie pan should I use?

A standard pie dish is 9 inches wide and about 1¼ inches deep. Larger pans (9½ or 10-inch) exist, but this recipe is designed for the standard size.

What are the different types of apple pie?

•American apple pie has two crusts – one on the bottom and a vented or lattice-style top.

•Dutch apple pie is also called apple crumb or apple crumble pie. It uses one crust and a buttery crumble topping. It’s loosely inspired by Dutch apple tarts.

•French apple pie usually starts with cooked apples and may include raisins, cherries, or spices. It’s often topped with pastry or cookie-style dough and baked upside-down with the fruit on top.

What is the best crumble topping for apple pie?

A classic crumble topping uses simple pantry staples: 1 cup flour, ½ cup brown sugar, ½ teaspoon cinnamon, ¼ teaspoon salt, and 6 tablespoons cold butter. Cut in the butter until you have loose, buttery crumbles – not dough. Optional nuts like walnuts or pecans add crunch.

📖The Recipe Card

Slice of apple crumble pie.
Print Recipe Add to Collection Go to Collections
4.34 from 3 votes

Easy Apple Crumb Pie with Crumble Topping

Easy apple crumb pie with fresh apples, a premade crust, and a buttery homemade crumble topping. Ready to bake in just 15 minutes.
Prep Time15 minutes mins
Cook Time50 minutes mins
Total Time1 hour hr 5 minutes mins
Course: Dessert
Cuisine: American
Keyword: Apple Crumb Pie, Apple Crumble Pie, Dutch apple pie, Easy Apple Pie
Servings: 8
Calories: 404kcal
Author: Dan Mikesell AKA DrDan

Ingredients

  • 1 refrigerated pie crust uncooked
  • 5-6 cups cooking apples peeled and sliced 4 to 6 apples depending on size

Coating for Apples

  • ½ cup granular sugar
  • ⅓ cup all-purpose flour
  • 1 teaspoon cinnamon
  • 2 teaspoons lemon juice optional
  • ½ teaspoon nutmeg optional

Crumble Topping

  • 1 cup all-purpose flour
  • ½ cup brown sugar packed
  • ½ teaspoon cinnamon
  • ⅛ teaspoon salt
  • 1 stick cold butter (½ cup) cold for the best crumb texture
US Customary - Convert to Metric

Instructions

Prep the Crust and Topping

  • Preheat the oven to 375° and place a cookie sheet on the bottom rack for any overflow. You can place the sheet on the rack you are using to help prevent a soggy crust.
    Apples with pie crust with topping ingredients.
  • Fit the refrigerated crust into a 9-inch pie pan and crimp the edges. No need to prebake.
    crimping edge of pie crust.
  • Start with 1 cup of all-purpose flour in a large bowl. Mix well with ½ cup brown sugar, ½ teaspoon cinnamon, and ⅛ teaspoon salt. Add one stick (½ cup) of butter cut into chunks. Using a fork or pie cutter, mix in the butter until evenly distributed—set aside.
    mixing crumble topping

Make the Apple Filling

  • Peel and slice apples. Use 4 large or 5-6 medium apples. You need 5-6 cups of apple. Granny Smith and Gala are good choices—others discussed in the post.
    peel and slice apples.
  • Mix ½ cup granulated sugar, ⅓ cup of all-purpose flour, and 1 teaspoon of cinnamon, then sprinkle over the apple slices—mix well to coat.
    coating apple slices with cinnamon sugar.

Assemble and Bake

  • Pour apple mixture into the 9-inch uncooked pie crust.
    adding seasoned apple to the pie crust
  • Top with the crumble topping mixture.
    top the pie with the crumble topping.
  • Bake on the middle rack of the fully preheated 375°F oven. About 20 minutes in, check the pie. Cover the edges with foil or a pie ring if they’re browning too fast.
    protect the edge of the pie during cooking if needed.
  • Bake for a total time of about 50 minutes until golden brown. Let the pie cool and set up completely—about 3 to 4 hours before slicing.
    whole apple crumb pie.

Video

Notes

Pro Tips

  1. Some good choices for apples are Honey Crisp, Granny Smith, Gala, Braeburn, Winesap, Jonathon, and Jazz. However, aside from Delicious and Macintosh, which lose some texture when baked, most apples will be fine.
  2. Use a standard pie pan, which is 9 inches in diameter and 1¼ inches deep.
  3. I use refrigerated pie crust. You can use frozen or homemade food.
  4. Be sure to fully cool the pie before cutting. It will take 3-4 hours.
  5. Store loosely covered at room temperature for up to 2 days. Refrigerated, it keeps for 3 to 4 days. Freeze for up to 4 months—just be sure it’s fully cooled and well wrapped.

Nutrition

Calories: 404kcal | Carbohydrates: 61g | Protein: 3g | Fat: 17g | Saturated Fat: 9g | Cholesterol: 30mg | Sodium: 193mg | Potassium: 153mg | Fiber: 3g | Sugar: 35g | Vitamin A: 402IU | Vitamin C: 4mg | Calcium: 29mg | Iron: 1mg

Editor's Note: Originally Published May 18, 2012. Updated with expanded discussion and updated photos.

Molly dog in the yard with leafs.

Easy Crock Pot White Chicken Chili (5 Ingredients)

spoonful of white chicken chili.

This easy 5-ingredient crock pot white chicken chili is warm, cheesy comfort food with almost no effort. Just dump, cover, and walk away—chicken, beans, salsa, Pepper Jack cheese, and cumin do all the work.

Make it any size—from a small batch in a 2-quart mini crock pot to a big family meal in a large slow cooker or on the stovetop. Thick, hearty, and ready in a few hours, it tastes like you cooked all day.

⏰ Quick Answer: How Long to Cook White Chicken Chili

Crock Pot: Low for about 4 hours or high for about 2 hours

Stovetop: Simmer 15–20 minutes until heated through

Always cook until the cheese has melted and the chili stirs together smoothly.

A spoonful of white chicken chili.
[feast_advanced_jump_to]

quote mark
Featured Comment by Kaitlyn :
⭐⭐⭐⭐⭐ "I have used this recipe numerous times now, and I love it! I have entered multiple chili cook-offs with this recipe, and I have won 3rd place and 1st two different years! Hoping to get 1st again this year!"

❤️ Why I Love This Recipe

  • Salsa does the heavy lifting — the flavor base with most of the spices in one jar.
  • Tried, true, and award-winning — we’ve made this for 45+ years, and it’s even won cook-offs.
  • Ultra simple, dump-and-go — stir, cover, and walk away.
  • Infinitely scalable — works in a 2-quart mini crock pot up to a full-size slow cooker for a crowd.
  • Cheesy comfort food fast — hearty, ready in a couple of hours, and tastes like it cooked all day.

🐓 Ingredients for 5-Ingredient White Chicken Chili

Ingredients for white chicken chili labeled.
  1. Chicken — shredded, like rotisserie or leftover baked chicken. Use of raw chicken is discussed below.
  2. White beans — Great Northern or Navy, canned and precooked
  3. Salsa — your choice of mild, medium, or hot for heat control
  4. Pepper Jack cheese — for creaminess and spice (or Monterey Jack if you want it milder)
  5. Ground cumin — the one spice you can’t skip

Optional: chicken broth at the end to adjust thickness.

👨‍🍳 Quick Overview: Crock Pot White Chicken Chili

1. Add to the crock pot: undrained white beans, salsa, shredded chicken, ground cumin, and cubed Pepper Jack cheese.

pouring beans into crock pot.

✅ Pro Tip: For lower sodium, drain and rinse the beans and replace the liquid with low-sodium broth.

2. Cook on low for 4 hours or high for 2 hours. It’s done when the cheese has melted in and the chili stirs together smoothly.

all the ingredients in the crock pot ready to mix.

3. Near the end, add chicken broth if you want to thin the chili to your taste.

Adding broth to thin the chili.

For more details, keep reading. See the Recipe Card below for complete instructions and to print.

♨️ Making Chicken Chili on the Stovetop

Prefer to skip the slow cooker? This recipe works just as well and faster on the stovetop. Since all the ingredients are fully cooked or safe to eat, it comes together quickly with the same great flavor.

  1. Use a large pot or Dutch oven.
  2. Add the beans, salsa, chicken, cumin, and cheese. Stir well.
  3. Bring to a simmer, cover, and cook for 15–20 minutes.
  4. For best flavor, let it gently simmer up to an hour so the tastes blend.
  5. Add broth at the end if you want a thinner chili.

🐓 Variations and Ingredient Options

  • Chicken — best with shredded rotisserie or leftover cooked chicken. For raw chicken, see the section below.
  • Beans — Great Northern or Navy are classic. Cannellini or black beans also work. If you drain them, replace the liquid with a little chicken broth.
  • Salsa — the backbone of the flavor. Choose mild, medium, or hot to control spiciness.
  • Cheese — Pepper Jack adds creaminess and heat; Monterey Jack keeps it mild.
  • Seasoning — cumin is essential. Add cayenne if you want extra heat.
  • Optional — chicken broth at the end to thin the chili to your taste.

👨‍🍳 Tips to Get It Right Every Time

  • Cooked beans only — don’t use raw dry beans in this recipe. They won’t cook in the time of this recipe.
  • Salsa matters — it’s the backbone of flavor, so use a brand you’d eat with chips.
  • Ingredient amounts are flexible — it’s chili, not baking. A little more or less chicken, beans, or cheese won’t hurt.
  • Leave room in the crock pot — normally avoid filling past 75%. Since this chili is mostly heating and blending flavors, you can push it a little — just wait to thin with broth until the end.

↕️ How to Make This Any Size—Chili for Two or a Crowd

This recipe makes about 8 servings, but it’s easy to scale down or up:

  • Half recipe — fits in a 2-quart mini crock pot and makes 4 servings.
  • Full recipe — best for a 3½- to 5-quart crock pot.
  • Double recipe — use a 6½-quart or larger crock pot.

✅ Pro Tip: Wait to add any broth until the end to adjust the thickness to exactly your preference. That way, the chili won’t push the crock pot past its recommended 75% full limit.

🐔 Using Raw Chicken in White Chicken Chili

You don’t have to start with cooked chicken — raw works too.

  • Oven method: Bake chicken breasts (or thighs) at 350°F until 165°F internal temperature, about 35–40 minutes. Shred while warm and stir into the chili.
  • Crock pot method: Place raw chicken breasts or thighs directly in the slow cooker with the other ingredients. Cook on low for 4 hours or high for about 2½ hours. Shred and stir back in before serving.

Using rotisserie or leftover chicken keeps this recipe truly dump-and-go, but both raw methods work just as well.

🍽️ Serving White Chicken Chili

Due to the cheese, this chili stays warm for a long time, which makes it great for tailgates, potlucks, or family dinners.

  • Serve with tortilla chips, extra cheese, sour cream, cilantro, avocado, or guacamole.
  • Pair it with Old Fashioned Cornbread, Cornmeal Biscuits, or a simple side salad.
  • Leftovers make an easy next-day lunch — it reheats beautifully.

❄️ Storage and Reheating

  • Refrigerator: Store in an airtight container for 3–4 days.
  • Freezer: Freeze up to 3–4 months in freezer bags or sealed containers. Thaw overnight in the refrigerator before reheating.

Reheating: Warm gently on the stovetop or in the microwave until hot. Add a splash of chicken broth if it seems too thick after storing.

📋 More Crock Pot Chili Recipes

Looking for more cozy slow cooker chili ideas? Try these favorites:

  • Crock Pot Three Bean Turkey Chili — hearty, lighter, and protein-packed.
  • Crock Pot Texas Chili — bold and spicy, bean-free style.
  • Low Fat Crock Pot White Chicken Chili — a lighter variation on this recipe.
  • Salsa Verde Chicken Chili — tangy twist with green salsa.

Small Crock Pot Chili

A classic All-American chili with ground beef, a mildly spicy tomato-based sauce, and tender beans. You can easily make chili for two in a mini crock pot or larger for a crowd.

orange bowl with chili with cheese

❓ FAQs

How can I make this chili more or less spicy?

With medium salsa, the spiciness is about a 4/10. For less heat, use mild salsa and Monterey Jack cheese instead of Pepper Jack. For more heat, choose hot salsa or add a pinch of cayenne. Adjusting the cumin won’t change much; let salsa and cheese do the work.

How do I adjust the thickness?

This chili is naturally thick. It’s easier to cook it thick, then thin at the end with chicken broth. Keep the bean liquid and about 2 cups of broth for a moderate thickness. For extra thick, skip the broth; for more soup-like, use up to 4 cups. If you drain the beans, replace that liquid with broth.

Can I use raw chicken instead of cooked?

Yes, you can. See the section above on Using Raw Chicken in White Chicken Chili for details on both oven and crock pot methods.

Can I make this for two or in a small crock pot?

Yes. A half batch fits perfectly in a 2-quart mini crock pot and makes about four servings—great for two with leftovers. For larger batches, use a 4–6 quart slow cooker or the stovetop version.

📖The Recipe Card

spoonful of white chicken chili.
Print Recipe Add to Collection Go to Collections
5 from 10 votes

Easy Crock Pot White Chicken Chili (5 Ingredients)

Thick, cheesy white chicken chili with just 5 ingredients. Make it in a 2-quart mini crock pot for two, or scale up in a full-size slow cooker for a crowd.
Prep Time5 minutes mins
Cook Time2 hours hrs
Total Time2 hours hrs 5 minutes mins
Course: Main Course
Cuisine: American
Keyword: 5 ingredient white chicken chili, crock pot white chicken chili recipe, small crock pot white chicken chili
Servings: 8 servings
Calories: 348kcal
Author: Dan Mikesell AKA DrDan

Ingredients

  • 6 cups white beans Great Northern or Navy
  • 3 cups shredded chicken about 1 pound
  • 1 cup medium salsa
  • 8 ozs pepper jack cheese cubed
  • 2 teaspoons ground cumin
  • 2 cups chicken broth Optional, add at the end to adjust thickness
US Customary - Convert to Metric

Instructions

  • Prepare about 3 cups of shredded chicken (rotisserie or baked). The use of raw chicken is discussed in the post.
    Ingredients for white chicken chili labeled.
  • Cube 8 oz. of pepper jack cheese.
    cube cheese before adding to chili.
  • In a small (3 to 5-quart) crock pot, combine one 48-oz jar of white beans (undrained),1 cup of salsa, about 3 cups of shredded chicken, 2 teaspoons of cumin, and 8 oz of pepper jack cheese (cubed).
    all the ingredients in the crock pot ready to mix.
  • Cook on low for 4 hours or high for 2 hours. Stir once or twice during cooking to distribute the cheese, or just stir well at the end. If desired, add up to one 14 oz can of chicken broth at the end to thin the chili to your preferred consistency.
    Adding broth to thin the chili.
  • Serve hot, refrigerate, or freeze.
    Ladle of chili over crock pot.

Video

Notes

Pro Tips:

  1. Use Rotisserie chicken or bake and shred some chicken.
  2. Adjust the heat according to the type of salsa. You can use Monterey cheese instead of Monterey Jake cheese. You can also adjust the cumin to taste.
  3. As written, a 3 to 5-qt crock pot should be good. Refer to the notes in the post to adjust the recipe size.
  4. Good in the refrigerator for 3–4 days. Good in a freezer for 3–4 months.
  5. Add broth at the end of cooking to achieve the desired thickness. This will also help it fit into a smaller crock pots.
  6. If you bring this to a gathering, print extra copies—you’ll be asked for the recipe.

Nutrition

Calories: 348kcal | Carbohydrates: 33g | Protein: 23g | Fat: 14g | Saturated Fat: 7g | Polyunsaturated Fat: 0.3g | Monounsaturated Fat: 3g | Trans Fat: 0.4g | Cholesterol: 44mg | Sodium: 1033mg | Potassium: 274mg | Fiber: 14g | Sugar: 1g | Vitamin A: 550IU | Vitamin C: 4.1mg | Calcium: 260mg | Iron: 2.3mg

Publisher note: Originally published March 2, 2010. It has been updated with expanded options, refreshed photos, and a table of contents to help navigation.

dogs with bunnies.
The Girls with their new bunny babies.
  • « Previous Page
  • 1
  • 2
  • 3
  • 4
  • …
  • 10
  • Next Page »

DrDan imageHi, I'm DrDan.
Welcome to 101 Cooking for Two, the home of great everyday recipes with easy step-by-step photo instructions.
About DrDan

Top THANKSGIVING RECIPES

  • turkey slice with gravy on orange plate.
    How to Roast a Turkey Breast in the Oven
  • Cut ham with pineapple honey glaze on a white plate
    Small Ham in a Crock Pot (2–4 lb Boneless Ham)
  • slice of Ribeye Roast on a white plate
    Small Boneless Prime Rib (Ribeye) Roast
  • Sausage dressing on a white plate.
    Old Fashioned Sausage Dressing Recipe
  • A spoonful of green bean casserole.
    Green Bean Casserole Without Mushroom Soup
  • Sweet potato casserole on a white plate
    Old Fashioned Sweet Potato Casserole
SITES THAT I WORK WITH OR HAVE HAD RECIPES FEATURED OR REFERENCED.

Footer

BACK TO TOP
OF PAGE
Join the club
SUBSCRIBE TODAY

About

  • About DrDan and the Blog
  • Contact Me
  • Comment Policy
  • Guest Posts, Partnering, and Business Questions

Content

  • Food FAQ
  • Kitchen Reference Sheets
  • Recipes Featured in the Videos
  • Guide To Cooking for Two
  • Old Saved Recipes Collections

dogs by the pond

↑ back to top ↑a

Privacy Policy | Terms of Service | Contact

COPYRIGHT © 2010-2026 101 COOKING FOR TWO. ALL RIGHTS RESERVED | BASED ON FOODIE PRO THEME