101 Cooking For Two

  • Recipes
  • About
  • FAQs/Help
  • Shop
  • 📖Emails
menu icon
go to homepage
  • Recipes
  • About
  • FAQs/Help
  • Shop
  • 📖Emails
subscribe
search icon
Homepage link
  • Recipes
  • About
  • FAQs/Help
  • Shop
  • 📖Emails
×
🏠Home » Recipes

Crock Pot Shredded Pork Tenderloin

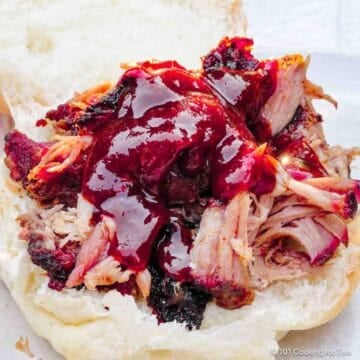
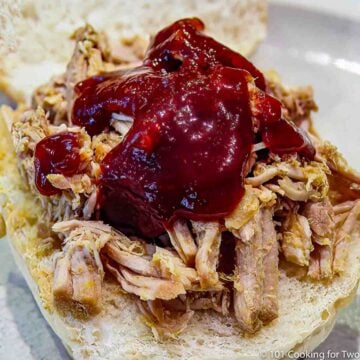
Shredded pork tenderloin with BBQ sauce on a bun.

This easy crock pot shredded pork tenderloin recipe makes healthy BBQ pulled pork tenderloin. Trim a pork tenderloin, coat it with BBQ rub, and a bit of liquid smoke in your slow cooker for 2-3 hours. You don't need a marinade or braising fluid. We enjoy delicious, moist, smoky pull pork for dinner or sliders for a small party.

🐖Ingredients

Pork tenderloin
Liquid smoke—good quality, recommended but not required
BBQ dry rub—brown sugar, chili powder, onion powder, garlic powder, kosher salt, black pepper


Shredded pork tenderloin with BBQ sauce on a bun.
[feast_advanced_jump_to]
Blue ribbon divider used for visual effect

quote mark
Featured Comment by Sandi:
"I made this tonight, and it was just as described. It's super easy and very tasty. The meat was tender with a nice flavor. Everyone loved it, and it will be used again! Thank you!"
⭐⭐⭐⭐⭐

You will love this pulled pork for some great BBQ sandwiches. Moist and tender, this shredded pork tenderloin is seasoned with a dry rub and only takes a few hours in a crock pot.

I think of this recipe as pulled pork for two—there is no need to make large amounts with leftovers for weeks. But you can easily scale up the amount to meet your needs.

See other crock pot sandwich recipes, like our Crock Pot French Dip Recipe, Crock Pot Pulled Pork Loin, Crock Pot BBQ Chicken, and Crock Pot Pulled Boston Butt.

👨‍🍳How to Make Crockpot Shredded Pork Tenderloin —Step-by-Step Photo Instructions

Pork tenderloin with liquid smoke and ingredients for BBQ dry rub—labeled.
trimmed pork tenderloin on a black board.

1. Trim and cut pork tenderloin into 5-6 pieces.

mixing spice rub in a small glass bowl.

2. Mix a dry rub of brown sugar, chili powder, onion powder, garlic powder, kosher salt, and black pepper.

Coating tenderloin with spice rub.

3. Coat the trimmed pork tenderloin with liquid smoke (optional) and the rub

Raw pork tenderloin with dry rub in a crockpot.

4. Place in the bottom of a 2-quart or larger crock pot. Cook on high for 2-3 hours until 155° and fork tender.

Shredding pork tenderloin in the crock pot.

5. Shred the meat and mix it into the crock pot liquid.

Shredded pork tenderloin in tongs.

6. Let it cook another 15-20 minutes on high before serving.

For more details, keep reading. See the Recipe Card below for complete instructions and to print.

🌡️When is pork tenderloin done and ready to shred?

The minimum safe temperature for pork tenderloin is 145°. But shedding needs to be a bit higher, usually 155°+.

Test it with a fork for "fork tender," when a fork can go in the meat and back out with little resistance. That is when it will shred the easiest.

✔️Tips and Variations

The thickness of a mass of pork will affect the cooking time. We prefer not to pile the chunks on top of others, or if you do, the cooking time will be longer. Please try to keep it to a single layer to help with cooking time and even out the cooking.

The liquid smoke is optional, but I love the smokiness it adds. But only use good-quality ingredients that list only water and smoke. I always use Hickory Wright's Liquid Smoke®️.

This works in a 2-quart crock pot, but I like to use a 3-4 quart size to stay in a single layer. But a bigger slow cooker will also work.

If the pork has been frozen, it may contain less moisture than a fresh tenderloin. If you need to, please add a bit of chicken broth after shredding.

The dry rub provides the seasoning, but you can use any pork rub you like. Check out BBQ Dry Rub, Southwest Chipotle BBQ Dry Rub, or Memphis Dry Rub.

🥣Related Shredded and Pulled Pork Recipes

For shredded pork loin, see Shredded Pork Loin in the Oven or Pulled Pork Loin in the Crock Pot. Or for pork butt, try Boston Butt on Gas Grill, Oven Pulled Pork Butt, or Crock Pot Pulled Boston Butt.

Check out some other crock pot BBQ recipes, like Crock Pot BBQ Chicken and Baby Back Ribs in the crock pot.

🍽️Serving

Serve as a pulled pork sandwich on a hamburger bun with the barbecue sauce you like. I love the original sauce from Gates of Kansas City but frequently use my homemade Memphis BBQ Sauce. American Test Kitchen likes Bull's-Eye®️ Original BBQ Sauce.

It can also be used as tacos, nachos, or quesadillas.

Add coleslaw if you wish, then a side salad, potato salad, Homemade French Fries, Grilled Mixed Vegetables, Creamy One-Pot Mac and Cheese, or Microwave Corn on the Cob.

❄️How to store and reheat shredded pork tenderloin

Store leftovers in an airtight container. Store in the refrigerator for 4 days. Or in a freezer for 3 months.

To reheat, cover in the oven with a few sprinkles of water until hot. Do not reheat in or cover with BBQ sauce. The meat will become mushy due to the acid in the BBQ sauce.

❓FAQs

When to add BBQ sauce to shredded pork tenderloin?

BBQ sauce should be added at serving but not during cooking or reheating.

BBQ sauce has acid due to the vinegar base. This will deteriorate the texture of pulled pork from a tenderloin or pork butt, especially when heated.

How to make large amounts.

Use a large crock pot and make a double or triple recipe. If you need more than one layer of pork, it will take longer to cook.

Can I use pork shoulder (Boston butt) or pork loin for this recipe?

No. This recipe is for pork tenderloin. For butt and loin recipes, please see the Related Recipes section above.

🐖About Pork Tenderloin

The tenderloin refers to the psoas muscle along the lower back. It is chicken tenders in the chicken or beef tenderloin (filet mignon) in cattle. The psoas muscle is generally the most tender cut since it is not used for movement.

A pork tenderloin is not a pork loin. Shredding a pork loin requires a braising technique.
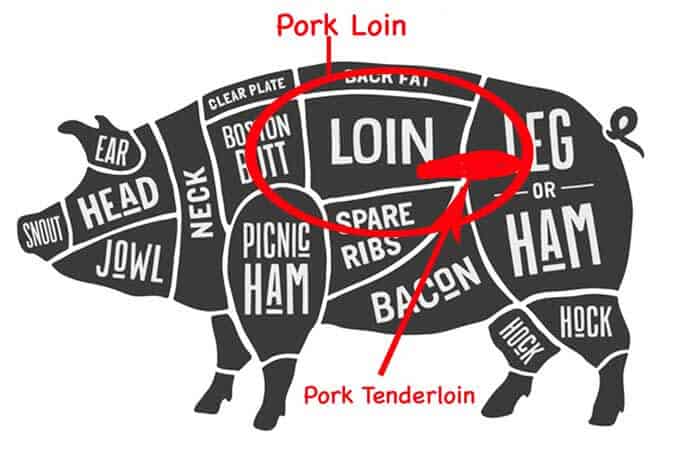
location of pork tenderloin and pork loin - Image licensed May 17, 2017, from Fotolia. Copyright by foxysgraphic - Fotolia. Image modified in accordance with the license.
Image licensed from Fotolia. Copyright by foxysgraphic - Fotolia. The image was modified per the license.
Blue ribbon divider used for visual effect

📖The Recipe Card

Shredded pork tenderloin on a bun with BBQ sauce.
Print Recipe Add to Collection Go to Collections
4.56 from 9 votes

Crock Pot Shredded Pork Tenderloin

This easy crock pot shredded pork tenderloin recipe makes healthy BBQ pulled pork tenderloin. Trim a pork tenderloin, coat it with BBQ rub, and a bit of liquid smoke in your slow cooker for 2-3 hours. You don't need a marinade or braising fluid. We enjoy delicious, moist, smoky pull pork for dinner or sliders for a small party.
Prep Time5 minutes mins
Cook Time2 hours hrs 20 minutes mins
Total Time2 hours hrs 25 minutes mins
Course: Main Course
Cuisine: American
Keyword: BBQ pulled pork tenderloin, crock pot pork tenderloin pulled pork, crock pot shredded pork tenderloin
Servings: 6
Calories: 131kcal
Author: Dan Mikesell AKA DrDan

Ingredients

  • 1½ pound pork tenderloin one whole
  • 2 tablespoons dry rub of your choice
  • 1 teaspoon liquid Smoke—optional but recommended Wrights preferred

Use my BBQ dry rub or season of your choice

  • 2 teaspoons brown sugar
  • 2 teaspoons chili powder
  • 1 teaspoon kosher salt
  • ¼ teaspoon black pepper
  • ¼ teaspoon onion powder
  • ¼ teaspoon garlic powder
US Customary - Convert to Metric

Instructions

  • Start with pork tenderloin. Trim off extra fat and the silver skin and cut into 5-6 pieces of about equal size.
    trimmed pork tenderloin on a black board.
  • If using the included dry rub, mix 2 teaspoons brown sugar, 2 teaspoons chili powder, 1 teaspoon kosher salt, ¼ teaspoon each black pepper, onion powder, and garlic powder.
    mixing spice rub in a small glass bowl.
  • In a larger bowl, coat the pork with liquid smoke (optional) and coat the pieces with the dry rub.
    Coating tenderloin with spice rub.
  • Place the meat in the bottom of a 2 quart or larger crock pot. Cook on high for 2-3 hours. Check the pork at 2 hours to see if it will shred easily—it should be over 155° and fork tender. You may need to cook up to 1 hour longer.
    Raw pork tenderloin with dry rub in a crockpot.
  • Shred the meat and mix it into the crock pot liquid. Let it cook another 15-20 minutes on high before serving.
    shredding pork tenderloin in the crock pot.

Notes

Pro Tips

  1. Be sure you use pork tenderloin and not pork loin for this recipe.
  2. You don’t have to cut the pork tenderloin into chunks, but it will take longer to cook and result in very long pork stands after shredding.
  3. Bad liquid smoke is worse than no liquid smoke. Use Wright's or skip this ingredient.
  4. Keep the pork in a single layer to help faster and even cooking.
  5. This fits in a 2-quart crock pot but will be a single layer in a 3-4 quart crock pot. I suggest a large crock pot for a double batch.
  6. Add the BBQ sauce you like at serving, but do not store or reheat the shredded pork in the sauce. It will affect the texture.
  7. Good in the refrigerator for 3-4 days and frozen for 3-4 days.

Nutrition

Calories: 131kcal | Carbohydrates: 2g | Protein: 24g | Fat: 3g | Saturated Fat: 1g | Cholesterol: 74mg | Sodium: 461mg | Potassium: 465mg | Fiber: 1g | Sugar: 1g | Vitamin A: 198IU | Calcium: 8mg | Iron: 1mg

This recipe is featured in Pulled Pork Recipes without a Smoker and Smaller Crock Pot Recipe Roundup

Editors Note: Originally Published July 13, 2014. Updated with expanded options, refreshed photos, and a table of contents to help navigation.

Lilly and Molly with dog toys
Full Speed Puppies at 6 ½ months

Coffee Steak Rub

With Coffee Steak Rub, your steaks will be exceptional! Made with ground coffee and sugar, just like cowboys would, it will create a delicious coffee-flavored crust on your favorite steaks, whether cooked on the grill or pan-seared and finished in the oven. Enjoy simple, old-fashioned cowboy goodness right at home.

🫘 Ingredients

Coffee Steak Rub—finely ground coffee, brown sugar, garlic powder, kosher salt, and black pepper
Uses—Sirloin, strip, flank, skirt, or other beef steak, tri-tip, pork chops, etc.

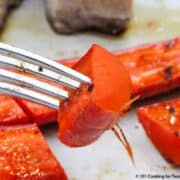
Coffee rubbed steak on a fork.
[feast_advanced_jump_to]
Blue ribbon divider used for visual effect

☕ What is Coffee Steak Rub

The origin of coffee steak rub dates back to when cowboys on the trail used coffee and sugar to enhance the flavor of their steak. Over time, this cowboy coffee steak rub was further developed at restaurants in Texas. Due to its origin, it is often referred to as cowboy coffee rub or simply cowboy rub.

I read versions from Bobby Fray, Ellie Krieger, Gordon Ramsey, the Barefoot Contessa, and many more. They were not even close to each other; each was the best recipe ever, and most had many ingredients that would not be on a chuckwagon.

I wanted a very simple version of a coffee rub. They always had sugar, coffee, salt, pepper, and maybe one or two other ingredients. But garlic was not uncommon, and my wife insisted.

You will taste coffee, garlic, and sugar with a smoky, crispy crust. Give it a try for a wonderful surprise. You can use it on any steak or other grilled meat. I chose sirloin steak as an example for this recipe.

Thumb up from my wife.
A strong thumb up from my wife.

🥣Ingredient options and substitutions

Coffee grounds—Use regular or decaf medium roast ground coffee with a fine or extra fine grind. Not recommended: instant coffee or flavored coffee

Sugar—light or dark brown sugar, but white sugar will work

Kosher salt, black pepper, garlic powder—recommended seasonings

Optional additions—chili powder, onion powder, paprika, cayenne pepper

👨‍🍳Using Coffee Steak Rub with Grilled Sirloin Steaks—Step-by-Step Photo Instructions

ingredients for coffee rub.

1. Mix cowboy rub of freshly finely ground coffee, brown sugar, garlic powder, kosher salt, and black pepper.

Trimmed sirloin on a white board.

2. Pat dry the steak. Trim well.

Coffee rubbed steak on board.

3. Coat the steak with a moderate coat and rub it in well. Let the meat rest at room temperature for 15 minutes while the grill preheats.

Placing sirloin on the grill.

4. Place the meat over high heat and flip every 4-5 minutes until the internal temperature is about 140°-145°—about 9-12 minutes, depending on the grill and thickness of the steak.

Coffee-rubbed sirloin on a white plate.

5. Allow to rest for 5-10 minutes before serving.

⏰🌡️ Time and temperature for grilled sirloin steak

Sirloin steak is usually about ¾ to 1 inch thick and, on a very hot grill, will usually take 9-12 minutes to get in the 140°-145° range.

  • Rare—cold red center(125°-130°) about 6-7 minutes total grill time. But check early.
  • Medium-Rare—warm red center(130°-135°) about 7-9 minutes total grill time.
  • Medium—pink and firm (140°-145°) about 9-12 minutes total grill time.
  • Medium-Well—minimal pink(150°-155°) about 12-14 minutes total grill time. Not suggested.
  • Well-Done—firm and brown(160°+ ) about 14 or more minutes total grill time. Not suggested.

Times are approximations for planning only. Cook to a final internal temperature and never by Time.

A sirloin is from a well-used muscle area of the cow, so it tends to be tougher. It is also leaner than many other cuts, so it is best cooked on the rarer side. You should pick a different steak cut if you like your beef well done.

👨‍🍳Uses of coffee steak rub

Check out these other grilled steak recipes where you might use this rub, like Marinated Sirloin Steak, Grilled New York Strip Steak, Grilled Filet Mignon, and Grilled Porterhouse Steaks. And don't miss trying it on pork, like How to Grill Pork Chops or Grilling Pork Tenderloin.

Or try it inside with Pan Seared Oven Roasted Strip Steak, Pan Seared Oven Roasted Filet Mignon, or Pan Seared Oven Roasted Pork Chops.

❓FAQs

Can coffee steak rub be stored?

Yes, but only for a few days. The coffee flavor will be lost, so it's best to make what you need for that day.

What coffee to use for steak rub?

Use a very finely ground standard coffee. Use the coffee you love and not a flavored coffee. If you have a rougher ground coffee, crush it into a fine powder—you don't want the grit.

Some recipes call for instant coffee, but that is a step too far for me—I have never found a drinkable instant coffee, but there are many excellent ground coffees.

Blue ribbon divider used for visual effect

📖The Recipe Card

coffee rubbed steak on a fork.
Print Recipe Add to Collection Go to Collections

Coffee Steak Rub

With Coffee Steak Rub, your steaks will be exceptional! Made with ground coffee and sugar, just like cowboys would, it will create a delicious coffee-flavored crust on your favorite steaks, whether cooked on the grill or pan-seared and finished in the oven. Enjoy simple, old-fashioned cowboy goodness right at home.
Prep Time20 minutes mins
Cook Time20 minutes mins
Total Time40 minutes mins
Course: Main Course
Cuisine: American
Keyword: Coffee Rubbed Steak, Coffee Steak Rub, Steak Rub
Servings: 2
Calories: 314kcal
Author: Dan Mikesell AKA DrDan

Ingredients

Coffee Rub Ingredients for 2 steaks. Increase in servings # as needed.

  • 1 tablespoon finely ground coffee
  • 1 ½ teaspoon kosher salt
  • ½ teaspoon brown sugar
  • ¼ teaspoon garlic powder
  • ¼ teaspoon black pepper

Sirloin steak as an example of use

  • 2 sirloin steaks 8-10 oz each well timed
US Customary - Convert to Metric

Instructions

  • Mix ingredients for dry rub: 1 tablespoon finely ground coffee, 1 ½ teaspoons kosher salt, ½ teaspoon brown sugar, ¼ teaspoon garlic powder, and black pepper. My coffee was the whole bean, so I needed to grind it first. A very fine grind is best.
  • Pat dry the steak. Trim well.
  • Coat the steak with a moderate coat and rub it in well. Let meat rest at room temp for 15 minutes while grill preheats.
  • Clean and oil the grill grates. Preheat on high.
  • Place meat over high heat and flip every 4-5 minutes until internal temp of about 140°-145°—about 9-12 minutes, depending on the grill, and thicken of the steak.
  • Allow to rest for 5-10 minutes before serving.

Notes

Pro Tips:

  1. The coffee needs to be finely ground and fresh. Do not use instant or flavored coffee.
  2. This rub will not store well—make it fresh as needed.
  3. The recipe is enough for only two steaks; use the serving number to increase the amount.
  4. You can use a coffee that you love.
  5. The cooking time will vary due to the thickness of the steak and the differences in grill variations. Keep an eye on the steak to ensure it's cooked to your desired level of doneness.
  6. This is relatively high in sodium. The nutrition calculations assume the rub is ⅔ used. If you are concerned about the sodium, cut the salt in half.


Nutrition

Calories: 314kcal | Carbohydrates: 2g | Protein: 49g | Fat: 10g | Saturated Fat: 3g | Cholesterol: 137mg | Sodium: 1256mg | Potassium: 772mg | Sugar: 1g | Calcium: 63mg | Iron: 3.7mg

Originally Published August 25, 2011. Updated with expanded options, refreshed photos, and a table of contents to help navigation.

Lilly is walking on a light coat of snow.

Easy Blueberry Crumble Pie (Fresh or Frozen Berries)

blueberry crumble pie on a gray plate.

This easy blueberry crumble pie uses a refrigerated crust, fresh or frozen blueberries, and a simple crumb topping. It's a simple semi-homemade pie without the hassle.

Easy blueberry crumble pie on a gray plate.
[feast_advanced_jump_to]

quote mark
Featured Comment by Kathy:
⭐⭐⭐⭐⭐"Easy Blueberry Crumb Pie was EASY and so delicious! Made it just as directed. "

🧡 Why You’ll Love This Recipe

  • Beginner-friendly and semi-homemade—smart shortcuts, no fuss.
  • Works with frozen or fresh blueberries—no thawing needed.
  • Buttery crumb topping—crispy, golden, and no second crust to roll.
  • 15-minute prep—let the oven and cooling time do the work.
  • Everyday ingredients—refrigerated crust, pantry staples, and berries.

🫐 Ingredients

Use fresh or frozen blueberries and a few pantry staples—nothing fancy here.

Fresh or frozen blueberries with pie crust and pie ingredients labeled.
  • Blueberries – Frozen or fresh both work. No need to thaw—just add a bit more flour if using frozen.
  • Refrigerated pie crust – One crust, unbaked. Follow package directions to fit your pie pan.
  • Pantry basics – Sugar, flour, and cinnamon for sweetening and thickening the filling.
  • Crumb topping – Just butter, flour, brown sugar, and more cinnamon. Simple and golden when baked.

👨‍🍳 Quick Overview: Easy Blueberry Crumble Pie (Fresh or Frozen Berries)

1. Prepare the crust

Fit a refrigerated crust into a 9-inch pie dish.

spreading a raw pie crust on pan.

2. Mix the filling and topping

Toss frozen or fresh blueberries with sugar, flour, and cinnamon. Add extra flour if using frozen berries. Mix the crumb topping separately.

Coat fresh or frozen blueberries with sugar and cinnamon in a bowl with a wooden spoon.

✅ Pro Tip: Frozen or Fresh Blueberries? Both Work—You don’t need to thaw frozen berries—just add an extra tablespoon of flour to the filling to soak up the extra juice. That keeps the pie from turning runny.

3. Assemble the pie

Pour the berry mixture into the crust and top with crumble.

adding blueberry filling to crust.

4. Bake and cool

Bake at 375° for 40–50 minutes, covering the edges halfway. Cool at least 2 hours before slicing. Serve with vanilla ice cream.

Your easy blueberry crumble pie is cooling on a rack.

✅ Pro Tip: Don’t Skip the Cool Down—Let the pie cool completely—at least 2 hours—before slicing. This helps the filling set and prevents that blueberry soup surprise.

👇 Scroll down for the printable recipe card and complete step-by-step photo instructions—or keep reading for tips and options.

👨‍🍳 Make It Right Every Time

A refrigerated pie crust is my preference—it keeps this an easy semi-homemade dessert. Frozen crusts work well too. Just don't prebake.

Use fresh or frozen blueberries, but always check for stems or bad berries. Frozen berries don’t need to be thawed, but add an extra tablespoon of flour to the filling and bake about 10 minutes longer.

Cornstarch works as a thickener, too—just use half as much as you would flour.

Premade pie filling can be used in a pinch, but the flavor and texture won’t be the same.

❓ FAQs—Pie troubleshooting

How do I keep the bottom crust from getting soggy?

An old trick that works is putting pies on baking sheets that are preheated in the oven. It will melt the fat in the crust faster and create a shield to prevent the filling from penetrating the crust.

How to prevent runny blueberry pie?

1) Be sure to add the extra flour to thicken the filling if using frozen berries.
2) Be sure to drain the berries well after rinsing.
3) Be ready to fill the pie crust, add the topping, and bake as soon as you coat the berries.
4) COOL COMPLETELY

Do I need to thaw frozen blueberries first?

Nope! Use them frozen, but add a bit more flour and bake a little longer.

❄️ Storage of leftover pie

  • Room temperature: Cover and keep for up to 2 days.
  • Refrigerator: Store sealed for 3–4 days. The topping will soften over time.
  • Freezer: Not recommended—texture will suffer when thawed.

🥧 Other Pie Recipes to Try

Love this easy blueberry pie? Try one of these next:

  • Apple Crumble Pie
  • Fresh Strawberry Pie
  • Small Batch Apple Crisp or Berry Crisp for Two.
  • Apple Berry Crumble

📖The Recipe Card

blueberry crumble pie on a gray plate.
Print Recipe Add to Collection Go to Collections
5 from 1 vote

Easy Blueberry Crumble Pie (Fresh or Frozen Berries)

This easy blueberry crumble pie is a semi-homemade dessert with a refrigerated crust, fresh or frozen blueberries, and a buttery crumb topping. Easy enough for any day and always a crowd-pleaser.
Prep Time15 minutes mins
Cook Time45 minutes mins
Total Time1 hour hr
Course: Dessert
Cuisine: American
Keyword: Blueberry Crumb Pie, blueberry crumble pie, frozen blueberries
Servings: 8
Calories: 409kcal
Author: Dan Mikesell AKA DrDan

Ingredients

  • 1 refrigerator pie crust

Filling

  • 4 cups blueberries – frozen or fresh
  • ½ cup sugar
  • 3 tablespoons flour – add 1 tablespoon more if using frozen berries
  • 1 teaspoon cinnamon

Topping

  • ½ cup salted butter cold
  • 1 cup all-purpose flour
  • ½ cup brown sugar
  • ½ teaspoon cinnamon
US Customary - Convert to Metric

Instructions

Preheat the oven

  • Preheat to 375°F. Place a baking sheet on the middle rack to catch any drips and help firm up the bottom crust.
    Blueberries with pie crust and pie ingredients.

Prepare the crust

  • Fit a refrigerated pie crust into a 9-inch pie dish and crimp the edge, following package directions.
    raw pie crust ready for the oven-3

Mix the filling and topping

  • To make the topping, combine 1 cup of flour, ½ cup of brown sugar, and ½ teaspoon of cinnamon. Cut in ½ cup cold butter until the mixture is crumbly.
    mixing topping ingredients in a white bowl
  • In a large bowl, toss 4 cups of blueberries (frozen or fresh) with ½ cup of sugar, 3 tablespoons of flour, and 1 teaspoon of cinnamon. If using frozen berries, add 1 extra tablespoon of flour to help thicken the filling.
    mixing topping in small bowl

Assemble the pie

  • Add the berry mixture to the crust. If any sugar mix is left behind in the bowl, sprinkle it over the top.
    adding blueberry filling to crust
  • Cover with the crumb topping.
    adding crumble topping to pie

Bake and cool

  • Place the pie on the baking sheet in the oven. After 20 minutes, cover the crust edges with foil or a pie ring to prevent over-browning. Bake for 40–50 minutes until golden and bubbly. If using frozen berries, bake 10 minutes longer.
    Whole blueberry crumble pie cooling on a rack.
  • Cool completely—at least 2 hours—before serving.
    blueberry crumble pie on a gray plate.

Notes

Pro Tips

  • The recipe is written for a 9-inch pie pan.
  • Don’t thaw frozen berries—just add the extra flour and bake longer.
  •  Protect the crust edge with foil to prevent burning.
  • Do a total of 2 hours plus of cooling before cutting. Restrain yourself.
  • Tips for avoiding soggy crust and runny filling are covered in the post.
  • Good at room temperature for 2 days; refrigerate up to 4 days in an airtight container.

Nutrition

Calories: 409kcal | Carbohydrates: 61g | Protein: 4g | Fat: 17g | Saturated Fat: 9g | Cholesterol: 31mg | Sodium: 193mg | Potassium: 113mg | Fiber: 3g | Sugar: 33g | Vitamin A: 395IU | Vitamin C: 7mg | Calcium: 26mg | Iron: 2mg

Publisher's Note: Originally Published July 12, 2017. Updated with expanded options, refreshed photos, and a table of contents to help navigation.

Lilly and Molly standing nose to nose.

Crockpot Chicken Fajitas Recipe

Chicken fajita with toppings on a gray plate.

These easy crockpot chicken fajitas are made with raw chicken, peppers, and onions cooked with salsa and fajita seasoning. Just add everything to the crock pot and let it cook.

⏰ Quick Answer: How Long to Cook Chicken Fajitas in a Crock Pot

Cook on low for about 4 hours or high for around 2 hours, until the chicken reaches 165°F.

Chicken fajita with toppings on a gray plate.
[feast_advanced_jump_to]

quote mark
Featured Comment by Laurie:
⭐⭐⭐⭐⭐
"I made this a few days ago and we loved it. It was tasty, not too spicy and simple to prepare. The only problem with it is the favorable smell went thru the house!"

📝 TL;DR — Crockpot Chicken Fajitas

What it is: Tex-Mex crockpot chicken fajitas with chicken, peppers, and onions cooked with salsa and fajita seasoning.

Why: Easy prep, reliable results, and a precooked chicken shortcut when you need a faster option.

How: Add everything to the crock pot, cook on low about 4 hours or high about 2 hours, shred the chicken, and serve in warm tortillas.

🐓 Ingredients You'll Need

Raw chicken with fajita ingredients.
  • Chicken: Raw boneless, skinless breasts, thighs, or even chicken tenders work. Any precooked chicken, like rotisserie or leftover chicken, may be used.
  • Bell peppers and onions: Slice into ½-inch strips so they keep shape.
  • Salsa: Adds Tex-Mex flavor—use mild or spicy to taste.
  • Fajita seasoning: Homemade or packet works fine (see recipe card).
  • Tortillas and toppings.

👨‍🍳 Quick Overview: How to Make Crock Pot Chicken Fajitas

1. Prepare Chicken: Trim and cut the raw chicken into large pieces for even cooking.

Trimming chicken breasts.

2. Prepare Vegetables: Slice bell peppers into ½-inch strips and onions into rings.

Trimmed onion and peppers on a black board.

3. Combine: Mix salsa with fajita seasoning in the crock pot. Add the raw chicken and coat well, then top with vegetables.

Mixing sauce in the crock pot.

4. Cook: Cook on low for about 4 hours or high for about 2 hours, until the chicken reaches 165°F.

Placing lid on the crock pot.

5. Shred: Remove the chicken, shred it, then return it briefly to the crock pot.

Spoonful of cooked chicken fajitas over the crock pot.

6. Serve: Spoon into warm tortillas with your favorite toppings.

Chicken fajitas topped with cheese.

For more details, keep reading. See the Recipe Card below for complete instructions and to print.

⏱️ How Long to Cook Chicken Fajitas in a Crock Pot

Cook raw chicken on low for about 4 hours or high for around 2 hours, until it reaches 165°F.

Cooking time varies with the thickness of the chicken and your crock pot. Start checking the internal temperature early to avoid overcooking.

Chicken thighs can cook a little longer and remain tender, but breasts are best at 165°F.

✅ Pro Tip: For food safety, the USDA recommends cooking chicken to 165°F measured at the thickest part. Use an instant-read thermometer to be sure.

🧂 Seasoning & Flavor Tips

  • Fajita seasoning: Homemade gives you more control over the flavor and salt, but a packet works well. Taco seasoning can substitute in a pinch.
  • Salsa: Use your favorite mild or spicy salsa. Salsa verde or a smoky chipotle salsa are easy variations.
  • Lime: Add the juice of one lime for a brighter flavor.
  • More heat: Add sliced jalapeños or a pinch of cayenne.

🐓 Cooking Tips for the Best Results

  • Cut the chicken: Cut large pieces of raw chicken for shredding, or slice into ¼-inch strips across the grain for faster cooking with no shredding needed.
  • Firmer peppers: Add the peppers during the last hour of cooking if you prefer them firmer.
  • Too much liquid: Drain excess liquid before serving for a thicker fajita filling.
  • Restaurant-style finish: Spread the drained fajita filling on a sheet pan and broil briefly to crisp the edges and concentrate the flavor.

🍗 Precooked Chicken Option

  • Use about 3 cups of shredded precooked chicken to replace 1 pound of raw chicken.
  • For rotisserie, leftover, or other precooked chicken, cook the salsa, seasoning, peppers, and onions first on low for about 2 hours or high for about 1 hour, until the vegetables are cooked.
  • Stir in the shredded chicken and cook for another 15–20 minutes, just until everything is hot and coated with the sauce.

↕️ Scaling the Recipe and Crock Pot Sizes

  • Half batch: Fits in a 2-quart mini crock pot—perfect for smaller households.
  • Full batch: Works in a 4–5 quart slow cooker.
  • Double batch: Use a 6-quart or larger cooker.
  • Cooking time stays the same, but smaller recipes in larger cookers may finish a little faster.
  • Use the serving slider in the recipe card to auto-adjust ingredient list amounts. Amounts in the instructions do not adjust.

🍽️ Serving Ideas

  • Classic fajitas: Serve in warm tortillas with your favorite toppings like salsa, cheese, sour cream, guacamole, or pico de gallo.
  • Fajita bowls: Serve over rice, cauliflower rice, or quinoa.
  • Salad topping: Add to fresh greens with salsa or your favorite dressing.
  • Leftovers: Use for quesadillas, nachos, or burritos.

🐓 Chicken Fajita Recipes

  • Easy Chicken Fajitas – Stovetop recipe with a flavorful marinade.
  • Sheet Pan Chicken Fajitas – Oven-baked with minimal cleanup.
  • Grilled Chicken Fajitas – Smoky and quick on the grill.
  • Chicken Fajita Quesadillas – A cheesy twist using fajita filling.

❄️ Storage & Reheating

  • Refrigerate: Store leftovers in an airtight container for up to 4 days.
  • Freeze: Freeze in an airtight container for up to 3 months. Thaw overnight in the refrigerator.
  • Reheat: Reheat gently on the stovetop or in the microwave until hot.

❓ FAQs

Can I cook frozen chicken in the crock pot?

No. The slow cooker heats too slowly for frozen chicken to reach a safe temperature quickly enough. Always thaw chicken before cooking.

What should I do with excess liquid in the crock pot?

Some extra liquid is normal from the chicken and vegetables. Drain before serving if you prefer a thicker fajita filling, or broil briefly to reduce the liquid and crisp the edges.

📖The Recipe Card

Chicken fajita with toppings on a gray plate.
Print Recipe Add to Collection Go to Collections
5 from 3 votes

Crockpot Chicken Fajitas Recipe

Easy crockpot chicken fajitas with chicken, peppers, onions, salsa, and fajita seasoning. Cook until the chicken is done, then shred and serve in warm tortillas with your favorite toppings.
Prep Time10 minutes mins
Cook Time4 hours hrs
Total Time4 hours hrs 10 minutes mins
Course: Main Course
Cuisine: Mexican
Keyword: Crock Pot Chicken Fajitas, Slow Cooker Chicken Fajitas, slow cooker fajitas
Servings: 8
Calories: 154.6kcal
Author: Dan Mikesell AKA DrDan

Ingredients

  • 1½–2 pounds Raw chicken (breasts, thighs, or tenders)
  • ¾ cup Salsa
  • 2–3 Bell peppers color of your choice
  • 1 Onion large sliced thin
  • 1 envelop Fajita seasoning OR make your own

Homemade Fajita Seasoning to replace the envelop (recommended)

  • 4 teaspoons chili powder
  • 1 teaspoon onion powder
  • 1 teaspoon garlic powder
  • 1 teaspoon salt
  • 1 teaspoon cumin
US Customary - Convert to Metric

Instructions

Prepare Chicken and Vegetables

  • Trim 1½–2 pounds of skinless, boneless chicken breasts, thighs, or tenders.
    raw chicken trimmed and cut into chunks
  • Slice 2–3 bell peppers, color of your choice, and 1 large onion into ½-inch slices.
    trimmed onion and peppers on a black board

Mix in the Slow Cooker

  • Add ¾ cup salsa to a 3-quart or larger crock pot. Stir in either the fajita seasoning packet OR 4 teaspoons of chili powder with 1 teaspoon each of onion powder, garlic powder, salt, and cumin. Mix well and spread evenly over the bottom.
    mixing sauce in the crock pot
  • Add the raw chicken to the salsa, coat well, then top with the vegetables.
    adding vegetables into crock pot with chicken

Cook

  • Cook on LOW for about 4 hours or HIGH for about 2 hours, until the chicken reaches 165°F. If using thighs, they may be cooked longer, to about 180°F.
    placing lid on the crock pot

Shred and Serve

  • Remove the chicken, shred it, and return it to the pot for 15–20 minutes to absorb the flavor.
    shredding chicken on a white board with forks
  • Remove the fajitas from the crock pot with a slotted spoon and drain excess fluid. Serve with tortillas, on salads, or rice bowls.
    spoonful of cooked chicken fajitas over the crock pot

Video

Notes

Pro Tips

Precooked chicken instructions are in the post.
A half recipe fits in a 2-quart mini crock pot; a full recipe works in a 4–5 quart cooker.
For a double batch, use a 6-quart or larger crock pot.
Smaller recipes in larger crock pots may cook faster, so check the chicken early.
CALORIE ESTIMATE IS ONLY THE CHICKEN AND VEGETABLES — none of the serving ingredients are included
  1.  

Nutrition

Calories: 154.6kcal | Carbohydrates: 5.6g | Protein: 25.1g | Fat: 3.3g | Saturated Fat: 0.7g | Polyunsaturated Fat: 0.6g | Monounsaturated Fat: 0.9g | Trans Fat: 0.01g | Cholesterol: 72.6mg | Sodium: 600.9mg | Potassium: 593.8mg | Fiber: 1.7g | Sugar: 2.8g | Vitamin A: 1382.4IU | Vitamin C: 41mg | Calcium: 23.8mg | Iron: 1mg

Editor's Note: Originally published July 30, 2016. Updated with refreshed photos, a faster precooked chicken option, simplified instructions, and a new layout for easier navigation.

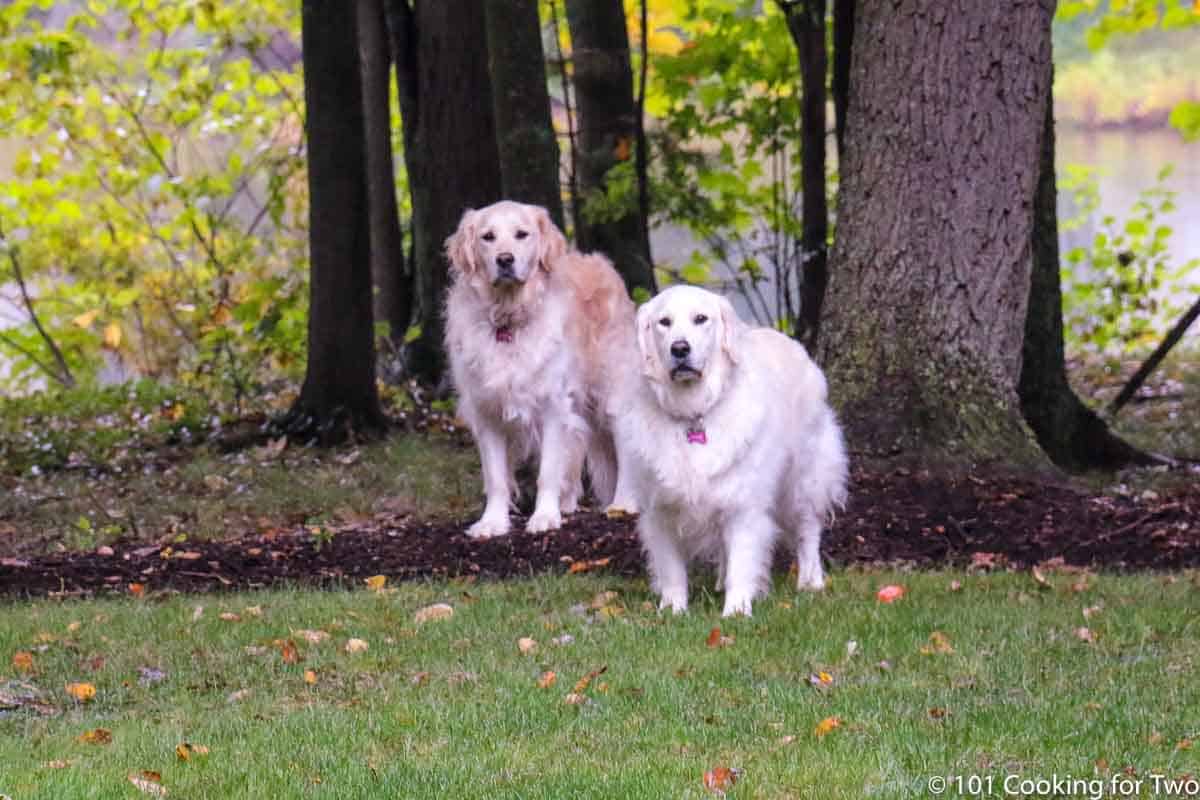
Molly and Lilly are standing in the yard.

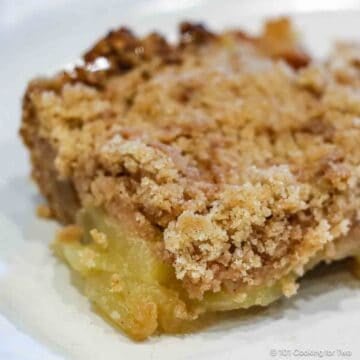
Small Batch Apple Crisp for Two or More

apple crisp on a white plate.

What can you do with only 2 or 3 apples? This small batch apple crisp recipe is the perfect answer. It has tender cinnamon apples with a buttery brown sugar crumble topping—an easy apple crisp for two or a small family without lots of leftovers.

Made with fresh apples and simple pantry ingredients, this old-fashioned apple crisp is easy to prepare and bakes in about 40 minutes for a warm homemade dessert any time of year.

🍏 Quick Answer: The Best Apples for Apple Crisp

  • Granny Smith is the classic choice. They are firm, tart, and hold their shape well while baking.
  • Honeycrisp is slightly sweeter but still stays firm. Other good choices are Pink Lady, Braeburn, and Jonagold.
  • Other apples will work, but softer apples like Red Delicious or McIntosh can become mushy when baked.
  • If you have more than one variety, combining a tart apple with a sweeter apple gives the best flavor.
apple crisp on a white plate.
[feast_advanced_jump_to]

quote mark
Featured Comment by Terry:
⭐⭐⭐⭐⭐ "It's a wonderful recipe and tastes just like my Grandmother's and Mother's when they made it."

🧡 Why You’ll Love This Apple Crisp

  • Flexible batch size – Make a smaller crisp for two people with leftovers. It scales easily down for fewer leftovers or up for a crowd.
  • Uses just a few apples – You’ll only need 2–3 apples, making it perfect for smaller households.
  • Simple pantry ingredients – The classic buttery crumb topping needs only flour, sugar, cinnamon, salt, and butter.
  • Beginner-friendly – No peeling required (unless you want) and no special tools.
  • Cozy and classic – Warm cinnamon apples with a buttery crumb topping—comfort food at its best.

🍎 Ingredients for Small Batch Apple Crisp

3 apples with flour and ingredients for apple crisp—labeled.

Here’s what you’ll need—just pantry staples and a few apples:

  • Apples – For the recipe as written, use 2–3 apples (about 2½ to 3 cups sliced). Granny Smith is the classic choice, but most varieties work fine — see 🍏 Best Apples to Use below.
  • All-purpose flour – For the crumb topping.
  • Sugar – White sugar is standard, but brown sugar adds a deeper, caramel-like flavor. Adjust the amount for the tartness of your apples.
  • Cinnamon – Gives that warm, old-fashioned flavor.
  • Salt – Just a pinch to balance sweetness.
  • Butter – Cold, salted butter works best for a crisp, crumbly topping.

👨‍🍳 Quick Overview: How to Make Apple Crisp

1. Prepare apples and topping

Peel (optional), then slice or cube 2½ to 3 cups of apples; toss with a pinch of cinnamon.

Apple slices in a measuring cup.

✅ Pro Tip: You’ll need about 2 large or 3 medium apples (≈1 to 1¼ pounds) to get 2½ to 3 cups..

2. Prepare the topping

In a bowl, whisk together flour, sugar, cinnamon, and salt. Cut in cold butter until the mixture forms coarse crumbs.

Mixing topping for apple crisp.

🤔 Tip: For extra crunch, stir ¼ cup rolled oats or chopped nuts into the topping.

3. Assemble

Spread apples in a buttered 8×8-inch dish (or similar). Cover evenly with the crumb topping—don’t pack it down.

Pouring topping over sliced apples in baking dish.

🤔 Tip: A 9×9 pan works too, but bakes a bit thinner and may finish a few minutes faster.

4. Bake

Bake at 375°F for about 40 minutes, until the topping is golden and the filling is bubbling at the edges. Cool 10–15 minutes before serving.

Golden brown apple crisp out of the oven.

👇 For full step-by-step instructions, scroll to the printable recipe card—or keep reading for tips, flavor options, and serving ideas.

🍏 Apple Crisp for Two and How to Scale the Recipe

A full recipe makes about 8–9 smallish servings. A half recipe makes 4 servings—perfect for two people to enjoy with fewer leftovers. You can bake a half batch in two ramekins, but it’s usually better in a small square or round dish for more even cooking.

  • A half recipe fits in:
    • Two 8–10 oz ramekins (about 4 inches wide)
    • A 5-inch square
    • 6-inch round baking dish
    • Bake for about 20 to 25 minutes
  • A full recipe fits in:
    • 8x8 square
    • 6x9 oblong
    • 9-inch round
    • Bake for about 40 minutes
  • A double batch fits in:
    • A standard 9x13 cake or casserole dish
    • Bake for about 50 to 60 minutes

No matter the size, bake until the top is browned, the filling is bubbling, and the apples are tender.

✅ Pro Tip: Use the serving # to scale your amounts—the written instructions below in the card don’t adjust when you change servings.

🍽️ Serving Apple Crisp

Apple crisp isn’t just dessert—it’s a cozy snack or even a sweet brunch side. This small-batch version is perfect for two people to enjoy warm, with a scoop of vanilla ice cream or a drizzle of caramel sauce. You’ll even have a little leftover for later.

If you’re feeding more, double the recipe and bring it to a potluck—it disappears fast.

❄️ How to Store and Reheat Apple Crisp

  • Refrigerate: Up to 4 days, tightly covered.
  • Freeze: Up to 3 months, wrapped in plastic and foil. Thaw overnight in the fridge.
  • Reheat: Warm briefly in the microwave or 350°F oven until heated through and crisp on top.

📋 More Easy Apple Recipes

If you’ve got extra apples, try one of these simple favorites:

  • Apple Cinnamon Muffins – Moist, fluffy, and great for breakfast or snacks
  • Easy Apple Crumb Pie – Classic flavor with a sweet crumb topping
  • Crock Pot Apple Cobbler – Set it and forget it—warm and cozy
  • Apple Bread – Soft, spiced quick bread loaded with apple flavor

❓ FAQs

Do the apples need to be peeled for apple crisp?

Nope — it’s up to you. I usually peel them (that’s what you’ll see in the photos), but the skins soften during baking and are fine to leave on.

Can apple crisps be made gluten-free?

Yes. Just swap the all-purpose flour for a gluten-free blend. Everything else stays the same.

How do I prevent peeled apples from browning?

Toss them with a little lemon juice — about ½ teaspoon per 2–3 apples — if you’re prepping ahead.

What’s the difference between a cobbler, crumble, and crisp?

Cobblers have a biscuit or cake-like topping.
Crisps have a buttery crumb topping, usually without oats.
Crumbles are similar to crisps but often include oats.

Many people use “crumble” and “crisp” interchangeably — but in my kitchen, this recipe is definitely a crisp.

Can I make apple crisp with just 3 apples?

Yes! This recipe is written for 2–3 medium apples (about 2½ to 3 cups sliced). That makes it perfect when you only have a few apples left in the fruit bowl—even the older ones work fine once they’re baked with cinnamon and a buttery crumb topping.

📖The Recipe Card

apple crisp on a white plate.
Print Recipe Add to Collection Go to Collections
4.38 from 8 votes

Small Batch Apple Crisp (Easy Recipe for Two or More)

Make an easy small batch apple crisp with only 2 or 3 apples and a buttery crumb topping. A perfect old-fashioned dessert for two or more.
Prep Time10 minutes mins
Cook Time40 minutes mins
Total Time50 minutes mins
Course: Dessert
Cuisine: American
Keyword: 3 apples, apple crisp for two, Easy apple crisp, Small batch apple crisp
Servings: 9
Calories: 223kcal
Author: Dan Mikesell AKA DrDan

Ingredients

  • 2½ to 3 cups apples sliced about 2 large or 3 medium
  • 1 cup flour
  • ¾ to 1 cup sugar depending on the sweetness of the apples
  • 1 teaspoon cinnamon divided
  • ¼ teaspoon salt
  • 1 stick butter ½ cup
US Customary - Convert to Metric

Instructions

Prepare

  • Preheat the oven to 375°F.
    3 apples with flour and ingredients for apple crisp—labeled.
  • Butter an 8-inch square baking dish or a similar-sized pan.
    A baking dish prepared with butter.

Prepare the apples

  • Peel (optional) and cube or slice 2½ to 3 cups of apples—about two larger or three medium apples. Use Granny Smith, Ida Red, or other firm varieties, but avoid Red Delicious and Macintosh apples. Sprinkle with ½ teaspoon of cinnamon.
    Apple slices in a measuring cup.

Prepare the topping

  • In a medium bowl, combine 1 cup of flour, sugar (use ¾ cup for sweet apples, up to 1 cup for tart ones), ½ teaspoon of cinnamon, and ¼ teaspoon of salt. Cut in 8 tablespoons of cold butter using a fork or pie crust cutter.
    Mixing topping for apple crisp.

Assemble

  • Spread the apples evenly in the prepared dish. Top with the crumble mixture.
    Pouring topping over sliced apples in baking dish.

Bake

  • Bake for about 40 minutes until golden brown and bubbly. Let cool slightly before serving.
    Apple crisp in the baking dish.

Video

Notes

Pro Tips

  1. This fits nicely in an 8x8 pan, but a 9X6 or 9-inch round will work. A 9x9 will be thinner and not suggested.
  2. This is an easy recipe to adjust up or down. A double recipe fits nicely in a standard 9 by 13 cake or casserole pan. Various pan sizes are discussed in the post.
  3. Granny Smith or Ida Red apples are recommended. You can use the apples you love, but I suggest avoiding Red Delicious and Macintosh. 
  4. Reduce the sugar to ¾ cup if the apples are particularly sweet.
  5. Brown sugar may be used for a slightly different flavor. Or use a mixture.
  6. The amount of apple slices can vary slightly up or down.
  7. A bit of cooling before serving helps it hold together.
  8. Store refrigerated airtight for 4 days. Or freeze for up to 3 months.
  9. Reheats nicely in the microwave.

Nutrition

Calories: 223kcal | Carbohydrates: 32g | Protein: 2g | Fat: 10g | Saturated Fat: 6g | Cholesterol: 27mg | Sodium: 155mg | Potassium: 52mg | Fiber: 1g | Sugar: 20g | Vitamin A: 333IU | Vitamin C: 2mg | Calcium: 7mg | Iron: 1mg

Publisher Note: Originally Published October 25, 2014, It is a great simple recipe. It was updated with expanded options, refreshed photos, and a table of contents to help navigation.

Lilly on the sofa.

Easy Tailgate Recipes

College of food for tailgating.

The best season of all, football season, is here, and it's time for tailgating or game parties. Put on your team jersey, practice the fight song, and then secure the best parking spot or seat in front of the TV. It's time to enjoy the company of friends and family.

[feast_advanced_jump_to]
College of food for tailgating.
Blue ribbon divider used for visual effect

Let the games begin. Whether tailgating, having a game party, or enjoying the game at home, you deserve great food without all the work.

Start with finger foods like potato chips or corn chips, cubes of cheddar or other cheeses, vegetable trays, and dips are always favorites.

While grilling, traditional hot dogs, brats, and burgers are a must. Here are a few other suggestions.

Save this recipe!

Enter your email address and we'll send the link straight to your inbox!

🥣Chili Recipes

I have 13 chili recipes, but these three are my favorites.

Easiest White Chicken Chili
Perfect for tailgating, this delicious chili will stay hot for a long time and keep you warm to the bone during the game. Make it with only five ingredients in your crock pot in a few hours.
5 Ingredient White Chicken Chili
spoonful of white chicken chili.
Small Crock Pot Chili (Ground Beef & Bean, Easy for Two or More)
A small recipe that is easy to scale to crowd size. A wonderful All-American ground beef chile that is easy to make ahead in any size slow cooker.
All-American Ground Beef Chili
orange bowl with chili with cheese

And lastly, a wonderful change of pace recipe.

White Chicken Chili with Salsa Verde
It is the perfect change of pace chili everybody will love. A mildly spicy white chicken chili made with chicken, white beans, green salsa verde, and a few pantry ingredients: a simple dump-and-go crock pot or fast stovetop recipe.
Salsa Verde Chicken Chili
Salsa Verde chili on a spoon.

🌮Tailgating Nachos and Tacos

Homemade Taco Meat Recipe
The best nachos start with the best ground beef taco meat. Make it in 25 minutes with ground beef and an easy homemade taco seasoning. Make it spicy or make it mild; you're in control. You will never use packaged taco seasoning again.
Homemade Taco Meat Recipe
Three hard shell spicy tacos on a white plate.
Crock Pot Chicken Tacos
You can prepare delicious chicken tacos or nachos with just three ingredients, a slow cooker, and five minutes of prep time. Cook the chicken for several hours, shred it, and cook for another hour. Serve this tender chicken taco meat as tacos, nachos, or other Mexican dishes.
Crock Pot Chicken Tacos
Chicken taco nacho chip in hand.
Chili Cheese Nachos
Chili Cheese Nachos with shredded beef chili smothered in melted cheese is perfect for tailgating and game-day parties. Easy to make ahead and serve both chili and nachos at the party.
Chili Cheese Nachos
plate of cheese chili nachos topped with tomatos and sour cream

🐓Wings and Dip

Crispy Baked Chicken Wings (Convection Oven)
Crispy baked chicken wings made in a convection oven with aluminum-free baking powder. Bake low to dry the skin, then finish hot for extra-crispy wings without frying.
Crispy Baked Chicken Wings
Crispy Baked Chicken Wings from 101 Cooking for Two
Blue Cheese Dip for Wings
This homemade Blue Cheese Dip for Wings is the perfect recipe for buffalo chicken wings, vegetables, salads, and many other dishes. No more store-bought dressing when you can have a fresh, made-from-scratch dip at your game party in five minutes.
Blue Cheese Dip for Wings
Blue cheese dip on celery.

🍔Pulled Pork, BBQ Chicken, or Brisket Sandwiches/Sliders

These are the classic tailgate dishes. I'm just giving you the meat since you can handle the serving.

How to Cook Pork Butt in the Oven for Pulled Pork
Make juicy BBQ pulled pork in your oven. Cook pork butt at 250°F until fall-apart tender, with crispy bark and rich, smoky flavor.
Pork butt in the oven
pulled pork sandwich with BBQ sauce
Easiest Crock Pot BBQ Chicken
This is one of the easiest recipes ever—tasty BBQ chicken in under 4 hours. Great for family gatherings and parties or just when you want to be lazy for an easy family dinner.
Crock Pot BBQ Chicken
a shredded BBQ chicken sandwich on a white plate
How to Cook Brisket in the Oven (Fall-Apart Tender BBQ)
Cook fall-apart tender BBQ brisket in the oven with an easy low-and-slow method. Works with any size or cut, with no smoker needed.
Oven Baked Brisket
Cutting the brisket.
Crock Pot Pork Loin Pulled Pork
Make tender, juicy shredded pork loin in your crock pot (slow cooker) with simple ingredients. Perfect for BBQ pulled pork sandwiches.
Crock Pot Pulled Pork Loin
shredded pork loin on a bun with sauce

🍮Sweet Endings

Dessert bars are a great addition to any tailgate party. Some easy cook-ahead bars will make you look like the hero.

Chocolate Chip Cheesecake Bite (or whole cheesecake)
Easy and delicious make ahead for the party. Real cheesecake bites with Oreo crust that is easy to make at home.
Chocolate Chip Cheesecake Bites
Chocolate chip cheesecake bars on a platter square view.
Easy Lemon Bars
Easy lemon bars are delicious and simple to make in under an hour. These homemade lemon squares are a perfect dessert treat with a crispy, buttery shortbread crust and tangy and sweet lemon filling—a small batch 8X8 recipe you can scale to your needs.
Lemon Bar Recipe
Two lemon squares on a gray plate.
New York Cheesecake Bars
Rich and creamy New York Cheesecake Bars with a buttery graham cracker crust. This easy small-batch recipe is baked in an 8X8 pan and easily doubles to a 9X13 pan.
Cheesecake Bar Recipe
Cheesecake bars on a blue plate.

Food Safety Tips

These gatherings are ready-made for food safety issues and leftovers at the party. Let's plan for food safety and get it right. Check out the USDA Food Safety recommendations.

two dog in Michigan bandanas

Don't forget the party animals and their treats, Homemade Dog Treats—Healthy & Low-Fat.

Enjoy the fall.

Wifo, Molly, Lilly, and DrDan

Originally Published August 28, 2019. It will be updated and republished yearly about this time.

Sticky Honey Garlic Chicken with Boneless Chicken (Sweet & Easy)

Honey garlic chicken with sauce on rice.

This sticky honey garlic boneless chicken is easy to make and scale from two to a crowd in a crock pot. A simple 4-ingredient honey garlic sauce of soy sauce, honey, ketchup, and garlic clings to every bite of the boneless chicken breasts or thighs.

Honey garlic chicken with sauce on rice.
[feast_advanced_jump_to]

quote mark
Featured Comment by Paul D.:
⭐⭐⭐⭐⭐
"Fantastic recipe! My family loves it. My wife thinks I'm a genius, lol."

🧾 TL;DR Recipe Summary

What: Boneless chicken breasts or thighs cooked in a sticky 4-ingredient honey garlic sauce.

Why: Easy prep, no browning, and scales from two to a crowd in any-size crock pot.

How: Mix the sauce, add the chicken, and cook on low for 3–4 hours. Thicken the sauce with cornstarch if desired.

🐓Ingredients

Labeled ingredients for honey garlic chicken.
  • Boneless Chicken – Skinless, boneless chicken breasts or thighs
  • Honey garlic sauce – Soy sauce, honey, ketchup, and fresh garlic. Optional: basil and crushed red pepper flakes; cornstarch for thickening.
  • For serving – Cooked rice, toasted sesame seeds, and sliced green onions

👨‍🍳 Quick Overview: Crock Pot Honey Garlic Chicken

1. Trim skinless boneless chicken (breasts or thighs) into serving-size pieces.

Chicken breasts trimmed into chunks.

2. Whisk together the honey garlic sauce and combine with the chicken in the crock pot.

Pouring sauce over raw chicken in the crock pot.

3. Cook on low for 3–4 hours. Breasts are done at 165°F; thighs are best at 180°–185°F. Start checking the temperature at 2 hours.

Cooked chicken with sauce on a ladle.

4. Spoon over rice with extra sauce. Garnish with sesame seeds and green onions.

Honey garlic chicken with rice on a white plate wide view.

👇For complete step-by-step instructions, scroll down to the printable recipe card or keep reading for tips, flavor options, and serving ideas.

🧂 Honey Garlic Sauce & Flavor Options

The 4-ingredient honey garlic sauce is made with soy sauce, honey, ketchup, and fresh garlic.

  • Soy sauce – Use low-sodium soy sauce; use tamari for gluten-free.
  • Honey – Adjust to taste for more or less sweetness.
  • Ketchup – Adds flavor, sweetness, and seasoning.
  • Garlic – Fresh is best. Substitute ⅛ teaspoon garlic powder per clove.
  • Optional flavors – Add basil, crushed red pepper flakes, or fresh ginger. A dash of sesame oil or rice vinegar also works well.

Extra sauce: Double the sauce ingredients if you want more for serving over rice or vegetables.

Thicker sauce: Thicken with cornstarch near the end of cooking.

↕️ Adjusting the Recipe Size

This recipe scales easily for two or a crowd. The recipe card defaults to 4 servings; use the serving slider to adjust the ingredient amounts. The instructions do not adjust.

  • 2 servings: 2- to 3-quart crock pot
  • 4 servings: 3- to 4-quart crock pot
  • 8 servings: 6-quart or larger crock pot

Keep the crock pot no more than about 75% full. Cooking time may vary with the amount and crock pot size. Cook to internal temperature, not by the clock.

🍽️ Serving Honey Garlic Chicken

Serve the chicken over rice with extra honey garlic sauce, green onions, and toasted sesame seeds. Steamed or roasted vegetables also work well.

For shredded chicken: Shred the chicken during the last 15–30 minutes and stir it back into the sauce.

❄️ Storage & Leftovers

Store leftovers in an airtight container in the refrigerator for up to 4 days or freeze for up to 4 months.

Reheat: Warm gently in the microwave or covered on the stovetop with some of the sauce to prevent drying.

🍚 More Chinese-Inspired Recipes

  • Chinese Boneless Ribs
  • Beef and Broccoli
  • General Tso Chicken
  • Cashew Chicken
  • Chicken Stir Fry

❓FAQs

Can I make honey garlic chicken gluten-free?

Yes. Use gluten-free tamari instead of soy sauce, and check the ketchup label to be sure it is gluten-free.

Can I use chicken thighs instead of breasts?

Yes. Boneless chicken thighs stay juicy and tolerate longer cooking. Boneless chicken breasts should be checked earlier and cooked to 165°F to prevent drying.

📖The Recipe Card

Honey garlic chicken with sauce on rice.
Print Recipe Add to Collection Go to Collections
4.55 from 20 votes

Crock Pot Sticky Honey Garlic Boneless Chicken

Sticky honey garlic boneless chicken made with boneless breasts or thighs and a sweet homemade honey garlic sauce in any size crock pot.
Prep Time10 minutes mins
Cook Time3 hours hrs
Total Time3 hours hrs 10 minutes mins
Course: Main Course
Cuisine: Chinese
Keyword: crockpot garlic honey chicken, honey garlic chicken crock pot, Slow Cooker Honey Garlic Chicken
Servings: 4
Calories: 300.3kcal
Author: Dan Mikesell AKA DrDan

Ingredients

  • 1½ pounds skinless chicken breasts or thighs

Honey Garlic Sauce

  • ½ cup ketchup
  • ¼ cup low sodium soy sauce
  • ¼ cup honey
  • 2–4 cloves garlic crushed or minced
  • ½ teaspoon basil optional
  • ¼ teaspoon red pepper flakes optional

Optional thickening

  • 1 tablespoon cornstarch
  • 2 tablespoons cold water

For serving

  • cooked rice
  • toasted sesame seeds
  • sliced green onions
US Customary - Convert to Metric

Instructions

Prep the chicken and sauce

  • Trim about 1½ pounds of skinless chicken. If using boneless breasts, cut into serving-size pieces. Thighs may not need cutting
    chicken breasts trimmed into chunks
  • In a medium bowl whisk together ½ cup of ketchup, ¼ cup of soy sauce (low sodium preferred), ¼ cup of honey, four cloves of crushed garlic, ¼ teaspoon red pepper flakes (optional), and ½ teaspoon basil (optional).
    whisking sauce ingredient in a white bowl

Combine in the crock pot

  • Spread the chicken across the bottom of a crock pot coated with cooking spray. Pour the sauce over the chicken and stir to coat.
    pouring sauce over raw chicken in crock pot
  • Optional: For a thicker sauce, mix 1 tablespoon of cornstarch with 2 tablespoons of water to form a slurry, and stir it in during the last hour of cooking.
    mixing corn starch into a slurry

Cook

  • Cook on low for 3–4 hours. Chicken breasts should reach a temperature of 165°F; thighs are best cooked to 180°F for better texture. Begin checking the temperature at 2 hours, as slow cookers can vary.
    cooked chicken with sauce on a ladle

Serve

  • Serve over rice with extra sauce. Garnish with toasted sesame seeds and sliced green onions.
    Honey garlic chicken with rice on a white plate.

Notes

Pro Tips:

  1. Use low-sodium soy sauce. For gluten-free, use gluten-free tamari and check the ketchup label.
  2. For extra sauce to serve over rice or vegetables, double the sauce ingredients.
  3. Refrigerate leftovers for up to 4 days or freeze for up to 4 months.

Nutrition

Calories: 300.3kcal | Carbohydrates: 27.1g | Protein: 38g | Fat: 4.5g | Saturated Fat: 1g | Polyunsaturated Fat: 0.7g | Monounsaturated Fat: 1.3g | Trans Fat: 0.1g | Cholesterol: 108.9mg | Sodium: 1046.3mg | Potassium: 789.3mg | Fiber: 0.3g | Sugar: 23.9g | Vitamin A: 242.8IU | Vitamin C: 3.8mg | Calcium: 22.2mg | Iron: 1.1mg

Originally Published January 4, 2015. Updated with expanded options, refreshed photos, and editing to help with navigation.

Dogs in the snow.

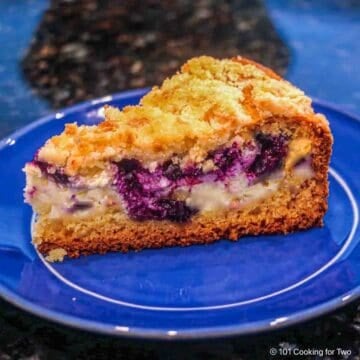
Blueberry Cream Cheese Coffee Cake

Blueberry Cream Cheese Coffee Cake on a blue plate.

Blueberry cream cheese coffee cake combines a rich cream cheese filling with fresh or frozen blueberries and a buttery streusel topping for a treat that's perfect for breakfast, brunch, or dessert.

The cream cheese filling gives every bite the rich flavor of New York cheesecake, while juicy blueberries add bursts of fresh flavor. Follow the easy step-by-step instructions, and you'll have a beautiful coffee cake that looks bakery-made.

Blueberry Cream Cheese Coffee Cake on a blue plate.
[feast_advanced_jump_to]

quote mark
⭐⭐⭐⭐⭐ Featured Comment by Charlene:
"Oh my gosh - this is just sinful!!! Your ratings need to go beyond #5, as this coffee cake is outstanding! We cannot stop eating it - LOVE this recipe!!!!"

🤔 TL;DR – Recipe Summary

What: Bake an easy blueberry cream cheese coffee cake with a rich cream cheese filling, buttery streusel topping, and fresh or frozen blueberries.

Why: It combines the best parts of coffee cake and New York cheesecake in one simple recipe that's perfect for breakfast, brunch, or dessert.

How: Layer the crust, cream cheese filling, blueberries, and streusel topping, then bake until golden and the center is just set.

🫐 Ingredients

Ingredients for blueberry cream cheese cake.
  • Blueberries— Fresh or frozen both work well. If using frozen, do not thaw. Pick over and rinse fresh berries before using.
  • Cream cheese— Use full-fat block cream cheese for the richest filling. Let it come to room temperature for easier mixing and a smoother texture.
  • Sour cream— Adds the tangy flavor and dense texture that makes the filling taste like New York cheesecake. Full-fat is best.
  • Egg— Bring to room temperature for a smoother, more even filling.
  • Butter, flour, and sugar— Form both the crust and the classic streusel topping.
  • Baking powder, baking soda, and vanilla extract

✔️ Easy Variations

  • Swap the blueberries for raspberries or blackberries.
  • Stir chopped pecans or walnuts into the streusel topping for extra crunch.

👨‍🍳 Quick Overview: How to Make Blueberry Cream Cheese Coffee Cake

1. Make the Crust and Streusel Topping

Combine flour, sugar, and salt. Cut in cold butter. Reserve part of the flour mixture for later as a topping.

To the remainder, add baking powder, baking soda, egg, sour cream, and vanilla extract.

cutting butter into flour with pie cutter in clear bowl.

2. Prepare the Pan with the Crust

Add the mixture to a greased springform pan. Spread over the bottom and up the sides about ¼ inch thick.

spread crust over pan and sides with spatula.

3. Mix Filling

Mix cream cheese, sour cream, sugar, and an egg until smooth and fluffy—about 2 minutes.

using an electric mixer to beat egg into mixture.

4. Assemble

Spread the filling into the crust, top evenly with the blueberries, fold the crust over the filling, and sprinkle with the reserved streusel topping.

using a spatula to fold the crust over the edge of the filling.

✅ Pro Tip: Toss the blueberries with a little flour before adding them to help prevent sinking during baking.

5. Bake

Bake at 350°F until golden brown, and the center is almost set with just a slight jiggle, about 55–60 minutes.

flour mixture on the top of the cake.

6. Cooling

Cool in the pan for 10–15 minutes before removing the springform ring. Refrigerate for at least 2 hours before serving.

removing springform pan form blueberry cream cheese cake.

For more details, keep reading. See the Recipe Card below for complete instructions and to print.

🍽️ Serving

Cool completely before cutting, just like cheesecake. For the best flavor and texture, let slices sit at room temperature for about 15 minutes before serving.

Enjoy this blueberry cream cheese coffee cake for breakfast, brunch, with an afternoon cup of coffee, or as an easy dessert.

❄️ Storage of leftovers

Because of the cream cheese filling, this coffee cake should not be stored at room temperature. Cover tightly and refrigerate for up to 3 days.

For longer storage, freeze individual slices or the whole cake, wrapped well, for up to 3 months. Thaw overnight in the refrigerator before serving.

🫐 More Blueberry Recipes

Don't miss these other blueberry recipes, like Oven Baked Blueberry Pancakes, Blueberry Cream Cheese Bars, Blueberry Cobbler, and Whole Wheat Blueberry Muffins.

❓ FAQs

Can I use a different fruit?

Yes. Raspberries and blackberries work especially well. You can also substitute other berries or even fruit preserves. Apricots and cherries are good choices.

Can I use something other than a springform pan for this recipe?

Yes. A deep 9-inch round cake pan or an 8- or 9-inch square baking pan will work. Line the bottom with parchment paper and grease the sides to help prevent sticking.

How do you keep the blueberries from sinking into the coffee cake?

Toss the blueberries with a little flour before folding them into the cake. Then get the cake into the oven promptly so they don't have time to settle.

Why does this coffee cake need to be refrigerated?

The cream cheese filling makes refrigeration necessary for food safety. Store leftovers covered in the refrigerator, then let slices sit at room temperature for about 15 minutes before serving for the best flavor and texture.

📖The Recipe Card

Blueberry Cream Cheese Coffee Cake on a blue plate.
Print Recipe Add to Collection Go to Collections
5 from 1 vote

Blueberry Cream Cheese Coffee Cake

This easy blueberry cream cheese coffee cake has a rich cream cheese filling, fresh or frozen blueberries, and a buttery crumb topping.
Prep Time30 minutes mins
Cook Time1 hour hr
Total Time1 hour hr 25 minutes mins
Course: Breakfast
Cuisine: American
Keyword: Blueberry Cream Cheese Coffee Cake, Blueberry Cream Cheese Dessert, Cream Cheese Coffee Cake
Servings: 12 servings
Calories: 345.4kcal
Author: Dan Mikesell AKA DrDan

Ingredients

Crust / Topping

  • 2¼ cups flour
  • ¾ cup sugar
  • ¼ teaspoon salt
  • ¾ cup butter
  • ½ teaspoon baking soda
  • ½ teaspoon baking powder
  • ¾ cup sour cream

Filling

  • 8 oz cream cheese room temp
  • ¼ cup sour cream
  • ¼ cup sugar
  • 1 teaspoon vanilla extract
  • 1 egg room temp
  • 1 cup blueberries fresh or frozen
US Customary - Convert to Metric

Instructions

  • Preheat oven to 350° conventional with a rack in the middle. Let the eggs and cream cheese set at room temperature for about 30 minutes.
    blueberries, eggs and cheesecake ingredients
  • Combine 2¼ cups flour, ¾ cup sugar, and ¼ teaspoon salt. Mix well. Cut in ¾ cup cold butter. I like to chop or shred the butter to aid in the mixing.
    cutting butter into flour with pie cutter in clear bowl
  • Reserve 1 cup of the flour mixture for later as a topping. Mix in ½ teaspoon each of baking powder and baking soda. Then mix in 1 egg, ¾ cup sour cream, and 1 teaspoon vanilla extract.
    removing one cup of flour mixture from bowl
  • Prepare a 9-inch springform pan with a light coat of butter and dusted with flour. Add the mixture to the prepared pan.
    round baking pan coated with flour
  • Spread over the bottom and up the sides about ¼ inch thick.
    spread crust over pan and sides with spatula
  • In a mixing bowl, place 8 oz cream cheese, ¼ cup sugar, ¼ cup sour cream, and 1 egg. Beat with an electric hand mixer until smooth and fluffy—about 2 minutes.
    using an electric mixer to beat egg into mixture
  • Add filling to the crust. Toss the blueberries with a little flour, then spread them evenly over the filling.
    adding blueberries to top of filling
  • Fold the crust that is up the sides of the pan onto the top of the filling. Helpful hint: Lightly spray the spatula with cooking spray to prevent sticking.
    using a spatula to fold the crust over the edge of the filling
  • Cover with the topping.
    flour mixture on the top of the cake
  • Bake at 350°F until golden brown, and the center is almost set with a slight jiggle – about 55-60 minutes. Allow to cool in the pan for 10-15 minutes, and remove the side of the pan.
    Refrigerate for at least 2 hours before serving.
    removing springform pan form blueberry cream cheese cake.

Notes

Pro Tips

  1. A springform pan is almost required. Using a standard baking pan is discussed in the post.
  2. This is for fresh or frozen blueberries. If you use frozen, there is no need to thaw, but both should be picked over for stems and rinsed.
  3. You can use other fresh fruit or even preserves—raspberry, apricot, or cherry are good choices.
  4. Cool completely before slicing for the cleanest cuts.
  5. Store airtight and refrigerated for up to 3 days. You can also freeze for 2-3 months, sealed airtight.

Nutrition

Calories: 345.4kcal | Carbohydrates: 38.8g | Protein: 4.9g | Fat: 19.4g | Saturated Fat: 11.7g | Polyunsaturated Fat: 0.9g | Monounsaturated Fat: 5.1g | Trans Fat: 0.4g | Cholesterol: 66.6mg | Sodium: 274.1mg | Potassium: 109.1mg | Fiber: 0.9g | Sugar: 18.7g | Vitamin A: 658.3IU | Vitamin C: 1.4mg | Calcium: 64.7mg | Iron: 1.2mg

Editor's Note: Originally Published August 7, 2016. Updated with expanded options, refreshed photos, and a table of contents to help with navigation.

Adapted from Allrecipes.com Raspberry Cream Cheese Coffee Cake.

dogs helping in the kitchen.

28 Smaller Labor Day Recipes

Labor Day is almost here, and with it, the end of "summer"...BOO. Let's fire up the grill and send it out in style with some easy, mostly smaller, grill recipes for the long weekend.

No grill, no problem – see the oven recipe section for indoor choices. And as a bonus, if you read to the end, you will get my Labor Day story (nobody else has one of those.)

Labor Day graphic with dogs in bows
[feast_advanced_jump_to]

I now love Labor Day. It used to be just a long weekend of work to me, but now I fire up the grill for the grand finale. Plus, it's also the gateway to my favorite month – September. The weather is perfect during the day and for sleeping at night, and it's the start of football and chili season.

🐄 4 Beef Grill Recipes

How to Grill Hamburgers (Juicy, Easy Method)
Grill juicy hamburgers with a simple method, a hot grill, and a 160°F finish. Reliable cook times and easy steps for perfect burgers every time.
How to Grill Burgers
burger on a bun
Grilled Ribeye Steak (Gas Grill)
Grill a juicy, tender ribeye steak on a gas grill with easy step-by-step instructions, cooking times, temperatures, and a doneness guide from rare to well done.
How to Grill Ribeye Steaks
A cut ribeye steak on a gray plate.
Grilled New York Strip Steak
Grill New York strip steak over high heat in just minutes for a delicious crust and a medium-rare center, with easy cooking times and temperatures for your preferred doneness.
How to Grill NY Strip Steaks
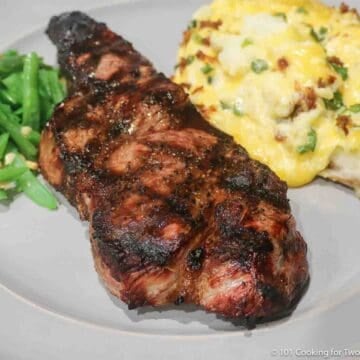
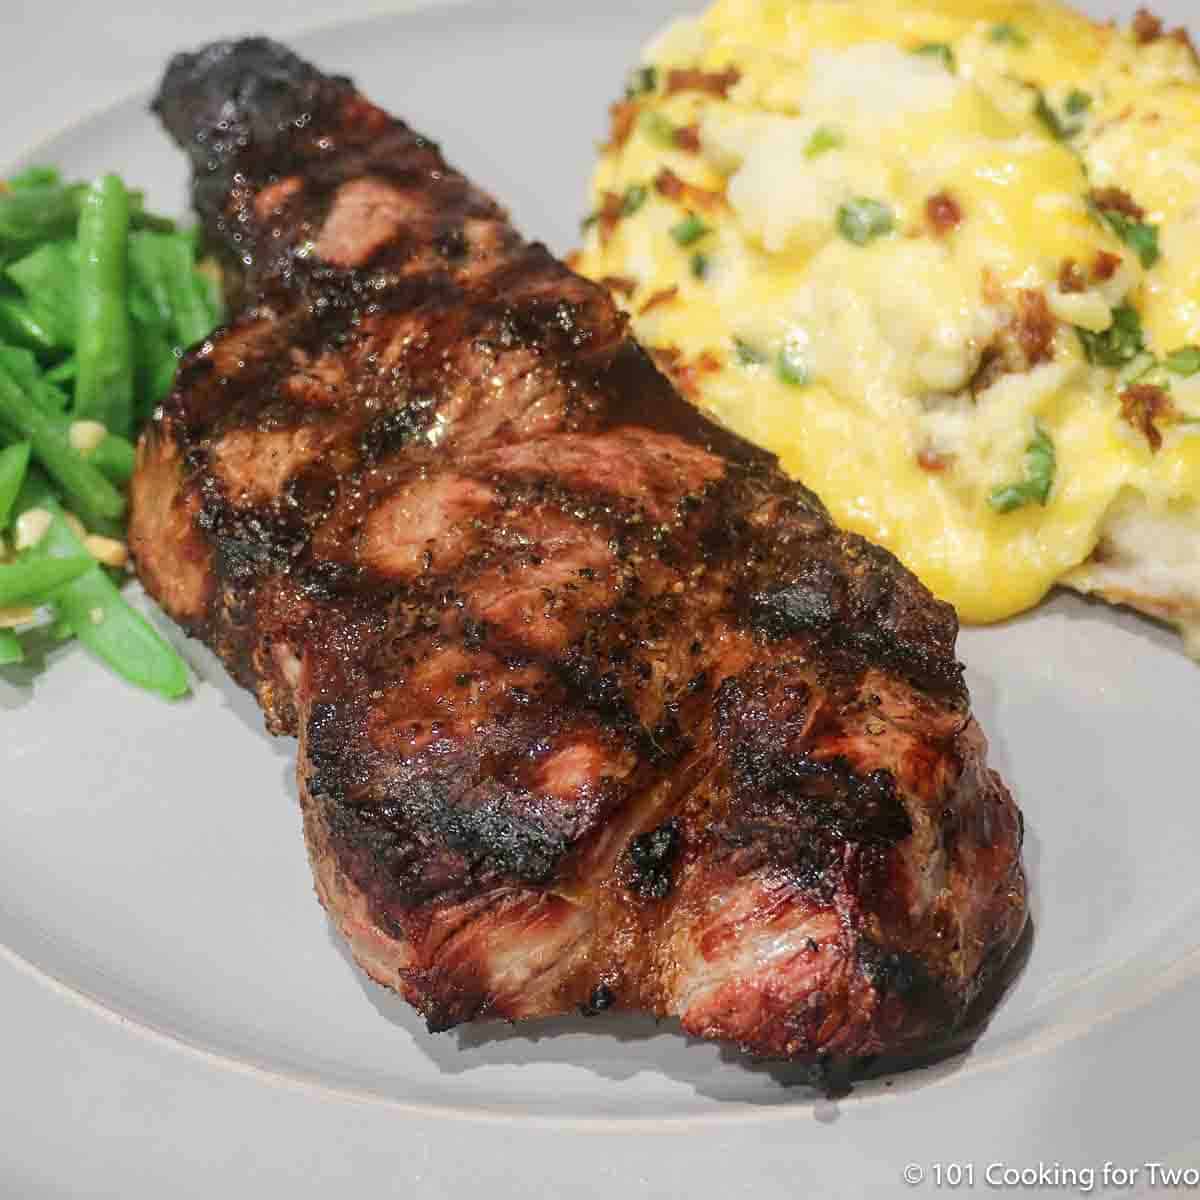
A strip steak with grill marks on a gray plate.
Grilled Filet Mignon (Best Way on Any Grill)
The best way to grill filet mignon with simple temps, timing, and doneness guides. Juicy, tender steak on a gas or any grill in about 10 minutes.
Grilled Filet Mignon
Grilled filet mignon with asparagus.

🐓 4 Chicken Grill Recipes

Grilled Chicken Legs (Easy, Crispy & Juicy Drumsticks)
Juicy, crispy grilled chicken legs made simple — season and cook over medium heat on a gas grill about 35 minutes for perfect drumsticks.
How to Grill Chicken Drumsticks Legs
chicken drumsticks cooking on the grill
Grilled Chicken Breasts on a Gas Grill
Juicy grilled chicken breasts with simple seasoning and easy step-by-step instructions. Grill at 450°F for about 15–20 minutes to 165°F internal temperature.
How to Grill Chicken Breasts
Two grilled chicken breasts on a blue plate.
Grilled Chicken Thighs (Juicy with Crispy Skin)
Juicy grilled chicken thighs with crispy skin every time using a simple, controlled grilling method. Cook at 450°F for 25–30 minutes with easy step-by-step instructions.
How to Grill Chicken Thighs
grilled chicken thigh on white plate
Grilled Whole Chicken on a Gas Grill
A whole chicken grilled intact over indirect heat for juicy meat and crispy, golden skin. Includes a simple BBQ variation with dry rub and sauce.
Grilled Whole Chicken
Grilled whole chicken on a gray plate

🐖 4 Pork Grill Recipe

Grilled Pork Chops
Easy grilled pork chops with simple seasoning and optional brine. Grill 1-inch chops over medium-high heat to 145°F for perfect results.
How to Grill Pork Chops
Two grilled pork chops on an orange plate.
How to Grill Pork Tenderloin on a Gas Grill
Grill pork tenderloin on a gas grill in about 25 minutes at 450°F. This easy beginner method delivers tender, juicy pork with simple prep and no fancy setup.
How to Grill Pork Tenderloin
pork tenderloin on blue platter
How to Cook Baby Back Ribs on a Gas Grill
Learn how to cook tender baby back ribs on a gas grill with a simple BBQ dry rub and optional wood smoke. Easy low-and-slow BBQ ribs, no smoker needed.
BBQ Ribs on the Grill
grilled Baby Back Ribs on black cutting board
Pulled Pork from Pork Butt on a Gas Grill
Pork butt (Boston butt) cooked low and slow over indirect heat on a gas grill with a dry rub and wood smoke until tender, smoky, and easy to pull.
Pork Butt on Gas Grill
Pulled Pork on a Gas Grill from 101 Cooking for Two

👨‍🍳 Sauce and Dry Rubs

Enhancement for almost any recipe—homemade is the best, freshest, and economical.

Homemade Memphis BBQ Sauce
Classic homemade Memphis-style BBQ sauce with tomato, sweetness, and a touch of spice. Ready in about 30 minutes and perfect for ribs, pulled pork, chicken, and more.
Memphis BBQ Sauce Recipe
BBQ sauce on pork
BBQ Dry Rub for Ribs, Pork, Beef, and More
The best BBQ Dry Rub recipes will enhance the meats' taste and complement the sauce's flavors. This easy-to-adjust homemade rub recipe has classic BBQ flavors.
BBQ Dry Rub Recipe
Spice for 8311 BBQ Rub
Memphis Dry Rub Recipe
A classic sweet and spicy Memphis Dry Rub Recipe from Marlowes of Memphis. Bring the great taste of Memphis to your grilled ribs or other BBQ recipes.
Memphis Dry Rub Recipe
Applying Memphis dry rub to baby back ribs

🥣 Grilling Side Dishes

There is nothing like grilled vegetables or fruits. That extra grill flavor is just outstanding.

Grilled Small Potatoes (No Foil)
Crispy grilled small potatoes, including baby, mini, and new potatoes, with creamy centers—no foil or parboiling needed.
Grilled Baby Potatoes
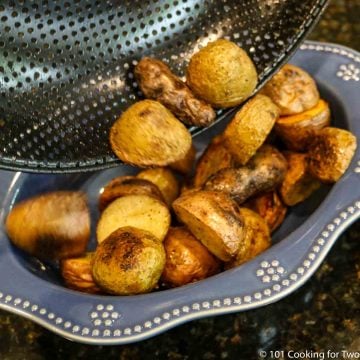
pouring small potatoes into blue bowl.
Grilled Mixed Vegetables
Delicious Grilled Mixed Vegetables cooked on the grill compliments any meal. You can easily add them to your grill while you cook dinner to complete your meal.
Grilled Mix Vegetables
Grilled Mixed Vegetables in a white bowl
Grilled Pineapple Slices with Brown Sugar Cinnamon Glaze
Glazed grilled pineapple slices are an easy delicious summer side dish. With a buttery caramelized brown sugar glaze, it also makes a great dessert when combined with ice cream—Ready in less than 15 minutes.
Grilled Pineapple
close up of Grilled Pineacpple with grill marks on a blue plate
Grilled Asparagus Recipe
An easy grilled asparagus recipe ready in about 10 minutes. Learn the simple preparation and grill temperature for tender asparagus on a gas or any grill.
How to Grill Asparagus
Grilled asparagus with Parmesan with ham.

👨‍🍳 No grill, no problem; take it inside

Not everybody has a grill; you can have similar results cooking inside.

How to Cook Pork Butt in the Oven for Pulled Pork
Make juicy BBQ pulled pork in your oven. Cook pork butt at 250°F until fall-apart tender, with crispy bark and rich, smoky flavor.
Pork Butt in the Oven
pulled pork sandwich with BBQ sauce
Baked Chicken Legs (Drumsticks) – Crispy & Juicy
Dry, season, and bake hot for crispy skin and juicy meat in about 35 minutes. Optional rack or flip once; finish to 185°–195°F for the best texture.
Oven Baked Chicken Legs
Baked chicken legs on a white plate.
Baby Back Ribs in the Oven
Bake tender, fall-off-the-bone BBQ baby back ribs with this easy low-and-slow oven method. The foil-wrapped recipe also works for pork spare ribs.
Oven Baked Baby Back Ribs
Full slab of back ribs.
Pan Seared New York Strip Steak (Oven Finish Method)
Pan sear New York strip steaks for a browned crust, then finish in the oven for juicy, tender steakhouse results.
Pan Seared Strip Steak
NY strip steak cut on an orange plate
Pan Seared Oven Roasted Pork Tenderloin
Pan-seared pork tenderloin, finished by baking to your ideal temperature, is tender, juicy, and delicious! With excellent browning from cast iron searing, it is still moist and tender from oven roasting— an easy, 30-minute dinner recipe.
Pan Seared Pork Tenderloin
pork tenderloin on blue platter

🥧Pie, Pie, and Kinda Pie

Your holiday meal desires a great ending that everybody will be talking about.

Easy Apple Crumb Pie with Crumble Topping
Easy apple crumb pie with fresh apples, a premade crust, and a buttery homemade crumble topping. Ready to bake in just 15 minutes.
Apple Crumble Pie
Slice of apple crumble pie.
Strawberry Pie with Jello (Easy and Reliable Fresh Recipe)
This strawberry pie with Jello is made with fresh berries, a simple homemade glaze, and a ready-made crust. An easy, reliable dessert that’s been a family favorite for nearly 50 years.
Strawberry Pie with Jello
Whole fresh strawberry jello pie ready to eat.
Small Batch Apple Crisp (Easy Recipe for Two or More)
Make an easy small batch apple crisp with only 2 or 3 apples and a buttery crumb topping. A perfect old-fashioned dessert for two or more.
Small Batch Apple Crisp
apple crisp on a white plate.
Crock Pot Apple Cobbler with Cake Mix
Easy crock pot apple cobbler made with fresh apples and cake mix. A simple small-batch dessert that scales from two to a crowd.
Apple Cobbler
Small crock pot apple cobbler with golden cake mix topping on a plate

😀 My Bad—A Labor Day Story

When I first started my private practice almost 50 years ago, I started in mid-August, and the other pediatrician went on vacation a week later (his first in over a year).

I was left to see patients and make any business decisions. This exchange happened the Friday before Labor Day.

Me: "Good night... see you Monday."

Them: "No, Tuesday"

Me: "Monday"

Them: (very loudly) "Tuesday, Monday is Labor Day."

Me: "So"

Them: "It's a holiday."

Me: "No"

Them: "YES"

Me: "A real holiday? I thought it was like Ground Hog Day or Columbus Day."

Them: "See you TUESDAY," they all shook their heads as they walked out snickering.

Me: "Hmmm, OK."

In my defense, I have just come out of years of medical training, working 80 to 100 hours per week. There were only two holidays, the Fourth of July and Christmas, and you got one off. All the rest of the days were equal, meaning they were nothing special, and you worked.

My bad, I guess.

I put that in to see if anybody got this far. And it is totally true. Even the wording is correct. Who else has a Labor Day story?

⚕️FOOD SAFETY

It is up to you to keep your friends and family safe. I frequently see dangerous food handling on TV food shows and other blogs. So, know the rules. PLEASE.

Check out food safety suggestions from FoodSafety.gov for best practices to keep everybody's holiday safe and healthy.

Blue ribbon divider used for visual effect

So relax and enjoy yourself. Grill a hot dog and have some ice cream. Enjoy your family and reflect on the last few years. Be kind to all and be filled with grace.

Wifo, Molly, Lilly, and DrDan

photo of Dogs at Work with molly and Lilly

Originally Published August 31, 2014. This post is reused yearly but is edited and updated annually. Some comments may be from previous years.

Fried Breaded Pork Tenderloin Sandwich (Iowa Style)

graphic for Pinterest of Pork Tenderloin Sandwich

Pork tenderloin sandwiches are a small-town café and state fair legend across the Midwest. It isn’t just a sandwich—it’s crispy, oversized, and barely fits the bun.

Most are made with pork loin, but I use pork tenderloin for more flavor and less fuss. Just flatten, bread, and pan-fry until golden and juicy—no deep fryer or fairgrounds needed.

Fried pork tenderloin sandwich with mayo on a bun.
[feast_advanced_jump_to]

quote mark
Featured Comment by Will from Waterloo:
"Best meat sandwich in the world. Great recipe, great tips. A ten for sure."

❤️ Why You'll Love This Fried Pork Tenderloin Sandwich

  • A true Iowa comfort food — crispy, pan-fried, and just like the famous Midwest sandwich.
  • Pork tenderloin instead of pork loin — naturally more tender with less pounding.
  • A homemade pork fritter — the classic crispy sandwich made famous in small-town Iowa cafés.
  • Choose your breading — breadcrumbs, crushed saltines, or cornflakes all make a crispy breaded crust.
  • Easy enough for any home cook — ready in about 30 minutes in a skillet.

🐖 Ingredients

pork tenderloin and coating ingredients.
  • Pork tenderloin – About 1½ pounds, trimmed. You can use pork loin (like boneless chops or cutlets), but it needs more pounding and isn't as tender.
  • Oil – Corn or canola oil works well for pan frying. You want something neutral with a high smoke point.
  • Breading – Use plain bread crumbs or go full Iowa with crushed saltine crackers or cornflakes. Each has its fan club.
  • Egg wash – 1 egg + milk. Helps the breading stick and crisp.
  • Pantry seasoning – All-purpose flour, salt, black pepper, onion powder, and garlic powder.
  • For serving – Hamburger buns, mayonnaise, mustard, pickle slices, red onion, lettuce, tomato—or however your memories call it.

👨‍🍳 How to Make a Fried Pork Tenderloin Sandwich (Iowa Style)

1. Trim, flatten, and dry

Cut the pork tenderloin into four pieces and butterfly each one.

cutting pork tenderloin on black board.

Flatten to ¼ inch thick and pat dry with paper towels.

flattening the pork with meat mallet.

2. Bread the fritters

Set up two pans—one with egg wash, one with the coating mix.

the start of the coating line.

Dip each piece in egg, then coat with breading. Let rest 5 minutes.

dipping tenderloin in egg wash.

3. Pan fry

Heat ¼ inch of oil to 350°–375°F. Fry each piece for 3–4 minutes per side, until golden brown and 145°F internal temp.

Graphic with browning tenderlion for turning.
Photo showing the edge of the breading turning brown.

✅ Pro Tip: Don’t crowd the pan. Fry in batches, keep finished pieces warm in a 200° oven, and use a thermometer to keep the oil in the 350°–375°F range—adjust the heat as needed.

4. Serving

Add to a bun with mayo, pickles, and your favorite toppings.

.

Fried pork tenderloin on a bun.

This is a quick overview of the recipe – not complete instructions. Scroll down for the full printable recipe card or keep reading for tips, toppings, and storage.

🤔 Fried Pork Tenderloin Options and Variations

Meat choices

I prefer pork tenderloin—it’s naturally tender and full of flavor. Pork loin is the classic choice, but it needs more pounding and tenderizing.

Some Midwest grocery stores—like Hy-Vee—carry pre-tenderized pork loin fritters, with or without breading.


Breading options

Use plain or Panko breadcrumbs, crushed saltines, or cornflakes—whatever fits your memory. Each gives a slightly different crunch and flavor.


Seasoning tips

Traditional versions are pretty mild. I usually stick with salt, pepper, garlic powder, and onion powder, but feel free to add paprika or use seasoned bread crumbs for more flavor.

♨️ Stovetop Frying Tips

  • This is a shallow pan-fry, not deep-frying. A countertop fryer will work, but a skillet is easier and less messy.
  • Use a large, heavy pan—cast iron works great. It holds heat better than a lightweight skillet.
  • Stick with a neutral oil like corn or canola.
  • Keep the oil between 350° and 375°F. Start at the high end—adding the pork will drop the temp. Adjust the heat as you go.
  • If the oil drops below 325°F, the coating will soak up more oil and get greasy. Too hot, and it burns. Aim for steady heat in that 350°–375°F sweet spot.

😊 Try the Oven-Fried Version

Oven Fried Pork Tenderloin Sandwich

Oven Fried Pork Tenderloin Sandwiches are great tasting with crisp breading. A healthier version of that great Iowa comfort food. Perfect for a retro lunch or easy dinner.

Pork Tenderloin Sandwich on white plate

🍽️ What to Serve with a Fried Pork Tenderloin Sandwich

Let’s be honest—these sandwiches are mild by design. That’s part of the tradition. But if you want to turn up the flavor, go for it. Try a zesty mayo (like cumin, garlic, or chipotle), spicy pickles, or a dash of hot sauce.

Serve on a soft bun with your favorite sides. Think stovetop French fries, scalloped potatoes, or roasted baby potatoes. Add a vegetable like microwave corn on the cob, baked green beans, or classic baked beans to round it out.

🧊 How to Store and Reheat

Store leftovers in an airtight container for up to 3 days in the fridge, or freeze for up to 3 months.

To reheat, bake in a 400° oven for 10–15 minutes, or pop it in the air fryer until hot and crispy again.

❓ FAQs

How do I keep the breading from falling off?

• Start with dry meat—paper towels are your friend.
• Egg wash makes the breading stick.
• Let breaded pieces rest 5 minutes before frying.
• Don’t flip too early—wait until the edges brown.
• Use a fork, not tongs. One flip is plenty.

Can breaded pork tenderloin filets be baked?

Yes. You can bake them for a lighter version—see my Oven Fried Pork Tenderloin Sandwiches.

What makes this fried pork tenderloin sandwich recipe different?

Most recipes use tenderized pork loin. This one uses true pork tenderloin—it’s naturally tender, has better flavor, and scales more easily for home cooking.

What is an Iowa pork tenderloin sandwich?

An Iowa pork tenderloin sandwich is a Midwestern classic made by breading and frying a thin pork cutlet until it extends well beyond the bun. Most restaurants use tenderized pork loin, while this recipe uses pork tenderloin for better flavor and tenderness.

The sandwich is believed to have evolved from German and Austrian schnitzel traditions brought to the Midwest by immigrants, eventually becoming the famous "pork fritter" served in small-town Iowa cafés and diners. Indiana has its own long tradition of serving oversized breaded pork tenderloin sandwiches as well.

📖The Recipe Card

graphic for Pinterest of Pork Tenderloin Sandwich
Print Recipe Add to Collection Go to Collections
4.80 from 5 votes

Fried Pork Tenderloin Sandwich (Crispy Iowa Classic)

A crispy fried pork tenderloin sandwich that's true Iowa comfort food. Breaded, pan-fried, and ready in about 30 minutes.
Prep Time10 minutes mins
Cook Time16 minutes mins
Total Time26 minutes mins
Course: Main Course
Cuisine: American
Keyword: fried pork tenderloin sandwich, Iowa Breaded Pork Tenderloin Sandwiches, pork tenderloin sandwich iowa
Servings: 4 servings
Calories: 540kcal
Author: Dan Mikesell AKA DrDan

Ingredients

  • 1 pork tenderloin trimmed
  • ¾ cup oil corn or canola

Egg wash

  • 1 egg
  • ½ cup milk

Breading

  • 1 cup AP flour
  • ½ cup bread crumbs panko preferred
  • 1 teaspoon salt
  • ½ teaspoon pepper
  • ½ teaspoon onion powder
  • ½ teaspoon garlic powder
US Customary - Convert to Metric

Instructions

Trim, flatten, and dry

  • Trim the pork tenderloin of fat and silverskin. Cut into four equal pieces and butterfly each by slicing ¾ through and folding open.
    cutting pork tenderloin
  • Cover with plastic wrap or place in a zip-top bag. Pound to ¼ inch thick. Pat dry with paper towels.
    flattening the pork with meat mallet

Bread the fritters

  • Set up two pans. In the first, combine 1 egg and ½ cup milk—whip well. In the second pan, 1 cup of AP flour, ½ cup of bread crumbs, 1 teaspoon of salt, and ½ teaspoon each of pepper, garlic powder, and onion powder.
    the start of the coating line
  • Coat each piece with the egg wash—shake to remove excess. Coat well in the flour mixture and shake off excess. Let it rest for about 5 minutes on a flat surface before cooking.
    dipping tenderloin in egg wash

Pan fry

  • Heat ¼ inch of oil in a large, heavy pan (cast iron preferred) to 350°–375°F. You need to check the temperature frequently, and a good instant-read thermometer is great here. Preheat the oven and a tray to 200° to keep batches warm while you do additional pieces.
    checking temperature of oil in pan
  • Place breaded pork tenderloin into the hot oil, but do not "crowd the pan." Fry for 3-4 minutes per side. About a minute into each side, shake the pan a little to move the meat a little, keeping it from sticking and helping it be crispy. The edge of the breading starts to brown, as the meat is saying, "Turn me now."
    Graphic with browning tenderlion for turning_
  • Cook until golden brown and internal temp of 145° plus. You will need to adjust the burner heat to keep the oil in the 350° to 375° range. You will not be able to keep it perfect, but be aware you need to turn up the heat. Between batches, you should turn the heat down to keep it from overheating.
    two tenderloins frying in oil
  • Transfer the completed tenderloin to the heated oven and pan to keep them warm for serving. Continue to cook your batches of tenderloins.
    four tenderloins staying warm on tray

Serve

  • Serve on a bun with mayo, a pickle, and other toppings of your choice.
    Fried pork tenderloin on a bun.

Notes

Pro Tips:

  1. This recipe will work with tenderized pork loin like pork chops or cutlets.
  2. The recipe post contains variations in meat choices, coating, and seasoning.
  3. The temperature of your oil is critical. I suggest corn or canola oil.
  4. To help the coating stick better:
    -Start with very dry meat. Dry with a paper towel before starting to coat.
    -Use egg as the wash.
    -Let the coating sit for 5 minutes before cooking.
    -Don't play with your food. Wait for the edge color to change before flipping.
    -When you do a flip, use a fork and stick it on the edge. Try only to flip once.
  5. It is good refrigerated after cooking for 2-3 days or frozen for about 3 months. Reheat after thawing in a 400° oven for 10-15 minutes.

Nutrition

Calories: 540kcal | Carbohydrates: 36g | Protein: 44g | Fat: 23g | Saturated Fat: 5g | Polyunsaturated Fat: 3g | Monounsaturated Fat: 14g | Cholesterol: 164mg | Sodium: 736mg | Potassium: 748mg | Fiber: 2g | Sugar: 3g | Vitamin A: 150IU | Vitamin C: 2.5mg | Calcium: 90mg | Iron: 4.3mg

Originally published August 9, 2012. Updated with greatly expanded options and explanations. Photos have been refreshed, and a few from other cookings have been added to help explain—finally, a table of contents and a puppy picture.

Dogs with Kongs.

Easy Beef Kabob Marinade

pile of beef kabobs on a plate.

This easy beef kabob marinade uses just 3 everyday ingredients for a simple way to add great flavor to beef. Marinate for as little as 30 minutes, or longer to help tenderize the meat.

Made with Worcestershire sauce, soy sauce, and garlic powder, it takes only minutes to mix and is perfect for beef kabobs and skewers.

A pile of beef kabobs on a plate.
[feast_advanced_jump_to]

quote mark
Featured Comment by Cathie :
"OMG !!! Tried this recipe out and loved it !!!!! 😋 it really is a kabob summer look forward to testing and trying more of your home cooked kabobs . Thank you for posting them . Great job !"

📝 TL;DR — Recipe Summary

✔️ What: A simple 3-ingredient beef kabob marinade made with Worcestershire sauce, soy sauce, and garlic powder.

✔️ Why: Quick, easy, and made with everyday ingredients. It adds great flavor without a complicated marinade.

✔️ How: Mix the marinade with cubed beef and refrigerate for at least 30 minutes for flavor or 1–4 hours to help tenderize.

🐄 Ingredients

Ingredients for simple beef marinade.

Beef Kabob Marinade

  • Worcestershire sauce – Adds savory, slightly tangy flavor and helps tenderize the beef.
  • Soy sauce – Adds salt and rich umami flavor.
  • Garlic powder – An easy way to add garlic flavor throughout the marinade.

For Beef Kabobs

  • Beef – Use a tender cut such as top sirloin, strip steak, or beef tenderloin. Trim as needed and cut into cubes before marinating.
  • Vegetables – Optional. Bell peppers, onion, mushrooms, zucchini, and cherry tomatoes are all good choices.

Quick Overview: How to Make Beef Kabob Marinade

#1 Mix the marinade

Combine Worcestershire sauce, soy sauce, and garlic powder.

Mixing marinade in a small bowl.

#2 Marinate the beef

Add cubed beef and coat well with the marinade. Cover and refrigerate until ready to make your kabobs.

Coating the meat cubes with marinade.

#3 Assemble and cook kabobs

Thread the marinated beef onto skewers, adding vegetables if desired. Cook for about 8–10 minutes, turning occasionally. Use high heat on the grill or 425°–450°F in the oven. Cook to your preferred doneness.

beef kabobs ready for the grill.

👇 Scroll down for marinating-time guidance, the best cuts of beef, FAQs, and the printable recipe card.

⏲️ How Long to Marinate Beef Kabobs

The marinade starts adding flavor in as little as 30 minutes, with most of the flavor developed by about 1 hour.

Tenderizing takes longer. You’ll see some effect after 1–2 hours, with very good results by 4 hours. Overnight or up to 24 hours is fine, but usually not necessary.

For food safety, refrigerate the beef while marinating if you won’t be cooking it within 2 hours.

🥩 Best Beef for Kabob Marinade

Top sirloin is my first choice—it’s tender, flavorful, reasonably priced, and easy to cut into cubes. Strip steak and beef tenderloin are also excellent choices.

Avoid tougher cuts such as chuck roast, stew meat, round steak, and eye of round. This marinade will help tenderize the beef, but it won’t make tough cuts tender enough for quick-cooking kabobs.

🔗 Other Kabob Recipes

For a more complex marinade with a longer marinating time, try my Best Steak Kabob Marinade—a great choice when you want more layers of flavor.

Or try one of these easy chicken kabob recipes:

  • Honey Garlic Chicken Kabobs
  • BBQ Chicken Kabobs
  • Buttermilk Ranch Chicken Kabobs

❓ FAQs

What is the best marinade for beef kabobs?

For a quick everyday marinade, this simple combination of Worcestershire sauce, soy sauce, and garlic powder adds plenty of flavor with only 30 minutes of marinating. Marinating for 1–4 hours will also help tenderize the beef.

Do I need to add salt and pepper?

No extra salt is needed. Worcestershire sauce and soy sauce provide plenty of salt. Add black pepper if you like.

Can I add meat tenderizer?

Yes, but it usually isn't necessary when using a tender cut of beef. If you want additional tenderizing, a commercial meat tenderizer such as Adolph's® can be added according to the package directions.

📖The Recipe Card

pile of beef kabobs on a plate.
Print Recipe Add to Collection Go to Collections

Easy 3-Ingredient Beef Kabob Marinade

This simple beef kabob marinade uses Worcestershire sauce, soy sauce, and garlic powder. Marinate for 30 minutes for great flavor or 1–4 hours to help tenderize.
Prep Time5 minutes mins
Marinating Time (or more)30 minutes mins
Total Time1 hour hr 15 minutes mins
Course: Main Course
Cuisine: American
Keyword: beef kabob marinade, Beef Kabobs, marinated beef kabobs
Servings: 4
Calories: 13.6kcal
Author: Dan Mikesell AKA DrDan

Ingredients

Beef Kabob Marinade

  • 2 tablespoons Worcestershire sauce
  • 2 tablespoons soy sauce
  • 1 teaspoon garlic powder
  • 2 tablespoons water
US Customary - Convert to Metric

Instructions

  • Mix the marinade: Combine Worcestershire sauce, soy sauce, and garlic powder.
    Mixing marinade in a small bow.
  • Marinate the beef: Add cubed beef and coat well with the marinade. Cover and refrigerate until ready to make your kabobs.
    Coating the meat cubes with marinade.
  • Assemble and cook the kabobs: Thread the marinated beef onto skewers, adding vegetables if desired. Cook for about 8–10 minutes, turning occasionally. Use high heat on the grill or 425°–450°F in the oven. Cook to your preferred doneness.
    beef kabobs ready for the grill

Notes

Pro Tips

  1. Top sirloin is my first choice, but other sirloin cuts, strip steak, or beef tenderloin also work well.
  2. The marinade starts adding flavor in as little as 30 minutes, with most of the flavor developed by about 1 hour.
  3. Tenderizing takes longer. You’ll see some effect after 1–2 hours, with very good results by 4 hours. Overnight or up to 24 hours is fine, but usually not necessary.

Nutrition

Calories: 13.6kcal | Carbohydrates: 2.6g | Protein: 0.8g | Fat: 0.03g | Saturated Fat: 0.01g | Polyunsaturated Fat: 0.01g | Monounsaturated Fat: 0.003g | Sodium: 399.3mg | Potassium: 105.1mg | Fiber: 0.1g | Sugar: 0.9g | Vitamin A: 6.7IU | Vitamin C: 1.1mg | Calcium: 12.3mg | Iron: 0.6mg

Originally published September 13, 2010. Updated with streamlined instructions, new photos, and improved navigation.

Molly and Lilly running for a treat.

Simple Cinnamon Apple Cake

Apple cake on a white plate.

This simple cinnamon apple cake recipe is moist, delicious, and full of fresh apple flavor. It's an old-fashioned family favorite, quick and easy to make with just two apples and everyday pantry ingredients.

The recipe makes an 8x8 cake, smaller than most apple cake recipes, but it's easy to scale up for a family gathering or down for two. Perfect for dessert, snacking, or whenever you have a couple of apples to use.

Apple cake on a white plate.
[feast_advanced_jump_to]

quote mark
Featured Comment by Jane:
⭐⭐⭐⭐⭐
"This is my new favorite cake. It is so easy to make, the size is perfect for two and it is really delicious! I can't wait to make it for all of the upcoming holidays. Thank you for sharing !"

This recipe is adapted from my wife's old-fashioned apple cake recipe, which she contributed to the Holmes School Cookbook years ago. I made it smaller, added more cinnamon, and shredded some of the apples for extra moisture and flavor. The result is a simple cake that has become a family favorite.

the Holmes School Cookbook.

🤔 TL;DR — Recipe Summary

  • What: A moist, old-fashioned cinnamon apple cake made with two fresh apples and pantry ingredients.
  • Why: Simple preparation, delicious cinnamon apple flavor, and a recipe that easily scales up or down.
  • How: Mix the ingredients, spread in an 8x8 pan, sprinkle with sugar, and bake at 350°F for about 45 minutes until a toothpick comes out clean.

🍎 Ingredients

two apples and cake ingredients.

Fresh apples
Egg
Cinnamon
Pantry ingredients—flour, sugar, oil, baking soda, vanilla extract
Walnuts—optional, chopped

👨‍🍳 Quick Overview: Cinnamon Apple Cake

1. Peel and dice the apples (¼ to ½ inch) or shred them.

shredding an apple into a metal bowl.

✅ Pro Tip: Shredding half the apples adds moisture and apple flavor, while dicing the rest adds texture.

2. Mix the prepared apples with all other ingredients and spread into a prepared 8x8 pan. Sprinkle the top with sugar.

mixing ingredients in a netal bowl.

3. Bake at 350°F for about 45 minutes, until a toothpick comes out clean.

using a tooth pick to check for done.

📌 For full step-by-step instructions, scroll to the printable recipe card or keep reading for details and tips.

🍎 What apples to use for Apple Cake

Granny Smith, Gala, Fuji, Honeycrisp, and Ida Red apples all work well in this cake. Use your favorite firm baking apple or a combination of varieties.

If buying apples specifically for this recipe, I recommend Granny Smith for a slightly tart flavor or Gala for a sweeter cake. Avoid Red Delicious and McIntosh apples, which tend to soften too much during baking.

🥣 Optional Vanilla Glaze

For a special occasion, dress up this simple apple cake with an easy vanilla glaze. It's delicious without the glaze, but this makes it a dessert worthy of company.

Mix ⅔ cup powdered sugar, ⅛ teaspoon vanilla extract, and 3–4 teaspoons milk until smooth. Drizzle over the cake while still warm. You can keep the sugar topping or skip it.

↕️ How to Make a Smaller or Larger Apple Cake

This recipe makes 8 servings in an 8x8 or 9-inch round pan, but it's easy to cut in half for two or double for a larger gathering.

Half recipe: Use a 6-inch round or 5x5-inch square pan. Baking time will be about 10 minutes shorter.

Double recipe: Use a 9x13-inch pan. Baking time will be about 10 minutes longer.

Adjusting servings: Change the servings in the recipe card to adjust the ingredient list amounts. The instructions and baking times do not automatically change.

Always check for doneness with a toothpick rather than relying on baking time alone.

❄️ Storage and Reheating

Store leftover apple cake in an airtight container at room temperature for up to 3 days.

Freezing: Cut into individual servings, wrap tightly, and freeze for up to 3 months. Thaw at room temperature.

Reheating: Warm individual servings briefly in the microwave if desired.

❓FAQs

What size pan is best for apple cake?

An 8x8-inch square or 9-inch round pan works best. An 8-inch round or 6x9-inch rectangular pan will also work. A springform pan is fine but not necessary.

How do I keep apple cake from sticking to the pan?

This is a moist, sticky cake. Grease and flour the pan, then line the bottom with parchment paper for easier removal. Even nonstick pans benefit from parchment paper.

📝 Other Apple Dessert Recipes

  • Crock Pot Apple Cobbler
  • Small Batch Apple Crisp
  • Apple Crumble Pie

📖The Recipe Card

Apple cake on a white plate.
Print Recipe Add to Collection Go to Collections
4.80 from 5 votes

Simple Cinnamon Apple Cake

A moist, delicious cinnamon apple cake made with two fresh apples, cinnamon, and simple pantry ingredients. This old-fashioned family recipe makes 8 servings and is easy to prepare and scale.
Prep Time10 minutes mins
Cook Time45 minutes mins
Total Time55 minutes mins
Course: Dessert
Cuisine: American
Keyword: Apple Cake, Cinnamon Apple Cake, Easy Apple Cake
Servings: 8
Calories: 364kcal
Author: Dan Mikesell AKA DrDan

Ingredients

  • 2 medium to large apples—Granny Smith or Gala preferred shredded or diced
  • 1 cup flour
  • 1 cup sugar
  • ½ cup oil
  • 1 egg
  • 1 teaspoon baking soda
  • ½ teaspoon salt
  • ½ teaspoon vanilla extract
  • 1 teaspoon cinnamon
  • ½ cup walnuts chopped Optional
  • 1 tablespoon sugar Optional for sprinkling on top
US Customary - Convert to Metric

Instructions

  • Preheat the oven to 350°F with the rack in the middle. Prep a 9-inch round or 8x8 cake pan with butter and flour. Parchment paper on the bottom is suggested.
    two apples and cake ingredients
  • Dice or shred two medium apples. I suggest half shredded and half with smaller dice of about ¼ to ½ inch.
    shredding an apple into a metal bowl
  • Mix all ingredients well and move to the prepared pan.
    mixing ingredients in a netal bowl
  • Sprinkle with about a tablespoon of sugar.
    sprinkling sugar on the cake
  • Bake at 350°F for about 45 minutes, until a toothpick inserted in the center comes out clean. Cool before serving.
    using a tooth pick to check for done

Notes

Pro Tips:

1. Granny Smith or Gala apples are preferred, but most firm apples will work. Avoid Red Delicious and McIntosh.
2. Shredding half the apples adds moisture and apple flavor, while dicing the rest provides texture.
3. The recipe can be halved or doubled. See the post for pan sizes and baking time adjustments.
4. For an optional vanilla glaze, mix ⅔ cup powdered sugar, ⅛ teaspoon vanilla extract, and 3–4 teaspoons milk. Drizzle over the warm cake.
5. Store airtight at room temperature for up to 3 days or freeze for up to 3 months.

Nutrition

Calories: 364kcal | Carbohydrates: 46g | Protein: 4g | Fat: 20g | Saturated Fat: 2g | Cholesterol: 20mg | Sodium: 291mg | Potassium: 105mg | Fiber: 2g | Sugar: 31g | Vitamin A: 54IU | Vitamin C: 2mg | Calcium: 18mg | Iron: 1mg

Editor's note: Originally published October 6, 2016. Updated with improved discussion and refreshed photos.

image of dogs begging for attention at the arm of the chair.

Blueberry Cream Cheese Bars with Shortbread Crust

blueberry cream cheese bar on pile of bars

These blueberry cream cheese bars with shortbread crust are part cheesecake, part crumb bar—rich, buttery, and loaded with fresh or frozen blueberries. The creamy filling and crumble top make them an easy dessert bar that’s hard to resist.

A pile of blueberry cream cheese bars with crumble topping.
[feast_advanced_jump_to]

quote mark
Featured Comment by Becky:
"Great recipe! Combines two favorites - blueberry crumb bars and blueberry cream cheese bars."

🤔 TL;DR — Recipe Summary

What: Blueberry cream cheese bars with a shortbread crust, cheesecake filling, and crumble top.

Why: Fresh or frozen blueberries work, and the bars can be made ahead.

How: Bake the crust, add the fillings and crumble, bake again, then chill before cutting.

🫐 Ingredients

blueberries with ingredients for cream cheese bars labeled.
  • Blueberry filling (fresh or frozen): blueberries, sugar, cornstarch
  • Cream cheese filling: cream cheese, sugar, egg
  • Shortbread crust and crumble top: flour, sugar, baking powder, salt, egg, cold butter

👨‍🍳 Quick Overview: Making Blueberry Bars With Cream Cheese

1. Make shortbread crust and topping: Mix the flour, sugar, baking powder, salt, and egg. Cut in cold butter until crumbly.

cutting butter into crumbly dough.

2. Bake crust: Press half of the mixture into a buttered baking dish and bake.

browned crust in baking dish.

3. Blueberry filling: If using fresh blueberries, rinse and dry them.. Toss with sugar and cornstarch.

coating blueberries with cornstarch.

✅ Pro Tip: Using frozen berries? Do not thaw first, but add an extra teaspoon of cornstarch to handle the extra liquid release.

4. Make cream cheese filling: Beat cream cheese, sugar, and egg until smooth.

Beating cream cheese batter in a white bowl.

5. Assemble: Layer the cream cheese mixture over the cooled crust, then add the blueberries and the remaining crumble.

topping the dish with remaining crumb topping.

6. Bake until golden – about 40 minutes. Refrigerate for at least 2 hours before cutting into bars or squares.

Blueberry cream cheese bar on a spatula.

👇 Scroll down for the printable recipe card and step-by-step photos, or keep reading for pro tips, scaling, and storage info.

😊 Variations

  • Other berries: Try raspberries or blackberries in place of blueberries.
  • Vanilla: Add 1 teaspoon to the cream cheese filling.
  • Cinnamon: Add ½ teaspoon to the crumble topping.

👍 Pro Tips

  • Soften the cream cheese: Room-temperature cream cheese mixes smoothly without lumps.
  • Line the pan: Butter it first, then add parchment if you want to lift out the bars for easier cutting.
  • Clean cuts: Chill the bars for at least 2 hours. Use a long, sharp knife and wipe or rinse it clean between cuts for tidy slices.

↕️ How to Scale the Recipe

The recipe card’s servings slider changes ingredients only; follow the pan and baking guidance below.

  • Half batch: Use an egg white in place of half an egg and a dish about 25–30 square inches and at least 1 inch deep. A 6-inch round dish works. Start checking early.
  • Full batch: Use a 6×9-inch, 8×8-inch, 9×9-inch, or 9-inch round pan. The 6×9 makes thicker bars; the 9×9 makes thinner ones. Check for a golden top and set center rather than relying only on the timer.
  • Double batch: Use a 9×13-inch pan. Expect a little more baking time; bake until the top is golden and the center is set.

❄️ How to Store and Freeze

Refrigerate: Keep the bars in an airtight container for up to 3 days. Because of the cream cheese filling, don’t leave them at room temperature.

Freeze: Wrap tightly, then place in a freezer-safe bag or container for up to 3 months.

🥣 More Dessert Bar Recipes

  • Classic Cheesecake Bars – smooth, creamy, and easy to slice
  • Lemon Bars – bright, tangy bars with a classic custard filling
  • Chocolate Chip Cheesecake Bars – rich, crowd-pleasing dessert bars

📖The Recipe Card

A pile of blueberry cream cheese bars with crumble topping.
Print Recipe Add to Collection Go to Collections
5 from 1 vote

Blueberry Cream Cheese Bars with Shortbread Crust

Rich blueberry cream cheese bars baked on a buttery shortbread crust with a crumble top. Cheesecake-style flavor without a water bath or springform pan.
Prep Time20 minutes mins
Cook Time40 minutes mins
Total Time1 hour hr
Course: Dessert
Cuisine: American
Keyword: blueberry bars with cream cheese, blueberry cheesecake bars, Blueberry Cream Cheese Bars
Servings: 16
Calories: 267kcal
Author: Dan Mikesell AKA DrDan

Ingredients

Shortbread crust and crumble topping

  • 2 cups flour
  • ¾ cup sugar
  • 1 stick butter
  • 1 egg
  • 1 teaspoon baking powder
  • ¼ teaspoon salt

Blueberry Mixture

  • 1 pint blueberries fresh or frozen
  • ½ cup sugar
  • 2 teaspoon cornstarch increase to 3 teaspoons if frozen berries

Cream Cheese Mixture

  • 8 oz cream cheese
  • ½ cup sugar
  • 1 egg
US Customary - Convert to Metric

Instructions

Make the Shortbread Crust and Crumb Top

  • Preheat oven to 375° conventional, not convection. Coat an 8X8 baking dish with butter.
    cream cheese with blueberries and other ingredients for bars
  • Mix 2 cups of flour, ¾ cup of sugar, 1 teaspoon of baking powder, ¼ teaspoon of salt, and 1 egg.
    starting to cut butter into dough
  • Cut the cold butter into the mixture with a pastry cutter or fork until it is crumbly. A food processor may be used.
    cutting butter into crumbly dough
  • Press half of the mixture into the prepared baking dish. Bake at 375°F for 8 minutes.
    brown crust in baking dish

Prepare the Blueberry Filling

  • Rinse and dry fresh blueberries. If using frozen, do not thaw. Toss the berries with ½ cup sugar and 2 teaspoons cornstarch for fresh berries or 3 teaspoons for frozen.
    coating blueberries with cornstarch

Make the Cream Cheese Filling

  • Beat 8 oz of cream cheese, ½ cup sugar, and 1 egg with a hand mixer until smooth.
    beating cream cheese batter in white bowl

Assemble and Bake

  • Layer the cream cheese mixture over the cooled crust, then top with blueberries and the remaining crumble.
    topping the dish with remaining crumb topping
  • Bake until nicely browned—about 40 minutes. Cool in a refrigerator for at least 2 hours before cutting.
    Blueberry cream cheese bar on a spatula.

Notes

Pro Tips

  1. This recipe is for an 6X9, 8X8, 9X9, or 9-inch round baking dish. Please refer to the discussion in the post for instructions on adjusting the recipe size and pan sizes.
  2. My serving size is about 2X2, but it varies according to your needs.
  3. Store airtight in the refrigerator for up to 3 days. It will be good frozen for 3 months. Do not store at room temperature for safety,

Nutrition

Calories: 267kcal | Carbohydrates: 39g | Protein: 3g | Fat: 11g | Saturated Fat: 7g | Cholesterol: 51mg | Sodium: 141mg | Potassium: 92mg | Fiber: 1g | Sugar: 25g | Vitamin A: 413IU | Vitamin C: 3mg | Calcium: 34mg | Iron: 1mg

Originally Published September 7, 2015. Updated with refreshed photos and clearer instructions.

Molly and Lilly in the Kitchen.

Grilled Flattened Chicken (Spatchcock/Butterflied)

BBQ Butterflied Chicken on white plate

Grilled flattened chicken (spatchcock/butterflied) is one of the fastest ways to cook a whole bird. It grills evenly for juicy meat, crispy skin, and great BBQ flavor.

Easy step-by-step photos show you how to flatten a whole chicken, then grill it with your favorite BBQ seasoning, sauce, or optional wood smoke.

😊 Why Should I Flatten a Chicken?

  • Faster cooking: Flattening (spatchcocking) the chicken reduces grill time to about 40–50 minutes.
  • More even cooking: The breasts and thighs finish at nearly the same time for juicy meat and crispy skin.
  • Easy to customize: Season it your way with BBQ seasoning, sauce, or optional wood smoke.
BBQ Butterflied Chicken on a white plate.
[feast_advanced_jump_to]

🤔 TL;DR – Recipe Summary

  • What: Grill a flattened whole chicken using the spatchcock method for juicy meat and crispy skin.
  • Why: Flattening helps the chicken cook faster and more evenly while giving you more flavorful, crispy skin.
  • How: Flatten, season with your favorite BBQ seasoning, then grill to 165°F. Add BBQ sauce or optional wood smoke if you like.

🧂 Ingredients

Here’s what you’ll need:

  • Whole chicken – About 4 pounds is a good size for even grilling.
  • Oil – Helps the skin crisp and holds the seasoning.
  • Seasoning or dry rub – Use your favorite BBQ rub or just salt and pepper.
  • Optional dry rub – Kosher salt, paprika, garlic powder, onion powder, cumin, and a pinch of cayenne.
  • Optional BBQ sauce – Brush on near the end for classic barbecue flavor.
  • Optional: wood chips for smoking – Add dry wood chips to a smoker box or foil pouch if your grill allows.

👨‍🍳 How to Spatchcock a Chicken

To make grilled flattened chicken, remove the backbone and flatten the bird—a technique called spatchcocking or butterflying. It cooks faster and more evenly on the grill.

1. Dry the chicken and remove the backbone

Pat the chicken dry with paper towels to make it easier to handle. Place it breast-side down and use sharp kitchen shears (or a heavy knife) to cut along both sides of the backbone. Remove the backbone and discard or save for stock.

Cutting back out of chicken.

2. Nick the breastbone

Flip the chicken breast-side up. Use a knife to make a small notch in the top of the breastbone—this helps it lay flat when pressed.

Notching breast bone with a knife.

3. Flatten the chicken

Pull the sides of the chicken outward slightly. Place your palm firmly over the breastbone and press down until you hear a crack and the chicken lies flat.

Butterflied chicken on a black board.

👨‍🍳 Quick Overview: Grilled Flattened Chicken

1. Flatten and season the chicken

Flatten (spatchcock) the chicken, brush with oil, and season. Let it rest at room temperature while setting up the grill.

Seasoning butterfied chcken with salt.

2. Set up the grill

Preheat the grill to a surface temperature of 350°–400°F. Clean and oil the grates. (Indirect grilling option in the FAQs.)

Clean and oil grill crates.

Optional: Add dry wood chips to a smoker box or foil pouch and place on the grates now. Use one round of chips—start smoking when the chicken goes on.

3. Grill the Flattened Chicken

Grill with the lid closed. Start skin-side up for 10 minutes. Flip to skin-side down and cook for 8–10 minutes, getting nice color but not over-browning the skin.

Flattened (spatchcock/butterflied) chicken cooking on a gas grill.

Flip back to skin-side up and continue cooking until the thickest part of the breast reaches 165°F—usually 20 to 30 minutes more, for a total of about 40 to 50 minutes.

Flattened chicken after skin side down.

4. Add BBQ sauce (optional)

If using BBQ sauce, brush it on during the last few minutes—just before the chicken reaches 165°F.

give a nice brush of BBQ sauce near end of grilling.

👇 Scroll down for the printable recipe card and full step-by-step photo instructions—or keep reading for pro tips, veggie options, and serving ideas.

⏰ How Long to Grill Flattened Chicken

At a grill surface temperature of 350°–400°F, a spatchcocked (flattened) chicken will take about 40 to 50 minutes to cook through. Smaller birds may finish faster; larger or uneven ones may take a little longer.

⏱️ Use the time as a rough guide—but always cook to final internal temperature, not the clock.

👉 Per USDA guidelines, chicken is safe to eat when the thickest part of the breast reaches 165°F. That’s usually in the center of the breast, not near the edges. Always check with an instant-read thermometer.

✅ Pro Tip: Thighs often reach 180°F or more—and that’s a good thing. They sit closer to the heat and taste even better at higher temps. Juicier, more tender, and no risk of drying out.

✔️ Tips to Make It Right Every Time

  • Use sharp kitchen shears to remove the backbone—cut about ½ inch from the spine through the softer cartilage. A heavy knife can work, but shears are safer and easier.
  • Cut safely. Clean your hands and cutting area well before and after. Use a bleach-based spray to sanitize everything the raw chicken touches.
  • Check grill surface temperature, not the lid thermometer. You want 350°–400°F at the grate level—use a grill surface thermometer for accuracy.
  • Charcoal grill? Watch your setup. It’s harder to hit the right surface temp without over-browning the skin. If your grill is large enough, indirect grilling may be a better option—see the FAQs for how to set that up.
  • Olive oil or melted butter are fine here. The grill temp is low enough that either one works well without burning—and both help the skin crisp up and hold seasoning.
  • Watch the skin. Flip based on color—not just time. If it’s darkening fast, flip early.

👉 Need help dialing in grill temp? See A Beginner’s Guide to Grill Temperature.

👨‍🍳 How to Roast a Flattened Chicken in the Oven

Roasting a spatchcocked chicken in the oven is just as easy—and a great option when grilling isn’t in the cards.

Place the flattened, seasoned chicken on a rimmed sheet pan and bake in a 425°F oven until the thickest part of the breast reaches 165°F—usually about 40 to 50 minutes.

You can follow the same prep as the grilled version—just skip the flipping.

👉 Sheet-pan dinner tip: The cook time is perfect for adding halved baby potatoes, carrots, or other firm vegetables to the pan. Toss them with a little oil and seasoning and roast alongside the chicken.

🧂 Seasoning Options

You’ve got lots of ways to season a spatchcocked (butterflied) chicken—BBQ, blackened, herbed, or simple and classic.

  • Keep it simple: Melted butter or oil with salt and pepper works, but it’s a little plain. Try my All-Purpose Seasoning for a boost of garlic and flavor.
  • Skip fresh herbs on the grill: Rosemary and thyme sound fancy, but they’ll burn fast. If you want herb flavor, mix them into a rub or add them after cooking.
  • For BBQ flavor: Use the rub in the recipe card or try one of my favorites—Memphis Dry Rub, BBQ Dry Rub, Black Magic Seasoning, or my Chipotle Seasoning. Finish with BBQ sauce like Memphis BBQ Sauce, Alabama White Sauce, or your favorite barbecue sauce.
  • For blackened chicken: Use Blackening Seasoning and skip the sauce—let the crust do the talking.
  • Or grab a store-bought rub: Commercial blends work fine too—just watch the salt if your chicken’s already brined.

🐓 Other Skin-On Grilled Chicken Recipes

If you’re into grilling chicken with the skin on (and you should be), here are a couple more favorites worth trying:

  • Grilled Chicken Drumsticks – Juicy, flavorful, and nearly impossible to mess up.
  • Grilled Chicken Thighs – Bold flavor, crispy skin, and a little extra richness.
  • Grilled Bone-in Chicken Breasts — Crispy skin, tender meat, and an optional BBQ finish.

👇 Want to keep the bird whole next time? Check out the full recipe below.

Grilled Whole Chicken

Learning to grill a whole chicken without spatchcocking(butterflied or flattened) is easier than you think. This recipe starts with an easy prep, and then you cook the intact, full chicken with indirect heat on your backyard grill.

Grilled whole chicken on a gray plate

🛒Products I Recommend

These are examples of what I use or recommend. There are many other great options.

Note: All links below are affiliate links, meaning I make a small profit from your purchases. Your price is not affected by this commission. We are a participant in the Amazon Services LLC Associates Program. As an Amazon associate, I earn from qualifying purchases.

Image for Maverick xr-50 remote thermometer from Maverick

Maverick XR-50 4 Probe Remote Thermometer

Maverick Adrenaline Barbecue Company XR-50 Extended Range Digital Remote Wireless 4 Probe. Highly Rated.
Shop at Amazon
Red Thermapen One

Thermapen™ One from Thermoworks™

My personal favorite cooking tool. It will make your a better cook today. More expensive but will last for years.
Shop at Amazon
CDN Grill Surface Thermometer

CDN Grill Surface Thermometer

Cheap and reliable—I still one mine.
Shop at Amazon
Thermopop by Thermoworks

Thermopop™ by Thermoworks™

Super fast and accurate, you can have the quality of Thermoworks on a budget. Highly recommended for the casual cook.
Shop at Amazon

🍴 Serving Suggestions

Round it out with some easy sides for a complete meal:

  • Potatoes on the Grill – Try grilled baby potatoes, grilled French fries, or my no-foil grilled potatoes.
  • Cold picnic sides – Cold Macaroni Salad, Caprese Paste Salad, Fresh Spinach Salad, or a green garden salad.
  • Hot veggies – Grilled Corn on the Cob, Grilled Carrots, or Grilled Mix Vegetables are all great matches.

You’ve already got the grill going—use it!

❄️ Leftovers & Storage

Store leftovers in an airtight container and refrigerate for up to 4 days, or freeze for up to 3 months.

Want to use them up fast? Shred and toss into tacos, wraps, or a BBQ chicken salad.

❓FAQs

Can I use indirect grilling to cook spatchcock chicken?

Yes—indirect grilling works great, especially on larger grills. Set up an indirect zone at 350°–400°F. Cook the chicken on the indirect side until it hits 150°–155°F, then move it over direct heat, skin-side down, to brown the skin. Finish cooking to 165°F internal temp. You may need to flip it back skin-side up to reach the final temperature evenly.

When is chicken safe to eat?

According to USDA guidelines, all chicken should be cooked to a minimum internal temperature of 165°F in the thickest part of the meat. Use an instant-read thermometer—don’t rely on appearance or guesswork.

Is it safe to rinse chicken?

No—rinsing chicken is no longer recommended. It can spread harmful bacteria around your sink and counter through water splatter. See To Rinse or Not to Rinse for more details.

Can I smoke spatchcock chicken?

Yes, you can add smoke flavor while grilling. Use a smoker box or foil pouch with dry wood chips and place it on the grill when the chicken goes on. One round of chips adds great flavor without overpowering the meat. For more tips, wood chip options, and troubleshooting, see my full post How To Set Up Your Gas Grill for Smoking.

Is flattened chicken the same as spatchcock or butterflied?

Yes — all three mean removing the backbone and pressing the chicken flat so it cooks faster and more evenly.

BBQ chicken with sauce.

📖The Recipe Card

BBQ Butterflied Chicken on white plate
Print Recipe Add to Collection Go to Collections

Grilled Flattened Chicken (Spatchcock Recipe)

An easy grilled flattened (spatchcock/butterflied) chicken recipe with juicy meat, even cooking, BBQ seasoning, and optional wood smoke.
Prep Time10 minutes mins
Cook Time40 minutes mins
Total Time50 minutes mins
Course: Main Course
Cuisine: American
Keyword: butterfly chicken, Grilled flattened chicken, grilled spatchcock chicken
Servings: 4
Calories: 691kcal
Author: Dan Mikesell AKA DrDan

Ingredients

  • 1 whole chicken, about 4 pounds
  • Seasoning of choice

Simple Spice Rub if needed

  • 2 teaspoons kosher salt
  • 2 teaspoons paprika
  • 1 teaspoon garlic powder
  • 1 teaspoon onion powder
  • ½ teaspoon cumin
  • ¼ to ½ teaspoon cayenne pepper optional
US Customary - Convert to Metric

Instructions

Flatten and season the chicken

  • Pat the chicken dry with paper towels. Using sharp kitchen scissors (or a heavy knife), cut along both sides of the backbone and remove it.
    whole chicken with scissors being cut
  • Nick the breastbone to help the chicken flatten, then flip it over and press down firmly until it lays flat.
    notching breast bone with knife
  • Brush all sides with oil and season well. Use your favorite seasonings or the rub provided.
    salting the chicken

Set up the grill

  • Preheat the grill to a surface temperature of 350°–400°F. Clean and oil the grates. (Indirect grilling option in the FAQs.)
    clean and oil grill crates
  • Optional: Add dry wood chips to a smoker box or foil pouch and place on the grates now. One round is enough.
    Wood chips in a smoker box.

Grill the chicken

  • Place the chicken skin-side up. Grill with the lid closed for 10 minutes.
    Flip to skin-side down and grill for 8–10 minutes to develop color—watch to avoid over-browning.
    Raw flattend chicken on a grill.
  • Flip back to skin-side up and continue cooking until the thickest part of the breast reaches 165°F—usually 20 to 30 minutes more.
    Flattened chicken after skin side down.

Add BBQ sauce (optional)

  • If using BBQ sauce, brush it on during the last few minutes—just before the chicken hits 165°F.
    BBQ Butterflied Chicken on white plate

Rest and serve

  • Let the chicken rest for 5-10 minutes before cutting and serving.
    Grilled Butterflied Whole Chicken from 101 Cooking For Two

Notes


Pro Tips

  1. As always, cook to final temperature and results—not by time alone. Times are just estimates.
  2. I’m suggesting a 3–4 pound whole chicken to decrease variability. In addition to the chicken being a variable, the grill's exact temperature, the flow of air, and the radiant heat affect cooking time.
  3. As always, we are cooking to final results and NEVER BY TIME ALONE. I give times so you have some estimates of how long something will take, but in this recipe, you should cook to the final temperatures and the skin results.
  4. I suggest BBQ sauce or the alternative spice rub, but you can season this any way you want. Seasoning is discussed in the post.
  5. Preheat the grill to a grill surface temperature of 350°-400°. If you need help, please check A Beginners Guide to Grill Temperature on a Gas Grill.
  6. If the breasts or thighs are lagging behind the other, turn off one side and rotate to chicken to help the side behind. Also, watch the browning on all sides to prevent burning.
  7. Indirect grilling, oven roasting, and other seasoning are discussed in the post.

Nutrition

Calories: 691kcal | Carbohydrates: 3g | Protein: 40g | Fat: 40g | Saturated Fat: 12g | Polyunsaturated Fat: 16g | Monounsaturated Fat: 8g | Cholesterol: 240mg | Sodium: 3278mg | Sugar: 3g

Originally Published June 23, 2013. Updated with refreshed photo along with updated options, discussion, and instructions to reflect current technique.

Jake begging for food.

Grilled Blackened Tilapia

Grilled Blackened Tilapia from 101 Cooking for Two

Grilling tilapia is healthy, easy, and fast to cook. Add a simple homemade blackening seasoning for spicy fish tacos or a delicious dinner. This easy grilled blackened fish recipe can be adapted to other fish. You can even use Cajan, Creole, or any other seasoning.

🐟Ingredients

Tilapia
Butter
Blackening Seasoning—Paprika, Onion Powder, Garlic Powder, Dry thyme, Dry oregano, Salt, Black Pepper, Cayenne pepper

grilled tilapia flaking on a plate.
[feast_advanced_jump_to]
Blue ribbon divider used for visual effect

quote mark
Featured Comment by Douglas:
⭐⭐⭐⭐⭐
"Great recipe! Both my wife and I loved the result. We will be grilling the blackened tilapia recipe again."

It is time to get some healthy fish in your diet with this quick and spicy recipe, which will become one of your favorites.

This tilapia recipe only needs a few minutes of prep and only about 5 minutes on the grill for a delicious low-fat main dish or tacos.

You can use fresh or thoroughly thawed frozen whole tilapia filets. But using other types of fish and seasoning are discussed.

👨‍🍳How to Grill Blackened Tilapia—Step-by-Step Photo Instructions

clean and oil grill crates.

1. Preheat the grill to high heat.

spices for blackening seasoning.

2. Make blackening seasoning if using my suggested blackening rub.

patting dry tilapia with paper towels.

3. Rinse and pat dry the tilapia. Brush with melted butter.

adding spices to fish on white plate.

4. Coat with blackening, Cajun, Creole, or other seasoning.

placing spiced fish in grill basket.

5. Load the tilapia in the grill basket, grill pan, or on a preheated griddle.

grill basket over direct heat.

6. Place the tilapia on a preheated grill.  The lid may be open or closed—grill for only 2 minutes.

cooked grilled tilapia still in grill basket.

7. Flip and grill for another 2 minutes. Check the temperature (145°) and color. You may need a few minutes more.

pile of blackened tilapia on a white plate.

8. Serve immediately; I suggest with Simple Tartar Sauce or making a spicy fish taco.

For more details, keep reading. See the Recipe Card below for complete instructions and to print.

⏰How long to grill fish

While thinner fish, like tilapia, are generally done in a grill basket in about 4-5 minutes, thicker fish may take 6-8 minutes or more.

Cook to good color and a minimum temperature of 145 °. A rough rule is to cook for 10 minutes per inch of thickness.

👨‍🍳Make it right every time

I cook on a gas grill, although charcoal or pellet grills can also be used.

Grill with no foil to get a nice crispy crust instead of in foil, which is more like steaming fish.

You can use fresh or thawed frozen tilapia. I like to move frozen tilapia to the refrigerator the day before cooking.

The thickness of whole tilapia filets can vary; cooking time will usually be 2-3 minutes per side, but thick filets may take 4 minutes per side.

Try to cook right to 145° for safety, but not much more, or your fish will dry.

🔥Spicing

The basic instructions for grilling fish don't change with the spicing, so you can use any spicing or flavor you want.

My homemade blackening seasoning is economical and easy to adjust. But you can use commercial Cajan, Creole, or blackening seasonings.

To adjust the heat in my homemade blackening seasoning, change the cayenne pepper.

  • Slip the cayenne pepper if you want no added heat to the spice mix.
  • Use ¼ teaspoon for 3 to 4 out of 10 heat.
  • Use ½ teaspoon for 6 to 7 out of 10 heat.
  • Use a full teaspoon for 9 to 10 out of 10 heat. I call this "manly man" level.

♨️Grilling tips

If you grill fish frequently, get a grill basket like the one pictured. It supports the fish, making flipping easy and painless. They are cheap and avalible at any big box store.

image of a grill basket.
Brinkmann®️ Steel Flexible Grilling Basket

If you use a grindle, preheat it with the grill since it is heavy and needs a lot of heat. Grill pans will usually heat fast but may prolong cooking time a little.

Since the fish is thin and uses high heat, you can cook with the grill lid open or closed—it does not matter.

Can I grill other fish fish?

Other fish fillets, such as mahi mahi, halibut, cod, or even salmon, can be used and typically cook about the same with an easy thickness adjustment.

Generally, fish will need about 10 minutes per inch of thickness of the fish fillet. Check for a final internal temperature of 145° with an instant-read thermometer.

For more information, please see my discussion of the 10-minute rule for cooking fish.

🐟Fish Recipes

Check out these other great tilapia recipes, like baked parmesan tilapia or lemon butter tilapia. Or for salmon, try Garlic Butter Salmon in a Convection Oven.

🍽️Serving suggestions

If you make fish tacos, my Pineapple Mango Salsa Recipe is a great compliment

If not making tacos, serve top with homemade tarter sauce and with smashed potatoes, scalloped potatoes, healthy biscuits, Cheddar Bay Biscuits, or cornmeal biscuits.

❄️Storing leftovers

Leftover fish is never as good as freshly cooked, but sometimes there are leftovers.

Seal leftovers in an airtight container and refrigerate for 4 days. You can freeze leftovers for three months, but they will lose their flavor and texture.

Leftovers may be reheated in the oven at 300° for about 10-15 minutes, lightly covered.

❓FAQs

What is tilapia?

Tilapia is a healthy, mild white fish commonly farm-raised but can also be caught in the wild. It provides economical, high-quality protein along with some healthier fats. It is available fresh or frozen in most of the world.

Can I cook this recipe in the oven?

Please see my baked blackened tilapia for instructions.

Blue ribbon divider used for visual effect

📖The Recipe Card

Grilled Blackened Tilapia from 101 Cooking for Two
Print Recipe Add to Collection Go to Collections
4.58 from 7 votes

Grilled Blackened Tilapia

Grilling tilapia is healthy, easy, and fast to cook. Add a simple homemade blackening seasoning for spicy fish tacos or a delicious dinner. This easy grilled blackened fish recipe can be adapted to other fish. You can even use Cajan, Creole, or any other seasoning.
Prep Time10 minutes mins
Cook Time4 minutes mins
Total Time14 minutes mins
Course: Main Course
Cuisine: American
Keyword: Blackened Tilapia, grilled blackened tilapia, Grilled Tilapia, season tilapia
Servings: 4 servings
Calories: 154kcal
Author: Dan Mikesell AKA DrDan

Ingredients

  • 1 pound Tilapia fresh or thawed frozen
  • 1 tablespoon butter melted

Blackening Rub-makes enough for 2 pounds

  • 3 tablespoons paprika
  • 1 teaspoon salt
  • 1 tablespoon onion powder
  • 1 teaspoon black pepper
  • 1 teaspoon dry thyme
  • 1 teaspoon dry oregano
  • ½ teaspoon garlic powder
  • ¼ to 1 teaspoon cayenne pepper to taste
US Customary - Convert to Metric

Instructions

  • Preheat the grill to high heat. If using a griddle instead of a grill basket, then place it on the grill to preheat.
    clean and oil grill crates
  • Combine 3 tablespoons paprika, one teaspoon salt, 1 tablespoon onion powder, one teaspoon black pepper, one teaspoon dry thyme, one teaspoon dry oregano, and ½ teaspoon garlic powder. Also, add cayenne pepper ¼ teaspoon for normal (3/10 heat), ½ teaspoon for spicy (7/10), and one teaspoon for manly man 10/10 heat.
    spices for blacken seasoning
  • Rinse and pat dry 1 pound of tilapia.
    patting dry tilapia with paper towels
  • Melt 1 tablespoon butter in a microwave—about 15 seconds.
    melting butter in the microwave
  • Brush both sides of tilapia with the melted butter.
    brushing fish with butter on a white plate
  • Coat both sides of the tilapia with a generous amount of the rub—you don't need all the rub. Other seasonings may be used instead.
    adding spices to fish on white plate
  • Spray a flexible grill basket with a generous amount of PAM.
    spraying grill basket with PAM
  • Load the tilapia in the grill basket. Alternatively, a grill pan will work. if using a griddle, then add a tablespoon or so of vegetable oil to the preheated griddle. Do not use olive oil since it smokes at high temperatures.
    placing spiced fish in grill basket
  • Place the tilapia on preheated grill. The lid may be open or closed—grill for only 2 minutes. Flip and grill another 2 minutes. Check temperature (145°) and color. You may need few minutes or so more.
    grill basket over direct heat_
  • While the thinner fish in a grill basket is generally done in about 4-5 minutes total time—thicker fish may take 6-8 minutes—to cook to good color and 145° minimum temperature.
    cooked grilled tilapia still in grill basket
  • You can serve immediately or make tacos.
    pile of blackened tilapia on white plate

Notes

Pro Tips

  1. You may be grilled with the hood open or closed.
  2. I use ½ teaspoon of cayenne pepper here. This was a 7/10 hot. I suspect most people will want ¼ teaspoon, which is a 3-4/10 heat level. The original recipe used a full teaspoon which I did once. It was what I call manly man level of 10/10.
  3. Store extra seasoning sealed tightly for next time. This is enough for about 2 pounds.
  4. While the thinner fish in a grill basket is generally done in about 4-5 minutes total time, thicker fish may take 6-8 minutes—cook to good color, and 145° minimum temperature.
  5. Grilling other fish and seasonings are discussed in the post.

Nutrition

Calories: 154kcal | Carbohydrates: 4g | Protein: 23g | Fat: 5g | Saturated Fat: 3g | Polyunsaturated Fat: 1g | Monounsaturated Fat: 1g | Cholesterol: 65mg | Sodium: 546mg | Potassium: 394mg | Fiber: 1g | Sugar: 1g | Vitamin A: 450IU | Vitamin C: 1.7mg | Calcium: 30mg | Iron: 0.9mg

Originally published May 11, 2013. Updated with expanded options, refreshed photos, and a table of contents to help navigation.

Lilliy dog looking great in the woods.
Molly dog walking in the woods.

How to Cook Thick Pork Chops (Easy 2-Inch+ Oven Recipe)

thick pork chop with gravy on a blue plate

Learn how to cook thick pork chops in the oven using a classic sear-and-bake method for 2-inch and thicker chops. This recipe works for bone-in or boneless thick-cut pork chops and avoids the dry results common with thick chops.

⏱️ Quick Answer: How Long to Bake Thick Pork Chops

For 1½–2-inch thick pork chops:

  • Sear: 2–3 minutes per side
  • Bake: 400°F for 20–25 minutes
  • Done: 145°F internal temperature
Thick pork chop with gravy on a blue plate.
Juicy thick pork chop smothered with homemade gravy.
[feast_advanced_jump_to]

quote mark
Featured Comment by Debbie:
⭐⭐⭐⭐⭐
"I tried your recipe tonight. I am not a big fan of pork chops, they always end up a bit dry. I followed your recipe, including the brine…THEY WERE THE BEST CHOPS I HAVE EVER EATEN!! I will never cook them any other way."

Today's pork is not yesterday's pork. It is now lean, healthy meat and can be a delicious protein for a healthy, balanced diet.

❤️ Why You’ll Love This Recipe

  • Beginner-friendly but impressive enough for guests.
  • Thick pork chops in the oven come out tender and flavorful every time.
  • Quick sear + oven finish gives professional results — no fancy tools.
  • Rest thick-cut chops before cooking — the key to even doneness.
  • Includes an optional pan gravy and adaptations for 2½-inch+ chops.

🐖Ingredients

Thick pork chops with seasoning and gravy ingredients labeled.
  • Thick pork chops – Use 1½ to 2-inch thick-cut center-cut pork chops, boneless or bone-in. Adjustments are included for chops 2½ inches or thicker. Well-marbled pork gives better flavor and juiciness. Boneless will cook a bit faster, but both work well.
  • Seasoning salt – Lawry’s is my go-to, but any seasoned salt you like is fine.
  • Black pepper – Freshly ground adds a little extra pop.

Optional

  • Other seasonings or dry rub – Garlic powder, paprika, or your favorite pork rub.
  • Gravy ingredients – Broth, flour, and salt.

👨‍🍳 How to Cook Thick Pork Chops in the Oven

Thick pork chops (1½ to 2 inches) take longer to cook than thinner chops. A quick sear and oven finish keep them juicy.

1. 🧂 Rest, trim, and season

Let thick-cut chops sit at room temperature 30–60 minutes. Trim and score the fat rim.

2 inch thick pork chops with trimmed and scored fat.

✅ Pro Tip: The rest is important – it helps the center cook through without drying out the outside.

Season with seasoning salt and black pepper.

seasoning pork chops with pepper and seasoning salt.

2. 🔥 Sear

Heat a skillet with oil over medium-high heat. Sear both sides of the chops for 2–3 minutes until browned.

Placing a thick cut pork chop in a pan to sear.

✅ Pro Tip: A cast iron skillet gives the best sear, but any oven-safe skillet will work.

3. ⏲️ Bake in the oven

Transfer to a 400°F oven and cook until the internal temperature is 145°–150°F, usually 20–25 minutes for 2-inch chops.

thick pork chops searing in cast iron skillet.

✅ Pro Tip: According to the USDA, the minimum safe internal temperature for pork chops is 145°F.

4. 🛑 Rest

Remove from the oven and tent with foil for 10 minutes before serving.

tenting pork chops on orange plate with foil.

5. 🥣 Optional Gravy

In a bowl, whisk flour into half of the broth. In the same pan, bring the rest of the broth to a boil. Slowly whisk in the flour mixture.

adding flour slurry to pan to make gravy.

Continue to whisk until thickened, about 2–3 minutes.

stirring brown gravy in skilling while thickening.

👇 Scroll down for the printable recipe card and step-by-step photos—or keep reading for more tips, serving ideas, and a grill variation.

⏲️ Time and Doneness for Thick Pork Chops in the Oven

A 2-inch thick pork chop takes about 30 minutes of active cooking time: 4–5 minutes to sear, then 20–25 minutes in a 400°F oven (375°F convection) to reach an internal temperature of 145°–150°F. Bone-in chops may take a few minutes longer.

👉 Searing isn’t just for looks — it starts the Maillard reaction for better flavor and texture. Skip it, and you’ll need extra oven time and lose that golden crust.


🌡️ Doneness Levels

  • Less than 145°F (Rare) – Not recommended for safety reasons.
  • 145°–150°F (Medium-Rare) – Juicy, with a little pink in the center.
  • 150°–155°F (Medium) – Slightly firmer, just a hint of pink.
  • 155°–160°F (Medium-Well) – Starting to dry out.
  • 160°F+ (Well Done) – Dry and tough. Not recommended.

😊 Pro Tips for Perfect Thick Pork Chops

  • Season simply or use your favorite rub – Salt, pepper, and seasoning salt work great. If you brined, skip any extra salt. Paprika adds nice color and flavor. A marinade (like my steak marinade) also works well for extra flavor.
  • Choose the right chops – Boneless or bone-in chops between 1½ and 2½ inches thick work best for this method.
    If your chops are thicker than 2½ inches, see the adjustments below for timing and technique.
  • Don’t skip the rest – Letting the chops sit at room temperature for 30 to 60 minutes helps them cook more evenly—so the inside finishes without overcooking the outside.
  • Cook to temperature, not time – Start checking the internal temperature around 12–15 minutes into baking. Use a meat thermometer to get it just right.

🔥 Grilling Thick Pork Chops

While I prefer the sear-and-bake method for the best temperature control, grilling adds great flavor and works well for thick chops using an indirect cooking method.

  • Follow the same prep as the oven method: trim, rest at room temperature, brine if you want, and season.
    Do not sear first.
  • Preheat your grill for indirect cooking at a surface temperature of 350° to 400°F in the indirect area.
  • Grill the chops with indirect heat, flipping every 5 minutes, until the internal temperature reaches 135°F—this will take about 20–25 minutes, depending on thickness and grill setup.
  • Move the chops to direct heat and sear both sides with the burners on high, just until they develop good color and reach a final internal temperature of 145°F.
  • Remove from the grill and tent with foil for 5 minutes before serving.

🥣 Making the Optional Gravy

Everybody loves gravy, so let’s make a quick and easy one that actually tastes great.

I like to use a pork gravy base from Penzeys to make “pork broth.” You can also use pork bouillon dissolved in water for the same purpose. If neither is available, chicken or vegetable broth works just fine.

There are two basic ways to make gravy:

  • Classic roux – Mix flour with the grease in the pan and cook it for a few minutes before adding liquid.
  • Easy method – Whisk the flour into some of the broth, then slowly stir it into boiling liquid in the pan.

Either works—but the second one’s faster and a little more foolproof for home cooks.

👉 Visit my How To Make Gravy at Home for more information on gravy.

🥩 Thinner Pork Chop Recipes

Looking for a recipe for 1-inch pork chops or thinner? Try one of these:

  • Pan Fried Pork Chops with Gravy
  • Breaded Pork Chops in the Oven
  • Pan Seared Oven Roasted Pork Chops

👉 For the grill, see How to Grill Pork Chops

🍴 Serving Suggestions

I usually serve pork chops with mashed potatoes (and gravy, of course), but they’re also great with:

  • Oven Roasted Red Potatoes
  • Baked French Fries.
  • A hot vegetable like roasted Parmesan asparagus, baked green beans with bacon, or baked cauliflower

End the meal with something simple and cozy like easy apple crisp or blueberry crumble pie.

❄️Storing leftovers

Store leftover pork chops in an airtight container:

  • Refrigerate for up to 4 days
  • Freeze for up to 4 months

Gravy made with flour stores just fine alongside the pork—same timeframes apply.

❓FAQs

🧂 Should I brine thick pork chops?

Brining isn’t required, but it does help keep chops extra juicy.

To brine: mix 2 tablespoons each of salt and sugar (white or brown) with 2 cups of water. Submerge the chops and refrigerate for 30 minutes to a few hours. Rinse well afterward and skip seasoning salt — just use pepper and maybe a little paprika.

How long to bake thick pork chops at 400°F?

For 1½–2-inch thick pork chops: after a 2–3 minute sear per side, bake at 400°F (regular) or 375°F (convection) until the internal temperature reaches 145°F. That usually takes 20–25 minutes in the oven phase — start checking at 12–15 minutes.

📏 Do I have to use a meat or instant-read thermometer?

Yes. Thickness, oven temp, and searing time all vary. The only reliable way to cook thick pork chops to doneness is with a thermometer.

Do I need a cast-iron skillet to cook thick pork chops?

No. Any oven-safe skillet works. Cast iron is ideal for searing because it holds heat, distributes it evenly, and goes from stovetop to oven without issue.

🐖 What Pork Chop to Use?

This recipe is built for thick center-cut pork chops — boneless or bone-in. Most extra-thick chops are just boneless slices of pork loin cut 1½–2 inches thick (or more). Bone-in chops work fine too; just add a few minutes since bones slow heat transfer.

✅ Tip: Buy a whole pork loin when it’s on sale and slice it yourself. You’ll get the thickness you want, save money, and they freeze well for 3–4 months.

graphic for pork chop location- licensed from Fotolia May 16,2017. Copyright foxysgraphic - Fotolia. Modified per allow by licensed.

📖The Recipe Card

thick pork chop with gravy on a blue plate
Print Recipe Add to Collection Go to Collections
4.95 from 19 votes

Oven-Baked Thick Pork Chops (Juicy & Foolproof)

Juicy, tender thick pork chops—seared on the stovetop, finished in the oven, and perfectly done every time. An easy, foolproof method with no guesswork, plus an optional pan gravy.
Prep Time5 minutes mins
Cook Time30 minutes mins
Resting30 minutes mins
Total Time1 hour hr 5 minutes mins
Course: Main Course
Cuisine: American
Keyword: how to cook thick pork chops, thick cut pork chop recipe, thick pork chops in oven
Servings: 2
Calories: 701kcal
Author: Dan Mikesell AKA DrDan

Ingredients

  • 2 Thick pork chops 1½ to 2 inches thick or more
  • 2 tablespoons Oil
  • Lawry's Seasoning salt to taste
  • Pepper to taste

For Gravy

  • 2 cups Broth—pork, chicken or vegetable.
  • 4 tablespoons Flour
  • Salt to taste
US Customary - Convert to Metric

Instructions

Rest, trim, and season

  • Pat the pork chops dry and let them rest at room temperature for 30–60 minutes. Preheat the oven to 375° convection (or 400° conventional).
    2 inch thick pork chops with seasoning and gravy makings
  • Trim the fat rim to less than ¼ inch and make relief cuts every inch to prevent curling.
    2 inch thick pork chops with trimmed and scored fat
  • Season with seasoning salt and pepper to taste.
    seasoning pork chops with pepper and seasoning salt

Sear

  • Heat 2 tablespoons of oil over medium-high heat. When shimmering, add the pork chops. Sear both sides for 2–3 minutes until nicely browned.
    Placing a thick cut pork chop in a pan to sear.

Bake in the oven

  • Transfer the skillet to the preheated oven and bake until the internal temperature reaches 145°—about 20–25 minutes. The time required will vary based on the thickness and starting temperature.
    thick pork chops searing in cast iron skillet

Rest

  • Remove from the oven and tent lightly with foil for 5-10 minutes while you make the gravy (optional).
    tenting pork chops on orange plate with foil

Optional Gravy

  • Mix 2 cups of pork broth using a gravy base, bouillon, or substitute chicken or vegetable broth. Whisk 4 tablespoons of flour into 1 cup of the broth.
  • Bring the other 1 cup of broth to a boil in the pan with the pan juices. Slowly whisk in most of the flour mixture. Stir continuously until the mixture thickens—about 2–3 minutes. Add more of the flour mixture if needed.
    adding flour slurry to pan to make gravy
  • Simmer for a few minutes more to finish.
    stirring brown gravy in skilling while thickening

Notes

Pro Tips:

  1. Instructions for 2½-inches+, seasoning options, and grill instructions are in the post. 
  2. Don’t skip the rest, before or after cooking.
  3. Use an oven-safe pan like cast iron. Sear to nearly the final color you want.
  4. Brine, if you have time: Mix 2 cups water with 2 tablespoons each of salt and brown sugar. Brine for 30 minutes to 2 hours in the refrigerator. Rinse after. Skip salt-based seasonings afterward.
  5. Cook to temperature, not time. Use an instant-read thermometer for best results. Remember, the temperature will rise slightly after removal.
  6. The gravy is optional, but a nice bonus. Pork gravy base works best, but chicken broth, veggie broth, or bouillon are good alternatives.

Nutrition

Calories: 701kcal | Carbohydrates: 13g | Protein: 76g | Fat: 35g | Saturated Fat: 9g | Polyunsaturated Fat: 3g | Monounsaturated Fat: 19g | Trans Fat: 0.2g | Cholesterol: 198mg | Sodium: 2186mg | Potassium: 1619mg | Fiber: 1g | Sugar: 0.002g | Vitamin A: 1350IU | Vitamin C: 0.2mg | Calcium: 2mg | Iron: 2.9mg

Editor's Note: Originally published July 17, 2016. Updated with expanded options, refreshed photos, and a table of contents to help navigation.

Dogs with purple puppy.

Crock Pot Baby Back Ribs (Fall-Off-the-Bone Recipe)

baby back ribs on an orange plate with fries

Baby back ribs in a crock pot (slow cooker) are easy to make with just 10 minutes of prep. Add a simple dry rub, let the crock pot do the work, then finish the ribs under the broiler with BBQ sauce for a sticky, delicious coating.

Quick Answer: How Long to Cook Baby Back Ribs in a Crock Pot

  • LOW: 7–8 hours
  • HIGH: 3–4 hours
  • Done: Fork-tender, usually 200°–205°F
  • Finish: Broil with BBQ sauce
ribs with fries on plate,
[feast_advanced_jump_to]

quote mark
Featured Comment by Marcia :
⭐⭐⭐⭐⭐
"This recipe was so easy!! My husband raved about the results & we both grew up in Texas, so we know good ribs. I used a dry rub & followed your instructions. Outstanding!!"

🩵 TL;DR — Recipe Summary

What: Baby back ribs cooked in a crock pot with a simple dry rub and BBQ sauce.

Why: Easy preparation, no grill needed, and perfect for smaller households.

How: Cook on LOW for 7–8 hours or HIGH for 3–4 hours until fork-tender. Finish under the broiler with BBQ sauce.

🐖 Ingredients

Baby back ribs with dry rub ingredients labeled.
  • Baby back ribs — One rack, about 3–4 pounds. Spare ribs or St. Louis ribs also work, but may need trimming to fit.
  • Dry rub — Use your favorite pork rub or the simple version in the recipe card. Other options: BBQ Dry Rub for Ribs or Memphis Dry Rub.
  • BBQ sauce — For brushing on the ribs before broiling.
  • Liquid smoke (optional) — Adds smoky flavor without a grill. I recommend Wright’s brand.

👨‍🍳 Quick Overview: Crock Pot Baby Back Ribs

1. Prep. Remove the membrane from the ribs and cut them in half. Coat with liquid smoke (optional) and rub on your favorite dry rub.

seasoning half slab of baby back ribs.

2. Load the crock pot. Stand the ribs around the sides, meat-side towards the center.

arrange ribs in the crock pot.

3. Cook low and slow. 7–8 hours on LOW or 3–4 hours on HIGH until fork-tender.

cooked ribs in crock pot with drainage.

4. Finish. Broil with BBQ sauce for a sticky, caramelized crust.

finished ribs on baking sheet.

👇For full step-by-step instructions, scroll to the printable recipe card—or keep reading for tips, flavor ideas, and serving suggestions.

⏲️ How Long to Cook Baby Back Ribs in a Crock Pot

Baby back ribs usually take 7–8 hours on LOW or 3–4 hours on HIGH in a crock pot, depending on thickness and how tightly they’re packed.

  • Two racks or tightly packed ribs: Allow 1–2 additional hours.
  • Frozen ribs: Should be fully thawed before cooking for safety.

Cook until fork-tender, usually at an internal temperature of 200°–205°F.

🌡️ How to Tell When Crock Pot Ribs Are Done

Crock pot ribs are done when the meat is fork-tender, usually at an internal temperature of 200°–205°F.

  • Fork test: The meat should pull apart easily between the bones.
  • Temperature: Check the thickest meat with an instant-read thermometer without touching bone.
  • Not tender yet? Continue cooking. If your crock pot won't reach the needed temperature, finish the ribs in a 300°F oven.

🍽️ Serving Suggestions for Slow Cooker Ribs

Serve these ribs with your favorite BBQ sauce, such as Memphis-Style BBQ Sauce. Add Macaroni Salad, Cornmeal Biscuits, or Crispy Baked French Fries for an easy BBQ dinner.

❄️ Storage and Reheating

Storage: Refrigerate leftover ribs in an airtight container for up to 4 days, or freeze for up to 4 months.

Reheating: Thaw frozen cooked ribs overnight in the refrigerator. Add a little BBQ sauce, wrap tightly in foil, and heat in a 300°F oven for about 30 minutes, until heated through.

🐖 More Rib Recipes

  • Grilled Baby Back Ribs — Low and slow on a gas grill.
  • Oven-Baked Baby Back Ribs — Tender ribs with a crispy finish.

❓ FAQs

Can I cook frozen baby back ribs in a crock pot?

Raw ribs should be fully thawed in the refrigerator before cooking in a crock pot for food safety.

Can I use spare ribs or St. Louis ribs instead of baby back ribs?

Yes. Both work with this method, but they are larger and may need trimming to fit your crock pot. Allow extra cooking time and check for tenderness.

Should I use liquid smoke?

Optional, but it adds smoky flavor without a grill. Use a little before applying the dry rub. I recommend Wright's brand.

Do I need to add liquid to the crock pot?

No. The ribs release enough juices as they cook. There's no need to add water, broth, or other liquids.

Can ribs overcook in a slow cooker?

Yes, but unlikely. Cooking too long can make the meat mushy or dry. Check for fork-tender ribs rather than relying on time alone.

📖The Recipe Card

ribs with fries on plate,
Print Recipe Add to Collection Go to Collections
5 from 5 votes

Crock Pot Baby Back Ribs

Cook fall-off-the-bone baby back ribs in a crock pot (slow cooker) with a simple dry rub and BBQ sauce. Just 10 minutes of prep, then cook until tender and finish under the broiler.
Prep Time10 minutes mins
Cook Time8 hours hrs 5 minutes mins
Total Time8 hours hrs 15 minutes mins
Course: Main Course
Cuisine: American
Keyword: Baby back ribs in crock pot, Crock Pot Baby Back Ribs, slow cooker baby back ribs
Servings: 4 servings
Calories: 809kcal
Author: Dan Mikesell AKA DrDan

Ingredients

  • 1 rack baby back ribs 3-4 pounds
  • ¼ cup dry rub just a nice coating
  • 4 tablespoons BBQ sauce
  • liquid smoke optional

Dry Rub Recipe If Needed—will make enough for 2 slabs of ribs

  • 8 tablespoons Brown sugar
  • 3 tablespoons Kosher salt
  • 1 tablespoon Chili powder
  • 1 teaspoon Onion powder
  • 1 teaspoon Black pepper
  • 1 teaspoon Garlic powder
US Customary - Convert to Metric

Instructions

Remove the membrane and trim

  • Peel the membrane from the back of the ribs. Trim excess fat, check for bone chips, and cut the rack in half.
    removing membrane from baby back ribs.

Apply the rub

  • If using liquid smoke, rub a little on the ribs before applying a light coating of your favorite dry rub.
    seasoning half slab of baby back ribs.

Arrange in a large slow cooker and cook

  • Stand the ribs around the sides of the crock pot, meat-side toward the center. Use crumpled foil underneath if needed to elevate them.
    arrange ribs in the crock pot.
  • Cook on LOW for 7–8 hours or HIGH for 3–4 hours, until fork-tender, usually 200°–205°F. Avoid opening the lid unnecessarily.
    cooked ribs in crock pot with drainage.

Finish under the broiler (or grill)

  • Carefully transfer the ribs to a baking sheet and brush with BBQ sauce.
    brush with BBQ sauce before browning under the broiler.
  • Broil or grill for about 5 minutes, until lightly browned and the sauce is sticky. Watch closely to prevent burning.
    finished ribs on baking sheet.

Video

Notes

Pro Tips:

  1. Two racks: Stand the ribs upright and allow 1–2 additional hours.
  2. Liquid smoke: Optional. A few teaspoons add smoky flavor before applying the dry rub.
  3. Doneness: Cook until fork-tender, usually 200°–205°F. Check with an instant-read thermometer, avoiding bone. For this recipe, use 190°F as the minimum doneness target.
  4. Storage: Refrigerate cooked ribs for up to 4 days or freeze for up to 4 months.
 

Nutrition

Calories: 809kcal | Carbohydrates: 40g | Protein: 56g | Fat: 48g | Saturated Fat: 17g | Cholesterol: 196mg | Sodium: 970mg | Potassium: 982mg | Fiber: 3g | Sugar: 24g | Vitamin A: 680IU | Vitamin C: 2mg | Calcium: 285mg | Iron: 9mg

Editor's Note: Originally published January 23, 2017. Updated with improved instructions, refreshed photos, and practical cooking tips.

Molly and Lilly sitting nicely.

Grilled Buttermilk Chicken

Buttermilk chicken on a white plate.

For tender and moist chicken, marinate the chicken in buttermilk. I use this simple marinade for the chicken to add flavor, but it also acts as a brine to add moisture to the best-grilled chicken breasts. Add seasoning to the marinade or season after the marinade. Makes the perfect moist and tender chicken sandwich.

🐓Ingredients

Chicken breasts
Buttermilk chicken marinade—Buttermilk, olive oil, garlic, salt, pepper
Optional—other spices or dry rub

Buttermilk chicken on a white plate.
[feast_advanced_jump_to]
Blue ribbon divider used for visual effect

Buttermilk is a perfect marinade for chicken breasts on the grill. Due to its acidic pH, it tenderizes and moisturizes simultaneously, which is important for grilled chicken breasts, which may be dry.

Buttermilk marinade for chicken is an economical recipe, and the spicing is flexible. You can keep it bland with just pepper or add flavor with the optional spices. I like to keep it light, then spice the chicken with a dry rub or seasonings.

👨‍🍳How to Cook Buttermilk Grilled Chicken Breasts—Step-by-Step Photo Instructions

trimmed chicken breasts on a white board.

1. Trim chicken breasts. Flatten to ¾ inch if thick.

adding buttermilk to bag with raw chicken.

2. Cover with buttermilk. Add olive oil, garlic powder, and other spices—refrigerate for 2-24 hours.

adding pepper to milk coverd chicken.

3. When ready to grill, remove the buttermilk from the bag, but do not rinse it off. Salt and pepper to taste and add other spices.

cleaning and oiling grill grates.

4. Preheat the grill to a grill surface temperature of about 450°.

Buttermilk chicken on the grill.

5. Grill over direct flip every 5 minutes until it reaches 165°—about 25-30 minutes.

For more details, keep reading. See the Recipe Card below for complete instructions and to print.

⏰How long to marinade chicken in buttermilk

Marinade for 2 to 8 hours. You will get some good effects in one hour, but in 2 hours, you will get most of the effects. Over 8 hours can lead to a mushy texture due to the acid breaking down the proteins, so I don't recommend overnight marinating with buttermilk.

⏲️How long to grill chicken breasts

Most chicken breasts will take 20-25 minutes on a grill with a surface temperature of 450°. Smaller breasts may take a bit less time, and larger ones may take longer. Remember never to cook on time alone.

You can cook faster at higher temperatures, but you will be more likely to dry the surface before the center is safe.

A chicken breast is done at 165° internal temperature in the thickest part of the breast. More will dry, and less is unsafe. An instant-read thermometer is required to get this right.

✔️Tips to get it right every time

When you pick your chicken, try to get about the same size and thickness.

If you have thick chicken breasts, flatten the breast a bit with a meat mallet or the bottom of a heavy pan. Try for about ¾ inch thick.

If the chicken was frozen, it must be thawed before proceeding.

🧂Spicing

Buttermilk chicken is very moist but bland if it is marinated only with garlic, salt, and pepper. Sometimes, that is what I want, but it is easy to add other seasonings to the marinade.

Add 1 tablespoon of Hidden Valley powdered ranch dressing seasoning to make a buttermilk ranch version.

Try a tablespoon of Italian seasoning or half a teaspoon of paprika, thyme, or rosemary. You can also heat it up with ¼ teaspoon of hot sauce or cayenne pepper.

I use this recipe with just garlic, salt, and pepper. Then, I will individualize the season for guests. I suggest an excellent BBQ spice rub—see BBQ Dry Rub or other spice mixes.

♨️How to oven bake

  1. Preheat the oven to 375°.
  2. Bake for about 30 minutes for smaller breasts, 35 for normal size, and 40 minutes for large.
  3. As always, you are cooking to a final internal temperature of 165 and never by just time.

♨️Grill set up

You can NOT cook chicken properly on high heat. You will dry the surface before the inside is even close to done or safe.

The grill surface temperature should be 450°. A little less is fine, and a smidge more is ok, but never over 500°. To get this right, you should use a grill surface thermometer. The hood thermometer is ALWAYS wrong. Please see my Grill Temperature on a Gas Grill for more discussion.

If you don't have a surface thermometer (you should), then medium to medium-high heat will be about 400°-450° on most gas grills.

You can use a charcoal grill but must be very careful about surface temperature. And, of course, your time will vary.

👨‍🍳Other marinade and grilled chicken recipes

For other chicken marinades, you will like to try Lemon Chicken Marinade and Garlic Lemon Marinaded Grilled Chicken Breasts.

Also, don't miss these other grilled chicken recipes, like Grilled Whole Chicken, Grilling Chicken Breasts, Grilled Chicken Legs, Grilled Chicken Tendersand Grilled Bone-in Chicken Thighs

🍴How to serve

Make a perfect chicken sandwich with these moist and tender breasts. Serve with a side salad and honey whole wheat rolls. Other good additions are Grilled Mixed Vegetables, Cornmeal Biscuits, and Single Serving Lemonade.

❄️Storage of leftovers

Leftovers may be stored in an airtight container in the refrigerator for 4 days or in the freezer for 4 months.

❓FAQs

What is the safe internal temperature for chicken breast?

According to the USDA, chicken and all poultry must reach an internal temperature of 165° in the thickest part of the chicken for safety.

You need to use an instant-read thermometer.

Can I use this marinade on other pieces of chicken?

It can be used on any chicken, even skin-on, such as drumsticks, thighs, or bone-in breasts.

Is buttermilk a good marinade for chicken?

Yes, it is one of the best. It imparts flavor, and because of its lower pH, it also breaks down proteins to tenderize and add moisture.

You can easily add other flavors to a buttermilk marinade or use it to add flavor, moisture, and tenderize, then add seasoning before cooking.

For food safety, buttermilk marinades should be refrigerated.

What is the difference between marinade and marinate?

The marinade is a noun and refers to the liquid. Marinate is a verb and is the act of using the marinade.

Food safety

Raw chicken and other poultry should be considered contaminated and handled with care. Wash your hands carefully before and after touching raw chicken.

We do not routinely wash raw chicken due to water splatter. See Should I Rinse Chicken? for more information.

You must cook chicken to an internal temperature of 165° for safety—see the USDA for more information. You need to check this with an instant-read thermometer.

Most recipes (including this one) include estimated cooking times. These are provided for planning purposes. You can not cook safely by time—you must use a thermometer.

Blue ribbon divider used for visual effect

📖The Recipe Card

Buttermilk chicken on a white plate.
Print Recipe Add to Collection Go to Collections
5 from 1 vote

Grilled Buttermilk Chicken

For tender and moist chicken, marinate the chicken in buttermilk. I use this simple marinade for the chicken to add flavor, but it also acts as a brine to add moisture to the best-grilled chicken breasts. Add seasoning to the marinade or season after the marinade. Makes the perfect moist and tender chicken sandwich.
Prep Time1 hour hr
Cook Time30 minutes mins
Total Time1 hour hr 30 minutes mins
Course: Grill, Main Course
Cuisine: American
Keyword: buttermilk marinade for chicken, grilled buttermik chicken, marinate chicken in buttermilk
Servings: 4
Calories: 243kcal
Author: Dan Mikesell AKA DrDan

Ingredients

  • 4 skinless boneless chicken breasts Trimmed
  • 1 cup buttermilk to cover
  • ¼ - ½ teaspoon garlic powder
  • 2 tablespoons olive oil
  • ½ teaspoon Kosher salt to taste
  • ½ teaspoon black pepper to taste
  • Additional seasoning of choice
US Customary - Convert to Metric

Instructions

  • Trim chicken breasts. Flatten to ¾ inch if thick.
    trimming chicken breasts on a white board
  • Place chicken in a 1-gallon zip lock in a large bowl. Cover with buttermilk and add ⅙ to ½ teaspoon of garlic powder. Another seasoning may also be added. Mix everything well, then refrigerate for 2 to 8 hours.
    adding buttermilk to bag with raw chicken
  • When ready to grill, remove the buttermilk from the bag, but do not rinse it. Salt and pepper to taste, and other seasonings, like a dry rub, may be added.
    adding pepper to milk coverd chicken
  • Preheat the grill to a grill surface temperature of about 450° medium-high on most grills—clean and oil grates.
    clean and oil grill crates
  • Grill over direct heat with the lid closed. Flip about every 5 minutes until an internal temperature of 165°—about 25-30 minutes, depending on the exact grill temperature and thickness of the chicken. Let rest for 5 minutes before serving. Oven instructions are in the post.
    Buttermilk chicken on the grill.
  • Let rest for 5 minutes before serving.
    Buttermilk chicken on a white plate.

Notes

Pro Tips

  1. Try to pick chicken breasts that are about the same size and thickness.
  2. If the thickness varies a lot, use a meat mallet or heavy pan to reach about ¾ inch thick.
  3. I recommend real buttermilk here. You can use a substitute but there is some extra taste with the real stuff.
  4. Other spices or spice mixes, such as ranch or Italian spice mix, may be added to the marinade. The post covers these options.
  5. Do not brine with salt before doing the buttermilk marinade/brine.
  6. Grill surface temperature is critical to getting this right. So use a grill surface thermometer. Also, use a meat thermometer to be sure the internal temperature is 165°.
  7. To bake, use a preheated 375° oven for about 20-25 minutes until the internal temperature reaches 165 °.

Nutrition

Calories: 243kcal | Carbohydrates: 1g | Protein: 57g | Fat: 3g | Saturated Fat: 0.1g | Polyunsaturated Fat: 0.01g | Monounsaturated Fat: 0.1g | Cholesterol: 164mg | Sodium: 736mg | Potassium: 40mg | Sugar: 1g | Vitamin A: 5IU | Vitamin C: 0.3mg | Calcium: 30mg | Iron: 0mg

Loosely based on a Martha Stewart buttermilk chicken recipe.

Editor's Note: Originally Published May 31, 2010. Updated with expanded options, refreshed photos, and a table of contents to help navigation.

Molly as a deck puppy.

How to Cook Pork Butt on a Gas Grill

Pulled Pork on a Gas Grill from 101 Cooking for Two

Cooking pork butt low and slow on a gas grill produces tender, smoky pulled pork without a dedicated smoker. Indirect heat holds the grill near 250°F, while wood chips add smoke and help develop a rich bark.

Clear but not dumbed down, this guide covers grill setup, smoke, timing, the stall, final temperature, and resting—everything you need to manage the long cook and pull the pork while it is at its best.

Quick Answer: How Long to Cook Pork Butt on a Gas Grill

Cook over indirect heat at 250°F.

  • Plan on 1½–2 hours per pound.
  • Cook to an internal temperature of 200°–205°F.
  • A 4-pound pork butt usually takes 6–8 hours.

Always cook to temperature, not time.

bbq sauce on pulled pork sandwich.
[feast_advanced_jump_to]

quote mark
Featured Comment by EllenJ:
⭐⭐⭐⭐⭐
"Great recipe! Really. There are tons of recipes out there for gas grilled smoked pulled pork, many good ones. But yours hits ALL the marks, including illustrations and customizing suggestions. Thanks!"

🤔 TL;DR — Recipe Summary

What: Tender, smoky pulled pork from a pork butt cooked low and slow over indirect heat on a gas grill.

Why: The fat renders and connective tissue softens, while the gas grill maintains steady heat without all-day charcoal management.

How: Apply dry rub, cook at 250°F, add smoke early, and continue to 200°–205°F. Rest, then pull while hot.

🐖 Ingredients

Pork butt with dry rub ingredients—labeled.
  • Pork butt: Also called Boston butt, this thick, well-marbled cut comes from the upper pork shoulder. The whole shoulder also includes the lower picnic shoulder and is much larger. Stores sometimes loosely label pork butt as “pork shoulder,” so check that you are buying the butt. Bone-in or boneless will work.
  • BBQ dry rub: Use your favorite store-bought rub or a homemade blend. The recipe card includes my basic dry rub.
  • Wood chips: Hickory produces a traditional barbecue smoke, while apple, cherry, or pecan are milder options. Choose one or combine them to suit your taste.

👨‍🍳 Quick Overview: How to Cook Pork Butt on a Gas Grill

1. Coat the pork butt generously with dry rub.

applying rub to pork butt.

2. Set up the gas grill for indirect cooking at 250°F with a drip pan under the meat. Once the temperature is steady, place the pork on the indirect side.

placing rubbed pork butt on the indirect side of the grill.

3. Add wood chips in a smoker box or foil pouch and smoke for 1–2 hours. Continue cooking until the internal temperature reaches 200°–205°F.

wood smoke from a gas grill set for indirect cooking.

4. Wrap tightly in two layers of foil, then in towels, and rest for 30 minutes to 2 hours.

grilled pork butt in foil.

5. Pull the pork apart with two forks while it is still hot. Serve as is or with your favorite BBQ sauce.

shredding pork butt with forks

📌 For complete step-by-step instructions, see the printable recipe card below or keep reading for tips.

♨️ Gas Grill Setup, Tools, and Wood Smoke

Set up the gas grill for indirect cooking at 250°F, with the pork over the unlit side and a drip pan underneath. Let the temperature stabilize before adding the meat. Start with a full propane tank and keep a backup available for the long cook.


Thermometers, drip pan, and foil

A remote thermometer is strongly recommended. Ideally, use one probe near the pork at grate level to monitor the grill temperature and another in the meat.

An instant-read thermometer is useful for confirming the final temperature in several places.

Use a drip pan beneath the pork to catch rendered fat and heavy-duty foil for wrapping during the rest.

✅ Pro Tip: Never place the drip pan directly on the burner tubes. Put it over the unlit side on the lava rocks or flavor bars, or on the cooking grate beneath the pork if necessary.


Adding wood smoke

Place dry wood chips in a built-in or cast-iron smoker box over an active burner. If you do not have one, seal the chips in a heavy-duty foil pouch, poke several holes in the top, and place it over the burner.

Do not soak the chips. One to two hours of smoke is usually enough.

📌 For detailed setup and troubleshooting, see How to Set Up Your Gas Grill for Smoking and Low-and-Slow Cooking

✅ Pro Tip: Most smoke flavor happens early in the cook, so make sure your chips are going while the meat is still cold.

⏲️ How Long to Cook Pork Butt on a Gas Grill

At 250°F over indirect heat, plan on approximately 1½–2 hours per pound. Bone-in pork butt may take somewhat longer. Use these times only for scheduling; the pork is done when it reaches 200°–205°F and is tender when probed.

Approximate cooking times:

  • 4 pounds: 6–8 hours
  • 5 pounds: 7½–10 hours
  • 6 pounds: 9–12 hours
  • 7 pounds: 10½–14 hours
  • 8 pounds: 12–16 hours

Thickness, bone-in versus boneless, grill-temperature fluctuations, weather, and the length of the stall can all affect cooking time.

When serving at a fixed time, finish early. Wrap the pork in foil and towels and hold it in an insulated cooler for up to four hours, keeping the internal temperature above 140°F.

🌡️ When Is Pork Butt Done?

Begin checking for doneness about three-quarters of the way through the estimated cooking time. Most pork butt is ready to pull at 200°–205°F. Check several areas while avoiding the bone and large pockets of fat.

Some folks swear by 208° or even 210°F, while others stop around 195°F. In my experience, anything under 200°F risks being too firm to shred easily, while cooking much beyond 205°F can cost moisture.

🤔 What Is the Stall?

At around 160°F, the pork’s internal temperature may stop rising for an hour or more. This is the stall. Moisture evaporating from the surface cools the meat nearly as fast as the grill heats it. The stall is usually more noticeable and prolonged with larger pork butts or whole briskets.

Wrapping tightly in foil or butcher paper—the “Texas Crutch”—can shorten the stall but may soften the bark. For an average pork butt, leave it unwrapped, keep the grill near 250°F, and be patient. The temperature will begin rising again.

🍽️ How to Serve Pulled Pork

Plan on about ⅓–½ pound of uncooked pork butt per serving. Use the higher amount for large appetites or when serving fewer side dishes.

Serve the pulled pork on hamburger buns with Memphis BBQ Sauce or your favorite barbecue sauce, or serve it without sauce on a plate. Classic sides include:

  • Cornbread
  • Potato salad
  • Cold Macaroni Salad
  • Broccoli Salad
  • Corn on the Cob

🔥 How to Reheat Pulled Pork and Keep It Warm

Oven method

  1. Spread the pulled pork in a rimmed baking sheet or shallow baking dish. A deeper casserole or cake pan will take longer.
  2. Sprinkle lightly with water or apple juice—just enough to moisten.
  3. Cover tightly with foil.
  4. Reheat in a 250°–300°F oven until the pork reaches 165°F, usually 30–45 minutes. Larger amounts and deeper pans will take longer.
  5. Serve immediately or keep covered at 140°F or higher.

Using a crock pot for serving

Do not reheat cold pulled pork in a crock pot. Reheat it to 165°F in the oven, microwave, or on the stovetop first.

Transfer the hot pork to a preheated crock pot no more than 75% full. Add a small amount of water or apple juice if needed, then use low or keep warm to maintain 140°F or higher. Stir occasionally for even heating.

✅ Pro Tip: For the best texture, store and reheat pulled pork without barbecue sauce mixed in. Add the sauce when serving.

❄️ How to Store and Freeze Pulled Pork

Shred the pork while it is still hot, then refrigerate it within two hours in shallow, airtight containers. Store in the refrigerator for 3–4 days or freeze for up to 4 months.

For freezing, divide the pork into meal-size portions and seal it flat in freezer bags. Flat packages freeze and thaw faster and take up less space. Do not leave the pork at room temperature to cool completely.

❓ FAQs

Should I inject pork butt?

Injection is optional. Pork butt already contains plenty of fat and connective tissue to remain moist during low-and-slow cooking. I prefer using a dry rub and letting the pork and wood smoke provide the flavor.

What should I do if I run out of propane?

Transfer the pork to a 250°F oven and continue cooking until it reaches 200°–205°F. It has already absorbed most of its smoke flavor early in the cook, so finishing in the oven will not hurt it.

Should I trim the fat cap or cook it facing up or down?

Trimming is optional, although removing an unusually thick fat cap reduces drippings and allows more surface contact with the dry rub. Fat side up or down makes little difference; tenderness comes from the internal fat and connective tissue, not the surface fat.

🐖 Pulled Pork Recipes

  • Oven Pulled Pork Butt
  • Crock Pot Pulled Pork
  • Pulled Pork Recipes Without a Smoker — Includes pork loin and pork tenderloin pulled pork recipes.

📖The Recipe Card

Pulled Pork on a Gas Grill from 101 Cooking for Two
Print Recipe Add to Collection Go to Collections
5 from 5 votes

Pulled Pork from Pork Butt on a Gas Grill

Pork butt (Boston butt) cooked low and slow over indirect heat on a gas grill with a dry rub and wood smoke until tender, smoky, and easy to pull.
Prep Time15 minutes mins
Cook Time8 hours hrs
Total Time8 hours hrs 15 minutes mins
Course: Main Course
Cuisine: American
Keyword: Boston Butt on Gas Grill, How to cook a Boston butt on gas grill, Pork Butt on Gas Grill
Servings: 8 servings
Calories: 356.3kcal
Author: Dan Mikesell AKA DrDan

Ingredients

  • 4–6 pounds pork butt (Boston butt), boneless or bone-in boneless or bone-in
  • ¾ cup BBQ dry rub, or the homemade rub below
  • wood chips, as needed for 1–2 hours of smoke type of your choice

Homemade pork butt dry rub

  • ½ cup brown sugar
  • 2 tablespoons kosher salt
  • 1 tablespoon chili powder
  • 1 teaspoon black pepper
  • 1 teaspoon onion powder
  • 1 teaspoon garlic powder
US Customary - Convert to Metric

Instructions

  • Mix the dry rub, if needed, and coat the pork butt generously. If time allows, wrap and refrigerate for at least 1 hour or overnight.
    applying rub to pork butt.
  • Set up the gas grill for indirect cooking at 250°F with a drip pan beneath the pork. Let the grill temperature stabilize
    placing rubbed pork butt on the indirect side of the grill.
  • Place the pork butt on the indirect side. Add dry wood chips to a smoker box or foil pouch over an active burner and start the smoke.
    wood chips in smoker box.
  • Smoke for 1–2 hours. Continue cooking over indirect heat at approximately 250°F, keeping the lid closed as much as possible.
    Cook for about 1½–2 hours per pound until the internal temperature reaches 200°–205°F. Check several areas, avoiding the bone and large pockets of fat.
    A smoking grill.
  • Remove the pork from the grill and wrap tightly in two layers of heavy-duty foil, then in towels. Rest for 30 minutes to 2 hours. To hold longer, place the wrapped pork in an insulated cooler for up to 4 hours, keeping it above 140°F.
    grilled pork butt in foil.
  • Pull the pork apart with two forks while it is still hot. Serve as is or with barbecue sauce.
    shredding pork butt with forks-2

Video

Notes

Pro Notes:

  1. Monitor both the grill temperature at grate level and the internal temperature of the pork. A remote two-probe thermometer is ideal.
  2. Cooking time is approximately 1½–2 hours per pound. Bone-in pork butt may take somewhat longer.
  3. Start with a full propane tank and keep a backup available. If you run out, transfer the pork to a 250°F oven and finish cooking.
  4. Do not soak the wood chips. Most smoke flavor is added early, and 1–2 hours of smoke is usually enough.
  5. Keep the grill lid closed. Every unnecessary peek drops the temperature and extends the cooking time.
  6. Bone-in or boneless will work. Fat side up or down makes little difference.
  7. Yellow mustard may be used as a binder before applying the rub, but it is optional.
  8. Pull the pork before it cools. Refrigerate leftovers for 3–4 days or freeze for up to 4 months.
  9. Reheating and serving instructions are included in the full post.
  10.  
Nutrition assumes all of the dry rub is consumed; actual sodium will usually be lower.

Nutrition

Calories: 356.3kcal | Carbohydrates: 14.4g | Protein: 42.7g | Fat: 13.1g | Saturated Fat: 4.6g | Polyunsaturated Fat: 1.5g | Monounsaturated Fat: 5.7g | Trans Fat: 0.1g | Cholesterol: 136.1mg | Sodium: 1912.1mg | Potassium: 814.8mg | Fiber: 0.4g | Sugar: 13.4g | Vitamin A: 297.9IU | Vitamin C: 0.01mg | Calcium: 48.9mg | Iron: 3.1mg

Editor's Note: Originally Posted July 15, 2012. Photos have been re-edited, information added, and editing has been done to help navigation.

Molly in a flag bandan with strawberry

Fourth of July Recipes for Smaller Celebrations

Graphic collage for Fouth of July. Has copyrighted material.

The big two-five-zero is coming up fast. This year's Fourth of July is especially special. So it’s time to fire up the grill, gather your people, and enjoy some truly great food.

A friendly nod to our wonderful Canadian neighbors as they celebrate Canada Day on July 1. While not technically their “Independence Day,” it’s close enough to toast with a burger.

Graphic collage for the Fourth of July. Has copyrighted material.
Contains an image licensed from Depositphotos on June 29, 2022.© ersanjit.
[feast_advanced_jump_to]

While you’re enjoying the national party, take a moment to appreciate the freedoms we enjoy—and the folks who help preserve them. Cheers to our military, first responders, and everyone keeping us safe.

This collection features easy, crowd-pleasing recipes—most scaled for smaller households, but ready to double if you're hosting more guests.

🥩 Grilled Steak Recipes

These beginner-friendly grilling options are stress-free. Just season, grill, and eat like a pro.

Grilled Filet Mignon (Best Way on Any Grill)
The best way to grill filet mignon with simple temps, timing, and doneness guides. Juicy, tender steak on a gas or any grill in about 10 minutes.
Grilled Filet Mignon
Grilled filet mignon with asparagus.
Grilled New York Strip Steak
Grill New York strip steak over high heat in just minutes for a delicious crust and a medium-rare center, with easy cooking times and temperatures for your preferred doneness.
Grilled NY Strip Steaks
A strip steak with grill marks on a gray plate.

🥩 Inside Steak Recipes

No grill, no problem! Move it inside.

Filet Mignon in the Oven (Pan-Seared and Oven-Baked Method)
Juicy filet mignon cooked in the oven with a pan-sear for a perfect crust and tender center. Ready in about 20 minutes with simple steps.
Sear and Bake NY Strip Steak
seared filet on a white plate with potatoes
Pan Seared New York Strip Steak (Oven Finish Method)
Pan sear New York strip steaks for a browned crust, then finish in the oven for juicy, tender steakhouse results.
Sear and Bake Filet Midgnon
NY strip steak cut on an orange plate

🐄 Burgers and Kabobs

These classic recipes deliver big flavor and are easy to scale up or down. Perfect for any size party.

How to Grill Hamburgers (Juicy, Easy Method)
Grill juicy hamburgers with a simple method, a hot grill, and a 160°F finish. Reliable cook times and easy steps for perfect burgers every time.
Grilling Hamburgers
burger on a bun
Easy 3-Ingredient Beef Kabob Marinade
This simple beef kabob marinade uses Worcestershire sauce, soy sauce, and garlic powder. Marinate for 30 minutes for great flavor or 1–4 hours to help tenderize.
Marinaded Sirloin Beef Kabobs
pile of beef kabobs on a plate.
Buttermilk Ranch Chicken Kabobs
Delicious Buttermilk Ranch Chicken Kabobs with tender and favorable chicken will make picky eaters happy. The easy buttermilk ranch marinade tenderizes and adds exceptional flavor.
Ranch Chicken Kabobs
chicken kabobs cooked on plate
Molly and Lilly in flag bandanas

🐓 Chicken Recipes

From drumsticks to tenders, chicken is always a reliable choice. These chicken recipes are simple, delicious, and ready to serve two or ten.

Grilled Chicken Legs (Easy, Crispy & Juicy Drumsticks)
Juicy, crispy grilled chicken legs made simple — season and cook over medium heat on a gas grill about 35 minutes for perfect drumsticks.
Grilled Chicken Legs
chicken drumsticks cooking on the grill
Baked Chicken Legs (Drumsticks) – Crispy & Juicy
Dry, season, and bake hot for crispy skin and juicy meat in about 35 minutes. Optional rack or flip once; finish to 185°–195°F for the best texture.
Baked Chicken Legs
Baked chicken legs on a white plate.
Crispy Oven Baked Chicken Thighs
This easy recipe makes crispy oven baked chicken thighs with golden skin and tender, juicy meat. Bone-in chicken thighs are ready in about 35 minutes.
Baked Chicken Thighs
Large plate of cooked chicken thighs.
Grilled Chicken Breasts on a Gas Grill
Juicy grilled chicken breasts with simple seasoning and easy step-by-step instructions. Grill at 450°F for about 15–20 minutes to 165°F internal temperature.
Grilling Chicken Breasts
Two grilled chicken breasts on a blue plate.
Grilled Chicken Tenders
Juicy grilled chicken tenders cooked in about 10 minutes with simple seasoning. Includes prep, grill time, temperatures, and easy step-by-step instructions.
Grilled Chicken Tenders
Grilled chicken tenders on a white plate

🐖 Pork Recipes

Pork belongs at the party, too. Toss on chops, ribs, or that crowd-pleasing BBQ pork tenderloin. Big flavor without the big effort.

Grilled Pork Chops
Easy grilled pork chops with simple seasoning and optional brine. Grill 1-inch chops over medium-high heat to 145°F for perfect results.
How to Grill Pork Chops
Two grilled pork chops on an orange plate.
How to Grill Pork Tenderloin on a Gas Grill
Grill pork tenderloin on a gas grill in about 25 minutes at 450°F. This easy beginner method delivers tender, juicy pork with simple prep and no fancy setup.
Grilling Pork Tenderloin
pork tenderloin on blue platter
Pan Seared Oven Roasted Pork Chops
Learn to cook the best baked pork chops that are tender and moist. With a little searing and minimal time, they are juicy and favorable. It doesn’t get better or easier than this.
Sear and Baked Pork Tenderloin
Pan Seared Oven Roasted Pork Chops from 101 Cooking for Two
How to Cook Baby Back Ribs on a Gas Grill
Learn how to cook tender baby back ribs on a gas grill with a simple BBQ dry rub and optional wood smoke. Easy low-and-slow BBQ ribs, no smoker needed.
Grilled Baby Back Ribs
grilled Baby Back Ribs on black cutting board
Boneless Pork Ribs in Oven – Pan-Seared and Baked Recipe
These boneless country-style pork ribs are pan-seared, then baked in the oven for juicy, tender results. A fast and easy 30-minute pork rib recipe.
30-Minute Boneless Country Style Ribs
BBQ country style boneless pork ribs on plate
Molly and Lilly in flag bandanas with a ball

🥗 Easy Side Dishes

The sides will turn the main dish into a full meal. These easy side dishes add color, crunch, and comfort to your plate.

Microwave Corn on the Cob in the Husk (Easy, No Shucking Needed)
Microwave corn on the cob in the husk for tender sweet corn in just minutes. No shucking, boiling, or mess—just an easy foolproof method.
Microwaving Corn on the Cob
corn on the cob in serving trays B
Single Serving Lemonade Recipe
This Single-Serving Lemonade Recipe with lemon juice and sugar is easy to make in only 2 minutes. Use a sugar substitute like Splenda®️ to make sugar-free lemonade. This recipe is about the ingredients lemonade ratio, so you can make a glass or a gallon. It's perfect for one, two, or a crowd.
Lemonade by the Glass
glass of lemonade with lemon juice
Broccoli Slaw Recipe
This easy broccoli slaw recipe combines crunchy vegetables, almonds, sunflower seeds, and crispy rice or ramen noodles with a tangy homemade vinaigrette. A quick, make-ahead salad for picnics, potlucks, and holiday meals.
How to make Broccoil Slaw Salad
broccoli slaw salad in a metal bowl
Bacon and Egg Spinach Salad with Tangy Ketchup Dressing
This old-fashioned bacon and egg spinach salad is tossed with a sweet, tangy homemade ketchup dressing. A quick spinach salad dressing recipe that's perfect for lunches, potlucks, or summer meals.
Simple Spinich Salad with Bacon
Spinach salad with bacon and dressing.
Easy Small Batch Cold Macaroni Salad (Creamy & Classic)
This small batch cold macaroni salad is creamy, classic, and easy to adjust for two or more. Fresh veggies, a tangy dressing, and tender pasta make it better than deli.
Easy Macaroni Salad
Small batch cold macaroni salad with creamy dressing on a white plate.
Broccoli Raisin Salad with Bacon (Small Batch or Crowd-Ready)
Fresh broccoli raisin salad with bacon, cheddar, and creamy dressing. Easy to make for two or scale up for family or a crowd.
Making Broccoli Salad
Broccoli Raisin Salad with Bacon on a white Plate.
Grilled Mixed Vegetables
Delicious Grilled Mixed Vegetables cooked on the grill compliments any meal. You can easily add them to your grill while you cook dinner to complete your meal.
Grilling Mixed Vegetables
Grilled Mixed Vegetables in a white bowl

🍖 Main Dishes for a Crowd

These bigger recipes are still easy and delicious, just more of everything.

Brisket on a Gas Grill (Low and Slow BBQ)

Make tender brisket on a gas grill using indirect heat, wood smoke, and a simple dry rub. Beginner-friendly, low-and-slow BBQ beef brisket with great bark.
Grilled Brisket
Cooked brisket on a gray board
How to Cook Brisket in the Oven (Fall-Apart Tender BBQ)
Cook fall-apart tender BBQ brisket in the oven with an easy low-and-slow method. Works with any size or cut, with no smoker needed.
Oven Baked BBQ Brisket
Cutting the brisket.
How to Cook Pork Butt in the Oven for Pulled Pork
Make juicy BBQ pulled pork in your oven. Cook pork butt at 250°F until fall-apart tender, with crispy bark and rich, smoky flavor.
Oven Baked Pulled Pork
pulled pork sandwich with BBQ sauce
Pulled Pork Loin in the Oven
Make tender BBQ pulled pork from pork loin in the oven with a simple braising method. The pork loin shreds easily for juicy BBQ sandwiches or feeding a crowd.
Pulled Pork Loin in the Oven
Pulled pork loin on a bun with BBQ sauce.
Chicken for a Crowd
It is easier than you think to feed a crowd fresh baked chicken. From a small party to a large group of a hundred or more, this recipe for baked chicken is perfect for any size crowd. Start with skin-on chicken breasts and drumsticks. Trim to finger food size, season to taste, and bake. Also, learn to keep your party safe with the food safety tips.
Chicken for a Crowd
Pile of cooked chicken ready for a large party.
Taco Meat Recipe
Easy, from-scratch spicy taco meat with tomato sauce and pantry spices – no packet. Perfect for nachos, tacos, and bowls.
Homemade Taco Meat Recipe
Three hard shell spicy tacos on a white plate.
Molly in a flag bandana

🍓 Desserts and Summer Treats

No party is complete without something sweet. From classic fruit desserts to refreshing treats, these desserts finish the meal with a smile.

Strawberry Pie with Jello (Easy and Reliable Fresh Recipe)
This strawberry pie with Jello is made with fresh berries, a simple homemade glaze, and a ready-made crust. An easy, reliable dessert that’s been a family favorite for nearly 50 years.
Strawberry Jello Pie
Whole fresh strawberry jello pie ready to eat.
Small Batch Apple Crisp (Easy Recipe for Two or More)
Make an easy small batch apple crisp with only 2 or 3 apples and a buttery crumb topping. A perfect old-fashioned dessert for two or more.
Easy Apple Crisp
apple crisp on a white plate.
New York Cheesecake Bars
Rich and creamy New York Cheesecake Bars with a buttery graham cracker crust. This easy small-batch recipe is baked in an 8X8 pan and easily doubles to a 9X13 pan.
Small Batch Cheesecake Bars
Cheesecake bars on a blue plate.
Grilled Pineapple Slices with Brown Sugar Cinnamon Glaze
Glazed grilled pineapple slices are an easy delicious summer side dish. With a buttery caramelized brown sugar glaze, it also makes a great dessert when combined with ice cream—Ready in less than 15 minutes.
Grilling Glazed Pineapple
close up of Grilled Pineacpple with grill marks on a blue plate
Chocolate Chip Cheesecake and Cheesecake Bars
This easy Chocolate Chip Cheesecake recipe can be made as a whole cheesecake or, as we prefer, impressive Chocolate Chip Cheesecake Bars. It is simple and almost foolproof, using cream cheese, sweetened condensed milk, chocolate chips, and an Oreo crust. Please try our go-to recipe for parties or take-a-dish occasions.
Chocolate Chip Cheesecake and Cheesecake Bars
Chocolate chip cheesecake bars on a platter square view.
Blueberry Cream Cheese Bars with Shortbread Crust
Rich blueberry cream cheese bars baked on a buttery shortbread crust with a crumble top. Cheesecake-style flavor without a water bath or springform pan.
Blueberry Cream Cheese Bars
A pile of blueberry cream cheese bars with crumble topping.

Food Safety

Let’s keep the fun going and the ER visits at zero. Food-borne illness is preventable—brush up on a few simple rules from the USDA’s food safety guide.

Lilly in a flag bandana

And don’t forget the party animals. Try a homemade treat or two for your four-legged guests with Low Calorie Dog Treats.

Stay safe, stay cool, and enjoy the holiday.

From DrDan

Editor's Note: Originally Published July 1, 2017. Updated yearly for republication.

Easy Macaroni Salad (Classic Recipe)

Small batch cold macaroni salad with creamy dressing on a white plate.

This small batch macaroni salad is creamy, classic, and served cold—easy to adjust for two or more. No mountain of leftovers here, just the right amount for a meal or a couple of sides.

Fresh veggies, a tangy dressing, and tender pasta make it taste way better than deli versions. Cook the pasta, chop a few veggies, mix it up, and chill. Backyard food doesn’t get easier.

Small batch cold macaroni salad with creamy dressing on a white plate.
[feast_advanced_jump_to]

quote mark
Featured Comment by Helene :
"This is a great recipe. I made it once exactly as written and it was good. "
⭐⭐⭐⭐⭐

💛 Why You’ll Love This Recipe

  • Way better than deli salad: Fresher, creamier, and actually tastes like something you want to eat.
  • Classic and flexible: A basic cold macaroni salad that’s easy to customize—make it your way with add-ins or keep it traditional.
  • Small batch, big flavor: Makes just enough for two, but easy to scale up or down—no mountain of leftovers.
  • Simple ingredients: Nothing fancy—just elbow macaroni, a few chopped veggies, and pantry staples.
  • Quick and make-ahead friendly: Ready in about 30 minutes and even better after chilling.

🥣Ingredient

Ingredients for classic macaroni salad—labeled.
  • Pasta: Usually elbow macaroni
  • Cheese: Typically cheddar
  • Vegetables: Red onion, celery, bell pepper
  • Dressing: Mayonnaise, milk, vinegar, yellow mustard, sugar, salt, and black pepper
  • Optional Ingredients: Discussed below

👨‍🍳Quick Overview: Making Macaroni Salad

1. Cook the pasta

Boil the pasta according to package directions. Drain and let it cool to room temperature.

Rrinsing cooked pasta under running water.

✅Pro Tip: Don’t overcook—mushy pasta doesn’t hold up well in creamy dressing.

2. Mix the dressing

Mix the mayonnaise, milk, vinegar, yellow mustard, sugar, salt, and black pepper until smooth. Taste and adjust.

Mixing dressing in a metal bowl.

3. Chop the vegetables

Finely dice the red onion, celery, and bell pepper (red or green). Add any extras now if you’re using them.

Chopped vegetables on black board.

4. Mix and chill

Combine the cooled pasta with the dressing, chopped veggies, and shredded cheddar. Refrigerate for at least 2 hours.

Mixing macaroni salad in a metal bowl.

✅Pro Tip: It’s even better the next day—let those flavors mingle.

👇For complete step-by-step instructions, scroll down to the printable recipe card or keep reading for tips, flavor options, and serving ideas.

🤔 Optional Ingredients and Variations

Add protein: Shredded chicken, ham, or tuna can turn this into a full meal—great for a light summer lunch.

Cheese swaps: Cheddar is classic—mild or sharp, shredded or cubed. Try Colby Jack or pepper jack for a little kick.

✅Pro Tip: Add chopped hard-boiled eggs to make your cold macaroni salad more filling—rich, protein-packed, and perfect for lunch.

Pasta: Elbow macaroni is traditional, but any short pasta like shells or rotini works. Cook just until done—don’t overcook. Rinse briefly after draining to prevent sticking.

Dressing tweaks: Use regular or low-fat mayo, or swap in plain Greek yogurt for a lighter option. Apple cider vinegar adds a little tang, but white vinegar works fine too

Veggie and flavor add-ins: Mix it up with chopped dill or sweet pickles (or a spoonful of relish), shredded carrots, pimentos, peas, or even a splash of pickle juice for extra tang.

🍽️ How Much per Person

This recipe, as written, makes about 3–4 cups of macaroni salad.

  • As a side dish: Plan on ½ to ¾ cup per person
  • As a main dish: Plan on about 1 cup per person

↕️ Adjusting the Recipe Amount

This small-batch recipe makes about 3–4 cups of finished salad. You can easily scale it to fit what you need:

  • Half batch: Use 1 cup dry pasta for macaroni salad for two
  • Double batch: Use 4 cups dry pasta for a larger crowd
  • Triple batch: Scale all ingredients evenly—same method, bigger bowl

The recipe card serving slider will adjust the ingredient amounts for you automatically. Just remember the instructions and cooking times stay the same—only the quantities change.

🥣 Cold Macaroni Salad & More Summer Favorites

Cold macaroni salad is a summer must—creamy, tangy, and best served chilled. The deli version? Usually a little stale and a lot mundane. This small-batch version is fresh, flavorful, and made to be eaten—not forgotten in the back of the fridge. Scale it up or down to make just what you need.

If you love easy cold salads for picnics, potlucks, or light lunches, try a few of these favorites next:

  • Basic Chicken Salad – Simple and satisfying.
  • Chipotle Chicken Salad – A smoky twist on the classic.
  • Waldorf Chicken Salad – Crunchy, fruity, and creamy.
  • Broccoli Salad with Bacon – Always a crowd-pleaser.

Cold macaroni salad keeps well and travels easily—perfect for summer eating.

❄️ Making Ahead & Storing Leftovers

Cold macaroni salad stores well and actually improves as it chills. You can make it a day ahead and let the flavors blend.

  • Storage: Keep covered in the fridge for 3–4 days.
  • Freezing: Not recommended—the dressing breaks and the texture gets weird.
  • Leftover veggies: Extra chopped onion or bell pepper? Freeze them flat in a zip-top bag for up to 3 months.

❓FAQs

How many cups of macaroni in a pound?

One pound of dry pasta is about 4 cups, depending on the shape. When cooked, 1 cup of dry pasta yields 1½ to 2 cups.

Can I serve cold macaroni salad right away?

You can, but it’s better after chilling for a couple of hours. The flavors blend, and the texture improves. In a pinch, chill it in the freezer for 15–20 minutes—just don’t forget it.

Do you eat macaroni salad hot or cold?

Macaroni salad is always served cold. This small batch version tastes best after chilling, and the flavors improve as it rests in the fridge.

⚕️Food Safety Tips

If not handled correctly, cold dishes can lead to food poisoning—so follow basic food safety rules:

  • If the temp is under 90°F, limit to 2 hours out
  • If the temp is over 90°F, cut that to 1 hour
  • Or keep it chilled at 40°F or below

Warm-weather parties are prime time for food safety slip-ups, especially with leftovers. Plan ahead and keep it safe. Check out more tips at the USDA Food Safety recommendations.

📖The Recipe Card

Small batch cold macaroni salad with creamy dressing on a white plate.
Print Recipe Add to Collection Go to Collections
5 from 3 votes

Easy Small Batch Cold Macaroni Salad (Creamy & Classic)

This small batch cold macaroni salad is creamy, classic, and easy to adjust for two or more. Fresh veggies, a tangy dressing, and tender pasta make it better than deli.
Prep Time10 minutes mins
Cook Time10 minutes mins
Total Time20 minutes mins
Course: Salad
Cuisine: American
Keyword: classic macaroni salad, Cold macaroni salad, Easy macaroni salad
Servings: 4 servings (1 cup each)
Calories: 541.6kcal
Author: Dan Mikesell AKA DrDan

Ingredients

  • 2 cups macaroni or other pasta 8 oz.
  • 1 cup mayonnaise regular or low-fat
  • 3 tablespoons milk
  • 2 tablespoons apple cider vinegar
  • 1 tablespoon mustard
  • 1–2 teaspoon sugar to taste
  • ½ teaspoon salt
  • ¼ teaspoon pepper
  • 1 red onion small or ½ medium
  • 2 ribs celery
  • 1 bell pepper red or green
  • 1 cup cheddar cheese shredded or cubed
US Customary - Convert to Metric

Instructions

Cook the pasta

  • Cook 2 cups of pasta according to package directions. A one-pound box is about 4 cups dry. Drain well, rinse to prevent sticking, and let cool.
    rinsing cooked pasta under running water-2

Mix the dressing

  • In a large bowl, whisk together 1 cup mayonnaise (regular or low-fat), 3 tablespoons milk, 2 tablespoons vinegar, 1 tablespoon mustard, 1–2 teaspoons sugar to taste, ½ teaspoon salt, and ¼ teaspoon pepper. Taste and adjust seasoning.
    mixing dressing in a metal bowl

Chop the vegetables

  • Finely chop 1 small or ½ medium red onion, 2 ribs of celery, and 1 pepper (red or green). (See post for other optional mix-ins.)
    chopped vegetables on black board

Mix and chill

  • Combine the pasta, dressing, chopped veggies, and cheddar cheese. Mix well and refrigerate for at least a few hours to blend flavors.
    mixing macaroni salad in metal bowl

Notes

Pro Tips

  1. This is an easy recipe to scale up or down to suit your needs.
  2. Use low-fat mayonnaise if preferred.
  3. A 1-pound box of dry pasta equals about 4 cups.
  4. This cold macaroni salad tastes best after chilling a few hours or overnight.
  5. Keeps well in the fridge for 3–4 days. Do not freeze.
  6. For food safety tips, see the USDA Food Safety recommendations.
  7. Optional mix-ins include chopped hard-boiled eggs, pickles or relish, shredded carrots, pimentos, peas, or protein like chicken, ham, or tuna. More discussion in the post.

Nutrition

Calories: 541.6kcal | Carbohydrates: 65g | Protein: 17.2g | Fat: 23.4g | Saturated Fat: 7.6g | Polyunsaturated Fat: 8.1g | Monounsaturated Fat: 5.1g | Trans Fat: 0.03g | Cholesterol: 37.5mg | Sodium: 1.007mg | Potassium: 381.8mg | Fiber: 3.8g | Sugar: 8.3g | Vitamin A: 1.37IU | Vitamin C: 40.8mg | Calcium: 252.7mg | Iron: 1.3mg
Blue ribbon divider used for visual effect

Originally Published May 25, 2014. Updated with expanded options, refreshed photos, and a table of contents to help navigation.

dogs looking for squirrals.

Broccoli Raisin Salad with Bacon

Broccoli Raisin Salad with Bacon on a white Plate.

Broccoli raisin salad with bacon is a classic side dish that’s easy to make and full of flavor. It’s loaded with crisp, fresh broccoli, bacon, cheddar cheese, raisins, and a creamy dressing for the perfect mix of sweet and salty.

Make a small batch for two or easily scale it up for the family or a crowd. This homemade broccoli salad is fresher, quick to make, and easy to customize.

Broccoli Raisin Salad with Bacon on a white Plate.
[feast_advanced_jump_to]

quote mark
Featured Comment by Emily :
"So minimal but so awesome!"

🤔 TL;DR — Recipe Summary

🥦 What: Fresh, crisp broccoli raisin salad with bacon, cheddar, and a creamy dressing.

❤️ Why: Starts as a small batch with flexible ingredients and easily scales up for crowds or family meals.

⏱️ How: Mix the dressing, combine with the salad ingredients, and chill before serving.

🥦 Ingredients

  • Fresh broccoli – One medium head (about 2–3 cups chopped). Florets and peeled stems both work.
  • Raisins – Adds sweetness and chew.
  • Sharp cheddar cheese – Cubed or shredded.
  • Bacon – Cooked until crispy and crumbled.
  • Red onion – Adds crunch and a little bite.
  • Dressing – Made with:
    • Mayonnaise
    • White vinegar
    • Sugar
    • Salt and pepper

👉 This salad can easily be adapted for keto, vegetarian, or even vegan diets—it’s flexible and up to you.

✅ Pro Tip: Use the freshest broccoli you can find. Older broccoli turns dry and bitter fast—it's the number one reason store-bought salads taste flat and dry. Look for firm stalks, tight florets, and no yellowing.

👨‍🍳 Quick Overview: Making Broccoli Raisin Salad

1. Prep ingredients

Start by washing and trimming the broccoli florets and stems. Also, chop the onion and cheese if needed.

Trimming broccoli on a black board.

✅ Pro Tip: Trim the broccoli to fork-sized pieces—this is a salad, not a knife-and-fork situation.

If using bacon, chop and fry until crispy and drain.

cooking cut bacon in skillet.

2. Combine

Mix the dressing first, then stir in the bacon, raisins, cheese, and onion. Add the broccoli last.

ingredients in a large bowl.

3. Refrigerate

Refrigerate for at least an hour to allow the flavors to blend before serving.

Mixing broccoli raisin salad in a bowl.

👇For complete step-by-step instructions, scroll down to the printable recipe card or keep reading for tips, flavor options, and serving ideas.

🤔 Optional Ingredients to Make It Your Way

  • Broccoli swap – Replace half the broccoli with chopped fresh cauliflower for a broccoli-cauliflower combo.
  • No bacon? – Leave it out or try chopped smoked almonds for crunch and flavor.
  • Raisin alternatives – Use dried cranberries instead for a tangier twist.
  • Other veggies – Add ½ cup of cherry tomatoes, shredded carrots, diced celery, or chopped cauliflower.
  • Nuts & seeds – Toasted sunflower seeds, almonds, walnuts, or pecans all add crunch and flavor.
  • Mayo swap – Use low-fat Greek yogurt for a lighter dressing.

👍 Tips to Make It Right Every Time

  • Use the freshest broccoli – Older broccoli gets dry and bitter, like the deli version nobody really wants. Look for firm stalks, tight florets, and bright green color.
  • Measure by volume, not guesswork – One medium head yields about 2–3 cups of florets; a large one gives 3–4 cups.
  • Dressing tips – Use good-quality mayo (or Greek yogurt if you prefer). Start with the base and adjust sugar or vinegar to make it sweeter or tangier—your call.
  • Cheese choices – Sharp cheddar is classic, cubed or shredded. Feta works, too—or skip it entirely.
  • Bacon made easy – Chop it before frying to save time, or cook full slices and crumble them after.

↕️ Making Broccoli Salad for Two or a Crowd

This broccoli raisin salad recipe makes about four servings—just right for one medium head of broccoli with no waste.

  • Cooking for two? Decrease the number of servings in the recipe card to cut the ingredient amounts in half.
  • Feeding a crowd? Increase the servings the same way.

✅ Pro Tip: When adjusting the recipe card, only the ingredient list changes automatically—not the instructions. So use the new amounts, but follow the same steps.

Got leftover broccoli? See the FAQs below for how to freeze it for later.

🕒 Make Ahead and Serving Suggestions

You can prepare broccoli raisin salad ahead of time and store it in an airtight container in the refrigerator. It's best the day it's made, but it's still good the next day. After two days, it starts to lose its crunch and begins to taste more like the deli version.

This salad isn’t just for picnics. It’s a great side dish year-round—serve it with grilled chicken breasts or hamburgers on the grill, or as part of a brunch spread alongside Waldorf Chicken Salad or Chicken Salad Sandwiches. Homemade always stands out next to the usual coleslaw and potato salad.

❄️ How to Store Broccoli Raisin Salad

Store leftovers in an airtight container in the refrigerator for up to 4 days.
For the best texture and flavor, try to eat it within 2 days.

❌ Do not freeze the prepared salad—it turns mushy.

🥗 More Summer Salad Recipes

If you're looking for more easy side salads, try one of these favorites:

Cold Macaroni Salad – Creamy and classic, just the right size.
Broccoli Slaw – Crunchy, tangy, and ready in minutes.
Caprese Pasta Salad – Fresh mozzarella, tomatoes, and basil in one simple dish.
Simple Spinach Salad with Bacon – Quick, flavorful, and topped with a warm bacon dressing.

❓FAQs

What can I use instead of raisins in broccoli salad?

Dried cranberries are the most common swap, but cherries or even chopped dates add a tangy-sweet bite.

How to make broccoli raisin salad healthier.

Use low-fat mayonnaise or plain Greek yogurt in the dressing. You can also swap the bacon for diced ham or Canadian bacon.

Can I freeze fresh broccoli?

Yes. Wash and trim the broccoli, then spread it in a single layer on a baking sheet. Freeze for 2–3 hours until solid, then transfer to zip-top bags or airtight containers. It will keep for up to 2 months.

Should I blanch the broccoli first?

Nope. Raw broccoli is the way to go—it stays crisp and gives the salad its signature crunch. Blanching isn’t needed for this salad or for freezing.

📖The Recipe Card

Broccoli Raisin Salad with Bacon on a white Plate.
Print Recipe Add to Collection Go to Collections

Broccoli Raisin Salad with Bacon (Small Batch or Crowd-Ready)

Fresh broccoli raisin salad with bacon, cheddar, and creamy dressing. Easy to make for two or scale up for family or a crowd.
Prep Time15 minutes mins
Cook Time5 minutes mins
Total Time20 minutes mins
Course: Salad
Cuisine: American
Keyword: Broccoli Salad, broccoli salad for two, broccoli salad with bacon and raisins
Servings: 4
Calories: 265.2kcal
Author: Dan Mikesell AKA DrDan

Ingredients

  • 2 to 3 cups fresh broccoli one medium head
  • ¼ cup raisins
  • 2 strips bacon
  • ¼ cup sharp cheddar small cubes
  • ½ medium red onion chopped

Broccili Salad Dressing

  • ½ cup mayonnaise
  • ¼ teaspoon salt
  • ⅛ teaspoon pepper
  • ½ to 1 tablespoon sugar
  • ½ to 1 tablespoon white vinegar or apple cider vinegar

Optional Add-ins

  • ¼ cup cherry tomatoes, shredded carrots, or celery halves
  • ¼ cup sunflower seeds, almonds, pecans, or walnuts
  • ¼ cup dried cranberries
US Customary - Convert to Metric

Instructions

Prep ingredients

  • Wash and trim the broccoli. Cut florets into small, fork-friendly pieces. Peel the tough outer layer from the broccoli stems and dice into ½-inch cubes.
    trimming broccoli on a black board
  • Chop the red onion and cheese, if needed.
    cheese chopped in cubes on white board
  • Cut 3–4 strips of bacon and cook over medium-high heat until crispy, about 5 minutes. Drain on a paper towel.
    cooking cut bacon in skillet

Combine

  • In a small bowl, combine ½ cup mayonnaise, ¼ teaspoon salt, ⅛ teaspoon pepper, ½ to 1 tablespoon white or apple cider vinegar, and ½ to 1 tablespoon sugar. Vary the sugar and vinegar to your taste. Mix in ¼ cup (½ medium) chopped red onion, 4 oz. sharp cheddar in small cubes, ¼ cup of raisins, and any optional ingredients.
    ingredients in a large bowl
  • Add the chopped broccoli and mix until evenly coated.
    mixing broccoli salad in bowl

Refrigerate

  • Cover and refrigerate for at least a few hours before serving to allow flavors to blend.
    bacon broccoli salad on a plate

Notes

Pro Tips:

  1. Use **the freshest broccoli** for the best crunch and flavor.
  2. Trim broccoli into fork-sized pieces**—this is a salad, not a knife-and-fork situation.
  3. Low-fat mayonnaise will reduce calories by almost half.
  4. A medium head of broccoli yields 2–3 cups; a large one yields 3–4 cups.
  5. This recipe is easy to scale—adjust the number of servings on this card. Only the ingredient list updates automatically; the instructions do not.
  6. Great additions: cherry tomatoes, carrots, celery, dried cranberries, or toasted nuts.
  7. Flavors improve after chilling overnight, but are still great the same day.
  8. Best within 2 days, but can be stored safely for up to 4 days.

Nutrition

Calories: 265.2kcal | Carbohydrates: 6.2g | Protein: 4.7g | Fat: 24.9g | Saturated Fat: 5.2g | Polyunsaturated Fat: 12.9g | Monounsaturated Fat: 5.9g | Trans Fat: 0.1g | Cholesterol: 22.8mg | Sodium: 452.2mg | Potassium: 195.8mg | Fiber: 1.4g | Sugar: 3g | Vitamin A: 374.5IU | Vitamin C: 41.6mg | Calcium: 77.7mg | Iron: 0.5mg

Based on Food Network's Paula Deen Broccoli Salad recipe. The original Paul Deen recipe needed some modification, more options, and made adjustable. My version focuses on broccoli raisin salad with bacon since those things are expected.

Editor's Note: Originally Published March 13, 2012. Updated with expanded options, refreshed photos, and a table of contents to help navigation.

Lilly with a flag bandana on the deck.

Crock Pot Pork Loin Pulled Pork

shredded pork loin on a bun with sauce

Can you make pulled pork with pork loin? Absolutely! This easy crock pot recipe makes tender, juicy shredded pork loin for delicious BBQ pulled pork sandwiches.

Cook the pork in a seasoned braising liquid until fork-tender, shred, and finish with your favorite BBQ sauce.

⏱️ Quick Answer: How Long to Cook Pork Loin in a Crock Pot for Pulled Pork?

Cook pork loin slices in braising liquid until fork-tender and easy to shred, usually at 185°F or higher.

  • LOW: 6–7 hours
  • HIGH: 3–4 hours

Cooking times vary with the thickness of the pork and your crock pot.

Crock pot pulled pork loin on a bun with BBQ sauce.
[feast_advanced_jump_to]

quote mark
Featured Comment by Sea :
⭐⭐⭐⭐⭐
"Wow Wow Wow!!! This is the ONLY way to do a pork loin in the crockpot!!!! Just pulled it out and shredded it, and it was all I could do to keep from eating it all right then and there!"

🐖 TL;DR — Recipe Summary

What is it? BBQ pulled pork made from pork loin instead of pork butt in a crock pot (slow cooker).

Why you'll love it: Tender, juicy shredded pork loin with less fat than pork butt, using simple ingredients.

How to make it: Cook pork loin in seasoned braising liquid until it shreds easily, then mix with BBQ sauce.

🐖 Ingredients

Pork loin with spices for pulled pork.
  • Pork loin — Use half of a whole boneless pork loin, about 2½–3 pounds.

✅ Pro Tip: Use pork loin, not pork tenderloin. They are different cuts and are not interchangeable in this recipe.

  • Beef broth — The base of the seasoned braising liquid.
  • Onion — Adds flavor to the braising liquid.
  • Chili powder and salt — Simple seasonings with a little kick.
  • Liquid smoke — Optional, for a hint of smoky BBQ flavor.
  • BBQ sauce — Mix into the shredded pork after cooking.

👨‍🍳 Quick Overview: Pulled Pork Loin in a Crock Pot

1. Prep: Mix the braising liquid in the crock pot. Trim and cut the pork loin into 1–1½-inch slices and add to the crock pot.

adding pork slices to crock pot.

2. Cook and shred: Cook on LOW for 6–7 hours or HIGH for 3–4 hours, until 185°F or higher and fork-tender. Remove the pork and shred.

shredding pork loin with a fork.

✅Pro Tip: Pork is ready to shred when a fork slides in and out with little resistance.

3. Finish: Reserve the braising liquid. Return the shredded pork to the crock pot with some of the liquid and the BBQ sauce. Cook on LOW for another 30–60 minutes.

pouring shredded pork back into crock pot.

👇For complete step-by-step instructions, scroll down to the printable recipe card or keep reading for tips, flavor options, and serving ideas.

⏱️ How Long & When Is It Done?

Cook pork loin slices in the crock pot until they reach 185°F or higher and are fork-tender. The pork should shred easily with a fork.

Cooking times:

  • LOW: 6–7 hours
  • HIGH: 3–4 hours

Don't rely on time alone. Pork loin varies in thickness and tenderness, so check both the internal temperature and how easily it shreds.

👨‍🍳 Flavor Options and Variations

The basic recipe uses chili powder, onion, and beef broth, but you can adjust the seasoning to your taste.

  • Adjust the BBQ flavor: Add garlic powder, paprika, or a little brown sugar to the braising liquid. For more heat, add cayenne pepper. Finish with your favorite BBQ sauce.
  • Tex-Mex shredded pork: Add cumin to the braising liquid and substitute salsa for the BBQ sauce. Perfect for tacos, nachos, or quesadillas.

💡 Pro Tips for Success

  • Trim the pork loin: Remove the fat cap and silver skin if possible. Any remaining silver skin can be removed during shredding.
  • Arrange the pork in a single layer with a little space between slices for even cooking.
  • Don't skimp on the liquid: The braising liquid should nearly cover the pork. Add more broth if needed.
  • Save the braising liquid: Add about ½ cup per pound after shredding and reserve the rest for reheating leftovers.
  • Tough pork loin: Some pork loins are naturally tougher. If the pork reaches 190°F but still isn't fork-tender and won't shred, chop it, add some reserved braising liquid, and refrigerate overnight. This helps improve the moisture and texture.

👥 Cooking for Two? Here's How

This recipe makes about 10 servings, perfect for a crowd or freezing leftovers. For a smaller batch, cut the ingredients in half and use a 3–4 quart crock pot. Keep enough braising liquid to nearly cover the pork.

If you buy a whole pork loin, cut the unused portion into pork chops or freeze it for another meal.

🥪 Serving Suggestions

Our favorite way to serve this shredded pork loin is on toasted buns with Memphis BBQ Sauce and coleslaw. It also works well served without a bun for a low-carb meal.

❄️ Leftovers and Reheating Pulled Pork Loin

Store leftover shredded pork loin and the reserved braising liquid in separate airtight containers. Refrigerate for 3–4 days or freeze in meal-sized portions for up to 4 months.

♨️ How to Reheat

  • Microwave: Add a little reserved braising liquid or BBQ sauce, cover loosely, and heat in 30-second intervals, stirring until hot.
  • Stovetop: Heat gently in a covered skillet over medium-low heat with a little braising liquid or BBQ sauce, stirring occasionally.

Reheat leftovers to 165°F. The extra liquid helps keep the lean shredded pork moist.

📖 More Pulled Pork Recipes

For a larger crowd, try my Oven Pulled Pork Loin—I've used it to feed fifty.

For traditional pulled pork made with pork butt, try one of these recipes:

  • Oven Pulled Pork Butt
  • Crock Pot Pulled Pork Butt
  • Pork Butt on a Gas Grill

❓FAQs

Are pork loin and pork tenderloin the same thing?

No. Pork loin is a larger, leaner cut, while pork tenderloin is smaller and more tender. They cook differently and are not interchangeable in this recipe.

Can I use pork tenderloin for pulled pork in the crock pot?

Yes, but pork tenderloin cooks faster and can dry out. For the correct cooking instructions, use my Crock Pot Shredded Pork Tenderloin recipe.

What is pork loin?

Pork loin comes from the back of the pig, near the baby back ribs. It's the same cut used for boneless pork chops.

A whole pork loin is often sold in large vacuum-sealed packages. You can cut it into chops, use part for pulled pork, and freeze the rest.

(Graphic with pork loin and pork tenderloin location. Image licensed May 17, 2017, from Fotolia—copyright by foxysgraphic - Fotolia. Image modified in accordance with the license.)
Graphic with pork loin and pork tenderloin location. Image licensed May 17, 2017, from Fontolia—copyright by foxysgraphic - Fotolia. Image modified in accordance with the license.

📖The Recipe Card

shredded pork loin on a bun with sauce
Print Recipe Add to Collection Go to Collections
5 from 4 votes

Crock Pot Pork Loin Pulled Pork

Make tender, juicy shredded pork loin in your crock pot (slow cooker) with simple ingredients. Perfect for BBQ pulled pork sandwiches.
Prep Time10 minutes mins
Cook Time4 hours hrs 30 minutes mins
Total Time4 hours hrs 40 minutes mins
Course: Main Course
Cuisine: BBQ
Keyword: crock pot pork loin pulled pork, pork loin pulled pork, pulled pork loin crock pot
Servings: 10
Calories: 211kcal
Author: Dan Mikesell AKA DrDan

Ingredients

  • 2½ pounds pork loin one half of a full loin.
  • 1 onion small diced
  • 2 cups beef broth
  • 2 tablespoons chili powder
  • ½ teaspoon salt
  • 1 teaspoon liquid smoke optional
  • 1 cup BBQ sauce after shredding

For Mexican

  • 1 teaspoon cumin to braising fluid
  • 1 cup medium salsa replaces BBQ sauce
US Customary - Convert to Metric

Instructions

Trimming the Pork Loin

  • Use 2½–3 pounds of pork loin. Trim excess fat and silver skin, then cut across the grain into 1–1½-inch slices.
    trim and slice pork loin.

Mix the Braising Fluid

  • Chop one small onion. In the crock pot, combine 2 cups of beef broth, the onion, 2 tablespoons of chili powder, and ½ teaspoon of salt. Add 1 teaspoon of liquid smoke (optional).
    mix braising fluid in crock pot.
  • Place the pork slices in a single layer in the crock pot.
    adding pork slices to crock pot.

Cook and Shred

  • Cook on HIGH for 3–4 hours or LOW for 6–7 hours, until the pork reaches 185°F or higher and is fork-tender. Remove and shred the pork.
    shredding pork loin with a fork.

Rehydrate the Pork

  • Move all the braising liquid to a bowl.
    used braising fluid in a bowl.
  • Return the shredded pork to the crock pot. Stir in about ½ cup of braising fluid per pound until the mixture is moist—reserve remaining liquid for reheating leftovers.
    pouring shredded pork back into crock pot.

Add Sauce and Finish

  • Add 1 cup BBQ sauce (or salsa for a Mexican variation). Stir to combine. Cook on low for 30–60 minutes on low to blend the flavors.
    adding salsa to pulled pork.

Video

Notes

Pro Tips

  • Pork loin slices are boneless pork chops—don’t confuse them with tenderloin. Any leftover raw pork loin makes great pork chops.
  • Some pork loins are just tough. If it won’t shred, chop it, moisten it, and refrigerate for a day—it will improve.
  • Best served the next day after flavors and moisture have settled in.
  • Freezes well for 4 months or refrigerates for up to 4 days.
  • Standard serving is ¼ pound.
  • Feeding a crowd? Try the Oven Pulled Pork Loin for a Crowd for cooking multiple pans at once.

Nutrition

Calories: 211kcal | Carbohydrates: 13.6g | Protein: 26.7g | Fat: 5.1g | Saturated Fat: 1.5g | Polyunsaturated Fat: 0.6g | Monounsaturated Fat: 1.9g | Cholesterol: 71.4mg | Sodium: 566.4mg | Potassium: 620.7mg | Fiber: 1g | Sugar: 10.1g | Vitamin A: 541.2IU | Vitamin C: 1mg | Calcium: 24.9mg | Iron: 1.2mg

Originally published March 22, 2013. Updated with expanded options, refreshed photos, and improved organization.

molly and lilly dogs playing in the yard

Honey Glazed Grilled Chicken Breasts

Honey glazed chicken breast large

These Honey Glazed Grilled Chicken Breasts have the perfect balance of sweet and savory flavors with a touch of smoky char. Ready in about 30 minutes, this honey chicken recipe is perfect for a quick weeknight dinner or summer cookout.

🤔 Quick Answer: What Is the Honey Glaze?

Ingredients — Honey balanced with soy sauce, olive oil, lemon juice, and a touch of garlic powder.

No marinating — Just mix, brush it on the chicken, and grill.

Caramelizes beautifully — Forms sticky, lightly charred edges while keeping the chicken moist and flavorful.

Honey glazed chicken breast on a white plate.
[feast_advanced_jump_to]

quote mark
Featured Comment by Loraine:
"This recipe was awesome! The best yet. Hubby just got a Weber grill and followed ur recipe to a tee.. moist inside too for being a chx breast…Thxs!!"

❤️ Why You’ll Love This Recipe

  • Beginner-friendly – Simple instructions and foolproof grilling make this great for any skill level.
  • Big flavor, no marinating – Just mix the glaze and brush it on. Easy and fast.
  • Tender and juicy – Flattened chicken breasts cook evenly and stay moist.
  • That smoky char – The glaze caramelizes over direct heat for sweet, sticky edges.

🐓 Ingredients for Honey Glazed Chicken Breasts

Boneless chicken breasts with honey glaze ingredients.
  • Boneless, skinless chicken breasts (flattened to ¾ inch thick)
  • Kosher salt and black pepper
  • Honey glaze: honey, olive oil, lemon juice, soy sauce, garlic powder
  • Optional brine: water and table salt (see recipe card for details)

👨‍🍳 Quick Overview: How to Grill Honey Glazed Chicken Breasts

This grilled chicken breast recipe is simple, flavorful, and great for beginners—no marinating, no fuss.

1. Preheat and prepare the chicken

Preheat the grill to a surface temperature of 450°F to 500°F.

Trim the chicken breasts and flatten them to about ¾ inch thick for even cooking. Brine if you want extra moisture.

Flattening chicken breasts in a bag with a meat mallet.

✅ Pro Tip: No need to rinse raw chicken. Just handle it carefully and cook to a safe internal temperature of 165°F. For details, see Chicken... To Rinse or Not To Rinse?

2. Glaze

Mix the honey glaze. Sprinkle the chicken with salt and pepper, then brush the glaze on both sides.

Coating chicken with honey glaze.

3. Grill

Place the chicken over direct heat. Close the lid. Flip every 5–6 minutes and brush with more glaze until the internal temperature reaches 165°F—about 25 minutes total.

brushing glaze on chicken.

✅ Pro Tip: According to the USDA, chicken breasts must reach an internal temperature of 165°F for safe eating. Use an instant-read thermometer and check the thickest part.

4. Rest

Let rest for 5 minutes before serving for the juiciest grilled chicken breasts.

grilled glazed chicken breasts on a white plate.

👇 Scroll down for the printable recipe card and complete step-by-step photo instructions—or keep reading for tips and serving ideas.

♨️ Grill Setup for Honey Glazed Chicken Breasts

Aim for a grill surface temperature of about 450°F—that’s medium to medium-high on most gas grills. Getting the grill temperature right is one of the most important steps when learning how to grill chicken breasts perfectly.

Need help dialing it in? See A Beginners Guide to Grill Temperature on a Gas Grill for a complete discussion.

🔄 Options & Variations

  • Chicken thighs – Boneless or bone-in (but skinless) thighs also work well. Grill to an internal temperature of 185°F for the best texture.
  • Butter instead of oil – Swap in melted butter for a richer glaze.
  • Smoked paprika – Add 1 teaspoon to the glaze for a warm, smoky depth that pairs beautifully with the honey.

🍗 More Grilled Chicken Recipes to Try

Looking for more ways to make juicy grilled chicken? Start with How to Grill Chicken Breasts, or check out these reader favorites:

  • Italian Grilled Chicken Breasts
  • BBQ Boneless Chicken Breasts on the Grill
  • Grilled Reverse-Seared Chicken Breasts
  • Lemon Garlic Marinated Chicken Breasts
  • Buttermilk Grilled Chicken

🍽️ How to Serve

Pair these honey-glazed chicken breasts with summer sides such as:  Grilled Baby Potatoes, Grilled Stuffed Tomatoes, Grilled Mixed Vegetables, and Grilled Corn on the Cob. Add Cornmeal Biscuits and a tall glass of homemade lemonade for a backyard meal that’s hard to beat.

❄️ Storing & Reheating Leftovers

Store leftovers in an airtight container for up to 4 days in the refrigerator or 3 months in the freezer.

To reheat:

  • Oven: Cover and warm at 350°F until hot
  • Air fryer: Works great for restoring some crisp edges
  • Microwave: Fastest, but may soften the glaze and texture

🧊 Tip: Thaw frozen chicken overnight in the refrigerator for best results.

❓ FAQs

Can I use chicken thighs instead of breasts?

Absolutely. Use boneless or bone-in (but skinless) thighs and grill to an internal temperature of 185°F for the best texture. They’re technically done at 165°F but more tender at 185°F.

Is this recipe gluten-free? What can I use instead of soy sauce?

Soy sauce usually contains wheat, so it’s not gluten-free unless labeled as such. For a gluten-free option, use tamari or coconut aminos instead. Both work well with the honey glaze and keep the flavor balanced.

Can I use a charcoal grill?

Yes. Just be sure to monitor the grill’s surface temperature closely—charcoal can run hot. Don’t overload the coals, and adjust the vents as needed to maintain a temperature of around 450°F.

How do I brine chicken breasts?

Brining helps prevent dry grilled chicken, especially if the meat was previously frozen. Use 2 cups of cold water and 1 tablespoon of table salt. Brine for 1–2 hours in the fridge, then remove the chicken, rinse off the brine, and pat dry.🧂

Salt note: 1 tsp table salt = 1¼ tsp Morton kosher = 2 tsp Diamond Crystal.

Can I use this glaze on other cuts of chicken?

Yes—this honey glaze works well on drumsticks, thighs, and even bone-in chicken breasts. Just adjust the cooking time and always use a thermometer to check doneness.

📖The Recipe Card

Honey glazed chicken breast large
Print Recipe Add to Collection Go to Collections
5 from 4 votes

Honey Glazed Grilled Chicken Breasts

Juicy, flavorful grilled chicken breasts brushed with a quick honey garlic glaze. No marinating—just mix, brush, and grill.
Prep Time20 minutes mins
Cook Time30 minutes mins
Total Time50 minutes mins
Course: Main Course
Cuisine: American
Keyword: grilled honey chicken, grilled honey chicken breasts, honey chicken glaze, Honey glazed griled chicken breasts
Servings: 2 servings
Calories: 232kcal
Author: Dan Mikesell AKA DrDan

Ingredients

  • 2 skinless boneless chicken breasts

Honey Glaze

  • 2 tablespoons honey
  • ½ teaspoon garlic powder
  • 2 tablespoons olive oil
  • 2 tablespoons lemon juice
  • 2 tablespoons soy sauce
  • Kosher salt and pepper to taste

Optional Brine

  • 2 cups water
  • 1 tablespoon table salt
US Customary - Convert to Metric

Instructions

Preheat and prepare the chicken

  • Trim the chicken breasts. Brine in water and salt for 1–2 hours, if desired. Then, rinse well and pat dry.
    Raw chicken and honey glaze ingredients.
  • If over ¾ inch thick, flatten to an even ¾ inch. Cover the chicken to prevent splatter for safety.
    Flattening thick chicken breast in a plastic bag with a meat mallet.
  • Let rest at room temperature while preheating the grill to a surface temperature of about 450°F (medium-high on most gas grills).
    clean and oil grill crates

Glaze

  • Mix the glaze of 2 tablespoons each of honey, soy sauce, lemon juice, and olive oil. Add ½ teaspoon garlic powder.
    mixing honey glaze.
  • Lightly season the chicken with salt (if not brined) and pepper. Brush both sides with glaze, reserving about ¾ of it for grilling.
    coating chicken with noney glaze.

Grill

  • Place over direct heat and close the lid. Flip the chicken and brush with glaze every 5 minutes.
    glazed chicken breasts on the grill.
  • Continue to flip every 5 minutes and brush until the internal temperature reaches 165°F—approximately 25 minutes. However, your cooking time may vary—cook to a final internal temperature of 165° in the thickest part.
    brushing glaze on chicken.

Rest

  • Allow to rest for 5 minutes before serving.
    grilled glazed chicken breasts on a white plate.

Video

Notes

Pro Tips:

  • Brining helps prevent dryness, especially if using previously frozen chicken.
    Salt equivalents: 1 tsp table salt = 1¼ tsp Morton kosher = 2 tsp Diamond Crystal kosher.
  • If you brine, rinse off the brine well, and do not add any more salt.
  • Flatten to ¾ inch for even cooking.
  • Grill surface temp should be around 450°F.
  • Always cook chicken breasts to 165°F. Use a thermometer—don’t guess. Lower is not safe. Higher will dry.
  • Skinless chicken thighs can also be used. Cook to 185°F for tenderness. Bone-in skinless thighs will take a bit longer.
  • Oil the grill grates well to prevent sticking.

Nutrition

Calories: 232kcal | Carbohydrates: 10g | Protein: 25g | Fat: 10g | Saturated Fat: 2g | Cholesterol: 72mg | Sodium: 767mg | Potassium: 437mg | Sugar: 9g | Vitamin A: 35IU | Vitamin C: 4.3mg | Calcium: 13mg | Iron: 0.6mg

Originally Published July 19, 2014. Updated with expanded options, refreshed photos, and a table of contents to help navigation. The original recipe was named honey crusted but glazed is more accurate to me.

dogs in the yard

Easy Steak Marinade

marinaded strip steak on a white plate.

This quick and easy steak marinade uses common pantry ingredients to add great flavor and help tenderize New York strip and other beef steaks. Mix it in just 5 minutes and get good flavor in only 30 minutes.

Marinate a few hours for the best flavor and tenderness. Whether you're grilling or pan-searing, this easy homemade recipe is sure to become your best steak marinade for New York strip and other steaks.

😊 How Long Should I Marinate Steak?

  • 30 minutes – Get most of the great flavor when you're short on time.
  • 2–4 hours – Best balance of flavor and tenderness for most steaks.
  • Up to 8 hours – Fine for thicker cuts or tougher steaks.
  • Avoid overnight – The lemon juice can begin to affect the texture of the meat.
Grilled marinated New York strip steak on a white plate.
[feast_advanced_jump_to]

quote mark
Featured Comment from Ted:
⭐⭐⭐⭐⭐
"Wow, tried this recipe with company last night. Don’t think I have had a better steak in years."

📝 TL;DR — Recipe Summary

✔️ What: A quick homemade steak marinade uses common pantry ingredients to add flavor and help tenderize beef steaks.

✔️ Why: Mix it in 5 minutes and get good flavor in just 30 minutes, or marinate longer for the best flavor and tenderness.

✔️ How: Whisk the marinade, combine with New York strip or other steaks, marinate for 30 minutes to 8 hours, then grill or pan-sear as desired.

🧂 Marinade Ingredients

Steak marinade ingredients.
  • Soy sauce – The base of the marinade, adding salt and rich umami flavor while helping season the steak.
  • Olive oil – Helps coat the steak evenly and carries the seasonings into the meat.
  • Lemon juice – Adds brightness and helps tenderize the meat.
  • Worcestershire sauce – Adds savory depth with a touch of tang and sweetness.
  • Seasonings – Garlic powder, dried basil, parsley flakes, and black or white pepper provide classic steakhouse flavor. Add a pinch of cayenne pepper or a few dashes of hot sauce for a little heat. Fresh herbs may also be used.

👨‍🍳 Quick Overview: Using Steak Marinade

Trim and prepare the steaks for cooking.

two trimmed New York Strip steaks on a red board.

Combine all marinade ingredients in a container or storage bag. Add the steaks and coat well. Refrigerate for 30 minutes, but 2 to 4 hours gives the best flavor and tenderness.

steaks marinating in a bag.

Remove the steaks from the marinade—do not rinse or pat them dry. Grill or pan-sear according to your favorite steak recipe.

marinade steak cooking on the grill.

For more details, keep reading. See the Recipe Card below for complete instructions and to print.

✔️ Tips for Perfect Marinated Steaks

  • Trim first. Trim excess fat and prepare the steaks for cooking before marinating so they're ready to cook when removed from the marinade.
  • Give it time. While 30 minutes adds plenty of flavor, 2 to 4 hours provides the best balance of flavor and tenderness.
  • Don't skip the oil. The oil helps distribute the seasonings evenly.
  • Skip cast iron. If pan-searing after marinating, use a stainless steel or other oven-safe skillet. The acidic marinade isn't ideal for cast iron.
  • Adjust the heat. Add a pinch of cayenne pepper, crushed red pepper, or a few dashes of hot sauce for a spicier marinade.

🔥 Recipes to Cook Marinated Steaks

After marinating, remove the steaks from the marinade—do not rinse or pat them dry. Discard the used marinade, then cook the steaks using your favorite method. These steak recipes all work well with this marinade.

  • Grilled NY Strip Steaks
  • Seared and Roasted Strip Steaks
  • Grilled Sirloin
  • Grilled Porterhouse
  • Grilled Ribeye

❓ FAQs

Do I have to discard the marinade after using?

Yes. Once raw meat has been in the marinade, it should be discarded. If you want marinade for basting or serving, reserve some before adding the steak.

According to the USDA, used marinade may be reused only after bringing it to a full boil.

Should steak be refrigerated while marinating?

Yes. Always marinate steak in the refrigerator, even for a short time. If the marinade or steak has been at room temperature for more than 2 hours, it should be discarded.

📖The Recipe Card

grilled marinaded strip steak ona white plate
Print Recipe Add to Collection Go to Collections
4.80 from 5 votes

Best Homemade Steak Marinade

This easy homemade steak marinade comes together in 5 minutes with pantry ingredients and delivers great flavor in 30 minutes. Perfect for New York strip and other beef steaks.
Prep Time5 minutes mins
Cook Time30 minutes mins
Total Time35 minutes mins
Course: Seasoning
Cuisine: American
Keyword: best steak marinade, easy steak marinade, Steak Marinade for strip steak
Servings: 2 servings
Calories: 71.7kcal
Author: Dan Mikesell AKA DrDan

Ingredients

  • 3 tablespoons soy sauce
  • 4 tablespoons olive oil
  • 3 tablespoons lemon juice
  • 2 tablespoons Worcestershire sauce
  • 2 teaspoons garlic powder
  • 1½ tablespoons dry basil
  • 2 teaspoons dry parsley flakes
  • ½ teaspoon black or white pepper white preferred
US Customary - Convert to Metric

Instructions

  • In a 1-gallon storage bag or airtight container. Combine 3 tablespoons soy sauce, 4 tablespoons olive oil, 3 tablespoons lemon juice, 2 tablespoons Worcestershire sauce, 2 teaspoons garlic powder, 1½ tablespoons dry basil, 2 teaspoons dried parsley flakes, and ½ teaspoon white or black pepper.
    steak marinade ingredients.
  • Trim your steaks of extra fat.
    two trimmed New York Strip steaks on a red board.
  • Add the steaks to the bag, squeeze out the air, and push them around to get them coated well. Refrigerate and marinate for 30 minutes, but 2 to 4 hours provides the best flavor and tenderness.
    steaks marinating in a bag.
  • Remove the steaks from the marinade. Do not rinse or pat them dry. Grill or pan-sear using your favorite steak recipe.
    marinade steak cooking on the grill.

Notes

Pro Tips

  1. Marinate for 30 minutes to 8 hours. For the best flavor and tenderness, marinate 2 to 4 hours.
  2. Fresh garlic may be substituted for garlic powder.
  3. White pepper is preferred, but black pepper works well.
  4. Trim the steak before marinating so it's ready to cook when removed from the marinade.
  5. This marinade works well with New York strip and other beef steaks.
  6. Do not reuse marinade unless it is brought to a full boil before serving or basting.
Nutritional information: The entire recipe can do 3-4 steaks, and only a tiny amount stays on the meat. Nutrition is assuming 10% of the marinade is absorbed.

Nutrition

Calories: 71.7kcal | Carbohydrates: 4.7g | Protein: 1.8g | Fat: 5.8g | Saturated Fat: 0.9g | Polyunsaturated Fat: 0.6g | Monounsaturated Fat: 4.2g | Sodium: 198.4mg | Potassium: 205.5mg | Fiber: 2.4g | Sugar: 0.6g | Vitamin A: 47.6IU | Vitamin C: 2.2mg | Calcium: 139.7mg | Iron: 5.7mg

The inspiration recipe is "Best Steak Marinade in Existence" from Allrecipes.com.  It is simplified with a few changes to the technique and minor modifications to make it friendly for smaller uses.

Editor’s Note: Originally published June 14, 2013. Updated with streamlined content, refreshed photos, and improved navigation.

Molly and Lilly in the yard

Blue Cheese Butter Recipe for Steak

Blue Cheese Compound Butter on a strip steak

This easy blue cheese butter recipe for steak combines butter, blue cheese, garlic, and herbs into a rich, flavorful topping. A homemade compound butter, it's ready in minutes and is perfect for steak, burgers, baked potatoes, vegetables, bread, and more.

Make a batch today and freeze individual servings for later. Whether you're grilling steaks for a special dinner or want an easy way to add bold flavor to everyday meals, this homemade blue cheese butter is always ready to melt into a creamy, flavorful sauce.

blue cheese compound butter on strip steak.
[feast_advanced_jump_to]

quote mark
Featured Comment by Ginger :
"Yummy! So good."
⭐⭐⭐⭐⭐

🤔 TL;DR — Recipe Summary

✔️ What: This easy blue cheese butter recipe is a homemade compound butter with garlic and herbs that's perfect for steak and more.

✔️ Why: Rich, creamy flavor in minutes. Make a batch and freeze individual portions for an easy finishing butter whenever you need it.

✔️ How: Mix softened butter with blue cheese, garlic, herbs, and seasonings. Chill until firm, then slice and serve fresh or freeze individual servings.

🧈 Ingredients for Blue Cheese Butter

blue cheese and ingredients for compound butter.
  • Butter – Salted butter is preferred for flavor. If using unsalted, you’ll need to add a bit of salt later.
  • Blue cheese crumbles – Crumbles are easiest, but any blue cheese can be used if broken up well.
  • Garlic – Crushed or finely minced for the best flavor distribution.
  • Fresh parsley – Adds color and a mild herbal note.
  • Dried basil – Optional, but it adds depth. You can also use fresh basil or sub in a different herb.
  • Optional flavor boosters – Want to experiment? See the flavor variations section below for add-ins like herbs, spices, and other cheeses.

✅ Pro Tip: Not all blue cheese is the same. Gorgonzola or Danish Blue are milder and creamier, while Roquefort or Stilton pack a stronger punch. Choose based on how bold you want your butter.

👨‍🍳 Quick Overview: How to Make Blue Cheese Butter

1. Mix it up: Combine softened butter with blue cheese crumbles, parsley, dried basil, and crushed garlic.

mixing compound butter in small bowl with fork.

✅ Pro Tip: Let the butter sit at room temp for about an hour. Or microwave for about 15–20 seconds, flipping halfway—but watch closely so it doesn’t start melting.

2. Shape the roll: Spoon the mixture onto parchment or wax paper and roll it up tightly into a log.

rolling a log of compound butter in parchment paper.

3. Chill, slice, and store: Refrigerate for 1–2 hours, then slice into tablespoon-sized pats. Serve immediately or freeze individual pats for later.

pat of compound butter on grilled strip steak.

👇 Scroll down for the printable recipe card and complete step-by-step photo instructions—or keep reading for variations, uses, and storage.

🔄 Flavor Variations & Ingredient Swaps

This version of compound butter uses blue cheese, garlic, and herbs for bold steakhouse-style flavor—but you can customize it to match your taste or what’s in the fridge.

🌿 Herbs You Can Use

Fresh or dried parsley, rosemary, thyme, basil, chives, sage, or oregano.
Stick with one or two—too many herbs will step on each other.


🌶️ Other Mix-In Ideas

  • Crushed red pepper flakes (for a little kick)
  • Lemon zest (for brightness)
  • Finely chopped shallots or green onions (just a little—too much and they’ll take over)
  • A touch of Dijon mustard

🧀 Cheese Swaps (If You're Not Into Blue Cheese)

  • Gorgonzola or Roquefort – Bold and tangy, with slightly different textures than standard crumbles
  • Stilton – Crumbly and intense; holds its own on grilled meats
  • Feta – Tangy like blue cheese but firmer—similar feel, different taste
  • Goat cheese – Soft and tangy, adds creamy texture
  • Sharp cheddar – Brings a punch of flavor but won’t melt as smoothly
  • Cream cheese – Adds richness without interfering with herbs or butter flavor

✅ Pro Tip: Swap cheeses based on flavor and texture. You want something strong enough to stand up to steak—or creamy enough to tie everything together.

🍴 How to Use Blue Cheese Butter

Steak’s the classic use—add a pat to grilled or pan-seared filet mignon, New York strip, ribeye, or porterhouse right after cooking. The butter melts over the hot meat and boosts flavor without much effort.

But it doesn’t stop there. Compound butter also works on:

  • Burgers (especially thick or grilled ones)
  • Baked or mashed potatoes
  • Roasted vegetables like mushrooms, green beans, or Brussels sprouts
  • Garlic bread or toast
  • Even stirred into rice or noodles for a quick upgrade

✅ Pro Tip: Add butter after cooking while the food’s hot. Adding it during will just melt it off into the pan.

❄️ Storage

Butter stores well, but the fresh ingredients mean it won’t last forever. I recommend using it within 4 days if refrigerated.

For longer storage, freeze it in pats: slice the log into tablespoon-sized pieces, lay them flat in a freezer bag, seal it tight, and freeze. Take out what you need, when you need it. They’ll keep for up to 3 months.

✅ Pro Tip: Freeze the pats in a single layer first so they don’t stick together—then you can grab just one or two at a time.

❓ FAQs

What is compound butter?

Compound butter is softened butter mixed with flavorings like herbs, garlic, spices, or cheese, then chilled until firm. This blue cheese version is a classic steakhouse-style compound butter.

Should I melt the butter and blue cheese to combine?

No. Just soften both — you want texture, not a sauce.

When should I add blue cheese butter to steak?

Add it after cooking, while the steak rests, so it melts into the meat instead of into the pan.

Is blue cheese butter the same as steakhouse butter?

Often, yes. Many steakhouse butters are compound butters made with blue cheese, garlic, and herbs—very similar to this recipe.

Can I freeze blue cheese butter?

Yes. Slice into pats, freeze flat, and store in a bag for up to 3 months.

📖The Recipe Card

Blue Cheese Compound Butter on a strip steak
Print Recipe Add to Collection Go to Collections
5 from 3 votes

Blue Cheese Butter Recipe for Steak

Rich, creamy blue cheese butter with garlic and herbs. Ready in minutes—perfect for steak, burgers, potatoes, vegetables, bread, and more.
Prep Time5 minutes mins
Cook Time0 minutes mins
Total Time2 hours hrs 5 minutes mins
Course: American
Cuisine: American
Keyword: blue cheese butter, blue cheese steak butter, compound butter for steak
Servings: 12
Calories: 89kcal
Author: Dan Mikesell AKA DrDan

Ingredients

  • ½ cup butter (one stick) salted preferred or add ¼ teaspoon kosher salt if unsalted butter
  • ½ cup blue cheese crumbs
  • 1 tablespoon parsley fresh, chopped
  • 1 teaspoon basal
  • 2 cloves garlic crushed
US Customary - Convert to Metric

Instructions

  • Allow the butter to come to room temperature. You can also microwave it briefly—about 15–20 seconds, flipping halfway.
    blue cheese and ingredients for compound butter
  • Combine the soft butter with ½ cup of blue cheese crumbles, 1 tablespoon of freshly chopped parsley, 1 teaspoon of dry basil, and 2 cloves of crushed garlic in a small bowl. Mix until well combined.
    mixing compound butter in small bowl with fork
  • Spoon the mixture onto parchment or wax paper and roll into a log. Refrigerate for 1–2 hours to firm up.
    rolling a log of compound butter in parchment paper
  • Slice into 1-tablespoon pats and serve on steaks, vegetables, or anything hot.
    Blue cheese compound butter on strip steak.

Notes

Pro Tips

  1. Use softened butter—it makes mixing easier.
  2. Salted butter is preferred. If using unsalted, add ¼ teaspoon of kosher salt per stick.
  3. Any blue cheese will work. Crumbles are easiest; ½ cup is about 2 ounces.
  4. Store in the fridge for 3 to 4 days. For longer storage, freeze pats flat in a sealed bag for 2–3 months.
  5. Great on steak, vegetables, burgers, potatoes, or stirred into rice or noodles.

Nutrition

Calories: 89kcal | Carbohydrates: 1g | Protein: 1g | Fat: 9g | Saturated Fat: 6g | Cholesterol: 25mg | Sodium: 146mg | Potassium: 14mg | Sugar: 1g | Vitamin A: 307IU | Vitamin C: 1mg | Calcium: 33mg | Iron: 1mg

Editor's Note: Originally Published July 10, 2016. Updated with expanded options, refreshed photos, and a table of contents to help navigation.

Lilly and Molly sharing a stick.

Father’s Day Recipes: The Best Steak for Dad

multiple steaks collage

Father’s Day is coming—time to treat Dad to a great meal. Skip the socks and fire up the grill or oven. Speaking as a dad, I can tell you that we want steak, family, and maybe a little peace and quiet (but mostly steak).

This guide has everything you need for a great Father's Day feast the whole family will love. Let’s make it a tradition.

multiple steaks collage
[feast_advanced_jump_to]

Steak or tie, tie or steak, what to do? Speaking as a dad, I want the steak. Make it a tradition in your family so you are covered every year—a prime-grade steak and family are all he wants.

🐄Types of Steaks: What to Buy

I'm a filet or strip steak guy, but there’s no wrong choice. Quality matters, buy Prime or Choice grade—skip the Select or “value” cuts. If you're spending the time, make it worth it.

Graphic with location of various steaks. Image licensed from Fotolia. Copyright by foxysgraphic - Fotolia. Image modified in accordance with the license.
Image licensed from Fotolia. Copyright by foxysgraphic - Fotolia. The image was modified in accordance with the license.

♨️Steak Doneness: Temperature Chart

DonenessInternal Temperature
Rare-cold red center125°-130°
Medium Rare-warm red center130°-135°
Medium-pink and firm140°-150°
Medium Well-minimal pink 150°-155°
Well Done-firm and brown160°+

✅ Don’t guess—use a thermometer. It’s not “cheating,” it’s smart.

🛒Thermometers: Picks for Dad

Great steak needs great tools. These are the ones I trust, from budget-friendly to premium picks.

Note: All links below are affiliate links, meaning I make a small profit from your purchases. Your price is not affected by this commission. We are a participant in the Amazon Services LLC Associates Program. As an Amazon associate, I earn from qualifying purchases.

Image for Maverick xr-50 remote thermometer from Maverick

Maverick XR-50 4 Probe Remote Thermometer

Maverick Adrenaline Barbecue Company XR-50 Extended Range Digital Remote Wireless 4 Probe. Highly Rated.
Shop at Amazon
Red Thermapen One

Thermapen™ One from Thermoworks™

My personal favorite cooking tool. It will make your a better cook today. More expensive but will last for years.
Shop at Amazon
TP19 from the manufacture..

ThermoPro TP19 Instant Read Thermometer

Fast and accurate instant read thermometer at a lower price perfect for any use.
Shop at Amazon
CDN Grill Surface Thermometer

CDN Grill Surface Thermometer

Cheap and reliable—I still one mine.
Shop at Amazon

🔥Grilled Steak Recipes

The classic way—and still the best. These recipes are beginner-friendly and have no fluff—just fire, salt, and technique.

If you need help with the grill temperature, please check A Beginners Guide to Grill Temperature on a Gas Grill.

Grilled Filet Mignon (Best Way on Any Grill)
The best way to grill filet mignon with simple temps, timing, and doneness guides. Juicy, tender steak on a gas or any grill in about 10 minutes.
Grilling Filet Mignon
Grilled filet mignon with asparagus.
Grilled Ribeye Steak (Gas Grill)
Grill a juicy, tender ribeye steak on a gas grill with easy step-by-step instructions, cooking times, temperatures, and a doneness guide from rare to well done.
Grilled Ribeye Recipe
A cut ribeye steak on a gray plate.
How to Grill a Porterhouse Steak
Learn how to grill a juicy porterhouse steak with simple seasoning over high heat in about 10 minutes. This easy method also works for T-bone steaks.
Grilling Porterhouse Steaks
porterhouse steak with fries on blue plate
Grilled New York Strip Steak
Grill New York strip steak over high heat in just minutes for a delicious crust and a medium-rare center, with easy cooking times and temperatures for your preferred doneness.
Grilling New York Strip Steak
A strip steak with grill marks on a gray plate.
How to Grill Sirloin Steak – Juicy, Quick & Easy
Juicy, tender sirloin steak in about 10 minutes on high heat. Season simply or use a quick marinade—either way, it's flavorful and foolproof.
Grilling Sirloin Steaks
Grilled sirloin steak on a white plate.

♨️Stovetop-to-Oven Steak Recipes

Weather not cooperating? No worries. These methods give you steakhouse results inside, with no grill needed.

These inside recipes work great with cast iron pans, but any oven-safe fry pan will work nicely. I generally do not cook meat with bones on the stovetop because the meat shrinks, and then the bone prevents browning completely.

Filet Mignon in the Oven (Pan-Seared and Oven-Baked Method)
Juicy filet mignon cooked in the oven with a pan-sear for a perfect crust and tender center. Ready in about 20 minutes with simple steps.
Oven Roasted Filet Mignon
seared filet on a white plate with potatoes
Pan Seared New York Strip Steak (Oven Finish Method)
Pan sear New York strip steaks for a browned crust, then finish in the oven for juicy, tender steakhouse results.
Oven Roasted NY Strip Steaks
NY strip steak cut on an orange plate

👨‍🍳Steak Enhancement: Seasoning, Butter, Marinade

Want to go the extra mile? Add flavor without stress. A good marinade, compound butter, or simple seasoning mix will do the trick.

Best Homemade Steak Marinade
This easy homemade steak marinade comes together in 5 minutes with pantry ingredients and delivers great flavor in 30 minutes. Perfect for New York strip and other beef steaks.
The Best Steak Marinade Recipe
grilled marinaded strip steak ona white plate
Blue Cheese Butter Recipe for Steak
Rich, creamy blue cheese butter with garlic and herbs. Ready in minutes—perfect for steak, burgers, potatoes, vegetables, bread, and more.
Blue Cheese Compound Butter Recipe
Blue Cheese Compound Butter on a strip steak
All Purpose Seasoning Recipe
This All-Purpose Seasoning recipe, also known as 7:2:1 or 7:2:2, is the perfect mixture of common spices and is ideal for meats, vegetables, potatoes, and salads. 
All Purpose Seasoning Blend
Recipes using All-purpose seasoning blend

🧑Non-Steak Options

Not everyone’s a steak fan (we still love them). Here are some great alternatives to keep everyone happy at the table.

Grilled Portobello Mushrooms with Simple Marinade
Grilled portobello mushrooms marinated in a simple blend of olive oil, soy sauce, lemon juice, and seasonings. Perfect as a vegetarian burger, main dish, or flavorful side.
Griling Mushrooms
grilled portobello mushroom on a bun
Grilled Bacon Wrapped Pork Tenderloin Medallions
Grilled bacon wrapped pork tenderloin medallions with an easy wrapping method. Skip the bacon for faster prep, with simple seasoning and cooking instructions.
Bacon Wraped Pork Medalion Recipe
grilled bacon wrapped pork medaion on white plate
Grilled Chicken Legs (Easy, Crispy & Juicy Drumsticks)
Juicy, crispy grilled chicken legs made simple — season and cook over medium heat on a gas grill about 35 minutes for perfect drumsticks.
Grilling Chicken Drumsticks
chicken drumsticks cooking on the grill
How to Grill Hamburgers (Juicy, Easy Method)
Grill juicy hamburgers with a simple method, a hot grill, and a 160°F finish. Reliable cook times and easy steps for perfect burgers every time.
Grilling Burgers
burger on a bun
Grilled Chicken Tenders
Juicy grilled chicken tenders cooked in about 10 minutes with simple seasoning. Includes prep, grill time, temperatures, and easy step-by-step instructions.
Grilling Chicken Tenders
Grilled chicken tenders on a white plate

🍽️Side Dishes and Dessert Ideas

For vegetable side dish recipes, try Fresh Spinach Salad, Grilled Asparagus, or Grilled Red Potatoes.

Top the meal off with a dessert, like Grilled Pineapple with ice cream, Small Batch Apple Crisp, or Chocolate Chip Cheesecake or Bars.

🐕Don't forget the party animals

dogs with ball

You know they’re watching your plate like a hawk. Give them something special too—these easy homemade treats are vet-approved and pup-approved.

Low-Fat Homemade Dog Treats—Healthy & Delicious
Low Fat Homemade Dog Treats are the perfect low-calorie treat for your dog. With only five ingredients, your dog will love the peanut butter and pumpkin taste. Much healthier than commercial treats—any veterinarian would approve.
Making Dog Treats at Home
Pile of homemade dog treats on a wire rack

Have a great Father's Day.

Wifo, Molly and Lilly, and DrDan

Originally Published June 11, 2019, and updated yearly.

Grilled Small Potatoes

grilled baby potatoes going into a blue bowl

Grilling small potatoes is easiest in a grill pan—no foil packets, no parboiling. Baby, mini, new, and any other small thin-skinned potatoes like red or Yukon Gold potatoes all work well. They turn golden with crispy edges and creamy centers in about 30 minutes.

pouring small potatoes into blue bowl.
[feast_advanced_jump_to]

📝 TL;DR — Recipe Summary

✔️ What: Grilled small potatoes with crispy edges and creamy centers—no foil or parboiling needed. Works with baby, mini, new, and other small thin-skinned potatoes.

✔️ Why: An easy grilled side dish ready in about 30 minutes with just potatoes, oil, and seasoning.

✔️ How: Cut potatoes to bite-size pieces, season, and grill in a grill pan, basket, or cast-iron skillet over medium heat until golden and tender.

🥔 Ingredients

baby potatoes with oil and seaonings.
  • Small potatoes – Baby red, baby gold, Yukon Gold, fingerling, new, mini, and other small thin-skinned potatoes all work well. Cut larger potatoes into bite-sized pieces.
  • Olive oil – Or another cooking oil you like.
  • Seasoning – Kosher salt, black pepper, and garlic powder work well. Use your favorite blend.
    (Optional: add herbs before grilling or sprinkle Parmesan after cooking.)

✅ Pro Tip: Want to use larger potatoes?
Go for thin-skinned varieties like Yukon Gold or red potatoes. Cut into bite-size pieces so no part is more than ⅜ inch from the surface—this helps them cook through evenly without burning.

👨‍🍳 Quick Overview: How to Grill Small Potatoes (No Foil)

Grilled small potatoes turn crisp and golden with a hint of smoke—perfect next to anything from chicken to steak.

1. Preparing potatoes

Wash thin-skinned potatoes and cut into bite-size pieces. If cut edges are exposed, soak in cold water for 15–20 minutes to remove excess starch, then rinse and pat dry.

Trimmed small potatoes in a bowl.

Toss with olive oil and your seasoning of choice.

mixing potatoes with oil and seaoning in bowl.

2. Grill potatoes

Place in a grill pan, basket, or cast-iron skillet on a 450°F grill with the hood closed.

adding potatoes to grill pan over direct heat.

✅ Pro Tip: That’s medium to medium-high on most gas grills—about right for most chicken (breasts, thighs, drumsticks, and split chicken) as well as pork chops and tenderloin.

Stir every 5–7 minutes until the potatoes are golden brown and tender, with an internal temp of 200°–210°F. The total time is about 30 minutes.

potatoes browning nicely in a grill pan.

👇 Scroll down for the printable recipe card and full step-by-step photo instructions—or keep reading for tips, variations, and FAQs.

⏲️ How Long to Grill Potatoes

Grill small potatoes for about 30 minutes until they reach an internal temperature of 200°–210°F. At that point, they’ll be tender inside with lightly crisp edges.

Exact timing depends on the size of the potatoes and your grill temperature. Cut size matters—smaller pieces cook faster and more evenly.

✅ Pro Tip: Aim for 210°F for the best creamy texture. 205°F is acceptable. Below 200°F? They’re not done.

grilled potatoes on an orange plate

🧂 Seasoning

Kosher salt and black pepper are all you need—but a little garlic powder adds extra flavor. We often use our All-Purpose Seasoning blend.

You can mix in herbs like thyme or rosemary before grilling, or finish with a sprinkle of Parmesan cheese right before serving.

✅ Pro Tip: Want a little heat? Add a pinch of cayenne or smoked paprika to the seasoning mix.

🍽️ Serving Suggestions

These grilled potatoes pair well with anything that shares the grill—chicken breasts or thighs, pork chops, tenderloin, burgers, or steak.

🔁 Storing and Reheating Leftovers

Store leftover grilled potatoes in an airtight container in the refrigerator for up to 4 days—or freeze for up to 3 months.

To reheat, use a 350°F oven or air fryer for 10–15 minutes until hot and crispy. A skillet with a splash of oil over medium-high heat works well too.

The microwave will work in a pinch but softens the texture.

🔗 More Grilled Side Dishes

Check out some other grilled side dishes, like:

  • Grilled Asparagus
  • Grilled Corn on the Cob
  • Grilled French Fries
  • Grilled Mixed Vegtables
  • Grilled Honey Glazed Carrots

❓FAQs

Do I need to parboil small, thin-skinned potatoes before grilling?

No. Just cut them small, season, and grill in a pan until they reach 200°–210°F. Skipping parboiling is what keeps the outside crispy and the inside creamy.

Can I grill small potatoes in a foil packet?

Yes, but it’s not any easier—and you’ll miss out on the crispy texture. You’ll need a sturdy foil pack and flip it halfway. A grill pan is simpler and gives better browning.

Can I cook potatoes on skewers instead?

You can. Metal skewers are best—they help heat the center of the potato. Just cut small enough to cook through without burning.

Can I make this in the oven?

Yes, but the method’s a little different. Try Oven Roasted Red Potatoes for a simple baked version with great texture.

Can I grill russet potatoes?

Russets are better grilled whole. Their thick skin and dry texture make them unsuitable for this method. For grilled whole russets, try Baked Potatoes on the Grill (No Foil).

📖The Recipe Card

pouring small potatoes into blue bowl.
Print Recipe Add to Collection Go to Collections
5 from 1 vote

Grilled Small Potatoes (No Foil)

Crispy grilled small potatoes, including baby, mini, and new potatoes, with creamy centers—no foil or parboiling needed.
Prep Time5 minutes mins
Cook Time30 minutes mins
Total Time35 minutes mins
Course: Vegetable
Cuisine: American
Keyword: Grilled Baby Potatoes, grilled baby red potatoes, grilled red potatoes, small potatoes
Servings: 4
Calories: 163kcal
Author: Dan Mikesell AKA DrDan

Ingredients

  • 1 ½ pounds baby potatoes (red, Yukon gold, or other thin-skinned varieties)
  • 1 tablespoon olive oil
  • 1 teaspoon kosher salt
  • ½ teaspoon pepper
  • ½ teaspoon garlic powder granular preferred
US Customary - Convert to Metric

Instructions

Preheat grill

  • Preheat the grill to a surface temperature of **450° to 500°F**—about medium-high heat on most gas grills. This matches well with chicken, pork chops, or tenderloin.
    Cleaning grill grates.

Prepare potatoes

  • Wash the potatoes and cut them into bite-size pieces. Make sure no part of each piece is more than **⅜ inch** from the surface for even cooking. If there are cut edges, soak the potatoes in cold water for 15 minutes to remove surface starch, then pat dry.
    Trimmed small potatoes in a bowl.
  • Mix with 1 tablespoon of olive oil, 1 teaspoon of kosher salt, ½ teaspoon of pepper, and ½ teaspoon of garlic powder.
    mixing potatoes with oil and seaoning in bowl

Grill

  • Place the potatoes in a grill pan or basket on the grates. Close the lid.
    adding potatoes to grill pan over direct heat
  • Grill for about 30 minutes, stirring every 5–7 minutes, until they reach an internal temperature of 200°–210°F and are tender with crispy edges.
    potatoes browning nicely in a grill pan

Notes

Pro Tips

  1. An easy recipe to scale up or down to your needs.
  2. Cut size and grill temp are key—keep pieces small and grill at 450°–500°F.
  3. Red, gold, fingerling, or new potatoes work best. Avoid russets—they have thick skin and don’t grill well this way.
  4. You can use any oil you like—olive, avocado, or canola.
  5. A done potato should be 200°F or higher internally. 210°F gives the best creamy texture.

Nutrition

Calories: 163kcal | Carbohydrates: 30g | Protein: 4g | Fat: 4g | Saturated Fat: 1g | Sodium: 592mg | Potassium: 716mg | Fiber: 4g | Sugar: 1g | Vitamin C: 34mg | Calcium: 20mg | Iron: 1mg

Editors Note: Originally published May 30, 2017. Updated with expanded options, refreshed photos, and a table of contents to help navigation.

dogs with a toy

Best Homemade Memphis BBQ Sauce Recipe – Ready in 30 Minutes

BBQ sauce on pork

This homemade Memphis BBQ sauce recipe is tomato-based with the perfect balance of sweetness, tang, and a touch of spice. Impress your friends and family with a classic homemade barbecue sauce that's ready in about 30 minutes.

Skip the bottled sauce and make a batch with pantry ingredients in just one saucepan. It's perfect for ribs, pulled pork, chicken, brisket, and more.

BBQ sauce on pork.
[feast_advanced_jump_to]

quote mark
Featured Comment by Heather:
⭐⭐⭐⭐⭐
"Simply the best BBQ sauce I have ever made. And I have tried many! Thanks for the wonderful recipe!"

📝 TL;DR — Recipe Summary

✔️ What: A classic Memphis BBQ sauce that's tomato-based with the perfect balance of sweetness, tang, and a touch of spice.

✔️ Why: Ready in about 30 minutes with pantry ingredients—great for ribs, pulled pork, chicken, brisket, and more.

✔️ How: Simmer everything together in one saucepan until the flavors blend, then cool and serve.

🧂 Ingredients and Options

This Memphis-style BBQ sauce is made with pantry staples—sweet, tangy, a little spicy, and optionally smoky. Here's what you'll need:

Ingredients for BBQ sauce including ketchup and spices.
  • Ketchup: Use a good-quality brand like Heinz®️ or Hunts®️. Fancy isn't necessary, but skip the bargain-bin stuff—it can throw off the balance.
  • Yellow Mustard: Plain yellow mustard only—nothing fancy. The recipe uses ½ cup, but you can ease it back to ⅜ cup if you want less bite and it’s still classic Memphis.
  • Brown Sugar: Light or dark both work. Dark brown has more molasses and gives a deeper, more robust flavor. Your choice.
  • Apple Cider Vinegar: Adds the signature tang. This is the backbone of Memphis sauce—don’t skip it. White vinegar works in a pinch, but cider vinegar is the real deal here.
  • Worcestershire Sauce: Adds depth and umami. No real substitutes—just don’t skip it.
  • Liquid Smoke (Optional but Recommended): A touch of smoke adds that just-off-the-pit flavor, even without a smoker. I recommend Wright’s hickory, but any brand that lists only “smoke” and “water” will do. Avoid those with artificial additives.
  • Celery Salt (Optional): Adds an earthy, aromatic layer. If you don’t have it, you can skip it—or make your own: 2 parts ground celery seed to 1 part table salt.
  • Chili Powder: Use a basic chili powder blend (ground chilies with some cumin and garlic). For a milder or sweeter sauce, swap in sweet paprika, or try smoked paprika for an earthy depth without adding heat. Mix and match to create your own signature flavor.
  • Cayenne Pepper: Adds a gentle kick. ¼ teaspoon gives you about a 3/10 heat level—enough to notice without scaring anyone. Adjust to taste.
  • Pantry Basics: Garlic powder, onion powder, salt, and black pepper.

👨‍🍳 Quick Overview: How to Make Memphis BBQ Sauce

1. Combine all ingredients in a medium to large non-reactive saucepan. A glass lid is helpful.

mixing ingredients in a black pan.

✅ Pro Tip: Stir vigorously until the mixture starts to boil, being careful to avoid splattering. Cover and occasionally remove from heat and stir well. It will burn you easily, so be careful.

2. Simmer for 30 minutes. As little as 15 minutes works reasonably well, but 30 is better for combining the flavors.

Memphis BBQ sauce on pork tenderloin.

👇 Scroll down for the printable recipe card and complete step-by-step photo instructions—or keep reading for store tips and more.

👍 Tips for the Best Results

  • Adjust to taste — try ⅜ cup mustard, skip the celery salt, or dial the cayenne up or down
  • Use a non-reactive saucepan — stainless or non-stick is best
  • Stir until it just starts to boil, then cover (a glass lid is recommended) and reduce the heat — this sauce is thick and will splatter far and wide if you push it too far. It’ll make a mess and burn you, so respect the bubble
  • 30 minutes of simmering gives the best flavor (but 15 works if you're in a hurry)

🍽️ When to Use this BBQ Sauce

This sweet and tangy Memphis-style sauce pairs best with dry-rubbed meats and smoky flavors. For a true Memphis combo, use it alongside a good rub like my  Memphis BBQ Dry Rub or Marlowe Black Magic Seasoning.

Try it with:

  • BBQ Ribs on the Grill
  • Pulled Pork Butt in the Oven
  • Smoked Brisket or Oven Baked BBQ Brisket
  • The Best Grilled Pork Tenderloin–Memphis Style

It also works well on chicken, burgers, meatloaf, and other grilled favorites.

❄️ How to Store Homemade BBQ Sauce

Like other homemade BBQ sauces, there are no food preservatives; although the acid from some ingredients may act that way, they are not tested. I suggest no longer than 2 hours at temperatures between 40° and 140°.

Store in the refrigerator for up to 5–7 days. It will probably keep longer, but that hasn't been tested.It will store frozen for about 3 months. I like to put small amounts in smaller freezer bags to use as needed.

🥣 Kansas City vs. Memphis Style BBQ Sauce

Let’s stay out of the full BBQ war and just talk sauce.

Kansas City-style BBQ sauce is thick, sweet, and tomato-based—often with molasses for that sticky finish. It’s usually tangy, sometimes smoky, and rarely very spicy.

Memphis-style BBQ sauce is thinner, tangier, and has more vinegar and mustard in the mix. It’s not as sweet as KC sauce and brings a bit more heat.

Some folks say Memphis and St. Louis sauces are just sub-types of Kansas City sauce, but there’s a clear difference. St. Louis sauce is thinner and less sweet than KC’s, but Memphis stands out with its mustard backbone and spicier bite.

Then there’s Carolina vinegar sauce, Alabama white sauce, and a wide range of Texas regional styles—but we’re not wading into that today. BBQ sauce has zip codes, and this one’s proudly Memphis.

❓ FAQs

Why use a non-reactive pan?

Tomato-based sauces like this one can react with certain metals and pick up a metallic taste. Stick with stainless steel or non-stick. Avoid cast iron or copper.

Do I need to use liquid smoke and celery salt?

No—but both add a little something extra, especially the liquid smoke. If you don’t have celery salt, you can mix 2 parts ground celery seed with 1 part table salt.

Is this BBQ sauce gluten-free?

Yes—this Memphis BBQ sauce can be gluten-free if you use the right brands. Most U.S. ketchup and liquid smoke are safe, and Worcestershire sauce made in the U.S. is typically gluten-free.

Always double-check labels, especially with imported Worcestershire.

What makes Memphis BBQ sauce different?

Memphis BBQ sauce is tomato-based like Kansas City sauce but thinner, tangier, and less sweet. It has a touch of mustard and vinegar for extra zip, making it a zesty contrast to thicker, molasses-heavy sauces.

Can I make this sauce less spicy?

Yes. Just reduce or skip the cayenne pepper for a mild version. You’ll still get the classic Memphis tang without the heat.

📖The Recipe Card

BBQ sauce on pork
Print Recipe Add to Collection Go to Collections
5 from 7 votes

Homemade Memphis BBQ Sauce

Classic homemade Memphis-style BBQ sauce with tomato, sweetness, and a touch of spice. Ready in about 30 minutes and perfect for ribs, pulled pork, chicken, and more.
Prep Time5 minutes mins
Cook Time30 minutes mins
Total Time35 minutes mins
Course: Sauce
Cuisine: American
Keyword: Memphis BBQ Sauce, Memphis Style BBQ Sauce, Tangy BBQ Sauce
Servings: 48 tablespoons
Calories: 24kcal
Author: Dan Mikesell AKA DrDan

Ingredients

  • 2 cups ketchup good quality
  • ¼–½ cup yellow mustard adjust to taste
  • ¼ cup apple cider vinegar
  • ½ cup brown sugar firmly packed
  • 3 tablespoons Worcestershire sauce
  • 2 tablespoons chili powder
  • 1 tablespoon black pepper
  • 1 tablespoon onion powder
  • 1 tablespoon garlic powder
  • 2 teaspoons celery salt
  • 2 teaspoons liquid smoke hickory preferred, optional but recommended
  • ¼–½ teaspoon cayenne pepper adjust to taste
US Customary - Convert to Metric

Instructions

  • Combine in a medium to large non-reactive saucepan with a glass lid: 2 cups Heinz or Hunts Ketchup, ¼–½ cup yellow mustard, ¼ cup apple cider vinegar, ½ cup firmly packed brown sugar, 3 tablespoons Worcestershire sauce, 2 tablespoons chili powder, 1 tablespoon black pepper, 1 tablespoon onion powder, 1 tablespoon garlic powder, 2 teaspoon celery salt, 2 teaspoons liquid smoke, ¼–½ teaspoon of cayenne pepper.
    Ingredients for BBQ sauce including ketchup and spices
  • Place over medium heat. Stir vigorously until it just starts to boil, then cover and reduce heat to low. This sauce is thick and splatters easily—be careful. Occasionally, remove from the heat to stir.
    black sauce pan with ketchup with mustard and spices
  • Simmer for 30 minutes. As little as 15 minutes works reasonably well, but 30 is better for combining the flavors.
    Memphis BBQ sauce on pork tenderloin

Notes

Pro Tips:

  1. Use a ketchup you love. I stick with Heinz or Hunts.
  2. A non-reactive pan (like stainless or non-stick) prevents off flavors.
  3. Adjust mustard to taste. I usually use about ⅜ cup for balance.
  4. Liquid smoke and celery salt are optional but recommended. Good liquid smoke should list only “smoke” and “water.”
  5. ¼ teaspoon cayenne gives about a 3/10 heat level—adjust as needed.
  6. Don’t leave the sauce between 40°F and 140°F for more than 2 hours.
  7. Store in the fridge for 5–7 days, or freeze in small portions for 3–4 months.

Nutrition

Serving: 1tablespoon | Calories: 24kcal | Carbohydrates: 6g | Protein: 0.1g | Fat: 0.1g | Saturated Fat: 0.01g | Polyunsaturated Fat: 0.03g | Monounsaturated Fat: 0.04g | Sodium: 196mg | Potassium: 19mg | Fiber: 0.2g | Sugar: 5g | Vitamin A: 200IU | Vitamin C: 1.7mg | Calcium: 10mg | Iron: 0.2mg

Based on Fine Cooking Magazine's version of Memphis BBQ sauce (no link available), with some minor adjustments and added options for you.

Originally Published April 19, 2010. Updated with expanded options, refreshed photos, and a table of contents to help navigation.

Molly and Lilly in the green yared with flag bandanas.

Bacon and Egg Spinach Salad with Tangy Ketchup Dressing

Spinach salad with bacon and dressing.

This bacon and egg spinach salad is an old-fashioned favorite with a sweet, tangy ketchup dressing. Crisp spinach, smoky bacon, and hard-boiled eggs make it hearty enough for lunch but simple as a side.

The ketchup vinaigrette is the nostalgic touch — quick to mix, pantry-friendly, and easy to customize with your favorite toppings.

Fresh bacon and egg spinach salad on a white plate.
[feast_advanced_jump_to]

quote mark
Featured Comment by Pat :
"I've been making this for decades. Originally saw the recipe as a winner of a contest. It was called Sedona Spinach Salad. It is delicious."

😊 Why You’ll Love This Spinach Salad

  • Simple and quick – Ready in 15 minutes with everyday ingredients.
  • Old-fashioned spinach salad – Classic bacon and egg spinach salad with a tangy ketchup dressing, just like recipes that have been around for decades.
  • Customizable – Toss in mushrooms, sprouts, or your favorite toppings.
  • Meal or side – Light enough for a side, hearty enough for lunch.
  • Pantry-friendly dressing – This easy spinach salad dressing recipe comes together in minutes with just ketchup, vinegar, and a few pantry staples.
old recipe card with salad recipe
This was the only copy of this long-time family favorite.

🥣 Ingredients

🥣 Basic Ingredients

  • Baby spinach – Fresh, cleaned, and dried
  • Bacon – Cooked, chopped, and drained
  • Hard-boiled eggs – Sliced or chopped for the salad
  • Homemade spinach salad dressing – A sweet, tangy vinaigrette made with ketchup, sugar, vinegar, olive oil, Worcestershire sauce, and kosher salt

Recommended Toppings (Use What You Like)

  • Bean sprouts – Canned or fresh
  • Water chestnuts – Sliced, canned
  • Red onion – Chopped
  • Fresh mushrooms – Optional (we skip them due to allergies)

Optional Add-Ins

  • Veggies – Avocado, cucumber, bell pepper, shredded carrots, or celery
  • Fruits – Apple chunks, strawberries, blueberries, or raspberries
  • Protein – Cooked chicken, shrimp, or tofu
  • Cheese – Blue cheese, feta, or goat cheese
  • Nuts – Pecans, almonds, walnuts, or pine nuts

Dressing Swaps (If You Must)

The sweet-and-tangy ketchup vinaigrette is the star, but you can use Italian, balsamic, or poppy seed dressing if preferred.

👨‍🍳Quick Overview: Making Simple Spinach Salad

1. Mix dressing

Mix spinach salad dressing of ketchup, sugar, olive oil, Worcestershire sauce, vinegar, and kosher salt.

tupperware shaker of spinach salad dressing

2. Prepare the ingredients

Wash and dry spinach, cook and chop bacon, and slice the hard-boiled eggs. Also, prep any extras like onion, sprouts, water chestnuts, or mushrooms.

raw cutup bacon in black skillet

3. Toss the salad

Combine the spinach, bacon, eggs, and toppings in a large bowl.

salad ready to mix

4. Serving

Serve with the dressing on the side so the spinach stays crisp.

salad mixed and ready to serve

👇For complete step-by-step instructions, scroll down to the printable recipe card or keep reading for tips, flavor options, and serving ideas.

🛒 How to Choose the Best Fresh Spinach

  • Look for dark green leaves with a crisp texture and fresh aroma.
  • Avoid wilted, slimy, or discolored spinach—fresh is key for salads.
  • Choose baby spinach when possible—it’s tender, sweet, and has thin stems.
  • Check the sell-by date on bagged spinach and pick the freshest one available.
  • Don’t overbuy—spinach can last up to 10 days, but it's best within 3 to 4 days.

🍽️ How to Serve Fresh Spinach Salad

  • Keep the dressing on the side so the spinach stays crisp and leftovers store better.
  • Make it a meal – this old-fashioned spinach salad with bacon and eggs is filling on its own, but you can also add grilled chicken or shrimp.
  • Serve it as a side with your favorite grilled dishes, like Grilled Chicken Thighs, Whole Grilled Chicken, Grilled Porterhouse Steaks, or Seared and Baked Strip Steaks.

❄️ How to Store Leftover Spinach Salad

  • Don’t freeze it – Spinach, eggs, and other toppings lose texture when frozen.
  • Store without dressing – The salad stays crisp longer if you keep the dressing separate.
  • Use an airtight container – Refrigerate immediately to keep everything fresh.
  • Best within 1 day – Still okay on day 2, but by day 3 it should be eaten or tossed.
  • Dressing lasts longer – The homemade dressing will keep in the fridge for up to a week.

❓FAQs

What makes this an old-fashioned spinach salad?

It’s the classic mix of fresh spinach, smoky bacon, hard-boiled eggs, and a tangy ketchup dressing. This style of salad has been around for decades, often passed down in family cookbooks and church suppers.

What is a vinaigrette dressing?

A vinaigrette is a simple mix of oil and vinegar—usually in a 3:1 ratio. This recipe uses ketchup to turn it into a sweet, tangy ketchup dressing that’s a little different from the norm but has that nostalgic, summer flavor.

Is it safe to eat raw spinach?

Yes—as long as it’s washed properly, just like any other raw vegetable. Pre-washed bagged spinach is usually ready to use, but you can always rinse it again if you prefer.

Why use baby spinach?

Baby spinach is tender, sweet, and naturally bite-sized. Older spinach has larger, tougher leaves and thicker stems, not as pleasant for a fresh salad.

How to store fresh spinach

Wrap it in paper towels and store in an airtight container or bag in the fridge’s crisper drawer. Keep it dry and wash only what you need. Moisture shortens its life.

📖The Recipe Card

Spinach salad with bacon and dressing.
Print Recipe Add to Collection Go to Collections
5 from 3 votes

Bacon and Egg Spinach Salad with Tangy Ketchup Dressing

This old-fashioned bacon and egg spinach salad is tossed with a sweet, tangy homemade ketchup dressing. A quick spinach salad dressing recipe that's perfect for lunches, potlucks, or summer meals.
Prep Time15 minutes mins
Total Time15 minutes mins
Course: Salad
Cuisine: American
Keyword: ketchup salad dressing, simple spinach salad, spinach salad dressing with ketchup, spinach salad with bacon
Servings: 8
Calories: 461.4kcal
Author: Dan Mikesell AKA DrDan

Ingredients

  • 1 lb baby spinach cleaned and dried
  • 3–4 strips bacon chopped, fried, and drained
  • 4 hard-boiled eggs

Our favorite toppings—many more in the recipe post

  • 14 oz bean sprouts drained
  • 8 oz sliced water chestnuts drained
  • 1 medium chopped red onion optional
  • ½ cup sliced fresh mushrooms optional

Spinach Salad Dressing

  • ⅓ cup ketchup
  • ½ cup sugar
  • ¾ cup olive oil or other vegetable oil
  • 1 tablespoon Worcestershire sauce
  • 3 tablespoons red vinegar or other vinegar
  • ½ to 1 teaspoon kosher salt
US Customary - Convert to Metric

Instructions

Mix dressing

  • Combine all dressing ingredients in a shaker, jar, or bowl. Shake or whisk well.
    tupperware shaker of spinach salad dressing

Prepare the ingredients

  • Wash and dry spinach. Cook and chop bacon. Slice eggs. Prep toppings (onion, sprouts, water chestnuts, mushrooms).
    raw cutup bacon in black skillet

Toss the salad

  • Add spinach, bacon, eggs, and toppings to a large bowl and toss to combine.
    salad ready to mix

Serve

  • Keep the dressing on the side to drizzle just before eating.
    salad mixed and ready to serve

Notes

Pro Tips

  • Fresh baby spinach with dark green leaves and thin stems gives the best texture.
  • Bacon and eggs are core; toppings like sprouts, water chestnuts, and mushrooms are optional.
  • Dressing is bold — adjust vinegar or oil to taste.
  • Serve with dressing on the side to keep the spinach crisp.
  • Leftovers store up to 3 days in the fridge (best on day 1).

Nutrition

Calories: 461.4kcal | Carbohydrates: 26.8g | Protein: 16.4g | Fat: 33.2g | Saturated Fat: 7.1g | Polyunsaturated Fat: 4.3g | Monounsaturated Fat: 20.2g | Trans Fat: 0.1g | Cholesterol: 121.3mg | Sodium: 823.1mg | Potassium: 663.2mg | Fiber: 3.3g | Sugar: 18.5g | Vitamin A: 5520.6IU | Vitamin C: 23.8mg | Calcium: 84.4mg | Iron: 3.2mg

Editor note: This is a republishing of a recipe originally published on May 24, 2010. That was the first year of the blog, and I just took a few pictures and tossed up the recipe so my kids would stop calling mom for it. It was updated with expanded options, refreshed photos, and a table of contents to help navigation.

Molly and Lilly in flag bandanas with a ball

Grilled Carrots with Honey Brown Sugar Glazed

grilled carrot on fork

Grilled Carrots with Honey Brown Sugar Glaze are easy to prep and grill—a perfect side dish for any grilled entree. We love carrots, and grilling enhances the sweetness and a little smoky caramelized char.

🥕Ingredients

Carrots
Olive oil
Glaze—honey, brown sugar, olive oil

grilled carrot on fork.
[feast_advanced_jump_to]
Blue ribbon divider used for visual effect

Grilling brings out the best in most foods; grilled carrots are no exception. We love the smoky grilled flavor of honey grilled carrots honey.

This recipe is simple: quickly prepare the carrots, brush them with oil, and grill alongside your main dish. Add a glaze halfway through for the star of the meal.

👨‍🍳How to Grill Carrots with Honey Glaze—Step-by-Step Photo Instructions

Carrots with honey and sugar..
cleaning and oiling grill grates.

1. Preheat grill to medium (surface temp of about 400°-450°).

cutting carrots in half with knife.

2. Trim carrots and cut them in half if they are over ¾ inch thick.

Brushing carrots with oil.

3. Brush the carrots with olive oil.

carrots on a grill grate.

4. Grill the carrots in a grill pan or on the grates, flipping every 5 minutes.

brushing carrots on the grill with honey.

5. Mix honey glaze of honey, brown sugar, and olive oil. At the 10-minute flip, brush all sides with the honey glaze.

grilled honey glazed carrots on a red plate.

6. Grill until the internal temperature is over 190°—about 5 to 10 minutes more.

For more details, keep reading. See the Recipe Card below for complete instructions and to print.

⏲️How long to grill carrots?

Grilled carrots need to be "fork-tender"—about 190°. Grilling will take about 15-20 minutes, depending on the exact grill temperature and the thickness of the carrots.

✔️Make them right every time

Pick fresh carrots of about equal size. Cut them in half longways if they are over ¾ inch thick, but they can be cooked whole if smaller. This is not a good recipe for baby carrots.

You may peel the carrots or not. Trim the top and the thin end off, then brush with olive oil before grilling.

I always talk about grill surface temperature, and carrots are a good match for the midrange 400°-450°—the range for most chicken and pork recipes. If you are running a grill over 450°, decrease the temperature in one area.

A gas grill works well since it is easier to control the temperature and usually has a large grill surface. If you can control the temperature, a charcoal grill may be used.

You can grill in a grill pan or directly on the grates. Either is fine, but it must be oiled well.

🍴Other grilled side dishes

Take advantage of these other grilled side dishes. Start with some starch, like Grill Small Potatoes or Grill Biscuits. Then add another grilled veggie recipes, like Grilled Stuffed Tomatoes or Grilling Asparagus. And don't forget dessert of Grilled Glazed Pineapple or Grilled Peaches.

🍽️When to serve

Grilled glazed carrots go with almost any grilled entree, but I find them particularly compelling with grilled burgers, grilled chicken breasts, grilled pork loin chops, or grilled porterhouse steak.

❄️Storage of leftovers

Store leftover grilled glazed carrots in an airtight container in the refrigerator for 3 days.

Reheat for about 5 minutes in an air fryer or a 375° oven. They are also great on a tossed salad or garnish.

❓FAQs

Do I need to peel the carrots?

No, just a good clean of the skin with running water and a brush will be fine.

Can I use baby carrots?

You can grill them in a grill pan, but baby carrots are cut from large woody carrots and have less flavor. So you will be disappointed.

Can I add the honey glaze when I start grilling?

No. The sugar in the honey will burn before the carrots are tender, so we partly cook them and then add the glaze for the last part of the cooking.

Blue ribbon divider used for visual effect

📖The Recipe Card

piece of grilled carrot on a fork
Print Recipe Add to Collection Go to Collections

Grilled Carrots with Honey Brown Sugar Glazed

Grilled Carrots with Honey Brown Sugar Glaze are easy to prep and grill—a perfect side dish for any grilled entree. We love carrots, and grilling enhances the sweetness and a little smoky caramelized char.
Prep Time5 minutes mins
Cook Time15 minutes mins
Total Time20 minutes mins
Course: Vegetable
Cuisine: American
Keyword: Grilled Carrots, grilled carrots honey, honey grilled carrots
Servings: 2 servings
Calories: 125kcal
Author: Dan Mikesell AKA DrDan

Ingredients

  • 2 carrots
  • 2 teaspoons olive oil for brushing

Honey Glaze

  • 1 tablespoon honey
  • 2 teaspoons brown sugar
  • 1 teaspoon olive oil
US Customary - Convert to Metric

Instructions

  • Preheat grill to medium (surface temp of about 400°-450°).
    clean and oil grill crates
  • Prep the carrots. Scrub well or peel. Cut off the root and skinny tip. If the carrots are thicker than ¾ inch, cut in half lengthwise. Mix 1 tablespoon honey, 2 teaspoons brown sugar, and 1 teaspoon olive oil, heat in the microwave for 15 seconds to get hot, and stir to combine the sugar.
    cutting carrots in half with knife
  • Give the carrots a good brush of olive oil, and don't forget the cut ends. Don't brush with glaze yet.
    Brushing carrots with oil
  • You can use a grill pan or grill directly on the grates, but be sure either is well-oiled. Flip the carrots every 5 minutes.
    carrots on a grill grate
  • About 10 minutes into grilling, brush with the honey solution, flip and brush again.
    brushing carrots on the grill with honey
  • Grill until the internal temperature is over 190° in the thickest part and tender, about 5 to 10 minutes more, for a total grill time of 15 to 20 minutes.
    grilled honey glazed carrots on a red plate.

Notes

Pro Tips

  1. Pick carrots of about the same size. If the thickest part is over ¾ inch in diameter, cut them in half longwise. Otherwise, you can grill them whole.
  2. Peeling is optional. Cut off the top and skinny tip.
  3. It is hard to cook this over 500° grill surface temperature since the outside will burn before the carrot is cooked. So, get the temperature right.
  4. Like many recipes, there are variables: exact grill temperature, the thickness of the carrots, and your desired tenderness.
  5. A done carrot is when it is as tender as you like and about 190° in the thickest part.

Nutrition

Calories: 125kcal | Carbohydrates: 18g | Protein: 1g | Fat: 6g | Saturated Fat: 1g | Sodium: 44mg | Potassium: 195mg | Fiber: 2g | Sugar: 15g | Vitamin A: 10191IU | Vitamin C: 4mg | Calcium: 20mg | Iron: 1mg

Originally Published June 20, 2013. Update with expanded details and refreshed photos—a table of contents added for navigation.

Molly in the yard.
Molly after running.

Single Serving Lemonade Recipe

glass of lemonade with lemon juice

This Single-Serving Lemonade Recipe with lemon juice and sugar is easy to make in only 2 minutes. Use a sugar substitute like Splenda®️ to make sugar-free lemonade. This recipe is about the ingredients lemonade ratio, so you can make a glass or a gallon. It's perfect for one, two, or a crowd.

🍋Ingredients

Lemon juice—freshly squeezed or bottled (ReaLemon®️)
Sugar—regular sugar or substitute like honey or granular Splenda®️

glass of lemonade with lemon juice.
[feast_advanced_jump_to]
Blue ribbon divider used for visual effect

This is an easy recipe for homemade lemonade for one or a crowd. The recipe is just a ratio of 2 parts lemon juice to 1-2 parts sugar (to taste) to 5 parts water—make one glass of lemonade at a time or a pitcher. Always taste test and more sugar may be needed.

A glass of lemonade with regular sugar has 105 calories, but sugar-free lemonade with granular Splenda®️has 30 calories—a good fit for most healthy diets.

Relax and sip your glass of lemonade on a hot day, or serve it with any meal. I love it with beef, like grilled burgers or grilled strip steaks.

lemon juice with sugar and a glass.

Lemonade ingredient ratio

I suggest starting with 1 part sugar, 2 parts lemon juice, and 5 parts water. Assume 1 cup of ice cubes is about ½ cup of water. Taste test and add more sugar or ReaLemon if needed.

Honey Lemonade

To make honey lemonade, honey is sweeter than sugar, so decrease the volume by 25% and dissolve it in hot water before combining it with other ingredients.

Fresh squeezed lemonade

Making fresh-squeezed lemonade only takes a bit more time to squeeze the lemons. For one 12 oz glass, generally use one large or two medium lemons.

Homemade Sugar-Free Lemonade

To make sugar-free lemonade, substitute the equalized amount of artificial sweetener for the sugar. Common sugar substitutes are sucralose (Splenda®), saccharin (Sweet n’ Low®), and aspartame (Equal®). Splenda Granulated Sweetener is a one-to-one substitute.

Two tablespoons of Splenda Granulated Sweetener is 12 calories vs two tablespoons sugar = 97 calories. With sugar, there are 106 calories and 28 grams of carbohydrates. With Splenda, it is 25.4 calories and 4.2 grams of carbohydrates.

One Splenda Sweetener Packet is equal to 2 teaspoons of sugar.

If you use artificial sweeteners, you should discuss the risks and benefits with your doctor, considering your individual medical condition.

❓FAQs

How much lemon juice is in 1 lemon?

Assume two tablespoons per medium-sized fresh lemon, but this will vary by the type and size of lemons. The general range for a medium-sized lemon is 2-3 tablespoons, while a large lemon may yield 4-5 tablespoons.

How much water is in ice cubes?

This varies by the size and shape of the cubes. A cup of ice cubes will be ½ to ¾ cup of water.

Blue ribbon divider used for visual effect.

📖The Recipe Card

glass of lemonade with lemon juice
Print Recipe Add to Collection Go to Collections

Single Serving Lemonade Recipe

This Single-Serving Lemonade Recipe with lemon juice and sugar is easy to make in only 2 minutes. Use a sugar substitute like Splenda®️ to make sugar-free lemonade. This recipe is about the ingredients lemonade ratio, so you can make a glass or a gallon. It's perfect for one, two, or a crowd.
Prep Time2 minutes mins
Total Time2 minutes mins
Course: Beverage
Cuisine: American
Keyword: lemonade recipe with lemon juice for 1 glass, Single serving lemonade, Sugar-free lemonade
Servings: 1 12 oz.
Calories: 105.8kcal
Author: Dan Mikesell AKA DrDan

Ingredients

  • ¼ cup lemon juice (ReaLemon®️) or Juice of 2 medium or 1 large lemon
  • 2-4 tablespoons sugar or Granulated Splenda®️
  • 1 cup water
  • ½ cup ice cubes

Instructions

  • Mix lemon juice, with sugar and water. Add ice last.
    pouring sugar into glass
  • Taste test and add a splash of lemon juice or sugar if needed for your taste.
    glass of lemonade with lemon juice

Notes

  1. Assume one medium lemon will yield about 2 tablespoons of lemon juice. However, this can vary from 2 to 3 tablespoons.
  2. Ice cubes will vary in the amount of water per cup of ice depending on size and shape. Assume ½ to ⅔ cup of water per cup of ice cubes.
  3. The nutrition is calculated as regular lemonade with sugar. With sugar, there are 106 calories and 28 grams of carbohydrates. With Splenda, it is 25.4 calories and 4.2 grams of carbohydrates.

Nutrition

Calories: 105.8kcal | Carbohydrates: 28.1g | Protein: 0.2g | Fat: 0.2g | Saturated Fat: 0.02g | Polyunsaturated Fat: 0.01g | Sodium: 18.6mg | Potassium: 63.3mg | Fiber: 0.2g | Sugar: 25.5g | Vitamin A: 3.7IU | Vitamin C: 23.6mg | Calcium: 14.6mg | Iron: 0.1mg

Editor's Note: Originally published  February 22, 2010, and updated with expanded options, refreshed photos, and a table of contents to help navigation.

dogs int the yard with their favorite trees.

Grilled New York Strip Steak

A strip steak with grill marks on a gray plate.

Grilled New York strip steak is quick to cook over high heat, with a delicious crust and a medium-rare center in just minutes. Follow the cooking times and temperatures for your preferred doneness.

This step-by-step recipe works on a gas grill or any grill, with adjustments for steak thickness and your preferred doneness.

⏱️ How Long to Grill New York Strip Steak

Cook 1-inch thick New York strip steaks over direct high heat at 500°F or higher on a gas grill or any grill.

  • Medium-rare: 7–8 minutes to reach 135°F
  • Medium: 9–10 minutes to reach 145°F

Always cook to final internal temperature using an instant-read thermometer.

Strip steak with grill marks with potatoes on a light gray plate.
[feast_advanced_jump_to]

quote mark
Featured Comment from Leslie :
⭐⭐⭐⭐⭐"We followed your directions exactly and turned out delicious!"

🥩 TL;DR — Recipe Summary

  • What it is: Grilled New York strip steak cooked over high heat for a delicious crust and a medium-rare center or your preferred doneness.
  • Why you’ll love it: Fast cooking, simple seasoning, and reliable results in just minutes.
  • How to make it: Grill strip steaks over direct high heat at 500°F or higher, using the cooking time as a guide and an instant-read thermometer for doneness.

🥩 Ingredients

New York strip steaks with seasoning—labeled

🥩 Strip Steak Selection

Start with high-quality strip steaks—also called striploin steaks. The two most common types are:

  • New York strip: Boneless, well-trimmed, and great for beginners
  • Kansas City strip: Bone-in, usually thicker with more edge fat

What to look for:

  • Thickness: 1 to 1½ inches thick is ideal (1 inch = ~10–12 oz)
  • Marbling: Look for fine white fat throughout
  • Grade: USDA Choice or Prime preferred for best flavor and tenderness
  • Trim if needed: Extra edge fat can cause flare-ups on the grill
  • Thinner steaks: ¾-inch cuts work but cook fast—watch your temps closely

🧂 Seasoning Options

  • Kosher salt and black pepper are all you need for great results
  • I like to use my 7:2:2 seasoning (salt, pepper, garlic) for more flavor
  • You can also try Montreal steak seasoning, or herbs like thyme or rosemary
  • Marinade: My Easy Steak Marinade is a great addition if you have time.
  • Timing matters: Salt an hour ahead or just before grilling—never in between

👨‍🍳 Quick Overview: How to Grill New York Strip Steak

1. Prep

Let the steaks rest at room temperature for 30 minutes before cooking. Trim excess edge fat and season to taste.

seasoning strip steaks on a black board

🧂 Seasoning Tip: Salt and pepper are plenty. I like some garlic or try a dry rub or Montreal seasoning.

2. Preheat

Fully preheat the grill to 500°F or higher for a good sear and fast cooking. Clean and oil the grates before you start.

Cleaning grill grates.

3. Grill

Cook over direct heat, flipping halfway through and rotating for grill marks. Remove 3°–5° before your final temperature.

placing strip steak on the grill grate

🌡️ Pro Tips: Use an instant-read thermometer to remove the steaks, accounting for residual cooking during the rest.

4. Rest

Let the steak rest 5–10 minutes to finish cooking and allow the juices to redistribute.

tenting strip steaks on a blue plate with foil

⏲️ Pro Tip: Cutting too soon lets the juices run out—always give it a full rest for the best results.

👇 For complete step-by-step instructions, scroll down to the printable recipe card or keep reading for tips, flavor options, and serving ideas.

⏰ New York Strip Steak Grill Time

A 1-inch thick strip steak cooks about 7–8 minutes over high heat for medium-rare (135°F). But always go by internal temperature, not just time.

Pull temps account for 3°–5° carryover cooking during the rest.

Approximate Grilling Times for Doneness

  • Rare: 125°–130° (pull at 120°–125°), about 6–7 minutes — cold red center. Rare is tricky—so only cook the first side for 3–4 minutes and watch closely, checking temperature early.
  • Medium-rare (recommended): 130°–135° (pull at 125°–130°), about 7–8 minutes — warm red center.
  • Medium: 140°–150° (pull at 135°–145°), about 9–11 minutes — pink and firm.
  • Medium-well: 150°–155° (pull at 145°–150°), about 12–14 minutes — slight pink center.
  • Well-done: 160°+ (pull 5° early), 14+ minutes — brown and firm. Not recommended.

🌡️ Temperature Pro Tip: Final temperature = doneness. Pull temp = 3°–5° below. Carryover = the free finish while resting.


What Affects Grill Time

This high-temperature direct-heat method works best for boneless strip steaks ¾ to 1½ inches thick, but thickness and bone will affect cooking time.

  • Thinner steaks may cook 1–2 minutes faster.
  • Thicker steaks take longer to cook and may overcook on the surface before the center reaches your preferred temperature.
  • Bone-in strip steaks usually take slightly longer to cook.
  • Refrigerator-cold steaks will take longer to cook.

An instant-read thermometer easily handles all these variables and is the best way to cook strip steak to your preferred doneness.


Sear and Move

For steaks about 1½ inches or thicker, or still refrigerator-cold, try the sear-and-move method to avoid overcooking the surface.

  1. Preheat the grill on high, then turn off the burners on one side to create an indirect-heat zone.
  2. Sear over direct high heat until you have the crust you want, then move the steaks to the indirect side.
  3. Close the lid and finish cooking to your preferred internal temperature using an instant-read thermometer.
cut strip steak on a gray plate with potatoes and beans.

🍽️ Serving Suggestions

Top your steak with a pat of butter—or go big with my blue cheese compound butter.

Serve grilled New York strip steak with a garden salad or grilled vegetables: Grilled Mixed Vegetables, Grilled Baby Potatoes, Grilled Carrots, or Grilled Corn on the Cob.

❄️ Storage and Leftovers

Leftover strip steak can be stored in the refrigerator for 3–4 days or frozen in an airtight container for up to 3–4 months.

To reheat, warm gently in a skillet with a bit of butter or broth until just heated through. Avoid overcooking, which can dry out the steak.

🥩 Other Steak Recipes to Try

  • Pan Seared New York Strip Steak
  • Seared and Baked Filet Mignon
  • Grilled Filet Mignon
  • Grilled Ribeye
  • Grilled Top Sirloin
  • Grilled Porterhouse Steak

❓ FAQs

Should I use oil on the steaks?

No need—there’s enough fat in the meat. Oil the grates, not the steak.

Should you close the grill lid when cooking New York strip steak?

Yes. Keep the lid closed while cooking so the grill holds its heat and cooks the steak more evenly. Leave it open only for very thin steaks.

📖The Recipe Card

A strip steak with grill marks on a gray plate.
Print Recipe Add to Collection Go to Collections
4.75 from 4 votes

Grilled New York Strip Steak

Grill New York strip steak over high heat in just minutes for a delicious crust and a medium-rare center, with easy cooking times and temperatures for your preferred doneness.
Prep Time10 minutes mins
Cook Time10 minutes mins
Total Time20 minutes mins
Course: Grilled, Main Course
Cuisine: American
Keyword: Grilled strip steaks, Grilling New York Strip Steaks, How long to grill strip steaks, How to grill NY strip steaks on a gas grill
Servings: 2
Calories: 317.5kcal
Author: Dan Mikesell AKA DrDan

Ingredients

  • 2 strip steaks 10-12 oz trimmed well. 1-inch thick recommended.
  • kosher salt and pepper to taste or 7:2:2 seasoning
US Customary - Convert to Metric

Instructions

Prep the steaks

  • Let the steaks rest at room temperature for 30 minutes if possible—15 minutes is still helpful.
    two NY strip steaks with seasoning on blue plate
  • Trim excess edge fat to prevent flare-ups on the grill.
    two trimmed strip steaks on a black board
  • Just before grilling, season with coarse salt and pepper (or 7:2:2). Other dry rubs or marinades are fine, too.
    seasoning strip steaks on a black board

Preheat the grill

  • Preheat your gas grill to high heat, aiming for a surface temperature of 500°F or higher. Clean and oil the grates well. Avoid olive oil—it has a low smoke point.
    clean and oil grill crates

Grill the strip steaks

  • Place the steaks over direct high heat and close the lid. Flip about halfway through cooking. For crossed grill marks, rotate the steaks 90° halfway through each side.
    placing strip steak on the grill grate
  • Grill until the internal temperature is 3°–5° below your final target. Never cook by time only—always cook to a target internal temperature using an instant-read thermometer..
    two grilled strip steaks on a blue plate

Rest before serving

  • Let the steaks rest for 5–10 minutes before slicing. Carryover cooking will finish the steak and allow the juices to redistribute.
    tenting strip steaks on a blue plate with foil

Video

Notes

Pro Tips

Works on gas, charcoal, or pellet grills.
Stick to 1-inch thick steaks if possible. ¾-inch steaks cook fast and are easy to overdo. Up to 1½ inches thick can be used, but the thicker they are, the harder and longer it takes.
Salt 1 hour before or just before grilling—not in between.
Use the seasoning you wish. We use our All-Purpose Seasoning, but Montreal and other mixes or rubs are fine.
Always use a thermometer. Guessing is how you ruin good steak.
Times are just planning tools—cook to temp, not the clock.

Nutrition

Calories: 317.5kcal | Protein: 29.2g | Fat: 21.3g | Saturated Fat: 8.6g | Cholesterol: 113.4mg | Sodium: 364.4mg | Potassium: 443.7mg | Calcium: 32.8mg | Iron: 2.1mg

Originally Published February 8, 2016. Updated with expanded options, refreshed photos, and a table of contents to help navigation.

dogs running slowly in the yard.

Strawberry Pie with Jello

Whole fresh strawberry jello pie ready to eat.

This strawberry pie is an easy dessert made using Jello, fresh strawberries, a simple homemade glaze, and a refrigerated crust. It comes together in about 25 minutes with five ingredients—no complicated steps or special skills needed.

Kitchen proven for nearly 50 years, this classic summer pie is reliable, foolproof, and always a hit. Just prep, combine, and chill until set.

⏱️ Quick Answer: How Long to Chill Strawberry Pie with Jello

  • 2 hours minimum
  • 3–4 hours for clean slices
  • Overnight is best

👉 Always refrigerate until fully firm before serving.

Whole fresh strawberry jello pie ready to eat.
[feast_advanced_jump_to]

quote mark
Featured Comment by M. Bartlett:
⭐⭐⭐⭐⭐
"This pie was easy to make and turned out well. We all loved it. A very good recipe."

📌 TL;DR — Recipe Summary

What it is: A fresh strawberry pie with an easy homemade Jello glaze, a refrigerated crust, and no-fuss prep.

Why you’ll love it: Easy, reliable, and made with fresh strawberries—perfect for summer desserts and potlucks.

How to make it: Bake the crust, prep the strawberries, make a quick Jello glaze, combine, and chill until fully set.

Jump to the Recipe Card or continue to read for details and options.

🍓 Ingredients for Strawberry Pie with Jello

fresh strawberries with pie crust and jello.
  • Fresh Strawberries
  • Refrigerated pie crust
  • Homemade Jello Glaze: Water, sugar, cornstarch, strawberry Jello

👨‍🍳 Quick Overview: How to Make Strawberry Pie with Jello

1. Prepare the crust

Bake a refrigerated pie crust according to the package instructions in a 9-inch pie plate. Other crusts may be used.

raw pie crust ready for the oven-3

2. Prepare the strawberries

Wash, trim, and slice strawberries. Dry with a paper towel.

Trimmed strawberries in a bowl.

3. Make the Jello glaze

Thicken a water and sugar mixture with cornstarch. When thick, remove from heat and mix in Jello. Allow to cool.

adding strawberry jello to thickenend sauce

4. Assemble and chill

Mix the berries into the cooled glaze before pouring it into the crust for the best coverage and sliceability. Smooth into the crust and refrigerate for 2–3 hours before serving.

smoothing top of strawberry pie after filling crust

👇For complete step-by-step instructions, scroll down to the printable recipe card or keep reading for tips, flavor options, and serving ideas.

🍓 Choosing the Best Strawberries for Strawberry Pie

Use fresh, ripe strawberries for the best strawberry pie flavor and texture. Wash, trim, and dry them well before using. You can leave them whole, but slicing makes the pie easier to serve and eat.

👍 What to look for

  • Deep red color throughout (no white or green tips)
  • Firm, plump berries with a smooth, taut surface
  • Sweet, fresh strawberry smell
  • Bright green caps that aren’t wilted

👎 What to avoid

  • Pale or partially white berries (underripe)
  • Soft, mushy spots or bruising
  • Mold or leaking juice
  • Dull or shriveled caps

✅ Pro Tip: Prepare the berries while the crust bakes. Wash, trim, and pat them dry, then let them air dry while you make the glaze. The glaze sticks better to dry berries, which improves texture, sliceability, and how well the pie holds up.

🥧 What Pie Crust to Use

You can make your crust, but commercial refrigerated or frozen crusts are convenient and perfect for this simple classic pie. Pillsbury refrigerated crusts, a no-bake graham cracker, or frozen shells are good choices.

I prefer a refrigerated crust, blind-baked to a golden brown according to the producer's instructions.

📅Make-ahead tip: Bake your crusts a few days ahead and store, covered tightly, in the refrigerator. Or frozen for 3 months. The other ingredients should be made the day of assembly.

🥣 Jello Glaze for Strawberry Pie

Commercial glaze is available, but it contains many chemicals and has a poor taste. The easy homemade version, made with cornstarch, white sugar, water, and strawberry Jell-O, is cheaper and vastly superior in flavor.

🤔Pro Tip: You can add the berries to the baked crust and then add the filling, but the glaze must coat the berries to preserve the pie. For the best coverage, mix the sliced berries into the Jell-O mixture after it has cooled, and then add it to the crust.

:

😊 Pie and Pie-like Dessert Recipes

Don't miss these other quick and easy fruit dessert recipes, like Blueberry Crumble Pie, Apple Crumble Pie, Small Batch Apple Crisp, and Apple Berry Crumble.

❄️ How to Store Strawberry Pie

Store in the refrigerator covered with plastic wrap. It will not freeze well.

❄️Storage tip: This pie keeps well for the first two days. By the third day, the berries will begin to deteriorate.

❓ FAQs About Strawberry Pie with Jello

How to prevent soggy pie crust bottoms?

Preheat a baking sheet in the oven and place the pie on it. This helps set the crust quickly by melting the fat and creating a barrier that prevents the filling from soaking in.

Why is my glaze runny?

The most common reason is undercooking the cornstarch mixture, which occurs when it is not cooked for long enough.

Bring it to a gentle boil and continue cooking for a few minutes after it starts to clear. It should thicken noticeably before it's done. It’s better to cook longer than you think rather than too short.

Also, dissolve the cornstarch completely—add it gradually while whisking constantly to avoid lumps.

Can I use frozen strawberries?

No. Frozen berries will release excess fluid and ruin the texture of the pie.

Can I use a Graham cracker crust

Yep, it's a very nice combination. You can buy premade graham cracker crusts or make your own.

📖The Recipe Card

Whole fresh strawberry jello pie ready to eat.
Print Recipe Add to Collection Go to Collections
5 from 5 votes

Strawberry Pie with Jello (Easy and Reliable Fresh Recipe)

This strawberry pie with Jello is made with fresh berries, a simple homemade glaze, and a ready-made crust. An easy, reliable dessert that’s been a family favorite for nearly 50 years.
Prep Time5 minutes mins
Cook Time20 minutes mins
Cooling2 hours hrs
Total Time2 hours hrs 25 minutes mins
Course: Dessert
Cuisine: American
Keyword: fresh strawberry pie, strawberry jello pie, strawberry pie with jello
Servings: 8
Calories: 268kcal
Author: Dan Mikesell AKA DrDan

Ingredients

  • 1 pie crust refrigerated and baked
  • 1 pound fresh strawberries (never frozen) or a bit more.

Homemade Jello Glaze

  • ¼ cup corn starch
  • 1 cup sugar
  • 1 ½ cup water
  • 3 oz strawberry Jell-O® one small package
US Customary - Convert to Metric

Instructions

Prepare the crust

  • Bake a refrigerated pie crust according to the package instructions in a 9-inch pie plate. Other crusts may be used.
    raw pie crust ready for the oven-3

Wash, trim, and dry the strawberries

  • Wash, trim, and slice one pound (or a little more) of strawberries. Dry with a paper towel and set aside to let them air dry while the glaze cools. The glaze sticks better to dry berries.
    Trimmed strawberries in a bowl.

Make the simple Jello glaze

  • In a larger saucepan, add 1 cup sugar to 1½ cups water over medium-high heat. Sprinkle in ¼ cup of cornstarch slowly while stirring.
    adding cornstarch to pan with sugar and water
  • The mixture will turn cloudy. Stir continuously over medium heat and bring to a light boil. In about 3-4 minutes, it will start to clear and thicken. When the thickening is complete (about two minutes after it starts to clear), remove it from the heat. Add a 3-oz package of Strawberry Jell-O® to the mixture and stir until completely dissolved.
    adding strawberry jello to thickenend sauce

Assemble and Chill

  • Mix the berries into the cooled glaze before pouring it into the crust for the best coverage and sliceability.
    mixing fresh strawberries into sauce
  • Pour the berry mixture into the pie crust. Refrigerate for at least 2 hours (preferably 3 hours or more) before cutting. Serve with whipped cream or vanalla ice cream.
    smoothing top of strawberry pie after filling crust

Storage

  • This is great on the first and second days. By the third day, the berries start to deteriorate.
    fresh strawberry pie slice on white plate

Video

Notes

Pro Tips:

  1. You can make your pie crusts, but this pie is fine with a frozen or refrigerated crust. A 9-inch crust is just right.
  2. Pick nice ripe strawberries.
  3. We like to add a few more berries. "Crowd the pan," so to speak.
  4. You can purchase glaze, but we recommend making your own. It's easy and tastes much better.
  5. Some people prefer to use whole berries with the point facing up. All for looks, and makes the pie harder to cut and consume.
  6. Dry the berries. The glaze does not stick well to wet berries.
  7. It is good for two days in the refrigerator, but not too good on the third day. It will not freeze well.
  8. Make two at once; the work is about the same, but you'll receive double the reward if you're having a party.

Nutrition

Calories: 268kcal | Carbohydrates: 53g | Protein: 3g | Fat: 6g | Saturated Fat: 2g | Sodium: 140mg | Potassium: 107mg | Fiber: 2g | Sugar: 37g | Vitamin A: 7IU | Vitamin C: 33mg | Calcium: 14mg | Iron: 1mg
Molly and Lilly in spring flowers 2020.

Publisher's note: This recipe was originally published on June 23, 2012. Updated with expanded options, refreshed photos, and a table of contents to help navigation.

BBQ Chicken Skewers

BBQ Chicken Skewers on a white plate

Fire up the BBQ grill for these delicious, fast, and easy BBQ chicken skewers (kabobs), ready in 30 minutes. Juicy chicken, your favorite sauce, and optional fresh veggies are perfect for a quick and tasty weeknight dinner or summer cookout. Oven-baked instructions are included.

🐓Ingredients

Chicken—skinless boneless chicken breasts
BBQ sauce
Pantry ingredients—olive oil, kosher salt, and black pepper
Optional—Pineapple, red or green peppers, red onions, zucchini, or summer squash

BBQ Chicken Skewers on a white plate.
[feast_advanced_jump_to]
Blue ribbon divider used for visual effect

I use this recipe when I don't know what to make with those chicken breasts in the fridge. Just trim, skew, grill, and brush with barbecue sauce, all in under 30 minutes. I use my favorite barbecue sauce for flavor and add optional ingredients if I have them for a complete dinner.

Check out these other easy kabob recipes, like Marinaded Beef Kabobs, Honey Garlic Chicken Kabobs, or Buttermilk Ranch Chicken Kabobs.

👨‍🍳How to Grill BBQ Chicken Skewers—Step-by-Step Photo Instructions

raw chicken with seasoning for kabobs.
clean and oil grill crates

1. Preheat grill to 450°—medium-high heat on most grills.

trimmed and cubed chicken on red board.

2. Trim and cube chicken breasts and any vegetables or pineapple.

mixing chicken with spices in metal bowl.

3. Mix oil with salt and pepper and brush the chicken. Brush other ingredients with oil.

cubes of chicken on skewers.

4. Thread onto skewers. If using vegetables or pineapple, add between the chicken.

Brushing BBQ sauce on a cooking kabob on the grill grate.

5. Grill over direct heat and rotate every 5 minutes until 155°, then brush with BBQ sauce. Continue to grill until 165°. About 20 minutes total grill time

For more details, keep reading. See the Recipe Card below for complete instructions and to print.

How Long to Grill Chicken Kabobs

The time needed to grill chicken kabobs on a 450° BBQ grill will vary depending on the size of your chicken pieces and the exact grill temperature. But 15 minutes is a good estimate to reach 165°F.

Check several locations, usually in the bigger pieces near the center of the skew, and check early with an instant-read thermometer.

♨️How to cook chicken skewers in the oven

You can cook kabobs on a tray in a 450° oven for about 15 minutes. As always, you cook to a final internal temperature, not by time alone. Time varies by the oven, the tray, and the size of the chicken chunks.

Ingredient options and variations

Chicken—skinless, boneless chicken breasts trimmed into approximately 1-inch cubes. Skinless thighs may be used, but they should be cooked to a slightly higher internal temperature of 180°F for tenderness.

BBQ sauce—the barbecue sauce you like or Memphis BBQ Sauce. Other seasoning options are discussed in the Tips section below.

Other seasonings besides BBQ sauce can easily be used. Try a seasoning salt like Loweys, thyme, rosemary, Black Magic Seasoning, BBQ Dry Rub, or my Chipotle Seasoning Recipe, are all good choices.

A marinade may be used, but it will add time. Check out Lemon Butter Chicken Marinade or Lemon Chicken Marinade.

If cooked on separate kabobs, the standard onion and bell peppers will cook faster than the chicken. However, they can cook with the chicken when mixed in with it.

piece of chicken on fork.

Suggested serving

Serve with a grilled side dish like Grill Red Potatoes or Grill French Fries, and maybe a side salad and Single Serving Lemonade.

Storage and reheating leftovers

Leftovers should be stored, sealed in an airtight container, refrigerated for 4 days, or frozen for 3 months. They can then be reheated in the oven or an air fryer.

❓FAQs

What is the difference between kabobs, kebabs, and skewers?

The terms are all used interchangeably, as is "shish kabobs." Kabobs are food on skewers. However, skewers can also refer to the wood or metal rods used to make kabobs or skewers. So use the term you like—I tend to go back and forth.

What skewers to use for chicken kabobs?

Use metal skewers, especially for chicken, where some heat transfer along the metal will help the cooking. You can use wooden skewers if soaked first to prevent them from burning.

What grill settings to use?

A grill surface temperature of about 450° is suggested for this and most chicken cooking. Higher temperatures tend to overcook and dry the outside before the center reaches the desired final internal temperature.

On most gas grills, this will be a bit above medium. On charcoal grills, you must be careful with the number of coals and the vent settings.

Please use a grill surface thermometer to get the right temperature. For more information on grill temperature, please see A Beginners Guide to Grill Temperature on a Gas Grill.

Food safety

Raw chicken and other poultry should be considered contaminated and handled with care. Wash your hands carefully before and after touching raw chicken.

We do not routinely wash raw chicken due to water splatter. See Chicken... To Rinse or Not To Rinse? for more information.

You must cook chicken to an internal temperature of 165° for safety—see the USDA for more information. You need to check this with an instant-read thermometer.

Most recipes (including this one) include estimated cooking times. These are provided for planning purposes. You can not cook safely by time—you must use a thermometer.

These gatherings are ready-made for food safety issues and leftovers at the party. Let's plan for food safety and get it right. Check out the USDA Food Safety recommendations.

Blue ribbon divider used for visual effect

📖The Recipe Card

BBQ Chicken Skewers on a white plate
Print Recipe Add to Collection Go to Collections
4.25 from 4 votes

BBQ Chicken Skewers

Fire up the BBQ grill for these delicious, fast, and easy BBQ chicken skewers (kabobs), ready in 30 minutes. Juicy chicken, your favorite sauce, and optional fresh veggies are perfect for a quick and tasty weeknight dinner or summer cookout. Oven-baked instructions are included.
Prep Time10 minutes mins
Cook Time15 minutes mins
Total Time30 minutes mins
Course: Main Course
Cuisine: American
Keyword: BBQ Chicken Kabobs, Chicken Kabobs, Chicken Skewers
Servings: 4
Calories: 327kcal
Author: Dan Mikesell AKA DrDan

Ingredients

  • 2 skinless boneless chicken breasts
  • 1 tablespoon olive oil
  • ½ teaspoon coarse salt
  • ¼ teaspoon pepper
  • ½ cup BBQ sauce

Optional added ingredients

  • 1 Green or red bell peppers
  • 1 Red onion in chunks
  • Pineapple
  • zucchini or summer squash
US Customary - Convert to Metric

Instructions

  • Start by cleaning and oiling the grill grates, then preheat the grill to a surface temperature of about 450°—medium-high heat on most grills.
    clean and oil grill crates
  • Trim 2 skinless boneless chicken breasts. Cut into 1-inch cubes or a little bigger. If using vegetables or pineapple, trim and cut into chunks.
    trimmed and cubed chicken on red board
  • Mix with 2 teaspoons olive oil, ½ teaspoon kosher salt, and ¼ teaspoon black pepper and brush the chicken. Use the remaining oil to brush the optional ingredients.
    mixing chicken with spices in metal bowl
  • Thread on to skewers. I like metal for heat transfer, but wood will do. If using wood, soak them first. If using vegetables or pineapple, trim and cut into chunks—add between the chicken and brush with oil.
    cubes of chicken on skewers
  • Place over direct heat and grill each side for 5 minutes before turning. Starting with the second turn, brush lightly with BBQ sauce.
    two chicken kabobs on grill
  • Cook until a nice color and an internal temperature of 165°.
    brushing the chicken kabob with BBQ sauce

Notes

Pro Tips

  1. You can use chicken thigh meat for these kabobs, but they should be cooked to an internal temperature of about 185°.
  2. The main trouble most people will have relates to grill temperature being too high, causing the surface to burn before the inside is done.
  3. You can put a very light sauce coat on the chicken at the start of cooking, but it is not really needed and may burn if you are not careful.
  4. Add bell pepper and red onion chunks between the chicken and cook with the chicken. If you make separate vegetable kabobs, they will cook about 5 minutes faster.
  5. You can do this on a charcoal grill but not over hot coals. Make a cooler area for the chicken and check frequently.
  6. I usually cook these with a closed grill hood, but you can do this with an open hood.
  7. You can also do this in an oven at 450° for about 15  minutes.

Nutrition

Calories: 327kcal | Carbohydrates: 25g | Protein: 48g | Fat: 7g | Saturated Fat: 1g | Polyunsaturated Fat: 1g | Monounsaturated Fat: 4g | Cholesterol: 140mg | Sodium: 1205mg | Potassium: 4mg | Fiber: 0.1g | Sugar: 21g | Vitamin C: 0.1mg | Calcium: 1mg | Iron: 0.1mg

Editors Note: Originally Published June 25, 2014. Updated with expanded options, refreshed photos, and a table of contents to help navigation.

Molly and Lilly in the green yared with flag bandanas.

17 Basic Gas Grill Recipes For Summer

College of grilling photos.

It's time to learn some basic recipes for your grill. This will be gas grill 101 for beginners, but even the most experienced grillers will pick up some valuable tips. So, whether you are learning new skills or just refreshing what you have been doing for years, fire it up, and let's start.

College of grilling photos.
[feast_advanced_jump_to]

This is a great refresher for all grillers, whether on gas, charcoal, or other grills. If you are a smoker, you probably are not reading this.

I'm aiming at those who have little experience and now have that shiny new grill from the big box store, but are a bit lost. They need some ideas, and they can handle these recipes. The easiest way to learn is through doing, so let's get started.

👨‍🍳Pro Tip: Grilling is all about temperature control. Get it right, and you are good for life. Get it wrong, and you doom yourself and your family to eat overcooked, undercooked, or even dangerous meals.

A Beginners Guide to Grill Temperature on a Gas Grill
Learn about grill temperatures on a gas grill. The most basic measurement to help you master your grill. Become the "Grill Master" today.
How to Control Grill Temperature
Grill surface thermometer

4 Easy chicken recipes

Here are three chicken recipes that will take you up just a notch. All have easy-to-follow step-by-step photos and complete instructions to get it right the first time and every time. Be sure to read the guide to grill temperature to get these right.

Grilled Chicken Breasts on a Gas Grill
Juicy grilled chicken breasts with simple seasoning and easy step-by-step instructions. Grill at 450°F for about 15–20 minutes to 165°F internal temperature.
Grilling Chicken Breasts
Two grilled chicken breasts on a blue plate.
Grilled Chicken Legs (Easy, Crispy & Juicy Drumsticks)
Juicy, crispy grilled chicken legs made simple — season and cook over medium heat on a gas grill about 35 minutes for perfect drumsticks.
Grilled Chicken Legs
chicken drumsticks cooking on the grill
Grilled Chicken Thighs (Juicy with Crispy Skin)
Juicy grilled chicken thighs with crispy skin every time using a simple, controlled grilling method. Cook at 450°F for 25–30 minutes with easy step-by-step instructions.
Grilling Chicken Thighs
grilled chicken thigh on white plate
Honey Garlic Chicken Skewers with Honey Garlic Marinade
Juicy chicken and tender vegetables in an easy 5-ingredient honey garlic marinade, then grilled or baked with a caramelized honey glaze.
Honey Chicken Kabobs
honey garlic chicken kabobs on a white board

5 Easy beef recipes

Grilling burgers is easy, but many beginners and experienced grillers get it wrong.

How to Grill Hamburgers (Juicy, Easy Method)
Grill juicy hamburgers with a simple method, a hot grill, and a 160°F finish. Reliable cook times and easy steps for perfect burgers every time.
Grilling Burgers
burger on a bun

Let's get our steaks done right. All with easy-to-follow photo instructions and complete discussion to get you to your final goal of a great steak.

Grilled Filet Mignon (Best Way on Any Grill)
The best way to grill filet mignon with simple temps, timing, and doneness guides. Juicy, tender steak on a gas or any grill in about 10 minutes.
Grilling Filet Mignon
Grilled filet mignon with asparagus.
Grilled New York Strip Steak
Grill New York strip steak over high heat in just minutes for a delicious crust and a medium-rare center, with easy cooking times and temperatures for your preferred doneness.
Grilling NY Strip Steaks
A strip steak with grill marks on a gray plate.
How to Grill a Porterhouse Steak
Learn how to grill a juicy porterhouse steak with simple seasoning over high heat in about 10 minutes. This easy method also works for T-bone steaks.
Grilling T-Bone Steaks
porterhouse steak with fries on blue plate
Easy 3-Ingredient Beef Kabob Marinade
This simple beef kabob marinade uses Worcestershire sauce, soy sauce, and garlic powder. Marinate for 30 minutes for great flavor or 1–4 hours to help tenderize.
Easy Marinated Sirloin Kabobs
pile of beef kabobs on a plate.

4 Easy pork recipes

Pork and grills are made for each other.

Grilled Pork Chops
Easy grilled pork chops with simple seasoning and optional brine. Grill 1-inch chops over medium-high heat to 145°F for perfect results.
How to Grill Pork Chops
Two grilled pork chops on an orange plate.
How to Grill Pork Tenderloin on a Gas Grill
Grill pork tenderloin on a gas grill in about 25 minutes at 450°F. This easy beginner method delivers tender, juicy pork with simple prep and no fancy setup.
Grilling Pork Tenderloin
pork tenderloin on blue platter
Grilled Boneless Pork Ribs (Fast & Easy Country-Style Ribs)
Juicy, tender boneless pork ribs grilled hot and fast in about 20 minutes. Easy country-style BBQ flavor with simple prep and no fuss.
Grilling Boneless Pork Ribs
Grilled boneless ribs on a blue plate.
Grilled Bacon Wrapped Pork Tenderloin Medallions
Grilled bacon wrapped pork tenderloin medallions with an easy wrapping method. Skip the bacon for faster prep, with simple seasoning and cooking instructions.
Pork Tenderloin Medalions
grilled bacon wrapped pork medaion on white plate

4 Easy grilled side dishes

Add some basic grilled side dishes to round out their meals with these recipes.

Grilled Small Potatoes (No Foil)
Crispy grilled small potatoes, including baby, mini, and new potatoes, with creamy centers—no foil or parboiling needed.
Grilling Small Potatoes
pouring small potatoes into blue bowl.
Grilled Mixed Vegetables
Delicious Grilled Mixed Vegetables cooked on the grill compliments any meal. You can easily add them to your grill while you cook dinner to complete your meal.
Grilling Mixed Vegetables
Grilled Mixed Vegetables in a white bowl
Grilled Pineapple Slices with Brown Sugar Cinnamon Glaze
Glazed grilled pineapple slices are an easy delicious summer side dish. With a buttery caramelized brown sugar glaze, it also makes a great dessert when combined with ice cream—Ready in less than 15 minutes.
Grilling Glazed Pineapple
close up of Grilled Pineacpple with grill marks on a blue plate
Grilled Corn on the Cob Without Husks
The best grilled corn on the cob is quick and easy with a few tips. Pick the best corn, husk, and a brush of oil with salt and pepper, and finish by grilling over medium heat until tender with some delicious char. It's not hard, and it's so good—no husk and no aluminum foil are needed.
Grilling Naked Corn
grilled corn on the cob in a holder

3 Bonus more advanced classic grill recipes

These are the real classics. They all need a bit more work and technique. You should tackle these after you feel comfortable with the basics. Of course, all the recipes have easy-to-follow step-by-step photo instructions.

Brisket on a Gas Grill (Low and Slow BBQ)

Make tender brisket on a gas grill using indirect heat, wood smoke, and a simple dry rub. Beginner-friendly, low-and-slow BBQ beef brisket with great bark.
Smoked Brisket on the Gas Grill
Cooked brisket on a gray board
How to Cook Baby Back Ribs on a Gas Grill
Learn how to cook tender baby back ribs on a gas grill with a simple BBQ dry rub and optional wood smoke. Easy low-and-slow BBQ ribs, no smoker needed.
Grilling Baby Back Ribs
grilled Baby Back Ribs on black cutting board
Pulled Pork from Pork Butt on a Gas Grill
Pork butt (Boston butt) cooked low and slow over indirect heat on a gas grill with a dry rub and wood smoke until tender, smoky, and easy to pull.
Pork Butt on Gas Grill
Pulled Pork on a Gas Grill from 101 Cooking for Two
How To Set Up Your Gas Grill for Smoking and Low and Slow Cooking
Let’s learn how to set up your gas grill for great low and slow cooking with smoking. A useful technique you need to master your gas gril
Low and Slow Grilling
smoking gas grill

⚕️Grill Safety

Safety and maintenance are essential. If you have a new grill to start the season, assemble and test it according to the manufacturer's instructions.

If your grill has been idle all winter, it should be cleaned and checked over as instructed by your grill manual. If you don't have the manual for your grill, you should be able to obtain one from the manufacturer, usually through their website. Always review the manual and follow its recommendations.

You need to check for damage. Look for insects nested in the works. Replace corroded parts. Clean grates, check the burners closely and be sure about any gas connections and valves. If using bottled gas, check over the container. A professional review may be in order.

Here is an excellent guide I use for my Weber S-470 (image above). Deep Cleaning Your Weber Gas Grill.

Blue ribbon divider used for visual effect
Deck Puppies - Molly and Lilly dogs on the deck.

Wow. You got this far. Have a great and safe grill season.
DrDan

Editor's Note: This article was originally published on March 31, 2019. It will be refreshed annually and now has improved navigation to help you find what you need.

Reverse Sear Chicken Breast on the Grill (Juicy Every Time)

two grilled chicken breasts on a blue plate

Learn how to reverse-sear chicken breast on any grill. Cook with indirect heat first, then finish with a quick sear for juicy, tender chicken with flavorful grill marks.

This beginner-friendly method works on gas, charcoal, and pellet grills. The quick marinade adds flavor and acts as a brine to help keep the chicken moist while step-by-step instructions show you exactly what to do.

❓ Quick Answer: What Is Reverse Sear Chicken Breast?

Reverse-searing cooks chicken with indirect heat first, then finishes it over direct heat.

  • Step 1: Cook with indirect heat to 140°F.
  • Step 2: Sear over direct heat to 165°F.
  • Result: Juicy, tender chicken with flavorful grill marks.
grilled chicken breast on an orange plate.
[feast_advanced_jump_to]

quote mark
Featured Comment by Dana:
"That is absolutely the best chicken I have ever grilled. Thank you so much for this recipe. I think the reverse grill definitely makes a difference."
⭐⭐⭐⭐⭐

🤔 TL;DR — Recipe Summary

What: Reverse-sear chicken breasts on any grill with indirect heat first, then finish over direct heat.

Why: A quick marinade adds flavor, acts as a brine, and the reverse-sear keeps the chicken juicy with flavorful grill marks.

How: Grill indirectly to 140°F, then sear over direct heat until the thickest part reaches 165°F.

🧂 Ingredients

raw chicken with oil and seaonings.

🍗 Chicken

Use boneless, skinless chicken breasts—preferably ones that are similar in size. If they’re thick, flatten them to about ¾ inch for even cooking.

You can also use boneless, skinless chicken thighs. They don’t need flattening but should be cooked to 185° for the best texture—thighs aren’t tender at 165°, although they are safe.

🧴 Brine/Marinade (30-minute soak)

This quick marinade also acts as a brine to keep the chicken moist and flavorful. It’s made with oil, water, garlic, salt, pepper, and a touch of sugar. Let the chicken sit in it for 30 minutes in the fridge, then rest at room temp while the grill preheats.


🌿 Optional Flavor Add-Ins

Customize it with your favorite flavors:

  • Smoked paprika or chili powder
  • A splash of lemon juice or vinegar
  • Fresh or dried herbs like rosemary or thyme
  • A BBQ rub (instead of or layered onto the marinade)

👨‍🍳 Quick Overview: Reverse Sear Chicken Breast on the Grill

1. Prepare the chicken and marinate

Trim chicken breasts and flatten to about ¾ inch thick if they’re thick—use a meat mallet or heavy pan.

Add to the brine/marinade and refrigerate for 30 minutes

chicken in marinade in bag.

2. Grilling indirect

Remove from marinade and let rest at room temperature while preheating the grill on high. Turn off half the burners to create indirect heat.

Clean and oil grill grates.

Place the chicken on the cooler side. Cook undisturbed for 10–12 minutes, until there’s no pink left on the bottom surface. Flip and rotate. Continue cooking until the internal temp reaches 140°—about another 10–12 minutes.

chicken breasts with grill marks starting to cook on grill.

3. Move to direct heat to finish

Move the chicken to the hot side of the grill and cook for about 5 minutes per side, until the internal temperature reaches 165°F.

Two chicken breasts grill on a blue plate.

✅Pro Tip: According to the USDA, chicken must be cooked to an internal temperature of 165°F for safety. To check this, use an instant-read thermometer.

👇For complete step-by-step instructions, scroll down to the printable recipe card or keep reading for tips, flavor options, and serving ideas.

⏱️ Reverse Sear Chicken Breast Time and Temperature

Preheat the grill with all burners on high. Once hot, turn off one side to make an indirect zone (burners off) and leave the other side on high heat for searing.

  • Indirect (cool side, burners off): Place chicken here for 20–25 minutes until it reaches about 140°F.
  • Direct (hot side, burners on high): Move the chicken here and sear for 4–5 minutes per side until the thickest part hits 165°F.

👉 Always confirm with an instant-read thermometer—grill heat and chicken thickness will affect timing.

For boneless, skinless thighs, allow about 30–35 minutes indirect to 155–160°F, then sear until they reach 185°F for the best texture.

✔️Tips to Get It Right Every Time

  • Use a thermometer. Grills vary, and chicken breasts come in all shapes. An instant-read thermometer is essential for getting it right.
  • Flatten thick chicken. Try to use breasts of similar size. If they’re thicker than ¾ inch, flatten them with a meat mallet for even cooking.
  • Brine and flavor in one. The marinade also works as a quick brine. You can swap in your favorite seasonings or use a traditional brine if you prefer.
  • Let it rest before grilling. Let the chicken sit at room temperature for 20–30 minutes before grilling. Cold chicken cooks unevenly and may dry out before the center is done.
  • Any grill works—if you can control the heat. Gas, charcoal, or pellet grills all work here. For tips on managing grill temps, see A Beginners Guide to Grill Temperature on a Gas Grill.

🍗 Other Skinless Boneless Chicken Recipes

Looking for more easy chicken breast recipes? Try these favorites:

  • How to Grill Chicken Breasts– classic and beginner-friendly
  • How to BBQ Skinless Boneless Chicken Breast– big flavor, no bones
  • Convection Roasted Chicken Breasts– easy indoor option

🍽️ Serving Suggestions

Your grill will be busy, so move the sides to the stove or microwave. Try:

  • Microwave Corn on the Cob
  • Simple Spinach Salad or a garden salad
  • Oven Baked French fries
  • Broccoli Slaw Salad.

🥡 Storage and Leftovers

Store leftovers in an airtight container for up to 4 days in the fridge or 3 months in the freezer.

Reheating: Thaw overnight in the refrigerator if frozen. Reheat in a 350° oven (covered) or use an air fryer. A microwave works but may soften the texture.

❓FAQs

How long to reverse sear chicken breast?

Cook over indirect heat about 20–25 minutes to 140°F, then sear about 5 minutes per side over direct heat until the thickest part hits 165°F. Always check with a thermometer—times vary with thickness and grill heat.

Can I reverse sear chicken breast on any grill?

Yes. Gas, charcoal, or pellet grills all work. Start indirect until about 140°F, then move to direct heat and sear until 165°F.

Does reverse sear work for chicken thighs?

Yes, but they take longer. Cook thighs over indirect heat for 30–35 minutes until they reach about 155–160°F, then move to direct heat and sear until the thickest part hits 185°F. That higher finish temp gives thighs the best texture.

Do I need to rinse raw chicken?

No. Rinsing can spread bacteria around your kitchen. Handle it carefully and wash your hands and surfaces thoroughly. For more info, see Chicken… To Rinse or Not To Rinse?

Can I cook reverse sear chicken by time alone?

No. Reverse sear timing depends on grill temp and chicken thickness. Always use an instant-read thermometer—go indirect to about 140°F, then finish over direct heat until the thickest part reaches 165°F.

📖The Recipe Card

grilled chicken breast on an orange plate
Print Recipe Add to Collection Go to Collections
4.84 from 6 votes

Reverse Sear Chicken Breast on the Grill (Juicy Every Time)

This easy reverse-sear chicken breast recipe makes juicy, tender grilled chicken every time. A quick marinade, indirect grilling, and a final sear create perfect results.
Prep Time5 minutes mins
Cook Time35 minutes mins
Total Time1 hour hr 10 minutes mins
Course: Grilled, Main Course
Cuisine: American
Keyword: how to reverse sear chicken, reverse sear chicken breast, reverse seared chicken
Servings: 2
Calories: 259kcal
Author: Dan Mikesell AKA DrDan

Ingredients

  • 2 boneless skinless chicken breasts

Brine/marinade

  • 2 tablespoons vegetable oil
  • 2 tablespoons water
  • 2 cloves garlic crushed
  • 1 teaspoon salt
  • ½ teaspoon pepper
  • 1 teaspoon sugar
US Customary - Convert to Metric

Instructions

Prepare the chicken and marinate

  • Start by mixing the brine/marinade in a ziplock bag with 2 tablespoons of oil, 2 tablespoons of water, 2 cloves of crushed garlic, 1 teaspoon of sugar, 1 teaspoon of salt, and ½ teaspoon of black pepper.
    raw chicken with oil and seaonings
  • Trim chicken breasts. If your chicken is thick, gently pound that area with a meat mallet or the bottom of a heavy pan to even it out. Aim for about ¾ inch thick.
    raw chicken on red board being hit with meat mallet
  • Add to the brine. Refrigerate for at least 30 minutes.
    chicken in marinade in bag

Grilling indirect

  • Remove the chicken from the marinade and allow it to set at room temperature for about 30 minutes while preheating the grill on maximum. Clean and oil well.
    clean and oil grill crates
  • Turn off half of the grill. Keep the lite burners on high. Place chicken on the side you turned off but keep the edge of the chicken breast within 4 inches of the lite burner. The thicker end of the chicken should be towards the heat.
    marinaded chicken going on grill grates
  • Cook undisturbed for about 10-12 minutes. You should have some grill marks and no pink left on the bottom surface before flipping. When you flip, place the thinner end towards the lite burner side.
    chicken breasts with grill marks starting to cook on grill

Move to direct heat to finish

  • Cook until internal temp of 140°—about another 10-12 minutes. Then place over the lite burners (still on high) for about 5 minutes per side until internal temp of 165°.
    two grilled chicken breasts on a blue plate
  • Remove from grill and allow to rest 5 minutes before serving.
    piece of chicken on fork

Notes

Pro Tips:

  1. Do not brine. The marinade is a combination of brine and marinade. Do not rinse before cooking this one.
  2. Try to use chicken breast of about the same size. Flatten with a meat mallet or the bottom of a pan to ensure uniform thickness. Aim for about ¾ inch.
  3. Allow the chicken to rest at room temperature for 20-30 minutes before grilling, which will help ensure the internal temperature is right without burning.
  4. Cook to a final internal temperature of 165°, then rest for at least 5 minutes before serving
  5. This is a very "your mileage may vary" type of recipe. There are several variables—the thickness and size of the chicken breast. The grill—not only its power, but also its configuration —will affect this recipe. So keep your eyes open and the thermometer at hand. You will be rewarded with ultra-moist chicken.
  6. For boneless, skinless thighs, allow about 30–35 minutes indirect to 155–160°F, then sear until they reach 185°F for the best texture.

Nutrition

Calories: 259kcal | Carbohydrates: 2g | Protein: 24g | Fat: 17g | Saturated Fat: 12g | Cholesterol: 72mg | Sodium: 714mg | Potassium: 418mg | Fiber: 1g | Sugar: 1g | Vitamin A: 34IU | Vitamin C: 2mg | Calcium: 11mg | Iron: 1mg

Based on Cook's Country Grilled Boneless Chicken Breasts recipe (subscription required.)

Originally Published May 22, 2016. Updated with expanded instructions, refreshed photos, FAQs, and helpful tips.

dogs setting in green yard.

26 Smaller Memorial Day Recipes

Memoral Day College-Image licensed from Fotolia May 26, 2016. Copyright igoror - Fotolia. Modified per allow by licensed.

This coming weekend marks Memorial Day, the unofficial start of summer. Fire up the grill for burgers, make a fresh strawberry pie, or grill some asparagus.

Gather with family or friends, head to the beach, or enjoy a picnic. All of these occasions call for great food, so let's get started with this collection of smaller recipes.

Memoral Day College-Image licensed from Fotolia May 26, 2016. Copyright igoror - Fotolia. Modified per allow by licensed.
Image licensed from Fotolia May 26, 2016. Copyright igoror - Fotolia. Modified per allowed by license.
[feast_advanced_jump_to]

Memorial Day honors the people who gave their lives while serving in the armed forces. Once known as Decoration Day, which began after the American Civil War to commemorate the Union dead, it later merged with a similar Confederate holiday and eventually became a day to remember all American war dead.

Molly and Lilly dogs playing with a ball on a rope.

🍔 Small Classic Backyard Grill Recipes

Chicken, burgers, and pork chops are all classic backyard grill recipes. Learn to make the perfect every time.

How to Grill Hamburgers (Juicy, Easy Method)
Grill juicy hamburgers with a simple method, a hot grill, and a 160°F finish. Reliable cook times and easy steps for perfect burgers every time.
Grilling Burgers
burger on a bun
Grilled Chicken Breasts on a Gas Grill
Juicy grilled chicken breasts with simple seasoning and easy step-by-step instructions. Grill at 450°F for about 15–20 minutes to 165°F internal temperature.
Grilling Chicken Breasts
Two grilled chicken breasts on a blue plate.
Grilled Chicken Legs (Easy, Crispy & Juicy Drumsticks)
Juicy, crispy grilled chicken legs made simple — season and cook over medium heat on a gas grill about 35 minutes for perfect drumsticks.
Grilling Chicken Legs
chicken drumsticks cooking on the grill
Grilled Pork Chops
Easy grilled pork chops with simple seasoning and optional brine. Grill 1-inch chops over medium-high heat to 145°F for perfect results.
Grilling Pork Chops
Two grilled pork chops on an orange plate.
Grilled Chicken Thighs (Juicy with Crispy Skin)
Juicy grilled chicken thighs with crispy skin every time using a simple, controlled grilling method. Cook at 450°F for 25–30 minutes with easy step-by-step instructions.
Grilling Chicken Thighs
grilled chicken thigh on white plate
How to Grill Pork Tenderloin on a Gas Grill
Grill pork tenderloin on a gas grill in about 25 minutes at 450°F. This easy beginner method delivers tender, juicy pork with simple prep and no fancy setup.
Grilling Pork Tenderloin
pork tenderloin on blue platter

😊All-American BBQ Classics (Bigger)

These are classic recipes, but while we think of them as bigger recipes, they can all be adjusted for smaller amounts, perfect for smaller households with some leftovers.

Brisket on a Gas Grill (Low and Slow BBQ)

Make tender brisket on a gas grill using indirect heat, wood smoke, and a simple dry rub. Beginner-friendly, low-and-slow BBQ beef brisket with great bark.
Grilled Brisket
Cooked brisket on a gray board
Pulled Pork from Pork Butt on a Gas Grill
Pork butt (Boston butt) cooked low and slow over indirect heat on a gas grill with a dry rub and wood smoke until tender, smoky, and easy to pull.
Pork Butt on Gas Grill
Pulled Pork on a Gas Grill from 101 Cooking for Two
How to Cook Baby Back Ribs on a Gas Grill
Learn how to cook tender baby back ribs on a gas grill with a simple BBQ dry rub and optional wood smoke. Easy low-and-slow BBQ ribs, no smoker needed.
Grilled Ribs
grilled Baby Back Ribs on black cutting board
How to Cook Pork Butt in the Oven for Pulled Pork
Make juicy BBQ pulled pork in your oven. Cook pork butt at 250°F until fall-apart tender, with crispy bark and rich, smoky flavor.
Oven Baked Pork Butt
pulled pork sandwich with BBQ sauce
Molly and Lilly dogs playing with a ball on a rope. Part 2.

❄️ Cold side dishes for buffets

Cold side dishes are commonly used for outdoor summer parties and serve as buffets. Here are some summer classics you can make, small or big, depending on your needs. Don't forget food safety—see the section below.

Easy Small Batch Cold Macaroni Salad (Creamy & Classic)
This small batch cold macaroni salad is creamy, classic, and easy to adjust for two or more. Fresh veggies, a tangy dressing, and tender pasta make it better than deli.
Recipe for Easy Macaroni Salad
Small batch cold macaroni salad with creamy dressing on a white plate.
Broccoli Raisin Salad with Bacon (Small Batch or Crowd-Ready)
Fresh broccoli raisin salad with bacon, cheddar, and creamy dressing. Easy to make for two or scale up for family or a crowd.
Recipe for Broccoli Salad with Bacon
Broccoli Raisin Salad with Bacon on a white Plate.
Caprese Pasta Salad—Fresh and Easy
Caprese Pasta Salad is a light, fresh Italian cold salad with tender pasta, fresh tomatoes, and mozzarella cheese with fresh basil and garlic.
Caprese Pasta Salad Recipe
Caprese Pasta salad on a large spoon
Bacon and Egg Spinach Salad with Tangy Ketchup Dressing
This old-fashioned bacon and egg spinach salad is tossed with a sweet, tangy homemade ketchup dressing. A quick spinach salad dressing recipe that's perfect for lunches, potlucks, or summer meals.
Spinich Salad with Homemade Dressing
Spinach salad with bacon and dressing.

🔥 Hot side dishes

Hot sides for those two and smaller holiday dinners.

Microwave Corn on the Cob
Microwave corn on the cob in the husk for tender sweet corn in just minutes. No shucking, boiling, or mess—just an easy foolproof method.
How to Microwave Corn on the Cob
corn on the cob in serving trays B
Grilled Mixed Vegetables
Delicious Grilled Mixed Vegetables cooked on the grill compliments any meal. You can easily add them to your grill while you cook dinner to complete your meal.
How to Grill Mixed Vegetables
Grilled Mixed Vegetables in a white bowl
Grilled Corn on the Cob Without Husks
The best grilled corn on the cob is quick and easy with a few tips. Pick the best corn, husk, and a brush of oil with salt and pepper, and finish by grilling over medium heat until tender with some delicious char. It's not hard, and it's so good—no husk and no aluminum foil are needed.
Grilling Corn on the Cob without Husks
grilled corn on the cob in a holder
Grilled Small Potatoes (No Foil)
Crispy grilled small potatoes, including baby, mini, and new potatoes, with creamy centers—no foil or parboiling needed.
Grilling Baby Potatoes
pouring small potatoes into blue bowl.
Molly and Lilly dogs playing with a ball on a rope. Part 1.

🥧Time for dessert

It ain't over until it's over. End the day with something special.

Strawberry Pie with Jello (Easy and Reliable Fresh Recipe)
While not a "small recipe" the leftovers are wonderful. Easy and delicious using fresh strawberries and a refrigerated pie crust.
Easy Fresh Strawberry Pie
Whole fresh strawberry jello pie ready to eat.
Small Batch Apple Crisp (Easy Recipe for Two or More)
Make an easy small batch apple crisp with only 2 or 3 apples and a buttery crumb topping. A perfect old-fashioned dessert for two or more.
Small Batch Apple Crisp
apple crisp on a white plate.
Grilled Pineapple Slices with Brown Sugar Cinnamon Glaze
Glazed grilled pineapple slices are an easy delicious summer side dish. With a buttery caramelized brown sugar glaze, it also makes a great dessert when combined with ice cream—Ready in less than 15 minutes.
How To Grill Pineapple
close up of Grilled Pineacpple with grill marks on a blue plate
Lemon Squares
Easy lemon bars are delicious and simple to make in under an hour. These homemade lemon squares are a perfect dessert treat with a crispy, buttery shortbread crust and tangy and sweet lemon filling—a small batch 8X8 recipe you can scale to your needs.
Lemon Squares
Two lemon squares on a gray plate.
New York Cheesecake Bars
Rich and creamy New York Cheesecake Bars with a buttery graham cracker crust. This easy small-batch recipe is baked in an 8X8 pan and easily doubles to a 9X13 pan.
Easy Cheesecake Bar Recipe
Cheesecake bars on a blue plate.

😊Sauce and rubs

Add some special flavors to your work.

Homemade Memphis BBQ Sauce
Classic homemade Memphis-style BBQ sauce with tomato, sweetness, and a touch of spice. Ready in about 30 minutes and perfect for ribs, pulled pork, chicken, and more.
Memphis BBQ Sauce
BBQ sauce on pork
BBQ Dry Rub for Ribs, Pork, Beef, and More
The best BBQ Dry Rub recipes will enhance the meats' taste and complement the sauce's flavors. This easy-to-adjust homemade rub recipe has classic BBQ flavors.
Recipe for BBQ Dry Rub
Spice for 8311 BBQ Rub
Memphis Dry Rub Recipe
A classic sweet and spicy Memphis Dry Rub Recipe from Marlowes of Memphis. Bring the great taste of Memphis to your grilled ribs or other BBQ recipes.
Recipe for Memphis Dry Rubs
Applying Memphis dry rub to baby back ribs

🐕 forget the party animals

Low-Fat Homemade Dog Treats—Healthy & Delicious
Low Fat Homemade Dog Treats are the perfect low-calorie treat for your dog. With only five ingredients, your dog will love the peanut butter and pumpkin taste. Much healthier than commercial treats—any veterinarian would approve.
Homemake Low-Fat Dog Treats
Pile of homemade dog treats on a wire rack

⚕️FOOD SAFETY

Let's be safe out there. Uncle Joe cannot have his burger rare, even though you wouldn't mind seeing him sick. It is your responsibility to keep them safe.

It's easy to forget food safety, but it's up to you to keep your friends and family safe. I frequently see dangerous food handling on TV food shows and other blogs. So, know the rules. PLEASE.

USDA food safety graph. Copyright USDA-Public Domain

A few key safety points.

  • Lots of hand washing and do not cross-contaminate.
  • Cook to a safe internal temperature—see the FDA safe temperatures chart.
  • Cold foods need to stay under 40°; if not, they are not safe if they are at room temperature for more than 2 hours (or 1 hour if it is over 90°).
  • Check out the USDA Food Safety recommendations.

Please remember what it is all about. Have a great holiday weekend, and enjoy your summer.

DrDan

Publisher note: This is a re-edit of the previous years' posts ( since 2016). New recipe recommendations are added as needed to keep it fresh.

How to Cook Sausage in the Oven (Breakfast Sausage Patties & Links)

baked sausage on a white plate.

Bake breakfast sausage patties or links in the oven for nicely browned, juicy sausage in about 15 minutes—no splatter, quick cleanup, and just one flip halfway through. Larger sausages, like Italian or brats, cook the same way but take about 25 minutes.

Juicy baked breakfast sausage patties on a white plate after cooking in the oven.

quote mark
Featured Comment by Kari :
⭐⭐⭐⭐⭐
"Breakfast made easy! Thank you for the instructions; this worked great! "

⏱️ Quick Answer: How Long to Cook Sausage in the Oven

Bake sausage at 400°F (other temperatures work) until it reaches 160°F—or 165°F for poultry sausage.

  • Breakfast sausage patties or links: 12–15 minutes at 400°F
  • Larger sausages (Italian, brats, kielbasa): about 25 minutes
[feast_advanced_jump_to]

📝 TL;DR — Recipe Summary

  • What: Cook perfectly browned, juicy breakfast sausage patties (or links) in the oven.
  • Why: No splatter or constant attention, leaving you free to prepare the rest of breakfast.
  • How: Preheating is optional. Bake in a standard or convection oven to 160°F internal temperature (165°F for poultry sausage). Use the broiler briefly at the end if more browning is needed.

🐖 What You Need

Raw breakfast sausage roll and uncooked Italian sausages on a tray.

Sausage:
Breakfast sausage patties or links work best, but you can also use Italian sausage, brats, kielbasa, or smoked sausage.
Choose pork, turkey, or chicken—they all cook the same.

Cooking surface:
Use a rimmed baking tray (like a sheet pan) to catch any grease. Coat it with cooking spray, or line it with parchment paper or aluminum foil.

👨‍🍳 Quick Overview: Cooking Sausage Patties or Links in the Oven

1. Prep the Tray and Sausage

Preheat the oven to 400°F—convection preferred. Line a rimmed baking tray with cooking spray, parchment paper, or foil for easy cleanup.

Spraying a baking tray with cooking spray.

✅ Pro Tip: Convection helps with browning, but any oven temp from 350° to 425°F will work—just adjust the cooking time.

If using breakfast sausage patties, press a shallow dimple in the center to help prevent puffing.

Pressing a dimple into the center of a raw breakfast sausage patty.

Arrange all sausages evenly on the tray—don’t crowd them.

Sausage patties and links arranged on prepared baking trays.

2. Bake and Flip

Place the tray on the middle oven rack. Flip patties or rotate larger sausages about halfway through the baking time for even cooking.

Flipping sausage halfway through cooking.

3. Check Temp and Finish

Bake until the internal temperature reaches 160°F, or 165°F if the sausage contains poultry.
Breakfast sausage: 12–15 minutes
Larger sausages (Italian, brats, etc.): about 25 minutes

Cooked breakfast sausage and Italian sausage on plates.

✅ Pro Tips: If the sausage is done but not browned, use the broiler for 1–2 minutes to finish.

👇 Scroll down for the printable recipe card and complete step-by-step photo instructions—or keep reading for tips

⏱️ How Long to Cook Sausage in the Oven

The exact time depends on the size of the sausage and your oven temperature. Breakfast patties or links usually finish fast, while thicker sausage takes longer.

  • Breakfast sausage patties or links: 12–15 minutes at 400°F
  • Thicker sausages (Italian, brats, kielbasa): 25–30 minutes
  • Safe temperature: 160°F for pork or beef, 165°F for poultry sausage

Convection cooks a little faster and browns more evenly, but any oven temperature from 350°F to 425°F works. Just adjust the time and check early with an instant-read thermometer.

👍 Tips for Baking Sausage

  • Dimple the patties. Press a ¼-inch deep, ¾-inch wide dimple in the center to prevent puffing. This keeps the patties flat and helps them cook evenly.
  • All sausage types cook the same way with this oven method. Pork, turkey, or chicken sausage—just follow the same method and use an instant-read thermometer to check the internal temp.
  • Use a rimmed baking tray. A sheet pan with sides keeps grease contained.
    – For patties, use PAM or parchment paper—foil tears easily when flipping.
    – For links, foil is fine and makes cleanup easier.
  • Convection helps with browning. If you have it, use it. A high oven temp and a low-sided pan will help the sausage brown more evenly.
  • Don’t bake longer just to brown. If the sausage is cooked through but still pale, finish with 1–2 minutes under the broiler. Easy fix—no dryness.

🤔 Special Tips for Larger Sausages

Larger sausages—like Italian, kielbasa, brats, and smoked sausage—bake well in the oven; they just need a bit more time. Expect 25–30 minutes at 400°F and cook them to an internal temperature of 160°F (or 165°F if they contain poultry).

  • Flip or rotate halfway through for even browning.
  • Add veggies like sliced peppers and onions to turn it into a sheet-pan dinner.
  • Flexible oven temps: 350°F to 450°F works; just adjust the time and check with an instant-read thermometer.

🍳 More Easy Breakfast Ideas

Want bacon? Try How to Cook Bacon in a Convection Oven

Here are more reader favorites for breakfast:

  • Oven Baked Blueberry Pancakes
  • Cinnamon Coffee Cake
  • Small French Toast Casserole

❄️ Storage and Reheating Leftovers

This method is perfect for meal prep since you can cook a full package at once.

Store leftovers in an airtight container in the refrigerator for up to four days, or freeze for one to two months.

Reheating: If frozen, thaw overnight in the fridge. Use the microwave for convenience, or reheat in a skillet or oven to keep the edges crisp.


❓ FAQs

Can you cook sausage in the oven?

Yes. Cooking sausage in the oven is one of the easiest methods – perfect for breakfast patties, links, brats, or Italian sausage. Bake at 400°F: about 12–15 minutes for breakfast sausage and 25 minutes for larger sausages. No splatter, no mess, and juicy results every time.

Can I cook frozen sausage?

Yes. You can bake frozen sausage in the oven, but it will take longer since you’re cooking to a safe internal temperature. The thicker the sausage and the colder your freezer, the more time it will need. Always use an instant-read thermometer to be sure.

Can I cook breakfast sausage slices from a roll in the oven?

Yes. Slice the sausage roll into ¾–1 inch patties, press a shallow dimple in the center to prevent puffing, and bake for 12–15 minutes at 400°F. Flip once for even browning.

Should I poke holes in the sausage casing?

No. Don’t poke holes in the casing. It keeps the juices inside, and while the casing may split naturally while cooking, poking holes will only dry the sausage out.

Should I cook precooked sausage?

Most precooked sausage is already safe to eat — check the label to confirm. You don’t need to fully cook it, just heat it through. That said, baking it in the oven can add better browning, moisture, and flavor.

📖The Recipe Card

baked sausage on a white plate.
Print Recipe Add to Collection Go to Collections
4.92 from 12 votes

How to Cook Breakfast Sausage in the Oven (Patties or Links)

Bake breakfast sausage patties or links in the oven for evenly browned, juicy results in about 15 minutes—no splatter and easy cleanup. Larger sausages like Italian or brats cook the same way with a longer time.
Prep Time5 minutes mins
Cook Time15 minutes mins
Total Time20 minutes mins
Course: Breakfast
Cuisine: American
Keyword: baked sausage patties, breakfast sausage in oven, cooking sausage in the oven
Servings: 8 servings
Calories: 182kcal
Author: Dan Mikesell AKA DrDan

Ingredients

  • 1 pound sausage breakfast, links, or larger sausages like Italian or brats
  • PAM cooking spray or parchment Paper to prevent sticking
US Customary - Convert to Metric

Instructions

Prep the Tray and Sausage

  • Preheat the oven to 400°F (convection preferred). Any oven temp from 350°F to 425°F will work—just adjust the time.
    Uncooked roll of breadfast sausage and pile of Italian sausage
  • Prep a rimmed baking tray with PAM spray, foil, or parchment paper.
    spraying baking tray with PAM
  • For breakfast patties, make them about ¾ inch thick and dimple the center (¼ inch deep, ¾ inch wide) to prevent puffing.
    dimpling the center of a sausage pattie on a red board
  • Spread sausage on the prepared baking pan, so they don't touch.
    uncooked breakfast and Italian sausage on tray

Bake and Flip

  • Bake on the middle rack. Flip patties or rotate larger sausages about halfway through for even cooking.
    Flipping sausage halfway through cooking.

Check Temp and Finish

  • Bake until the internal temperature reaches 160°F, or 165°F if the sausage contains poultry.
    Breakfast sausage: 12–15 minutes
    Larger sausages (Italian, brats, etc.): about 25-39 minutes
    For extra browning, finish under the broiler for 1–2 minutes.
    cooked sausage patties and links o plates

Video

Notes

Pro Tips

  1. You can use the sausage you want, breakfast links or patties, or larger sausages like Italian sausage, kielbasa, brats, or smoked sausage. You can also use pork, turkey, or chicken sausage—cooked or uncooked.
  2. It cooks well with other dishes since you can use different oven temperatures
  3. You need a pan with some sides, like a sheet pan. 
  4. Foil is great for cleanup but if doing patties that need flipped, use cooking spray or parchment.
  5. The most important thing is a safe internal temperature of 160° or 165° if the sausage contains poultry.
  6. Don’t overbake to get color—use the broiler to finish browning instead.

Nutrition

Calories: 182kcal | Carbohydrates: 1g | Protein: 10g | Fat: 15g | Saturated Fat: 5g | Cholesterol: 46mg | Sodium: 425mg | Vitamin A: 100IU | Calcium: 20mg | Iron: 0.4mg

Originally Published February 14, 2015. Updated with expanded options, refreshed photos, and a table of contents to help navigation.

Molly in the kitchen.

How to Grill a Whole Chicken on a Gas Grill

Grilled whole chicken on a gray plate

Grilling a whole chicken on a gas grill is easier than it looks. This simple indirect-heat method gives you juicy meat and crispy, golden skin while keeping the chicken intact.

Season it your way—from classic salt and pepper to BBQ—and let the grill do most of the work. You get an impressive dinner without fussy prep or hovering over the flames.

⏱️ Quick Answer: How Long to Grill a Whole Chicken on a Gas Grill

Grill over indirect heat at 350°–400°F until the thickest part of the breast reaches 165°F and the thighs reach about 185°F.

  • A 5-pound whole chicken usually takes 80–90 minutes.
  • Smaller chickens will cook a little faster, while larger chickens will take longer.
  • Rest for 5–10 minutes before carving.
Grilled whole chicken on a gray plate.
[feast_advanced_jump_to]

quote mark
Featured Comment by Janice :
⭐⭐⭐⭐⭐
"Best. Ever. Why would you ever BBQ a whole chicken any other way? No changes to the recipe. Perfect the way it is. Thanks!!"

🤔 TL;DR — Recipe Summary

  • What: A whole chicken grilled intact on a gas grill and seasoned your way—from simple salt and pepper to BBQ.
  • Why: Indirect heat cooks the chicken evenly without spatchcocking, flipping, or constant attention.
  • How: Grill at 350°–400°F over indirect heat, rotate once, and cook until the breast reaches 165°F and the thighs reach about 185°F.

🐓 Ingredients

Whole chicken with seasoning and butter—labeled.
  • Whole chicken: A 4–6-pound chicken cooks most evenly with this method. Larger birds may overbrown before the center is done.
  • Butter: Helps the skin brown and become crisp.
  • Seasoning: Use coarse salt and black pepper, with optional garlic powder.
  • Optional variations: Add rosemary, thyme, or lemon-garlic seasoning, or use a BBQ dry rub.

👨‍🍳 Quick Overview: Grilling a Whole Chicken on a Gas Grill

1. Set up the grill for indirect cooking, with a surface temperature of 350°–400°F in the indirect zone.

Clean and oil the grill grates.

2. Prepare the chicken: Pat the chicken dry, truss the legs, and tuck the wings under. Brush with melted butter and season with kosher salt and pepper.

Shaking seasoning on the chicken.

✅ Pro Tip: Trussing pulls the legs toward the center so the chicken cooks more evenly. Use kitchen twine.

3. Start grilling: Place the chicken in the indirect zone with one thigh angled toward the direct heat. Close the lid and grill for 40 minutes.

chicken on the grill with thermometers.

4. Rotate and finish: Turn the chicken so the other thigh faces the direct heat. Brush with more butter, close the lid, and continue grilling until the breast reaches 165°F and the thighs reach about 185°F.

brushing the chicken on the grill after rotation.

5. Rest: Let the chicken rest for 5–10 minutes before carving.

Whole grilled chicken on a light blue plate.

👇 For complete step-by-step instructions, scroll down to the printable recipe card, or keep reading for helpful tips and flavor options.

⏲️ How Long to Grill a Whole Chicken

A 5-pound whole chicken usually takes 80–90 minutes over indirect heat at 350°–400°F. Start checking the internal temperature at about 75 minutes. Smaller chickens may finish sooner, while larger chickens will take longer.

Cooking time varies with the chicken’s size and shape, the actual grill-surface temperature, and how often you open the lid. Use the clock to estimate when to check—not to determine doneness.

✅ Pro Tip: The chicken is done when the thickest part of the breast reaches 165°F and the thighs reach about 185°F.

🧂 Seasoning: Classic, BBQ, and More

Brush the chicken with melted butter, then choose your seasoning:

  • Classic: Coarse salt, black pepper, and optional garlic powder.
  • Herb: Rosemary, thyme, lemon-garlic seasoning, or your favorite poultry blend.

♨️ BBQ Whole Chicken

Replace the salt and pepper with your favorite BBQ dry rub. During the final 10–15 minutes, brush the chicken lightly with BBQ sauce; repeat once if desired. Add sauce only near the end because its sugar can burn.

🔥 Gas Grill Setup for Indirect Cooking

Turn on the burner or burners on one side of the grill and leave the area beneath the chicken unlit. Adjust the active burners to maintain a surface temperature of 350°–400°F in the indirect zone where the chicken will sit.

Gas grills vary, so use a grill-surface thermometer rather than relying only on the thermometer in the lid. Use an instant-read thermometer to check the chicken near the end of cooking.

For more help, see A Beginners Guide to Grill Temperature on a Gas Grill and How To Set Up Your Gas Grill for Smoking and Low and Slow Cooking.

Optional Wood Smoke

For a light smoky flavor, place wood chips in a smoker box or foil pouch over the active burner. Keep the lid closed and use a mild wood such as apple or hickory.

🍴 How to Serve Grilled Whole Chicken

Serve with Grilled Baby Potatoes, a simple salad, or Grilled Pineapple Slices for something sweet. For two, enjoy part of the chicken for dinner and save the remaining meat for another meal.

❄️ How to Store Leftovers

Store leftover chicken in an airtight container in the refrigerator for up to 4 days or freeze for up to 3 months.

Use the leftovers in salads, sandwiches, basic chicken salad or Waldorf Chicken Salad.

🍗 More Whole Chicken Recipes

  • Grilled Spatchcock Chicken: A faster grilling method that also works well for half a chicken.
  • Oven Baked Whole Chicken: An easy indoor option when grilling is not practical.

⚕️ Food Safety

  • Do not rinse raw chicken. It can spread bacteria around your sink and counters. See Why You Should Not Rinse Raw Chicken for more.
  • Cook chicken safely. The USDA recommends 165°F in the thickest parts. For better texture, cook the thighs and legs to about 185°F.
  • Do not stuff the cavity with food you intend to eat. The stuffing must also reach 165°F, which may overcook the chicken. 
  • Prevent cross-contamination. Wash your hands before and after handling raw chicken, and refrigerate it below 40°F, away from ready-to-eat foods.

📖The Recipe Card

Grilled whole chicken on a gray plate
Print Recipe Add to Collection Go to Collections
5 from 11 votes

Grilled Whole Chicken on a Gas Grill

A whole chicken grilled intact over indirect heat for juicy meat and crispy, golden skin. Includes a simple BBQ variation with dry rub and sauce.
Prep Time10 minutes mins
Cook Time1 hour hr 30 minutes mins
Total Time1 hour hr 40 minutes mins
Course: Main Course
Cuisine: American
Keyword: Grilled full chicken, Grilled Whole Chicken, whole chicken on the grill
Servings: 6 servings
Calories: 346kcal
Author: Dan Mikesell AKA DrDan

Ingredients

  • 5 pounds whole chicken 4-6 pound range. Bigger will take longer.
  • 2 tablespoons butter
  • Kosher salt and pepper to taste or seasoning of your choice.
US Customary - Convert to Metric

Instructions

  • Set up the grill for indirect cooking. Clean and oil the grates. Heat the active burners and adjust them to maintain a surface temperature of 350°–400°F in the indirect zone.
    clean and oil grill crates
  • Remove any giblets, trim excess fat, and pat the chicken dry—do not rinse. Truss the legs and tuck the wings under.
    a whole raw chicken.
  • Melt the butter and brush it over the chicken, reserving some for later. Season with kosher salt and black pepper, or use your preferred seasoning or BBQ dry rub.
    shaking seasoning on the chicken
  • Place the chicken in the indirect zone with one thigh angled toward the direct heat. Close the lid and grill for 40 minutes.
    chicken on the grill with thermometers
  • Rotate the chicken so the other thigh faces the direct heat. Brush with the remaining butter and continue grilling until the breast reaches 165°F and the thighs reach about 185°F.
    brushing the chicken on the grill after rotation
  • Rest for 5–10 minutes before carving.
    cooked whole chicken sliced on plate-3

Notes

Pro Tips

  1. A 5-pound chicken usually takes 80–90 minutes. Smaller chickens may cook faster, while larger chickens will take longer.
  2. Chicken size and shape, grill temperature, and opening the lid can affect cooking time. Use internal temperature—not the clock alone—to determine doneness.
  3. Monitor the grill-surface temperature with a grill thermometer; the thermometer in the hood may not reflect the temperature beside the chicken.
  4. For BBQ chicken, season with dry rub before grilling. Brush lightly with BBQ sauce during the final 10–15 minutes, repeating once if desired.
  5. Chicken is safe when the thickest part of the breast reaches 165°F. Thighs and legs have better texture at about 185°F.

Nutrition

Calories: 346kcal | Carbohydrates: 1g | Protein: 27g | Fat: 26g | Saturated Fat: 9g | Cholesterol: 119mg | Sodium: 523mg | Potassium: 274mg | Sugar: 1g | Vitamin A: 320IU | Vitamin C: 2mg | Calcium: 16mg | Iron: 1mg

Originally Published June 11, 2017. Updated with expanded options, refreshed photos, and improved organization.

Happy Lilly running in grass.
  • « Previous Page
  • 1
  • 2
  • 3
  • 4
  • 5
  • …
  • 10
  • Next Page »

DrDan imageHi, I'm DrDan.
Welcome to 101 Cooking for Two, the home of great everyday recipes with easy step-by-step photo instructions.
About DrDan

Top THANKSGIVING RECIPES

  • turkey slice with gravy on orange plate.
    How to Roast a Turkey Breast in the Oven
  • Cut ham with pineapple honey glaze on a white plate
    Small Ham in a Crock Pot (2–4 lb Boneless Ham)
  • slice of Ribeye Roast on a white plate
    Small Boneless Prime Rib (Ribeye) Roast
  • Sausage dressing on a white plate.
    Old Fashioned Sausage Dressing Recipe
  • A spoonful of green bean casserole.
    Green Bean Casserole Without Mushroom Soup
  • Sweet potato casserole on a white plate
    Old Fashioned Sweet Potato Casserole
SITES THAT I WORK WITH OR HAVE HAD RECIPES FEATURED OR REFERENCED.

Footer

BACK TO TOP
OF PAGE
Join the club
SUBSCRIBE TODAY

About

  • About DrDan and the Blog
  • Contact Me
  • Comment Policy
  • Guest Posts, Partnering, and Business Questions

Content

  • Food FAQ
  • Kitchen Reference Sheets
  • Recipes Featured in the Videos
  • Guide To Cooking for Two
  • Old Saved Recipes Collections

dogs by the pond

↑ back to top ↑a

Privacy Policy | Terms of Service | Contact

COPYRIGHT © 2010-2026 101 COOKING FOR TWO. ALL RIGHTS RESERVED | BASED ON FOODIE PRO THEME