101 Cooking For Two

  • Recipes
  • About
  • FAQs/Help
  • Shop
  • 📖Emails
menu icon
go to homepage
  • Recipes
  • About
  • FAQs/Help
  • Shop
  • 📖Emails
subscribe
search icon
Homepage link
  • Recipes
  • About
  • FAQs/Help
  • Shop
  • 📖Emails
×
🏠Home » Recipes

24 Smaller Mother's Day Recipes

Mothers Day graphic with dogs

This year, Mother's Day is coming on fast, so lets gets our plan in place. These recipes are ideal for smaller celebrations but can easily scale up to any amounts needed—no need for a week of leftovers.

Mothers Day graphic with dogs.
[feast_advanced_jump_to]

I have my plan is in place, starting with Baked Blueberry Pancakes and some Oven Baked Sausage or Oven Bacon. The day's main attraction will be Oven Baked Filet Mignon with oven roasted baby potatoes. I need to choose a dessert soon.

😊 Smaller Breakfast Recipes

Start the day right with a great breakfast.

Small French Toast Casserole (Easy Small-Batch Recipe)
Easy small-batch French toast casserole with a soft, custardy center and cinnamon top. Make it overnight in an 8x8 pan, scale it down for two, or make almost any size.
Small French Toast Casserole
French Toast Casserole on orange plate with syrup.
Baked Blueberry Pancake (Easy Oven Recipe)
Make a baked blueberry pancake with homemade batter and fresh or frozen berries. It bakes all at once in the oven and scales from a small skillet batch to a 9×13 pan.
Baked Blueberry Pancake Recipe
Baked Blueberry Pancakes on a gray plate
Small Cinnamon Coffee Cake
With the great taste of Cinnabon cinnamon rolls, this quick and easy Cinnamon Coffee Cake recipe has it all, from buttery and tender cinnamon-swirled cake with caramelized streusel topping and a sweet glaze. An 8X8 small batch recipe that is simple to make smaller or bigger.
Recipe for Cinnamon Coffee Cake
Piece of cinnamon coffee cake on a spatula.
How to Cook Breakfast Sausage in the Oven (Patties or Links)
Bake breakfast sausage patties or links in the oven for evenly browned, juicy results in about 15 minutes—no splatter and easy cleanup. Larger sausages like Italian or brats cook the same way with a longer time.
How to Bake Breakfast Sausage
baked sausage on a white plate.
Convection Oven Bacon (Crispy & Easy)
Cook crispy bacon in a convection oven in about 20 minutes. This easy, mess-free method cooks bacon evenly with no flipping. A regular oven may also be used.
Convection Oven Bacon
pile of cooked bacon on a white plate

🐄 Steak Recipes

We are a beef family (yes, I know...).

Grilled Filet Mignon (Best Way on Any Grill)
The best way to grill filet mignon with simple temps, timing, and doneness guides. Juicy, tender steak on a gas or any grill in about 10 minutes.
Grilling Filet Mignon
Grilled filet mignon with asparagus.
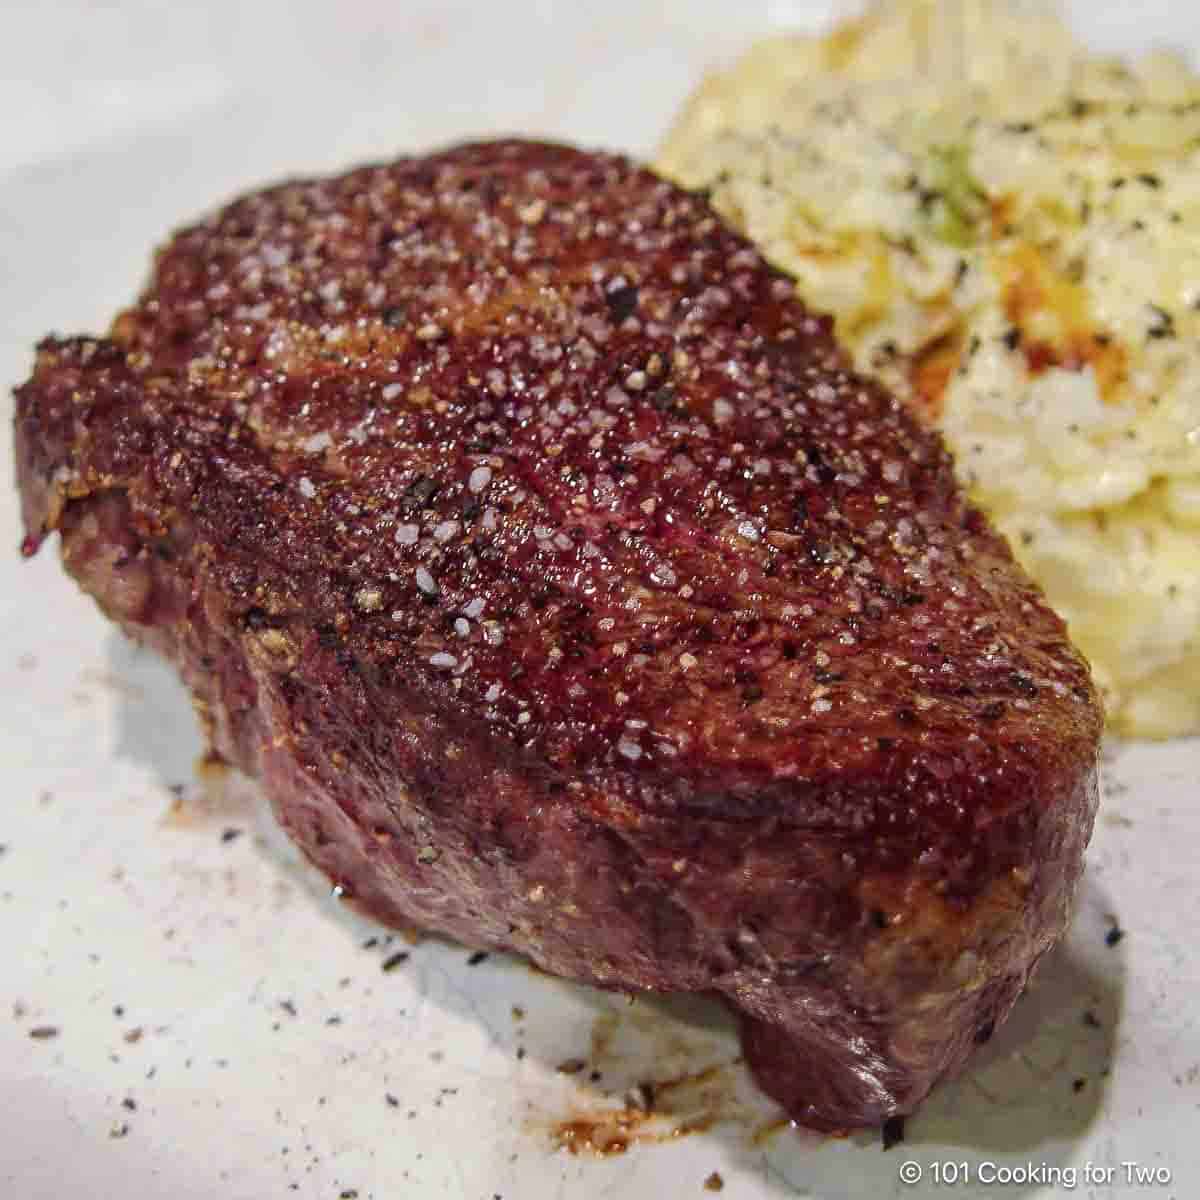
Filet Mignon in the Oven (Pan-Seared and Oven-Baked Method)
Juicy filet mignon cooked in the oven with a pan-sear for a perfect crust and tender center. Ready in about 20 minutes with simple steps.
Oven Filet Mignon
seared filet on a white plate with potatoes
Grilled Ribeye Steak (Gas Grill)
Grill a juicy, tender ribeye steak on a gas grill with easy step-by-step instructions, cooking times, temperatures, and a doneness guide from rare to well done.
Grilled Ribeye
A cut ribeye steak on a gray plate.
Pan Seared New York Strip Steak (Oven Finish Method)
Pan sear New York strip steaks for a browned crust, then finish in the oven for juicy, tender steakhouse results.
Baked Strip Steaks
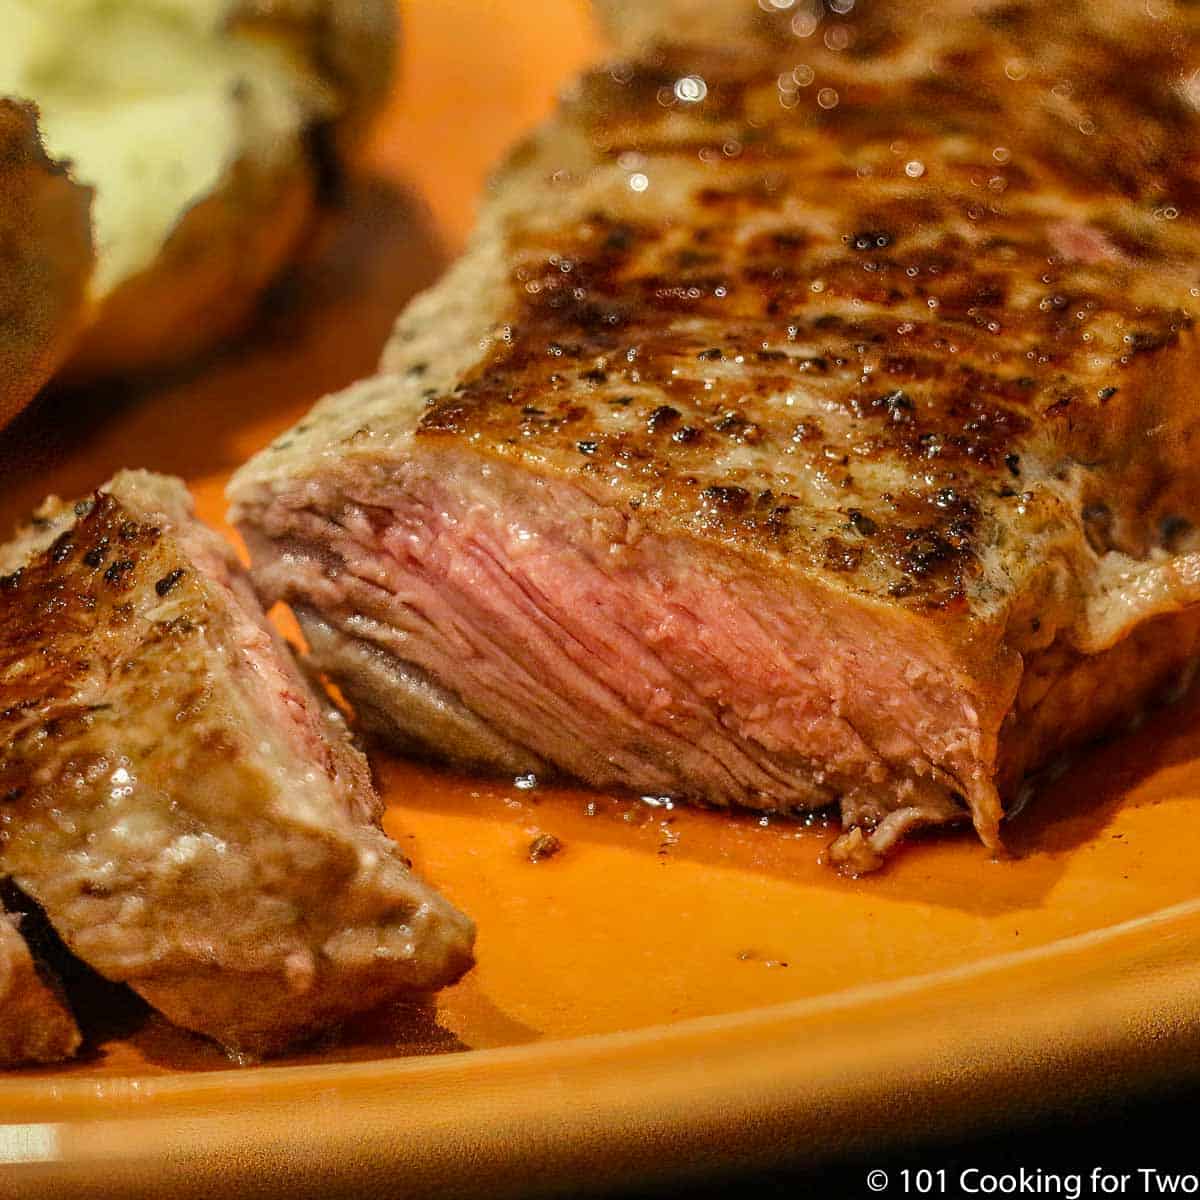
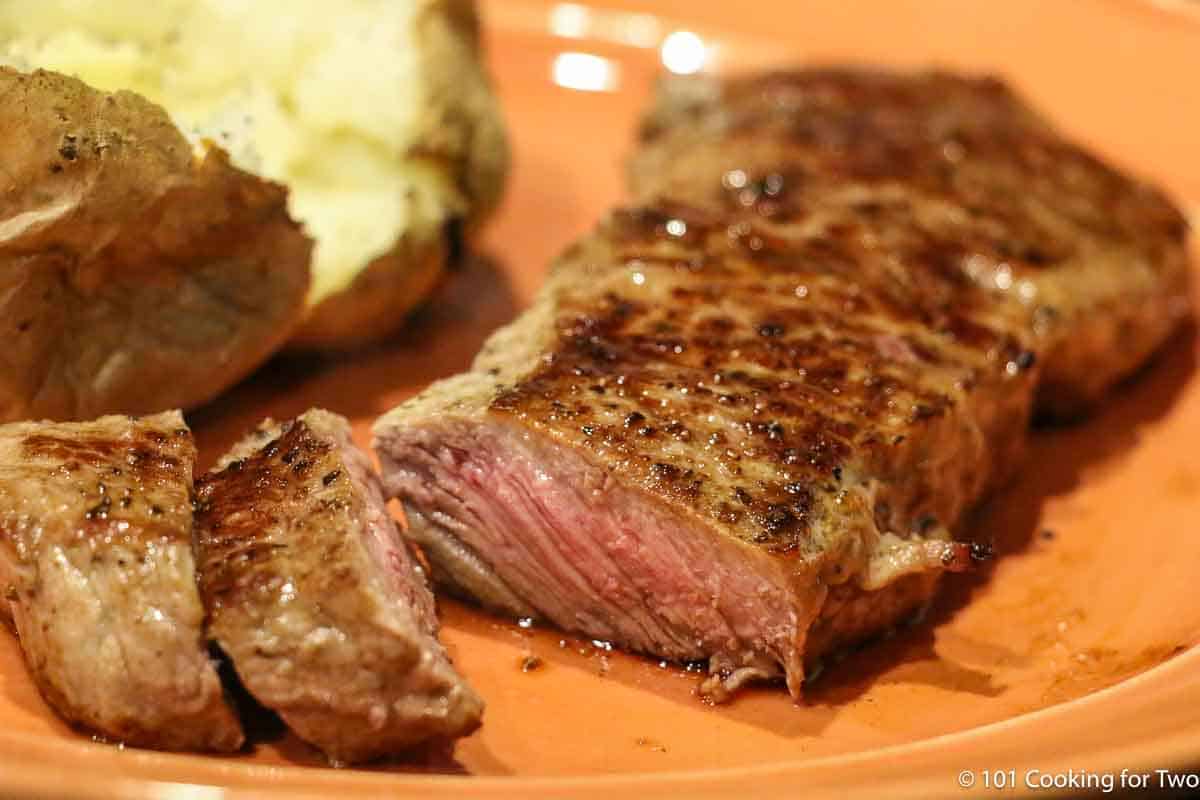
NY strip steak cut on an orange plate
How to Grill a Porterhouse Steak
Learn how to grill a juicy porterhouse steak with simple seasoning over high heat in about 10 minutes. This easy method also works for T-bone steaks.
Grilled T-Bones
porterhouse steak with fries on blue plate

Add some steak enhancements to make it memorable.

Best Homemade Steak Marinade
This easy homemade steak marinade comes together in 5 minutes with pantry ingredients and delivers great flavor in 30 minutes. Perfect for New York strip and other beef steaks.
Easy Steak Marinade
grilled marinaded strip steak ona white plate
Blue Cheese Butter Recipe for Steak
Rich, creamy blue cheese butter with garlic and herbs. Ready in minutes—perfect for steak, burgers, potatoes, vegetables, bread, and more.
Blue Cheese Compound Butter
Blue Cheese Compound Butter on a strip steak

🐓 Chicken and Pork Recipes

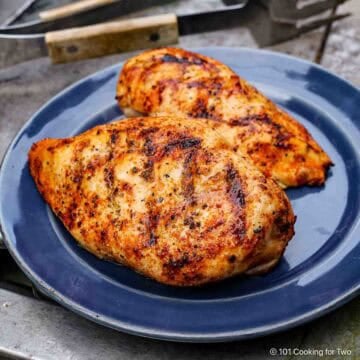
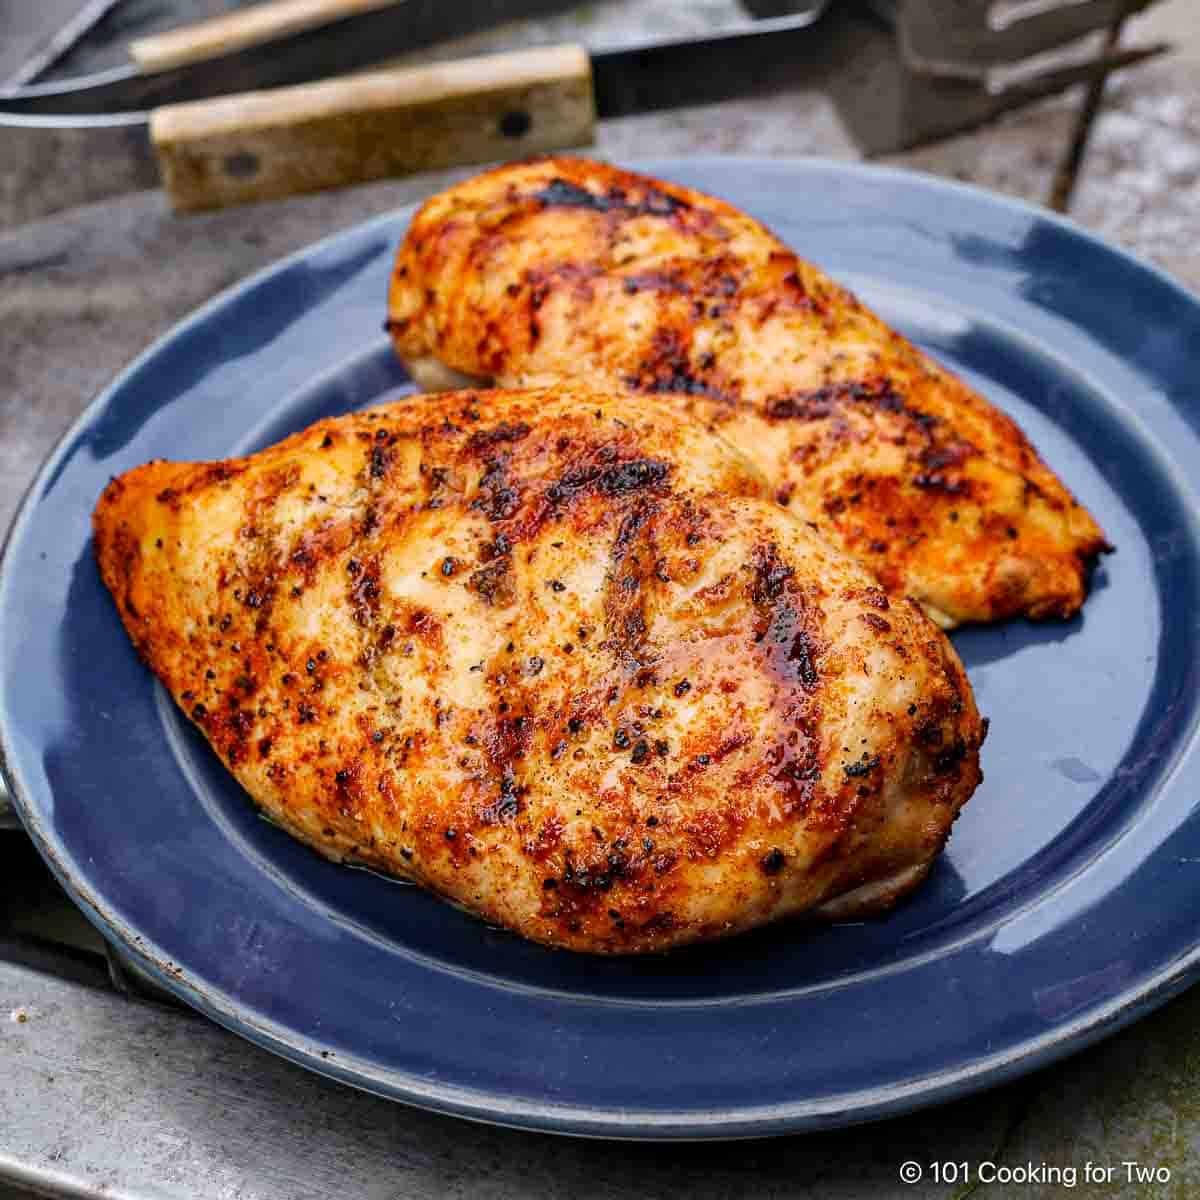
Grilled Chicken Breasts on a Gas Grill
Juicy grilled chicken breasts with simple seasoning and easy step-by-step instructions. Grill at 450°F for about 15–20 minutes to 165°F internal temperature.
Grilling Chicken Breasts on a Gas Grill
Two grilled chicken breasts on a blue plate.
Baked Mayo Parmesan Chicken Breast
Juicy baked chicken breasts coated with seasoned mayo and Parmesan, then topped with Panko for a golden crunch. Ready in about an hour.
Mayo Parmesan Chicken
bite of mayo parmesan chicken on a fork
How to Grill Pork Tenderloin on a Gas Grill
Grill pork tenderloin on a gas grill in about 25 minutes at 450°F. This easy beginner method delivers tender, juicy pork with simple prep and no fancy setup.
Grilling Pork Tenderloin
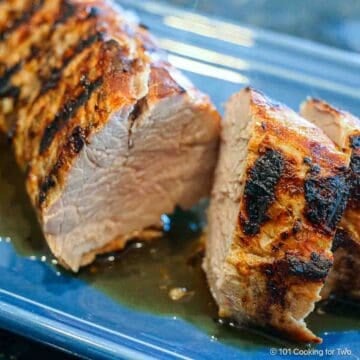
pork tenderloin on blue platter

👍 Side Dishes Recipes Mom will Love

Crispy Roasted Baby Red Potatoes
Roast baby red potatoes in the oven until golden and fork-tender, about 30–35 minutes for small potatoes. Simple, crispy, and reliable.
Oven Roasted Red Potatoes
Roasted red potatoes on a white plate.
Roasted Asparagus (Easy Oven Recipe)
Learn how to roast asparagus in the oven for crisp and tender results with simple seasoning and optional Parmesan.
How to Bake Asparagus
baked Parmesan asparagus on a white platter
Microwave Corn on the Cob in the Husk (Easy, No Shucking Needed)
Microwave corn on the cob in the husk for tender sweet corn in just minutes. No shucking, boiling, or mess—just an easy foolproof method.
How to Microwave Corn on the Cob
corn on the cob in serving trays B
Baked Green Beans with Bacon
Baked Green Beans with Bacon are the perfect side dish with any meal—an easy green bean recipe with brown sugar, garlic, bacon, and tender green beans.
Baked Green Beans with Bacon
green beans with bacon on an orange plate
Parmesan Baked Potatoes
Quick and easy Parmesan Baked Potatoes halves have a creamy center and a crispy Parmesan cheese crust with butter and garlic.
Parmesan Baked Potatoes Halves
parmesan baked potato on a white plate

😊 Smaller Dessert Recipes

Great meals deserve great endings, and you made it yourself.

Blueberry Crisp with Fresh or Frozen Berries
A small-batch blueberry crisp made with any fresh or frozen berries. Bakes in ramekins or a small dish with a buttery oat topping. Quick, flexible, and easy to make gluten-free.
Berry Crisp for Two
berry crisp on a fork
New York Cheesecake Bars
Rich and creamy New York Cheesecake Bars with a buttery graham cracker crust. This easy small-batch recipe is baked in an 8X8 pan and easily doubles to a 9X13 pan.
Lemon Bar Recipe
Cheesecake bars on a blue plate.
Apple and Berry Crumble
This easy apple and berry crumble combines tender apples, juicy berries, and a buttery crumb topping. Use fresh fruit or make a quick version with frozen berries and apple pie filling.
Semi-Homemade Apple Berry Crumble
blue bowl of apple berry crumble with ice cream
Lemon Squares
Easy lemon bars are delicious and simple to make in under an hour. These homemade lemon squares are a perfect dessert treat with a crispy, buttery shortbread crust and tangy and sweet lemon filling—a small batch 8X8 recipe you can scale to your needs.
Lemon Bar Recipe
Two lemon squares on a gray plate.

Have a great holiday.

From Wifo, Molly, Lilly, and DrDan

Molly and Lilly in spring flowers

Editors note: This is a yearly recurring post. This version was created on May 8, 2019, and will be updated yearly.

Smaller Cinco de Mayo Recipes

Graphic markup for Cinco de Mayo.2023recipe collection

It's time to plan your Cinco de Mayo menu with these easy and delicious smaller recipes. Most recipes are written for medium amounts since we love Mexican leftovers, but they can easily be scaled down for smaller amounts. Make world-class tacos, tender quesadillas, carnitas, or even the best taco soup. I do love food holidays.

[feast_advanced_jump_to]
Graphic markup for Cinco de Mayo.2023recipe collection

Cinco de Mayo was a victory in battle over the French and is not the Mexican Independence Day, which is September 16th. I'm sure our French friends will join us on the food side of the celebration and wish our Mexican neighbors a happy holiday.

Please enjoy my personal favorites.

🌮Tacos and Nachos

One of my favorite recipes is this ground beef taco meat. With bold flavors, it is not your mother's tacos. I make a 2-3 pound batch of taco meat at least once per month. Rarely do we freeze any. Two of us consume it in 3-4 days.

Three hard shell spicy tacos.
Taco Meat Recipe (Homemade From Scratch)
This easy ground beef taco meat recipe has bold flavors and takes just 25 minutes to prepare. Make it hot for spicy tacos or mild for family taco night. Use fresh pantry spices for a fantastic homemade taco seasoning—you will never use packaged taco seasoning again.
Homemade Taco Meat Recipe
Three hard shell spicy tacos on a white plate.
Crock Pot Chicken Tacos
You can prepare delicious chicken tacos or nachos with just three ingredients, a slow cooker, and five minutes of prep time. Cook the chicken for several hours, shred it, and cook for another hour. Serve this tender chicken taco meat as tacos, nachos, or other Mexican dishes.
Crock Pot Chicken Tacos
Chicken taco nacho chip in hand.
Easy Mexican Shredded Beef
Shredded Mexican Beef is tender and flavorful, using a beef roast and a few pantry ingredients. It's super easy to make on the stovetop or in your crock pot. It makes fantastic tacos, burritos, and quesadillas.
Shredded Beef Taco and More
shredded beef nacho
Chili Cheese Nachos
Chili Cheese Nachos with shredded beef chili smothered in melted cheese is perfect for tailgating and game-day parties. Easy to make ahead and serve both chili and nachos at the party.
Chili Cheese Nacho Recipe
plate of cheese chili nachos topped with tomatos and sour cream

👍Fajitas and Carnitas

Easy Sheet Pan Chicken Fajitas
Ready in only 30 minutes, this Easy Sheet Pan Chicken Fajitas recipe is perfect for fajitas, quesadillas, and tacos. Give everybody the Mexican dish they want with this versatile Mexican chicken.
Sheet Pan Chicken Fajitas
chicken fajita tortilla with sour cream.
Easy Marinated Steak Fajitas
This Easy Marinated Steak Fajitas recipe starts with a great fajita marinade and ends with great-tasting melt-in-your-mouth tender steak strips and vegetables.
Marinaded Steak Fajitas Recipe
Steak Fajitas on tortilla and white plate
Chicken Fajita Quesadillas in 30 Minutes
Chicken Fajita Quesadillas with sautéed onions, green peppers, seasoned chicken, and melted cheese in a crispy tortilla—an easy home recipe with everyday ingredients.
Fast Chicken Fajita Quesadillas
fajita quesadilla with trimmings on a blue plate
Pork Carnitas in the Oven (Juicy, Tender & Crispy)
Make juicy, crispy pork carnitas in the oven—no mess or deep fryer. An easy low-and-slow recipe for tender Mexican pulled pork that’s perfect for tacos, burritos, or nachos.
Pork Carnitas in the Oven
Shredded carnitas in a tortilla.
Healthy Chicken Carnitas
Make Healthy Chicken Carnitas, AKA Carnitas do Pollo, but keep the traditional stovetop method using chunks of tender chicken with citrus and other spices for that deep flavor.
Healthy Chicken Carnitas
chicken carnitas on white plate

🥘Enchilada casseroles

Healthy Chicken Enchilada Casserole—Easy and Quick
Healthy chicken enchilada casserole is quick and easy to make. Featuring homemade enchilada sauce and fresh chicken, it is done in 60 minutes.
Fast Chicken Enchilada Casserole
Chicken enchilada casserole on an orange plate.
Easy Sour Cream Chicken Enchiladas
Easy sour cream chicken enchiladas with chicken and cheese rolled in tortillas and covered with a simple homemade sour cream sauce.
Sour Cream Chicken Enchilada Recipe
Bite of sour cream chicken enchilada on a fork.
Crock Pot Chicken Enchilada Casserole
Easy Crock Pot chicken enchilada casserole made with shredded chicken, homemade enchilada sauce, tortillas, and cheese. Use precooked or raw chicken for a simple family dinner.
Crock Pot Chicken Endiladas
Crock pot chicken enchilada casserole on a spoon.
Blue ribbon divider used for visual effect

🥣Soup and Side Dishes

Crock Pot Taco Soup
This easy crock pot taco soup recipe features seasoned ground beef, beans, and thick, spicy tomato broth. You can make it spicy, thick, or thin, or make a small batch for two. But you will never make a more delicious taco soup. It's spicy tacos in a bowl, perfect for Taco Tuesday.
Spicy Taco Soup Recipe
Bowl of taco soup with toppings.
Easy Mexican Rice
This Easy Mexican Rice Recipe is ready in 30 minutes with pantry ingredients. Better than many restaurants, it is perfect for your favorite homemade Mexican dinner.
Easy Mexican Rice Recipe
Mexican rice on a fork
Small-Batch Guacamole Recipe with 2 Avocados
Make delicious homemade guacamole with 2 avocados and 4 simple ingredients in about 10 minutes. This easy small-batch recipe is customizable to your taste and can be scaled up or down.
Easy Guacamole Recipe
guacamole on a chip over a bowl
Pineapple Mango Salsa Recipe
Sweet and savory with a touch of spice, this easy Pineapple Mango Salsa Recipe is a perfect fresh fruit salsa to serve as an appetizer or party dish. Or as a complement to tacos, fish, or other entree.
Pineapple Mango Salsa Recipe
pineapple mango salsa on white plate.

For a complete listing of all our Mexican offerings, please visit our Mexican Recipe Category.

Let's all join together and wish our wonderful neighbor to the south Happy Cinco de Mayo (AKA Victory Over the French) Day. The French would agree, at least on the food side.

DrDan

dogs romping in yard.

Editor's Note: Originally published April 29, 2017. This roundup post is a "recurring" post that is updated and reused yearly for a special occasion so that some comments may be older.

Crock Pot Taco Soup

Bowl of taco soup with toppings.

This easy crock pot taco soup recipe features seasoned ground beef, beans, and thick, spicy tomato broth. You can make it spicy, thick, or thin, or make a small batch for two. But you will never make a more delicious taco soup. It's spicy tacos in a bowl, perfect for Taco Tuesday.

🐄Ingredients

Ground beef—leaner preferred
Onion
Canned ingredients—green chiles, black beans, kidney beans, diced tomatoes, tomato sauce, beef broth
Spices for taco seasoning—chili powder, cumin, oregano, garlic powder, cayenne pepper, salt, and black pepper
Optional—Jalapeno pepper, Ranch dressing powder, bell pepper, corn

Bowl of taco soup with toppings.
[feast_advanced_jump_to]
Blue ribbon divider used for visual effect

quote mark
Featured Comment by Karen :
"We love, love, love this recipe!"

The trouble with most taco soup recipes is the lack of flavor. A package of taco seasoning does not work well for a large volume of soup. Instead, you can make this soup recipe with spices from your pantry.

I called this "kick-tail" spicy taco soup because I like to spice it up, but I have toned it down a bit. It's easy and quick to make in the crock pot, or you can cook it in less than an hour with only one pan on the stovetop.

You won't believe this fits your diet. It will fit a healthy diet like a low-calorie or low-fat diet or even a low-carb keto diet. You can decrease the salt by using low-sodium products and reducing the salt.

This chili is based on my Taco Meat Recipe, like my Taco Casserole. Or check out some other crock pot Mexican chicken recipes, like Slow Cooker Chicken Fajitas, Crock Pot Chicken Enchiladas, Chicken Tortilla Soup, and Crock Pot Chicken Tacos.

👨‍🍳How to Make Taco Soup—Step-by-Step Photo Instructions

ground beef with spices and ingredients for taco soup.
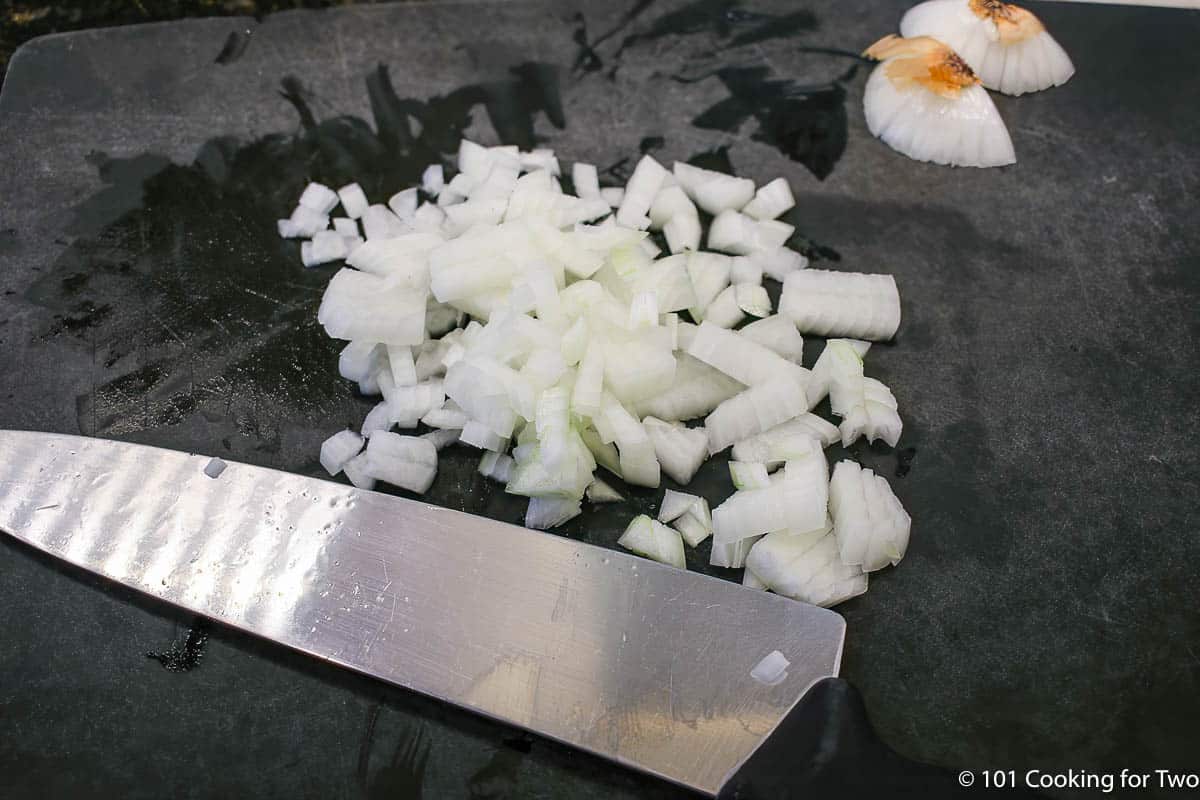
chopped onion with knife.

1. Prep the onion with optional jalapeno pepper.

raw burger and chopped onion in skillet.

2. Brown meat with onion.

mixing taco spices in silver bowl.

3. Mix spices.

adding spices as ground beef browns.

4. Drain the fat after about 6 minutes and add the spices. Finish browning—about 10 minutes total time.

rinsing beans under running water.

5. Rinse beans.

adding all ingredents to the crock pot.

6. Add all ingredients to the crock pot.

ladle of taco soup.

7. Cook on low in the crock pot for 6 hours or 3 hours on high.

For more details, keep reading. See the Recipe Card below for complete instructions and to print.

✔️Tips and variations to make it right every time

This recipe requires ground meat. Ground beef is usually used, but ground turkey or chicken will be fine.

The heat level is 6/10 on the heat meter with a teaspoon of cayenne pepper and one jalapeno. Without the jalapeno and cayenne pepper, the heat level will be 1-2 out of 10. Add more or less spices or jalapeno to adjust the heat level.

If you want a very thick taco chili-like consistency, reduce the beef broth.

The optional dry ranch dressing adds an interesting taste and is an excellent counterbalance to the hot spiciness if you crank up the heat.

Optional additions are bell pepper and corn.

Make it the stovetop.

To make taco soup on the stovetop, make the taco meat as directed. Then, add all the ingredients to the pan instead of adding to the crockpot. Bring to a boil on the stovetop, turn down the heat, cover, and simmer for at least 30 minutes, but 1-2 hours is better.

⬇️How to make this a "for two" friendly recipe

A full recipe makes about 14 cups of chili, which makes 8 large servings and needs a 5-quart or larger crock pot. It freezes well, so we always make the full-size even though we cook for two.

  1. A half recipe will fit nicely in a 3-quart crock pot or smaller pan on the stovetop and make 4 servings.
  2. Use the recipe card and adjust the number of servings to 4.
  3. Use the amount of ingredients in the ingredient list, not the instructions—those do not adjust.
  4. Cook for the same amount of time.

Serving

Serve topped with shredded cheese and a dollop of sour cream. Other possible toppings are tortilla strips, jalapeno, avocado slices, cilantro, green onion, or avocado slices—or your favorite taco toppings.

My side dishes would mainly consist of tortilla chips with salsa and Guacamole, but Mexican rice, refried beans, or a green garden salad also work well for me.

Storing leftovers

Leftovers should be stored sealed in an airtight container in the refrigerator for 4 days or frozen for 3-4 months. They are good in the fridge for 3-4 days and good in the freezer for 3-4 months.

❓FAQs

Can I use packaged taco seasoning?

You "can," but you will miss out on most of the great taste of the excellent homemade taco spice mix.

Can I add raw ground meat to the crock pot?

No. You will have clumps of meat and all the fatty drainage in your dish.

The ground meat must be browned, spiced, and drained before adding it to the pot. Crock pots are great for many things, but cooking ground meat is not one of them.

Blue ribbon divider used for visual effect

This recipe is listed in these categories. See them for more similar recipes.

101's Best Recipes, Chili Recipes, Crock Pot Recipes, Healthy Recipes, Low Fat Recipes, Mexican Recipes, Small Crock Pots Recipes

Have you tried this recipe, or have a question? Join the community discussion in the comments.

📖The Recipe Card

Bowl of taco soup with toppings.
Print Recipe Add to Collection Go to Collections

Crock Pot Taco Soup

This easy crock pot taco soup recipe features seasoned ground beef, beans, and thick, spicy tomato broth. You can make it spicy, thick, or thin, or make a small batch for two. But you will never make a more delicious taco soup. It's spicy tacos in a bowl, perfect for Taco Tuesday.
Prep Time20 minutes mins
Cook Time6 hours hrs
Total Time6 hours hrs 20 minutes mins
Course: Main dish, Soup
Cuisine: Mexican
Keyword: how to make taco soup, taco soup for two, taco soup recipe
Servings: 8
Calories: 291kcal
Author: Dan Mikesell AKA DrDan

Ingredients

  • 1 lb ground beef
  • 1 onion medium chopped
  • 1 jalapeno pepper optional, minced

Pantry ingredients

  • 4 cups diced tomatoes
  • 14 oz tomato sauce
  • 2 cups light kidney beans drained and rinsed
  • 2 cups black beans drained and rinsed
  • 2 cups beef broth Optional-leave out if you want very thick
  • ¼ cup green chilies
  • 1 tablespoon ranch dressing powder half an envelop—Optional

Spices

  • 3 tablespoons chili powder
  • 1 teaspoon cumin
  • 1 teaspoon oregano
  • 1 teaspoon garlic powder
  • ½-1 teaspoon cayenne pepper optional
  • 1 teaspoon salt
  • ½ teaspoon black pepper
US Customary - Convert to Metric

Instructions

  • Use the ground meat and beans of your choice.
    ground beef with spices and ingredients for taco soup.
  • Prep a medium onion with a medium chop and one jalapeno pepper by mincing (optional.)
    chopped onion on black board
  • Cook 1 pound of ground beef with diced onion in a large pan. If finishing on the stovetop, use a Dutch oven.
    raw burger and chopped onion in skillet.
  • While beef is starting to cook, combine the spices: 3 tablespoons chili powder, 1 teaspoon cumin, 1 teaspoon oregano, ½ to 1 teaspoon cayenne pepper, 1 teaspoon garlic powder, 1 teaspoon salt, and ½ teaspoon of pepper.
    mixing taco spices in silver bowl
  • When the beef and onion have cooked for 6-8 minutes and are mostly browned, drain the fat. Add the spices. Continue to cook until the beef is well browned–about 10 minutes total cooking time. Add the beef to a 5-quart or larger crock pot, or leave it in the Dutch oven if cooking on the stovetop.
    adding spices as ground beef browns.
  • Rinse 1 can of black beans and 1 can of kidney beans, and add to the pot. You may substitute any beans you want.
    rinsing beans under running water
  • Add all remaining ingredients: 1 small can of green chilies, 2 cans diced tomatoes, tomato sauce, the diced jalapeno, ½ envelope of dry ranch dressing mix (optional), and a 14 oz can of beef broth. The beef broth may be omitted if you want this thick.
    adding all ingredents to the crock pot
  • Cook on low in the crock pot for 6 hours or 3 hours on high. Or bring to a boil on the stovetop, turn down the heat, cover, and simmer for at least 30 minutes, but 1-2 hours is better.
    ladle of taco soup

Notes

Pro Tips

  1. This recipe requires a larger crock pot of at least 5 quarts. The half recipe will fit in a 3-quart.
  2. This is an easy recipe to cut in half. See the recipe post for instructions.
  3. Use the beans and ground meat of your choice.
  4. Please do not use packaged taco seasoning—it is much better with the pantry spices.
  5. This is 6/10 on the heat-o-meter with the jalapeno and the 1 teaspoon of cayenne pepper. If you want less heat, cut back the cayenne pepper and/or eliminate the jalapeno pepper. You will still have great taste without any heat.
  6. When browning the meat, when you get it all broken up and starting to brown, drain and add the spices. This will lock the flavor in the meat and not drain off with the fat.
  7. You can cook for a shorter period since everything is safe, but it is better if cooked the suggested time so the flavors come together.
  8. The optional ranch dressing powder adds an interesting cool vs. spicy heat taste. It is recommended if you have elected higher heat with the jalapeno and max cayenne pepper.
  9. Good refrigerated for 4 days and frozen for 4 months.

Nutrition

Calories: 291kcal | Carbohydrates: 30g | Protein: 24g | Fat: 9g | Saturated Fat: 3g | Cholesterol: 49mg | Sodium: 922mg | Potassium: 1040mg | Fiber: 11g | Sugar: 7g | Vitamin A: 1291IU | Vitamin C: 18mg | Calcium: 96mg | Iron: 5mg

Publishing Note: Originally Published: January 13, 2012. Updated with expanded options, refreshed photos, and a table of contents to help navigation.

Inside dogs with big smiles.

30 Minute Pork Fajitas

pork fajita on griddle

Quick and easy on a grill or the stovetop, these healthy pork fajitas are bursting with great Tex-Mex flavors. They're a perfect change-of-pace recipe for Taco Tuesday or Cinco de Mayo, with incredible tastes and tenderness.

🐖Ingredients

Pork tenderloin
Spices—chili powder, oregano, paprika, garlic powder, salt, option coriander
Vegetables—onion, bell pepper
Serving—tortillas, shredded cheese, sour cream, and other toppings.

Grilled pork with veggies for fajitas.
[feast_advanced_jump_to]
Blue ribbon divider used for visual effect

The Mexican flavors of fajitas are perfect for pork. Using pork tenderloin, you can have tender and moist pork fajitas on the table in less than 30 minutes.

You can do this on the stovetop or a grill, but a grill with a griddle will add some fire-roasted flavors.

Try other healthy Mexican recipes, like Grilled Chicken Fajitas, Pork Carnitas with Pork Tenderloin, Chicken Carnitas, Crock Pot Chicken Fajitas, or Healthier Chicken Enchilada Casserole.

How to Make Pork Fajitas—Step-by-Step Photo Instructions

pouring oil on griddle.

1. If grilling, start by preheating the grill with a griddle to 450°.

spices for pork fajitas.

2. Mix spices.

trimming a pork tenderloin on a black board.

3. Trim pork tenderloin of any silver skin and fat. Cut "cross-grain" after cutting the tenderloin longitudinally.

adding spices to bowl with cut up pork.

4. Coat the pork with most of the spice mix.

sliced peppers and onion on black board.

5. Prep some veggies.

seasoned pork on the griddle.

6. Grill: grill open. Add the meat to the griddle and stir frequently.

cooking meat and vegetables the grill griddle.

7. Grill: After a minute or two, add the veggies and sprinkle with the reserved spices.

Grilled pork for fajitas on the grill.

8. Grill: Continue to stir for 10 to 12 minutes total cooking time. The meat should be 145° and the veggies clear.

cooking peppers and onions in a cast iron skillet.

9. Stovetop: cook in a large skillet with oil similar to the grill. Pork first then the veggies, finally combined.

pork fajita on a white plate.

10. Serving: Serve with warmed tortillas and toppings of your choice.

For more details, keep reading. See the Recipe Card below for complete instructions and to print.

👨‍🍳Seasoning notes

Since we are using pork tenderloin, it does not need a long marinade to help with tenderness. Also, it will pick up flavors rapidly. This is a fairly standard combination of spices.

The original recipe includes coriander. Coriander is the seeds of the same plant that gives us cilantro, but they have different tastes and uses. It does add some taste, but I suspect many of you will not have it on hand. You can skip it in the recipe if you want.

♨️Grilling Method

I prefer this cooked on the grill with a large griddle. Preheat with the griddle in place to about 450° grill surface temperature. See A Beginners Guide to Grill Temperature on a Gas Grill if you have questions.

Use only higher-temperature oils like corn or canola oil. This is not the time for olive oil. When you add the pork, turn the burners up to high and leave the grill hood open so you can give it attention.

After the pork has had a few minutes head start, add the vegetables. Grill until the pork is browned nicely and 140°-145°. The onions should be transparent, and the peppers should be browning and tender.

♨️Stovetop Method

Use a large skillet, preferably cast iron. First, cook the meat. It will take about 8-10 minutes to brown nicely and reach an internal temperature of 140°-145°.

Then remove the tenderloin and cook the vegetables for about 6-8 minutes until the onions are clearing some and some browning of the peppers.

Add the meat back in to cook another few minutes, and serve sizzling hot in the pan.

Can I use shredded pork instead?

To use previously cooked shredded pork, coat it with seasoning, start cooking the vegetables, and mix in the seasoned pork after 3-4 minutes. You can make shredded pork with Crock Pot Shredded Pork Tenderloin, Pulled Pork Loin, or Pulled Pork Loin in the Oven. You can also use bake slow cooked pork butt.

🥣Serving

Serve sizzling hot in the skillet; it will keep it warm for a long time. Warm some tortillas in the oven or cover them for a few seconds in the microwave.

Garnish with cilantro and a slice of lime. Other common toppings include pico de gallo, lime juice, sour cream, shredded cheddar or Mexican cheese, shredded lettuce, and black beans.

Add side dishes of chips and salsa, Mexican Rice, Easy Guacamole, and Mango Salsa with Pineapple.

Leftovers

Store in an airtight container refrigerated for 3 days, or frozen for 3 months. Reheat in a microwave or with a bit of oil on the stovetop over medium heat.

FAQs

Can I use pork loin instead of pork tenderloin for pork fajitas?

Yes, but pork loin fajitas will not be as tender. A pork tenderloin weighs about 1 ½ pounds, so substitute on weight.

Where did fajitas orginate?

Fajitas, which we consider Mexican, are a Texas, not Mexican, tradition originating there in the 1970s. Initially made with skirt steak, almost every meat has been used to create this wonderfully tasty dish. You can also do a vegetarian version.

Blue ribbon divider used for visual effect

📖The Recipe Card

Grilled pork with veggies for fajitas.
Print Recipe Add to Collection Go to Collections
4.47 from 13 votes

30 Minute Pork Fajitas

Quick and easy on a grill or the stovetop, these healthy pork fajitas are bursting with great Tex-Mex flavors. They're a perfect change-of-pace recipe for Taco Tuesday or Cinco de Mayo, with incredible tastes and tenderness.
Prep Time15 minutes mins
Cook Time12 minutes mins
Total Time27 minutes mins
Course: Main Course
Cuisine: Mexican
Keyword: pork fajita recipe, Pork Fajitas, Pork Tenderloin Fajitas
Servings: 4 servings
Calories: 240kcal
Author: Dan Mikesell AKA DrDan

Ingredients

  • 1 pork tenderloin trimmed

Spices

  • 4 teaspoons chili powder
  • ½ teaspoon oregano
  • ½ teaspoon paprika
  • ½ teaspoon garlic powder
  • ½ teaspoon table salt
  • ¼ teaspoon ground coriander optional

Veggies

  • 1 onion large
  • 2 bell peppers green or red

Serving

  • flour tortillas
  • sour cream
  • cheese etc
  • topping of choice
US Customary - Convert to Metric

Instructions

  • Start by preheating the grill with a griddle and a tablespoon of oil. Or a large skillet if doing stovetop. Get the temp to around 450°.
    pouring oil on griddle
  • Mix spices 1 tablespoon chili powder; ½ teaspoon each of oregano, salt, paprika, and garlic powder; and ¼ teaspoon coriander.
    spices for pork fajitas
  • Trim the pork tenderloin of any silver skin and fat. Rinse and pat dry. Cut in half the long way. Flip the halves of the tenderloin back together and cut into ½ inch slices. This will make them "cross-grain" and more tender.
    trimming a pork tenderloin on a black board
  • Put pork into a large bowl, add the spice mixture and stir together coating the pork well.
    adding spices to bowl with cut up pork
  • Prep some veggies. I went with a large onion along with a green and red pepper.
    chopped onion with red and green pepper on a black board
  • I leave the top of the grill open at this point and increase the burners to high. Add the meat to the griddle. Stir frequently. That grill is hot. After a minute or two add the veggies.
    pork chunks cooking on the griddle
  • Continue to stir and flip frequently. You will feel like you're cooking here. Total cooking time 10 to 12 minutes from the pork hitting the griddle.
    Grilled pork for fajitas on the grill.
  • Serve with warmed tortillas and toppings of your choice. I went with sour cream, cheese, and jalapeno slices. A simple way to heat tortillas is to sprinkle a dish towel with some water, put tortillas inside, and heat in a microwave on high until hot.
    pork fajita on a white plate

Notes

Pro Tips:

  1. Pork loin may be used but will not be as tender.
  2. Instructions for shredded pork are in the post.
  3. Cut your tenderloin against the grain.
  4. Use a BIG skillet. Cast-iron is preferred. If bigger than 12-inches, you can cook the meat and veggies together. Give the meat a few minutes headstart.
  5. Good in the refrigerator for 3 days. Reheat in a skillet or microwave.
  6. Nutrition only includes pork and veggies.

Stovetop Instructions

  1. If doing a stovetop method, place a large skillet, preferably cast-iron, over medium-high heat, and add 1 tablespoon oil. If the pan is big enough, you can do the meat and vegetable together but give the meat about a 2-minute headstart.
  2. Otherwise, cook the meat first for about 8-10 minutes until brown nicely and 140°-145°. Remove and cover. Add a bit of oil to the pan, the cut vegetables, sprinkle with the reserved spices, and cook until the onion is clearing and peppers are browning some. Add the meat back into the skillet and cook a few more minutes.

Nutrition

Calories: 240kcal | Carbohydrates: 7g | Protein: 37g | Fat: 6g | Saturated Fat: 2g | Polyunsaturated Fat: 1g | Monounsaturated Fat: 3g | Cholesterol: 111mg | Sodium: 351mg | Potassium: 822mg | Fiber: 2g | Sugar: 3g | Vitamin A: 1100IU | Vitamin C: 75.1mg | Calcium: 30mg | Iron: 2.7mg

Based on a MayoClinic.com recipe.

Originally Published June 3, 2012. Updated with expanded options, refreshed photos, and a table of contents to help you navigate.

Lilly dog at full speed

Steak Kabob Marinade (Easy & Foolproof)

Marinaded Steak Kabobs from 101 Cooking for Two

Want a steak kabob marinade that’s easy and actually works? This one’s bold, savory, and beginner-proof—an easy steak marinade for kabobs that works with sirloin, strip, or your favorite cut. No weird ingredients, no fuss.

❓ Quick Answer: How Long Should You Marinate Steak Kabobs?

• 4–6 hours for the best balance of flavor and tenderness. Tougher cuts may need up to 8 hours.
• 2 hours will still add good flavor if you're short on time.
• Avoid over-marinating—the acid can make the meat mushy.

Grilled steak kabobs with marinade on blue plate.
[feast_advanced_jump_to]

quote mark
Featured Comment by Jaime :
⭐⭐⭐⭐⭐
"I have become a much better cook thanks to you. This Marinade is delicious."

🤔 Why This Marinade Works

  • Beginner-friendly: No mystery ingredients or fancy techniques—just mix, marinate, and grill.
  • Pantry staples: You probably have everything for this kabob (kebab) marinade already: oil, soy sauce, lemon juice, and a few dried herbs.
  • Balanced flavor: A little sweet, a little tangy, and plenty of savory umami to bring the steak to life.
  • Tender, not mushy: The acid in the marinade helps tenderize without overdoing it—just enough time makes a big difference.

🥣 Ingredients You’ll Need

This is a classic marinade for steak kabobs using common pantry staples.

Ingredients for steak kabob marinade—labeled.
  • Olive oil – The base that helps everything stick and keeps the meat moist
  • Soy sauce – Brings salt and savory depth
  • Worcestershire sauce – Adds umami and complexity
  • Lemon juice or vinegar – Helps tenderize the steak
  • Honey or brown sugar – Adds balance and encourages browning on the grill
  • Garlic powder, dried basil, parsley flakes – Dried herbs for flavor
  • Pepper – White or black, depending on what you have

Optional variations:
These additions tweak the flavor but aren’t required. Stick with the base or mix and match to suit your taste:

  • Dijon mustard – Adds tang and complexity
  • Smoked paprika – Brings a mild smoky note, great for gas grills
  • Red pepper flakes – A bit of heat, if you like things spicy
  • Fresh garlic – Swap in for garlic powder (1–2 cloves, crushed)
  • Rosemary or thyme – Fresh or dried herbs for a more herbal flavor
  • Balsamic vinegar – Use instead of lemon juice for a richer, slightly sweet marinade

✅ Pro Tip: These are flavor options—not must-haves. Try one or two if you’re in the mood to mix things up, but the base marinade has everything you need for great results.

👨‍🍳 Quick Overview: Making Steak Kabobs with Marinade

1. Mix the marinade

Combine olive oil, soy sauce, lemon juice (or vinegar), brown sugar, Worcestershire sauce, and seasonings in a bowl. Whisk until well blended.

Mix the beef kabob marinade in a bowl with a whisk.

2. Marinate the steak

Trim excess fat and cut the steak into 1-inch cubes. Sirloin and strip steak work best. Add the beef to the marinade and refrigerate for 2 to 8 hours.

adding steak to bag with marinade

✅Pro Tips: Let the meat rest at room temperature for 15–30 minutes after marinating. It’ll cook more evenly and sear better.

3. Assemble the kabobs

Thread the marinated steak onto skewers. Soak wooden skewers for at least 10 minutes before grilling to help prevent burning.

Sirloin kabobs made with steak marinade and wooden skewers.

✅Pro Tip: Wooden skewers help you avoid overcooking the center. Metal ones can transfer too much heat too fast.

4. Grill the beef kabobs (steak skewers)

Grill the beef kabobs (steak skewers) over medium-high heat, turning every 3 to 4 minutes. The total time is usually 10–15 minutes, depending on the size of the cubes and your preferred level of doneness.

Grilled steak kabobs with marinade coming off the grill.

👇 For full step-by-step instructions, including exact measurements, scroll down to the printable recipe card—or keep reading for more tips, variations, and serving ideas.

⏲️ How Long Should You Marinate the Steak?

Aim for 4 to 6 hours for the best flavor and tenderness. That’s the sweet spot.

  • Tougher cuts? Go up to 8 hours.
  • Tender steaks like ribeye or filet? Two hours is plenty.

You’ll get good flavor transfer in as little as 30 minutes, but the texture won’t improve much in that short time. If you’ve got the time, two hours or more is worth it.

✅ Pro Tip: Don’t marinate overnight—too much time in acid can break down the texture and make the meat mushy instead of tender.

🥩 Choosing the Right Steak for Kabobs

This marinade works with almost any steak, but it really shines as a sirloin steak kabob marinade, giving both great flavor and gentle tenderizing.

  • Top sirloin is my go-to—it’s flavorful, tender, and budget-friendly.
  • New York strip works well too, especially if you trim excess fat.
  • Ribeye has great flavor but more fat, which can cause flare-ups.
  • Filet mignon (beef tenderloin) is tender but more expensive.

You can use flank or skirt steak, but they tend to be chewier—even with a good marinade. If you do, slice them thin and against the grain.

✅ Pro Tip: I love this as a sirloin kabob marinade—it keeps lean steak juicy and flavorful, making tender steak skewers every time.

🍢 Other Great Kabob Recipes

Looking for a full kabob recipe (not just the marinade)? Try one of these easy options—one beef and plenty of chicken to mix things up:

  • Easy Beef Kabobs – Simple three-ingredient marinade
  • Honey Garlic Chicken Kabobs – Sweet and savory
  • BBQ Chicken Kabobs – Smoky and saucy
  • Buttermilk Ranch Chicken Kabobs – Tangy and tender

These are all beginner-friendly and great for mixing up your grilling game.

🍽️ What to Serve with Grilled Steak Kabobs

Plan on about ½ pound of steak per person. This marinade makes enough for roughly four servings—scale it up as needed if you're feeding a crowd.

For a little extra flavor, top your grilled steak skewers with a pat of steak butter or garlic butter right off the grill.

Add vegetables like red onion or bell pepper between the beef cubes on the skewers to make classic shish kabobs.

As for sides, here are a few favorites that pair perfectly:

Warm sides for the grill:

  • Grilled Baby Red Potatoes
  • Grilling Asparagus
  • Grilled Corn on the Cob

Cold sides for summer meals:

  • Broccoli Salad with Raisins
  • Cold Macaroni Salad

✅ Pro Tip: Keep the rest of the plate simple—these steak kabobs bring bold flavor, so let them be the star.

😊 Leftovers and Storage

Leftover steak kabobs are great the next day—especially sliced up on a salad or tucked into a wrap.

Store leftovers in an airtight container in the refrigerator for up to 4 days. For longer storage, wrap tightly and freeze for up to 4 months.

✅ Pro Tip: If reheating, use a skillet or microwave in short bursts to avoid overcooking the steak.

❓ FAQs

What steak cut works best with this marinade?

It works with almost any steak, but it really shines as a sirloin steak kabob marinade. Sirloin takes on the flavor beautifully while staying juicy and tender on the grill.

Can I use this marinade on pork or chicken?

Yes, absolutely. For chicken, marinate for one to two hours. For pork chops or pork tenderloin, go with one to four hours. The marinade works well for both, but leaner meats don’t need as much time as beef.

What is the difference: kabobs vs. shish kabobs vs. skewers?

“Shish” means skewer, and while the terms get tossed around, they aren’t exactly the same. Kabobs are usually just chunks of meat. Shish kabobs typically include vegetables too, and skewers refer to the stick—whether you’re loading it up with steak, shrimp, or marshmallows.

Why is there no salt in the recipe?

There’s already plenty of sodium in the soy sauce and Worcestershire sauce, so extra salt just isn’t needed here. You won’t miss it.

Can I reuse marinade after it’s touched raw meat?

No—once raw meat hits the marinade, it’s no longer safe to reuse. If you want to baste during grilling, make a little extra and keep it separate from the batch that touches the meat.

✅ Pro Tip: You can boil used marinade for a few minutes to make it safe, but it’s easier (and safer) to set some aside ahead of time.

📖The Recipe Card

Grilled steak kabobs with marinade on blue plate.
Print Recipe Add to Collection Go to Collections
4.34 from 3 votes

Easy Steak Kabob Marinade for Grilling

Easy steak kabob marinade made with pantry ingredients. Marinate 4–6 hours for bold, balanced flavor and juicy, tender kabobs. Great with sirloin or New York strip steak.
Prep Time10 minutes mins
Marinate time2 hours hrs
Total Time2 hours hrs 10 minutes mins
Course: Main Course
Cuisine: American
Keyword: marinaded steak kabobs, sirloin steak kabob marinade, steak kabob marinade, steak marinade for kabobs
Servings: 2
Calories: 336kcal
Author: Dan Mikesell AKA DrDan

Ingredients

Marinade - Enough for up to 2 pounds of meat

  • 4 tablespoons olive oil
  • 3 tablespoons soy sauce
  • 2 teaspoons brown sugar or honey
  • 3 tablespoons lemon juice OR red wine or balsamic vinegar
  • 2 tablespoons Worcestershire sauce
  • 2 teaspoons garlic powder
  • 1½ tablespoons dry basil
  • 2 teaspoons dry parsley flakes
  • ½ teaspoon white pepper or black pepper

Steak

  • 1–2 pounds sirloin, strip, or other beef steak About ½ pound per serving. Top sirloin or strip steak are great choices.
US Customary - Convert to Metric

Instructions

Mix the marinade

  • Combine: 4 tablespoons olive oil, 3 tablespoons soy sauce, 2 teaspoons brown sugar, 3 tablespoons lemon juice, 2 tablespoons Worcestershire sauce, 1½ tablespoons dry basil, 2 teaspoons garlic powder, 2 teaspoons dry parsley flakes, and ½ teaspoon white (or black) pepper. Whisk to combine.
    Mix the beef kabob marinade in a bowl with a whisk.

Marinade the steak

  • Trim visible fat and cut the steak into 1-inch cubes. Sirloin and strip steak work well.
    trimming steak into cubes on red board
  • Add the steak to the marinade and mix well. Refrigerate for 2 to 8 hours—4 to 6 hours is ideal. Don’t marinate overnight. Tender cuts like filet or ribeye only need 2 hours.
    adding steak to bag with marinade

Assemble the kabobs

  • Thread the steak cubes onto skewers. Soak wooden skewers in water for at least 10 minutes to help prevent burning.
    Sirloin kabobs made with steak marinade and wooden skewers.

Grill the steak kabobs

  • This is a marinade post, not a full grilling guide. However, grill over medium-high heat, turning every 3–4 minutes, until your desired doneness is reached—usually 10 to 15 minutes.
    Grilled steak kabobs with marinade coming off the grill.

Notes

Pro Tips:

  1. The marinade is enough for up to 2 pounds of meat.
  2. Use black pepper if you don’t have white—other seasoning options are listed in the post.
  3. Marinate for at least 2 hours. The ideal time is 4 to 6 hours. As little as 30 minutes adds flavor but won’t tenderize.
  4. Wooden skewers work best since they don’t overcook the center. Soak them before using to reduce burning.
  5. I usually go with top sirloin, but strip steak also works great.
  6. Plan on ½ pound of steak per person. That’s usually one nicely filled skewer per serving.
  7. Nutrition info is based on marinated sirloin steak. Most of the marinade isn’t absorbed.

Nutrition

Calories: 336kcal | Carbohydrates: 1g | Protein: 50g | Fat: 13g | Saturated Fat: 4g | Cholesterol: 138mg | Sodium: 226mg | Potassium: 776mg | Fiber: 1g | Sugar: 1g | Vitamin C: 1mg | Calcium: 64mg | Iron: 4mg
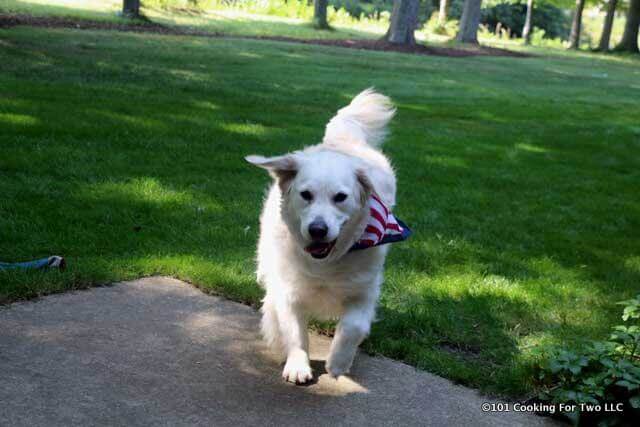
Molly dog running with a flag bandana in the summer.

Originally Published August 28, 2017. Updated with expanded options, refreshed photos, and a table of contents to help navigation.

Grilled Corn on the Cob Without Husks

grilled corn on the cob in a holder

The best grilled corn on the cob is quick and easy with a few tips. Pick the best corn, husk, and a brush of oil with salt and pepper, and finish by grilling over medium heat until tender with some delicious char. It's not hard, and it's so good—no husk and no aluminum foil are needed.

🌽Ingredients

Ears of corn
Vegetable oil
For serving—salt, black pepper, butter.
Other seasoning options—smoked paprika, Old Bay seasoning if served with seafood, or Ranch powder.

grilled corn on the cob in a holder.
[feast_advanced_jump_to]
Blue ribbon divider used for visual effect

For us, grilled sweet corn is the perfect side dish for grilled burgers, steaks, chicken, or any grilled meal. It is fast, easy, cheap, and so good.

I prefer my corn grilled without the husk. The corn will develop char, a Maillard reaction, and a smoky flavor everybody loves. Corn still in the husk or wrapped in aluminum foil will steam cook from the trapped moisture.

Don't miss the super easy Microwave Corn on the Cob—perfect corn for two. Or other grilled side dish recipes, like Grilling Asparagus, Grilled Baby Potatoes, Grilled Mixed Vegetables, and Grilled Tomatoes

👨‍🍳How to Grill Corn on the Cob Without Husks—Step-by-Step Photo Instructions

cleaning and oiling grill grates.

1. Clean and oil grill grates with a temperature of 400°to 450°,

corn on the cob with salt and pepper on white plate.

2. Husk and clean corn of silks. Brush with vegetable oil and a light sprinkling of salt and black pepper.

corn on the cob with salt and pepper on white plate,

3. Grill for 10-12 minutes, turning and moving around every 3-4 minutes.

grilled corn with char.

4. Cook until you are getting the char you want. Add more seasoning of your choice.

For more details, keep reading. See the Recipe Card below for complete instructions and to print.

⏰How Long to Cook Corn on the Grill

It will take about 10 to 12 minutes to grill corn without the husk and not in foil at 450°. Grill until the corn is tender and has moderate char.

Corn on the cob wrapped with foil or still in the husk will take about 20 minutes to cook. All methods require frequent moving of the corn and will vary by the grill temperature and size of the corn.

🌽How to Pick the Best Corn on the Cob

  1. Do not peel back the husk to look; it provides no useful information and will accelerate the deterioration of that corn—bad for you if you buy it and for the seller if you don't.
  2. The first step to the best corn is where you get it. The best, in order, is your garden, your neighbor's vegetable stand, the farmer's market, and finally, the supermarket.
  3. Examine the tassel; it should be brown and silky, not black and dry, which are signs of older corn.
  4. The husk should be bright green and tight against the corn. It should have good moisture and not be turning yellow or brown on the edges.
  5. Look for little brown holes in the husk, usually near the top. Those are wormholes. Just say no.
  6. Feel the kernels through the husk to ensure they are even and plump.

🌡️What grill temperature to grill corn on the cob?

The best grill temperature for corn on the cob is 400° to 450°, which is medium to medium-high on most gas grills. This is the correct temperature for husked, unhusked, or foil-wrapped corn.

That's the same temperature range for most grilled chicken recipes and pork, such as grilled pork loin chops and tenderloins.

Grilling at high temperatures may burn the surface of the corn before it is tender. If you are cooking with high heat on your gas grill, like grilling New York strip steaks or grilling burgers, decrease the heat in an area of the grill for the corn.

Charcoal grills may be used, but it is harder to control the grill temperature. For more discussion, see A Beginners Guide to Grill Temperature on a Gas Grill.

🤔How to grill corn on the cob in the husk or aluminum foil?

Both methods depend on the corn's internal moisture to steam cook it in a closed space. Both will take about 20 minutes or more to cook at 450°, although the corn with husks may take a few more minutes. Be sure to rotate every 4 minutes.

To grill in the husk, soak the corn in the husk in water for 20 minutes after trimming off the silks and loose husk. To grill in foil, remove all husk and silks and wrap tightly in heavy-duty aluminum foil or double wrap in standard foil.

❓FAQs

How to get the sweetest corn on the cob.

There are several hundred types of corn on the cob, commonly called sweet corn. Some have enhanced the sweetness; you wouldn’t know the variety unless you planted the corn.

What you can control is the freshness since the sugar in the corn starts to deteriorate rapidly as soon as picked and, in 3-4 days, will be mostly starch. The easiest route for most of us to the sweetest corn is getting the freshest corn.

What is Mexican street corn (elote)?

Mexican street corn, known as elote, is sold by street vendors. The husk is peeled back and tied with twine, then grilled and coated with a spicy sauce of mayo, sour cream, crumbly cheese, and spices, commonly topped with lime juice and cilantro.

Blue ribbon divider used for visual effect

📖The Recipe Card

grilled corn on the cob in a holder
Print Recipe Add to Collection Go to Collections

Grilled Corn on the Cob Without Husks

The best grilled corn on the cob is quick and easy with a few tips. Pick the best corn, husk, and a brush of oil with salt and pepper, and finish by grilling over medium heat until tender with some delicious char. It's not hard, and it's so good—no husk and no aluminum foil are needed.
Prep Time5 minutes mins
Cook Time10 minutes mins
Total Time15 minutes mins
Course: Vegetable
Cuisine: American
Keyword: corn on the cob on the grill, grilled corn on the cob no husk, how long to grill corn on the cob
Servings: 2
Calories: 98kcal
Author: Dan Mikesell AKA DrDan

Ingredients

  • 2 ears corn husked and cleaned, do as many as you need
  • vegetable oil
  • salt
  • pepper
  • butter to taste
US Customary - Convert to Metric

Instructions

  • Husk and clean corn of silks. Brush with vegetable oil and a light sprinkling of salt and black pepper.
  • Grill over medium-high heat of 400° to 450° surface temperature for about 10-12 minutes, turning and moving around every 3 minutes.
  • Cook until you are getting the char you want. Serve with the seasoning of your choice.

Notes

Pro Tips

  1. Assuming you are cooking this with something else, corn can tolerate a hot grill but cooks much faster and can easily burn. Most chicken and most pork recipes are cooked at the suggested temperature for corn. For steak or burgers, create a lower temp section on the grill.
  2. Fresh corn equals the sweetest corn.
  3. You don't need to peek at the corn under the husk. The silk needs to be brown and moist, not black and dry. The husk should be moist and bright green, and the kernels should feel full through it.

Nutrition

Calories: 98kcal | Carbohydrates: 11g | Protein: 2g | Fat: 5g | Saturated Fat: 2g | Polyunsaturated Fat: 1g | Monounsaturated Fat: 1g | Cholesterol: 5mg | Sodium: 850mg | Potassium: 1mg | Fiber: 2g | Sugar: 5g | Vitamin A: 50IU

Originally Published August 20, 2010. Updated with expanded options, refreshed photos, and a table of contents to help navigation.

Dogs on the run.

Parmesan Crusted Tilapia (Baked & Crispy Recipe)

flakey tilapia on a plate.

This Parmesan Crusted Tilapia recipe makes crispy, golden fish in the oven with simple pantry ingredients and very little effort. Fresh or frozen fillets both work, making this an easy baked tilapia recipe for a fast weeknight dinner.

⏱️ Quick Answer: How Long to Bake Tilapia in the Oven

Bake at 425°F conventional (400°F convection).

  • Most tilapia fillets need 10–12 minutes.
  • Bake until the fish flakes easily and reaches 145°F internally.
Flaky tilapia golden brown on a white plate.
[feast_advanced_jump_to]

quote mark
Featured Comment from Toots:
⭐⭐⭐⭐⭐
"This came out super crispy and flaky. It was super easy...The fish cooked perfectly and the fam LOVED it! Definitely a keeper."

🐟 TL;DR — Recipe Summary

What it is: Crispy Baked Tilapia with a delicious Parmesan crust using simple pantry ingredients.

Why you’ll love it: Quick, beginner-friendly, and works with fresh or thawed frozen tilapia fillets.
How to make it: Dry the fish well, coat it with the seasoned Parmesan mixture, and bake for about 10–12 minutes until crispy and flaky.

🐟 Ingredients for Parmesan-Crusted Tilapia

Use fresh or frozen tilapia fillets, pantry staples, and a little seasoning to build this crispy oven-baked coating.

Labeled image showing tilapia fillets, Parmesan, oil, paprika, parsley, salt, and pepper.
  • Tilapia Fillets – About 4 fillets (4–6 oz each), fresh or fully thawed frozen. Pat them dry for best crispiness.
  • Parmesan Cheese – Grated or shredded, preferably fresh. This forms the crispy crust.
  • Olive Oil or Melted Butter – Brushed on for a golden finish and to help the coating stick.
  • Paprika – Adds mild, smoky flavor. Sweet paprika is common, but smoked or hot works too.
  • Dried Parsley – Optional, but adds color and a fresh note.
  • Salt and Black Pepper – Just a little to balance the flavor.

👨‍🍳 Quick Overview: How to Bake Tilapia

1. Prep the Fish: If using frozen fillets, thaw fully in the fridge. Pat dry with paper towels to help the crust stick.

pat dry tilapia with paper towels.

2. Mix the Coating: In a shallow pan, mix Parmesan cheese, paprika, parsley, salt, and black pepper.

mixing coating in a shallow pan.

3. Coat the Fillets: Brush each fillet with oil or melted butter, then press into the Parmesan mixture to coat both sides.

brushing raw tilapia with oil.

✅Pro Tip: Don’t crowd the pan. And skip the rack—it tends to rip off that crispy topping.

4. Bake the Tilapia: Place the coated fish on a lightly oiled baking tray. Bake at 425°F (400°F convection) for 10–12 minutes, until golden brown.

crusted tilapia on a white plate.

✅ Check for Doneness: Tilapia should flake easily with a fork or reach 145°F internally.

👇For full instructions, scroll to the printable recipe card—or keep reading for tips, sides, and storage.

🤔 Options and Variations

  • Breadcrumbs: Replace half the Parmesan with Panko breadcrumbs for extra crunch.
  • Garlic Powder: Adds savory depth without overpowering the fish.
  • Spice Mixes: Try Old Bay, lemon pepper, or Cajun seasoning.
  • Cayenne Pepper: Add a small pinch for heat.
  • Other Herbs: Dried thyme, oregano, or basil work well in the coating.

🥗 Gluten-Free and Low-Carb Options

This baked tilapia is naturally gluten-free and low-carb when made without the optional Panko breadcrumbs.

  • Gluten-Free: Skip the breadcrumbs or use gluten-free Panko.
  • Low-Carb: Use the Parmesan-only coating and omit the Panko.

🐟 More Tilapia Recipes

Here are more easy baked and grilled tilapia recipes to try.

  • Baked Blackened Tilapia – An easy baked tilapia recipe with savory blackened spices.
  • Lemon Butter Tilapia – A tilapia recipe with lemon-butter flavor that can be baked or grilled.
  • Grilled Blackened Tilapia – Grill-only with bold seasoning, ready fast.

🍽️ What to Serve with Parmesan-Crusted Tilapia

This crispy fish pairs well with fresh or hearty sides:

  • Vegetables: Roasted Asparagus, Roasted Cauliflower, or Bacon-baked Green Beans.
  • Low-carb sides: Creamy Mashed Cauliflower or Easy Cheesy Cauliflower Casserole.
  • Starches: Baked Rice, Baked French Fries, or Oven-roasted Red Potatoes.
  • Bread: Healthy Biscuits, Cheddar Bay Biscuits, or Cornmeal Drop Biscuits.

Serve tilapia with a lemon slice or tartar sauce.

❄️ Storing and Reheating Leftovers

This one’s best fresh, but leftovers can work.

  • Store in foil or an airtight container in the fridge for up to 3 days.
  • Reheat in a 300°F oven or air fryer. Open the foil so the crust can re-crisp.

✅ Tip: The crust won’t be as crispy and may loosen a bit.

❓FAQs

Can I use different fish?

Yes. Cod, haddock, or other firm white fish work well. If the fillets are about 1 inch thick or less, cooking time will be similar. Thicker fish will need longer.

For thicker pieces, follow the 10-Minute Rule for Cooking Any Fish — about 10 minutes of cooking per inch of thickness.

How do I get the topping brown and crispy?

Start with fully thawed, well-dried fillets and a hot oven. If the crust is still pale near the end, broil for 1–2 minutes—but watch closely.

📖The Recipe Card

flakey tilapia on a plate.
Print Recipe Add to Collection Go to Collections
4.79 from 14 votes

Crispy Parmesan-Crusted Tilapia (Oven-Baked in 20 Minutes)

This easy baked Parmesan Crusted Tilapia is crispy, flaky, and ready in 20 minutes using fresh or frozen fillets.
Prep Time10 minutes mins
Cook Time10 minutes mins
Total Time20 minutes mins
Course: Main Course
Cuisine: American
Keyword: baked tilapia recipes, Crispy baked tilapia, Parmesan crusted tilapia, Parmesan crusted tilapia recipe
Servings: 4 servings
Calories: 267kcal
Author: Dan Mikesell AKA DrDan

Ingredients

  • 1 pound Tilapia ( 4 filets fresh or thawed if frozen)
  • 1 cup Parmesan cheese—grated or shredded fresh if possible
  • 1 tablespoon olive oil or melted butter
  • 1 tablespoon paprika
  • 1 tablespoon dried parsley
  • ½ teaspoon salt
  • ½ teaspoon pepper
  • ½ cup Panko breadcrumbs (optional) to replace half the Parmesan
US Customary - Convert to Metric

Instructions

Prep the Fish

  • If using frozen tilapia, thaw completely in the refrigerator. Pat the fillets dry with paper towels. Preheat the oven to 425°F conventional (400°F convection).
    dry tilapia
  • Prepare a baking tray with a light coat of oil or nonstick spray. Line with foil for easier cleanup.
    brushing oil on tray.

Mix the Coating

  • Grate Parmesan if needed. In a shallow dish, combine Parmesan, paprika, parsley, salt, and pepper.
    grating fresh Parmesan cheese

Coat the Fillets

  • Brush both sides of the tilapia with oil or melted butter. Dredge in the Parmesan mixture, pressing gently to coat. Place the coated fish on the prepared baking sheet. Press a little extra coating on top if desired.
    brushing raw tilapia with oil

Bake

  • Bake for 10–12 minutes until the fish flakes easily with a fork and reaches 145°F internally.
    crusted tilapia on a white plate

Video

Notes

Pro Tips

  1. Dry the tilapia thoroughly before coating for a crispier result.
  2. Freshly grated Parmesan gives the best flavor and texture.
  3. If unsure about doneness, use an instant-read thermometer and aim for 145°F in the thickest part.

Nutrition

Calories: 267kcal | Carbohydrates: 1g | Protein: 32g | Fat: 13g | Saturated Fat: 5g | Polyunsaturated Fat: 1g | Monounsaturated Fat: 5g | Cholesterol: 79mg | Sodium: 685mg | Potassium: 386mg | Fiber: 0.2g | Sugar: 0.2g | Vitamin A: 1750IU | Vitamin C: 0.8mg | Calcium: 290mg | Iron: 1.3mg

Editor's Note: Originally Published on December 18, 2010, the blog's first year. The blog has grown 1000X since that time. Now updated with expanded options, refreshed photos, and a table of contents to help navigation.

dogs by the pond and trees.

How to Cook Baby Back Ribs on a Gas Grill

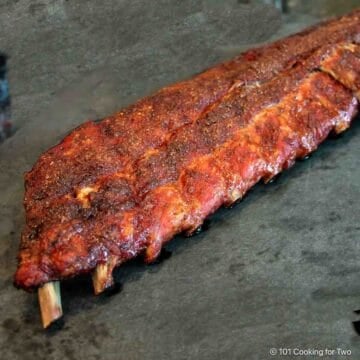
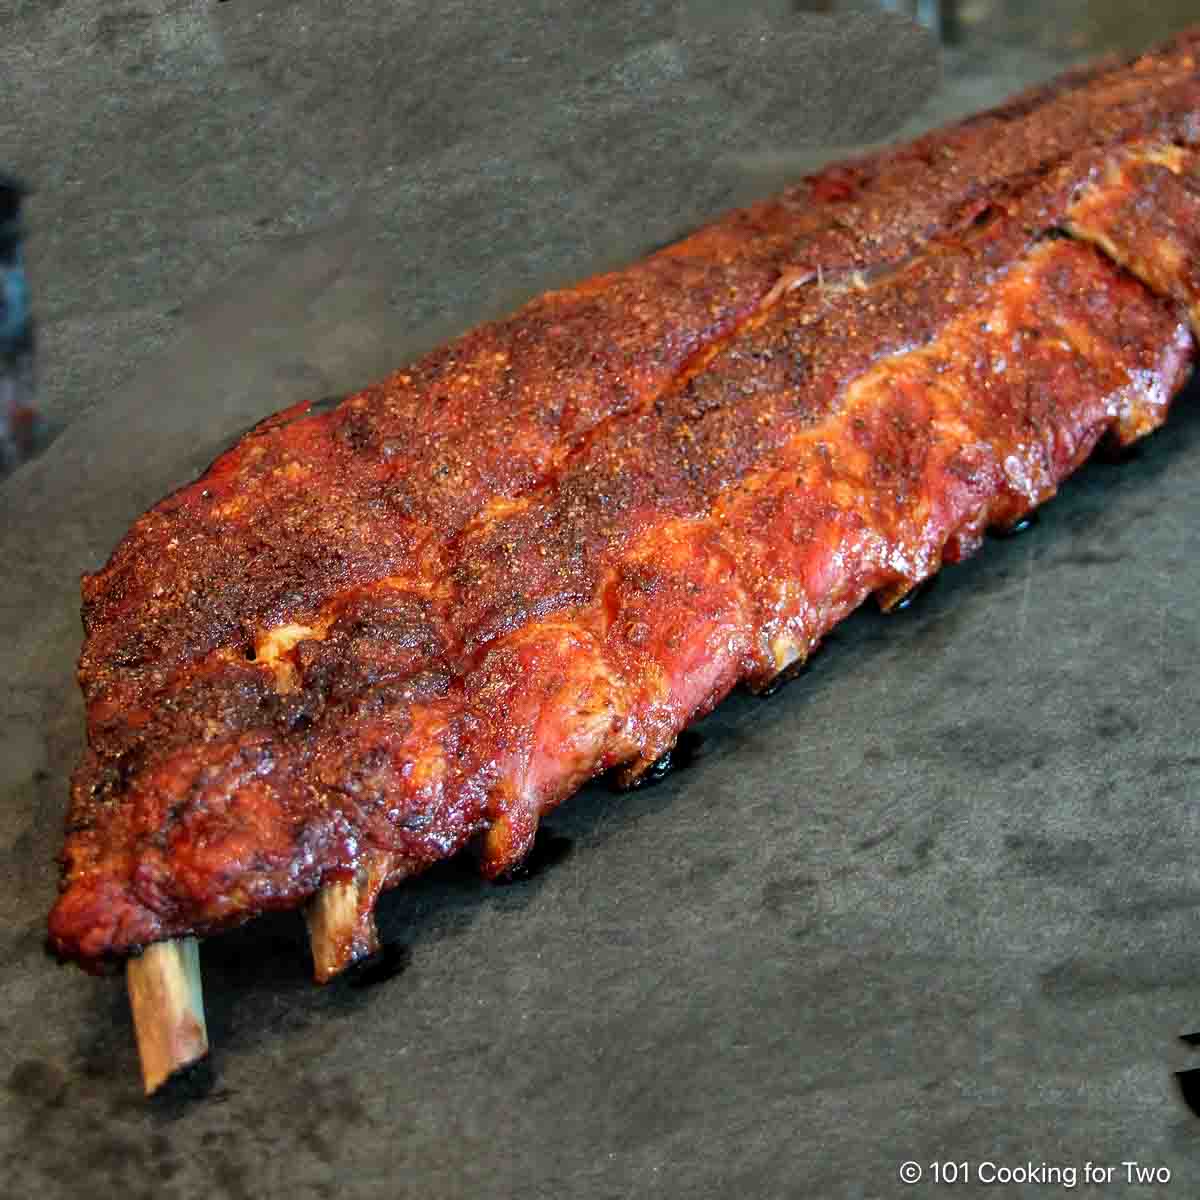
grilled Baby Back Ribs on black cutting board

Learn how to cook juicy, tender BBQ baby back ribs on a gas grill low and slow at 250°F. No smoker or foil required—just a simple BBQ dry rub and optional wood smoke.

Follow these easy step-by-step instructions to create tender, smoky BBQ ribs with authentic flavor using indirect heat.

Quick Answer: How Long to Cook Baby Back Ribs on a Gas Grill

  • Cook baby back ribs over indirect heat on a gas grill at about 250°F.
  • Most racks take about 3 hours, but always cook to doneness—not just time.
  • They're done when they reach 200°–205°F, the bones begin to show, and the rack cracks when lifted with tongs.
grilled Baby Back Ribs on black cutting board.
[feast_advanced_jump_to]

quote mark
Featured Comment from Matt :
⭐⭐⭐⭐⭐
"Delicious. Wife also loved them. These are the best ribs I've cooked so far - this basic recipe is a keeper, and I'm going to stick with it."

🤔 TL;DR — Recipe Summary

What: Learn how to cook tender baby back ribs on a gas grill with a simple dry rub and optional wood smoke.

Why: An easy low-and-slow BBQ method that delivers tender, smoky ribs without a smoker. It also works for St. Louis or spare ribs.

How: Grill over indirect heat at about 250°F for about 3 hours, then cook until the ribs reach 200°–205°F and crack when lifted with tongs.

🐖 Ingredients

Baby back ribs with BBQ dry rub ingredients—labeled.
  • Baby back ribs – St. Louis and spare ribs may be used, but allow extra cooking time for the larger cuts.
  • BBQ dry rub – Use your favorite or a simple blend of brown sugar, kosher salt, chili powder, black pepper, onion powder, and garlic powder.
    Optional: Add cayenne for heat.
  • Wood chips (optional) – Hickory, apple, cherry, or your favorite for authentic smoke flavor on a gas grill.
  • BBQ sauce (optional) – For serving. Use what you like—I recommend my Memphis Barbecue Sauce.

🔧 Equipment

  • Gas grill – A propane or natural gas grill that can maintain indirect heat at about 250°F. Charcoal grills can work too, but are harder to control for long cooks.
  • Thermometer – A grill surface thermometer helps monitor grill temp, and an instant-read thermometer checks when the ribs are done.
  • Smoker box or foil pouch – For adding wood chips on a gas grill.
  • Drip pan with water – Placed under the ribs to regulate heat and moisture. NEVER PLACE ANYTHING IN THE BURNERS.

✅ Pro Tip: Make sure you have a full backup propane tank. Low and slow cooks can run long, and running out of gas halfway through is a fast track to tough ribs and takeout.

👨‍🍳 Quick Overview: How to Cook Baby Back Ribs on a Gas Grill

1. Set up the grill for indirect cooking

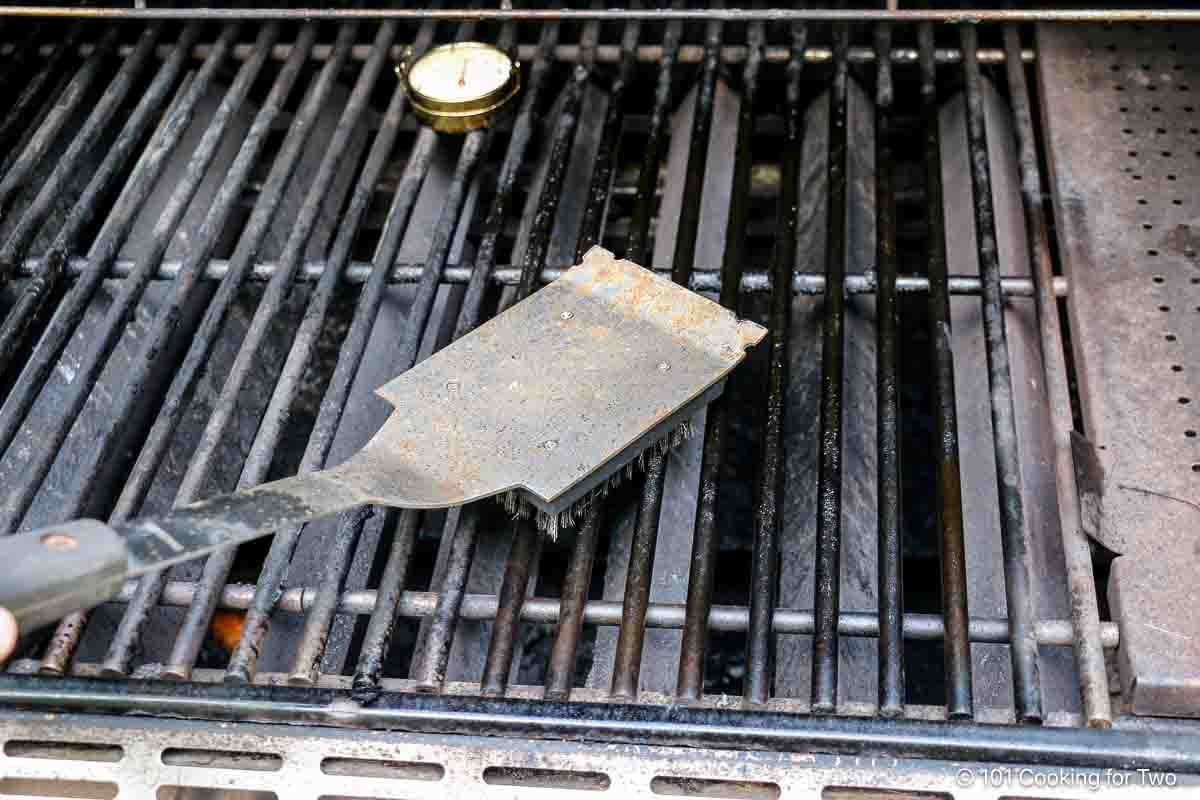
Set up your gas grill for indirect heat at about 250°F. Place a drip pan underneath the ribs, then clean and oil the grates.

Cleaning grill grates.

✅ Pro Tip: Do not put the drip pan (or anything else) on the grill burners. But the pan can go on the lava rocks.

Optional: Add smoke using a smoker box, cast iron pan, or foil pouch with holes—start right at the beginning for 30–60 minutes.

Wood chips in a smoker box.

✅ Pro Tip: Add water to the drip pan to help stabilize the temperature and keep things moist.

2. Preparing the ribs

Remove the inner membrane and check for bone chips. Apply your dry rub to all sides.

Removing the inner membrane on a rack of ribs.

✅ Pro Tip: Use a butter knife and a paper towel to get under the membrane and peel it off—it’s slippery but worth the effort.

3. Grill low and slow at 250°F

Cook over indirect heat for about 3 hours. Smaller baby back ribs may be done in about 2 hours, while St. Louis or spare ribs usually take longer. No foil is needed.

ribs on grill over pan.

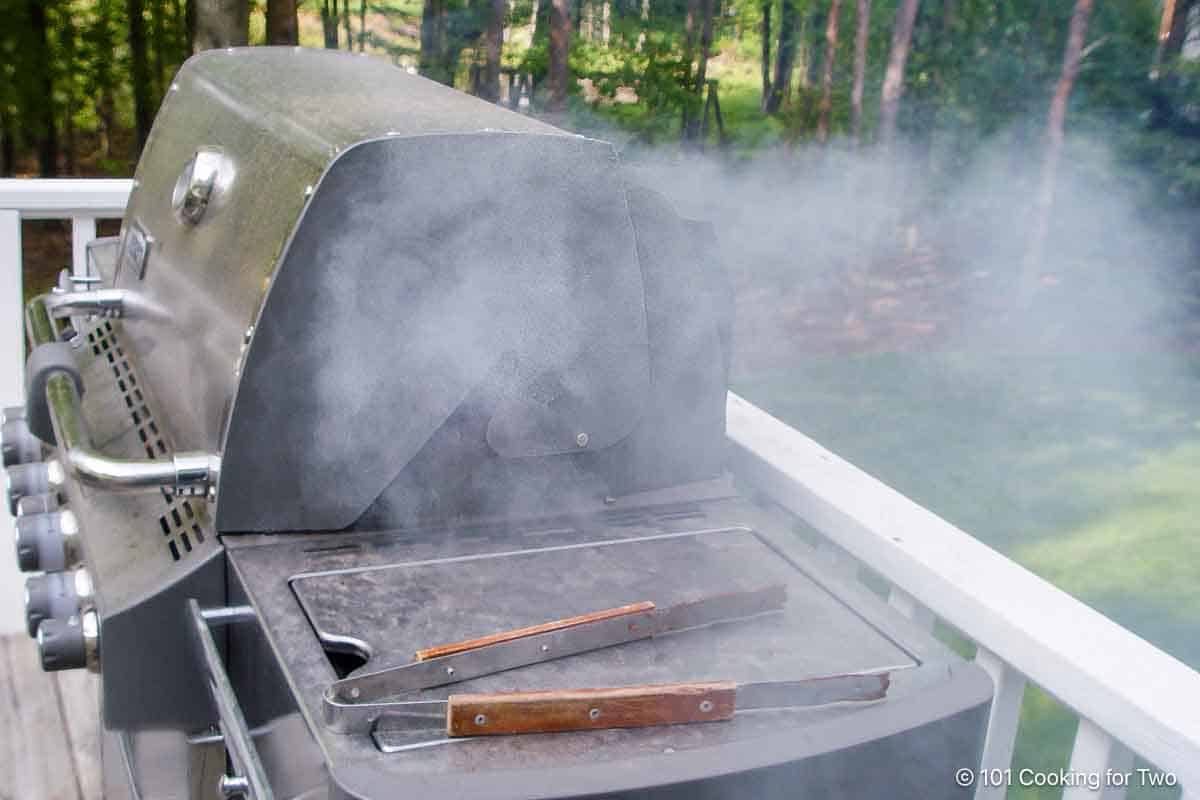
Optional: Add smoke in the first hour.

A smoking grill.

✅ Pro Tip: Don’t keep opening the lid—every peek drops the temp and adds time to the cook.

4. Know when they're done

The ribs are done when they reach 200°–205°F, the bones begin to show, and the rack cracks when lifted with tongs.

ribs breaking when picked up with tongs.

👇For full step-by-step instructions, scroll to the printable recipe card or keep reading for tips, rub options, and serving ideas.

⏰ How Long to Cook Baby Back Ribs on a Gas Grill at 250°F

About 3 hours at 250°F is typical for a rack of baby back ribs on a gas grill, but always cook to doneness, not just by time.

  • Medium baby back ribs: About 3 hours at 250°F
  • Smaller racks: Start checking at 2 hours
  • Thick slabs: May take up to 4 hours
  • Two slabs in a rib rack: Add 30–60 minutes
  • St. Louis or spare ribs: Take longer than baby backs

Don’t cook by time—cook to doneness. Use the signs below to know when they’re really ready.

Keeping the grill near 250°F is the key to tender, juicy ribs. Temperatures closer to 300°F will cook faster but can dry the ribs before the connective tissue fully breaks down.

🔥 How to Tell When Baby Back Ribs Are Done

Ribs are ready when the internal temp is 200°–205°F, the bones start to show, and the rack of ribs cracks slightly when lifted with tongs. These three signs are more reliable than time alone.

  • 🌡️ Temperature – While some consider ribs done at 190°F, most people—including me—prefer 200°–205°F for the best texture. That’s when the collagen fully breaks down and the ribs become tender.

    Use an instant-read thermometer, but the bones can make it tricky to get an exact reading.
  • 🦴 Exposed rib bones – As the meat cooks and tightens, the ends of the bones will start to show.
picture of the exposed bones saying we are done.
Exposed rib bone ends are saying we are done cooking.
  • 🔪 The crack test – Lift the ribs with tongs about a third of the way from one end. If the rack cracks slightly under its own weight, it’s done.
done ribs crack under their own weight.
Fully cooked ribs are cracking under their own weight.

🔧 Using Indirect Heat and Smoke on a Gas Grill

For ribs, you’ll be cooking with indirect heat—meaning the meat isn’t directly over the flames. Every grill setup is a little different, so use a grill surface thermometer to make sure the indirect zone stays near 250°F. A drip pan with water under the ribs helps stabilize temperature and prevent flare-ups. Just don’t place it directly on the burners.

✅ Pro Tip: The best temperature to cook ribs on a gas grill is 250°F for tender, juicy results—the same temperature used by competition grillers and smokers.

If you want to add smoke, use a smoker box or a foil pouch with wood chips. Hickory is my go-to, but apple, cherry, or pecan work well too.
See How to Set Up Your Gas Grill for Smoking and Low and Slow Cooking for more detail.

🥣 Dry Rub Options for Ribs

The recipe uses a simple 6-ingredient dry rub with common pantry spices—sweet, salty, and balanced. You can also use:

  • Memphis Dry Rub – For a classic, peppery finish
  • Cajun or Chipotle BBQ rubs – For heat and bold flavor
  • Your favorite store-bought blend – No shame in saving time

🐖 More Rib Recipes to Try

  • Baby Back Ribs in the Oven
  • Crock Pot Baby Back Ribs
  • Grilled Boneless Pork Ribs
  • 30-Minute Boneless Ribs

🍽️ What to Serve with BBQ Baby Back Ribs

This is a dry rub recipe, so the sauce is served at the table. I like my Memphis Barbecue Sauce, but use whatever you enjoy.

Great sides for ribs include:

  • Classic Macaroni Salad
  • Caprese Pasta Salad
  • Microwave Corn on the Cob
  • Stovetop French Fries
  • Old-Fashioned Cornbread or Cornmeal Drop Biscuits

❄️ Storage and Reheating Tips

  • Refrigerate leftovers in an airtight container for up to 4 days
  • Freeze for up to 4 months—wrap tightly to prevent freezer burn

To reheat:

  • Preferred: In the oven—place ribs on a rimmed tray, cover with foil, and warm at 300°F until heated through
  • Faster option: Microwave in short bursts, covered with a damp paper towel or vented wrap

✅Pro Tip: Always thaw frozen cooked ribs overnight in the refrigerator for the best texture when reheating.

❓Frequently Asked Questions

How do I remove the membrane from baby back ribs?

Pork ribs have a thin membrane on the back that some leave on—but I always remove it for better flavor and texture.

Use a butter knife to loosen a corner near the end of the rack, then grip it with a paper towel and peel. It may not come off perfectly the first time, but it gets easier with practice.

Do I need to wrap the ribs in aluminum foil?

No. Wrapping interferes with smoke absorption and prevents bark from forming. I leave mine unwrapped the whole time.

Can I cook baby back ribs on a charcoal grill?

Yes—as long as you use indirect heat and keep the temperature steady. Just know it’s harder to maintain 250°F for several hours on charcoal compared to gas.

How to Keep Grilled Ribs Moist?

The key is low and slow at 250°F. If the temp creeps up to 300°, they’ll dry out.

Optional tricks: brining beforehand, spritzing with apple juice during the cook (but this extends time), or brushing with sauce in the last 30 minutes.

Some wrap ribs for the second half of cooking—but I skip that to keep the bark crisp.

What’s the difference between baby back ribs, St. Louis ribs, and spare ribs?

Baby back ribs come from near the spine—they’re shorter, curved, and cook faster.

Spare ribs are larger, meatier, and come from the belly side of the rib cage.

St. Louis ribs are spare ribs that have been trimmed to remove the rib tips, cartilage, and sternum—making them flatter and more uniform in shape.

This recipe uses baby backs, but the same method works for all three. Just increase the cooking time for larger cuts.

The diagram below shows where each rib type comes from:graph showing location of baby back ribs- licensed from Fotolia May 16,2017. Copyright foxysgraphic - Fotolia. Modified per allow by licensed.

📖The Recipe Card

grilled Baby Back Ribs on black cutting board
Print Recipe Add to Collection Go to Collections
4.78 from 9 votes

How to Cook Baby Back Ribs on a Gas Grill

Learn how to cook tender baby back ribs on a gas grill with a simple BBQ dry rub and optional wood smoke. Easy low-and-slow BBQ ribs, no smoker needed.
Prep Time10 minutes mins
Cook Time3 hours hrs
Total Time3 hours hrs 10 minutes mins
Course: Main Course
Cuisine: BBQ
Keyword: baby back ribs on gas grill, grilled baby back ribs, how long to cook ribs on gas grill, how to bbq ribs on gas grill, how to cook baby back ribs on a gas grill
Servings: 2 servings
Calories: 590.3kcal
Author: Dan Mikesell AKA DrDan

Ingredients

  • 1 rack baby back ribs
  • ¼–½ cup rub of your choice

Dry rub—makes about a cup (enough for 2 slabs)

  • 8 tablespoons brown sugar ½ cup
  • 3 tablespoons kosher salt
  • 1 tablespoon chili powder
  • 1 teaspoon black pepper
  • 1 teaspoon onion powder
  • 1 teaspoon garlic powder

Instructions

Set up the grill for indirect cooking

  • Set up the grill for indirect cooking at a surface temperature of 250°F. Place a drip pan with ½ inch of water under the indirect zone—but not directly on the burners.
    Baby back ribs with BBQ dry rub ingredients—labeled.
  • Add smoke using a smoker box, cast iron pan, or foil pouch with holes—start right at the beginning for 30–60 minutes.
    Wood chips in a smoker box.

Preparing the ribs

  • Remove the inner lining and check for bone chips.
    Removing the inner membrane on a rack of ribs.
  • Rub with about ½ cup of a dry rub of your choice or my suggested rub. The rub will work fine if applied just before grilling or the day before. If applying early, then wrap with plastic wrap and refrigerate.
    ribs with rub on black board

Grill low and slow at 250°F

  • Place over the drip pan and start your smoke—30-60 minutes of smoke is enough. Then keep your hands off for about 2-3 hours total from the start of cooking. Add some time to that if cooking more than one slab. It may be 4 hours or more. If you are unsure of your grill setup or doing smaller ribs, start checking at 1½ hours.
    ribs on grill over pan

Know when they're done

  • The ribs are done when: First, an internal temperature of 190°+ (200°-205° preferred.) Second, some ends of rib bones are sticking out. Lastly, when you pick up the ribs with tongs holding them about ⅓ of the way up, they should crack.
    ribs breaking when picked up with tongs
  • Allow to rest for 10 minutes before serving.
    edges if bones showing on ribs

Video

Notes

Pro Tips:

  1. The three most important points to success are grill setup, keeping the right grill surface temperature, and knowing the endpoint of cooking.
  2. If you are unsure of your grill setup or doing smaller ribs, start checking at 1½ hours. Also, review How To Set Up Your Gas Grill for Smoking and Low and Slow Cooking.
  3. Doneness guide (any of the following means they’re ready): • Internal temperature of 190°F+ (200°–205°F preferred)
    • Rib bone ends start sticking out
    • The rack cracks slightly when lifted with tongs one-third of the way from the end
  4. This post is for one slab of baby backs. If you have enough space, you could do two side by side, or use a rib rack. If you have a large slab of ribs or do a rib rack to cook more slabs, you must add some time. And if you use a larger rib like a St. Louis or spare ribs, they will also take longer.

Nutrition

Calories: 590.3kcal | Carbohydrates: 62.3g | Protein: 32.7g | Fat: 27.6g | Saturated Fat: 10.1g | Polyunsaturated Fat: 4.9g | Monounsaturated Fat: 10.4g | Trans Fat: 0.2g | Cholesterol: 97.8mg | Sodium: 5378.3mg | Potassium: 787.7mg | Fiber: 6.7g | Sugar: 25.1g | Vitamin A: 1587.9IU | Vitamin C: 7.1mg | Calcium: 656.2mg | Iron: 22.2mg

Originally published May 11, 2014. Updated with expanded options, refreshed photos, and a table of contents to help navigation.

dogs by the pond and trees.

Taco Meat Recipe (Homemade From Scratch)

Three hard shell spicy tacos on a white plate.

Homemade taco meat is easy to make from scratch in about 25 minutes with ground beef, pantry spices, and no seasoning packet. Restaurant-quality taco meat for your tacos, nachos, burritos, and more.

By making it at home from scratch, you control the flavor and heat—from mild to spicy—to suit your taste without relying on a seasoning packet. With homemade taco meat this good, everybody will love Taco Tuesdays.

Three hard shell spicy tacos on a white plate.
[feast_advanced_jump_to]

quote mark
Featured Comment by SandyToes:
"Talk about a blast from the past! Your filling is as close to those classic SoCal tacos as I've ever tasted, albeit a little spicier. I like the heat… thanks from the bottom of my taco-loving heart…"

🤔 TL;DR – Recipe Summary

What: Homemade taco meat made from scratch with ground beef, pantry spices, and no seasoning packet.

Why: Ready in about 25 minutes with better flavor than packet mixes, and easy to make mild or spicy.

How: Brown the ground beef with onion and garlic, stir in the seasoning and tomato sauce, simmer for a few minutes, then serve.

🌮 Ingredients and Substitutions

From scratch, no packet – pantry chili powder, cumin, oregano, salt, and pepper (plus optional cayenne) do the work; a little tomato sauce keeps it juicy.

ground beef with seasoning for taco meat.
  • Ground Beef – Use 80/20 for juicy, flavorful results. Leaner beef works but may be drier. Ground turkey or chicken can be substituted for a lighter flavor.
  • Onion and Garlic – fresh give the best flavor, but onion powder and garlic powder work well when you're short on time.
    • 1 medium onion = 1 tablespoon onion powder
    • 1 clove garlic = ¼ teaspoon garlic powder
  • Homemade Taco Seasoning – Chili powder, cumin, oregano, salt, and pepper create rich, homemade flavor without a seasoning packet.
  • Homemade Taco Seasoning – Chili powder, cumin, oregano, salt, and pepper create rich, homemade flavor without a seasoning packet.
  • Cayenne Pepper (Optional) – Leave it out for mild taco meat, or add it to taste for extra heat.
  • Tomato Sauce – Keeps the meat juicy and helps the spices coat every crumble. Crushed or diced tomatoes work in a pinch—just simmer a little longer.

✅ Pro Tip: Some tomato sauces taste sharp; add ½–1 teaspoon brown sugar to balance acidity – it won’t make the meat sweet.

👨‍🍳 Quick Overview: Homemade Taco Meat

1. Prepare onion and garlic

Chop the onion and mince or crush the garlic.

chopped onion on a black board

2. Brown the ground beef

In a large skillet over medium–high heat, brown the beef and onion, then add the garlic in the last 30 seconds.

adding onion to burger in pan.

✅ Pro Tip: Add the garlic in the last 30 seconds so it blooms in the fat – removes the raw bite and boosts aroma – then drain. Don’t brown it (bitter).

3. Drain the fat

Drain the excess fat well.

removing fat from skillet.

4. Add the seasoning and tomato sauce

Stir in the homemade seasonings and tomato sauce, adjusting the cayenne pepper to taste. 

adding tomato sauce to browned burger.

Simmer about 5 minutes until the sauce coats the meat, then serve.

cooked taco meat in pan

👇 Scroll down for the printable recipe card and complete step-by-step photo instructions—or keep reading for tips, veggie options, and serving ideas.

🌶️ Make It Spicy (or Mild)

  • No cayenne = mild and family-friendly
  • ¼ teaspoon cayenne = mild kick (about 3/10 heat)
  • ½ teaspoon cayenne = medium heat (around 5–6/10)
  • Fresh jalapeño – Add it with the onion to replace cayenne with fresh heat
  • Chipotle or ancho chili powder – Use ½–1 teaspoon chipotle for smoky heat or ancho for a deeper chili flavor with moderate heat.

🛠️ Recipe Tips & Easy Variations

  • Ground turkey or chicken – A leaner option that works well but has a milder flavor than ground beef.
  • Add-ins for texture – Black beans, chopped bell pepper, or shredded carrot stretch the meat and add color.
  • Garlic options – Fresh gives the best flavor. Short on time? Substitute ¼ teaspoon garlic powder per clove and add it with the seasonings instead of during browning.
  • Make the seasoning in bulk – Mix a double or triple batch of the dry seasonings ahead of time to save time on busy nights. For a complete seasoning mix, add onion and garlic powder—or remember to use fresh onion and garlic when cooking.
  • Warm the tortillas – Microwave wrapped in a damp towel, warm in foil in the oven, or lightly toast in a dry skillet.

🌮 How to Use It: Tacos, Nachos, and Bowls

Use for loaded nachos, tacos, bowls, or burritos – weeknight-fast and meal-prep friendly.

  • Hard or soft tacos – Spoon into crispy shells or warm flour tortillas, then pile on toppings.
  • Loaded nachos – Spread on chips, top with cheese, and heat in the oven or microwave.
  • Taco bowls – Build over rice or lettuce; add beans, cheese, sour cream, and salsa.
  • Burritos or enchiladas – For burritos, wrap with cheese and beans; for enchiladas, roll and bake with enchilada sauce.
  • Quesadillas – Add taco meat and cheese; cook in a skillet until the cheese melts and the tortilla is crisp.
  • Taco salad – Toss it on chopped lettuce with your favorite toppings and a drizzle of dressing.

Topping ideas – Keep it simple with shredded cheddar, sour cream, and salsa, or go all out with pico de gallo, avocado, chopped tomatoes, jalapeños, cilantro, and green onions.


Side dish favorites – Serve with Mexican rice, refried beans, guacamole, or tortilla chips and salsa. Try my Pineapple-Mango Salsa it's always a hit.

🌮 More Homemade Mexican-Inspired Recipes

Here are a few more taco-night favorites to try next:

  • Crock Pot Chicken Tacos
  • Mexican Shredded Chicken
  • Mexican Shredded Beef
  • Oven Baked Pork Carnitas

These all play well with the same toppings and sides – just switch up the protein.

❄️ Leftovers & Storage

Scales easily – half for two, or double for meal prep and leftovers.

  • Fridge – Store in an airtight container for up to 4 days.
  • Freezer – Good for up to 4 months—freeze in single-meal portions for easy reheating.
  • Reheating – For best texture, warm on the stovetop over medium-low with a splash of water or broth, stirring until hot; or microwave in short bursts, stirring between intervals.

✅ Pro Tip: This taco meat actually tastes better the next day—the flavors deepen, making it great for meal prep or quick lunches.

❓ FAQs

How much taco meat should I plan per person?

Plan on about ¼ pound of meat per person, or enough for 2 tacos. Adjust up for big appetites—I triple it for teenage boys and always aim for leftovers.

Do I need to add water like a seasoning packet?

Nope. This isn’t a powdered mix—the tomato sauce adds all the moisture you need.

Why use tomato sauce in taco meat?

It replaces the packet’s water, helps spices cling to the crumbles, and keeps the meat juicy. If the sauce tastes sharp, stir in ½–1 teaspoon brown sugar to balance – it won’t make it sweet.

Can I use tomato paste instead of tomato sauce?

Yes. Use about half as much tomato paste plus an equal amount of water (1:1 with the paste), then simmer until it coats the meat. Tomato paste adds a deeper, slightly sweeter taste than sauce.

Can I cook this in a cast-iron skillet?

Only if it’s enamel-coated. Plain cast iron is “reactive,” and the acidity from the tomato sauce can cause a metallic taste. Stick with a non-stick or stainless steel skillet for best results.

📖The Recipe Card

Three hard shell spicy tacos on a white plate.
Print Recipe Add to Collection Go to Collections
4.17 from 6 votes

Taco Meat Recipe (Homemade From Scratch)

Easy, from-scratch spicy taco meat with tomato sauce and pantry spices – no packet. Perfect for nachos, tacos, and bowls.
Prep Time2 minutes mins
Cook Time20 minutes mins
Total Time22 minutes mins
Course: Main Course
Cuisine: Mexican
Keyword: ground beef taco recipes, spicy ground beef tacos, spicy taco meat
Servings: 8
Calories: 210kcal
Author: Dan Mikesell AKA DrDan

Ingredients

  • 2 pounds ground beef
  • 1 medium onion – diced
  • 2–4 cloves garlic – minced or crushed

Taco seasoning:

  • 4 tablespoons chili powder
  • 1–2 teaspoons ground cumin
  • 1 teaspoon dry oregano
  • ¼–½ teaspoon cayenne pepper (optional)
  • 1 teaspoon salt
  • ½ teaspoon black pepper
  • 8 oz tomato sauce
US Customary - Convert to Metric

Instructions

Prepare onion and garlic

  • Mix the taco seasoning in a small bowl. If using fresh, dice the onion and mince or crush the garlic. Otherwise, add the powder substitutes in the pro tips.
    chopped onion on black board

Brown the meat

  • In a large skillet over medium-high heat, cook the ground beef and onion. Add the garlic in the last 30 seconds of browning. Cook until there's no pink—about 6–10 minutes.
    adding chopped onion to burger in a fry pan

Drain the fat

  • Remove as much excess fat as possible.
    removing fat from skillet

Season and finish

  • Stir in the taco seasoning and tomato sauce.
    adding tomato sauce to browned burger
  • Simmer over medium heat for about 5 minutes until it reduces and coats the crumbles.
    taco meat cooked in a skillet
  • Use for loaded nachos, tacos, bowls, or burritos.
    Three hard shell spicy tacos.

Video

Notes

Pro Tips

  1. To change the yield, adjust the number of servings at the top of the card—ingredient amounts will scale automatically.
  2. Use 80/20 ground beef for the best texture and flavor.
  3. Swap in 1 tablespoon onion powder for a medium onion, and ¼ teaspoon garlic powder per clove.
  4. Ground turkey or chicken works too—expect a milder flavor.
  5. Spiciness Guide—cayenne pepper amounts:
    Omit for a family-friendly version
    ¼ teaspoon cayenne = about 3/10 heat
    ½ teaspoon cayenne = 5–6/10
  6. I usually make a 2 or 3-pound batch—it freezes great.
  7. Reheating – For best texture, warm on the stovetop over medium-low with a splash of water or broth, stirring until hot; or microwave in short bursts, stirring between intervals. Storage – Refrigerate up to 4 days or freeze up to 4 months.

Nutrition

Calories: 210kcal | Carbohydrates: 4g | Protein: 14g | Fat: 16g | Saturated Fat: 6g | Cholesterol: 54mg | Sodium: 388mg | Potassium: 335mg | Fiber: 1g | Sugar: 1g | Vitamin A: 907IU | Vitamin C: 2mg | Calcium: 32mg | Iron: 2mg

This is a modified, simplified version of the Cook’s Illustrated taco meat recipe (subscription required).

Originally published May 6, 2011. Occasionally updated for clarity, tips, and photos.

Molly and Lilly in spring flowers 2020.

Juicy Ground Chicken Burgers (Easy Grill or Stovetop Recipe)

Chicken burgers on the grill.

Juicy ground chicken burgers, ready in about 20 minutes –mperfect on the grill or stovetop. They’re a healthier, leaner option that still delivers real burger satisfaction.

Using lean ground chicken (or turkey) and a quick panade to keep the patties from drying out, they’re a weeknight win for anyone eating lighter—but still craving a good burger.

Chicken burgers on the grill.
[feast_advanced_jump_to]

quote mark
Featured Comment from Marcia :
⭐⭐⭐⭐⭐
"They turned out beautifully and are moist and flavorful. A keeper recipe."

🐔 Why You'll Love This Recipe

  • Juicy, lean, and satisfying – proof that healthier low-fat burgers can still taste like real burgers.
  • Ready in about 20 minutes on the grill or stovetop for an easy weeknight meal.
  • Moist every time, thanks to a simple panade of mayo and breadcrumbs.
  • Flexible seasoning – start simple or mix it up with your favorite spices.
  • Foolproof for beginners – no special tools or techniques needed.

🐓 Ingredients You’ll Need

ground chicken with mayo and breadcrumbs.
  • Ground chicken (or turkey) – Choose lean ground chicken or ground turkey. Chicken breast is lower in fat, while thigh meat or turkey adds more juiciness.
  • Mayonnaise – Adds flavor and moisture to keep the patties tender. Use regular or light.
  • Panko breadcrumbs – Better texture than plain crumbs and helps the burgers hold together.
  • Seasoning – A mix of salt, black pepper, garlic powder, and onion powder works great.

👉 Want to switch up the flavor? See seasoning ideas below.

👨‍🍳 Quick Overview: How to Cook Ground Chicken Burgers

Here’s how to make juicy ground chicken patties that cook in about 20 minutes to a perfect 165°F, whether you’re using the grill or stovetop.

1. Mix: Combine ground chicken, Panko breadcrumbs, mayonnaise, and seasoning. Don’t overmix—just until blended.

ground chicken with mayo and breadcrumbs in a white bowl.

2. Form: Shape into patties about 4 inches wide and just over ½ inch thick. Press a small dimple in the center to help them cook evenly.

Dimpling the center of a chicken patty.

✅ Pro Tip: Press a small dimple in the center to prevent puffing and help even cooking.

3. Preheat: Heat the grill to medium-high (around 450°F) or a non-stick or cast-iron skillet with a touch of oil over medium-high.

Cleaning grill grates.

4. Cook: Grill or pan-cook about 5 minutes per side, flipping once. The burgers are done when the internal temp hits 165°F.

Four ground chicken burgers on a grill.

5. Serve: Rest for a couple of minutes, then build your burger with your favorite toppings.

grilled chicken burger on a bun with toppings,

👇 Scroll down for the full step-by-step photo instructions and printable recipe card—or keep reading for seasoning ideas, pro tips, and serving suggestions.

🌡️ Chicken Burger Internal Temp (When Are They Done?)

The safe internal temperature for ground chicken or turkey burgers is 165°F, according to the USDA. Use an instant-read thermometer in the center of the thickest patty to check.

Don’t rely on color – poultry can stay slightly pink even when fully cooked. Trust the thermometer, not your eyes.

✅ Pro Tip: Pull the patties off the heat as soon as they hit 165°F. Lean meat doesn’t have much carryover cooking, so they’ll stay juicy and tender if you stop right on target.

🥣 Substitutions and Flavor Variations

  • Ground chicken or turkey: Chicken breast is leaner but can dry out faster. Thigh meat or ground turkey adds a bit more fat for a juicier patty.
  • Breadcrumbs: Panko gives the best texture and holds moisture better than plain breadcrumbs. Gluten-free or Italian-style both work fine.
  • Panade options: Mayo adds flavor and keeps things juicy, but you can swap in plain Greek yogurt or a splash of milk.
  • Flavor boost: A teaspoon of Worcestershire sauce adds a subtle, beefy depth.

🌶️ Seasoning Ideas

Ground chicken takes on flavor easily, so you can go classic or bold. Here are a few favorite ways to mix it up:

  • Italian-style: basil, oregano, garlic, and a pinch of red pepper flakes
  • Southwest: chili powder, cumin, smoked paprika, or a spoonful of salsa
  • Buffalo or BBQ: toss with hot sauce, blue cheese, or your favorite BBQ rub
  • Simple & classic: salt, pepper, garlic powder, and onion powder – always reliable

👉 Tip: Season the meat lightly before forming patties. You can always add extra flavor later with toppings or sauce.

🤔How to Keep Chicken Burgers from Falling Apart

Even with a great recipe, ground chicken patties can be delicate. Whether you’re cooking on the grill or stovetop, here’s how to keep them together and out of trouble:

  • Use a panade (mayo + breadcrumbs) that’s thick, not runny.
  • Don’t make the patties too thin – aim for about ½ inch thick.
  • Shape them on parchment or wax paper so they’re easy to move.
  • Keep them chilled until cooking – it helps them hold their shape.
  • Oil the grill grates or pan well to prevent sticking.
  • Use a non-stick or cast-iron skillet if cooking indoors.
  • Flip only once – no over-handling.
  • Still having trouble? Mix in one beaten egg for extra binding next time.

🍽️ How to Serve Chicken Burgers

Serve these ground chicken patties just like classic burgers — on a toasted bun with lettuce, tomato, onion, and your favorite condiments. Add cheese, bacon, or avocado for an extra boost.

At a cookout, go with familiar sides like Cold Macaroni Salad, potato salad, coleslaw, chips, or Grilled Corn on the Cob. Indoors, try a simple salad or serve with Crispy Baked French Fries or Microwave Corn on the Cob for an easy weeknight meal.

🍔 More burger recipes

For other cookout-worthy sandwiches:

  • Grill Hamburgers
  • Juicy Lucy Burgers
  • Meatloaf Patties
  • Smokehouse Burgers

For healthier options:

  • Low Fat Burgers
  • Grilled Portobello Mushrooms

❄️ Storage of Leftover Chicken Patties

Store cooked patties in an airtight container in the refrigerator for 3 to 4 days.
To freeze, let them cool completely first, then wrap tightly or place in a freezer-safe container for up to 2 to 3 months.

👉 Reheat gently in a skillet or microwave until the internal temp reaches 165°F to keep them juicy and safe to eat.

❓FAQs

How long does it take to cook ground chicken burgers?

Cook about 10 minutes total — roughly 5 minutes per side on medium-high heat — until the internal temperature reaches 165°F. Grill or stovetop both work great..

What is the internal temperature for chicken burgers?

According to the USDA, the safe internal temp for ground chicken or turkey burgers is 165°F. Use an instant-read thermometer to check the center of the patty.

Are ground chicken burgers healthy?

Yes. Ground chicken is naturally lower in fat and calories than beef but still high in protein. How you season and cook it determines just how healthy it stays.

What is a panade, and why does it matter?

A panade is a simple mix of starch and liquid — in this case, breadcrumbs and mayo — that keeps ground meat moist and tender. It’s your insurance against dry burgers.

Can I make the patties ahead of time?

Yes — form them and refrigerate up to 24 hours before cooking.
I don’t recommend freezing raw patties; mayo can separate after thawing and affect texture. For best results, freeze after cooking instead.

📖The Recipe Card

Chicken burgers on the grill.
Print Recipe Add to Collection Go to Collections
5 from 4 votes

Juicy Ground Chicken Burgers (Grill or Stovetop)

Juicy, flavorful ground chicken burgers that cook fast on the grill or stovetop. A healthier, low-fat burger option that’s ready in about 20 minutes.
Prep Time10 minutes mins
Cook Time10 minutes mins
Total Time20 minutes mins
Course: Main Course
Cuisine: American
Keyword: chicken hamburger, ground chicken burger,, juicy chicken burger
Servings: 4
Calories: 158.1kcal
Author: Dan Mikesell AKA DrDan

Ingredients

  • 1 pound ground chicken or ground turkey
  • ½ cup panko bread crumbs
  • 2 tablespoons mayonnaise
  • ½ teaspoon salt
  • ¼ teaspoon black pepper
  • ¼ teaspoon garlic powder
  • ½ teaspoon onion powder optional
US Customary - Convert to Metric

Instructions

  • Use the seasoning of your choice. You may use ground turkey instead.
    ground chicken with mayo and breadcrumbs
  • Mix 1 pound of ground chicken or ground turkey with ½ cup Panko bread crumbs and 2 tablespoons of mayonnaise. Add your preferred seasoning or use ½ teaspoon onion powder, ¼ teaspoon garlic powder, ½ teaspoon salt, and ¼ teaspoon black pepper. Do not overmix.
    ground chicken with mayo and breadcrumbs in a white bowl
  • Form into patties using ¼ to ⅓ pound of meat each. Patties should be ⅜ to ½ inch thick and about 3½ to 4 inches in diameter. Press a small dimple into the center of each patty to prevent puffing.
    Dimpling the center of a chicken patty.
  • Preheat your grill to medium-high (about 450°F), or heat a non-stick or cast iron skillet with a bit of oil over medium-high heat until shimmering.
    clean and oil grill crates
  • Cook for about 5 minutes per side, flipping once. The patties are done when the internal temperature reaches 165°F.
    Four ground chicken burgers on a grill.

Notes

Pro Tips

  1. Panko breadcrumbs work best for texture. Flavored varieties like Italian or cheese are fine.
  2. Mayo keeps them moist, but you can use plain yogurt or milk if needed.
  3. Don’t overcook—lean chicken dries quickly. Use a thermometer and pull at exactly 165°F.
  4. The center dimple helps prevent puffing and ensures even cooking.
  5. This recipe will work with a wide variety of grill temperatures. Just be sure to cook to the right final internal temperature.
  6. Grill or stovetop both work—use a grill pan indoors for nice marks.
  7. Chicken burgers are more delicate than beef, so handle with care.
  8. More seasoning and variation ideas are in the full post.
  9. Nutrition is calculated using lean ground chicken breasts and low fat mayo.

Nutrition

Serving: 4oz | Calories: 158.1kcal | Carbohydrates: 6.5g | Protein: 20.9g | Fat: 4.3g | Saturated Fat: 0.8g | Polyunsaturated Fat: 1.1g | Monounsaturated Fat: 0.4g | Trans Fat: 0.01g | Cholesterol: 56.1mg | Sodium: 459.3mg | Potassium: 615.2mg | Fiber: 0.4g | Sugar: 0.7g | Vitamin A: 5.6IU | Vitamin C: 0.1mg | Calcium: 22.8mg | Iron: 1.3mg

Originally Published May 7, 2015. Updated with expanded options, refreshed photos, and a table of contents to help navigation.

dogs looking for squirrals.

How to Grill Chicken Breasts on a Gas Grill

Two grilled chicken breasts on a blue plate.

Grilling chicken breasts is easy with the right temperature, cooking time, and a few simple tips. These step-by-step photo instructions will help you get juicy, tender chicken breasts without overcooking.

⏱️ How Long to Cook Chicken Breast on a Grill

  • Grill for 15–20 minutes at 450°F, flipping every 5 minutes.
  • Cook to 165°F internal temperature for safe, juicy results.
  • Use an instant-read thermometer, not time alone. Thinner breasts cook faster; thicker ones take longer.
Grilled Chicken Breasts on a blue plate.
[feast_advanced_jump_to]

quote mark
Featured Comment by Richard:
"Love your cooking directions, really helped me learn to grill…"

👨‍🍳 TL;DR — Recipe Summary

What it is: A simple method for grilling juicy chicken breasts using controlled heat on a gas grill or other grill.

Why it works: Even cooking at the right temperature prevents dry, overcooked chicken.

How to make it: Preheat the grill to 450°F, season lightly, and grill with the lid closed, flipping every 5 minutes until the chicken reaches 165°F (about 15–20 minutes).

🐓 Ingredients

Chicken breasts with seasoning and oil—labeled.jpg
  • Chicken breasts – Boneless, skinless, preferably 8–12 oz each.
  • Oil – Vegetable or olive oil.
  • Optional brine – Water, salt, and brown sugar for extra moisture.
  • Seasoning – Kosher salt, black pepper, garlic powder, and paprika.

👨‍🍳 Quick Overview: Grilling Chicken Breasts on a Gas Grill

1. Prep the chicken: Trim excess fat and flatten thicker breasts to about ¾ inch for even cooking. Brine if desired.

flattening chicken breasts.

✅ Pro Tip: Flattening the chicken helps it cook evenly. Use a zip-top bag to protect from splatter.

2. Season: Pat dry, brush with oil, and season all sides lightly.

sprinkling spices on chicken breasts.

3. Grill: Clean and oil the grates. Preheat to 450°F, then grill with the lid closed, flipping every 5 minutes until the chicken reaches 165°F—about 15–20 minutes total.

two raw seasoned chicken breasts on grill grates.

✅ Pro Tip: Don't cook by time alone. Use an instant-read thermometer and check early if your chicken is smaller or thinner.

👇For complete step-by-step instructions, scroll down to the printable recipe card or keep reading for tips, flavor options, and serving ideas.

⏰ How Long to Grill Chicken Breast

Most boneless, skinless chicken breasts take 15–20 minutes to grill at 450°F, flipping every 5 minutes.

  • Smaller or thinner breasts: 10–15 minutes.
  • Larger or thicker breasts: 20–25 minutes.

Always cook to an internal temperature of 165°F, not by time alone. Grill temperature, chicken thickness, and starting temperature affect cooking time.

🌡️ Best Grill Temperature for Chicken Breast

The best grill temperature for chicken breast is 450°F at the cooking surface (medium-high heat on most gas grills). This gives you juicy chicken with good browning without overcooking the outside.

Don't rely on the hood thermometer—it measures air above the grates, not the cooking surface. Use a grill surface thermometer if available.

Too much heat burns the outside before the center is done. Too little heat can lead to dry, overcooked chicken.

grilled chciken breast cut with potato.

🧂 How to Season Chicken Breasts for the Grill

Use a simple mix of paprika, garlic powder, kosher salt, and black pepper—or your favorite seasoning. If you brined the chicken, reduce or skip the salt.

For more flavor, try my Lemon Chicken Marinade, BBQ Dry Rub, or Memphis Dry Rub.

✅ Pro Tip: Commercial seasoning blends can contain a lot of salt. Use less if you've brined the chicken.

👍 Tips for Grilling Chicken Breasts

  • Match the size: Choose chicken breasts of similar size and thickness for even cooking.
  • Fresh vs. frozen: Previously frozen chicken benefits from flattening and brining to help prevent dryness.
  • Control the grill temperature: Every grill behaves differently. Learn to manage the cooking temperature, not just the burner settings. See my Beginner's Guide to Grill Surface Temperature for help.

🤔 Should You Brine Chicken Breasts Before Grilling?

Brining is optional, but it helps keep chicken breasts juicy, especially if they were previously frozen.

Mix 2 cups of water with 1 tablespoon each of table salt and brown sugar. Add garlic or other seasonings if desired. Submerge the chicken in the brine in a zip-top bag or covered container.

Refrigerate for 20 minutes to 1 hour. Brining longer can make the chicken too salty or affect its texture.

✅ Pro Tip: Drain the brine and pat the chicken dry with paper towels before seasoning. Do not rinse raw chicken.

⚠️ Common Mistakes When Grilling Chicken Breasts

  • Not preheating the grill: A properly preheated grill helps the chicken cook evenly and brown nicely.
  • Skipping the flattening step: Uneven thickness leads to dry, overcooked edges before the center is done.
  • Overcooking: Chicken breasts dry out quickly when cooked past 165°F. Use an instant-read thermometer.
  • Skipping the rest: Let the chicken rest for 5–10 minutes before serving to reduce juice loss when cutting.

❄️ Storage of Leftovers

Store leftover grilled chicken breasts in an airtight container in the refrigerator for up to 4 days or freeze for up to 3 months.

To reheat, thaw overnight in the refrigerator if frozen. Cover and warm in a 325°F oven until heated through. A microwave also works, but may dry out the chicken.

🐓 Try These Other Chicken Recipes

  • Honey-Glazed Grilled Chicken Breasts
  • Grilled a Whole Chicken on a Gas Grill
  • Reverse Seared Skinless Boneless Chicken Breasts
  • Grilled Chicken Tenders – great for kids or smaller portions

❓ FAQs

How do I flatten thick chicken breasts?

If a chicken breast is thicker than ¾ inch or uneven, place it in a zip-top bag and gently flatten it with a meat mallet, rolling pin, or heavy pan. Aim for an even thickness so it cooks uniformly.

Are grilled chicken breasts healthy?

Yes. Grilled chicken breasts are high in protein and low in carbs and fat when simply seasoned and not breaded or fried. They’re a great option for low-calorie and low-carb diets.

What temperature should a gas grill be for chicken breasts?

A medium-high grill surface temperature of about 450°F works best. This allows the chicken to cook through without burning the outside.

Can I grill chicken that is still frozen?

For best results, thaw chicken breasts completely before grilling. Frozen chicken cooks unevenly, and the outside may overcook before the center reaches a safe 165°F.

When is chicken done and safe to eat?

According to the USDA, chicken is safe to eat at 165°F internal temperature, measured in the thickest part. Always use an instant-read thermometer—don’t guess by color or time.

📖The Recipe Card

Two grilled chicken breasts on a blue plate.
Print Recipe Add to Collection Go to Collections
5 from 3 votes

Grilled Chicken Breasts on a Gas Grill

Juicy grilled chicken breasts with simple seasoning and easy step-by-step instructions. Grill at 450°F for about 15–20 minutes to 165°F internal temperature.
Prep Time5 minutes mins
Cook Time20 minutes mins
Total Time25 minutes mins
Course: Main Course
Cuisine: American
Keyword: grilling chicken breasts, How long to grill chicken breasts, how to grill chicken breasts on a gas grill
Servings: 2
Calories: 280.3kcal
Author: Dan Mikesell AKA DrDan

Ingredients

  • 2 Boneless, skinless chicken breasts 8–12 oz each.
  • 1 teaspoon olive oil or other vegetable oil

Optional Brine

  • 2 cups water
  • 1 tablespoon table salt
  • 1 tablespoon brown sugar

Suggested Spices

  • ½ teaspoon granular garlic powder
  • ½ teaspoon paprika
  • ¼ teaspoon pepper
  • ½ teaspoon kosher salt
US Customary - Convert to Metric

Instructions

  • Pick chicken breasts of about the same size.
    Chicken breasts with seasoning and oil—labeled.jpg
  • Trim the chicken. If the breasts are thick, use a meat mallet and flatten the thickest part of the breasts to ¾ inch.
    flattening chicken breasts.
  • If brining, combine 2 cups of cold water with 1 tablespoon each of table salt and brown sugar. Submerge the chicken, cover, and refrigerate for 20 minutes to 1 hour. Drain the brine and pat the chicken dry. Do not rinse.
    raw chicken marinading in large bowl
  • Clean and oil the grill grates. Preheat the surface to a temperature of 450°F.
    clean and oil grill crates
  • Pat the chicken dry and brush lightly with vegetable or olive oil.
    brushing olive oil on chicken
  • Season all sides. I suggest ½ teaspoon each of paprika and garlic powder, plus ¼ teaspoon black pepper. Add ½ teaspoon kosher salt only if you did not brine the chicken.
    sprinkling spices on chicken breasts
  • Place the chicken over direct heat with the lid closed. Flip every 5 minutes until the internal temperature reaches 165°F—usually 15–20 minutes. Check early, since cooking time varies with thickness.
    two raw seasoned chicken breasts on grill grates
  • Allow to rest for 5 minutes before serving.
    grilled chciken breast cut with potato.

Video

Notes

Pro Tips

  • Getting good results without a good instant-read thermometer is almost impossible—extra points for a grill surface thermometer.
  • Use chicken breasts of similar size for even cooking. Flatten to about ¾ inch if needed.
  • Brine if you have time. Be sure to have the breasts completely covered by the brine.
  • Use seasoning or marinade of your choice, but not with salt if you brine. 
  • The grill surface temperature should be about 450°F (medium-high on a gas or propane grill).
  • Always cook to 165°F internal temperature with an instant-read thermometer.
  • ⚠️ Overcooking is the #1 mistake — that’s how you end up with hockey pucks instead of juicy chicken.
  • Good refrigerated for up to 4 days. Good frozen for 3 months.

Nutrition

Serving: 1breast | Calories: 280.3kcal | Carbohydrates: 1g | Protein: 48.4g | Fat: 8g | Saturated Fat: 2.9g | Polyunsaturated Fat: 1g | Monounsaturated Fat: 2g | Trans Fat: 0.1g | Cholesterol: 145.2mg | Sodium: 845.3mg | Potassium: 862.9mg | Fiber: 0.3g | Sugar: 0.1g | Vitamin A: 315.7IU | Vitamin C: 2.7mg | Calcium: 14.5mg | Iron: 1mg

Editor's note: This article was originally published on June 7, 2019, and has been updated with expanded options, refreshed photos, and a table of contents to help with navigation.

dogs in the green yard.

Leftover Ham and Turkey Recipes

ham on a white plate

I love leftovers, but sandwiches get a little old. Let's do something special with that leftover ham or turkey—a great casserole, delicious soup, or entree. Just follow the easy step-by-step recipes.

ham on a white plate.
[feast_advanced_jump_to]
Blue ribbon divider used for visual effect

I will start with ham. I'm talking about store-bought pre-cooked ham. These might be refrigerated and sealed at the store and spiral-cut. If you have a different type of ham, I have provided some links with options for most other types.

❄️Storing leftover turkey

Leftover freshly cooked turkey is refrigerated for four days if sealed well and maybe frozen for three months.

🐖Leftover ham recipes

We all enjoy ham and cheese sandwiches and breakfast dishes like ham and eggs. I don't think you need recipes for these, but here are some of our favorite recipes that use ham or where ham can make a great addition.

Old Fashioned Scalloped Potatoes and Ham (Easy & Cheesy)
Classic scalloped potatoes and ham baked in a creamy white sauce with cheddar. Easy to make with leftover ham, fork-tender potatoes, and cheesy comfort food flavor.
Scalloped Potatoes and Ham
Scalloped Potatoes and Ham on a fork
Fried Rice with Minute Rice (Easy 10-Minute Recipe)
Make fried rice fast with Minute Rice—no day-old rice needed. Ready in 10 minutes with simple ingredients; add egg and vegetables or keep it plain.
Easy Egg Fried Rice
fried rice on a white plate
Easy Broccoli Cheese Soup Recipe
Add some ham to this delicious and creamy Broccoli Cheese Soup. It is one of the best soup recipes for home cooks. It is a simple one-pot soup from scratch with multiple options to make it your way.
Broccoli Cheese Soup
broccoli cheese soup in blue bowl

🍖Leftover ham bone recipes

From a "cooking for two" viewpoint, these soup recipes are too big unless you have freezer space. If you do, these are great options. If you don't have freezer space, give the ham bone to a friend.

Crock Pot Ham and Bean Soup (With Ham Bone)
An old-fashioned ham and bean soup made easy in the crock pot. Just white beans, a meaty ham bone (or diced ham), and simple seasoning.
Crock Pot Ham and Bean Soup
Ham and bean soup on spoon
Ham and Vegetable Soup with a Ham Bone
A hearty ham and vegetable soup made with a meaty ham bone, tender vegetables, and rich broth. Easy to make in a crock pot or on the stovetop.
Ham Vegetable Soup
Ham and vegetable soup on a spoon.
Puerto Rican Ham Bone Soup with Potatoes and Beans
An excellent ham soup bursts with potatoes, rice, carrots, and beans in a spicy broth. Give that ham bone a great ending today with this hardy soup you will love.
Puerto Rican Ham Bone Soup
Ladle of ham soup

🦃Leftover turkey recipes

The turkey tetrazzini is very popular the week after Thanksgiving, but there are also other options.

Turkey Tetrazzini Recipe (Easy Creamy Casserole)
Make this turkey tetrazzini recipe with tender turkey, pasta, peas, and a creamy Parmesan sauce from scratch. Perfect for leftovers and easy to scale.
Turkey Tetrazzini Casserole
large serving of turkey tetrazzini on a blue plate
Three Bean Turkey Chili
Hearty and healthy, Three Bean Turkey Chili is easy in your crock pot or made it fast on the stovetop with ground turkey, beans, and pantry ingredients.
Three Bean Turkey Chili
turkey chili with sour cream in a bowl.

Two chicken recipes, both with turkey options.

Double Crust Chicken Pot Pie Recipe
This easy double crust chicken pot pie combines tender chicken, vegetables, and homemade gravy between two refrigerated pie crusts. A delicious semi-homemade comfort food dinner without canned soup.
Chicken Pot Pie Recipe
Whole chicken pot pie.
Chicken Broccoli Rice Casserole Recipe
This cheesy Chicken Broccoli Rice Casserole Recipe is made from scratch without canned soup. Tender chicken, broccoli, and rice are topped with buttery Parmesan breadcrumbs for a delicious family dinner in about an hour.
Chicken Broccoli Rice Casserole
fork full of casserole

❄️Storing leftover ham

Ham can generally be stored in the fridge for 3-5 days, but this can vary by type. If you have something other than store-bought pre-cooked ham, please see the FoodSafety.gov Ham Storage Chart for details.

Can I freeze ham?

Yes, ham and ham bones will freeze well. There are those old wives' tales that you can not freeze ham. They are wrong—ham and ham bones can both be frozen.

Most common hams are good for 1-2 months frozen. There is some variability by type of ham, so please see the FoodSafety.gov Ham Storage Chart for details.

If you know that you need to freeze some of the ham for later, freeze part of it as soon as possible. Seal it well; if it is large, divide it into smaller amounts.

To thaw your ham after it's been frozen, allow it to defrost in the refrigerator. Depending on its size, it should thaw in about 24 to 48 hours.

dogs with bunnies
The Easter Bunny is in trouble... "Give up the ham, or the bunnies are toast."

Originally Published April 20, 2019.

How to Grill Chicken Thighs on a Gas Grill

grilled chicken thigh with some char

Grill bone-in chicken thighs for about 25–30 minutes for juicy meat and crispy skin. The key is controlled heat and moving the thighs as they cook to prevent flare-ups and burning.

⏱️ Quick Answer: How Long to Grill Chicken Thighs

  • Grill temp: 450°F (medium-high)
  • Bone-in thighs: 25–30 minutes to 185°F (recommended)
  • For 165°F: about 20–25 minutes (safe but not as tender)
Grilled chicken with some crispy char on skin.
[feast_advanced_jump_to]

quote mark
Featured Comment by Davey:
⭐⭐⭐⭐⭐
"This site is the Holy Grail for how to cook chicken thighs. I trim off excess fat, season liberally with 7:2:1 rub (with an extra ½ part smoked paprika), and grill to 185-190. Comes out so delicious. Made them again yesterday, and people were telling me how fantastic the chicken was. Thanks!"

🧾 TL;DR — Recipe Summary

What it is: Bone-in, skin-on chicken thighs grilled until juicy with crispy skin.

Why it works: Moving the thighs as they cook helps control flare-ups and prevents burnt skin.

How to make it: Grill over medium-high heat, flipping and moving the thighs until they reach 185°F.

🐓 Ingredients

Raw chicken thighs with seasoning—labeled.
  • Bone-in, skin-on chicken thighs – Best for juicy meat and crispy skin. Boneless or skinless thighs may be used, but they cook faster and need timing adjustments.
  • Seasoning – Kosher salt and black pepper are all you need. You can also use your favorite BBQ rub, All-Purpose 7:2:2 Seasoning, or another seasoning blend.

👨‍🍳 Quick Overview: Grilling Chicken Thighs

1. Trim and season – Remove extra fat or loose skin, then season with salt, pepper, or your favorite seasoning or BBQ rub.

trim any fat off of chicken thighs.

2. Grill at 450°F with uneven timing – Grill skin-side up for 5–6 minutes and skin-side down for 4 minutes. Keep repeating that uneven timing, flipping and moving to a new area of the grill each time to control flare-ups.

Place seasoned thighs on a preheated grill.

3. Finish and rest – Continue grilling until the internal temperature reaches 185°F. Rest for 5–10 minutes before serving.

pile of chicken thighs.

👇For complete step-by-step instructions, scroll down to the printable recipe card or keep reading for tips, flavor options, and serving ideas.

⏲️ How Long to Grill Chicken Thighs

Grill bone-in chicken thighs on a gas grill at about 450°F for 25–30 minutes to reach the recommended internal temperature of 185°F.

For the USDA-safe minimum of 165°F, they may be done in about 20–25 minutes, but the meat is often stringier and less tender. I found that especially noticeable in my early testing.

Use the uneven grilling method—keep the skin-side-up periods longer than the skin-side-down periods, and move the thighs to a new grill area with each flip to control flare-ups.

Always cook to internal temperature, not just time.

♨️ Best Grill Temperature and Uneven Grilling Method

A grill surface temperature of about 450°F (medium-high) works best for bone-in chicken thighs. It is hot enough to crisp the skin, but not so hot that flare-ups and burning become hard to control.

Use the uneven grilling method: grill skin-side up for 5–6 minutes, then skin-side down for 4 minutes. Repeat that timing, moving the thighs to a new area of the grill after each flip so fat does not keep dripping onto the same hot spot.

  • Preheat the entire grill so you have room to move the chicken.
  • Trim excess fat and loose skin before grilling.
  • Use a grill-surface thermometer if you have one; hood thermometers are often inaccurate.
  • Continue until the internal temperature reaches 185°F.

Other grill types: Charcoal and pellet grills also work if you can hold the cooking surface near 450°F and leave enough room to move the thighs away from flare-ups or hotter areas.

For help with grill temperatures, see Guide to Grill Temperature on a Gas Grill.

🐔 Grilling Boneless Chicken Thighs

Boneless, skinless chicken thighs cook much faster than bone-in thighs—usually about 10–15 minutes total at 450°F.

Flip every 4–5 minutes; no need for uneven grilling times. Cook to 185°F for the best texture. A light coating of oil can help prevent sticking and drying.

😊 Seasonings, BBQ & Marinade Options

Seasoning: Salt and pepper are enough, or use your favorite seasoning blend, Classic BBQ Rub or Memphis Dry Rub

BBQ sauce: Brush on during the last 5 minutes of grilling, then add more after cooking if you like. Use your favorite sauce or my Memphis Barbecue Sauce

Marinade: Optional, but it works especially well with boneless thighs. Avoid very sugary marinades until later in cooking, or they may burn. Try my Lemon Butter Marinade.

🍽️ Serving Suggestions

Serve grilled chicken thighs with a fresh salad and a simple side such as Grilled Baby Potatoes, potato salad, grilled vegetables, or corn on the cob.

For a sweeter contrast, Grilled Pineapple also works well.

❄️ Storage & Reheating

Store leftovers in an airtight container in the refrigerator for 3–4 days or freeze for up to 3 months.

Reheat in a 350°F oven for 15–20 minutes or an air fryer at 350°F for 5–7 minutes to help re-crisp the skin. The microwave works, but the skin will soften.

😊 Other Delicious Chicken Recipes

  • Crispy Oven Baked Chicken Thighs – Crispy skin and juicy meat from the oven
  • Grilled Chicken Drumsticks – Similar grill method with dark meat
  • Oven Baked Chicken Legs – Crispy skin without the grill
  • Grilled Chicken Breasts – A leaner grilled chicken option

❓ FAQs

How do I trim chicken thighs?

Trim visible fat from the underside and edges. Remove loose or hanging skin, but leave the attached skin in place to help keep the meat juicy.

Can I grill chicken thighs without a thermometer?

You can, but a meat thermometer is the best way to avoid undercooking or overcooking. For the best texture, cook chicken thighs to about 185°F.

What’s the best internal temperature for chicken thighs?

Cook to about 185°F for tender, juicy meat and crisp skin. America’s Test Kitchen also recommends higher temperatures for dark meat, up to 190–195°F for extra tenderness. The USDA minimum is 165°F for safety.

Why does chicken skin burn on the grill?

Fat drips cause flare-ups. Trim excess fat, keep the grill around 450°F, and move the thighs to a clean area after each flip.

📖The Recipe Card

grilled chicken thigh on white plate
Print Recipe Add to Collection Go to Collections
4.79 from 19 votes

Grilled Chicken Thighs (Juicy with Crispy Skin)

Juicy grilled chicken thighs with crispy skin every time using a simple, controlled grilling method. Cook at 450°F for 25–30 minutes with easy step-by-step instructions.
Prep Time10 minutes mins
Cook Time25 minutes mins
Total Time35 minutes mins
Course: Main Course
Cuisine: American
Keyword: grilled boneless chicken thighs, Grilled Chicken Thighs, grilling chicken thighs, how long to grill chicken thighs
Servings: 4
Calories: 247kcal
Author: Dan Mikesell AKA DrDan

Ingredients

  • 4 bone-in, skin-on chicken thighs
  • Salt and Pepper or seasoning of choice
US Customary - Convert to Metric

Instructions

Preheat the grill

  • Preheat your gas grill to a surface temperature of about 450°F—medium to medium-high on most grills. Clean and oil the grill grates well. Preheat the entire grill so you can rotate the thighs to avoid flare-ups.
    clean and oil grill crates

Trim and season

  • While the grill is preheating, let the thighs rest at room temperature for 20–30 minutes if you have time.
    trimming fat off the chicken thigh
  • Trim excess fat and loose skin. Season all sides with salt, pepper, or your favorite seasoning or BBQ rub. Brushing the skin lightly with oil is optional.
    adding seasoning to raw thighs

Grill with uneven grilling method

  • Place the thighs skin-side up over direct heat. Grill for 5–6 minutes, then flip skin-side down, move to a new area of the grill, and cook for 4 minutes. Continue repeating the uneven timing—5–6 minutes skin-side up and 4 minutes skin-side down—moving to a new area with every flip. Reduce the heat if the skin is getting too dark.
    placing thighs over direct heat skin up
  • Grill until the internal temperature reaches 185°F, usually about 25–30 minutes. Check the temperature early and cook to temperature, not time.
    pile of chicken thighs.

Resting

  • Let the grilled thighs rest for 5–10 minutes before serving.
    chicken thigh with a bite out of it.

Video

Notes

Pro Tips:

  • Keep the grill surface around 450°F. A surface thermometer is more accurate than the grill hood thermometer.
  • Trim excess fat and loose skin to reduce flare-ups.
  • Use the uneven grilling method and move the thighs to a new area with every flip.
  • Cook to about 185°F for tender thighs. Chicken is safe at 165°F, but the texture will be firmer and stringier.
  • Always cook to internal temperature, not time.
  • Boneless thigh modifications are discussed in the post.

Nutrition

Calories: 247kcal | Carbohydrates: 1g | Protein: 18g | Fat: 19g | Saturated Fat: 5g | Cholesterol: 111mg | Sodium: 668mg | Potassium: 232mg | Vitamin A: 88IU | Calcium: 9mg | Iron: 1mg

Editor's Note: Originally Published August 1, 2015. Updated with expanded options, refreshed photos, and a table of contents to help navigation.

Dog walking time - walking Molly Dog and Lilly Dog out of the driveway on lish.
Dog walking time. They are so good.
Coming back from the dog walk.

Smaller Easter Recipes

Molly and Lilly in spring flowers

Easter, the unofficial kick-off to spring, is around the corner, and it is time for some planning. But not everybody needs to feed a crowd. Let's have a small celebration and make sure there are controllable leftovers.

So, while you color a few eggs and find some toys for the little ones, get a plan together.

Molly and Lilly in spring flowers.
Molly and Lilly were sniffing the spring flowers in 2020.
[feast_advanced_jump_to]

🍽️ Smaller Main Course Recipes

The start of a plan is always the main dish. Here are some delicious but smaller mains.

Small Crock Pot Ham with Brown Sugar-Honey Glaze
Cook a small 2–4 lb boneless ham in your crock pot with a brown sugar-honey glaze and pineapple. Easy, juicy, and perfect for holidays or smaller gatherings.
Small Brown Sugar Glazed Ham
slices of ham with pineapple on white plater
Small Boneless Prime Rib (Ribeye) Roast
Juicy, tender boneless prime rib (ribeye roast) coated in garlic butter and roasted to perfection. Easy to cook at home for smaller gatherings or holiday dinners.
Small Ribeye Roast
slice of Ribeye Roast on a white plate
Roasted Turkey Breast Recipe
Learn how to roast a bone-in turkey breast in the oven using one steady 350°F temperature. This easy method gives you juicy, tender meat and golden-brown skin without changing oven temperatures.
Baked Turkey Breast Recipe
turkey slice with gravy on orange plate.
Filet Mignon in the Oven (Pan-Seared and Oven-Baked Method)
Juicy filet mignon cooked in the oven with a pan-sear for a perfect crust and tender center. Ready in about 20 minutes with simple steps.
Oven Filet Mignon
seared filet on a white plate with potatoes
Oven-Baked Turkey Tenderloin with Gravy
Juicy turkey tenderloin with a quick pan sear, oven-roasted finish, and easy homemade gravy. A simple turkey dinner for weeknights or a small holiday meal.
Turkey Tenderloin Recipe
image of cut turkey with gravy on plate
What to Do With Leftover Ham
Leftover ham is a great problem to have, but there are a few challenges, especially for smaller households. Let's deal with it correctly and safely.
Leftover Ham Recipes
ham on a white plate

🥔 Vegetable Side Dishes

A main dish without sides is not a full meal. They need to be easy to make but also delicious. We always make the cheesy potatoes with the ham.

Cheesy Potatoes with Real Potatoes (No Soup, From Scratch)
Creamy, cheesy comfort food made from scratch—no canned soup or frozen hash browns. Real potatoes, sour cream, and cheddar baked until golden and bubbly.
Cheesy Potatoes with Real Potatoes
Cheesy potato casserole on a white plate.
Crispy Roasted Baby Red Potatoes
Roast baby red potatoes in the oven until golden and fork-tender, about 30–35 minutes for small potatoes. Simple, crispy, and reliable.
Baked Baby Potatoes
Roasted red potatoes on a white plate.
Roasted Asparagus (Easy Oven Recipe)
Learn how to roast asparagus in the oven for crisp and tender results with simple seasoning and optional Parmesan.
Roasted Asparagus Recipe
baked Parmesan asparagus on a white platter
Baked Green Beans with Bacon
Baked Green Beans with Bacon are the perfect side dish with any meal—an easy green bean recipe with brown sugar, garlic, bacon, and tender green beans.
Frozen Green Bean Recipe
green beans with bacon on an orange plate
Parmesan Roasted Cauliflower
This caramelized Parmesan roasted cauliflower recipe will become your favorite way to cook cauliflower. Using fresh or frozen, it makes a great hot baked side dish.
How to Roast Cauliflower
Parmesan Roasted Cauliflower from 101 Cooking for Two

🍞 Bread Recipes

I'm a bread fanatic. A nice bread completes any meal, and there is nothing like homemade bread.

Easy 60-Minute Yeast Dinner Rolls
Soft and fluffy homemade yeast dinner rolls in about 60 minutes. This easy recipe is perfect for beginners; it makes 12 rolls, or scale down to a small batch of 6.
Easy Dinner Rolls
Bowl of dinner rolls.
Lunch Lady Rolls—Small Batch Version
Old fashioned 60s school Lunch Lady Rolls, those wonderful hot rolls everybody loved in the cafeteria. You can now be made with this small batch recipe mixed by hand or in a stand mixer at home.
Small Batch Lunch Lady Rolls
Stand Mixer Lunch Lady Rolls from 101 Cooking for Two
Julia Child's French Bread - Simplified
Not for two, but a wonder loaf for any holiday. Julia Child's French Bread recipe is the ultimate crusty artisan French bread. While it takes some time, it is worth the effort.
Julia Child's French Bread Recipe
Julia Child's French Bread on wooden peel.

🥧 Small Dessert Recipes

Make it an exceptional meal with a sweet ending.

Small Batch Apple Crisp (Easy Recipe for Two or More)
Make an easy small batch apple crisp with only 2 or 3 apples and a buttery crumb topping. A perfect old-fashioned dessert for two or more.
Small Batch Apple Crisp
apple crisp on a white plate.
Blueberry Crisp with Fresh or Frozen Berries
A small-batch blueberry crisp made with any fresh or frozen berries. Bakes in ramekins or a small dish with a buttery oat topping. Quick, flexible, and easy to make gluten-free.
Berry Crisp for Two
berry crisp on a fork
Easy Lemon Bars
Easy lemon bars are delicious and simple to make in under an hour. These homemade lemon squares are a perfect dessert treat with a crispy, buttery shortbread crust and tangy and sweet lemon filling—a small batch 8X8 recipe you can scale to your needs.
Lemon Bar Recipe
Two lemon squares on a gray plate.
Strawberry Pie with Jello (Easy and Reliable Fresh Recipe)
This strawberry pie with Jello is made with fresh berries, a simple homemade glaze, and a ready-made crust. An easy, reliable dessert that’s been a family favorite for nearly 50 years.
Fresh Strawberry Pie Recipe
Whole fresh strawberry jello pie ready to eat.
Apple and Berry Crumble
This easy apple and berry crumble combines tender apples, juicy berries, and a buttery crumb topping. Use fresh fruit or make a quick version with frozen berries and apple pie filling.
Apple Berry Crumble
blue bowl of apple berry crumble with ice cream

🐰 Special Easter Treats

Time for a special treat. And don't forget the colored sprinkles or M&Ms.

Crock Pot Peanut Clusters (Easy Chocolate Recipe)
Easy crock pot peanut clusters with chocolate and just 4 ingredients. Sweet, salty, and crunchy homemade candy for holidays, gifts, or parties.
White Chocolate Almond Cluster Recipe
Crock pot chocolate peanut clusters on parchment paper.
Crock Pot White Chocolate Almond Clusters
Super easy and delicious white chocolate almond clusters are the perfect gift for the holidays or for any special occasion. Simple with these step by step photo instruction for the perfect white chocolate candy.
White Chocolate Almond Cluster Recipe
white chocolate almond clusters on a white plate

And the dogs also desire a treat.

Low-Fat Homemade Dog Treats—Healthy & Delicious
Low Fat Homemade Dog Treats are the perfect low-calorie treat for your dog. With only five ingredients, your dog will love the peanut butter and pumpkin taste. Much healthier than commercial treats—any veterinarian would approve.
Recipe for Low Fat Dog Treats
Pile of homemade dog treats on a wire rack

Originally Published April 14, 2019. Updated yearly for new choices

Molly and Lilly with Mr Bunny.
Molly and Lilly with their Easter Bunny. I think he is in trouble.

Cheesy Potatoes with Real Potatoes – No Soup, No Shortcuts

Cheesy potato casserole on a white plate.

Forget the soup cans and frozen hash browns—these cheesy potatoes with real potatoes are made completely from scratch. A creamy, golden cheesy potato casserole recipe with sour cream, cheddar, and that old-fashioned flavor you remember from homemade funeral potatoes, only better.

Simple ingredients, no shortcuts—just rich, cheesy comfort food that belongs next to ham, turkey, or any big family meal.

Cheesy potato casserole on a white plate.
[feast_advanced_jump_to]

quote mark
Featured Comment from Su8:
⭐⭐⭐⭐⭐
"You had me at "no soup, no frozen potatoes". Superb recipe. Thanks!"

🤔 Cheesy Potato Casserole — Recipe Summary

What it is: Old-fashioned cheesy potato casserole made from scratch—no canned soup, no frozen hash browns. The classic funeral potatoes done right.

Why you’ll love it: Creamy, cheesy, and pure comfort food. Real potatoes, real flavor, simple ingredients—and a recipe I’ve made for over 40 years, every Easter and holiday.

How to make it: Boil and shred potatoes, mix with sour cream and cheese, then bake until golden and bubbly.

(Jump to the Recipe Card or keep reading for step-by-step photos and pro tips.)

🥔 Ingredients for Cheesy Potato Casserole

https://www.101cookingfortwo.com/crock-pot-cheesy-potatoes.

Here’s what you need to make cheesy potatoes with real potatoes from scratch—without frozen hash browns or canned soup.

  • Potatoes – Russets for fluffy texture; Yukon Golds for a creamier texture.
  • Sour cream – Just adds richness and that classic homemade flavor.
  • Cheddar cheese – Sharp cheddar gives the best flavor; mild or Colby Jack also work well.
  • Green onions – For mild onion flavor and color.
  • Salt and pepper – Just enough to balance everything.

Optional add-ins:

  • Crumbled bacon or diced ham for a loaded “crack potatoes” twist.
  • Topping: buttered breadcrumbs, crushed crackers, or Parmesan for a golden crust.

👨‍🍳 Quick Overview: How to Make Cheesy Potatoes (From Scratch)

This overview summarizes the recipe for cheesy potatoes using real potatoes, but no soup. For the complete recipe, see the Recipe Card. Keep reading for tips.

1. Cook the potatoes:

Scrub and pierce the potatoes with a fork. Boil until fork-tender—about 40 minutes—then cool in the refrigerator so they’re easier to peel and grate.

six potatoes boiling in black pan

✅ Pro Tip: Forking the potatoes before boiling helps prevent them from splitting open.

2. Mix the casserole:

Peel and shred the cooled potatoes.

grating potatoes into large glass mixing bowl.

✅ Pro Tip: Cold potatoes grate more cleanly and keep a better texture after baking.

Combine the potatoes with sour cream, shredded cheddar, sliced green onions, salt, and pepper. Spread evenly into a greased casserole dish.

adding shredded cheese to mixing bowl with alll other ingredients.

Spread evenly into a greased casserole dish.

moving raw potato casserole into baking dish.

3. Bake:

Bake uncovered at 350°F convection (375°F conventional) for 35–40 minutes, until hot and golden brown on top.

spoonful of cheesy potatoes.

🤔 Variations and Optional Ingredients

🥘 Baking dish size: A 9×13-inch baking dish or 2½–3-quart casserole works for a full batch. A half recipe fits nicely in a deep 8-inch round or 6×9 pan.

🔥 Oven temperature: Bakes well anywhere from 350° to 425°F. I use 350°F convection (375°F conventional) but adjust if cooking alongside other dishes.

🥔 Potato type: Russets give a fluffier texture; Yukon Golds make it creamier. You’ll need about 3 pounds (6 medium-large potatoes).

❄️ Frozen potatoes: You can use them in a pinch, but the texture won’t be the same. Once you’ve had it with real potatoes, you won’t go back.

🧀 Cheese options: Sharp cheddar gives that classic bite, but mild cheddar, Colby Jack, or a cheddar-mozzarella blend also work.

🧹 Topping ideas: Crushed Ritz crackers, cornflakes, or buttered breadcrumbs for crunch. A sprinkle of Parmesan adds color and flavor.

📅 Make Ahead & Freezing Instructions

This cheesy potato casserole is easy to make ahead. Assemble it, cover tightly, and refrigerate for up to 2 days before baking. You can bake it straight from the fridge—just add a few extra minutes to the baking time if it’s cold.

To freeze, bake the casserole first, then let it cool completely. Double-wrap and freeze for up to 3 months. Thaw overnight in the refrigerator, then reheat covered in the oven until warmed through.

✅ Pro Tip: Don’t freeze it unbaked – the texture of the potatoes can get mushy and grainy, and the sour cream can become grainy and separate.

🍽️ What to Serve with Cheesy Potatoes

This cheesy potato casserole goes with just about everything—ham, brisket, turkey, pork chops, or roast chicken.  It’s a holiday favorite with Honey Glazed Ham or Baked Turkey Breast, but just as good with BBQ Baked Beef Brisket or pork chops.

DrDan’s pick? It’s the must-have side with Easter ham. My wife wouldn’t let me skip it if I tried.

✅ Serving Tip: Let the casserole rest for 10–15 minutes after the initial baking so it sets up for easier scooping and cleaner servings.

❄️ Storing leftovers

  • Store leftover cheesy potatoes covered in the refrigerator for up to 4 days.
  • For longer storage, freeze leftovers in an airtight container for up to 3 months. Thaw overnight in the refrigerator before reheating.
  • To reheat, cover with foil and warm in the oven at 350°F until hot, or use the microwave for smaller portions. The oven keeps the texture closer to freshly baked.

❓ FAQs

Can I make cheesy potatoes low-carb or keto?

Not this version—but you can swap the potatoes for cauliflower. Try my Cheesy Cauliflower Casserole for a similar flavor and texture without the carbs.

Can I use frozen potatoes instead of fresh?

Yes, but the texture won’t be the same. Frozen hash browns work, but once you’ve had these with real potatoes, you probably won’t go back.

What are the best potatoes for cheesy potato casserole?

Russet potatoes are the top choice for a fluffy texture. Yukon Golds are a close second and give a slightly creamier result thanks to their lower starch content.

👍 More Potato Recipes to Try

Looking for another easy potato side? Try one of these next:

  • Crock Pot Cheesy Potatoes – Creamy, slow-cooked comfort food, no oven needed.
  • Crispy Smashed Potatoes – Golden, crunchy edges without deep frying.
  • Roasted Baby Potatoes – Simple, flavorful, and great with any meal.
  • Twice Baked Potatoes – Cheesy, loaded, and make-ahead friendly.
  • Old Fashion Scalloped Potatoes – Creamy and classic, the perfect comfort side.

📖The Recipe Card

Cheesy potato casserole on a white plate.
Print Recipe Add to Collection Go to Collections
5 from 3 votes

Cheesy Potatoes with Real Potatoes (No Soup, From Scratch)

Creamy, cheesy comfort food made from scratch—no canned soup or frozen hash browns. Real potatoes, sour cream, and cheddar baked until golden and bubbly.
Prep Time15 minutes mins
Cook Time1 hour hr 20 minutes mins
Total Time1 hour hr 15 minutes mins
Course: Potato
Cuisine: American
Keyword: Cheesy Potato Casserole, Cheesy Potatoes, Funeral Potatoes
Servings: 8 serving
Calories: 331kcal
Author: Dan Mikesell AKA DrDan

Ingredients

  • 3 pounds potatoes about 6 medium-large Russets or Yukon Golds
  • 2 cups sour cream
  • 6 green onions
  • 2 cups sharp cheddar cheese shredded
  • 1 teaspoon salt
  • ½ teaspoon pepper
US Customary - Convert to Metric

Instructions

Cook the Potatoes

  • Add enough water to cover the potatoes in a large pot, and bring to a boil.
    https://www.101cookingfortwo.com/crock-pot-cheesy-potatoes.
  • Scrub about 3 pounds of potatoes and poke each one a few times with a fork to help prevent splitting.
    scrubing potatoes under running water
  • Add the potatoes to boiling water, reduce the heat, cover, and simmer until fork-tender—about 40 minutes. Fork-tender is when you can insert a large fork, and it pulls out easily. The time may vary depending on the type and size of the potatoes.
    six potatoes boiling in black pan
  • Remove the potatoes from the water and place them in the refrigerator to cool for a few hours.
    moving cooked potatoes to a dish to cool

Prepare and Mix the Casserole

  • Peel the cooled potatoes (skins should slide off easily) and shred them by hand or with a food processor.
    grating potatoes into large glass mixing bowl
  • Clean and slice the green onions.
    slicing green onion on wooden board.
  • In a large bowl, combine the shredded potatoes with 2 cups of sour cream, 2 cups of shredded sharp cheddar cheese, 1 teaspoon of salt, ½ teaspoon of pepper, and the green onions.
    adding shredded cheese to mixing bowl with alll other ingredients
  • Spray a 9x13 baking dish or 2½-quart casserole dish with cooking spray. Spread the mixture evenly and smooth the top. You can bake now or cover and refrigerate for up to 2 days.
    moving raw potato casserole into baking dish

Bake

  • Preheat the oven to 350°F convection (375°F conventional). Bake uncovered until golden brown—about 35–40 minutes. Add a few minutes if the ingredients are cold from the refrigerator, or reduce the time for a smaller batch or a thinner layer.
    spoonful of cheesy potatoes.

Video

Notes

Pro Tips

  1. A full recipe fits a 9x13 or 2½-quart casserole dish; a half recipe fits an 8-inch round or 6x9 dish.
  2. The exact amount of potatoes can vary a little—no need to weigh them.
  3. One medium-large potato is about 8 oz. Yukon Golds provide a creamier texture, while Russets are fluffier.
  4. You can make this ahead and store it refrigerated for about 2 days before cooking. You can also freeze the cooked casserole for 3-4 months.
  5. Done is when the top is nicely browned—no need for a specific internal temperature.

Nutrition

Calories: 331kcal | Carbohydrates: 36g | Protein: 13g | Fat: 16g | Saturated Fat: 10g | Cholesterol: 50mg | Sodium: 517mg | Potassium: 884mg | Fiber: 2g | Sugar: 2g | Vitamin A: 561IU | Vitamin C: 12mg | Calcium: 313mg | Iron: 2mg

Editor's Note: Originally published October 5, 2013. This recipe was in my top 10 recipes of 2013. I have repeated this dish hundreds of times. Please enjoy one of our favorite dishes. Updated with expanded options, refreshed photos, and a table of contents to help navigation.

dogs in the yard on a cool fall day.

How to Grill Hamburgers – Beginner Guide to Juicy Burgers

nicely done burger on a bun. All on a white plate

Learn how to grill hamburgers on any grill. Quick and easy, most ¼–½ lb burger patties cook in 7–12 minutes total over high heat, flipping once halfway through. Exact time depends on thickness and grill temperature for moist and juicy results every time.

⏱️ How long to grill hamburgers?

Grill burger patties over high heat (about 500–600°F) until they reach 160°F internal temperature.

  • ¼ lb patties: 7–8 minutes total (about 4 minutes per side)
  • ⅓ lb patties: 8–10 minutes total (about 4–5 minutes per side)
  • ½ lb patties: 10–12 minutes total (about 5–6 minutes per side)

Rest 5 minutes before serving. Works on a gas grill or any grill.

grilled burger on a bun.
[feast_advanced_jump_to]

quote mark
Featured Comment by Jane:
⭐⭐⭐⭐⭐
"I am so excited!! This really worked for me. I am new to gas grills and have been struggling with it. Now I can make an awesome burger..."

🧾 TL;DR — Recipe Summary

What it is: Grilled hamburgers cooked over high heat on any grill with simple seasoning and no mixing—just form, grill, and finish to 160°F.

Why you’ll love it: Juicy burgers every time with clear temps and timing—no guesswork and beginner-friendly.

How to make it: Preheat grill to 500–600°F, grill 7–12 minutes (about 4–6 minutes per side), and cook to 160°F internal temperature.

🐄 Ingredients

Balls of burger with seasoning and cheese.

Choose 80/20 ground beef or ground chuck.

80% lean and 20% fat gives the best balance of juicy and flavorful. You can use 85/15, but leaner meat tends to dry out. Fresh beef is best for texture and moisture.

Season the patties simply

Salt and pepper are all you need, or use your favorite blend. I use my All Purpose Seasoning (7:2:1 and 7:2:2—salt, pepper, garlic). Montreal steak seasoning is another solid option.

Serve with (optional)

  • Buns – Toasted if you like, but use something sturdy and soft.
  • Cheese – Add during the last minute of grilling. Cheddar, Swiss, Colby Jack, or even Velveeta all work.
  • Toppings – Go classic with lettuce, tomato, onion, and pickles, or get creative.

✅ Using lean beef, chicken, turkey, or meat alternatives? See the Burger Alternatives section below for tips.

👨‍🍳 Quick Overview: How to Cook Hamburgers on the Grill

1. Preheat the grill

Clean, oil, and turn your grill to high preheating fully—aim for about 500–600°F or a bit higher.

Cleaning grill grates.

2. Form and season the patties

Use 80/20 ground beef and form patties ⅓ to ½ pound, about ½ inch wider than the bun. Dimple the center and season both sides.

seasoning burgers.

✅Pro Tip: The center dimple helps the patties cook evenly without puffing up.

3. Grill over direct heat

Grill about 4–6 minutes per side, flipping once, until the internal temperature reaches 160°F.

flip burgers after 5 minutes.

✅Pro Tip: The USDA recommends 160°F as the safe final temperature for ground beef.

4. Rest and serve

Let the burgers rest 5 minutes before serving. Toast the buns if you like, then add your favorite toppings.

two hamburgers on buns.

👇For full step-by-step instructions, scroll to the printable recipe card or keep reading for grilling tips and serving ideas.

⏲️ How Long to Grill Hamburgers (Time Chart & Temps)

Most ¼–½ lb burger patties cook in 7–12 minutes total over high heat, flipping once halfway through. Exact time depends on thickness and grill temperature.


Approximate Time Chart:

  • ¼ lb patties: 7–8 minutes total (about 4 minutes per side)
  • ⅓ lb patties: 8–10 minutes total (about 4–5 minutes per side)
  • ½ lb patties: 10–12 minutes total (about 5–6 minutes per side)

Times are for dimpled burgers about ½ to 1 inch thick, cooked over high heat (about 500–600°F) and flipped once. Always cook to 160°F internal temperature — use an instant-read thermometer.

Thinner patties cook faster but can dry out. Thicker burgers (over 1 inch) will take longer and may need lower heat or a two-zone setup to avoid burning the outside before the center is done.

🥣 Burger Patty Tips

  • Size matters: Form patties about ½ inch wider than the bun — usually 4 inches across and ½ to 1 inch thick. Use ⅓–½ lb of ground beef; ¼ lb works, but thinner burgers are easier to overcook.
  • Keep it cold: Unlike steak, patties should go straight from the fridge to the grill, with only a quick pause to shape and season. Cold meat holds its shape and cooks more evenly.
  • Handle gently: Work the meat as little as possible so the burgers stay tender.

✅ Pro Tip: Dimple the center: Press an indentation about 1 inch wide and roughly ⅓ the thickness of the patty. This prevents puffing so burgers cook evenly without drying out.

🔥 Grilling Tips

  • Preheat fully to high heat (about 500–600°F). Aim for at least 500°F for a proper sear.
  • Lid closed: You can grill with the lid open for thin patties, but keeping it closed maintains even heat — especially on gas grills.
  • Cook to 160°F internal temperature, then let rest 5 minutes.

✅ Top Pro Tips:

  • Flip once — don’t mess with them.
  • Don’t press or poke. It just squeezes out juices and invites flare-ups.
  • And yes, that means don’t play with your food.

🍽️ Serving Hamburgers

These are the classic diner-style grilled burgers—juicy inside, lightly charred outside, and ready for any topping combo you like.

  • Buns matter: Skip the flimsy ones. Toast lightly on the grill if you like — brush with butter or oil first.
  • Cheese timing: Add during the last minute on the grill or as soon as the burgers come off — it’ll melt from the residual heat.
  • Classic toppings: Mustard, ketchup, mayo, lettuce, tomato, onion, pickles.
  • Optional upgrades: Bacon or BBQ sauce if you want to mix it up.

Looking for the right sides? Try Microwave Corn on the Cob, Crispy Baked French Fries. Dessert? Strawberry Jello Pie or Brown Sugar Cinnamon Glazed Grilled Pineapple.

🧆 Burger Alternatives: Lean Meats and More

Want to use leaner meat or something different? You can use lean beef, chicken, turkey, or meat alternatives.

Remember, these alternatives cook a bit differently and can dry out faster, so adjust for texture and moisture. Cook poultry to 165°F and beef to 160°F for safety.

Check out these recipes for tips on getting great results:

  • Low-Fat Burgers – Lean beef done right
  • Grilled Ground Chicken Burgers – Flavorful and juicy
  • Juicy Lucy Burger – Stuffed with cheese for extra moisture
  • Meatloaf Burgers – Moist and tender with a flavor boost
  • Smoked Hamburgers – A slow-smoke twist if you're ready to level up
  • Grilled Portobello Mushrooms – A satisfying vegetarian option

❓ FAQs

How do I know when hamburgers are done?

Check the center with an instant-read thermometer and cook to 160°F internal temperature. Time and color aren’t reliable. Below 160°F is unsafe for ground beef, and higher temperatures will dry out the burgers.

What’s the best beef for burgers on the grill?

Ground chuck or 80/20 beef (80% lean, 20% fat) is ideal. It gives the best balance of flavor and juiciness. Leaner blends (90/10) can dry out.

Should I grill hamburgers with the lid open or closed?

Closed is best. It keeps the heat steady and speeds up cooking, especially on gas grills.

Can I make hamburger patties ahead of time?

Yes. Shape and season up to a day in advance. Keep them cold in the fridge until grilling.

📖The Recipe Card

burger on a bun
Print Recipe Add to Collection Go to Collections
5 from 5 votes

How to Grill Hamburgers (Juicy, Easy Method)

Grill juicy hamburgers with a simple method, a hot grill, and a 160°F finish. Reliable cook times and easy steps for perfect burgers every time.
Prep Time10 minutes mins
Cook Time9 minutes mins
Total Time19 minutes mins
Course: Grill, Main Course
Cuisine: American
Keyword: Grilled Burgers, grilled hamburgers, How to grill hamburgers
Servings: 3 burgers
Calories: 384kcal
Author: Dan Mikesell AKA DrDan

Ingredients

  • 1 pound 80/20 ground beef ⅓ pound patties suggested
  • Salt and pepper to taste or other seasoning
  • buns and fixings
US Customary - Convert to Metric

Instructions

Preheat the grill

  • Clean and oil grill grates. Preheat the grill on high (over 500°F), and let it fully preheat before grilling.
    clean and oil grill crates

Form and season the patties

  • Start with 80/20 ground beef. Divide into ⅓ to ½ pound balls—about tennis ball size—and shape into patties roughly 4 inches wide and ½ to ¾ inches thick.
    forming hamburger into patties.
  • Sprinkle both sides with salt and pepper (or your preferred seasoning)—I use my All Purpose Seasoning 7:2:2 (salt, pepper, garlic). Another seasoning is fine.
    seasoning burgers.
  • ✅ Press an indentation of 1-inch diameter and ⅓ the thickness in the center of one side of the patty. It prevents puffing and helps the burger cook evenly.
    putting dimple into burgers to prevent puffing.

Grill over direct heat

  • Grill with the lid closed (preferred) or open if you prefer. Flip after 5 minutes.
    raw burger patties on the grill.
  • Continue grilling 3–4 more minutes, until the internal temperature reaches 160°F. You're cooking to temperature, not time.
    flip burgers after 5 minutes.

Rest and serve

  • Remove from heat and let rest for 5 minutes before serving.
    two hamburgers on buns.

Video

Notes

Pro Tips

  1.  Use 80/20 ground beef for best results—juicy, flavorful, and grill-friendly.
  2. Always cook to a final temp of 160°F using an instant-read thermometer.
  3. Avoid pressing or poking during cooking—it drains juices and causes flare-ups.
  4. Resting helps the juices reabsorb, keeping your burger tender and moist.

Nutrition

Calories: 384kcal | Protein: 26g | Fat: 30.2g | Saturated Fat: 11.6g | Polyunsaturated Fat: 0.8g | Monounsaturated Fat: 13.2g | Trans Fat: 1.9g | Cholesterol: 107.4mg | Sodium: 101.3mg | Potassium: 408.2mg | Calcium: 27.2mg | Iron: 2.9mg
Molly dog .on the deck.

Editor's Note: Originally published August 17, 2013,  updated with expanded options, refreshed photos, and a table of contents to help navigation.

Easy Broccoli Cheese Soup Recipe

broccoli cheese soup in blue bowl

This easy broccoli cheese soup recipe is one of the best for a creamy, comforting meal. Make it from scratch in one pot and one hour with tender broccoli and your choice of cheese.

🤔 Quick Answer: What Cheese to Use in Broccoli Cheese Soup

  • Sharp cheddar to make classic broccoli cheddar soup.
  • Add Velveeta for an extra creamy, smooth soup.
  • Make it your way with Colby, Monterey Jack, or another cheese you enjoy.
broccoli cheese soup in blue bowl.
[feast_advanced_jump_to]

quote mark
Featured Comment by Linda:
⭐⭐⭐⭐⭐
"This is the perfect broccoli cheese soup!!! Easy, quick and delicious. Not too heavy and thick like so many recipes. I added cayenne at the end because we love it."

🫕 TL;DR — Recipe Summary

What: Easy, creamy broccoli cheese soup made from scratch in one pot and one hour.

Why: Simple ingredients, fresh or frozen broccoli, and flexible cheese choices make it easy to adjust to your taste.

How: Make a quick roux with onion and butter, add broth and milk, then simmer the broccoli until tender. Stir in your choice of cheese until creamy and smooth.

🥦 Ingredients

Labeled ingredients for broccoli cheese soup.
  • Broccoli — fresh, frozen, or even leftover broccoli; cut any large pieces down to spoon size. No need to thaw frozen broccoli first.
  • Cheese — sharp cheddar gives that classic broccoli cheddar flavor. For extra creaminess, use some Velveeta, or try Colby, Monterey Jack, or a cheddar blend.
  • Aromatics — onion and garlic.
  • Butter, flour, milk, and broth — build the creamy body of the soup.
  • Salt and pepper.

✅ Pro Tip: Block cheese melts the smoothest, but pre-shredded will still work if that’s what you have.

👨‍🍳 Quick Overview: How to Make Broccoli Cheese Soup

1. Chop broccoli and onion.

chopped broccoli on black board.

✅ Pro Tip: Cut broccoli florets into spoon-size pieces before cooking so they’re easy to eat and cook more evenly.

2. Cook onion in butter until softened; add minced garlic and cook for 1 more minute.

adding chopped onion to melted butter.

3. Make the roux. Sprinkle in flour, stir, and cook until lightly browned — about 3 minutes.

sprinkling flour to make a roux.

4. Add broth, salt, and pepper. Bring to a low boil. Slowly stir in milk and let it thicken.

adding milk to the soup pot.

5. Add broccoli. Cover and simmer until tender — 20 to 25 minutes.

broccoli added to the soup pot.

6. Blend if you like. Use an immersion blender or potato masher for creamier texture.

using a potato masher on the soup.

7. Reduce the heat to low and let the simmer stop. Add the cheese. Cheddar is classic, but I like mixing cheddar with Velveeta.

adding cheese to soup.

8. Cook on low for about 5 minutes, stirring until the cheese is melted and the soup is smooth. Do not boil. Serve warm.

broccoli cheese soup in a ladle.

👇 Scroll down for the printable recipe card or keep reading for cheese options, variations, and storage tips.

🥦 Broccoli Options

Fresh broccoli gives the best texture and flavor, but frozen works just as well—no need to thaw first. Cut large pieces into spoon-size florets so they cook evenly and are easy to eat.

Leftover cooked broccoli also works. Add it after the soup has thickened, then go straight to the cheese step. It only needs to heat through.

🧀 Cheese Choices

Sharp cheddar gives the classic broccoli cheddar soup flavor—it’s rich, tangy, and melts beautifully. For a creamier texture, mix in a bit of Velveeta or use a blend like Colby or Monterey Jack.

Shred block cheese yourself when possible—it melts more smoothly than pre-shredded cheese, which is coated to prevent clumping.

Reduce the heat to low and let the simmer stop before adding the cheese. Stir gently until melted and smooth, and do not let the soup boil.

If the cheese clumps or separates, it’s usually from overheating or using pre-shredded cheese. Don’t worry—it’ll still taste great, just a little less smooth.

🥛 Dairy and Seasoning Choices

Whole milk gives the creamiest texture, but 2% or other lower-fat milk works well. You don’t need heavy cream or half-and-half, although either can be used for a richer soup.

Salt and pepper are all you need for seasoning, but a pinch of nutmeg or paprika adds extra flavor.


🍲 Variations of Broccoli Cheese Soup

🥕 Panera-Style Broccoli Cheddar

For a flavor like Panera’s version, add a cup of shredded or matchstick carrots and a rib of thinly sliced celery along with the broccoli. Use only sharp cheddar for that restaurant-style balance of creamy and cheesy.

🥓 Bacon or Ham

Chop 3 strips of bacon into ½-inch pieces, fry until crisp, drain, and stir in with the cheese. Diced leftover ham works too.

🌼 Cauliflower Cheese Soup

Swap the broccoli for the same amount of cauliflower and cook until tender.

🥡 Storing & Reheating

Refrigerate leftovers in an airtight container for 3 to 4 days. To freeze, cool completely, then store in freezer-safe containers for up to 3 months. Thaw overnight in the refrigerator before reheating.

This soup reheats best over medium-low heat on the stovetop or gently in the microwave. Avoid boiling once the cheese is added — high heat can make it separate.

❓ FAQs

Can I use frozen broccoli?

Yes. There’s no need to thaw it first. Cut any large pieces into spoon-size florets before adding them to the soup so they cook evenly.

What pot size do I need?

A single recipe makes about 7–8 cups of soup, and you’ll need some working room for the roux and mixing.

For a single recipe, use a 4-quart or larger soup pot or Dutch oven. For a double batch, use at least a 6½-quart Dutch oven — perfect if you want some for today, tomorrow, and the freezer.

Can I make broccoli cheese soup gluten-free?

Yes. Skip the flour and thicken the soup with a cornstarch slurry instead. Stir it in after the broccoli is tender and cook until the soup thickens.

🍲 Other Soup Recipes You’ll Love

If you’re in the mood for more comfort soups, try my Chicken Noodle Soup, Vegetable Beef Soup, or Tomato Basil Soup. You’ll also find this recipe in Our Best Soups.

Broccoli cheese soup in a spoon.

Crock Pot Broccoli Cheddar Soup

Rich and creamy crock pot broccoli cheese soup is super easy to make with frozen or fresh broccoli and only a few minutes of prep before going in your slow cooker—the perfect comfort food for a cold winter day.

📖The Recipe Card

broccoli cheese soup in blue bowl
Print Recipe Add to Collection Go to Collections
4.88 from 16 votes

Easy Broccoli Cheese Soup Recipe

Easy broccoli cheese soup made from scratch in one pot and one hour. Creamy and comforting, with tender broccoli and your choice of cheese.
Prep Time15 minutes mins
Cook Time40 minutes mins
Total Time55 minutes mins
Course: Soup
Cuisine: American
Keyword: broccoli and cheese soup easy, Broccoli Cheese Soup, easy broccoli cheddar soup
Servings: 6
Calories: 334kcal
Author: Dan Mikesell AKA DrDan

Ingredients

  • 1 head broccoli large head or 12 oz bag of frozen broccoli or 12 oz bag of frozen broccoli
  • 2 cups shredded cheese of choice (4 oz ≈ , 1 cup of block cheese). Sharp cheddar with Velveeta mix preferred.
  • ¼ cup butter
  • 1 onion small
  • 1 clove garlic
  • ¼ cup flour
  • 2 cups chicken or vegetable broth
  • ½ teaspoon salt
  • ½ teaspoon pepper
  • 2 cups milk

For Panera copycat soup (add with broccoli)

  • 1 cup carrot matchstick, shredded, or diced
  • 1 rib celery
US Customary - Convert to Metric

Instructions

  • Rinse and trim one large head of fresh broccoli, or use 12 oz of frozen broccoli. Trim any larger florets into spoon-size chunks.
    chopped broccoli on black board
  • Mince a small or ½ of a medium onion. Melt 4 tablespoons of butter over medium-high heat. Add onion and saute until translucent, about 3 minutes. Add 1 clove of minced garlic and cook one more minute.
    adding chopped onion to melted butter
  • Reduce the heat to medium. Stir in flour and cook until lightly browned — about 3 minutes.
    sprinkling flour to make a roux
  • Slowly add 2 cups of chicken or vegetable broth, stirring to incorporate the flour mixture. Add ½ teaspoon of salt and ½ teaspoon of black pepper. Let thicken slightly, then slowly add 2 cups of milk. Bring to a low boil; simmer until thickened.
    adding milk to the soup pot
  • Add broccoli, cover, and turn down the heat to simmer. Simmer until broccoli is tender—about 20 to 25 minutes.
    broccoli added to the soup pot
  • Optional: Puree some or all of the soup with an immersion blender or potato masher.
    using a potato masher on the soup
  • Reduce heat to low and let the simmer stop. Add 2 cups of sharp cheddar or a mixture of your choice. Stir until melted and incorporated—about 5 minutes. Do not boil.
    adding cheese to soup
  • Serve hot.
    broccoli cheese soup in a ladle.

Video

Notes

Pro Tips:

  1. Scaling: The recipe, as written, needs a 4-quart or larger pot. For a double batch (my normal), use a 6-quart or larger pot, such as a full-size Dutch oven.
  2. For the best melting, use shredded block cheese. Sharp cheddar is classic, but choose the cheeses you like. I prefer a mix of half Velveeta and half shredded sharp cheddar.
  3. Frozen broccoli works well and eliminates about 10 minutes of prep time compared with fresh broccoli. No need to thaw first.
  4. For the Panera copycat, add 1 cup of matchstick carrots and 1 rib of celery sliced thin with the broccoli.
  5. Leftovers: Refrigerate 3–4 days or freeze up to 3 months.

Nutrition

Calories: 334kcal | Carbohydrates: 20.8g | Protein: 17.2g | Fat: 21.6g | Saturated Fat: 12.4g | Polyunsaturated Fat: 1g | Monounsaturated Fat: 5.1g | Trans Fat: 0.3g | Cholesterol: 60.6mg | Sodium: 613.3mg | Potassium: 677.8mg | Fiber: 3.8g | Sugar: 8g | Vitamin A: 5008.2IU | Vitamin C: 93.4mg | Calcium: 444.6mg | Iron: 1.4mg

Based on combining Pioneer Woman with an Allrecipes recipe.

Editor's note: This recipe was originally published on December 19, 2015. It has become one of my go-to recipes, and it is now updated with expanded options, refreshed photos, and a table of contents to help navigate.

Lilly in Flowers 2022

How to Cook Filet Mignon in the Oven (Pan-Seared)

filtet mignon with potatoes on a white plate

Learn how easy it is to cook filet mignon in the oven at home for juicy, tender results with a delicious crust.

It makes a melt-in-your-mouth centerpiece for special meals at home or holiday celebrations.

⏱️ How Long to Cook Filet Mignon in the Oven

For a 1-inch filet mignon baked at 400°F:

  • Sear: 2–3 minutes per side
  • Medium-rare (130°–135°F): 5–7 minutes in the oven
  • Medium (140°–150°F): 8–10 minutes in the oven

Thicker filets or other doneness levels will take longer.

filet with potatoes on a white plate.

quote mark
Featured Comment by Gina:
⭐⭐⭐⭐⭐
"Perfect instructions, perfectly done, couldn’t be easier! The timing chart was very helpful. Thank’s doc."

[feast_advanced_jump_to]

🤔 TL;DR — Recipe Summary

What: Tender filet mignon with a flavorful seared crust for special meals.

Why: Fast, reliable, and easy to cook to your preferred doneness with a thermometer.

How: Rest at room temperature, season, pan-sear for 2–3 minutes per side, then finish baking in the oven to your target temperature.

🐄 Ingredients — Filet and Seasoning Suggestions

Filet mignon with seasoning–labeled.
  • Filet mignon: Use 6- to 8-ounce filets about 1 to 1½ inches thick. Prime or well-marbled Choice both work well.
  • Butter or oil: Butter adds flavor; use a high-heat oil such as avocado or canola if you prefer.
  • Seasoning: Kosher salt and black pepper are all you need, or use your favorite steak seasoning.

👨‍🍳 Quick Overview: How to Cook Filet Mignon in Oven

1. If you have time, let the filet mignon rest at room temperature for 30 to 60 minutes. Pat dry and season all sides.

seasoning filets on a wooden board.

2. Sear the filets in a hot skillet for 2–3 minutes per side in butter or oil until a crust forms.

raw filets in a skillet with melted butter.

✅ Pro Tip: Searing adds the best flavor and crust. You can skip it, but the oven time will be longer.

3. Transfer the skillet to a preheated oven and roast to 3–4°F below your target temperature.

Pan-seared filet mignon in a cast-iron skillet.

4. Move the filets to a plate, tent loosely with foil, and rest for 5–10 minutes before serving.

cut medium rare filet mignon.

👇For step-by-step photos and full instructions, scroll to the printable recipe card—or keep reading for tips and serving ideas.

⏰ How Long to Cook Filet Mignon in the Oven

After a 2–3 minute sear per side, finish a 1-inch filet mignon in a 400°F oven:

  • Rare (125°–130°F): 4–5 minutes
  • Medium-rare (130°–135°F): 5–7 minutes
  • Medium (140°–150°F): 8–10 minutes
  • Medium-well to well done (150°F+): 12 minutes or longer

Remove the filet about 3–4°F below your target temperature and rest for 5–10 minutes. Thicker or colder filets will take longer, so use an instant-read thermometer and check early.

Oven temperature is flexible: 400°F is my standard, but 375° to 425°F will also work; lower temperatures take longer and higher temperatures cook faster.

Rare steak warning: Thin or room-temperature filets can reach rare very quickly and may need only 1–2 minutes in the oven after searing. Check the temperature before the oven step and again very early.

Without searing: You can bake filet mignon entirely in the oven, but it will take longer and won’t develop the same browned crust.

👍 Tips for Success

  • Use a thermometer and check early: Filet mignon cooks quickly, and you can always cook it longer—but you can’t uncook it.
  • Use cast iron for the best sear: Its even heat gives you excellent browning, but any oven-safe skillet rated for at least 400°F will work.
  • Time your salt: Season immediately before cooking or at least an hour ahead.

🍽️ What to Serve with Filet Mignon

Serve filet mignon with simple sides that don’t compete with the steak. Good choices include roasted potatoes, asparagus, green beans, a fresh salad, or crusty bread.

For extra richness, top the hot filet with a pat of butter or compound butter just before serving.

❄️ Storage and Reheating

Store cooked filet mignon in an airtight container in the refrigerator for 3 to 4 days.

Reheat gently in a skillet over low heat to avoid overcooking, or slice it cold for sandwiches or steak salads.

🐄 Other Steak Recipes

  • Grilled Filet Mignon
  • Grilled New York Strip Steaks
  • Seared and Baked Strip Steak

❓ FAQs

Can I cook filet mignon in the oven without searing?

Yes. It will take longer and won’t develop the same browned crust, but you can bake it entirely in the oven. Cook to your preferred internal temperature.

What is the best oven temperature for filet mignon?

I use 400°F. You can also use 375° to 425°F—lower temperatures take longer, while higher temperatures cook faster.

Do I need a meat thermometer?

Yes, for reliable results. Filet mignon cooks quickly, and timing alone is not accurate enough to judge doneness.

Why rest filet mignon after cooking?

Rest it for about 5–10 minutes so the temperature finishes rising and the juices redistribute before serving.

📖The Recipe Card

seared filet on a white plate with potatoes
Print Recipe Add to Collection Go to Collections
4.97 from 27 votes

Filet Mignon in the Oven (Pan-Seared and Oven-Baked Method)

Juicy filet mignon cooked in the oven with a pan-sear for a perfect crust and tender center. Ready in about 20 minutes with simple steps.
Prep Time2 minutes mins
Cook Time16 minutes mins
Total Time18 minutes mins
Course: Main Course
Cuisine: American
Keyword: best way to cook filet mignon, how long to cook filet mignon in oven, how to cook filet mignon, how to cook filet mignon in oven
Servings: 2 servings
Calories: 347kcal
Author: Dan Mikesell AKA DrDan

Ingredients

  • 2 filet mignon about 1-1½ inch thick and about 6-8 oz
  • 1 tablespoon butter or oil
  • salt and pepper or other steak seasoning
US Customary - Convert to Metric

Instructions

1. Preheat, rest, and season

  • Preheat oven to 400°F. Trim filets if needed. Let them rest at room temperature for 30–60 minutes.
    Filet mignon with seasonings—labeled.
  • Pat dry well with paper towels. Season all sides to taste with the seasoning of your choice. Just kosher salt and black pepper or All-Purpose Seasoning, which adds garlic powder, is enough.
    seasoning filets on a wooden board.

2. Searing the steaks

  • Heat the butter or oil in a cast-iron or oven-safe skillet over medium-high heat. Sear the filets for 2–3 minutes per side until well browned.
    raw filets in a skillet

3. Finish in the oven

  • Transfer skillet to the oven. Roast until the internal temperature is 3°–4°F below your target. Medium-rare takes about 5–7 minutes in the oven to reach 130°–135°F.
    Pan-seared filet mignon in a cast-iron skillet.

4. Rest and serve

  • Remove from the pan, tent loosely with foil, and rest for 5–10 minutes before serving.
    cut medium rare filet mignon.

Video

Notes

Pro Tips:

  • Prime beef is excellent, but well-marbled Choice works well.
  • Season immediately before cooking or at least an hour ahead.
  • Always use an instant-read thermometer—don’t cook by time alone.
  • For rare or thinner filets, check the temperature before and very early during oven roasting.
  • Remove the filets 3°–4°F below your target temperature; they will continue cooking while resting.

Nutrition

Calories: 347kcal | Protein: 22g | Fat: 28g | Saturated Fat: 9g | Polyunsaturated Fat: 2g | Monounsaturated Fat: 14g | Cholesterol: 76mg | Sodium: 616mg | Potassium: 346mg | Calcium: 40mg | Iron: 1.4mg

Editor's Note: Originally published March 10, 2012; updated with expanded options, refreshed photos, and edits to improve navigation.

dogs looking at the stuffed cat.

Honey Garlic Pork Tenderloin (Grilled or Oven-Baked)

grilled pork tenderloin cut on white plate

Honey Garlic Pork Tenderloin is an easy, flavor-packed recipe brushed with a quick 3-ingredient honey glaze. It cooks in about 25 minutes—on the grill or in the oven.

Juicy, tender, and loaded with sweet-savory flavor from honey, soy sauce, and garlic powder. No fancy prep—just brush and cook, or let it marinate for deeper flavor.

grilled pork tenderloin cut on white plate.
[feast_advanced_jump_to]

quote mark
Featured Comment From Eric:
⭐⭐⭐⭐⭐
"I’ve never made a pork tenderloin before this, and this has literally become one of my favorite things to make. I’ve made it 4 times now in the last 2 months. It’s so good. I usually make more of the sauce."

📝 TL;DR — Recipe Summary

✔️ What: Honey garlic pork tenderloin with a simple 3-ingredient honey glaze. Grill it or bake it in the oven.

✔️ Why: Juicy, tender pork with sweet-savory flavor in about 30 minutes. Great for busy weeknights or weekend grilling.

✔️ How: Mix the glaze, brush it on, and cook to 145°F. For deeper flavor, let the pork marinate for 30 to 120 minutes before cooking.

🐖 Ingredients

pork tenderlioin with garlic and honey.
  • Pork tenderloin – Usually 1 to 1½ pounds. Remove silverskin and any membrane before cooking.
  • Honey – For sweetness and caramelization in the glaze.
  • Soy sauce – Adds salt and umami depth. Use low-sodium if brining.
  • Garlic powder – Granulated preferred. Adds flavor without overpowering.

💡 Optional: If you want to brine, use 2 tablespoons of salt in 2 cups of water. Refrigerate for 1–2 hours, then rinse and pat dry before cooking.

👨‍🍳 Quick Overview: Cooking Honey Garlic Pork Tenderloin

1. Preheat and mix glaze

Preheat the grill to a surface temperature of about 450°F, or the oven to 400°F (375°F convection).

Mix the glaze: honey, soy sauce, and garlic powder.

mixing honey garlic glaze,

2. Trim and glaze

Trim the pork tenderloin, removing any silverskin and membrane.

Brush all sides with the glaze.

brushing glaze on pork tenderloin.

✅ Pro Tip: For deeper flavor, wrap the glazed tenderloin in plastic and refrigerate for 30–120 minutes before cooking.

3. Grill or bake

Place on the grill (lid closed) or in the preheated oven.

Oven: Brush with glaze three times during baking—about every 8 minutes.

Grill: Rotate the tenderloin every 5 minutes, brushing with more glaze during the first three turns.

placing pork tenderloin on the grill.

Cook until the internal temperature is 145° to 150°F. This usually takes about 22–27 minutes, but start checking early. Let the pork rest for 5 minutes before slicing.

Honey garlic pork tenderloin on a platter.

👇 Scroll down for the printable recipe card and complete step-by-step photo instructions—or keep reading for tips, veggie options, and serving ideas.

🌡️ Pork Tenderloin Temperature and Doneness Guide

Cook pork tenderloin to an internal temperature of 145° to 150°F for the best balance of safety and juiciness. That usually takes about 22–27 minutes whether you grill at 450°F or bake in a 375° convection (400° conventional) oven.

Use these internal temperature targets to guide your preferred doneness:

  • 145°–150°F (Medium-Rare) – Juicy and tender (recommended)
  • 150°–155°F (Medium) – Slightly firmer but still moist
  • 155°–160°F (Medium-Well) – Starting to dry
  • 160°F+ (Well Done) – Not recommended due to dryness and texture

⏲️ Important: Always cook to the final internal temperature—not by time. Variables like grill temp, oven calibration, and tenderloin thickness will affect how long it takes.

🍯 Honey Garlic Glaze Options

This simple honey garlic glaze is delicious as written, but you can customize it to suit your taste or use it as a quick marinade before grilling or baking.

  • Honey-Dijon – Add a teaspoon of Dijon mustard for a tangy twist.
  • Spiced glaze – Try a pinch of cloves, nutmeg, or allspice for a honey-baked ham vibe.
  • Honey-cinnamon – A dash of cinnamon gives a warm, sweet finish.
  • Fresh garlic – Use sautéed minced garlic instead of garlic powder (see FAQ below).

Quick marinade option – For deeper flavor, brush on the glaze, cover, and refrigerate for 30–120 minutes before cooking. This also works great on chicken or other pork cuts like chops.

🍽️ Serving Suggestions

The sweet-savory glaze pairs well with starches and roasted vegetables.

Great side options:

  • Starches – Oven-baked rice, French bread, or baked French fries.
  • Vegetables – Grilled corn on the cob, roasted red potatoes, or grilled mixed vegetables.
  • Oven-friendly – Baked cauliflower or Parmesan-roasted asparagus are great if you’re not grilling.

Finish with something cool and fruity—like Grilled Pineapple or a slice of Strawberry Jello Pie.

🐷 More Pork Tenderloin Recipes to Try

If you like this one, here are a few more to keep in rotation:

  • How to Grill a Pork Tenderloin on a Gas Grill — A full step-by-step guide for juicy results every time.
  • Memphis Pork Tenderloin — A personal favorite with bold, smoky flavor.
  • Chipotle Lime Pork Tenderloin — Inspired by Alton Brown—zesty, spicy, and different.
  • Balsamic Pork Tenderloin — A savory glaze with just the right tang.

🧊 Storing and Reheating Leftovers

Store leftovers in an airtight container in the refrigerator for up to 3 days, or freeze for up to 3 months.

Using leftovers: If frozen, thaw overnight in the fridge. Reheat in the oven or microwave, or slice cold and toss into a salad.

❓FAQs

Can I use this glaze as a marinade?

Yes—but it’s not a traditional long soak. For deeper flavor, brush on the glaze, cover with plastic wrap, and refrigerate for 30–120 minutes before cooking. You can also use the same glaze on chicken or pork chops.

Should I brine the pork tenderloin?

Usually not necessary — tenderloin is already tender. If you want to, use 2 tablespoons of salt in 2 cups of water for 1–2 hours. Rinse and pat dry before adding the glaze and cooking, and use low-sodium soy sauce in the glaze.

Can I use fresh garlic instead of garlic powder?

Yes. Sauté minced garlic briefly in oil or butter before adding to the glaze to avoid a raw garlic taste. Garlic powder is quicker and works fine.

Can I use pork loin instead of pork tenderloin?

No. Pork loin is much larger than pork tenderloin and cooks very differently. This recipe is written for a 1- to 1½-pound pork tenderloin.

What’s the best grill setup for this recipe?

Use a grill surface temperature of about 450°F (medium-high). That's hot enough to caramelize the honey glaze without burning it. If using charcoal, set up a cooler zone for indirect heat. Always cook to an internal temperature, not just by time.

For help with grill temperature, see Guide to Grill Temperature on a Gas Grill.

📖The Recipe Card

grilled pork tenderloin cut on white plate
Print Recipe Add to Collection Go to Collections
5 from 1 vote

Honey Garlic Pork Tenderloin (Grill or Oven Method)

Juicy pork tenderloin brushed with a sweet-savory 3-ingredient honey glaze. Ready in about 30 minutes on the grill or in the oven.
Prep Time10 minutes mins
Cook Time25 minutes mins
Total Time35 minutes mins
Course: Main Course
Cuisine: American
Keyword: honey garlic pork tenderloin, Honey Glazed Pork Tenderloin, honey glazed pork tenderloin grilled
Servings: 4
Calories: 236kcal
Author: Dan Mikesell AKA DrDan

Ingredients

  • 1 pork tenderloin about 1½ pounds

Honey Garlic Glaze

  • 2 tablespoons honey
  • 1 tablespoon soy sauce
  • ½ teaspoon garlic powder Granulated garlic powder preferred
US Customary - Convert to Metric

Instructions

Preheat and mix glaze

  • Preheat the grill to a surface temperature of about 450°F, or the oven to 375°F convection (400°F conventional).
    pork tenderlioin with garlic and honey
  • Mix 2 tablespoons of honey, 1 tablespoon of soy sauce, and ½ teaspoon of garlic powder.
    mixing honey garlic glaze

Trim and glaze

  • Trim the pork tenderloin, removing any silverskin and membrane.
    trimmed pork tenderloin on white board
  • Brush all sides with the glaze.
    brushing glaze on pork tenderloin

Grill or bake

  • Place the tenderloin on the grill (lid closed) or in a pan in the preheated oven.
    Oven: Brush with glaze three times during baking—about every 7–8 minutes.
    Grill: Flip (rotate) every 5 minutes, brushing with more glaze during the first three turns.
    placing pork tenderloin on the grill
  • Cook until the internal temperature is 145°F to 150°F, about 22–27 minutes.
    Honey garlic pork tenderloin on a platter.
  • Let rest for 5 minutes before slicing.

Notes

Pro Tips

  • Always cook to the final internal temperature—not by time. Tenderloin thickness, grill temp, and starting meat temp will all affect timing.
  • Understand grill surface temperature. Too hot, and the glaze will burn before the pork cooks through. A grill surface thermometer is highly recommended.
  • Pork tenderloin is almost triangular—so a “flip” is a one-third rotation, not 180°.
  • If the oven-baked tenderloin looks pale, place it under the broiler for a few minutes for better color.
  • You can brine if you’d like: use 2 tablespoons of salt in 2 cups of water and refrigerate for 1–2 hours. Rinse well and pat dry. Use low-sodium soy sauce in the glaze if you brine.
  • Optional marinade: For deeper flavor, brush on the glaze, cover, and refrigerate 30–120 minutes before cooking. Works on pork chops or chicken too.

Nutrition

Calories: 236kcal | Carbohydrates: 9g | Protein: 36g | Fat: 6g | Saturated Fat: 2g | Polyunsaturated Fat: 1g | Monounsaturated Fat: 3g | Cholesterol: 111mg | Sodium: 227mg | Potassium: 622mg | Sugar: 8g | Vitamin A: 20IU | Vitamin C: 2.5mg | Calcium: 10mg | Iron: 2.2mg

Editor's note: Originally published June 20, 2015. Updated with expanded options, refreshed photos, and a table of contents to help navigation.

Molly and Lilly with pink puppy.

How to Grill Pork Tenderloin on a Gas Grill

grilled tenderloin cut to show done interior

Grilling pork tenderloin on a gas grill takes about 25 minutes with direct heat—no complicated two-zone grilling. By accounting for its unique triangular shape with one-third turns, you can easily grill tender, juicy pork every time.

⏱️ Quick Answer: How Long to Grill Pork Tenderloin on a Gas Grill

Grilling a 1½ lbs pork tenderloin on a gas grill takes 22–27 minutes to reach 145°F (medium-rare) using an easy direct-heat method.

grilled tenderloin cut to show done interior.
[feast_advanced_jump_to]

quote mark
Featured Comment by Mark:
⭐⭐⭐⭐⭐
"Great recipe, easy to follow directions. Taste fantastic"

📋 TL;DR— Recipe Summary

What it is: An easy direct-heat method for grilling pork tenderloin on a gas grill.

Why you'll love it: No two-zone grilling needed. The simple one-third turns help grill all three sides evenly.

How to make it: Season, grill at 450°F, turn one-third every 5 minutes, and grill to 145°F.

🐖 Ingredients

Pork tenderloin with seasoning—labeled.

Pork tenderloin – About 1½ pounds, trimmed of fat and silver skin. Do not use a pork loin.

Seasoning – Kosher salt and black pepper, or your favorite pork rub or spice mix.

👨‍🍳 Quick Overview: How to Grill Pork Tenderloin on a Gas Grill

1. Trim off the silver skin and excess fat. Brine if desired, then pat dry and season.

trimmed pork tenderloin on a red board.

2. Place over direct heat on a preheated grill at 450°–500°F. Rotate one-third of a turn every 5 minutes. Grill to an internal temperature of 145°F.

grilled pork tenderloin still on the grill.

3. Tent with foil and rest for 5–10 minutes so the juices reabsorb. Then slice across the grain and serve.

grilled pork tenderloin cut on a board.

👇 For complete instructions, see the recipe card or keep reading for tips, flavor options, and serving ideas.

⏲️ How Long to Grill Pork Tenderloin on a Gas Grill

Grill a 1½ lbs pork tenderloin over direct heat at 450°F for about 22–27 minutes to reach 145°F (medium-rare).

Smaller tenderloins may take less time, while larger or thicker ones take longer. Always check the internal temperature with an instant-read thermometer.

Estimated grill times at 450°F for a 1½-pound tenderloin:

  • Rare (below 145°F): Not recommended under USDA guidelines.
  • Medium-rare (145°–150°F): About 22–27 minutes. Recommended.
  • Medium (150°–155°F): About 27–30 minutes.
  • Medium-well (155°–160°F): About 29–32 minutes.
  • Well-done (160°F+): Not recommended; tends to be dry.

Residual cooking: The temperature will rise 2° to 4°F after removing it from the grill.

Food safety: USDA recommends a minimum internal temperature of 145°F with a 3-minute rest. Always check with an instant-read thermometer rather than relying on time alone.

🌡️ Grill Temperature for Pork Tenderloin

Use a 450°F grill surface temperature over direct heat. The temperature at the cooking surface may differ from the grill's hood thermometer.

No grill surface thermometer? Set your grill to medium to medium-high heat. It will work well as long as you grill to your desired internal meat temperature, accounting for a 2°–4°F rise after removal from the grill.

For more help, see my Guide to Grill Temperature on a Gas Grill.

🥣 Seasoning Options

Kosher salt and black pepper are enough, but I usually add garlic powder with my All-Purpose Seasoning. For more flavor, try my BBQ Dry Rub or Southwest Chipotle Seasoning.

🍽️ Serving Grilled Pork Tenderloin

Slice the rested pork tenderloin across the grain and serve plain or with Memphis BBQ Sauce.

For side dishes, try Grilled Corn, Grilled Little Potatoes, or Grilled Mixed Vegetables. A simple green salad also works well.

❄️ Storage and Reheating

Store leftover pork tenderloin in an airtight container in the refrigerator for up to 4 days or freeze for up to 3 months.

Reheat gently in the microwave at medium power to prevent drying out. Cold slices are also excellent in sandwiches or salads.

📝 More Grilled Pork Tenderloin Recipes

  • Alton Brown's Chipotle Lime Pork Tenderloin — a chipotle-lime marinade
  • Balsamic Pork Tenderloin — balsamic and garlic
  • Honey Garlic Pork Tenderloin — a sweet garlic glaze
  • Memphis BBQ Pork Tenderloin — BBQ flavor

❓ FAQs

Is a little pink in pork okay?

Yes. Pork is safe at an internal temperature of 145°F with a 3-minute rest, even if slightly pink inside.

Should I brine pork tenderloin?

Brining is optional but can help retain moisture, especially if the pork was previously frozen. Dissolve 1 tablespoon of kosher salt per cup of water, adding an equal amount of sugar if desired. Refrigerate the pork in the brine for 1–2 hours, then pat dry and skip additional salt when seasoning.

Do I need indirect heat to grill pork tenderloin?

No. This recipe uses direct heat throughout, with one-third turns for even grilling. There's no need to set up separate heat zones.

Is pork loin the same as pork tenderloin?

No. Pork tenderloin is smaller, thinner, and grills much faster. A pork loin needs different cooking instructions.

location of pork tenderloin on a chart of a pig - Image licensed May 17, 2017, from Fotolia. Copyright by foxysgraphic - Fotolia. Image modified in accordance with the license.
Image licensed from Fotolia. Copyright by foxysgraphic - Fotolia. The image was modified following the license.

📖The Recipe Card

pork tenderloin on blue platter
Print Recipe Add to Collection Go to Collections
5 from 6 votes

How to Grill Pork Tenderloin on a Gas Grill

Grill pork tenderloin on a gas grill in about 25 minutes at 450°F. This easy beginner method delivers tender, juicy pork with simple prep and no fancy setup.
Prep Time5 minutes mins
Cook Time25 minutes mins
Total Time35 minutes mins
Course: Main Course
Cuisine: American
Keyword: Grilled Pork Tenderloin, Grilling pork tenderloin, how to cook a pork tenderloin on a gas grill, How to grill pork tenderloin
Servings: 4
Calories: 177kcal
Author: Dan Mikesell AKA DrDan

Ingredients

  • 1 pork tenderloin about 1½ pounds (not pork loin)
  • Kosher salt and pepper to taste or seasoning of choice

Optional Brine

  • 4 cups water
  • 4 tablespoons salt
  • 2–4 tablespoons brown sugar
US Customary - Convert to Metric

Instructions

Trim and prep

  • Trim the tenderloin of any excess fat and the silver skin.
    trimmed pork tenderloin on a red board.

Optional brine

  • To brine: Combine 4 cups of water and 4 tablespoons of salt in a food-safe plastic bag. Add 2–4 tablespoons of sugar if desired. Refrigerate for 1–2 hours. Pat dry after brining. Do not use salty seasoning if you brined.
    adding pork tenderloin to a brine.

Seasoning and grilling

  • Preheat grill to 450°–500°F. Season the pork, then place over direct heat.
    season and place on grill.
  • Close the lid and rotate one-third of a turn every 5 minutes to grill all three sides evenly. Grill for about 25 minutes, until the internal temperature reaches 145°F.
    grilled pork tenderloin still on the grill.

Resting before slicing

  • Remove from the grill, allowing for a 2°–4°F temperature rise during resting. Tent lightly with foil and rest for 5–10 minutes. Slice across the grain and serve.
    grilled pork tenderloin cut on a board.

Video

Notes

Pro Tips

  1. Pork tenderloin is triangular. Rotate one-third of a turn each time to grill all three sides evenly.
  2. Aim for a grill surface temperature of 450°F. Without a surface thermometer, use medium to medium-high heat.
  3. Grill to your preferred internal temperature, allowing for a 2°–4°F rise during resting. For medium-rare, the final temperature should be at least 145°F.

Nutrition

Calories: 177kcal | Protein: 31g | Fat: 5g | Saturated Fat: 2g | Polyunsaturated Fat: 1g | Monounsaturated Fat: 2g | Cholesterol: 96mg | Sodium: 655mg | Potassium: 540mg | Vitamin A: 15IU | Vitamin C: 1.7mg | Calcium: 10mg | Iron: 1.8mg

Publisher note: Originally published May 21, 2017. Updated several times since then to improve the reader experience.

Molly and Lilly chasing the ball.

Grilled Chicken Legs (Crispy and Juicy on the Gas Grill)

grilled chicken drumsticks on a grill

Juicy, crispy, and easy — these grilled chicken legs are everything you want from a backyard cookout. Simple seasoning, steady heat, and turning every 5 minutes for about 30-35 minutes give you perfect drumsticks every time — no marinade or tricks needed.

⏰ How Long to Grill Chicken Legs

  • Grill temperature: about 450°F (range 400–500°F)
  • Total time: 30–35 minutes
  • Turn every: 5 minutes
  • Final internal temp: 185°F for the best texture

Time varies slightly by drumstick size and grill temperature. Always cook to temperature, not time.

chicken drumsticks cooking on the grill.
[feast_advanced_jump_to]

quote mark
Featured Comment by Jan:
⭐⭐⭐⭐⭐
"the best...the best..... chicken legs...ever....goodbye Bobby Flay...hello Doctor Dan....it is going to be an excellent chicken leg summer....thank you!"

🍗 TL;DR — Recipe Summary

What it is: Juicy, crispy grilled chicken legs made simple for any skill level — works with gas, propane, charcoal, or whatever grill you have.

Why it works: Simple seasoning, steady medium heat, and turning every 5 minutes for about 35 minutes give foolproof results.

How to make it: Grill at about 450°F until the internal temperature reaches 185°F for tender, crispy drumsticks.

Jump to the Recipe Card or keep reading for tips, seasoning ideas, and temperature control tricks.

🐓 Ingredients

Drumsticks with seasonings—labeled.
  • Chicken legs (drumsticks) — Use drumsticks of similar size so they cook evenly. Trim loose skin or joint pieces if needed. Chicken leg quarters are covered in the FAQs.
  • Seasoning — Use your favorite seasoning or just salt and pepper. My All-Purpose 7:2:1 mix works perfectly.
  • Optional:
    • A light brush of oil can help dry skin crisp faster, but it’s not required.
    • Want BBQ flavor? Add a dry rub and brush with your favorite sauce during the last 5 minutes.

👨‍🍳 Quick Overview: How to Grill Chicken Legs

1. Preheat the grill — Clean and oil grates. Heat to about 450°F (medium-high).

Cleaning grill grates.

🔥 Pro Tip: Use a grill surface thermometer for accurate temps—hood thermometers aren’t reliable for this. See A Beginners Guide to Grill Temperature to learn more.

2. Prep the chicken — Trim excess skin and loose pieces, then pat dry and season.

season drumsticks to taste.

3. Grill — Place legs on the grill, close the lid, and cook for 30–35 minutes, turning every 5 minutes until the internal temperature reaches 185°F.

chicken drumsticks cooking on the grill..

🌡️ Pro Tip: An instant-read meat thermometer is a must. Don’t rely on time alone—185°F is your target for juicy, tender legs.

4. Rest and serve — Remove from heat and rest for 5 minutes before serving.

pile of grilled drumsticks.

📌For complete step-by-step instructions, scroll down to the printable recipe card or keep reading for tips, flavor options, and serving ideas.

⏰ How Long to Grill Chicken Legs on a Gas Grill

Grill chicken legs for about 30–35 minutes over about 450°F, turning every 5 minutes, until they reach an internal temperature of 185°F for the best texture (safe at 165°F).

About 450°F is recommended—medium-high on most grills—but anywhere in the 400–500°F range works. Exact time varies by drumstick thickness and grill temperature. Lower heat takes longer and can dry the meat; higher heat risks burning the skin before the inside is done.

✅ Tip: Always use a meat thermometer — it’s the only reliable way to know when they’re done.

🌡️ Best Internal Temperature for Chicken Legs

For chicken drumsticks and thighs, 185°F is the target for juicy, tender meat with great texture.

While 165°F is the FDA’s minimum for safety, dark meat cuts like legs and thighs stay tough and stringy at that point. The connective tissue breaks down between 170°–185°F, turning the meat moist and tender.

You can even go up to 195°F if needed — the meat will still be juicy. America’s Test Kitchen agrees (subscription required).

🍗 More Chicken Recipes You'll Love

👇 More Reader Favorites:

  • Grilled Chicken Thighs – Juicy, flavorful, and grill-friendly.
  • Crispy Oven Baked Chicken Thighs – Great skin, great flavor, no frying.
  • Chicken for a Crowd – The original that inspired these easy methods.

Oven Bake Chicken Legs

Oven-baked chicken legs are crispy, moist, and tender every time. A simple recipe, just trim, pat dry, season, and bake. Follow the easy step-by-step photo instructions for perfect chicken legs every time in your oven, with or without convection.

Baked chicken legs on a white plate.

🍽️ Serving Ideas

Serve grilled chicken legs with classic cookout sides like grilled corn on the cob, potato salad, coleslaw, or mac and cheese.

For lighter meals, pair with a green salad, grilled vegetables, or caprese pasta salad. They’re also great chilled for picnics or meal prep.

❄️ Storage and Reheating Leftovers

Refrigerate leftovers in an airtight container for up to 4 days.
Freeze for up to 4 months, but the skin will lose crispness — remove it before freezing if you plan to reheat later.

To reheat, use a 325°F oven or air fryer for 10 to 15 minutes, or until warmed through and the skin crisps back up a bit. Microwaving works but will soften the texture.

❓ FAQs

How do I keep grilled chicken legs moist and tender?

Chicken legs stay juicy when cooked over medium-high heat (about 450°F) and turned regularly. Don’t overcook early—finish at about 185°F for the best texture, not just 165°F. Always use a thermometer and avoid high heat that burns the outside before the inside is done.

Should the grill hood be open or closed?

Closed is best—it gives you better control and more even cooking. A good rule of thumb: leave it open for very thin foods (under ½ inch thick), but close it for anything thicker. Between ½ and 1 inch is borderline, but closed still works better. Over 1 inch? Always close the lid.

Should I use oil on the skin of drumsticks?

Not needed. The skin crisps better without it, but brushing with oil will make it thicker and softer.

Can I grill frozen drumsticks?

No. The outside will burn before the inside cooks safely. Always thaw completely before grilling.

Are chicken legs, chicken leg quarters, and drumsticks the same things?

Chicken legs and drumsticks are the same and used interchangeably. 

Leg quarters include the drumsticks and the thigh. Follow the Grilled Chicken Thighs recipe to handle the extra fat and flare-ups.

My chicken legs still have some pinkness even though the temperature is correct.

This is rare, but it can happen—usually with previously frozen chicken when bone marrow pigments seep into the meat during cooking. If the internal temperature is 165°F or higher, the chicken is safe, and at 185°F it will be fully tender. In most cases, properly cooked chicken legs will not appear pink.

⚕️ Food Safety

Treat all raw chicken as potentially contaminated — wash your hands and surfaces thoroughly after handling.

Don’t rinse chicken; it spreads bacteria without improving safety or taste.

According to the USDA, chicken is safe at 165°F, but for drumsticks and thighs, aim for 185°F for the best texture.

Always check with an instant-read thermometer in the thickest part of the meat.

📖The Recipe Card

chicken drumsticks cooking on the grill
Print Recipe Add to Collection Go to Collections
4.93 from 38 votes

Grilled Chicken Legs (Easy, Crispy & Juicy Drumsticks)

Juicy, crispy grilled chicken legs made simple — season and cook over medium heat on a gas grill about 35 minutes for perfect drumsticks.
Prep Time10 minutes mins
Cook Time30 minutes mins
Total Time40 minutes mins
Course: Main Course, Main dish
Cuisine: American
Keyword: grilled chicken legs, how long to grill chicken drumsticks, how to grill chicken drumsticks
Servings: 6 drumsticks
Calories: 120kcal
Author: Dan Mikesell AKA DrDan

Ingredients

  • 6 Chicken drumsticks
  • Salt and pepper to taste or seasoning of your choice
US Customary - Convert to Metric

Instructions

  • Preheat the grill to get a surface temp of about 450°F. That is medium-high on a standard gas grill and medium on a hot gas grill. Clean and oil the grill grates.
    clean and oil grill crates
  • Pat the drumsticks dry with paper towels. If you have the time, let them rest at room temperature for 15-30 minutes before grilling.
    pat dry drumsticks with paper towel.
  • Trim off excess skin and loose bones/tissue, especially in the joint area.
    trimming chicken drumstick.
  • Season to taste. Kosher salt and pepper will be fine, or you can use my 7:2:2 spice mix. Or use the seasoning of your choice.
    season drumsticks to taste.
  • Check the grill surface temperature and place the chicken legs on the grill. Close the grill hood. Flip about every 5 minutes until the internal temperature reaches 185°F, about 30-35 minutes.
    place drumsticks over direct heat.
  • Let rest for 5-10 minutes before serving.
    chicken drumsticks cooking on the grill..

Video

Notes

Pro Tips

  1. Pat dry and season to taste. I like my All Purpose Seasoning - 7:2:1 and 7:2:2. Seasoning mixes or dry rubs work well. A light touch of cayenne pepper adds a bit of heat that most adults like but do not use with kids.
  2. Medium grill with a surface temperature of about 450°F. Over 500° will not work well. 400° minimum. 350°F will take longer and dry the meat more.
  3. This recipe's key is the final internal temperature of 185°+. While 165° is safe, the texture will be much better at 185°.
  4. If you are cooking chicken leg quarters, use the Grilled Chicken Thighs recipe to learn to control the fat flare-ups.

Nutrition

Calories: 120kcal | Carbohydrates: 1g | Protein: 13g | Fat: 7g | Saturated Fat: 2g | Cholesterol: 70mg | Sodium: 660mg | Potassium: 169mg | Vitamin A: 35IU | Calcium: 8mg | Iron: 1mg

Editor's note: Originally published June 26, 2011. Updated with refreshed photos, clearer instructions, and improved formatting for easier navigation — same great recipe, just better explained.

dogs int the yard with their favorite trees.

Crock Pot Pizza Casserole (Easy and Cheesy)

Crock pot pizza casserole in a slow cooker with cheese and pepperoni topping.

This Crock Pot Pizza Casserole has all the cheesy, meaty flavor of pizza—no crust required. Just brown the meat, add everything to the crock pot—including the uncooked pasta and homemade sauce ingredients—and dinner practically makes itself.

Crock pot pizza casserole in a slow cooker with cheese and pepperoni topping.
[feast_advanced_jump_to]

quote mark
Featured Comment by Jerri:
⭐⭐⭐⭐⭐
"Delicious! I doubled this because I don't have a small crockpot. It worked perfectly and was a big hit. The grandkids loved it!"

📝 TL;DR — Recipe Summary

What: A cheesy Crock Pot Pizza Casserole with pasta, sausage, pepperoni, mozzarella, and homemade pizza sauce.

Why: An easy pizza casserole in a crock pot with all the pizza flavor and no crust to make.

How: Brown the meat, then add it with the uncooked pasta, sauce ingredients, cheese, and pizza toppings. Slow cook until the pasta is tender.

🍕Ingredients

Ground meat with pasta and ingredients for crock pot pizza—labeled.
  • Uncooked pasta: Short shapes like penne or rotini work well.
  • Ground meat: I like a mix of ground beef and Italian sausage, but use what you have.
  • Homemade sauce (simmers in the pot): Crushed or diced tomatoes, water, onion, garlic, oregano, salt, and pepper. Better flavor than jarred.
  • Mozzarella cheese: Stir some in for structure, then melt more on top.
  • Pepperoni: A must for us—but like any pizza, toppings are up to you.

👨‍🍳 How to Make Pizza Casserole in a Crock Pot

1. Prepare the ingredients

Chop the onion and green bell pepper (optional). Brown and drain the ground meat with the onion and garlic.

Browning burger with onion.

✅ Pro Tip: Never add raw ground meat to a slow cooker—it won’t cook properly, and you'll end up with greasy clumps. Always brown and drain first.

2. Mix the casserole

In a crock pot, combine the pizza sauce ingredients, uncooked pasta, some shredded cheese, green pepper, and a handful of pepperoni slices. Stir in the browned meat.

adding browned meat to crock pot.

3. Add the toppings

Top with the remaining mozzarella cheese and any extra toppings you like.

topping a casserole in the crock pot.

4. Slow cook

Cook on low for 4 to 5 hours, until the edges are browned and the pasta is tender.

large spoonful of pizza pasta casserole.

This is just the quick overview—see the recipe card below for full step-by-step instructions and ingredient amounts.

🤔 Ingredient Options and Variations

Ground meat: A 50/50 mix of ground beef and Italian sausage is my favorite. More sausage can overpower the other flavors. Ground turkey or chicken also work.

Cheese: Mozzarella is traditional, but other cheeses may be mixed in. Parmesan is a good addition on top.

Pepperoni and other meats: Pepperoni is my favorite, but ham, bacon, Canadian bacon, or rotisserie chicken also work. All meats should be precooked.

Other toppings: Add olives, mushrooms, or sturdy vegetables at the start. Add delicate toppings, such as pineapple, during the last 30 minutes.

Sauce: Jarred pizza or marinara sauce may replace the homemade sauce. Crushed tomatoes are preferred for homemade, but diced tomatoes or tomato sauce also work.

Onion or Garlic
Use 1 teaspoon of onion powder in place of a small onion, and ¼ teaspoon of garlic powder for each clove.

👍 Pro Tips to Make It Right

  • Start checking the pasta at 4 hours. Most batches take 4–5 hours on low, but crock pots vary.
  • Use sturdy, short pasta such as penne or ziti. Gluten-free and quick-cooking pasta may cook differently.
  • Avoid lifting the lid unnecessarily—it releases heat and increases cooking time.

↕️ Crock Pot Size and Scaling

This recipe makes about six smaller servings (or four hearty ones) in a 3 to 4-quart crock pot.

  • Half batch: Use a 2-quart mini crock pot.
  • Full batch: Fits a 3 to 4-quart crock pot.
  • Double batch: Use a 6-quart or larger crock pot.

👉 Use the recipe card to adjust servings—but follow the ingredient list, not the instructions. The steps don’t scale automatically.

Cooking time may vary with batch size and your crock pot. The casserole is done when the pasta is tender and the edges begin to brown.

📋 Related Recipes

  • French Bread Pizza: Fast, crispy, and customizable.
  • How to Make Pizza Dough: If you do want to try making crust from scratch.
  • Low Carb Tortilla Pizza: Quick and perfect for lighter cravings.
  • 4 Cheese Chicken Pizza: Cheesy and hearty, with a layer of protein.

❄️ Storage of Leftovers

Store leftovers in an airtight container in the refrigerator for up to 4 days. Freeze for up to 3 months, although the pasta texture may soften after thawing. Reheat individual servings in the microwave.

❓FAQs

Do I need to cook the pasta before adding it to the crock pot?

Not usually. This recipe is designed for uncooked pasta, which cooks right in the sauce. If you’re using gluten-free or quick-cooking pasta—or just unsure—precook it to al dente. If you do, skip the added water and shorten the cook time to about 3 hours.

Can I bake pizza casserole in the oven?

Yes. Precook the pasta to al dente, then bake the assembled casserole in a 350°F oven for 25–30 minutes, until it’s bubbling and golden.

📖The Recipe Card

Crock pot pizza casserole in a slow cooker with cheese and pepperoni topping.
Print Recipe Add to Collection Go to Collections
4.34 from 6 votes

Easy Crock Pot Pizza Casserole

Easy cheesy Crock Pot Pizza Casserole with uncooked pasta, sausage, pepperoni, and homemade pizza sauce. Everything cooks together for an easy family dinner.
Prep Time15 minutes mins
Cook Time5 hours hrs
Total Time5 hours hrs 15 minutes mins
Course: Main Course
Cuisine: Italian
Keyword: crock pot pizza casserole, crock pot pizza recipe, slow cooker pizza casserole
Servings: 6 servings
Calories: 493.1kcal
Author: Dan Mikesell AKA DrDan

Ingredients

  • 1 pound ground meat a combination of beef and Italian sausage
  • 2 cups uncooked pasta penne, ziti, or other short standard shape
  • 4 oz sliced pepperoni
  • ½ green pepper optional
  • 8 oz mozzarella cheese divided

Sauce Ingredients

  • 4 cups crushed or diced tomatoes not drained
  • 1 cup water if uncooked pasta
  • 2 cloves garlic crushed
  • 1 onion small
  • 1 teaspoons oregano
  • 1 teaspoons salt
  • ½ teaspoon black pepper
US Customary - Convert to Metric

Instructions

Prepare the ingredients

  • Chop a small onion and half a green pepper (optional).
    chopped onion and green pepper.
  • Brown 1 pound of ground meat, usually half ground beef and half mild Italian sausage, over medium-high heat. Add the chopped onion after a couple of minutes. Cook for about 8 minutes, or until no pink remains. Add 2 cloves of crushed garlic at the last minute of browning. Drain.
    Browning burger with onion.

Mix the casserole

  • Add 28–32 oz of crushed tomatoes or diced tomatoes (not drained), 1 cup of water, 4 oz of sliced pepperoni minus 12 slices for topping, oregano, salt, pepper, green pepper, and 1 cup of mozzarella cheese to a 3 to 4-quart crockpot. Mix well, then stir in 2 cups of uncooked pasta.
    mixing sauce in the crock pot.
  • Add the cooked ground meat after draining the fat.
    adding browned meat to crock pot.

Add toppings

  • Top with 1 cup of shredded mozzarella and 12 slices of pepperoni or other toppings.
    topping a casserole in the crock pot.

Slow cook

  • Cook on low for approximately 4-5 hours, until the edges are brown and the pasta is tender. Start checking the pasta at 4 hours—it should be tender, and the edges of the casserole should be lightly browned.
    Browned crock pot pizza casserole.

Video

Notes

Pro Tips

  • Fits nicely in a 3–4 qt crock pot. Half recipe → 2 qt mini. Double recipe → 6 qt or larger.
  • Cooking a small batch in a large crock pot can make the pasta cook faster—start checking early.
  • Use a standard short pasta (penne, ziti, rotini). Gluten-free or quick-cook pastas can behave unpredictably.
  • Two cups of dry pasta = about 8 oz (half a 1-lb box).
  • Substitutions: 1 tsp onion powder for one small onion, ¼ tsp garlic powder per clove.
  • Cook on low only for 4–5 hours; check at 4 hours since slow cookers vary.
  • You can use jarred pizza or spaghetti sauce—one 24-ounce jar plus the cup of water replaces the crushed tomatoes.
  • Keeps 4 days refrigerated or 3 months frozen (texture softens after freezing).

Nutrition

Calories: 493.1kcal | Carbohydrates: 28.5g | Protein: 37.2g | Fat: 25.6g | Saturated Fat: 10.8g | Polyunsaturated Fat: 1.4g | Monounsaturated Fat: 9.6g | Trans Fat: 1.1g | Cholesterol: 109mg | Sodium: 1192.4mg | Potassium: 835.1mg | Fiber: 3.8g | Sugar: 7.8g | Vitamin A: 509.3IU | Vitamin C: 22mg | Calcium: 377.5mg | Iron: 4.6mg

Editor's Note: Originally published December 26, 2013. Updated with expanded options, refreshed photos, and a table of contents to help navigation.

Molly and Lilly in the yard.

How to Cook Pork Butt in the Oven for Pulled Pork (Low and Slow)

pulled pork on a bun with sauce

This easy pork butt oven recipe makes juicy BBQ pulled pork with crispy bark at 250°F. The simple low-and-slow method turns pork butt (Boston butt) into tender, fall-apart pork with very little work.

⏱️ Quick Answer: How long to cook pork butt in the oven?

A 4–5 pound pork butt takes about 8–10 hours in a 250°F oven.

  • Cook to 200°–205°F internal temperature for tender pulled pork.
  • Bone-in may take slightly longer.
Oven pulled pork sandwich with sauce.
[feast_advanced_jump_to]

quote mark
Featured Comment by Lisa B :
⭐⭐⭐⭐⭐
"I was beyond amazed at the end product of this recipe. The cooking method is foolproof. People thought the pork was cooked on a smoker or grill. It was perfectly moist but with the crunchy texture of the bark mixed in. So easy! Outstanding results."

📝 TL;DR — Oven Pulled Pork from Pork Butt

What it is: Pork butt cooked at 250°F until tender and pullable, with crispy bark and BBQ flavor. 

Why you’ll love it: Easy prep, reliable results, and no smoker required. 

How to make it: Season with dry rub, cook to 200°–205°F, rest, then shred.

👨‍🍳 DrDan says: I’m not about babysitting a grill or smoker all day. This method gives me great pulled pork with bark and flavor—without the hassle. Just rub it, stick it in the oven at 250°F, and it comes out perfect every time.

🐖 Ingredients for Oven Pulled Pork

Pork butt with rub ingredients—labeled.
  • Pork Butt (Boston Butt): Use pork butt, also called Boston butt and often labeled pork shoulder. Bone-in or boneless both work. Remove the net from boneless pork butt before cooking—it can pull off the bark.
  • Dry Rub: Use your favorite BBQ rub or the simple homemade rub in the recipe card.
  • Liquid Smoke: Optional, but recommended for smoky BBQ flavor without a smoker. I use Wright’s, which lists only smoke and water.
    👉If you skip liquid smoke, a thin coating of yellow mustard can help the rub stick.
  • Flavor Options: Use my Memphis dry rub or Chipotle Seasoning. Add cayenne for extra heat or smoked paprika for deeper smoke flavor.

👨‍🍳 Quick Overview: How to Cook Pork Butt in the Oven

1. Pat the pork butt dry, coat with liquid smoke (optional), and apply your rub.

coating a pork butt with dry rub,

2. Place it on a foil-lined, rimmed baking sheet with a rack (optional) to keep it out of the drippings and improve the bark.

rubbed pork butt on rack.

3. Bake in a 250°F oven (no convection) until the internal temperature reaches 200° to 205°F—usually 8 to 10 hours.

cooked pork butt out of the oven on a tray.

4. Wrap the pork tightly in foil, then in towels. Let it rest for 1 to 2 hours, but even 15 minutes will help with moisture before shredding.

Pork butt in foil being wrapped.

✅ Pro Tip: A well-wrapped pork butt can stay warm in a small cooler for up to 4 hours.

👇 Scroll down for tips, serving ideas, and the printable recipe card with complete step-by-step instructions.

⏰ How Long to Cook Pork Butt in the Oven at 250°F

At 250°F, a 4- to 5-pound pork butt usually takes about 8 to 10 hours. Plan on roughly 2 hours per pound, but cook to temperature, not time. Bone-in or thicker roasts may take longer.

You can use 225° to 275°F, but 250°F is my preferred temperature for reliable cooking and good bark. I would avoid 300°F or higher.

For pork butts over 6 pounds, cut them into two pieces or cook two smaller roasts separately on a rack. They will usually finish in about the same time as a 4- to 5-pound roast.

Two roasted pork butts on a tray.

✅ Pro Tip: Check your oven. Many ovens automatically shut off after 8–12 hours. Make sure yours won’t stop mid-cook.

🌡️ When is Pork Butt Done?

Pork butt is ready for pulled pork at 200°–205°F internal temperature, when the connective tissue has broken down enough for the meat to shred easily.

It may start becoming tender around 195°F, but 200°–205°F gives more reliable pull-apart texture.

✅ Pro Tip: Cook to temperature, not time. Check with an instant-read or probe thermometer.

🍽️ How to Serve BBQ Pulled Pork

Serve pulled pork on toasted buns with Memphis BBQ Sauce and coleslaw, or use it for tacos, quesadillas, nachos, or baked potatoes.

✅ Pro Tip: Plan on about ⅓ pound of pork butt per serving before cooking, which yields roughly ¼ pound of pulled pork—enough for one good-sized bun sandwich or two sliders.

Great Side Dishes for Pulled Pork

Good choices include coleslaw, potato salad, old-fashioned cornbread, cheesy potato casserole, and stovetop mac and cheese.

🧊 Storing Pulled Pork

Store leftover pulled pork in an airtight container in the refrigerator for up to 4 days. For the best texture, I prefer using it within 2 days. 

Freeze pulled pork for 3 to 4 months in meal-size portions. Vacuum-seal bags or freezer bags work well.

🔥 How to Reheat Pulled Pork

Reheat pulled pork in the oven, microwave, or on the stovetop until hot. For larger amounts, I prefer the oven because it heats evenly without drying the meat.

Oven Method

  1. Spread the pork in a baking dish or rimmed pan.
  2. Sprinkle lightly with water or apple juice.
  3. Cover tightly with foil.
  4. Heat at 250°–300°F for about 30–45 minutes, depending on the amount.
  5. Keep warm in a 140°–150°F oven, or transfer to a crock pot on low or warm for serving.

✅ Pro Tip: Don’t store or reheat pulled pork with BBQ sauce already mixed in. The acid can soften the texture.

👍 More Pulled Pork Recipes

Try these other ways to make pulled pork:

  • Pork Butt Gas Grill – classic smoky BBQ flavor without a smoker
  • Crock Pot Pulled Pork – easy low and slow recipe
  • Crock Pot Pork Loin Pulled Pork – healthy lean pulled pork loin
  • Pulled Pork Loin in the Oven – a leaner oven version option

❓ FAQs

Should I cover the pork butt with foil while cooking?

No. Cook it uncovered so the bark can develop. Wrap it in foil only during the resting period.

Can I cook pork butt overnight in the oven?

Yes, if your oven can safely run that long. Some ovens automatically shut off after 8–12 hours, so check yours before starting.

Should the fat cap face up or down?

Either works. Fat-cap direction has little effect on tenderness; time and internal temperature matter much more.

📖The Recipe Card

pulled pork sandwich with BBQ sauce
Print Recipe Add to Collection Go to Collections
4.97 from 29 votes

How to Cook Pork Butt in the Oven for Pulled Pork

Make juicy BBQ pulled pork in your oven. Cook pork butt at 250°F until fall-apart tender, with crispy bark and rich, smoky flavor.
Prep Time10 minutes mins
Cook Time8 hours hrs
Total Time9 hours hrs 40 minutes mins
Course: Main Course
Cuisine: American
Keyword: Oven Pulled Pork Butt, pork butt in oven, pulled pork in oven, pulled pork recipe oven
Servings: 12 serving
Calories: 238.1kcal
Author: Dan Mikesell AKA DrDan

Ingredients

  • about 4 pounds Pork butt aka Boston Butt frequently called pork shoulder
  • Dry rub of your choice good quality
  • 2 tablespoons Wright's Liquid Smoke optional but recommended

Suggested dry rub if you don't have one

  • ½ cup dark brown sugar
  • 3 tablespoons Diamond Crystal kosher salt 2 tablespoons if using Morton
  • 1 tablespoon chili powder
  • 1 teaspoon garlic powder
  • 1 teaspoon onion powder
  • 1 teaspoon black pepper
US Customary - Convert to Metric

Instructions

1. Prepare the pork butt:

  • Use a rub of your choice. If using my rub, mix ½ cup dark brown sugar, 2 tablespoons kosher salt, 1 tablespoon chili powder, 1 teaspoon garlic powder, 1 teaspoon onion powder, and 1 teaspoon black pepper.
    Pork butt with rub ingredients—labeled.
  • Pat the pork butt dry, then coat all sides with about 2 tablespoons of liquid smoke (optional).
    coating a pork butt with liquid smoke-2,
  • Use about 1 cup of rub to cover generously. If prepping ahead, wrap in plastic wrap and refrigerate for a few hours or overnight. If not, go straight to baking.
    coating a pork butt with dry rub,

2. Roast low and slow:

  • Line a rimmed baking sheet with foil and place a rack on top. Spray the rack with PAM or oil.
    sparying baking tray with rack with PAM,
  • Place the pork butt on the rack and cook at 250°F (no convection)—no need to preheat. Fat cap up or down doesn’t matter.
    Pork butt with rub on tray with rack
  • Cook until the internal temperature reaches 200°–205°F—about 8 to 10 hours for a 4- to 5-pound pork butt, depending on size, shape, bone-in vs. boneless, and oven behavior.
    cooked pork butt out of the oven on a tray.

3. Rest the meat:

  • Remove from oven, wrap tightly in heavy-duty foil, then several towels. Rest in a small insulated cooler or on the counter for 1–2 hours. It will stay warm in a well-wrapped cooler for up to 4 hours.
    wrap pork butt in aluminum foil then a towel.

4. Shred and serve:

  • Use forks to shred. The meat should fall apart easily and stay juicy, with crispy bark.
    shredding pork butt with forks.

Video

Notes

Pro Tips:

  1. Use the rest time to adjust your serving window by a few hours.
  2. No rack? Use foil balls to keep the pork out of the drippings.
  3. Wright’s Liquid Smoke is a good choice; the label should list only smoke and water.
  4. Use your favorite BBQ rub or the homemade rub in the card.
  5. Salt amounts are based on Diamond Crystal kosher salt: 1 tsp table salt = 1¼ tsp Morton kosher = 2 tsp Diamond Crystal. You can reduce the salt for a lower-sodium rub—it still works well.
  6. 195°F is the minimum for pullable pork, but 200°–205°F is better.
  7. Do not cover while cooking—a dry oven helps develop bark.
  8. Reheating suggestions are in the post.
 

Nutrition

Calories: 238.1kcal | Carbohydrates: 9.7g | Protein: 28.5g | Fat: 8.7g | Saturated Fat: 3g | Polyunsaturated Fat: 1g | Monounsaturated Fat: 3.8g | Trans Fat: 0.1g | Cholesterol: 90.7mg | Sodium: 1234.76mg | Potassium: 544.9mg | Fiber: 0.3g | Sugar: 9g | Vitamin A: 198.6IU | Vitamin C: 0.1mg | Calcium: 33.6mg | Iron: 2mg

Editor's note: Originally Published November 2, 2013. Updated with expanded options, refreshed photos, and a table of contents to help navigation.

6 month old Molly and Lilly running fast.

Three Bean Turkey Chili

turkey chili with sour cream in a bowl.

Hearty and healthy, Three Bean Turkey Chili is easy in your crock pot or made it fast on the stovetop with ground turkey, beans, and pantry ingredients.

One of my best chili recipes, it has world-class taste and is guilt-free, with less than 3 grams of fat and 220 calories per serving.

Ingredients

Ground turkey
Vegetables—onion, celery, jalapeno pepper, diced tomatoes, tomato paste
Pantry ingredients—chicken broth, Worcestershire sauce, chili powder, ground cumin, garlic powder, salt, pepper
Beans—pinto, black, and kidney beans

turkey chili with sour cream in a bowl.
Blue ribbon divider used for visual effect
[feast_advanced_jump_to]

Featured Comment from Dea
"WOW!!!!! Made this for the first time today and so much great flavor!!!! The house smelled so good I could barely wait for dinner time!!! "

A flexible recipe that can use other ground meat, leftover turkey, or rotisserie chicken—or skip the meat and make it as vegetarian chili. Instructions for 2-quart mini crock pots to full size are in the discussion. And if you need it fast, opt for the stovetop method—ready in 30 minutes.

The beans in this chili are a balance of kidney beans with pinto and black beans, although you may substitute white beans like great northern or navy beans—–all in a flavorful spicy broth.

👨‍🍳How to Cook Turkey Chili in a Crock Pot—Step-by-Step Photos

ground turkey with beans and chili ingredients.

1. Use ground turkey; other meat may be used, or go vegetarian.

browning ground turkey.

2. Brown the meat.

chop onion, celery, and jalapeno.

3. Dice the celery, onion, and jalapeno pepper.

rinsing beans under running water.

4. Drain and rinse the beans.

pouring browned ground meat into crock pot.

5. Mix all ingredients in the crock pot.

Ladle full of turkey chili over a crock pot.

6. Cook on low for 6 to 7 hours or high for 3-4 hours.

For more details, keep reading. See the Recipe Card below for complete instructions and to print.

♨️Making turkey chili on the stovetop

This is a fast and easy recipe to cook on the stovetop. It will be done in as little as 30 minutes, but the longer it simmers, the better. Try for an hour or more if you can.

  1. Start browning the meat in a large Dutch oven-type pan over medium-high heat. Add the onions and celery while you do that. When browned and the celery and onion are tender, drain any liquid.
  2. Stir in all the other ingredients, then bring to a low boil over medium heat. Then, decrease the heat to a simmer and cover. Cook for a minimum of 15 minutes, but an hour is better.
  3. If using leftover turkey or rotisserie chicken, add it after cooking the onion and celery in a bit of oil.

Make it your way—variations and options.

  • I prefer ground turkey in this recipe or use other ground meat. Leftover turkey or rotisserie chicken may be substituted—2 to 3 cups per pound of ground meat. Or leave the meat out for a delicious vegetarian chili.
  • Any combination of beans will work. I suggest pinto, black, and light kidney beans. Use low sodium, drain, and rinse. Other beans, like white beans, may be used.
  • You can add other vegetables, like bell peppers or green chilies.
  • This is a thick chili if you use 1 cup of broth. If you want medium thick, use 2 cups of broth. Add 1-2 cups of low-sodium chicken broth for a turkey soup thickness.
  • This is about a 2-3 out of 10 on a heat scale with the jalapeno but no Ro-Tel. A level the whole family, even the kids, will love. Add the Ro-Tel will be about 4 out of 10 level of heat. And add a second jalapeno for 6 out of 7.

😊Favorite chili recipes

Don't miss some of my favorite chili recipes, like Small Crock Pot Chili and Small Crock Pot White Chicken Chili.

Healthier chili recipes, try Pork Chili, Simple Texas Chili, and Healthy White Chicken Chili.

↕️Size of the crock pot and adjusting the recipe size

The full recipe makes 12-13 cups of 8 servings of 1 ½+ cup each. Crock pots should not be filled over 75%, so that needs 4 ½ quarts or larger.

To use a 2-quart mini-crock pot, make a half recipe, but do not add the broth until the end of cooking. Otherwise, a half recipe needs a 2 ½ quart or larger slow cooker.

A double recipe would need a large crock of 8 quarts or larger. If you want a larger recipe, increase the recipe by 50% to 12 servings that will work in a 6 ½ quart or larger crock pot.

  1. Use the recipe card and adjust the number of servings to 4 for a half recipe or 12 for a larger recipe of 150%.
  2. Use the amount of ingredients in the ingredient list, not the instructions—those do not adjust.
  3. Use the crock pot size discussed above.
  4. Cook for the same amount of time.

🍽️ Serving

I like to top tomato-based chili with a dollop of sour cream and a shredded cheddar cheese sprinkle. Then garnish with a slice of avocado, sliced scallions, or cilantro.

Serve with tortilla chips, low-fat biscuits, cornbread, or cornmeal biscuits, and you have a filling and hearty chili dinner.

Storage of leftovers

To store leftover chili, it is good in the refrigerator in an airtight container for 4 days or frozen for 4 months.

If frozen, thaw overnight in the refrigerator. Reheat on the stovetop over medium heat in a saucepan. You can reheat it in a microwave, also.

❓FAQs

Why add Worcestershire sauce to the chili?

The Worcestershire sauce pops up the "meaty" to almost beef-like taste for the turkey.

Why brown ground meat before cooking in a crock pot?

Any ground meat needs to be browned before cooking in a slow cooker. If you don't, the meat will clump, and all the fatty drainage will be in the crock pot.

How to control the sodium in chili?

There are three steps to control the sodium in chili. The first is obvious: don't add extra salt.

Next, only buy low-sodium ingredients. Canned beans, broth, and Worcheshire sauce are available in most markets.

Lastly, rinsing the beans also removes some sodium—estimates vary, but removing about a third of the sodium is the common estimate.

Blue ribbon divider used for visual effect

This recipe is listed in these categories. See them for more similar recipes.

101's Best Recipes, Chili Recipes, Crock Pot Recipes, Healthy Recipes, Low Fat Recipes, Mini Crock Pot Recipes, Small Crock Pots Recipes

Have you tried this recipe, or have a question? Join the community discussion in the comments.

📖The Recipe Card

turkey chili with sour cream in a bowl.
Print Recipe Add to Collection Go to Collections
5 from 3 votes

Three Bean Turkey Chili

Hearty and healthy, Three Bean Turkey Chili is easy in your crock pot or made it fast on the stovetop with ground turkey, beans, and pantry ingredients.
Prep Time15 minutes mins
Cook Time6 hours hrs
Total Time6 hours hrs 15 minutes mins
Course: Main Course
Cuisine: American
Keyword: Crock Pot Chili, Three Bean Chili, Turkey chili
Servings: 8 of 1 ½ cups
Calories: 210.5kcal
Author: Dan Mikesell AKA DrDan

Ingredients

  • 1 pound ground turkey
  • 2 ribs celery Diced
  • 1 onion Large
  • 1 jalapeno pepper
  • 4 cups dice tomatoes may substitute one 10 oz can of RoTel for one 14 oz can of diced tomatoes.
  • 6 oz tomato paste
  • 1 to 2 cups chicken broth Low sodium
  • 1-2 tablespoons Worcestershire sauce Low sodium if possible
  • 2 tablespoons chili powder
  • 1 teaspoon ground cumin
  • ½ teaspoon salt adjust to taste
  • ½ teaspoon pepper
  • 2 teaspoons garlic powder
  • 45-48 oz Beans-pinto, black, and light kidney beans suggested—low sodium and rinsing. three cans
US Customary - Convert to Metric

Instructions

  • Start by browning 1 pound of ground turkey in a skillet over medium-high heat.
    browning ground turkey.
  • Dice two ribs of celery and one large onion. Dice one jalapeno pepper.
    chop onion, celery, and jalapeno.
  • Rinse and drain three cans of beans; low sodium preferred. I used pinto, black, and light kidney beans, and that is the combination I recommend.
    rinsing black beans under running water
  • To a 4 ½ quart or larger crock pot, add the cooked ground meat, prepared veggies, and two 14 oz cans of diced tomatoes (substitute one 10 oz can of Ro-Tel for one can if you want.) Also, add one 6 oz can of tomato paste, 1 to 2 cups of low sodium chicken broth, 1-2 tablespoons Worcestershire sauce, 2 tablespoons chili powder, 1 teaspoon ground cumin, ½ teaspoon salt, ½ teaspoon pepper, 2 teaspoons garlic powder.
    pouring browned ground meat into crock pot.
  • Mix well. Cook on low for 6-7 hours or high for 3-4 hours.
    Ladle full of turkey chili over a crock pot.

Video

Notes

Pro Tips

  1. Instructions for adjusting the size of this recipe are in the post.
  2. This recipe adapts well to precooked shredded meat like leftover turkey or rotisserie chicken. Just add 2-3 cups the last hour of cooking and skip the ground meat. Details in the post.
  3. Use the ground meat of your choice, but I prefer ground turkey. Just skip the meat and use vegetable broth to make it vegetarian.
  4. Substitute a can of Ro-Tel for one can of the diced tomatoes for added taste and a bit more heat.
  5. This is about a 2-3 out of 10 on a heat scale. You can add a second jalapeno, use the Ro-Tel, or add ¼-1/2 teaspoon of cayenne pepper.
  6. If sodium is a concern, use lower sodium products and rinse the beans well.
  7. I assume a serving size of about 1 ½ cups per serving. This should be good in the refrigerator for 4 days. It will freeze well for 4 months.

Stovetop Method

  1. This is an easy recipe to cook on the stovetop. It will be done in as little as 30 minutes, but the longer it simmers, the better. Try for an hour or more if you can.
  2. Start with browning the meat in a large Dutch oven-type pan. Add the onions and celery while you do that. When browned and the celery and onion are tender, drain any liquid.
  3. Add all the other ingredients and bring to a low boil over medium heat. Then, decrease the heat to a simmer and cover. Cook for a minimum of 15 minutes, but an hour is better.
  4. If using leftover turkey or rotisserie chicken, add 2-3 cups after cooking the onion and celery in a bit of oil.

Nutrition

Calories: 210.5kcal | Carbohydrates: 28.2g | Protein: 22.3g | Fat: 2.4g | Saturated Fat: 0.5g | Polyunsaturated Fat: 0.9g | Monounsaturated Fat: 0.6g | Trans Fat: 0.1g | Cholesterol: 31.2mg | Sodium: 702.3mg | Potassium: 1010mg | Fiber: 8.8g | Sugar: 8.2g | Vitamin A: 1117.1IU | Vitamin C: 18.5mg | Calcium: 92.7mg | Iron: 4.2mg

Editor Note: Originally published November 1, 2014. Updated with expanded options, refreshed photos, and a table of contents to help navigation.

Molly running in the snow with bandana.

How to Cook Strip Steak (Pan Seared—Oven Finished)

NY strip steak cut on an orange plate

This easy New York strip steak recipe uses a quick pan sear for a browned crust, then finishes in the oven for a juicy center cooked just the way you like it.

It is a simple way to cook strip steak at home with reliable timing and no grill needed.

⏱️ Quick Answer: How Long to Cook New York Strip Steak in the Oven

Sear for 2–3 minutes per side, then finish in a 400°F oven. Temperatures from 350°F to 425°F also work well but may take a few minutes more or less.

  • Rare (125°F): about 4–5 minutes
  • Medium-rare (130–135°F): about 5–7 minutes
  • Medium (140–145°F): about 6–8 minutes

Cook to your desired internal temperature—time will vary with thickness.

NY strip steak cut on an orange plate.

quote mark
Featured Comment by Colleen:
⭐⭐⭐⭐⭐
"I made this for my family tonight. I got 5 STARS from even the pickiest eater"

[feast_advanced_jump_to]

📝 TL;DR — Recipe Summary

What: New York strip steak with a browned crust and juicy center.

Why: Pan searing builds the crust, and finishing in the oven makes doneness easier to control.

How: Sear for 2–3 minutes per side, then finish in the oven to your desired internal temperature.

🥩 Ingredients

New York strip steaks with seasoning—labeled
  • New York strip steaks — 1 to 1½ inches thick, preferably Choice or Prime grade. Bone-in strip steaks also work but may take slightly longer.
  • Salt and pepper — coarse kosher salt and black pepper are all you really need.
  • Optional seasoning — garlic powder or your favorite steak seasoning.

👨‍🍳 Quick Overview: How to Cook New York Strip Steak

1. Let steaks rest at room temperature if you have time. Trim fat and season.

seasoning trimmed strip steaks on black board.

✅ Pro Tip: Salt the steaks either right before searing or at least 1 hour ahead. Salting 15–45 minutes before cooking draws moisture to the surface without enough time for it to reabsorb, which can leave the steak less juicy and tender.

2. Sear in a cast iron or oven-safe skillet with oil or butter for about 2–3 minutes per side until a deep brown crust forms.

.

seared steaks in a black skillet.

3. Move the skillet to a hot oven and cook to your desired internal temperature. Remove the steaks 3°–5°F early for carryover cooking.

finished steaks in a black skillet.

4. Tent loosely with foil and rest for 5–10 minutes before slicing.

strip steak with baked potato.

📌 For full step-by-step instructions, scroll to the printable recipe card or keep reading for details and tips.


⏰ How Long to Cook Strip Steak in the Oven

After pan searing for 2-3 minutes per side, finish in a 400°F oven. Oven temperatures from 350°F to 425°F all work well with minor adjustments in timing.

  • Rare (125°–130°F): about 4–5 minutes oven time after the sear
  • Medium-rare (130°–135°F): about 5–7 minutes oven time after the sear
  • Medium (140°–145°F): about 6–8 minutes oven time after the sear
  • Medium-well (150°–155°F): about 9–11 minutes oven time after the sear
  • Well done (160°F+): about 12–15 minutes oven time after the sear

✅ Pro Tip: Always cook to internal temperature, not just time. Pull the steak 3°–5°F early for carryover cooking.

What affects timing: Oven accuracy, steak thickness, sear time, and starting temperature all change how long it takes in the oven.

🥔 What to Serve with Strip Steak

Keep the sides simple. Potatoes are the classic choice, with a green vegetable to round out the meal.

  • Oven Roasted Red Potatoes
  • Crispy Parmesan Baked Potatoes
  • Twice Baked Potatoes for Two
  • Roasted Asparagus with Garlic and Parmesan
  • Baked Green Beans with Bacon

❄️ Storage and Reheating

Store leftover strip steak in an airtight container for up to 4 days in the refrigerator or 3–4 months in the freezer.

Reheat gently in the microwave, stovetop, oven, or air fryer just until warm. Cold slices also work well on salads or sandwiches.

🥩 Related Steak Recipes

  • Grilled New York Strip Steak
  • Grilled Porterhouse Steaks
  • Pan Seared Filet Mignon
  • Grilled Filet Mignon

❓ FAQs

Can I cook New York strip steak in the oven without searing?

Yes. Cook it entirely in the oven to your desired internal temperature, but you will miss the browned crust and extra flavor from pan-searing. Using a rack helps the steak cook more evenly, and it will take longer.

Why use cast iron for pan seared steak?

Cast iron holds heat well and moves directly from the stovetop to the oven. It is the best choice for getting a deeply browned crust, but any oven-safe skillet will work.

Is strip steak the same as New York strip steak?

Usually, yes. New York strip steak is commonly sold as strip steak, Kansas City strip, or striploin steak.

📖The Recipe Card

NY strip steak cut on an orange plate
Print Recipe Add to Collection Go to Collections
4.93 from 38 votes

Pan Seared New York Strip Steak (Oven Finish Method)

Pan sear New York strip steaks for a browned crust, then finish in the oven for juicy, tender steakhouse results.
Prep Time4 minutes mins
Cook Time14 minutes mins
Total Time18 minutes mins
Course: Main Course
Cuisine: American
Keyword: finish strip steak in the oven, oven finished New York strip steak, pan seared New York strip steak
Servings: 2
Calories: 318kcal
Author: Dan Mikesell AKA DrDan

Ingredients

  • 2 New York strip steaks 1 inch thick
  • salt and pepper to taste or season to taste
US Customary - Convert to Metric

Instructions

Trim and season

  • Let the steaks rest at room temperature for 15–30 minutes if you have time. Preheat the oven to 400°F.
    New York strip steaks with seasoning—labeled
  • Trim excess edge fat, pat dry, and season with salt and pepper or your favorite steak seasoning.
    seasoning trimmed strip steaks on black board

Pan sear for flavor

  • Heat butter or oil in a cast iron or oven-safe skillet over medium-high heat. Sear about 2–3 minutes per side until deeply browned.
    adding steaks to hot skillet
  • When hot, add the strip steaks and sear both sides for about 2 minutes, or until they reach your desired crust color.
    seared steaks in a black skillet

Finish the steak in the oven

  • Transfer the skillet to the oven and cook to your desired internal temperature. For a 1-inch steak, about 5–7 minutes for medium-rare or 7–9 minutes for medium. Check early.
    finished steaks in a black skillet

Rest before serving

  • Remove the steaks 3°–5°F before the target temperature, tent loosely with foil, and rest 5–10 minutes before slicing.
    cut strip steak on gray plate

Video

Notes

Pro Tips:

  1. Let steaks rest at room temperature before cooking to help them cook more evenly. Skip only if you must.
  2. For the juiciest steak, season with salt right before searing or at least 1 hour ahead.
  3. Use the seasoning of your choice, or just coarse salt and pepper. Marinades also work well.
  4. Butter or oil both work. Butter adds flavor, while oil has a higher smoke point.
  5. The internal temperature will rise about 3°F–5°F during resting.
  6. NEVER cook by time alone. Use an instant-read thermometer to check doneness.

Nutrition

Calories: 318kcal | Protein: 29g | Fat: 21g | Saturated Fat: 9g | Cholesterol: 113mg | Sodium: 74mg | Potassium: 444mg | Calcium: 33mg | Iron: 2mg

Editor's note: This article was originally published on February 20, 2015. It has been updated with refreshed photos and improved instructions.

Molly at 14 months old.

Small Crock Pot Chili

orange bowl with chili with cheese

This easy small-batch chili is my best homemade chili recipe. It works in any size crock pot—from a 2-quart mini to a full-size—and easily scales from 2 to 12 servings.

With ground beef, tender beans, and a mildly spicy tomato-based sauce, it’s sure to be your go-to chili recipe. Whether you want a small chili for two or enough for a game day crowd, it always comes out right.

orange bowl with chili with cheese.
[feast_advanced_jump_to]

quote mark
Featured Comment by Rae:
⭐⭐⭐⭐⭐
"Five stars. I made this recipe for my office's chili cookoff...and won!!! "

⏱️ Quick Answer: How long does chili take in a crock pot?

  • Low: 8 hours, preferred for longer simmer for better flavor.
  • High: 4 hours.

My wife wanted “a great everyday chili.” This All-American crock pot chili has ground beef, kidney beans, traditional chili spices, and a tomato-based sauce. It’s perfect for an everyday meal, game day, or a family get-together.

🐄 Ingredients

ground beef and Ingredient for crock pot chili.
  • Ground beef — 80/20 works best for flavor; drain after browning.
  • Onion and garlic — classic chili aromatics.
  • Tomatoes — diced plus tomato paste for richness.
  • Beans — canned kidney beans are traditional, but black or pinto beans work too.
  • Bell pepper (optional) — adds sweetness and color.
  • Spices — chili powder, cumin, oregano, salt, black pepper, and cayenne (optional heat).

👨‍🍳 Quick Overview: How to Make Crock Pot Chili

1. Chop the green bell pepper (optional) and onion. Rinse and drain canned kidney beans.

rinsing beans under running water.

2. Brown the ground beef with the onion, adding the garlic near the end – about 8 minutes. Drain and move to the crock pot.

adding chopped onion to browning ground beef.

3. Add diced tomatoes, tomato paste, water, and spices.

mixing all ingredients in the crock pot.

4. Cook covered on LOW for 8 hours or HIGH for 4 hours.

Ladle of chili over the crock pot.

👇 Scroll down for the scalable recipe card and complete step-by-step photo instructions—or keep reading for tips and options.

🥣 Variations and Ingredient Options

  • Meat: Ground beef is classic, but ground turkey or chicken also works.
  • Beans: Use canned kidney, black, or pinto beans. Don't use dry beans without properly preparing them first.
  • Tomatoes: Fire-roasted diced tomatoes add extra depth.
  • Vegetables: Skip the bell pepper or add extra vegetables if you like.
  • Heat: Adjust the cayenne to taste or add half a jalapeño.
  • Thickness: This is a thick chili. Add water or broth for a thinner chili.

♨️ Chili for Two (or a Crowd): Crock Pot Sizes & Scaling

This recipe makes about 6 cups of chili (4 servings). Whatever size crock pot you use, keep it no more than 75% full so the chili cooks evenly.

Make it as written for 4 people or for two with leftovers, or scale down to a true 2-serving batch—or up to 8 or 12.

  • Half recipe (2 servings): Can be made in a smaller crock pot, but watch carefully—smaller pots often have temperature-control issues.
  • Full recipe (4 servings): Fits comfortably in a 2-quart mini crock pot or larger.
  • Double recipe (8 servings): Needs a 4-quart or larger crock pot.
  • Triple recipe (12 servings): Needs a 6-quart or larger crock pot.

Smaller amounts in a large crock pot may cook faster and can even burn around the edges, so check early.

👉 To scale, adjust the number of servings in the recipe card. Use the amounts shown in the ingredient list (the instructions will not auto-scale).


Chili for one person

There’s too much work and too much waste with partly used ingredients to make just one serving of chili. Make the half recipe (2 servings) instead and freeze the extra.

🍽️ Serving Suggestions and Toppings

Top with shredded cheddar cheese, sour cream, avocado, or sliced green onions.

Serve with Old Fashioned Cornbread, Cornmeal Biscuits, or tortilla chips for dipping.

❄️ Storage and Reheating

Refrigerate leftovers in an airtight container for up to 4 days or freeze for 4 months. Thaw overnight in the refrigerator. Reheat on the stovetop or in the microwave until hot.

Other Small Crock Pot Chili Recipes to Try

This chili recipe is one of many small crock pot recipes. Try one of these popular chili recipes:

  • Stew Meat Chili
  • Crock Pot Texas Chili
  • Healthy White Chicken Chili
  • Salsa Verde Chicken Chili

Small Crock Pot White Chicken Chili

This easy-to-make homemade chicken chili is my best chicken chili. Only 5 ingredients are needed: shredded chicken, white beans, salsa, cheese, and cumin to make this dump-and-go small-batch white chicken chili recipe, which can win the office chili cookoff.

A spoonful of white chicken chili.

❓FAQs

Can I make this chili on the stovetop?

Yes. Brown the ground beef with the onion and garlic, and drain. Add the remaining ingredients and simmer for about 45 minutes, or until the vegetables are tender.

Can ground meat be added to a crock pot raw?

It should be browned first. Raw ground meat will clump and release excess fat into the chili, giving it a poorer texture.

How can I lower the sodium in chili?

Use low-sodium canned beans and rinse them well. Don't add extra salt during cooking—it can always be added at the table. If you thin the chili, use water or low-sodium broth.

How much chopped onion does one onion yield?

• A small onion (about the size of a lemon) yields about ½ cup chopped.
• A medium onion (about the size of a baseball) yields about 1 cup chopped.
• A large onion (about the size of a grapefruit) yields about 2 cups chopped.

📖The Recipe Card

orange bowl with chili with cheese
Print Recipe Add to Collection Go to Collections
5 from 21 votes

Small Crock Pot Chili (Ground Beef & Bean, Easy for Two or More)

A classic small-batch ground beef and bean chili made in a small crock pot. Easy to make for two with leftovers or scale up for a crowd. Simple ingredients and a foolproof crock pot recipe.
Prep Time20 minutes mins
Cook Time8 hours hrs
Total Time8 hours hrs 20 minutes mins
Course: Main Course
Cuisine: American
Keyword: chili for two, crockpot chili for two, small batch chili
Servings: 4
Calories: 350kcal
Author: Dan Mikesell AKA DrDan

Ingredients

  • 1 pound ground beef (80/20 recommended)
  • ½ cup chopped onion 1 small
  • 1 clove garlic minced or crushed
  • 2 cups canned kidney beans, low sodium, rinsed and drained
  • ½ green bell pepper (optional)
  • 2 cups diced tomatoes
  • 3 oz tomato paste
  • ½ cup water
  • 3 tablespoons chili powder
  • 1 teaspoon cumin
  • ½ teaspoon oregano
  • ½ teaspoon salt
  • ¼ teaspoon pepper
  • ⅛ teaspoon cayenne pepper – optional and adjust to taste
US Customary - Convert to Metric

Instructions

  • This recipe fits in a 2-quart mini crock pot but can also be made in a larger crock pot.
    ground beef and Ingredient for crock pot chili
  • Chop half of the green bell pepper and a small onion. Rinse and drain one can of light kidney beans.
    Chopped green pepper on a black board
  • Brown 1 pound of ground beef. After 3–4 minutes, add ½ cup chopped onion (one small). Near the end of browning, add minced or crushed garlic. The total browning time is about 8 minutes. Drain and add to the crock pot.
    adding chopped onion to browning ground beef
  • Add one 14-oz can of diced tomatoes, 3-oz of tomato paste, ½ cup water, 3 tablespoons chili powder, 1 teaspoon cumin, ½ teaspoon oregano, ½ teaspoon salt (to taste), ¼ teaspoon pepper, and ⅛ teaspoon cayenne pepper (optional and adjust to taste).
    mixing all ingredients in the crock pot
  • Cook covered on LOW for 8 hours or HIGH for 4 hours.
    Ladle of chili over the crock pot

Video

Notes

Pro Tips:

The full recipe fits in a 2-quart mini crock pot. See the post for scaling and crock pot sizes.
Use ground turkey or chicken if you wish.
A small onion is ½ cup chopped. A medium onion is equivalent to 1 cup of chopped onion.
Rinse beans to reduce sodium, and add salt only to taste.
This is a thick chili. Add more wate
r or beef broth if you prefer your chili to be more like a soup.
The serving size is about 1½ cups.
Refrigerate for up to 4 days or freeze for up to 4 months.

Nutrition

Calories: 350kcal | Carbohydrates: 30g | Protein: 31g | Fat: 13g | Saturated Fat: 5g | Cholesterol: 74mg | Sodium: 638mg | Potassium: 1216mg | Fiber: 10g | Sugar: 9g | Vitamin A: 2300IU | Vitamin C: 29mg | Calcium: 116mg | Iron: 7mg

Editor's Note: Originally published January 19, 2015. The text and options have been expanded. I have published it now as a smaller recipe. I generally make a double batch, and that was initially published. I have also refreshed all the photos and added a table of contents to help with navigation. Please enjoy this excellent chili.

Molly and Lilly looking for Mr Squirrel in the snow.

Boneless Pork Ribs in Oven (Fast Sear and Bake Recipe)

Learn how to cook boneless pork ribs in the oven with this fast sear-and-bake recipe for great browning and juicy results. Tender and juicy boneless country-style ribs are ready for dinner in about 30 minutes.

Quick Answer: How Long to Cook Boneless Pork Ribs in the Oven

Total time: About 25–30 minutes for these boneless pork ribs, including the pan-sear and oven time.

  • Prep and seasoning: 3–5 minutes
  • Sear: 4–6 minutes
  • Oven time: About 15 minutes at 375°F
  • Target temperature: 145°–150°F
boneless pork ribs cut on white plate.
[feast_advanced_jump_to]

quote mark
Featured Comment by Beth:
⭐⭐⭐⭐⭐
"Delicious, MOIST, and fast !!!! thank you for sharing your recipe and technique, and what a clever way to cook ribs!!"

🧾 TL;DR — Recipe Summary

What it is: Lean boneless country-style pork ribs, pan-seared and baked in the oven.

Why you’ll love it: Fast, juicy, and tender, with great browning and no slow cooking.

How to make it: Season, sear for 4–6 minutes, then bake at 375°F for about 15 minutes to 145°–150°F.

🛒 Ingredients

Boneless pork ribs with seasoning and BBQ sauce, partly AI edited—labeled.
  • Boneless pork ribs — also called boneless country-style pork ribs. Use the lean loin-cut ribs for this fast sear-and-bake method.
  • Seasoning: Salt and black pepper are enough, or add garlic powder. A pork dry rub also works well.
  • Barbecue sauce (optional): Brush on after searing if you want a BBQ-style finish. Try my Memphis BBQ sauce or your favorite.

✅ Pro Tip: Use the loin-cut boneless pork ribs—lean, scored into strips, and perfect for this quick oven method—not the bone-in country-style pork ribs, which are a fattier shoulder cut meant for slow cooking.

👨‍🍳 Quick Overview: How to Cook Boneless Pork Ribs

1. Prep and season. Deepen the factory scoring to about ¾ of the thickness, then season well with salt, pepper, garlic, or dry rub.

Deepening cuts in boneless pork ribs before seasoning.

✅ Pro Tip: Deeper cuts help the seasoning soak in and the ribs cook evenly.

2. Pan-sear. Brown both sides in a hot skillet for 2–3 minutes per side.

placing boneless ribs in cast iron skillet.

✅ Pro Tip: Cast iron works best, but any oven-safe skillet will do.

3. Bake. Move the pan to a 375°F oven for about 15 minutes, until the internal temperature reaches 145°–150°F. Rest for 5 minutes before serving.

brushing seared boneless ribs with BBQ sauce.
Brushing with BBQ sauce after searing (optional).

📌 For full step-by-step instructions, scroll to the printable recipe card or continue for timing tips and serving ideas.

⏲️ How Long to Cook Boneless Pork Ribs in the Oven

Boneless pork ribs take about 25–30 minutes total, including a quick 2–3 minute sear per side and about 15 minutes in a 375°F oven.. Cooking time varies with thickness and how long you sear them.

Cook to temperature, not time alone. For these lean boneless country-style ribs, I recommend 145°–150°F for juicy, tender results.


🥩 Boneless Pork Ribs Doneness Chart

  • 145°–150°F (Medium-Rare): Slightly pink, very juicy, and tender. 145°F is the USDA minimum safe temp.
  • 150°–155°F (Medium): Fully cooked, still moist and flavorful.
  • 155°–160°F (Medium-Well): A bit firmer and starting to dry out.
  • 160°F+ (Well Done): Safe but dry — not ideal for this lean cut.

✅ Pro Tip: Skipping the sear? You’ll lose some flavor, but you can bake for about 25 minutes instead. Cook to 145°–150°F for best results, and always use a meat thermometer.

🍴 Serving Ideas

Serve these boneless pork ribs with classic BBQ sides like coleslaw, baked beans, homemade cornbread, or crispy baked French fries.

Without barbecue sauce, serve them more like pork chops with baked green beans with bacon, roasted asparagus, or Honey Wheat Dinner Rolls.

🧊 Storing and Reheating Leftovers

Refrigerate leftovers in an airtight container for up to 4 days, or freeze for up to 3 months.

To reheat, use the oven or microwave until hot throughout. Cover the ribs and add a small splash of broth or water to help keep them moist.

📖 More Boneless Country-Style Rib Recipes

  • How to Grill Boneless Country Style Pork Ribs — step-by-step grilling method
  • Crock Pot Chinese Boneless Ribs — easy takeout-style ribs
  • Grilled Memphis Boneless Country Style Pork Ribs — brined and seasoned for the grill

❓ FAQs

Should I brine boneless pork ribs?

It’s optional but helpful—especially if the ribs were previously frozen. A short brine (1–4 hours) improves moisture and tenderness.

Simple brine (for 1–4 hours):
•2 tablespoons table salt
•1 tablespoon sugar or brown sugar
•2 cups water
•Options: add spices like garlic, pepper, or allspice for extra flavor.

Are boneless and bone-in country-style ribs the same?

No. The boneless country-style pork ribs used in this recipe are cut from the pork loin, so they are lean and cook quickly.

Bone-in country-style ribs usually come from the shoulder area and contain more fat and connective tissue. They are better suited to low-and-slow cooking, not this fast sear-and-bake method.
The image below shows where the boneless loin-cut ribs come from compared with the shoulder cut. (Image licensed May 17, 2017, from Fontolia. Copyright by foxysgraphic - Fotolia. Image modified in accordance with the license.)
Graphic of pork cuts showing boneless country-style pork ribs from loin vs. shoulder—Image licensed May 17, 2017, from Fontolia. Copyright by foxysgraphic - Fotolia. Image modified in accordance with the license.

📖The Recipe Card

BBQ country style boneless pork ribs on plate
Print Recipe Add to Collection Go to Collections
4.96 from 43 votes

Boneless Pork Ribs in Oven – Pan-Seared and Baked Recipe

These boneless country-style pork ribs are pan-seared, then baked in the oven for juicy, tender results. A fast and easy 30-minute pork rib recipe.
Prep Time5 minutes mins
Cook Time20 minutes mins
Total Time25 minutes mins
Course: Main Course
Cuisine: American
Keyword: baked boneless pork ribs, boneless country style ribs, boneless pork ribs in oven
Servings: 4 small servings or 2 large
Calories: 232kcal
Author: Dan Mikesell AKA DrDan

Ingredients

  • 1½ pounds boneless country-style pork ribs one slab
  • Salt and pepper to taste or seasoning of choice
  • 1-2 teaspoon Oil
  • 1 tablespoon BBQ sauce optional

Instructions

1. Trim and season the boneless pork ribs

  • Preheat the oven to 350°F convection or 375°F conventional. Trim most of the fat cap and silverskin from a 1½-pound slab of boneless country-style pork ribs.
    trimming fat pad from boneless pork ribs.
  • Deepen the scoring to about ¾ of the thickness, keeping the slab intact. (Brining is optional. See the post for a simple brine.)
    deepening the cuts in boneless ribs.
  • Pat dry with paper towels. Season all sides and into the cuts with salt, pepper, or your favorite seasoning blend (I like my all-purpose mix: salt, pepper, and garlic powder).
    seasoning country style bonelsss ribs.

2. Searing the ribs

  • Heat a cast-iron skillet or another oven-safe pan over medium-high heat with 1 to 2 teaspoons of oil. Add the ribs and sear for 2–3 minutes per side, until browned. Get close to the final color you want before baking.
    placing boneless ribs in cast iron skillet.

3. Optional: Brush with BBQ sauce

  • Remove from heat and brush the top (not the bottom) generously with BBQ sauce. Be sure to get it into the cuts.
    brushing seared boneless ribs with BBQ sauce.

4. Bake in the oven

  • Transfer the skillet to the oven. Bake for 15–20 minutes, or until the internal temperature reaches 145°–150°F. Most ribs will be done in about 15 minutes; thicker pieces may take longer.
    cooked country style ribs in skillet.

Video

Notes

💡Pro Tips

  1. Boneless country-style pork ribs are different from bone-in country-style ribs and require a faster cooking method.
  2. Trim excess fat and silverskin, but don’t worry about making them perfect.
  3. Pat the ribs dry before seasoning and searing.
  4. Preheat the skillet and oil before adding the ribs.
  5. Rest for 5 minutes after baking. Skipping the sear? Add about 10 minutes to the oven time.
 

Nutrition

Calories: 232kcal | Carbohydrates: 2g | Protein: 38g | Fat: 7g | Saturated Fat: 2g | Cholesterol: 112mg | Sodium: 128mg | Potassium: 668mg | Sugar: 1g | Calcium: 9mg | Iron: 1mg

Originally published March 31, 2012. Updated with an expanded explanation and discussion. Photos are refreshed. A few images are from different photo shoots and may not match.

Dogs are standing in the yard.

Baked Blackened Tilapia

flacking Blackened Tilapia on a white plate

This Baked Blackened Tilapia recipe makes tender, flaky fish with bold, spicy flavor in about 20 minutes. It's an easy, healthy dinner made in the oven with fresh or frozen tilapia and your homemade blackening seasoning.

Baking instead of pan-frying means less mess, no splattering oil, and no standing over a hot skillet. Just a simple sheet pan recipe with delicious results.

⏱️ How Long to Bake Blackened Tilapia in the Oven?

  • Oven temperature: Preheat to 425°F (400°F convection).
  • Cooking time: About 7–10 minutes for thawed tilapia fillets, depending on thickness.
  • Doneness: Cook to an internal temperature of 145°F. Check early to avoid overcooking.
close up of tilapia on white plate.
[feast_advanced_jump_to]

quote mark
Featured Comment by Nancy:
⭐⭐⭐⭐⭐
"I made this in the oven, and we loved it. I decided to try it in the Air Fryer, and the fish was equally good - dinner was ready a little faster and with fewer dishes to clean. Thanks for a great recipe!"

📋 TL;DR — Recipe Summary

  • What: Tender, flaky baked blackened tilapia with a bold, spicy homemade seasoning made from common pantry spices.
  • Why: A quick, easy fish dinner with minimal cleanup. No premade blackening seasoning needed.
  • How: Brush fresh or thawed tilapia with oil, coat with seasoning, and bake in a hot oven until done.

🐟 Ingredients

  • Tilapia fillets: Fresh or frozen and thawed.
  • Olive oil: Or melted butter, to help the seasoning stick and keep the fish moist.
  • Homemade blackening seasoning: Made with paprika, onion powder, garlic powder, thyme, oregano, cayenne pepper, salt, and black pepper. Adjust the cayenne to your preferred heat level.
  • Cooking spray: A light spray helps prevent the seasoned surface from drying out while baking.

👨‍🍳 Quick Overview: Baked Blackened Tilapia in the Oven

1. Make the blackening seasoning, adjusting the cayenne pepper to your preferred heat level.

Mixing rub ingredients in orange bowl.

2. Pat the thawed tilapia dry, brush with oil, and coat both sides with the seasoning.

rubbing spices on tilapia.

3. Place the fish on a prepared, oiled sheet pan and lightly spray with cooking spray.

Spraying seasoned tilapia with cooking spray.

4. Bake until nicely browned and flaky, reaching an internal temperature of 145°F for about 7–10 minutes, depending on thickness. Check early to avoid overcooking.

baked blackened tilapia on tray.

For more details, keep reading. See the recipe card below for complete instructions and to print.

🤔 Options, Variations, and Tips

  • Cajun or Creole tilapia: Use your favorite Cajun or Creole seasoning instead of the homemade blackening rub.
  • Adjust the heat: Increase or decrease the cayenne pepper to suit your taste. See the blackening seasoning section below for details.
  • Frozen tilapia: Thaw overnight in the refrigerator for more predictable cooking. You can cook from frozen, but it takes longer. Always cook to 145°F.
  • Prevent sticking: Use an oiled foil-lined baking sheet, parchment paper, or a silicone baking mat.
  • Avoid overcooking: Tilapia dries out quickly. Check early with an instant-read thermometer.

🐟 Can I Substitute Other Fish for Tilapia?

Yes. Other mild white fish, such as cod, haddock, or halibut, work well with this blackening seasoning.

Cooking time will vary with the thickness of the fillets. Plan on about 10 minutes per inch of thickness, but always check for a final internal temperature of 145°F with an instant-read thermometer.

🔥 Blackening Seasoning—Adjusting the Heat

You can adjust the spiciness of homemade blackening seasoning with your choice of paprika and the amount of cayenne pepper.

Paprika: Regular sweet paprika is my preference. Smoked paprika adds a smoky flavor, while hot paprika adds extra heat.

Cayenne pepper: Adjust the amount to your taste. My approximate heat ratings for this recipe are:

  • 1 teaspoon: Very hot (9/10)
  • ½ teaspoon: Hot (7/10)
  • ¼ teaspoon: Mild to moderately spicy (3–4/10)—my usual amount
  • None: Little heat unless you use hot paprika.

🍽️ Serving Suggestions

Serve baked blackened tilapia with lemon or lime wedges and Homemade Tartar Sauce. Add a simple vegetable, rice, or potatoes for an easy dinner.

Fish tacos: This blackened tilapia makes terrific fish tacos. Serve in warm tortillas with guacamole and your favorite salsa. Mexican rice makes a great side.

Homemade Tartar Sauce

Quick and Easy Tartar Sauce uses only four ingredients you already have in your kitchen. A small homemade version that is better than the store-bought version.

Tarter sauce in white bowl.

🧊 Storage and Reheating

Blackened tilapia is best served fresh. Refrigerate leftovers in an airtight container for up to 3 days.

Reheat gently in the oven or microwave until hot. Avoid overcooking, which will dry out the fish.

📝 More Tilapia Recipes

  • Grilled Blackened Tilapia — The grilled version of this recipe.
  • Parmesan Crusted Tilapia — Another easy oven-baked tilapia recipe.
  • Grilled Lemon Butter Tilapia — A milder alternative with lemon and butter.

Or try Garlic Butter Salmon — Another simple oven-baked fish dinner.

📖The Recipe Card

flacking Blackened Tilapia on a white plate
Print Recipe Add to Collection Go to Collections
4.69 from 22 votes

Baked Blackened Tilapia

Make Baked Blackened Tilapia in the oven with a bold, spicy homemade seasoning using common pantry spices. A quick, easy, healthy fish dinner ready in about 20 minutes.
Prep Time10 minutes mins
Cook Time10 minutes mins
Total Time20 minutes mins
Course: Fish, Main Course
Cuisine: American
Keyword: baked blackened tilapia, blackened tilapia in oven, cajun tilapia baked
Servings: 4 servings
Calories: 178kcal
Author: Dan Mikesell AKA DrDan

Ingredients

  • 1 pound Tilapia fillets fresh or thawed frozen
  • 2 tablespoons extra virgin olive oil or melted butter
  • cooking spray

Blackening Rub — Makes More Than Needed. Save the Extra.

  • 3 tablespoons paprika of your choice
  • 1 teaspoon salt
  • 1 tablespoon onion powder
  • 1 teaspoon black pepper
  • ¼ –1 teaspoon cayenne pepper to taste
  • 1 teaspoon thyme
  • 1 teaspoon oregano
  • ½ teaspoon garlic powder

Simple Tartar Sauce - optional

  • ⅓ cup mayonnaise
  • 2 teaspoons lemon juice
  • 1 teaspoon sweet pickle relish
  • ¼ teaspoon onion powder
US Customary - Convert to Metric

Instructions

  • Preheat the oven to 425°F (400°F convection).
    Spices for blackening seasoning
  • In a small bowl, combine 3 tablespoons paprika, 1 teaspoon salt, 1 tablespoon onion powder, 1 teaspoon black pepper, ¼ to 1 teaspoon cayenne pepper, 1 teaspoon dry thyme, 1 teaspoon dry oregano, and ½ teaspoon garlic powder.
    This makes more seasoning than needed. Use only about ¼ to ⅓ of the mix for one pound of fish. Store the extra for later, in an airtight container.
    Mixing rub ingredients in metal bowl
  • Line a baking sheet with aluminum foil and coat with oil or cooking spray. Parchment paper may also be used.
    brushing oil on baking tray
  • Pat the thawed tilapia fillets dry with paper towels.
    drying tilapia filets with paper towel
  • Brush both sides of the tilapia with olive oil or melted butter.
    brushing tilapia with oil
  • Coat both sides of the fillets with the blackening seasoning. **Do not use all the seasoning mix.** Save the extra in an airtight container.
    rubbing spices onto tilapia
  • Place the seasoned fish on the prepared baking sheet and lightly spray with cooking spray.
    spraying tilapia with PAM
  • Bake until nicely browned and flaky, about 7–10 minutes, depending on thickness. Cook to a final internal temperature of 145°F with an instant-read thermometer. Check a few minutes early.
    cooked blackened tilapia on the baking tray
  • Optional tartar sauce: Mix the mayonnaise, lemon juice, sweet pickle relish, and onion powder in a small bowl.
    ingredients for simple tarter sauce

Video

Notes

Pro Tips

1. Extra seasoning: The blackening rub makes more than needed. Use only ¼ to ⅓ of the mixture per pound of fish. Store the unused seasoning in an airtight container.
2. Adjust the heat: Start with ¼ teaspoon cayenne for moderately spicy fish. Use ½ teaspoon for hot or 1 teaspoon for very hot. Omit it for milder seasoning.
3. Other seasonings: Cajun or Creole seasoning may replace the homemade blackening rub.
4. Frozen tilapia: Thaw overnight in the refrigerator for the most predictable results. Cooking from frozen takes longer.
5. Other fish: Mild white fish, such as cod or haddock, can be substituted. Adjust cooking time for thickness.
6. Prevent dryness: A light spray of cooking oil over the seasoned fish helps keep the surface from drying out.
7. Nutrition: Nutritional information does not include the optional tartar sauce.

Nutrition

Calories: 178kcal | Carbohydrates: 5g | Protein: 21g | Fat: 10g | Saturated Fat: 2g | Polyunsaturated Fat: 1g | Monounsaturated Fat: 5g | Cholesterol: 40mg | Sodium: 563mg | Potassium: 60mg | Fiber: 1g | Sugar: 1g | Vitamin A: 300IU | Vitamin C: 4.1mg | Calcium: 50mg | Iron: 2.3mg

Editor note: This article was originally published on August 3, 2012. It has been updated with expanded options and refreshed photos.

Molly with a stuffed cat.

Old Fashioned Scalloped Potatoes and Ham

Scalloped Potatoes and Ham on a fork

Scalloped potatoes and ham is a baked-from-scratch comfort food. This old-fashioned recipe layers thin-sliced potatoes, leftover ham, a creamy white sauce, and plenty of cheddar, and bakes it all into a golden, fork-tender casserole — easy to make full-size or scale down for two with leftovers.

⏲️ Quick Answer: How Long to Bake Scalloped Potatoes and Ham

  • Bake at 350°F for about 60 minutes (45 minutes covered + 15 uncovered).
  • For a softer, fork-tender texture, bake about 115 minutes (90 minutes covered + 15 uncovered).
scalloped potatoes and ham on a fork.
[feast_advanced_jump_to]

quote mark
Featured Comment from Deanna I:
⭐⭐⭐⭐⭐
"5 stars. This recipe brought back great memories! It is actually better than my mom's."

❤️ Why You'll Love This Recipe

  • Cheesy comfort food: Layers of potatoes, ham, and sauce baked into a golden, bubbly casserole.
  • Easy to make: A simple roux and pantry ingredients—no canned soup needed.
  • Perfect for leftover ham: A great way to use holiday ham from Easter or Christmas.
  • Flexible size: Make a full pan for family or cut it in half for two with leftovers.
  • Fork-tender potatoes every time: Choose your texture—creamy soft or with a little firmness.

🥔 Ingredients

Ham with potatoes and casserole ingredients—labeled.
  • Potatoes — Russets are traditional; peel and slice ¼–⅜ inch thick. Yukon Gold or red potatoes also work and don’t need peeling.
  • Ham — Best with leftover holiday ham cut into bite-size chunks. Skip thin deli slices.
  • Cheese — Mild cheddar is classic. Sharp cheddar, Monterey Jack, or Gruyère are good options too.
  • White sauce — A simple roux of butter, onion, flour, milk, salt, and pepper.

👨‍🍳 How to Make Scalloped Potatoes and Ham (Step-by-Step Overview)

1. Prep the potatoes – Scrub, peel, and slice russet potatoes about ⅜ inch thick. Soak in cool water while preparing the sauce.

Slicing peeled potatoes with a mandoline.

2. Cook the onion – Chop an onion and cook in butter until clearing, about 3–4 minutes.

Cooking onion in butter.

3. Make the roux – Sprinkle flour into the butter/onion mixture, whisk well, and cook about 2 minutes until lightly browned.

Adding flour to butter and cooked onion.

4. Add the milk – Slowly whisk in milk, add salt and pepper, and cook until thickened, about 3–4 minutes.

Pouring milk into the roux to make a cheesy sauce.

5. Prep for assembly – Rinse and dry the potatoes, cut ham into bite-size pieces, and butter a casserole dish.

Butter the casserole dish.

6. Layer – Do 3 layers of potatoes, cheese, ham, and sauce. Top with the remaining cheese.

Pouring sauce over a layer of casserole.

7. First bake – Cover tightly with aluminum foil and bake at 350°F convection (375°F conventional).

Casserole covered in foil.

8. Finish – Bake 45–90 minutes covered, then 20–25 minutes uncovered until golden and bubbling. Covered time will vary depending on your desired texture. Rest 10 minutes before serving.

Golden brown baked scallop potatoes with ham.

✅ Pro Tip: I highly recommend the longer baking time for the best texture.

This is an overview of making scalloped potatoes and ham with step-by-step photos. For full details, keep reading or see the scalable Recipe Card below for complete instructions and to print.

⏲️ How Long to Bake Scalloped Potatoes and Ham

Many recipes suggest 40–45 minutes covered, then 20–25 minutes uncovered at 350°F. At that point, the casserole is cooked through and ready to serve, though the potatoes will usually still have some firmness in the center.

For fork-tender results, plan on about 90 minutes covered plus 20–25 minutes uncovered until golden brown and bubbling. Always let it rest 10 minutes before serving so the sauce sets.

Cook to your preferred texture—creamy soft or with a little firmness.

🤔 Tips for Ham, Potatoes, and Cheese

  • Ham: A great way to use leftover ham, but any bite-size ham pieces will work. If your ham has a sweet glaze, rinse it off under running water before adding it. Use about ¾ pound (around 3 cups) for a full recipe — more or less to taste.
  • Potatoes: Russets are traditional (peel and slice ¼–⅜ inch thick), but Yukon Gold or red potatoes work well and don’t need peeling. Use a mandolin if you have one — with the guard — to get even slices and avoid injury. A medium Russet weighs about 6–8 ounces. Always use raw potatoes, not frozen.
  • Cheese: Mild cheddar is classic, but sharp cheddar, Monterey Jack, or Gruyère also work well. Shredding from a block gives the smoothest sauce.

📅 Make Ahead & Freezing Instructions

Make Ahead:
Assemble the casserole fully, cover it tightly, and refrigerate for 2–3 days before baking. When you’re ready to bake, let it sit out while the oven preheats, then bake as directed. If the casserole is still very cold when it goes into the oven, the covered time may run longer.

Freezing:
Don’t freeze this casserole uncooked — the potatoes turn grainy.
For freezer meals, bake it first, cool completely, and freeze in meal-size portions for 1–2 months. Reheat in the oven for the best texture.

⬇️ How to Make Scalloped Potatoes and Ham for Two (with Leftovers)

This recipe is easy to cut in half, from 8 to 4 servings. The work doesn’t decrease much, but you’ll end up with a “for two” meal plus leftovers that freeze well.

  • Use a 6×9 or 8×8 pan for the half recipe.
  • In the recipe card, adjust servings from 8 to 4 — that will do the math and change the ingredient amounts displayed.
  • The amounts listed in the instructions do not adjust, so follow the ingredient list, not the step text.
  • Cooking time will be slightly shorter, so start checking early for fork-tender potatoes.

🍽️ Serving Suggestions

Serve scalloped potatoes and ham as a main dish or as a hearty side. Because it’s a rich, starchy casserole, pair it with something fresh or simple: a green salad, steamed vegetables, peas, corn, or green beans all work well.

❄️ How to Store Leftovers

Store leftovers sealed in the refrigerator for 3–4 days. For longer storage, freeze for 1–2 months.

Reheat in the oven when possible. If frozen, thaw overnight in the refrigerator before reheating.

❓ FAQs

What's the difference between scalloped and au gratin potatoes?

Scalloped potatoes are baked in a casserole with a creamy sauce. Au gratin means “with cheese.” Since this recipe has both, you could call it scalloped potatoes, au gratin potatoes, or even scalloped au gratin potatoes.

Do I need to make a white sauce for scalloped potatoes and ham?

Yes. The creamy sauce—made from a simple butter-onion-flour roux with milk—is what gives scalloped potatoes their classic texture. Let the casserole rest for 10 minutes after baking so the sauce can thicken and set.

If you need help with the roux, see Making Gravy from Scratch.

Why are my potatoes still firm?

With the standard covered baking time of 45 minutes, the potatoes will still be slightly firm. If you want a creamier, fully fork-tender texture (like I do), bake for about 90 minutes covered, then 20–25 minutes uncovered to brown.

Other reasons for firm potatoes include thicker slices or putting the casserole into the oven very cold — both will require a longer covered bake time to soften.

😊 Other Recipes You Will Love

  • Old Fashion Scalloped Potatoes — a 50-year-old classic.
  • Crock Pot Scalloped Potatoes — easy slow cooker version (add ham if you like).
  • Tuna Noodle Casserole — creamy classic with a Parmesan topping.
  • Crock Pot Chicken Pasta — cheesy baked-ziti flavor without the oven.
  • Chicken Broccoli Casserole — an easy, cheesy family favorite.

📖The Recipe Card

Scalloped Potatoes and Ham on a fork
Print Recipe Add to Collection Go to Collections
4.87 from 43 votes

Old Fashioned Scalloped Potatoes and Ham (Easy & Cheesy)

Classic scalloped potatoes and ham baked in a creamy white sauce with cheddar. Easy to make with leftover ham, fork-tender potatoes, and cheesy comfort food flavor.
Prep Time25 minutes mins
Cook Time2 hours hrs
Total Time2 hours hrs 25 minutes mins
Course: Main Course
Cuisine: American
Keyword: Old Fashioned Scalloped Potatoes and Ham, Scalloped Potatoes and Ham, scalloped potatoes and ham for two
Servings: 8 servings
Calories: 402kcal
Author: Dan Mikesell AKA DrDan

Ingredients

  • 4 russet potatoes—medium (peeled and sliced thin)
  • 1 small onion – chopped
  • 4 tablespoons butter
  • 4 tablespoons all-purpose flour
  • 1 teaspoon salt
  • ½ teaspoon pepper
  • 3 cups milk
  • 2 cups shredded cheese (mild or sharp cheddar, Monterey Jack, others)
  • ¾ pound ham — diced or cut into small bite-size pieces (about 3 cups; a bit more or less is fine)
US Customary - Convert to Metric

Instructions

  • Preheat oven to 350° convection or 375° conventional.
    Ham with potatoes and casserole ingredients—labeled.
  • Scrub, peel, and slice 4 medium russet potatoes (1½ to 2 pounds), about ⅜ inch thick. A mandolin is recommended if you have one. If you use a mandolin, please follow the manufacturer's safety instructions.
    cutting potatoes with a mandolin
  • Chop 1 small onion. Chop or slice your ham into bite-size pieces.
    Chop an onion.
  • Over medium-high heat, in a medium saucepan, melt 4 tablespoons of butter and add the onion. Cook until clearing—about 3–4 minutes.
    cooking chopped onion with butter in a sauce pan
  • Sprinkle in 4 tablespoons of flour and mix well. Continue to cook and whisk for about 2 minutes until light browning.
    sprinkling flour into cooked onion and butter to make roux
  • Add 3 cups of milk slowly while continuing to whisk. Whisk and cook until thickening well—about 3–4 minutes. Mix in 1 teaspoon salt and ½ teaspoon black pepper.
    Add milk to the saucepan with a whisk.
  • Prep a 9 by 13 inch casserole dish with a coat of butter.
    Butter the casserole dish.
  • Add about ⅓ of the sliced potatoes, top with ⅓ of the ham, ½ cup of shredded cheese, and ⅓ of the sauce. Repeat twice, but with the top layer, add the cheese last and double to a full cup.
    pouring sauce over layer in the casserole
  • Cover with aluminum foil.
    Casserole covered with foil.
  • Bake 45–90 minutes covered, then 20–25 minutes uncovered until golden and bubbling. Covered time will vary depending on your desired texture. Allow to sit for about 10 minutes before serving—do not skip this step.
    browned scalloped potatoes and ham out of the oven

Video

Notes

⏲️ How Long to Bake Scalloped Potatoes and Ham

Many recipes suggest 40–45 minutes covered, then 20–25 minutes uncovered at 350°F. At that point, the casserole is cooked through and ready to serve, though the potatoes will usually still have some firmness in the center.
For fork-tender results, plan on about 90 minutes covered, plus 20–25 minutes uncovered, until golden brown and bubbling.
Cook to your preferred texture—creamy soft or with a little firmness.

Pro Tips:

  1. Make a smaller scalloped potatoes for two with leftovers. See the post for details.
  2. Use a mandolin to save time — but always with the guard (you don’t want an injury). Follow all manufacturer instructions.
  3. Use potatoes of your choice, but I like Russets.
  4. Cheese of your choice. I use mild cheddar or Monterey Jack.
  5. I scale this up or down depending on how much leftover ham I have.
  6. Make ahead and refrigerate for 2 days before baking. Freezing before baking is not suggested.
  7. Leftovers are good refrigerated for 4 days and can be frozen for 2 months.

Nutrition

Calories: 402kcal | Carbohydrates: 28g | Protein: 22g | Fat: 22g | Saturated Fat: 12g | Cholesterol: 73mg | Sodium: 1065mg | Potassium: 757mg | Fiber: 2g | Sugar: 6g | Vitamin A: 645IU | Vitamin C: 7mg | Calcium: 337mg | Iron: 2mg

Editor's Note: This recipe was originally published on April 12, 2014. Updated with expanded options, refreshed photos, and a table of contents to help navigation.

Molly in a flag bandan with strawberry.

Italian Sausage Marinara Sauce

italian Sausage Marinara on pasta on a white plate

Quick and easy Italian Sausage Marinara Sauce has a wonderful taste. Use it on spaghetti, pasta casseroles, spaghetti squash, or a sub sandwich.

Make this easy, delicious sauce in about an hour with these simple step-by-step photo instructions.

Ingredients

Italian Sausage
Onion and garlic
Tomato products—paste, crushed, and diced
Seasoning—oregano, basil, salt, pepper, red pepper flakes (optional)

italian Sausage Marinara on pasta.
[feast_advanced_jump_to]
Blue ribbon divider used for visual effect

A good marinara sauce escapes most people, and the long-simmering needed to get to a great taste scares many people away. Usually, they end up with disgusting jar sauce.

While you can make this sauce in an hour, like all sauces, the longer the simmer, the better. Please enjoy this easy and delicious recipe we have used for years.

👨‍🍳How to make Italian Sausage Marinara Sauce—Step-by-Step

browning sausage in a skillet.

1. If you have Italian sausage links, you can cut them into 1-inch pieces, remove the casings, and use them as small meatballs. You can break the links into ground sausage and use it that way. Or use Italian ground sausage.

chopped onion with knife.

2. Chop a medium onion and add until the meat is browned and the onion slightly clearing. It is ok for the meat not to be totally cooked at this point. Add 4 to 5 crushed garlic cloves and let "bloom" for 30 seconds. Remove from heat.

adding crushed tomatoes to cooked sausage.

3. Add 2 teaspoons dried oregano, 2 teaspoons dried basil, 1 teaspoon salt, ½ teaspoon pepper, ½ teaspoon red pepper flakes (optional), 28 oz crushed tomatoes, 6 oz tomato paste, and 6 oz water, and 14 ½ oz diced tomatoes.

simmering sauce in the pan.

4. Place back on medium heat until a light boil, cover, and turn down to a light simmer for 1-3 hours.

For more details, keep reading. See the Recipe Card below for complete instructions and to print.

Options and variations—make it your way

The Italian sausage needs to be one you enjoy. I suggest a sweet Italian sausage, not a hot one. You want to be able to control the heat level.

If you have sausage links, you can remove the casing, cut it into pieces, and cook them almost like a meatball. Or mash them up and cook them like bulk sausage.

With tomato products, quality matters—if you buy cheap generic products, you will get cheap generic results. You can switch between the same volume of crushed or diced tomatoes.

The tomato paste adds a huge burst of tomato taste and some very nice sweetness.

Spiciness—This is relatively mild with a heat level of 2-3 if you use ½ teaspoon of crushed red pepper. Without that, there is almost no heat. The heat can get out of hand quickly if you use hot Italian sausage. So be careful.

🇮🇹Easy Italian recipes you will love

Fire up the slow cooker for some Crock Pot Pasta Bake or Crock Pot Chicken Pasta Bake. Or stay on the stove with Easy Chicken Spaghetti, Baked Italian Meatballs, or Baked Chicken Spaghetti, And get fancy with Chicken Parmesan Soup or Healthy Chicken Parmesan.

↕️How to make this a "for two" or "family size " recipe

This is a very easy recipe to cut in half or double to fit your needs

  1. Use the recipe card and adjust the number of servings.
  2. Use the amount of ingredients in the ingredient list, not the instructions—those do not adjust.
  3. Use diced tomatoes for the crushed if needed.
  4. Cooking time will be the same.

How to use Italian sausage marinara sauce

The most common use is Italian sausage spaghetti. Serve with a fresh salad and nice bread like Julia Child's French Bread or Stand Mixer Peasant Bread.

Use in other pasta dishes like lasagna or Baked Pasta and Sausage.

If made as meatballs, it makes excellent sub sandwiches.

Storage of leftovers

Leftover sauce should be sealed in an airtight container. Then refrigerate for 4 days or freeze for 4 months.

✔️FAQ

Do I need to cook the sausage before simmering it?

You must brown the sausage to prevent clumping in the bulk sausage and drain excess fat. Since we are simmering the sauce, it will finish cooking to a safe 165° in the sauce.

If in meatball shape, browning will add some taste but is not otherwise required.

Blue ribbon divider used for visual effect

This recipe is listed in these categories. See them for more similar recipes.

30-Minute Dinner Recipes, Italian Recipes, Pork Recipes

Have you tried this recipe, or have a question? Join the community discussion in the comments.

📖The Recipe Card

italian Sausage Marinara on pasta on a white plate
Print Recipe Add to Collection Go to Collections
5 from 2 votes

Italian Sausage Marinara Sauce

Quick and easy Italian sausage marinara sauce has a wonderful taste. Use it on spaghetti, pasta casseroles, spaghetti squash, or a sub sandwich. Just follow these simple step-by-step photo instructions for some great Italian.
Prep Time10 minutes mins
Cook Time1 hour hr
Total Time1 hour hr 10 minutes mins
Course: Main Course
Cuisine: Italian
Keyword: Italian Sausage Marinara Sauce, Marinara Sauce, Spaghetti Sauce
Servings: 8
Calories: 247kcal
Author: Dan Mikesell AKA DrDan

Ingredients

  • 1 pound Sweet Italian Sausage
  • 1 onion medium
  • 4 cloves garlic crushed
  • 2 teaspoon oregano
  • 2 teaspoon basil
  • 1 teaspoon salt
  • ½ teaspoon pepper
  • ½ teaspoon red pepper flakes optional
  • 28 oz crushed tomatoes
  • 6 oz tomato paste
  • 6 oz water
  • 15 oz diced tomatoes
US Customary - Convert to Metric

Instructions

  • If you have Italian sausage links, you can cut them into 1-inch pieces, remove the casings, and use them as small meatballs. You can break the links into ground sausage and use it that way. Or use Italian ground sausage.
    browning sausage in a skillet
  • Chop a medium onion and add until the meat is browned and the onion slightly clearing. It is ok for the meat not to be totally cooked at this point. Add 4 to 5 cloves of crushed garlic and let "bloom" for 30 seconds. Remove from heat.
    chopped onion on white board
  • Add 2 teaspoons dried oregano, 2 teaspoons dried basil, 1 teaspoon salt, ½ teaspoon pepper, ½ teaspoon red pepper flakes (optional), 28 oz crushed tomatoes, 6 oz tomato paste, and 6 oz water, and 14 ½ oz diced tomatoes.
    adding crushed tomatoes to cooked sausage in pan
  • Place back on medium heat until light boil.
    simmering sauce in the pan
  • Cover and turn down to a light simmer for 1-3 hours.
    sausage marinara on pasta on a white plate

Notes

Pro Tips

  1. You can use bulk or linked Italian sausage. If links, you can cook it in some chunks like a small meatball after removing the casing or break them up and cook it like bulk sausage.
  2. Use only the sausage and tomato products you like. Generic ingredients will get generic results.
  3. You can use diced tomatoes instead of crushed tomatoes.
  4. The heat level for ½ teaspoon of crushed pepper is about 3. A full teaspoon will be about 6-7.
  5. I suggest not using hot Italian sausage, or the heat can get out of hand as the spices come out into the sauce.
  6. As little as 30 minutes will give fairly good results. The longer you simmer, the better.
  7. Good refrigerated for 3-4 days and frozen for 3-4 months.

Nutrition

Calories: 247kcal | Carbohydrates: 19g | Protein: 14g | Fat: 12g | Saturated Fat: 4g | Polyunsaturated Fat: 0.04g | Monounsaturated Fat: 0.01g | Cholesterol: 33mg | Sodium: 1283mg | Potassium: 397mg | Fiber: 4g | Sugar: 9g | Vitamin A: 600IU | Vitamin C: 19.8mg | Calcium: 70mg | Iron: 2.5mg

Editor's Note: Originally published April 13, 2010. Updated with expanded options, refreshed photos, and a table of contents to help navigation.

dogs with purple puppy.

Pan Seared Oven Roasted Pork Tenderloin

pork tenderloin on blue platter

Pan-seared pork tenderloin, finished by baking to your ideal temperature, is tender, juicy, and delicious! With excellent browning from cast iron searing, it is still moist and tender from oven roasting— an easy, 30-minute dinner recipe.

🐖Ingredients

Pork tenderloin
Butter or oil
Seasoning of your choice—Kosher salt and black pepper is enough, but adding garlic powder is suggested.

pork tenderloin on blue platter sq
[feast_advanced_jump_to]
Blue ribbon divider used for visual effect

Featured Comment from Curtis:
5 stars. I love this recipe. I make it at least twice a month. The tenderloins turn out juicy and perfect just about every time…

This recipe depends on an old, tried and true method. First, we will sear a pork tenderloin in a cast-iron skillet, creating flavor by causing a Maillard reaction. Then, baked in the oven to bring it up to the final internal temperature.

👨‍🍳How to Sear a Pork Tenderloin and Bake in the Oven—Step-by-Step

trimmed pork tenderloin on a red board with a knife.

1. Preheat the oven to 400° convection or 425° in a regular oven. Trim by removing the "silver skin" and any trimmable fat. Pat dry with a paper towel, then season with coarse salt, black pepper, or other seasoning.

pork tenderloin in a cast iron skillet.

2. Heat 1-2 teaspoons of butter or vegetable oil in an oven-safe pan (cast iron skillet preferred) over medium-high heat until hot. Sear for approximately 2 to 3 minutes, rotate ⅓, and repeat until all sides are seared.

cooked pork tenderloin in a cast iron skillet.

3. Move the tenderloin and skillet to the preheated oven and cook until an internal temp of 145°-150° (15-17 minutes usually) using an instant-read thermometer.

Pork Tenderloin slices on plate.

4. Move to a plate, tent lightly with foil, and rest for about 5 minutes before slicing and serving.

For more details, keep reading. See the Recipe Card below for complete instructions and to print.

⏰How long to bake pork tenderloin

After searing on the stovetop for about 6-9 minutes, the baking time will be 15 to 17 minutes to 145° in a 425° oven. It will vary by the tenderloin size, the amount of searing, the beginning temperature of the meat, your pan, and the oven.

Other oven temperatures for medium-rare (145°-150°.)

Oven
Temperature
Searing
Time
Approximate
Oven TIme
Approximate
Total Time
350°6 to 9 minutes25+ minutes31 -34+ minutes
375°6 to 9 minutes20-24 minutes26-33 minutes
400°6 to 9 minutes18-20 minutes24-29 minutes
425°6 to 9 minutes15-17 minutes21-26 minutes
These are approximate times provided for planning only. Convection oven time will be 25° lower.

Always check the internal temperature and allow for a 2°-4° rise in temperature after cooking. Never cook by time alone, always check early, and thinner tenderloins cook significantly faster.

🌡️Levels of Cooked Pork (Doneness)

Cooked Pork LevelInternal Temperature
RareNot recommended due to safety.
Medium-Rare145°-150°
Medium150°-155°
Medium-Well155°-160°
Well Done160°+
For pork chops, loin, and tenderloin.

✔️Tips to cook it right every time

The shape of the tenderloin is a bit odd. It is triangular, not flat, round, or square. So, when cooking pork tenderloin, it needs to be "flipped" by rotating ⅓, not ½, rotation.

The best pan to use is a cast iron 10 or 12-inch skillet, but any oven-safe pan that can move from stovetop to oven will work.

If you don’t have a pan that will work, sear in a stovetop pan and move to a different preheated oven-safe pan like a rimmed baking sheet to finish.

The pan must be hot with a couple of teaspoons of melted butter or oil over medium-high heat when the tenderloin is placed in the pan. It will not sear well if it is not hot at the start of searing.

Sear to approximately the final color you want at the end of cooking.

Seasoning options

Just coarse salt and black pepper are acceptable. Much of the taste will come from the searing of the tenderloin, creating a Maillard reaction. A good dose of garlic is required in our house, and I usually use our All Purpose Seasoning - 7:2:2, which has a good amount of garlic powder.

You may use fresh garlic by adding a couple of fresh garlic cloves to olive oil, cooking for a minute or two, and then spreading over the tenderloin as it moves from the stovetop to the oven.

Thyme, smoked paprika, fresh herbs, or other spices can be added before entering the oven.

Pork Tenderloin Recipes

Take it outside when Grilling Pork Tenderloin, Memphis Grilled Pork Tenderloin, or Pork Tenderloin Medallions. Make a complete meal with Roasted Pork Tenderloin with Potatoes.

Make wonderful pork tenderloin sandwiches: Oven Fried Pork Tenderloin Sandwiches, Shredded Pork Tenderloin, or Iowa Breaded Pork Tenderloin Sandwiches.

Why Use Cast-Iron?

While not required for this recipe, cast iron is the best choice for many reasons.

  • Cast iron can tolerate both high heat and easily transform from the stovetop to the oven.
  • The bottom is very flat and transfers heat across the surface evenly.
  • It is naturally non-stick when correctly seasoned.
  • It is generally cheap and will last for generations.

🍽️How to Serve

To fancy it up a bit, a pan sauce can be made with the browned bits and juices left in the pan by adding some broth or wine. You may add other seasonings like Dijon mustard or more butter, shallots, or other spices. Whisk together and serve with the slices of tenderloin.

We usually serve with hot vegetables like Roasted Parmesan Asparagus, Baked Green Beans with Bacon, or Parmesan Roasted Cauliflower. Add in some Oven Roasted Baby Potatoes or Easy Dinner Rolls.

While pork is "the other white meat," for wine, we usually skip white wine and go for a millet or cabernet.

How to Store Leftovers

Seal leftovers in an airtight container and refrigerate for 4 days or freeze for 3-4 months.

To reheat leftovers just a short time in a microwave works well. Or on the stovetop, if the slices are relatively thin, in a frying pan with a bit of oil over medium heat. You can also reheat in the oven or an air fryer.

❓FAQs

How do you remove the silverskin from a pork tenderloin?

Most tenderloins will have a "silver skin" that should be removed. It is some tough connective tissue.

Work a finger or butter knife under the silver skin, then work off the silver skin with a sharp knife and some traction. It may take several times to get most of it. A bit left is not an issue.

What is the minimum safe internal temperature for pork tenderloin?

According to the USDA, the minimum safe final internal temperature is 145°. At 145°, the center will be a little pink but hot. The pork temperature will rise 2°-4° after cooking, so account for that.

You can cook to a higher internal temperature if you wish.

Do I have to use a meat thermometer to check the pork's internal temperature?

You must use a meat thermometer or an instant-read thermometer to get the correct final temperature.

🐖Pork Tenderloin is Not Pork Loin

The tenderloin refers to the psoas muscle along the lower back. The psoas is the most tender cut of meat since it is not used for movement. It is chicken tenders in the chicken or beef tenderloin (filet mignon) in cattle.

location of pork tenderloin - Image licensed May 17, 2017, from Fotolia. Copyright by foxysgraphic - Fotolia. Image modified in accordance with the license.
Image licensed from Fotolia. Copyright by foxysgraphic - Fotolia. The image was modified following the license.

Over the years, many commenters on this blog have confused pork loin with tenderloin. It is obvious when they have a "4-pound tenderloin"—no, they do not.

The tenderloin usually weighs about 1 to 1 ½ pounds. A huge one could push towards 2 pounds. PLEASE BE SURE YOU HAVE A TENDERLOIN AND NOT A LOIN.

Blue ribbon divider used for visual effect

This recipe is listed in these categories. See them for more similar recipes.

101's Best Recipes, 30-Minute Dinner Recipes, Pork Recipes, Pork Tenderloin Recipes

Have you tried this recipe, or have a question? Join the community discussion in the comments.

📖The Recipe Card

pork tenderloin on blue platter
Print Recipe Add to Collection Go to Collections
5 from 9 votes

Pan Seared Oven Roasted Pork Tenderloin

Pan-seared pork tenderloin, finished by baking to your ideal temperature, is tender, juicy, and delicious! With excellent browning from cast iron searing, it is still moist and tender from oven roasting— an easy, 30-minute dinner recipe.
Prep Time5 minutes mins
Cook Time25 minutes mins
Total Time30 minutes mins
Course: Main Course
Cuisine: American
Keyword: Baked Pork Tenderloin, oven roasted pork tenderloin, pan seared pork tenderloin
Servings: 4 servings
Calories: 221kcal
Author: Dan Mikesell AKA DrDan

Ingredients

  • 1 pork tenderloin about 1 ½ pounds
  • 2 teaspoons butter or vegetable oil
  • kosher salt to taste
  • pepper coarse ground
  • garlic powder optional
US Customary - Convert to Metric

Instructions

  • Preheat the oven to 400° convection or 425° in a regular oven. Trim by removing the "silver skin" and any trimmable fat. Pat dry with a paper towel, then season with coarse salt, black pepper, or other seasoning.
    trimmed pork tenderloin on a red board with a knife
  • Heat 1-2 teaspoons of butter or vegetable oil in an oven-safe pan (cast iron skillet preferred) over medium-high heat until hot. Sear for approximately 2 to 3 minutes, rotate ⅓, and repeat until all sides are seared.
    pork tenderloin in a cast iron skillet
  • Move the tenderloin and skillet to the preheated oven and cook until an internal temp of 145°-150° (15-17 minutes usually) using an instant-read thermometer.
    cooked pork tenderloin in a cast iron skillet
  • Move to a plate, tent lightly with foil, and rest for about 5 minutes before slicing and serving.
    Pork Tenderloin slices on plate

Video

Notes

Pro Tips

  1. Cast iron works very well here or another oven-safe pan. If you do not have an oven-safe pan, sear on the stovetop, then transfer to a preheated oven pan.
  2. I like to use my All Purpose Seasoning; 7:2:2 for the seasoning, which has salt, pepper, and garlic powder., But use any seasoning you want.
  3. Remember that a pork loin is NOT a pork tenderloin.
  4. Pork tenderloin is a triangular shape so sear all three sides.
  5. Be sure to rest the meat after cooking for 5 minutes or a bit more so the fluid will reabsorb into the meat.
  6. Many options are discussed in the post. Please check there if you have questions first.
  7. Serving size note. Pork tenderloin is two large servings or 3-4 smaller servings and is a bit dependent on the size of the tenderloin. They will range from slightly over 1 pound to almost 2 pounds.

Nutrition

Calories: 221kcal | Protein: 35g | Fat: 8g | Saturated Fat: 4g | Cholesterol: 111mg | Sodium: 379mg | Potassium: 668mg | Calcium: 10mg | Iron: 2mg

Editor's Note: This recipe was originally published on February 15, 2010, the second month of this blog. It has had several minor updates but is now a total rewrite of the discussion and new photos.

Dogs running hard in snow..

Pork Carnitas in the Crock Pot

pork carnitas soft taco with toppings.

The easiest way to make perfect pork carnitas is low and slow in your crock pot from pork butt. Spend a few minutes trimming, then season with citrus and classic spices. You can now make fall-apart tender carnitas at home.

Ingredients

Pork Butt—AKA Boston Butt
Fresh limes and orange
Jalapeno
Garlic
Seasoning—cumin, oregano, salt, black pepper

pork carnitas soft taco with toppings.
[feast_advanced_jump_to]
Blue ribbon divider used for visual effect

Featured Comment from Suzanne:
"5 stars. I had been looking for a recipe for Carnitas that had the citrus flavors and this hit the nail on the head. These were perfect and so easy…"

Pork carnitas are the holy grail of Mexican food around my house. But they are usually too much work, so restaurants are for us. We now grade Mexican restaurants on their carnitas (and refried beans) just like I judge Italian restaurants by their Chicken Parmesan.

I have made carnitas on the stovetop (huge mess) and oven, see Pork Carnitas in the Oven (less mess). It was time to make carnitas even easier in a crock pot.

👨‍🍳How to Make Carnitas from Pork Butt in a Crock Pot—Easy Step-by-Step

pork butt with seaoning for carnitas.

1. Start with fresh orange, lime, and jalapeno, along with 3-5 pounds of pork butt.

pork butt cut into cubes for carnitas.

2. Cut the pork butt into 2-inch chunks. Trim large pieces of fat and, of course, the bone if present.

chopping a jalapeno on a black board.

3. Mince the jalapeno and crush or mince four cloves of garlic.

squeezing an orange on raw pork.

4. Add the meat to a large mixing bowl and coat it with the juice of a large orange and two limes. If cooking closer to three pounds, do one lime and a smaller orange.

mixing other seasoning into bowl with raw carnitas.

5. Add two teaspoons of coarse salt, one teaspoon of black pepper, one teaspoon of cumin, and one teaspoon of oregano. Add the garlic and jalapeno and mix well.

seasoned carnitas in a large crock pot.

6. Prep a large crock pot with a good spray of PAM. Add the meat, cook on low for 5-6 hours, and check the internal temperature. You're looking for 190° plus.

large crock pot with lid set with some opening.

7. Optional browning of a single layer of meat after reaching 190°+: remove enough liquid to leave about half the meat exposed. Save the removed liquid. Cook for one more hour with the top opened a little to vent moisture. Save all the juices for later.

cooked carnita on a large spoon.

8. Remove the carnitas and cover with foil for 10-20 minutes before serving. Save all juices and refrigerate for reheating—skim fat after cooling.

pork carnitas shredded on plate.

9. Serve shredded with the topping of your choice, as pork tacos or fajitas.

For more details, keep reading. See the Recipe Card below for complete instructions and to print.

🐖What Pork To Use

Use pork butt, also known as Boston butt, which is the classic meat for carnitas. It should be seasoned and cooked low and slow. We want to get the top crisped up, so 3-5 pounds is the right amount for most standard full-size crock pots.

I have recipes for carnitas with chicken and pork tenderloin on this site, but pork butt is the best choice here.

About Seasoning and Citrus

The spicing will also be classic—fresh orange, lime, jalapeno, cumin, oregano, and garlic.

The cutting up of the pork into "little meats" provides more surface area for flavor, and they cook faster.

Oranges and limes add a unique flavor to this recipe. You can use juice instead of fresh fruit. One orange will make ¼ to ⅓ cup of orange juice for the orange. For the lime, use 2 tablespoons of lime juice.

↕️How to use smaller crock pots and make a "for two" recipe

My preferred way to cook this recipe is with a larger crock pot and a single layer of chunks of pork butt. This allows for some browning in the crock pot, as described. But the total volume of the recipe makes use of smaller crock pots work.

If not browning in the crock pot, two layers of meat will cook well, but you should make sure the internal temperature reaches 190°+ (200° is better). This makes use of a full recipe in a small 3 to 4-quart crock pot work, and a half recipe will work in a 2-quart mini crock pot.

  1. Use the recipe card and adjust the number of servings to half.
  2. Use the amount of ingredients in the ingredient list, not the instructions—those do not adjust.
  3. The half recipe will fit in a 2-quart mini crock pot in two layers or one layer in a small 3-4 quart crock pot.
  4. Cook to an internal temperature of 190°+.

More Easy Mexican Recipes

Check out Pork Carnitas in the Oven, Crock Pot Mexican Casserole with Chicken,Mexican Chicken and Rice, and Crock Pot Chicken Enchiladas. And don't miss our favorite Taco Meat Recipe—once you try it, you will never repurchase taco mix again.

🍽️Serving carnitas

Carnitas are commonly shredded and served in soft flour or corn tortillas. Typical toppings for tacos are usually used.
-Sour cream
-Shredded cheese of choice
-Pico de Gallo
-Salsa
-Guacamole or avocado
-Sliced jalapenos
-Chopped cilantro, tomatoes, lettuce, and onions

For side dishes, anything you like, but here are some suggestions.
-Refried beans
-Mexican Rice
-Chips and salsa
-Queso dip

Storage of leftovers

Leftover carnitas can be stored refrigerated for 4 days if sealed airtight. You can also freeze carnitas for 3 months.

♨️How to reheat carnitas

There are so many choices and so much disagreement. All will use some crock pot cooking liquid to moisturize during reheating. If you run out or forget to save some, use chicken broth. Here are three ways to reheat.

How to reheat carnitas in the oven

The oven is the most recommended method. But a couple of ways are usually recommended.

First Method—shred up some, add some of the cooking liquid, and heat under a broiler on a baking sheet. This will add some crispiness and is preferred.

Second Method—use a covered dish in a 350° oven. Add some of the cooking liquid to the bottom. This will take about 10-15 minutes.

If you don't have the cooking liquid, use chicken broth or apple juice.

How to reheat carnitas on the stovetop

Heat 1 tablespoon of oil in a large skillet over medium-high heat. Place shredded pork into the pan, press down, and cook until the bottom side is browning. Add some of the juices and flip. Continue to cook until the bottom is brown a bit and all the meat is hot.

Can carnitas be reheated in the microwave?

Yes, this is ok but be careful. Heat only what you need and just warm enough to be served immediately. Add some juices to moisten.

FAQs

Can carnitas be made with other meat?

The traditional street is pork butt, but other meats may be used as well as other cooking methods. Here are a few examples: Healthier Pork Carnitas with Pork Tenderloin and Chicken Carnitas.

What are carnitas

Known as "little meats" and sometimes called Mexican pulled pork, they can be found on the street in Mexico cooking in large vats of lard. Not a good option for us home-cooking Yankees.

The most common home method is braising a chuck of pork butt in a spiced-up fluid of some type and then cooking off the liquid on the stovetop—a major mess. There is almost no mess with baking, and much of the fat drains due to the rack, so the "greasy factor" is markedly decreased.

Blue ribbon divider used for visual effect

This recipe is listed in these categories. See them for more similar recipes.

Crock Pot Recipes, Mexican Recipes, Mini Crock Pot Recipes, Pork Butt Recipes, Pork Recipes, Small Crock Pots Recipes

Have you tried this recipe, or have a question? Join the community discussion in the comments.

📖The Recipe Card

pork carnitas soft taco with toppings.
Print Recipe Add to Collection Go to Collections
5 from 1 vote

Pork Carnitas in the Crock Pot

The easiest way to make perfect pork carnitas is low and slow in your crock pot from pork butt. Spend a few minutes trimming, then season with citrus and classic spices. You can now make fall-apart tender carnitas at home.
Prep Time15 minutes mins
Cook Time6 hours hrs
Total Time6 hours hrs 15 minutes mins
Course: Main Course
Cuisine: Mexican
Keyword: Carnitas, Crock Pot Carnitas, Crock Pot Pulled Pork
Servings: 8 servings
Calories: 348kcal
Author: Dan Mikesell AKA DrDan

Ingredients

  • 3-5 pounds Pork Butt AKA Boston Butt
  • 2 limes
  • 1 orange large
  • 1 jalapeno
  • 4 cloves garlic
  • 2 teaspoons coarse salt
  • 1 teaspoon black pepper
  • 1 teaspoon cumin
  • 1 teaspoon oregano
US Customary - Convert to Metric

Instructions

  • Start with fresh orange, lime, and jalapeno, along with 3-5 pounds of pork butt.
    pork butt with seaoning for carnitas
  • Cut the pork butt into 2-inch chunks. Trim large pieces of fat and, of course, the bone if present.
    pork butt cut into cubes for carnitas
  • Mince the jalapeno and crush or mince four cloves of garlic.
    chopping a jalapeno on a black board
  • Add the meat to a large mixing bowl and coat with the juice of a large orange and two limes. If cooking closer to three pounds, do one lime and a smaller orange.
    squeezing an orange on raw pork
  • Add two teaspoons of coarse salt, one teaspoon of black pepper, one teaspoon of cumin, and one teaspoon of oregano. Add the garlic and jalapeno and mix well.
    mixing other seasoning into bowl with raw carnitas
  • Prep a large crock pot with a good spray of PAM. Add the meat, cook on low for 5-6 hours, and check the internal temperature. You're looking for 190° plus.
    seasoned carnitas in a large crock pot
  • Optional browning of a single layer of meat after reaching 190°+: remove enough liquid to leave about half the meat exposed. Save the removed liquid. Cook for one more hour with the top opened a little to vent moisture. Save all the juices for later.
    large crock pot with lid set with some opening
  • Remove the carnitas and cover with foil for 10-20 minutes before serving. Save all juices and refrigerate for reheating—skim fat after cooling.
    cooked carnita on a large spoon
  • Serve shredded with the topping of your choice, as pork tacos or fajitas.
    pork carnitas soft taco with toppings.

Notes

Pro Tips:
  1. Use 3-5 pounds of pork butt. Since you will be cutting it up, boneless or bone-in does not matter.
  2. Season as you like, but the citrus is a feature of traditional carnitas.
  3. If you want, you can skip the part about venting the crock pot. Then to finish, shred a bit and brown under a broiler.
  4. The juices you save can be added anytime you need a bit of moisture like reheating. If you didn't save that fluid, you can use chicken broth or apple juice.
  5. Refrigerate the juices and skim off the fats after cold.
  6. To reheat, shred up some, then add some of the juices and heat under a broiler.
  7. Other reheating methods and options are discussed in the post.
Nutrition calculation is meat only
 

Nutrition

Calories: 348kcal | Carbohydrates: 5g | Protein: 33g | Fat: 21g | Saturated Fat: 7g | Polyunsaturated Fat: 2g | Monounsaturated Fat: 9g | Cholesterol: 104mg | Sodium: 945mg | Potassium: 494mg | Fiber: 2g | Sugar: 2g | Vitamin A: 50IU | Vitamin C: 23.9mg | Calcium: 20mg | Iron: 1.8mg

Originally Published March 7, 2015. Updated with expanded options, refreshed photos, and a table of contents to help navigation.

Molly and Lilly running in the snow.

Convection Oven Chicken Breast (Juicy and Evenly Cooked)

cut baked chicken on white plate

Convection oven chicken breast cooks more evenly because the fan circulates hot air around the meat. That means better browning and fewer dry edges while the thicker center finishes cooking.

This fast and easy recipe makes juicy, tender chicken breasts in about 25 minutes with simple prep. A regular oven also works, but convection is my preferred method for the most even results.

⏱️ Quick Answer: How Long to Cook Chicken in a Convection Oven

  • 375°F convection — about 26–30 minutes
  • 400°F convection — about 23–26 minutes (suggested)
  • 425°F convection — about 20–23 minutes (easy to overcook)

Bake to an internal temperature of 165°F, checking the thickest part with an instant-read thermometer.

image of cut baked chicken on white plate
[feast_advanced_jump_to]

quote mark
Featured Comment by shirt:
⭐⭐⭐⭐⭐
"Hi Dan, I followed your recipe and cooked the best chicken breasts ever!"

📝 TL;DR — Recipe Summary

  • What: Boneless, skinless chicken breasts baked in a convection oven.
  • Why: Circulating hot air promotes more even cooking and better browning, helping prevent dry edges while the thicker center finishes cooking.
  • How: Flatten thicker breasts to about ¾ inch, season, and bake at 400°F convection for about 23–26 minutes, until the thickest part reaches 165°F.

🐓 Ingredients

raw chicken breast with butter and seasoning.
  • Chicken — Boneless, skinless chicken breasts; try to use evenly sized pieces.
  • Butter or olive oil — Helps with browning and moisture.
  • Seasoning — Paprika, garlic powder, kosher salt, and black pepper (or your favorite mix).
  • Optional brine — Water and salt for 15–30 minutes adds moisture, especially for previously frozen chicken.

👨‍🍳 Quick Overview: Convection Oven Chicken Breasts

The three secrets of juicy convection oven chicken breast are even thickness, the right temperature, and a short rest.

1. Trim boneless, skinless chicken breasts of any excess fat. If over ¾ inch thick, flatten slightly for even cooking. Brine if you wish.

Flattening chicken breasts in a bag with a meat mallet.

2. Pat dry, place in a prepared baking dish, brush with melted butter, and season to taste.

brushing raw breasts with butter.

3. Bake in a preheated oven at 400°F convection until the internal temperature reaches 165°F—about 23–26 minutes.

baked chicken in pan.

4. Rest for 5 minutes before serving for the juiciest results.

Baked chicken breast with roasted potatoes.

For more details, keep reading, or see the Recipe Card below for complete instructions and a printable version.

⏰ How Long to Bake Chicken Breasts in a Convection Oven

Baking time depends mostly on the size and thickness of the chicken breasts.

Estimated baking times:

  • 350°F convection — about 30–35 minutes
  • 375°F convection  — about 26–30 minutes
  • 400°F convection — about 23–26 minutes (suggested)
  • 425°F convection — about 20–23 minutes (can easily overcook)

Times are only guides—thickness, oven variation, and starting temperature all matter. Use an instant-read thermometer for accuracy and pull the chicken as soon as it reaches 165°F in the thickest part for juicy, tender results.

Using a regular oven: Bake at 425°F instead of 400°F convection and allow a few extra minutes. It works well, but you lose some of convection’s more even cooking and browning. Cook to 165°F.

🧂 Seasoning Tips

Start with a light coating of melted butter or olive oil to help with browning and hold the seasoning. Keep it simple with paprika, garlic powder, kosher salt, and black pepper, or use your favorite seasoning mix.

Skip the salt if you brined the chicken. For more flavor, try Italian seasoning, BBQ rub, Black Magic Seasoning, or my Chipotle Seasoning Recipe. Fresh thyme, oregano, or rosemary also work well.

Want a little heat? Swap the paprika for chili powder or add a pinch of cayenne pepper.

💡 Tips for Juicy, Tender Chicken

  • Use similar-sized breasts so they finish cooking at about the same time.
  • Flatten thicker breasts to about ¾ inch for more even cooking.
  • Use an instant-read thermometer. Remove the chicken when the thickest part reaches 165°F.
  • Rest for 5 minutes before cutting.
  • Previously frozen chicken may be drier. A short brine can help add moisture.
  • Use a rack when possible. It allows the circulating convection air to reach more of the chicken for more even cooking and browning.

🥩 How to Flatten Boneless Skinless Chicken Breasts

Flattening helps chicken breasts cook more evenly. Place each boneless, skinless chicken breast inside a plastic bag or between sheets of plastic wrap. Gently pound the thickest part with a meat mallet or the bottom of a heavy pan until about ¾ inch thick.

Always protect your work area from raw chicken splatter—assume it’s contaminated and clean carefully afterward.

flattening thick chicken breast in a plastic bag with a meat mallet.

🍽️ How to Serve

Serve convection oven chicken breast with roasted potatoes, rice, or a fresh salad. Add a green vegetable such as  roasted asparagus or green beans for an easy complete meal.

For a larger dinner, add Easy Dinner Rolls and finish with an Apple Crumb Pie or Blueberry Crisp.

Leftovers are also excellent for meal prep. Slice the chicken for sandwiches, wraps, or salads, or shred it for crock pot chicken chili or a broccoli chicken casserole.

🧊 Storage and Reheating

Store leftovers in an airtight container in the refrigerator for up to 4 days or freeze for up to 4 months.

Reheat gently in the microwave or covered in a 350°F oven until warm. Avoid overheating, which can dry out the chicken.


🍗 Boneless Skinless Chicken Breast Recipes

Try Pan Seared Oven Baked Chicken Breast for extra seared flavor, or Baked Parmesan Crusted Chicken, Crispy Oven Fried Chicken, or Melt in Your Mouth Chicken for other easy oven recipes.

When the weather cooperates, try How to Grill Chicken Breasts.

❓ FAQs

Should I bake chicken breasts covered with foil?

No. Bake uncovered so the circulating hot air can brown the surface. Covering traps steam and reduces the browning advantage of convection.

Can I bake chicken breasts in a regular oven?

Yes. Bake at 425°F instead of 400°F convection and allow a few extra minutes. A regular oven works well, but you lose some of convection’s more even cooking and browning. Cook to 165°F.

Can I use the convection roast setting?

Yes, but it may cook faster and brown more deeply. Convection settings vary by oven, and convection roast may use additional heat from the broiler element. Watch closely and cook to 165°F.

Should I brine chicken breasts before baking?

Brining is optional but can add moisture, especially to previously frozen chicken. Mix 2 cups water with 1 tablespoon salt and brine for 15–30 minutes, but no longer than 2 hours. Rinse, pat dry, and skip extra salt when seasoning.

⚕️ Chicken Food Safety

Always handle raw chicken carefully—assume it’s contaminated. Wash your hands and surfaces after touching it, but don’t rinse the chicken itself to avoid spreading bacteria. Cook to a safe internal temperature of 165°F, and check with an instant-read thermometer in the thickest part.

📖The Recipe Card

baked chicken breast on a white plate
Print Recipe Add to Collection Go to Collections
5 from 7 votes

Convection Oven Chicken Breast (Juicy and Tender)

Make juicy, tender chicken breast in a convection oven in about 25 minutes. The circulating heat cooks more evenly and improves browning for dependable results.
Prep Time5 minutes mins
Cook Time25 minutes mins
Total Time30 minutes mins
Course: Main Course
Cuisine: American
Keyword: convection oven chicken breasts, Grilling chikken breasts, How long to bake chicken breast
Servings: 2 breasts
Calories: 183kcal
Author: Dan Mikesell AKA DrDan

Ingredients

  • 2 chicken breasts boneless skinless
  • 1 tablespoon butter

Optional Brine

  • 2 cups water
  • 1 tablespoon table salt

Suggested Seasoning—Use what you want

  • ½ teaspoon kosher salt Skip salt if you brined
  • ¼ teaspoon pepper
  • ½ teaspoon garlic powder
  • ½ teaspoon paprika
US Customary - Convert to Metric

Instructions

  • Preheat the oven to 400°F convection. For a conventional oven, use 425°F.
    raw chicken breast with butter and seasoning.
  • Trim boneless skinless chicken breasts of excess fat.
    trimming chicken breasts on a red board.
  • If thick, place the chicken in a ziplock bag and flatten the breasts to about ¾-inch thickness with a meat mallet or a heavy pan.
    flattening chicken breasts in a bag with a meat mallet.
  • (Optional) Brine in 2 cups of water + 1 tablespoon of salt for 15–30 minutes. 2-hour maximum. Be sure to rinse off the brine and dry before proceeding.
    adding chicken breast to the brine.
  • Mix seasoning of ½ teaspoon each of kosher salt, garlic powder, and paprika, plus ¼ teaspoon black pepper. Leave out the salt if using a brine. You may use any seasoning you want.
    Spices mixed in a small bowl.
  • Prep a small baking dish with PAM. Use a rack if available for better convection airflow and browning.
    coating a small baking pan with PAM.
  • Melt 1 tablespoon of butter in the microwave and brush both sides of the chicken. Apply your seasoning to your taste.
    brushing raw breasts with butter.
  • Bake in the preheated oven. It will take about 23–26 minutes and is done when the internal temperature is 165°F in the thickest part of the breasts. Check the chicken temperature 4–5 minutes early to avoid overcooking.
    baked chicken in pan.
  • Allow to rest for 5 minutes before serving.
    baked chicken breast with roasted potatoes.

Video

Notes

Pro Tips

The three secrets for the best results: flatten thick breasts, bake at the right oven temperature, and rest for 5 minutes after cooking to 165°F.
Brining helps add moisture, especially for previously frozen chicken.
Always cook to 165°F using an instant-read thermometer—don’t guess.
Avoid overcooking for the best texture and juiciness.
Store leftovers in the fridge for up to 4 days or freeze for 4 months.

Nutrition

Serving: 1breast | Calories: 183kcal | Carbohydrates: 0g | Protein: 24g | Fat: 8g | Saturated Fat: 4g | Cholesterol: 87mg | Sodium: 763mg | Potassium: 418mg | Fiber: 0g | Sugar: 0g | Vitamin A: 455IU | Vitamin C: 1.3mg | Calcium: 6mg | Iron: 0.5mg

Originally Published April 16, 2019. Updated with expanded options, refreshed photos, and a table of contents to help navigation.

Lilly dog looking into the tree

Old-Fashioned Tuna Casserole Recipe (From 2 to Family Size)

Tuna casserole on a spoon.

This old-fashioned tuna casserole recipe has creamy noodles, tender peas, and a buttery Parmesan topping baked golden brown. It’s simple comfort food with no fancy ingredients—just a classic casserole made the easy way.

Made for two with leftovers, this tuna noodle casserole bakes in a small dish in about 30 minutes and makes 4 servings. Scale down to a mini tuna casserole with 2 servings or double it for a family-size batch of 8.

Tuna casserole on a spoon.
[feast_advanced_jump_to]

quote mark
Featured Comment by Wendy:
⭐⭐⭐⭐⭐
"I love tuna casserole but this is even better than my previous recipe.... Outstanding recipe! I will be sharing your website with all my sisters!"

🍽️ TL;DR — Recipe Summary

Why: An easy small-batch tuna noodle casserole for two with leftovers that scales from 2 to 8 servings.

How: Combine cooked noodles, tuna, peas, and the creamy sauce, then add the buttery Parmesan topping and bake.

Results: A creamy, comforting casserole with tender noodles and a crisp, golden topping.

🥣 Ingredients for Tuna Casserole

Ingredients for tuna casserole with pasta and soup.
  • Tuna — Canned tuna in water, drained well. Chunk light gives the classic flavor, but albacore is milder.
  • Pasta — Egg noodles or any dry pasta work well. Cook to al dente before mixing, and salt the cooking water.
  • Vegetables — Onion, celery, and frozen peas are classic. Mushrooms are optional.
  • Dairy — Milk and butter make the creamy base. Whole or 2% milk both work.
  • Soup — Cream of mushroom soup is classic, but cream of chicken or celery also work.
  • Topping — Panko breadcrumbs, grated Parmesan, and melted butter make the crisp, golden topping.

👨‍🍳 Quick Overview: How to Make Classic Tuna Noodle Casserole

1. Cook the pasta to al dente per package instructions.

cooking pasta in black pan.

2. Trim the vegetables and sauté in butter until slightly transparent—about 5 minutes.

cooking celery and onion.

3. Mix the topping: Combine panko breadcrumbs, grated Parmesan cheese, and melted butter.

adding butter to topping.

4. Mix all ingredients except the topping. Transfer to a casserole dish and add the topping.

mixing tuna into other ingredients.

5. Bake at 400°F until hot and nicely browned—about 30 minutes.

browned tuna noodle casserole.

For more details, keep reading. See the Recipe Card below for complete instructions and to print.

✔️ Options and Variations

  • Tuna: This recipe uses more tuna than most for a meatier casserole. Shredded cooked chicken or rotisserie chicken can substitute for tuna.
  • Pasta: Egg noodles are classic, but elbows, penne, or rotini also work well.
  • Vegetables: Add mushrooms with the celery and onion. Broccoli or mixed vegetables also work; thaw and cook them first to avoid thinning the sauce.
  • Topping: Substitute crushed potato chips or Ritz crackers for the panko, or add shredded cheddar. You can also skip the topping for a softer casserole.

🗓️ Make Ahead

Assemble the casserole without the topping. Cover and refrigerate for up to 2 days or freeze for up to 3 months. Thaw frozen casserole overnight in the refrigerator.

Before baking, let it sit at room temperature for about 30 minutes. Add the topping and bake as directed, adding a few extra minutes if needed.

↕️ How to Adjust the Recipe Size

This small-batch tuna casserole is designed for two people with leftovers (4 servings), but it can easily be halved to 2 servings or doubled for a family. Use the adjusted amounts in the ingredient list; the written instructions do not change.

2 Servings — Small Tuna Casserole

Set the recipe card to 2 servings. Use a 6-inch round, 5×5-inch square, or two ramekins. Check early since the smaller casserole may cook faster.

4 Servings — Tuna Casserole for Two with Leftovers

Make the recipe as written in a 6×9-inch baking dish or 8-inch round pan.

8 Servings — Family Size

Set the recipe card to 8 servings and use a 9×13-inch pan. It may take slightly longer; bake until browned on top and bubbling at the edges.

🍽️ What to Serve with Tuna Casserole

Serve tuna casserole with a simple salad or vegetables like carrots, broccoli, or Parmesan Roasted Cauliflower. Add Cheddar Bay Biscuits or Healthy Biscuits for a bread side.

🧊 Storage and Reheating Leftovers

Store cooked casserole in an airtight container in the refrigerator for up to 4 days, or freeze for up to 3 months.

To reheat, thaw overnight in the refrigerator if frozen. Reheat covered in the oven, air fryer, or microwave. If it starts to dry out, add a splash of water or chicken broth.

🥘 Other Old-Fashioned Comfort Food Recipes

  • Scalloped Potatoes and Ham
  • Easy Turkey Tetrazzini
  • Cheesy Chicken, Broccoli, and Rice Casserole
  • Chicken Pot Pie

❓ FAQs

Can I use uncooked noodles without precooking?

No. There isn’t enough liquid or cooking time for dry pasta. Cook the noodles to al dente before mixing.

Do I have to use condensed soup?

No. Older versions used a white sauce instead. Make a roux with butter and flour, then whisk in milk and seasonings until thickened. Cheese may also be added.

Can I freeze tuna casserole?

Yes. Freeze before or after baking for up to 3 months. For the best texture, add the topping just before baking. Thaw overnight in the refrigerator.

What kind of pasta works best?

Egg noodles are classic, but elbows, penne, or rotini also work well. Avoid delicate pasta shapes that may become mushy during baking.

📖The Recipe Card

Tuna casserole on a spoon.
Print Recipe Add to Collection Go to Collections
4 from 6 votes

Old-Fashioned Tuna Casserole (Small Batch or Family Size)

Creamy, old-fashioned tuna casserole made with noodles, peas, and a buttery Parmesan topping. This easy small-batch recipe makes 4 servings—perfect for two with leftovers or scaled up for a family dinner.
Prep Time20 minutes mins
Cook Time30 minutes mins
Total Time50 minutes mins
Course: American, Main Course
Cuisine: American
Keyword: Old Fashioned Tuna Casserole, Tuna casserole for two, Tuna casserole with egg noodles
Servings: 4
Calories: 391.2kcal
Author: Dan Mikesell AKA DrDan

Ingredients

  • 2 (5 oz) cans tuna in water drained
  • 2 cups dry pasta or egg noodles cook to al dente
  • ½ medium onion chopped
  • 1 rib celery chopped
  • 1 teaspoon butter
  • 1 (10 oz) can cream of celery, chicken, or mushroom soup
  • ½ cup milk
  • salt and pepper to taste about ½ teaspoon each
  • 1 cup frozen peas

Topping

  • ½ cup panko bread crumbs
  • ⅓ cup grated Parmesan cheese
  • 2 tablespoons butter melted
US Customary - Convert to Metric

Instructions

  • Preheat the oven to 400°F.
    Ingredients for tuna casserole with pasta and soup.
  • In boiling water, cook 2 cups (about 8 ounces) of pasta to al dente according to package instructions and drain well. Two cups of dry pasta is about half of a 1-pound box.
    cooking pasta in black pan
  • Mix the topping of ½ cup panko breadcrumbs, ⅓ cup grated Parmesan cheese, and 2 tablespoons melted butter.
    adding butter to topping
  • Chop 1 rib of celery and ½ medium onion. Also, slice fresh mushrooms if using. Sauté in 1 teaspoon of butter over medium-high heat until they become slightly transparent—about 5 minutes.
    saute celery and onion in skillet
  • In a large bowl, mix drained cooked noodles, the sauteed vegetables, 1 can cream of celery (or chicken or mushroom) soup,  ½ cup milk, 1 cup frozen peas, salt, and pepper to taste (I suggest ½ teaspoon each), and two (5-oz) cans of tuna, drained. Gently stir to avoid damaging the pasta.
    mixing tuna into other ingredients
  • Pour the mixture into a 6×9-inch or 8-inch round baking dish. Sprinkle the topping over the casserole.
    adding topping to casserole
  • Bake until nicely browned—about 30 minutes. Remove and allow to sit for 5 minutes before serving.
    browned tuna noodle casserle

Video

Notes

Pro Tips

  • This recipe makes 4 servings in a 6×9-inch baking dish or 8-inch round pan. Use a 9×13-inch dish for a double recipe. See the post for a 2-serving version.
  • This recipe uses twice the tuna of many versions for better tuna flavor and texture.
  • For mushrooms, cook them with the celery and onion and use cream of mushroom soup.
  • Storage: Refrigerate leftovers for up to 4 days or freeze for up to 3 months.

Nutrition

Calories: 391.2kcal | Carbohydrates: 38.9g | Protein: 27.4g | Fat: 13.8g | Saturated Fat: 7.1g | Polyunsaturated Fat: 1.3g | Monounsaturated Fat: 3.7g | Trans Fat: 0.3g | Cholesterol: 78.4mg | Sodium: 976.5mg | Potassium: 468.9mg | Fiber: 3.9g | Sugar: 5.1g | Vitamin A: 720.4IU | Vitamin C: 15.8mg | Calcium: 171.4mg | Iron: 3.2mg

Adapted from the classic tuna noodle casserole recipe popularized by Campbell Soup in the 1950s—the creamy tuna casserole America loves. Our version also draws on memories of the many tuna casseroles my wife and I have made and eaten over the years.

Publisher's Note: Originally Published January 16, 2017. Updated with expanded options, refreshed photos, and improved organization for easier navigation.

Lilly on the sofa.

Pineapple Mango Salsa Recipe

pineapple mango salsa on white plate.

Sweet and savory with a touch of spice, this easy Pineapple Mango Salsa Recipe is a perfect fresh fruit salsa to serve as an appetizer or party dish. Or as a complement to tacos, fish, or other entree.

This delicious salsa is fast and simple with fresh pineapple, mango, pepper, and lime juice. Just follow the simple step-by-step instructions.

🍍Ingredients

Pineapple—fresh
Mango
Vegetables—red bell pepper, red onion, and tomato
Jalapeno pepper
Fresh cilantro
Lime juice
Optional Ingredients—avocados, peaches, strawberries, or corn are good additions or substitutes.

pineapple mango salsa on white plate.
[feast_advanced_jump_to]
Blue ribbon divider used for visual effect

Fruit salsa is the perfect complement to spicy Mexican food or party dish. It is easy to adjust the ingredients to your preferences and the size from cooking for two friendly to a large party size.

Pineapple Mango Salsa is healthy and takes only 15 minutes to make with fresh fruits and vegetables. Just a little slicing and dicing, and you're there. It is one of my wife's favorites and has been our home's main Mexican side dish. Please give this great side dish a try.

👨‍🍳How to Make Pineapple Mango Salsa—Step by Step

fresh pineapple with mango and salsa ingredients.

1. Clean and trim the pineapple, mango, tomato, and red bell pepper into ¼-inch pieces.

mincing jalapeno on black board.

2. If using, mince jalapeno pepper and chop cilantro.

mixing salsa ingredients in a large bowl.

3. Combine the prepared ingredients in a large bowl and add lime juice—stir well.

pineapple mango salsa on white plate.

4. Refrigerate covered for 1 hour or more before serving for the flavors to blend if you have time.

For more details, keep reading. See the Recipe Card below for complete instructions and to print.

✔️Variations and options

  • To make mango salsa, skip the pineapple and double the mango.
  • To make pineapple salsa, skip the mango and double the pineapple.
  • To make peach mango salsa, add peaches to replace the pineapple. You can also substitute corn, avocado, and many other things.
  • Fresh pineapple is excellent and should be used. But if you insist, a 20 oz can of drained chunks equals the 2 cups half of the fresh pineapple will yield.
  • A good mango should be firm but not rock hard and not mushy.
  • Cilantro is listed as optional since many people dislike the taste.
  • The jalapeño pepper provides mild heat and can be eliminated or adjusted to your taste.
  • For the tomato, use a medium to larger plum or Roma tomato, which has more "meat" and less juice and seeds.
  • One fresh lime is about two tablespoons of concentrated lime juice. Some lime zest can be added to boost the flavor.

When to serve Pineapple Mango Salsa?

Serve with fish or pork dishes like Garlic Butter Salmon, Baked Parmesan Tilapia, Grilling Pork Tenderloin, or Blackened Tilapia in the Oven.

This salsa works well as a party appetizer or with Tex-Mex, like fish tacos, Chicken Fajita Quesadillas, Sheet Pan Chicken Fajitas, Chicken Fajita Quesadillas, and Grilled Chicken Fajitas.

↕️How to make this a "for two" or "family size" recipe

This is a very easy recipe to cut any size, but if you cut it down, you will waste lots of ingredients. This recipe makes 4 to 5 cups of salsa, which I call 6 servings.

  1. Use the recipe card and adjust the number of servings from 6 to the desired amount.
  2. Use the amount of ingredients in the ingredient list, not the instructions—those do not adjust.

🔪How to cut a mango?

image of three steps to cut up a mango-Images licensed from Adobestock. May 16, 2018. Copyright ©RomainQuéré - stock.adobe.com. Modified per allow by licensed.
Images licensed from Adobestock. May 16, 2018. Copyright ©RomainQuéré - stock.adobe.com. Modified per allowed by the license.
  1. Cut a disk off both sides of the mango as close as possible to the pit.
  2. Crosscut the disks.
  3. Turn the disks inside out, then cut off the chunks. You can try to get more out of the part with the pit, but it won't be much.

Storage of leftovers

Cover leftover pineapple mango salsa with plastic wrap and push it down over the leftovers to eliminate the trapped air. Then, add an airtight cover.

Good in the refrigerator for 2-3 days. I find the quality is excellent for 24 hours, good at 48 hours, and OK at 3 days.

❓FAQs

Can I use pineapple mango salsa as a marinade?

You can marinate chicken breasts for about an hour and then grill or bake them. Due to the acid in the pineapple, I do not recommend marinating longer.

Can I freeze Pineapple Mango Salsa?

Freezing will affect the texture severely and is generally not recommended.

Blue ribbon divider used for visual effect

This recipe is listed in these categories. See them for more similar recipes.

101's Best Recipes, Appetizer and Party Recipes, Grill Side Dish Recipes, Mexican Recipes, Side Dish Recipes

Have you tried this recipe, or have a question? Join the community discussion in the comments.

📖The Recipe Card

pineapple mango salsa on white plate.
Print Recipe Add to Collection Go to Collections
5 from 1 vote

Pineapple Mango Salsa Recipe

Sweet and savory with a touch of spice, this easy Pineapple Mango Salsa Recipe is a perfect fresh fruit salsa to serve as an appetizer or party dish. Or as a complement to tacos, fish, or other entree.
Prep Time15 minutes mins
Refrigerate before serving1 hour hr
Total Time1 hour hr 15 minutes mins
Course: Appetizer
Cuisine: Mexican
Keyword: Mango Salsa, Pineapple Salsa, Salsa
Servings: 6 servings
Calories: 66kcal
Author: Dan Mikesell AKA DrDan

Ingredients

  • ½ fresh pineapple chopped ¼ inch
  • 1 mango chopped ¼ inch and peeled
  • ½ red pepper diced ¼ inch
  • 1 Roma tomato chopped ¼ inch
  • ½ red onion small chipped ⅛ inch
  • 1 jalapeno cored and seeded chopped very finely
  • 3 tablespoons cilantro chopped optional
  • 1 lime
US Customary - Convert to Metric

Instructions

  • Start by cleaning the pineapple, mango, and bell pepper. Chop half the pineapple and half the pepper into ¼ inch pieces. Cut the mango and the Roma tomato into ¼ inch pieces. If you need instructions on cutting up the mango, see the discussion above.
    pineapple with mango and salsa ingredients
  • Clean the jalapeno by cutting off ends and de-seeding, then chop fine. Chop half of a small red onion into ⅛ inch pieces.
    chopping a jalapeno on a black board
  • Chop the cilantro.
    chopping cilantro on a black board
  • Add all to a large mixing bowl and add the juice of one lime. Mix well. Refrigerate for 1 hour if you have time to allow the flavors to blend
    mixing salsa ingredients in a glass bowl
  • Add all to a large mixing bowl and add the juice of one lime. Mix well. Refrigerate for 1 hour before serving if you have time to blend the flavors.
    Mango Pineapple Salsa on a white plate wide view

Notes


Pro Tips

  1. A single recipe is good for smaller households, but for parties, use a double recipe.
  2. A good mango should be firm but not rock hard and definitely not mushy.
  3. Roma or plum tomatoes are better for this since they have more "meat".
  4. Cilantro is optional.
  5. You can double the mango and eliminate the pineapple. Or double the pineapple and eliminate the mango.
  6. Do not use canned pineapple if you can avoid it.
  7. This recipe makes 4-5 cups which we are calling 6 servings.
  8. Stores well refrigerated for 2 days. On the third day, it starts having texture problems. Freezing is not recommended.

Nutrition

Calories: 66kcal | Carbohydrates: 18g | Protein: 1g | Fat: 0.2g | Saturated Fat: 0.04g | Polyunsaturated Fat: 0.1g | Monounsaturated Fat: 0.05g | Sodium: 2mg | Potassium: 128mg | Fiber: 2g | Sugar: 13g | Vitamin A: 750IU | Vitamin C: 90.8mg | Calcium: 20mg | Iron: 0.5mg

Featured in Easy Tailgate Recipes, Big Game Recipes Roundup, and Great Cinco de Mayo Recipes.

Editor's Note: Originally Published July 4, 2010. Updated with expanded text and instructions along with updated photos.

Molly dog sunning herself.

Happy Holidays and Happy Birthday to Our Girls

Dogs smiling with toys and a fireplace

Season's Greetings and Happy Holidays to everybody, and Happy 10th Birthday to our girls, Lilly and Molly, born on Christmas Eve, 2013. So, hang the stockings by the chimney with care and have a Merry Christmas or a great and joyful holiday, no matter what holiday you are celebrating this season.

image of Lilly and Molly dogs posed infront of fire for Holiday Picture 2017
I think this is one of my best pictures... ever. Look at those smiles.

Remember to show everybody the grace, love, and joy in your heart.

Molly, Lilly, Wifo, and DrDan

PS—Are you still looking for recipes? Try 22 Recipes for Christmas.

Some popular recipes this year have been:

Small Ribeye Roast

How to Cook a Brisket on a Gas Grill—lots of grilling going on this year!

Small Crock Pot Ham with Brown Sugar Honey Glaze

Pan Seared Oven Roasted Filet Mignon

Roasted Turkey Breast—The Easy Way

Blue ribbon divider used for visual effect

Previous Molly and Lilly Birthday Pictures

image of Lilly and Molly dogs posed infront of Christmas tree for Holiday Picture 2016
image of Lilly and Molly dogs posed with antilers for Holiday Picture 2015
image of Lilly and Molly dogs in outtakes with antlers for Holiday Picture 2015
With Antlers and outtakes
One year old Molly and Lilly Dogs posing with a stuffed Santa
Molly and Lilly are one year old.

Editor's Note: Originally Published December 23, 2014. Updated yearly, so some comments are older.

Candied Bacon (Easy Oven Recipe)

candied bacon on a tray

Learn how to make candied bacon in the oven with just bacon and brown sugar. This easy, two-ingredient recipe makes a crispy, sweet-and-salty treat that's perfect for holiday parties, snacks, or homemade gifts.

Add optional chili powder and cayenne pepper for a sweet and spicy version.

candied bacon on a tray.
[feast_advanced_jump_to]

📌 TL;DR — Candied Bacon

  • What: Crispy, sweet-and-salty candied bacon made with just bacon and brown sugar.
  • Why: An easy two-ingredient treat for holiday parties, snacks, or gifts.
  • How: Coat bacon with brown sugar and cook in the oven on a rack until crispy. Add optional spices for a sweet and spicy version.

🥓 Ingredients

bacon with brown sugar and spices.

Bacon—lean, thick-cut preferred.
Brown sugar—light or dark
Optional spices—chili powder and cayenne pepper

👨‍🍳 Quick Overview: How to Make Candied Bacon in the Oven

1. Cut bacon strips in half or thirds. Trim any large chunks of fat.

trimming fat off raw bacon strips.

2. Coat the bacon with brown sugar (and optional spices). Arrange on a prepared baking sheet with a well-greased rack.

sprinkling extra coating on bacon strips on rack.

3. Cook in a 375°F oven (350°F convection) until browned and crispy. Let rest a few minutes, pat off excess fat, and transfer to a plate or parchment paper before the sugar hardens.

cooked candied bacon still on the rack.

For more details, keep reading. See the recipe card below for complete instructions and to print.

✔️ Tips for Perfect Candied Bacon

  • Use thick-cut bacon. It holds together better and gives you a crispy, chewy texture. Thin bacon cooks faster and may become brittle.
  • Use an oven-safe rack. Place it over a foil-lined baking sheet and coat it well with cooking spray. The rack lets excess fat drain away and allows you to coat both sides of the bacon.
  • Watch the cooking time. Thickness and ovens vary. Cook until the bacon is browned and crispy, but watch closely near the end so the sugar doesn't burn.
  • Don't let it stick. Let the bacon rest for a few minutes, pat off any pooled fat, and transfer it from the rack before the sugar hardens.

🥓 Candied Bacon Variations

Spicy candied bacon: Add 1 tablespoon of chili powder and ¼ to ½ teaspoon of cayenne pepper to the brown sugar. Adjust the cayenne to your taste.

Smoky candied bacon: Use smoked bacon or add smoked paprika to the brown sugar for extra smoky flavor.

Maple candied bacon: Substitute ⅜ cup (6 tablespoons) of maple syrup for the ½ cup of brown sugar. Cook until well browned to reduce stickiness.

🧊 Storage and Reheating

Store leftover candied bacon in an airtight container in the refrigerator for 3–4 days. For longer storage, freeze for up to 2 months, separating layers with parchment or wax paper.

Serve cold or reheat in a 350°F oven for about 5 minutes. Do not store at room temperature.

📝 Other Sweet Recipes

  • Chocolate Peanut Clusters
  • Bacon Wrapped Chicken Bites
  • Cinnamon Candied Almonds

❓ FAQs

Should I coat both sides of the bacon with brown sugar?

Yes, if you're using a well-greased oven-safe rack. Without a rack, coat only the top side to prevent sticking and burning.

Can I make candied bacon without a rack?

Yes. Line a rimmed baking sheet with foil and coat it well with cooking spray. Place the bacon directly on the prepared pan, coating only the top side. A rack gives better results by allowing excess fat to drain away.

📖The Recipe Card

candied bacon on a tray
Print Recipe Add to Collection Go to Collections
4.28 from 36 votes

Candied Bacon Recipe

Make crispy, sweet-and-salty candied bacon in the oven with just bacon and brown sugar. Add optional spices for a sweet and spicy treat that's perfect for parties, snacks, or holiday gifts.
Prep Time10 minutes mins
Cook Time20 minutes mins
Total Time30 minutes mins
Course: Appetizer
Cuisine: American
Keyword: Candied Bacon
Servings: 22
Calories: 117kcal
Author: Dan Mikesell AKA DrDan

Ingredients

  • 1 pound bacon thick sliced
  • ½ cup brown sugar light or dark
  • 1 tablespoon chili powder optional
  • ¼-½ teaspoon cayenne pepper optional
US Customary - Convert to Metric

Instructions

  • 1. Prepare the oven. Preheat to 375°F (350°F convection). Line a rimmed baking sheet with foil, place an oven-safe rack on top, and spray both sides of the rack generously with cooking spray.
    Spraying PAM on a rack on a foil covered tray
  • 2. Prepare the coating. Place ½ cup of brown sugar in a shallow bowl. If using optional spices, mix in 1 tablespoon of chili powder and ¼–½ teaspoon of cayenne pepper.
    brown sugar and spices in a small glass bowl
  • 3. Prepare the bacon. Cut 1 pound of thick-cut bacon into halves or thirds. Trim any large pieces of fat.
    trimming fat off raw bacon strips
  • 4. Coat the bacon. Dip both sides in the brown sugar mixture and arrange in a single layer on the prepared rack, leaving a little space between pieces. Sprinkle the top with more brown sugar mixture.
    sprinkling extra coating on bacon strips on rack
  • 5. Cook and cool. Cook in the oven for about 15–20 minutes, until browned and crispy. Watch closely to prevent burning. Let rest for a few minutes, pat off pooled fat with a paper towel, and transfer to a plate or parchment paper before the sugar hardens.
    patting off the fat from cooked candied bacon still on the rack

Notes

1. Bacon: Thick-cut bacon works best. Thinner bacon cooks faster and may become brittle.
2. No rack? Use a foil-lined baking sheet coated generously with cooking spray. Coat only the top of the bacon with brown sugar.
3. Optional spices: Add chili powder and cayenne pepper for spicy candied bacon. Adjust the cayenne to taste.
4. Watch closely: Cooking time varies with bacon thickness and your oven. The sugar can burn quickly near the end.
5. Cooling: Never drain candied bacon on paper towels—it will stick. Transfer to parchment paper or a plate before the sugar hardens.
6. Storage: Refrigerate in an airtight container for 3–4 days or freeze for up to 2 months. Do not store at room temperature.

Nutrition

Calories: 117kcal | Carbohydrates: 5g | Protein: 7g | Fat: 7g | Saturated Fat: 3g | Cholesterol: 20mg | Sodium: 361mg | Potassium: 118mg | Fiber: 1g | Sugar: 5g | Vitamin A: 134IU | Calcium: 8mg | Iron: 1mg

Editor Note: Originally published May 24, 2015. Updated with simplified instructions, optional variations, and improved recipe tips.

dogs romping in yard

Crock Pot Fudge

pieces of fudge with nuts on a red plate

Make delicious Crock Pot Fudge with chocolate chips, sweetened condensed milk, and the gentle heat of your slow cooker. With just 5 minutes of prep, it's a fun holiday candy recipe to make with kids. They can watch the chocolate melt and help stir with adult supervision.

A pile of pieces of fudge with nuts on a red plate.
[feast_advanced_jump_to]

quote mark
Featured Comment by Leslie:
"Made this with 4 year old granddaughter, used butterscotch chips, chocolate, and toasted pecans. It’s delicious!"

😊 TL;DR — Recipe Summary

What: Rich, creamy chocolate fudge made with chocolate chips and sweetened condensed milk.

Why: An easy holiday candy recipe that's fun to make with kids.

How: Cook on LOW with the lid off, stirring every 20–30 minutes until smooth. Pour into a prepared pan and refrigerate until firm.

💡 Good to Know: Why Leave the Lid Off?

Keep the crock pot lid OFF. A lid traps steam, which can condense and drip into the chocolate. Those drops of water can cause melted chocolate to seize, becoming thick and grainy instead of smooth. Leaving the lid off lets moisture escape and allows you to watch the chocolate melt.

🍫 Ingredients

Ingredients for Crock Pot Fudge with two bags of chocolate chips, sweetened condensed milk, vanilla, and walnuts.
  • Sweetened condensed milk—not evaporated milk.
  • Chocolate chips—Semi-sweet recommended; milk or dark chocolate also work. Use good-quality chocolate chips for the best flavor and smooth melting.
  • Vanilla extract
  • Chopped walnuts or pecans—optional.
  • Optional toppings—Sprinkles, M&Ms, or Reese's Pieces.

👨‍🍳 Quick Overview: Crock Pot Fudge

1. Combine the ingredients in a 3-quart or larger crock pot. Cook on LOW with the lid OFF, stirring every 20–30 minutes until melted and smooth—usually 1–2 hours, but crock pots vary.

pouring sweetened condensed milk into crock pot.

2. Stir in optional add-ins, like chopped nuts, at the end of cooking.

pouring nuts into crock pot with melted fudge.

3. Pour the fudge into a prepared 8-inch square pan lined with parchment paper and smooth the top. Add any optional toppings now.

pouring fudge into pan to cool.

4. Refrigerate until firm, about 2 hours. Remove from the pan and cut into serving-size pieces.

fudge cut into pieces on parchment paper.

For more details, keep reading. See the recipe card below for complete instructions and to print.

⏱️ Why Does Crock Pot Fudge Cooking Time Vary?

Crock Pot Fudge usually takes 1–2 hours on LOW with the lid off, but cooking times vary for two main reasons.

  • Chocolate chips: Different brands and types of chocolate chips melt at different rates. Use good-quality chips and stir every 20–30 minutes.
  • Crock pot size and temperature: Larger crock pots may heat a small batch faster, and cooking temperatures vary between models.

Never cook on HIGH. Check frequently near the end of cooking to avoid overheating the chocolate. The fudge is ready when the chips are completely melted and the mixture is smooth and well combined. Do not cook longer!

♨️ Scaling and Crock Pot Size

This recipe works well in a 3-quart crock pot but can be adjusted for smaller or larger batches.

  • Half recipe: Use a 2-quart mini crock pot and a 6-inch round pan.
  • Full recipe: Use a 3-quart or larger crock pot and an 8-inch square pan.
  • Double recipe: Use a 6-quart crock pot and a 9 × 13-inch pan.

Larger crock pots may melt the chocolate faster, so watch closely and stir occasionally.

To adjust the recipe, change the servings in the recipe card. Use the adjusted ingredient amounts, not the amounts in the instructions.

🧊 How to Store Crock Pot Fudge

Store fudge in an airtight container to prevent drying out.

  • Room temperature: Up to 1 week in a cool place.
  • Refrigerator: 2–3 weeks.
  • Freezer: Up to 3 months. Wrap tightly and store in an airtight container or freezer bag.

For the best texture, let refrigerated or frozen fudge come to room temperature before serving.

👍 Other Easy Candy Recipes

  • 5-Minute Fudge
  • Oreo Fudge
  • White Chocolate Almond Clusters
  • Crock Pot Chocolate Peanut Clusters
  • Christmas Candy Recipes — more homemade holiday candy ideas.

❓FAQs

Can I use butterscotch chips in Crock Pot Fudge?

I used to substitute one 12-ounce bag of butterscotch chips for one bag of chocolate chips. However, butterscotch chips have become increasingly difficult to melt smoothly, probably due to changes in their formulation. I no longer recommend using them in this recipe.

📖The Recipe Card

pieces of fudge with nuts on a red plate
Print Recipe Add to Collection Go to Collections
4 from 1 vote

Crock Pot Fudge

Make easy Crock Pot Fudge with chocolate chips, sweetened condensed milk, and vanilla. Just 5 minutes of prep makes this a fun holiday candy recipe to make with kids.
Prep Time5 minutes mins
Cook Time1 hour hr
Cooling time2 hours hrs
Total Time3 hours hrs 5 minutes mins
Course: Appetizer
Cuisine: American
Keyword: Crock Pot Candy, Crock Pot Fudge, Fudge
Servings: 36
Calories: 161kcal
Author: Dan Mikesell AKA DrDan

Ingredients

  • 14 oz sweetened condensed milk
  • 24 oz chocolate chips (two 12-oz bags)—semi-sweet recommended
  • 1 teaspoon vanilla extract

Optional

  • ¾–1 cup chopped walnuts or pecans
  • Sprinkles, M&Ms, or Reese's Pieces for topping
US Customary - Convert to Metric

Instructions

  • Prepare the crock pot: Use a 3-quart or larger crock pot. Coat the inside generously with cooking spray.
    Image of fudge ingredients.
  • Add the ingredients: Combine 1 (14-ounce) can of sweetened condensed milk, 2 (12-ounce) bags of chocolate chips, and 1 teaspoon of vanilla extract in the crock pot.
    pouring sweetened condensed milk into crock pot
  • Melt the chocolate: Cook on LOW with the lid OFF for 1–2 hours, stirring every 20–30 minutes. Stop cooking when the chocolate is completely melted and the mixture is smooth. Do not overcook.
  • Prepare the pan: Line an 8-inch square pan with two crossing sheets of parchment paper. A little butter under the parchment will help hold it in place.
    parchment paper in a baking dish
  • Add optional nuts: Stir in ¾ to 1 cup of chopped walnuts or pecans after the chocolate is melted.
    pouring nuts into crock pot with melted fudge
  • Transfer to the pan: Pour the fudge into the prepared pan and smooth the top. Add optional toppings, if desired.
    pouring fudge into pan to cool
  • Chill and cut: Refrigerate until firm, about 2 hours. Lift the fudge out using the parchment paper and cut into serving-size pieces.
    fudge cut into pieces on parchment paper
  • Store: Keep in an airtight container at room temperature for up to 1 week, refrigerated for 2–3 weeks, or frozen for up to 3 months.
    pieces of fudge in a tower pile

Video

Notes

Pro Tips

  • Chocolate chips: Use good-quality semi-sweet chocolate chips for the best results. Milk or dark chocolate chips also work, but melting times may vary.
  • Crock pot size: A 3-quart crock pot works well. Larger pots may melt the chocolate faster, so check frequently to prevent scorching.
  • Cook on LOW with the lid OFF. Never use HIGH. The open lid prevents condensation from dripping into the chocolate.
  • Stir every 20–30 minutes. Stop cooking as soon as the chocolate is completely melted and smooth. Do not overcook.
  • Pan preparation: Use an 8-inch square pan lined with parchment paper. A little butter under the parchment helps hold it in place.
  • Optional additions: Stir in chopped nuts after melting. Add candy toppings after transferring the fudge to the pan.
  • Storage: Keep airtight at room temperature for up to 1 week, refrigerated for 2–3 weeks, or frozen for up to 3 months.

Nutrition

Calories: 161kcal | Carbohydrates: 16g | Protein: 2g | Fat: 10g | Saturated Fat: 5g | Cholesterol: 5mg | Sodium: 16mg | Potassium: 159mg | Fiber: 2g | Sugar: 13g | Vitamin A: 39IU | Vitamin C: 1mg | Calcium: 45mg | Iron: 1mg

Originally published November 12, 2017. Updated regularly.

dogs play in the leaf pile.

Soft Banana Cookie Recipe

plate of banana cookies with nuts.

Don't throw out your over-ripe bananas! You only need two to make this delicious old-fashioned Banana Cookie Recipe like grandma would use. It takes only 30 minutes, and only a few pantry ingredients are needed!

Ingredients

Bananas—ripe
Butter and egg
Pantry—all-purpose flour, sugar, baking soda, salt
Spices—cinnamon, nutmeg, cloves
Optional—chocolate chips, quick oats, chopped walnuts or pecans

plate of banana cookies with nuts.
Blue ribbon divider used for visual effect

This easy recipe makes delicious cookies that taste like banana bread. With a soft and chewy texture, they are the perfect cookie 'n milk cookie—done in 30 minutes with these simple step-by-step photo instructions.

Make banana nut or chocolate chip banana cookies with simple options. Or add some quick oats for banana oatmeal cookies.

👨‍🍳How to Make Banana Cookies

two bananas along with flour and cookie ingredients.

A couple of ripe bananas and other things you have. Let the butter and egg rest and come to room temperature before starting. Preheat oven to 350° conventional, not convection.

butter with sugar and spices on stand mixer.

In a mixing bowl, add one stick (½ cup) of butter at room temperature and 1 cup of sugar. Cream together at high speed for a few minutes with a hand or stand mixer until it becomes fluffy. Add 1 room-temperature egg and whip for a few minutes.

adding baking soda to the bananas.

Mash 2 large bananas to make about 1 cup of mashed banana. Then mix in 1 teaspoon of baking soda, and let sit for a few minutes.

adding flour to the stand mixer.

Mix the banana with the butter. Add 2 cups flour, one pinch of salt, and ½ tsp each of cinnamon, nutmeg, and cloves. I cut back the nutmeg and cloves to ¼ tsp each (personal taste). Optional: Stir in 1 cup of chopped nuts or chocolate chips.

spooning dough onto covered cooking tray.

Prep two baking sheets with parchment paper. I like a larger cookie, so I used an ice cream scoop to spoon batter that makes a larger cookie.

baked cookies on a baking tray.

Cook until the edges are turning a bit darker brown. These large cookies took 15 minutes. A smaller cookie might take as little as 12 minutes.

Allow to rest on the tray for 5 minutes after coming out of the oven before moving to a cooling rack.

For more details, keep reading. See the Recipe Card below for complete instructions and to print.

banana cookie with a bite out.

Variations

Make banana pecan cookies by adding 1 cup of chopped pecans. Or make a walnut or other nut version.

Make chocolate chip banana cookies by adding 1 cup of semi-sweet, milk, or dark chocolate chips.

Add other things like raisins or similar dried fruit.

Add a cup of quick-cooking oats to make a version of banana oatmeal cookies.

You may mix and match these additions to your taste. But you may need to back down the nuts some if you add other things.

Related recipes

There are lots of things to do with ripe bananas. Try our favorite Old Fashioned Banana Bread or Banana Cake. Or use your bananas for breakfast to make Oven Baked Banana Pancake or Banana Muffins.

🍌What bananas to use

This recipe needs about one cup of mashed ripe bananas. That is about 2 medium to larger bananas.

We want ripe or “overripe” bananas. Why? They are sweeter and make the recipe much better than greener bananas.

👨‍🍳What spices to use

The original recipe had cinnamon, nutmeg, and cloves. It was a little heavy in the last two, and I suggested a range in the recipe for both. I will stay with the low end of the ranges.

❄️Storage of leftovers

In an airtight container, your leftover cookies will be good at room temperature for about 2 days. Refrigerated for 3 to 4 days and frozen for 3 months.

❓FAQs

Can I freeze over-ripe bananas?

While over-ripe bananas are great for baking, peel and freeze them until you can bake bread or muffins if you don't have time to use them now.

Freeze them for 3-4 months. They can be frozen whole but peeled, cut into slices, or mashed. I suggest a Zip-Lock bag to get as much air out of the container.

Blue ribbon divider used for visual effect

This recipe is listed in these categories. See them for more similar recipes.

Dessert Recipes

Have you tried this recipe, or have a question? Join the community discussion in the comments.

📖The Recipe Card

plate of banana cookies with nuts.
Print Recipe Add to Collection Go to Collections
5 from 1 vote

Soft Banana Cookie Recipe

Don't throw out your over-ripe bananas! You only need two to make this delicious old-fashioned Banana Cookie Recipe like grandma would use. It takes only 30 minutes, and only a few pantry ingredients are needed!
Prep Time15 minutes mins
Cook Time15 minutes mins
Total Time30 minutes mins
Course: Sweets
Cuisine: American
Keyword: Banana Cookies, Banana Nut Cookies
Servings: 24 cookies
Calories: 145kcal
Author: Dan Mikesell AKA DrDan

Ingredients

  • ½ cup butter
  • 1 large egg
  • 2 cups all-purpose flour
  • 1 cup sugar
  • 2 bananas ripe
  • 1 teaspoon baking soda
  • 1 pinch salt
  • ¼-½ teaspoon cinnamon
  • ¼-½ teaspoon nutmeg
  • ¼-½ teaspoon cloves
  • 1 cup optional chopped pecans or walnuts
  • 1 cup optional semi-sweet, milk, or dark chocolate chip
US Customary - Convert to Metric

Instructions

  • A couple of ripe bananas and other things you have. Let the butter and egg rest and come to room temperature before starting. Preheat oven to 350° conventional, not convection.
    two bananas along with flour and cookie ingredients
  • In a mixing bowl, add one stick (½ cup) of butter at room temperature and 1 cup of sugar. Cream together at high speed for a few minutes with a hand or stand mixer until it becomes fluffy. Add 1 room-temperature egg and whip for a few minutes.
    butter with sugar and spices on stand mixer
  • Mash 2 large bananas to make about 1 cup of mashed banana. Then mix in 1 teaspoon of baking soda, and let sit for a few minutes.
    adding baking soda to the bananas
  • Mix the banana with the butter. Add 2 cups flour, one pinch of salt, and ½ tsp each of cinnamon, nutmeg, and cloves. I cut back the nutmeg and cloves to ¼ tsp each (personal taste). Optional: Stir in 1 cup of chopped nuts or chocolate chips.
    adding flour to the stand mixer
  • Prep two baking sheets with parchment paper. I like a larger cookie, so I used an ice cream scoop to spoon batter that makes a larger cookie.
    spooning dough onto covered cooking tray
  • Cook until the edges are turning a bit darker brown. These large cookies took 15 minutes. A smaller cookie might take as little as 12 minutes. Allow to rest on the tray for 5 minutes after coming out of the oven before moving to a cooling rack.
    baked cookies on a baking tray

Notes

Pro Tips

  1. Ripe bananas are best in this recipe.
  2. The original recipe had cinnamon, nutmeg, and cloves. It was a little heavy in the last two and I suggested a range in the recipe for both. I will stay with the low end of the ranges.
  3. Good at room temperature for about 2 days. Refrigerated for 3-4 days and frozen for 2-3 months.

Nutrition

Calories: 145kcal | Carbohydrates: 19g | Protein: 2g | Fat: 7g | Saturated Fat: 3g | Cholesterol: 10mg | Sodium: 82mg | Potassium: 68mg | Fiber: 1g | Sugar: 10g | Vitamin A: 124IU | Vitamin C: 1mg | Calcium: 8mg | Iron: 1mg

Adapted from a Food.com recipe.

Originally Published December 12, 2013. Updated with expanded discussion and refreshed photos.

Jake with his much loved ball.

Saltine Cracker Toffee

Pieces of Saltine Cracker Toffee with Christmas crack toppings.

Saltine Cracker Toffee is a wonderful combination of sweet, salty, and crunching, with easy homemade toffee candy on saltine crackers and then melted chocolate. It can be topped with chopped pecans or other seasonal toppings, making it Christmas Crack candy.

Ingredients

Saltine crackers
Toffee ingredients—butter, brown sugar
Chocolate chips—semi-sweet, milk chocolate or dark chocolate chips.
Toppings—chopped pecans and almost anything— M&Ms, walnuts, candy sprinkles, marshmallows, crushed candy canes or hard candy, chopped Oreos or other cookies

Pieces of Saltine Cracker Toffee with Christmas crack toppings.
[feast_advanced_jump_to]
Blue ribbon divider used for visual effect

Load this saltine cracker toffee with seasonal toppings to make a Christmas Crack recipe, a Southern regional candy frequently appearing at holiday gatherings, as gifts, or as your custom snack.

Just follow these simple step-by-step photo instructions, then top as you want. It moves fast, so read all the instructions before starting.

👨‍🍳How to Make Saltine Cracker Toffee

Saltine crackers, butter and other ingredients for Christmas crack candy.

1️⃣Preheat oven to 350°. Prepare a 12 X 18 half-sheet pan using a large sheet of parchment paper. Cover with a single layer of 48 saltine crackers.

Butter and brown sugar in a sauce pan.

2️⃣Place 1 cup of butter and 1 cup of brown sugar in a non-stick saucepan over medium-high heat.

Boiling Toffee in a sauce pan.

3️⃣Bring to a boil, then cook for 3 minutes while mixing well. It will get a little darker if you have good eyes. It will pull away from the edge of the pot with stirring.

Pouring carmel over the crackers on a tray.

4️⃣Pour over the toffee over the saltines.

Spreading the toffee over the crackers with a spatula.

5️⃣Smooth to cover rapidly. Bake in the preheated oven for 5 minutes.

chocolate chips spread over the hot pan.

6️⃣Remove from oven and sprinkle with 12 oz of chocolate chips. Allow it to set for 5 minutes, then smooth the melted chocolate.

Christmas crack topped with nuts.

7️⃣Top with 1 cup of chopped pecans. Add seasonal toppings to make Christmas Crack Candy.

Add other toppings like M and M's or sprinkles.

8️⃣There is plenty of room for multiple variations. Cool in the refrigerator for a few hours. Break into pieces to serve.

For more details, keep reading. See the Recipe Card below for complete instructions and to print.

Helpful tips to get it right every time

  1. You must have the oven fully preheated before starting. You are using it to bring the toffee to its final required temperature.
  2. A dab of butter in the corners of the tray will help hold the parchment in place.
  3. Cover the tray with saltines and get all the ingredients out before starting. It goes very fast.

Ingredients options

Like a lot of things in cooking, quality matters. Use ingredients you trust and like.

  • Use only real butter. Margarine can have unpredictable results when making the toffee.
  • Use fresh, crisp saltine crackers. Other crackers like Ritz, Club, Graham crackers, or even Biscoff may be used, but try to get good coverage of the tray.
  • To add flavor to the toffee, mix in 1 teaspoon of vanilla extract as it comes off the stovetop before spreading on the crackers.
  • Good quality chocolate is important. You can use your favorite chocolate chips, like milk chocolate, semi-sweet chocolate, or dark chocolate. Even white chocolate chips will work, but use the best you can find.

Topping Options

  • You will need about a cup to a cup and a half of toppings for the topping. Also, you will have a large surface area to cover, so mix it up so your friends will have various choices.
  • I suggest some chopped pecans and add some holiday M&Ms and sprinkles.
  • Topping options include different nuts, crushed Oreos, or other cookies. And smaller candies or other chips like peanut butter, caramel, or butterscotch.
  • For more flavors and crunch, try some crushed peppermint, toffee, or chocolate toffee bark. And broken-up candy canes are always seasonal.

Other Candy Recipes

Check out these other great choices for holiday parties and giving. If you need a large number of candies, try these Chocolate Pretzel Candies or Chocolate Peanut Clusters. For gifts, try White Chocolate Fudge, White Chocolate Almond Clusters, or 5-Minute Chocolate Fudge.

This recipe is part of Christmas Candy Recipes. Check out other easy candy recipes.

⬇️How to make a smaller recipe

A full-size recipe uses 48 saltine crackers to cover a half-size baking sheet, which is 12 by 16 inches. Use an 8 by 12-inch quarter baking sheet for a half recipe.

  1. Use the recipe card and adjust the number of servings from 48 to 24.
  2. Use the amount of ingredients in the ingredient list, not the instructions—those do not adjust.

How to Store Saltine Cracker Toffee

Store for up to two weeks if tightly sealed at cooler room temperature, but warm rooms may soften the candy. So, a cooler pantry will work well.

A refrigerator or freezer is not recommended since the saltines will become soggy when the lower temperatures bring the moisture out of the other ingredients.

FAQs

Why is the saltine toffee grainy?

Graininess in toffee is from sugar that did not fully dissolve. To prevent this next time, stir the butter and brown sugar together while it melts, and be sure the entire pan of toffee is boiling fully and not just the edges before stopping.

About Toffee, Butterscotch, Brittle, and Carmel

Toffee and butterscotch are both made by heating sugar and butter. Butterscotch is heated to a lower temperature, making it soft and chewy, while toffee is cooked to a higher temperature, producing a harder, crunchy candy.

The difference between a toffee and a brittle is mainly butter. Toffee is sugar with butter, and brittle is usually without butter. Brittles are cooked to a higher temperature to reach a "hard-crack" state, while toffees are cooked to a slightly lower temperature and are a little softer.

Carmel, like brittles, is just heated sugar but cooked to a lower temperature and is softer.

Blue ribbon divider used for visual effect

This recipe is listed in these categories. See them for more similar recipes.

Appetizer and Party Recipes, Candy Recipes, Holiday Recipes

Have you tried this recipe, or have a question? Join the community discussion in the comments.

📖The Recipe Card

Pieces of Saltine Cracker Toffee with Christmas crack toppings.
Print Recipe Add to Collection Go to Collections

Saltine Cracker Toffee

Saltine Cracker Toffee is a wonderful combination of sweet, salty, and crunching, with easy homemade toffee candy on saltine crackers and then melted chocolate. It can be topped with chopped pecans or other seasonal toppings, making it Christmas Crack candy.
Prep Time5 minutes mins
Cook Time12 minutes mins
Total Time22 minutes mins
Course: Appetizer
Cuisine: American
Keyword: Candy, Christmas Candy
Servings: 48
Calories: 99kcal
Author: Dan Mikesell AKA DrDan

Ingredients

  • 48 saltine crackers
  • 1 cup butter
  • 1 cup brown sugar light or dark
  • 12 oz chocolate chips
  • Toppings of choice.
US Customary - Convert to Metric

Instructions

  • Preheat oven to 350°. Prepare a 12 X 18 half-sheet pan using a large sheet of parchment paper. Cover with a single layer of 48 saltine crackers.
  • Place 1 cup of butter and 1 cup of brown sugar in a non-stick saucepan over medium-high heat.
  • Bring to a boil, then cook for 3 minutes while mixing well. It will get a little darker if you have good eyes. It will pull away from the edge of the pot with stirring.
  • Pour over the toffee over the saltines. Smooth to cover rapidly. Bake in the preheated oven for 5 minutes.
  • Remove from oven and sprinkle with 12 oz of chocolate chips. Allow it to set for 5 minutes, then smooth the melted chocolate.
  • Top with 1 cup of chopped pecans. Add seasonal toppings to make Christmas Crack Candy.
  • There is plenty of room for multiple variations. Cool in the refrigerator for a few hours. Break into pieces to serve.

Notes

Tips

  1. A full recipe fits on a 12 by 18 half-size sheet pan.
  2. Variations of ingredients and toppings are discussed in the post.
  3. Use the topping of your choice. I suggest a cup of chopped pecans with seasonal M&Ms with sprinkle candies.
  4. Store sealed tightly at cool room temperature.
Nutrition Note: Calculate on a 2-inch square piece with no toppings added other than toffee and chocolate chips.

Nutrition

Calories: 99kcal | Carbohydrates: 12g | Protein: 1g | Fat: 6g | Saturated Fat: 4g | Polyunsaturated Fat: 0.1g | Monounsaturated Fat: 0.1g | Cholesterol: 11mg | Sodium: 64mg | Potassium: 16mg | Fiber: 0.1g | Sugar: 8g | Vitamin A: 150IU | Calcium: 4mg | Iron: 0.4mg

Originally Published December 11, 2018. Refreshed with updated options and discussion.

dogs in snow with sticks.

  • « Previous Page
  • 1
  • 2
  • 3
  • 4
  • 5
  • 6
  • …
  • 10
  • Next Page »

DrDan imageHi, I'm DrDan.
Welcome to 101 Cooking for Two, the home of great everyday recipes with easy step-by-step photo instructions.
About DrDan

Top THANKSGIVING RECIPES

  • turkey slice with gravy on orange plate.
    How to Roast a Turkey Breast in the Oven
  • Cut ham with pineapple honey glaze on a white plate
    Small Ham in a Crock Pot (2–4 lb Boneless Ham)
  • slice of Ribeye Roast on a white plate
    Small Boneless Prime Rib (Ribeye) Roast
  • Sausage dressing on a white plate.
    Old Fashioned Sausage Dressing Recipe
  • A spoonful of green bean casserole.
    Green Bean Casserole Without Mushroom Soup
  • Sweet potato casserole on a white plate
    Old Fashioned Sweet Potato Casserole
SITES THAT I WORK WITH OR HAVE HAD RECIPES FEATURED OR REFERENCED.

Footer

BACK TO TOP
OF PAGE
Join the club
SUBSCRIBE TODAY

About

  • About DrDan and the Blog
  • Contact Me
  • Comment Policy
  • Guest Posts, Partnering, and Business Questions

Content

  • Food FAQ
  • Kitchen Reference Sheets
  • Recipes Featured in the Videos
  • Guide To Cooking for Two
  • Old Saved Recipes Collections

dogs by the pond

↑ back to top ↑a

Privacy Policy | Terms of Service | Contact

COPYRIGHT © 2010-2026 101 COOKING FOR TWO. ALL RIGHTS RESERVED | BASED ON FOODIE PRO THEME