101 Cooking For Two

  • Recipes
  • About
  • FAQs/Help
  • Shop
  • 📖Emails
menu icon
go to homepage
  • Recipes
  • About
  • FAQs/Help
  • Shop
  • 📖Emails
subscribe
search icon
Homepage link
  • Recipes
  • About
  • FAQs/Help
  • Shop
  • 📖Emails
×
🏠Home » Recipes

Crock Pot Chicken Noodle Soup

Ladle of chicken noodle soup over the crock pot

This easy crock pot chicken noodle soup is adapted from a classic 1972 Betty Crocker recipe, with tender chicken, vegetables, and egg noodles in a delicious broth like grandma would make.

Converted from the original stovetop recipe for any-size crock pot, with flexible scaling for 2, 4, or 8 servings. It’s simple comfort food with easy prep and dependable results.


Ladle of chicken noodle soup over the crock pot.
[feast_advanced_jump_to]

quote mark
Featured Comment by Taylor:
⭐⭐⭐⭐⭐
"Everything turned out perfectly…. Wonderful recipe-and one of the few I have found that are made to accommodate a small cooker."

⭐ TL;DR — Recipe Summary

What: Easy crock pot chicken noodle soup with chicken, vegetables, broth, and egg noodles.

Why: Simple prep, classic comfort-food flavor, and flexible scaling for 2, 4, or 8 servings.

How: Add the chicken, vegetables, broth, and seasonings to the crock pot and cook until tender. Shred the chicken, then add the noodles near the end so they don’t overcook.

🐓 Ingredients

Two raw chicken breasts with veggies and broth.
  • Chicken — boneless skinless breasts or thighs
  • Chicken broth — low-sodium preferred
  • Vegetables — carrots, celery, and onion
  • Seasoning — salt, black pepper, and one bay leaf
  • Dry noodles — standard commercial egg noodles work best

👨‍🍳 Quick Overview: How to Make Chicken Noodle Soup in a Crock Pot

1. Prep: Chop the vegetables and trim the chicken.

Chopped carrots with celery and onion on a blackboard.

2. Cook: Add everything except the noodles to the crock pot and cook until the chicken is tender. Remove and shred the chicken, then return it to the crock pot.

adding broth to all other ingredients in the crock pot.

3. Add noodles: Add the egg noodles near the end and cook until tender. Adjust the seasoning and broth as needed, then serve.

Adding pasta to the soup in a crock pot.

For more details, keep reading. See the Recipe Card below for complete instructions and to print.

👍 Options and Tips

Chicken options

  • Use cubed boneless chicken breasts or thighs for the easiest version.
  • For shredded chicken, cook breasts to 165°F or thighs to 180°F, then shred and return the chicken when adding the noodles.
  • For rotisserie chicken, add it with the noodles when the carrots are tender since it is already cooked.

Broth and noodle adjustments

  • For a brothier soup, add 1–2 cups of chicken broth.
  • For more noodles, add about 2 cups of broth for every ½ cup of additional dry pasta.
  • Add noodles only after the chicken and vegetables are cooked. Cook until the noodles are tender, checking every 15 minutes since pasta cooking times vary.

↕️ Scaling for 2, 4, or 8 and Crock Pot Sizes

  • For 2: Half recipe makes 2–3 servings and fits a 2-quart crock pot.
  • For 4: Full recipe makes about 10 cups (4–6 servings) and fits a 3½-quart crock pot.
  • For 8: Double recipe makes 8–12 servings and needs a 6½-quart or larger crock pot.

Changing the recipe size

  1. Use the recipe card to scale the ingredients to half or double.
  2. Measure from the ingredient list since amounts in the instructions don’t auto-adjust.
  3. Cooking time stays the same for all sizes.
  4. If adding extra noodles, add extra broth as described in “Options and Tips.”

✅ Pro Tip: Don’t fill the crock pot more than 75% full. If adding extra broth, hold some back until the soup is cooked, then add it as needed.

♨️ Stovetop Version

  1. Add everything except the noodles to a Dutch oven.
  2. Bring to a gentle simmer and cook until the chicken is fully cooked and the vegetables are tender, about 60–90 minutes.
  3. For whole chicken, remove breasts at 165°F or thighs at 180°F, shred, and return to the pot. If using rotisserie chicken, add it now.
  4. Bring the soup to a boil, add the noodles, and cook according to package instructions until tender.

🧊 Storage and Leftovers

  • Refrigerator: Store for 3–4 days. The noodles absorb broth, so add broth or water when reheating as needed.
  • Freezer: For the best texture, freeze for 3–4 months before adding the noodles. Portion what you plan to freeze before the noodle step.
  • Freezing with noodles: It’s safe, but the noodles will soften and the soup will be thicker after thawing.

📖 More Crock Pot Soup Recipes

  • Homemade Vegetable Beef Soup — another classic recipe.
  • Crock Pot Chicken Vegetable Soup — light, simple, and family-friendly.
  • Crock Pot French Onion Soup — slow-cooked sweetness with deep flavor.
  • Crock Pot Broccoli Cheddar Soup — a simple crock pot version of a classic.

❓ FAQs

What pasta works best for chicken noodle soup?

Standard egg noodles work best. They hold their shape, cook evenly, and match the timing in this recipe. Quick-cooking or other pasta may cook much faster, so check it frequently.

📖The Recipe Card

Ladle of chicken noodle soup over the crock pot
Print Recipe Add to Collection Go to Collections
4.41 from 5 votes

Crock Pot Chicken Noodle Soup

Easy crock pot chicken noodle soup with tender chicken, vegetables, and egg noodles. Simple prep and flexible scaling make it perfect for 2, 4, or 8 servings.
Prep Time10 minutes mins
Cook Time4 hours hrs
Total Time4 hours hrs 10 minutes mins
Course: Soup
Cuisine: American
Keyword: Chicken Noodle Soup, Crock Pot Chicken Noodle Soup, Slow Cooker Chicken Noodle Soup
Servings: 4 servings
Calories: 172.9kcal
Author: Dan Mikesell AKA DrDan

Ingredients

  • 2 skinless boneless chicken breasts (1 to 1½ pounds; thighs may be used)
  • 4-6 cups chicken broth
  • 2 carrots sliced
  • 2 ribs celery sliced
  • 1 onion, medium chopped
  • ½ teaspoon salt
  • ½ teaspoon pepper
  • 1 bay leaf
  • 1½ cup dry egg noodles
US Customary - Convert to Metric

Instructions

  • Prep the vegetables: Peel and slice 2 carrots, chop 1 medium onion; slice 2 ribs of celery.
    chopped carrots with celery and onion on a black board
  • Prep the chicken: Trim 2 chicken breasts (1–1½ pounds) into 1-inch cubes, or cook them whole and shred them before adding the noodles.
    cubes of raw chicken trimmed on a black board
  • Load the crock pot and cook: Add the chicken and vegetables to a 3½-quart or larger crock pot. Add 32 oz chicken broth, 1 bay leaf, ½ teaspoon salt, and ½ teaspoon pepper. Cook on LOW for 4 hours total.
    👉 For a soupier result, add an additional 1–2 cups of broth.
    adding broth to all other ingredients in the crock pot
  • Add noodles: After 3 hours, or when the chicken is cooked and the vegetables are tender, add 1½ cups dry egg noodles. Cook for the final hour, or until the noodles are tender.
    adding pasta to the soup in a crock pot

Notes

Pro Tips

For rotisserie chicken, add it with the noodles when the carrots are tender.
Use standard egg noodles for predictable cooking. Check early for doneness.
For extra noodles, add about 2 cups of broth per ½ cup of additional dry noodles.
This recipe scales for 2, 4, or 8 servings; see the post for crock pot sizes.
Storage: Refrigerate for 3–4 days. For the best freezer results, freeze for 3–4 months before adding the noodles.
 

Nutrition

Calories: 172.9kcal | Carbohydrates: 16.7g | Protein: 19.2g | Fat: 3.6g | Saturated Fat: 0.9g | Polyunsaturated Fat: 0.8g | Monounsaturated Fat: 1.3g | Trans Fat: 0.01g | Cholesterol: 48.1mg | Sodium: 467.1mg | Potassium: 599.9mg | Fiber: 1.7g | Sugar: 2.3g | Vitamin A: 5213.8IU | Vitamin C: 3.1mg | Calcium: 36.8mg | Iron: 1.1mg
a much used 1972 Betty Crocker's Cookbook.

This is my wife's favorite chicken noodle soup recipe, but I added the conversion to a small crock pot. The original source is the 1972 Betty Crocker Cookbook.

Editor's Note: Originally published November 20, 2012. Updated with expanded options, refreshed photos, and a table of contents to help navigation.

Molly and Lilly running in the snow.

How to Cook Brisket in the Oven (Fall-Apart BBQ Recipe)

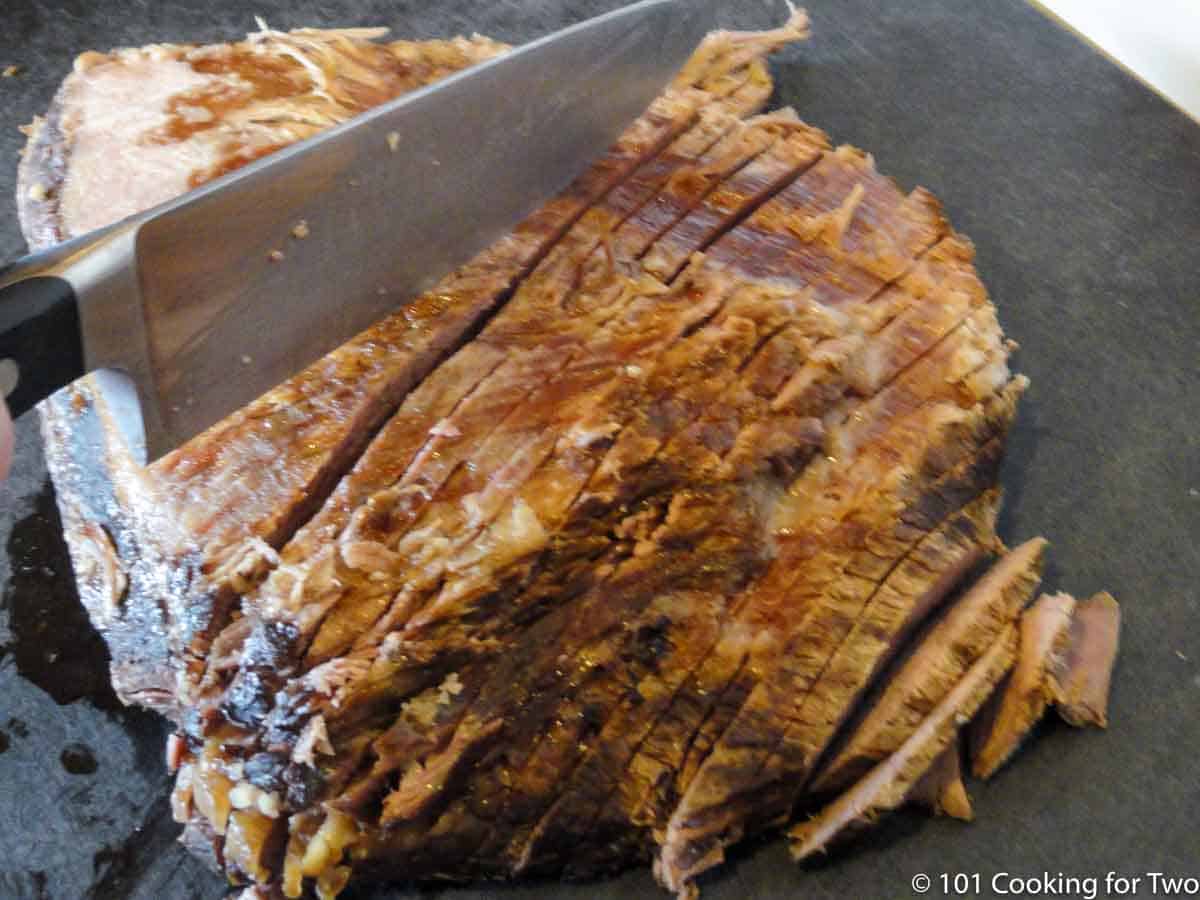
Cutting the brisket.

Cooking fall-apart tender beef brisket in your oven is simple with this low-and-slow recipe—no smoker required.

A light coating of liquid smoke adds BBQ flavor before it cooks tightly covered. This easy make-ahead oven-baked brisket is perfect for family dinners or feeding a crowd.

Quick Answer: How Long to Cook Brisket in the Oven

  • Cooking time: Plan on about 1 hour per pound at 300°F in a tightly covered pan. Thick, whole, or frozen brisket may take longer.
  • Doneness: Cook to 200°–205°F and fork-tender. Use temperature and tenderness—not the clock alone.
Cutting the brisket.
[feast_advanced_jump_to]

quote mark
Featured Comment by Dave:
⭐⭐⭐⭐⭐
"Thank you for this recipe. I have done 3 so far, and thanks to your simple thorough instructions, they have all been perfect. And it’s so easy!"

🤔 TL;DR — Recipe Summary

  • What: Fall-apart tender BBQ beef brisket cooked low and slow in the oven—no smoker or grill needed.
  • Why: Simple, reliable, and perfect for making ahead. The method works with any size brisket—flat, point, or whole.
  • How: Coat with liquid smoke, seal tightly, and bake at 300°F until 200°–205°F and fork-tender. Remove the fat, chill, slice, and reheat with barbecue sauce.

🐄 Ingredients

raw brisket with liquid smoke.
  • Beef brisket: Use any size or cut. Flat cuts are leaner and slice neatly; point cuts are thicker and more marbled. A whole brisket contains both. Leave the fat on—it is easily removed after cooking.
  • Liquid smoke: Essential for the smoky BBQ flavor in this recipe. I recommend Wright’s; cheaper brands may taste artificial. Do not omit it.
  • Barbecue sauce: Use your favorite sauce for reheating and serving the sliced brisket.

👨‍🍳 Quick Overview: How to Cook Brisket in the Oven

1. Pat the brisket dry and coat all sides with liquid smoke.

adding liquid smoke to brisket in a cake pan.

2. Place it in a large pan, cover tightly with foil, and seal all the edges. Bake at 300°F—no need to preheat.

sealing pan with foil.

3. Bake until 200°–205°F and fork-tender, about 1 hour per pound.

Checking cooked brisket for tenderness with a large fork.

4. Scrape off the fat cap while the brisket is still hot. If it has two muscle layers, separate them. Discard the liquid. For clean slices, cover and refrigerate for at least 3 hours.

scraping fat off cooked brisket.

5. Cut across the grain into ⅛- to ¼-inch slices. For chopped brisket, slice across the grain first, then chop; chilling is optional.

slicing the cooked brisket cross-grain.

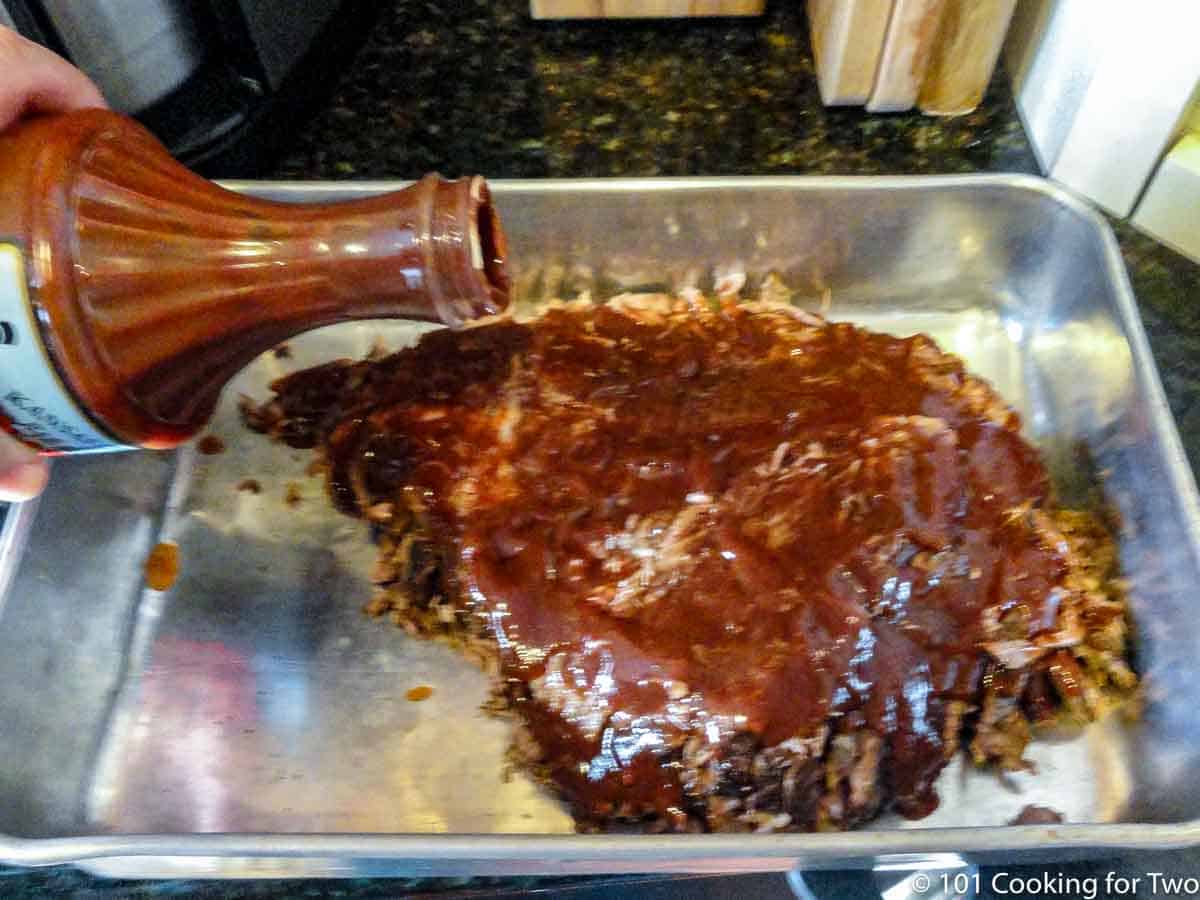
6. Coat with BBQ sauce and reheat, covered, at 375°F for about 25 minutes or until hot.

pouring sauce on sliced brisket.

👇 This overview is not the complete recipe. Use the printable recipe card below for full instructions and amounts.

⏰ How Long to Cook Brisket in the Oven

At 300°F in a tightly covered pan, plan on about 1 hour per pound. This is only a starting point because thickness matters as much as weight.

  • A thick point or whole brisket will take longer than a thin flat.
  • A whole brisket may need 8 to 10 hours or more.
  • Add 1 to 2 hours when cooking brisket from frozen.

Start checking early and allow extra time. Brisket rarely respects a dinner schedule.


🌡️ When Is Brisket Done?

Brisket is done when it passes both tests:

  • Temperature: 200°–205°F in the thickest part
  • Tenderness: A fork or probe slides into the meat with little resistance

If the brisket reaches the target temperature but still feels tight, cover it again and continue cooking. Check about every 20 to 30 minutes until tender.

🔪 How to Cut a Brisket

For clean, even slices, cover and refrigerate the brisket for at least 3 hours. Warm brisket tends to fall apart—which is only a problem when you want neat slices.

If the brisket has two layers of meat, separate them along the fat seam and remove the fat between them. The grain may run in different directions, so cut each piece separately.

Slice across the grain, about 90° from the direction of the muscle fibers. Aim for slices ⅛ to ¼ inch thick.

For chopped brisket, chilling is optional. Slice across the grain first, then chop to the desired size. This keeps the fibers short and prevents long, stringy pieces.

🍽️ Serving BBQ Brisket

Serve the brisket sliced or chopped with extra barbecue sauce.

Kansas City brisket sandwiches: Soft white bread and triple-decker sandwiches are Kansas City traditions. In our family, a “correct” brisket sandwich is stacked three layers high on Wonder Bread with Gates BBQ sauce. Buns or other sandwich bread also work.

Other ways to serve brisket:

  • Pile it over mac and cheese
  • Add it to wraps or quesadillas
  • Chop it into baked beans or hash

Favorite side dishes:

  • Baked beans
  • Coleslaw
  • Potato salad
  • French fries
  • Cheesy Potatoes with Real Potatoes

My wife’s favorite meal is this brisket with Gates sauce and her cheesy potatoes—just sayin’.

❄️ Leftover Brisket Storage

  • Refrigerate: Store in an airtight container for up to 4 days.
  • Freeze: Wrap tightly or use an airtight container and freeze for up to 4 months.
  • Reheat: Cover and reheat with barbecue sauce until hot. The sauce helps prevent the brisket from drying out.

🔥 Related BBQ Recipes

Grilled Brisket

Cook brisket low and slow on your gas grill for tender meat with smoky flavor and a crusty bark—no traditional smoker needed.

Cooked brisket on a gray board
  • Boston Butt in the Oven
  • Oven-Baked Baby Back Ribs
  • Pork Butt on a Gas Grill

❓ FAQs

How much brisket should I buy?

Plan on about ½ pound of raw brisket per person, or more if you want leftovers. A sandwich usually holds about ¼ pound of cooked brisket. Feeding teenage boys? Planning on a pound each is not unreasonable.

What is Liquid Smoke?

Liquid smoke is real wood smoke condensed into liquid. It adds smoky flavor without a smoker. I recommend Wright’s brand; look for it near the Worcestershire sauce.

Can I cook a frozen brisket in the oven?

Yes. Cook it using the same tightly covered method, but allow 1 to 2 additional hours. It is done when it reaches 200°–205°F and is fork-tender—not when the clock says so.

What is brisket?

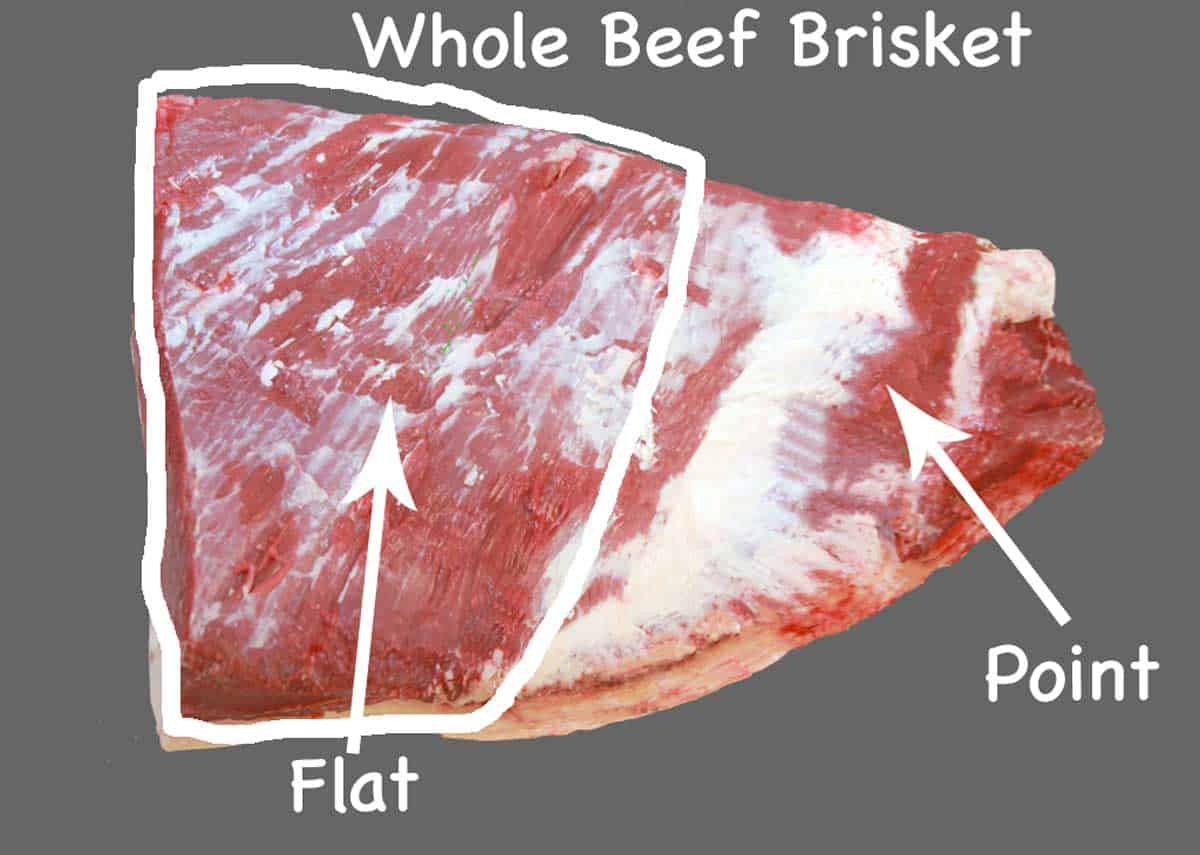
Brisket comes from the lower chest of the cow and contains parts of two overlapping muscles separated by a layer of fat:
Flat: Leaner and easier to slice
Point: Thicker, fattier, and more marbled
Whole brisket or packer: Contains both muscles and commonly weighs 8 to 12 pounds or more
Retail definitions of flat and point vary, so either portion may contain two layers of meat. Buy Choice or Prime grade for the best results.
📍 Diagram courtesy of Texas A&M Meat Science, used according to published permission. 101 Cooking for Two is not endorsed by the State of Texas or its agencies.
graphic with whole brisket labeled parts

📖The Recipe Card

Cutting the brisket.
Print Recipe Add to Collection Go to Collections
5 from 4 votes

How to Cook Brisket in the Oven (Fall-Apart Tender BBQ)

Cook fall-apart tender BBQ brisket in the oven with an easy low-and-slow method. Works with any size or cut, with no smoker needed.
Prep Time5 minutes mins
Cook Time4 hours hrs 30 minutes mins
Total Time4 hours hrs 35 minutes mins
Course: Main Course
Cuisine: American
Keyword: BBQ brisket in the oven, how to cook brisket in the oven, oven baked brisket recipe
Servings: 16 servings
Calories: 191.1kcal
Author: Dan Mikesell AKA DrDan

Ingredients

  • 4 pounds Beef Brisket any size will do
  • 3-4 tablespoons liquid smoke
  • ½ cup BBQ sauce
US Customary - Convert to Metric

Instructions

  • Turn on the oven to 300°F—no need to preheat.
    raw brisket with liquid smoke
  • Pat the brisket dry. Place in a pan fat-side up and coat all sides with 3–4 tablespoons of good-quality liquid smoke.
    adding liquid smoke to brisket in a cake pan
  • Cover tightly with aluminum foil sealed on all edges.
    sealing pan with foil
  • Bake until fork-tender and the internal temperature reaches 200°–205°F. Plan on about 1 hour per pound.
    cooked brisket with a large for checking for tender
  • Scrape off the fat cap while the meat is still hot. If the brisket has two layers of meat, separate the two layers. Cover and refrigerate if slicing for at least 3 hours before slicing. Discard the liquid.
    scraping fat off cooked brisket
  • Slice across the grain into slices that are ⅛ to ¼ inch thick. Or chop if you prefer. To chop, it is best to slice first, but you can also chop it hot without slicing.
    slicing the cooked brisket cross-grain
  • Transfer back to a pan, coat with BBQ sauce, and reheat—covered—at 375°F for about 25 minutes until hot.
    pouring sauce on sliced brisket

Notes

Pro Tips:

  1. Do not omit the liquid smoke. It provides the seasoning and smoky flavor during cooking. I recommend Wright’s brand.
  2. Plan on about 1 hour per pound at 300°F, but thickness matters. Thick points and whole briskets may take longer; add 1 to 2 hours for frozen brisket.
  3. Cook to 200°–205°F and fork-tender. Use time only as an estimate.
  4. Scrape off the fat while the brisket is hot. If it has two layers of meat, separate them along the fat seam.
  5. For clean slices, refrigerate for at least 3 hours. For chopped brisket, slice across the grain first, then chop—it may be served hot.
  6. Refrigerate leftovers for up to 4 days or freeze for up to 4 months. Reheat covered with barbecue sauce.

Nutrition

Calories: 191.1kcal | Carbohydrates: 3.6g | Protein: 23.6g | Fat: 8.4g | Saturated Fat: 2.9g | Polyunsaturated Fat: 0.3g | Monounsaturated Fat: 3.9g | Cholesterol: 70.3mg | Sodium: 187.9mg | Potassium: 394.9mg | Fiber: 0.1g | Sugar: 3g | Vitamin A: 20IU | Vitamin C: 0.1mg | Calcium: 8.6mg | Iron: 2.2mg

Editor’s Note: Originally published April 9, 2011. Updated with expanded instructions and improved organization. Please enjoy one of our favorite recipes.

dogs in the yard with their favorite trees.

All-Purpose Seasoning Recipe

graphic with foods using everyday seasoning

This All-Purpose Seasoning recipe, also known as 7:2:1 or 7:2:2, is the perfect mixture of common spices and is ideal for meats, vegetables, potatoes, and salads. 

🧂Ingredients

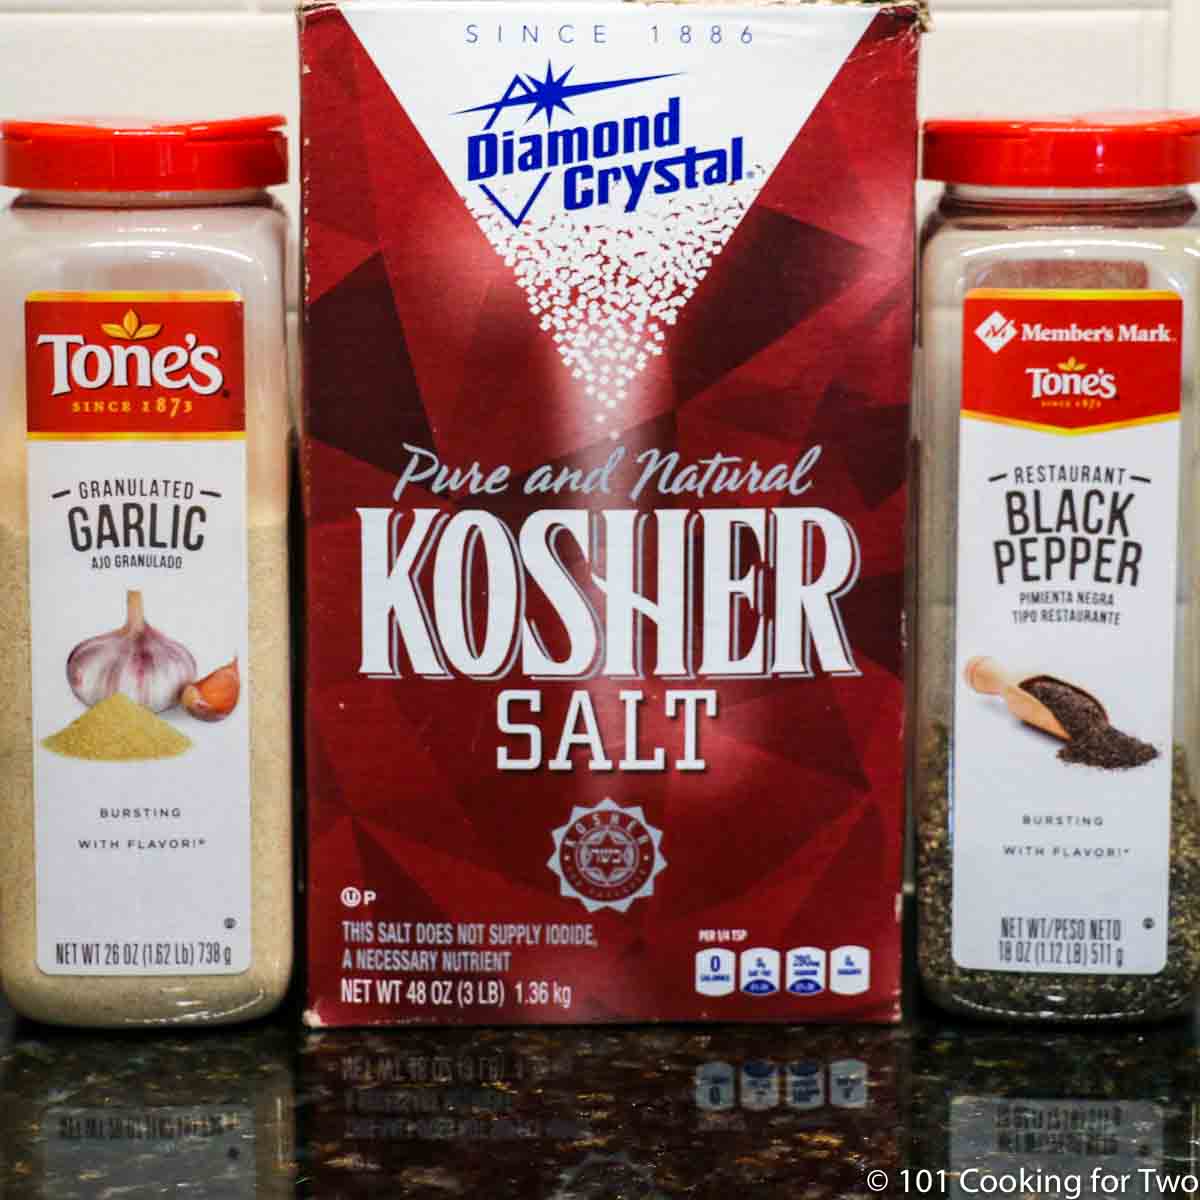
Kosher salt
Black pepper—coarse
Granular garlic powder

Recipes using All-purpose seasoning blend
[feast_advanced_jump_to]
Blue ribbon divider used for visual effect

This homemade spice blend saves you time and money. No reason to get your favorite seasonings out every time and measure. Keep it by the stove and on the table in a sealed shaker.

It is much more economical than commercial blends. And it will store well for six months or more, depending on what you add.

You can keep it basic with a 7:2:1 or 7:2:2 ratio of kosher salt:pepper:granulated garlic, which compliments most meat, salad, potatoes, and vegetables. Or make it your signature blend by adding other spices and herbs you frequently use. Also, adjust the basics if you like.

We use it almost everywhere, like on grilled filet mignon, grilled ribeye, oven baked chicken legs, seared and baked chicken breast, and many more meat or vegetable dishes.

image of ingredients for 7:2:1 seasoning

🧂Salt Notes

This mixture uses coarse salt like kosher or sea salt. The recipe uses Diamond Crystal Kosher salt, which, due to its granular shape, has fewer salt molecules per teaspoon.

The rough equivalent is 1 teaspoon table salt = 1 ¼ teaspoon Morton kosher salt or sea salt = 2 teaspoons Diamond Crystal kosher salt.

If you use Morton salt or another coarse salt like sea salt, use 4 tablespoons - not 7 which is for Diamond Crystal.

But since salt is mostly to taste, use what you want. If you are salt-sensitive or restricting salt, try cutting the salt in half.

🥣Pepper, Garlic, and Other Seasonings

Pepper—Use restaurant grind black pepper, which is a rougher grind. Finer grinds will not stay mixed in with the salt well.

Garlic—Use "granulated" garlic and not powder. Its texture will mix a lot better with the salt and pepper. Garlic powder is a much finer grind and will not stay mixed in well.

Onion—Optional, like garlic, use the granulated form if added, not the fine powder.

Less common seasonings—Only add them if you use them very frequently: Paprika, dill, coriander, basil, thyme, oregano, red pepper flakes, and cayenne pepper.

👨‍🍳Uses

Use this almost anywhere you use salt and pepper. The suggested basic blend works great on most meat chicken, beef like steak and burgers, and pork like tenderloins or chops.

Other dishes like baked or roasted potatoes, cooked vegetables, and salads.

You can make up several different customized blends for other uses.

✔️Tips

Finer ground spices will settle in the mix and lead to uneven seasoning.

Use a shaker that can be sealed. I buy them at Penzy's Spices. Or recycle another container with a large hole shaker and seals tight. A container can be refilled for many years to come.

The recipe uses tablespoons, but obviously, it could be teaspoons, cups, ounces, or whatever, so you can change up the amount you mix.

❓FAQs

What is All-Purpose Seasoning mix?

It is a mixture of the common spices you add to dishes during cooking and serving. The basic recipe is salt, pepper, and garlic. But you should customize it to your taste and household usage.

How to store All-Purpose Seasoning mix?

Store where it is conveniently close to where you use it. The container should have a tight-fitting top and a shaker with larger holes.

How long can you store All-Purpose Seasoning mix?

For the basic mixture, 6 months at least. For customized blends, if using dried spices, it should be about the same.

📖The Recipe Card

Recipes using All-purpose seasoning blend
Print Recipe Add to Collection Go to Collections
4.67 from 3 votes

All Purpose Seasoning Recipe

This All-Purpose Seasoning recipe, also known as 7:2:1 or 7:2:2, is the perfect mixture of common spices and is ideal for meats, vegetables, potatoes, and salads. 
Prep Time2 minutes mins
Total Time2 minutes mins
Course: Rubs and Sauces
Cuisine: American
Keyword: Everyday Seasoning, Seasoning Mix, Seasoning Salt
Servings: 120 ¼ teaspoon
Calories: 1kcal
Author: Dan Mikesell AKA DrDan

Ingredients

  • 7 tablespoons Diamond Crystal kosher salt Only 4 tablespoons of Morton Kosher salt. Adjust to your taste.
  • 2 tablespoons black pepper course grind
  • 1-2 tablespoon Granular garlic 2 for 7:2:2
  • other things to your taste
US Customary - Convert to Metric

Instructions

  • Mix well. If using Morton then use 4 tablespoons of salt. ADJUST THE SALT TO YOUR TASTE.
    homemade seasoning salt
  • This is written with tablespoons, but you could use teaspoons, cups. or any other measurement. It is all about the ratio of ingredients. This is not a "by weight" recipe.
    Mixing spices in a small bowl
  • Store in an airtight container.

Notes

Pro Tips:

  1. This is a bit heavy in salt for some. Cut it down for your taste. If you are salt sensitive or need low sodium, try half the salt initially.
  2. This is based on Diamond Crystal Kosher salt. Conversion for various salts: 1 teaspoon table salt = 1 ¼ teaspoon Morton kosher salt = 2 teaspoons Diamond Crystal kosher salt.
  3. If you are using Morton salt or another coarse salt like sea salt, use 4 tablespoons.
  4. Use granular garlic powder, not regular garlic powder.
  5. We always use two parts garlic powder due to our love of garlic.
  6. Use this almost anywhere you use salt and pepper. The suggested basic blend works great on most meat chicken, beef like steak and burgers, and pork like tenderloins or chops.
    Other dishes like baked or roasted potatoes, cooked vegetables, and salads.
  7. You can make up several different customized blends for other uses.
  8. Use a shaker with large holes and a top that seals. I get mine at Penzy's
  9. This is written with tablespoons, but you could use teaspoons, cups, or any other measurement. It is all about the ratio of ingredients.
Optional Ingredients:
Onion powder—Optional, like garlic, use the granulated form if added, not the fine powder.
Less common seasonings—Only add them if you use them very frequently: Paprika, dill, coriander, basil, thyme, oregano, red pepper flakes, and cayenne pepper.

Nutrition

Calories: 1kcal | Carbohydrates: 1g | Protein: 1g | Fat: 1g | Saturated Fat: 1g | Sodium: 392mg | Potassium: 3mg | Fiber: 1g | Sugar: 1g | Vitamin A: 1IU | Calcium: 1mg | Iron: 1mg

Originally Published August 26, 2011. Updated with expanded options, refreshed photos, and a table of contents to help navigation.

Molly and Lilly first night home playing tug

How to Grill a Porterhouse Steak

porterhouse steak with fries on blue plate

Learn how to grill a juicy porterhouse steak over high heat in about 10 minutes. Porterhouse steaks (or T-bone steaks) are one of the best cuts for grilling because they combine a tender filet with a flavorful New York strip.

Whether you're cooking for a special dinner or just want a great steak at home, this easy method delivers a flavorful crust and a tender, juicy center every time.

Quick Answer: How Long to Grill a Porterhouse Steak

Grill time is about 10 minutes for a 1-inch porterhouse steak on a hot grill (500°–600°F).

  • Medium-rare (130°–135°F): 7–9 minutes
  • Medium (140°–145°F): 9–11 minutes
  • Thickness and grill temperature affect cooking time.

Always cook to your desired internal temperature, not just by time.

Grilled porterhouse steak served with fries on a blue plate.
[feast_advanced_jump_to]

quote mark
Featured Comment from Jennifer :
⭐⭐⭐⭐⭐
"I followed this yesterday (exactly) and my steaks were perfect. Thank you so much."

TL;DR — Recipe Summary

What: Grill a juicy porterhouse steak (or T-bone steak) with simple seasoning and high heat.

Why: A quick, foolproof method with a flavorful crust and tender, juicy center.

How: Grill over high heat for about 10 minutes, cooking to your desired internal temperature.

🥩 Ingredients

You only need a quality steak and a few simple ingredients for a great grilled steak.

  • Porterhouse steak – 1 inch thick is ideal for the best grilled porterhouse steak; ¾–1½ inches will work. Choice or prime grade preferred. Don’t forget T-bones are the same cut with a smaller filet side.
  • Kosher salt and coarse black pepper – Simple seasoning for the pure steak flavor.
  • Optional: Garlic powder, Montreal steak seasoning, or compound butter for serving.

👨‍🍳 Quick Overview: How to Grill Porterhouse Steak

1. Preparing the Steaks

Rest at room temperature for 30–60 minutes. Trim excess fat and season both sides with salt and pepper or your favorite steak seasoning.

A porterhouse steak trimmed of fat is being seasoned on a blackboard.

✅ Pro Tips: Season either right before grilling or 60 minutes ahead. Salt pulls out moisture at first, but given time, it reabsorbs for better flavor and texture.

2. Starting to Grill

Clean and oil the grates. Preheat the grill to high heat (over 500°F), then place the steaks over direct heat.

porterhouse steak going onto direct heat.

3. Cooking on the Grill

Flip every 5 minutes and grill to your desired internal temperature (medium-rare or medium recommended). Remove 2–3° early and rest for 5–10 minutes to allow the juices to redistribute.

flipping steak on grill.

📌 For complete step-by-step instructions, scroll down to the printable recipe card or keep reading for tips, flavor options, and serving ideas.

⏱️ How Long to Grill a Porterhouse Steak

A 1-inch porterhouse steak usually takes about 10 minutes over high heat. Thickness, grill temperature, and starting temperature all affect the exact cooking time. Always cook to your desired internal temperature, not just by time.

🔥 Approximate Grilling Time by Doneness (1-inch thick, rested to room temperature)

  • Rare (125°–130°F): About 6–7 minutes
  • Medium-rare (130°–135°F): About 7–9 minutes ✅ Recommended
  • Medium (140°–150°F): About 9–11 minutes ✅ Recommended
  • Medium-well (150°–155°F): Around 12–14 minutes
  • Well done (160°F+): 14 minutes or more

👉 Steaks will rise 2°–4°F after removal — pull them a bit early.

✅ Pro Tip: Use an instant-read thermometer for accuracy; grill time is only a guide.

These grilling times also work for similarly thick T-bone steaks. Always cook to the final internal temperature rather than time alone.

🧂 Seasoning Tips

  • Simple is all you need: Just salt and pepper lets the beef flavor shine.
  • Upgrade the flavor: Try Montreal steak seasoning, my 7:2:2 seasoning mix, or any steak blend you enjoy.
  • Timing matters: Season either right before grilling or about 60 minutes ahead so the salt has time to reabsorb.
  • Marinade is optional: Not needed for tenderness or flavor, but it can add a different taste profile. Try my Easy Steak Marinade for a quick flavor boost.

🔥 Grilling Tips

  • Use high heat (over 500°F): Whether gas or charcoal, sear over direct heat for the best crust.
  • Oil the grates, not the steaks: A well-oiled grate prevents sticking — you don’t need to oil the meat.
  • Avoid hot spots: Rotate steaks as needed for even cooking.

🐄 Porterhouse vs. T-Bone Steaks – What’s the Difference?

Graphic showing the difference T-Bone and Porterhouse Steaks.
The difference between T-bone steaks and Porterhouse steaks.

Porterhouse and T-bone steaks come from the same section of the short loin, with a New York strip on one side of the bone and a tenderloin (filet mignon) on the other.

Porterhouse steaks have more tenderloin — at least 1¼ inches wide, compared to ½ inch up to 1¼ inches on a T-bone. (Less than ½ inch? That’s just a bone-in strip steak.) Both cuts grill exactly the same way.

If they’re the same price, grab the Porterhouse for more filet.

🍽️ Serving

After resting, slice the porterhouse steak across the grain for the most tender bites. Add a pat of butter or compound butter and let it melt over the warm meat, or sprinkle with fresh rosemary or thyme.

For sides, keep it simple: Fresh Spinach Salad, Oven-Roasted Potatoes, or quick stovetop veggies so the steak stays the star. If you’re feeling indulgent, pair with a bold red wine or your favorite cold beer.

❄️ Storage & Reheating

  • Fridge: Store leftover steak in an airtight container for 3–4 days.
  • Freezer: Wrap well and freeze for up to 3–4 months. Thaw overnight in the fridge before reheating.
  • Reheat gently: Warm in a skillet over low heat with a bit of oil or butter, or wrap in foil and heat in a 250°F oven until warmed through. The microwave works in a pinch but can dry the meat.
  • Leftover ideas: Slice thin for steak sandwiches, serve over salad, or make steak and eggs for breakfast.

❓ FAQs

Can I cook T-bone and Porterhouse steaks on the stove?

Yes. Pan-sear in a hot skillet for a few minutes per side, then transfer to a 425°F oven to finish to your desired internal temperature. The meat next to the bone won't sear as evenly because it pulls away slightly as it cooks. The results are similar to my Pan Seared Oven Roasted Strip Steak.

Can I cook a thicker steak this way?

This method works well for steaks up to about 1½ inches thick if they are rested at room temperature first. For steaks thicker than 1½ inches, use reverse searing or a lower grill temperature so the center cooks before the outside overcooks.

Do thicker steaks need to be flipped more than once?

Yes. Steaks over 1 inch thick, especially 1½ inches or more, benefit from being flipped every 4–5 minutes and rotated as needed for even cooking.

Do I need to close the grill lid when cooking a Porterhouse?

Usually yes. Closing the lid helps maintain even high heat, especially on a gas grill. On charcoal grills, keep the lid closed except when flipping the steak to maintain temperature and reduce flare-ups.

🥩 More Great Grilled Steak Recipes You’ll Love

Looking for another cut? Try one of these grill favorites:

  • Grilled Filet Mignon – Tender and fast, perfect for special occasions.
  • Grilled Sirloin – Budget-friendly with big flavor.
  • Grilled New York Strip Steaks – A classic cut with simple seasoning
  • How to Grill Ribeye Steak – A slice of prime rib on the grill

📖The Recipe Card

porterhouse steak with fries on blue plate
Print Recipe Add to Collection Go to Collections
4.89 from 9 votes

How to Grill a Porterhouse Steak

Learn how to grill a juicy porterhouse steak with simple seasoning over high heat in about 10 minutes. This easy method also works for T-bone steaks.
Prep Time5 minutes mins
Cook Time10 minutes mins
Total Time15 minutes mins
Course: Main Course
Cuisine: American
Keyword: Grilled Porterhouse Steak, Grilled T-bone steak, How Long to Grill Porterhous Steak, how to cook a porterhouse steak
Servings: 2 Steaks
Calories: 1120kcal
Author: Dan Mikesell AKA DrDan

Ingredients

  • Porterhouse or T-Bone Steaks—choice or prime grade about 1 inch thick.
  • Salt and pepper to taste or 7:2:2 seasoning (kosher salt, pepper, garlic)

Instructions

Prepare the Steaks

  • Start with 1-inch thick Porterhouse or T-bone steaks. Let rest at room temperature for about 1 hour if possible.
    two porterhouse steaks with seasoning
  • Trim excess fat. Season just before grilling or up to 1 hour ahead. I use 7:2:1 seasoning, but salt and pepper work fine — or use your favorite steak seasoning.
    seasoning trimmed porterhouse steaks

Preheat the Grill

  • Preheat your grill to high heat (over 500°F). Clean and oil the grill grates well.
    oiling preheating grill

Cooking on the Grill

  • For crosshatch grill marks, rotate steaks 90° halfway through each side (about 2½ minutes in).
    placing porterhouse steak on a grill
  • For crosshatch grill marks, rotate the steak 90° halfway through each side (about 2½ minutes in).
    flipping a porterhouse steak on the grill
  • Check doneness early with an instant-read thermometer — remove steaks 2–3°F below the target temperature, as they will continue to rise while resting. About 9 minutes total will yield medium-rare (130°–135°F) for a 1-inch Porterhouse.
    porterhouse steak on a blue plate
  • Rest steaks off the heat, lightly tented with foil, for 5–10 minutes before serving.
    bite of steak on a fork

Notes

Pro Tips:

  • Use a high smoke point oil on grill grates—olive oil may smoke
  • Resting at room temperature before grilling helps steaks cook evenly.
  • Season either right before grilling or 60 minutes ahead—never in between.
  • For rare, decrease the first side grilling time. The post discusses rare doneness more.
  • This method works best for ¾ to 1½ inch thick steaks. For thicker steaks use a reverse sear method.
🔥 Approximate Grilling Time by Doneness (1-inch thick, rested to room temperature)
  • Rare (125°–130°F): About 6–7 minutes
  • Medium-rare (130°–135°F): About 7–9 minutes ✅ Recommended
  • Medium (140°–150°F): About 9–11 minutes ✅ Recommended
  • Medium-well (150°–155°F): Around 12–14 minutes
  • Well done (160°F+): 14 minutes or more
👉 Steaks will rise 2°–4°F after removal — pull them a bit early.

Nutrition

Calories: 1120kcal | Protein: 85g | Fat: 84g | Saturated Fat: 34g | Polyunsaturated Fat: 3g | Monounsaturated Fat: 37g | Cholesterol: 290mg | Sodium: 1403mg | Potassium: 1356mg | Calcium: 30mg | Iron: 8.8mg

Editor's Note: Originally Published July 27, 2013. Updated with expanded options, refreshed photos, and a table of contents to help navigation.

Lazy Molly and Lilly in green grass.

Healthy Chicken Enchilada Casserole—Easy and Quick

Chicken enchilada casserole on an orange plate.

Healthy chicken enchilada casserole is quick and easy to make. Featuring homemade enchilada sauce and fresh chicken, it is done in 60 minutes.

This casserole will fit a healthy diet like a low-calorie or low-fat diet or even a low-carb keto diet. With less than 200 calories and 5 grams of fat per serving, it is also relatively low in carbohydrates for a low-carb/keto diet.

🐓Ingredients

Chicken—raw breasts or rotisserie chicken
Tomato sauce
Corn tortillas
Cheese—Shredded Mexican blend or cheddar cheese.
Pantry ingredients—chili powder, paprika, onion powder, garlic powder, cumin, salt, black pepper
Optional add-ins—corn, black beans, green chiles, or whatever you want

Chicken enchilada casserole on an orange plate.
[feast_advanced_jump_to]
Blue ribbon divider used for visual effect

Featured Comments
Donna:
"Wow! This was amazing. We love the sauce."
Leslie: "I have made this before really good and easy, 5-star recipe."

This delicious healthy enchilada casserole recipe has a great Homemade Enchilada Sauce, tender chicken, and cheese. Everybody will love this layered casserole that is super easy to assemble.

It's much easier to make and less messy than rolled enchilada casseroles. It has an easy homemade enchilada sauce that is much better than the canned alternative. You can use raw chicken cooked in the sauce or rotisserie chicken to speed things up.

👨‍🍳How to make Healthy Chicken Enchilada Casserole—Step-by-Step

raw chicken with enchilada ingredients.

1. Preheat the oven to 350° convection or 375° conventional.

trimmed and cut up chicken breasts on a black board.

2. Trim two skinless boneless chicken breasts and cut them into three pieces each. These vary a lot in size. Aim for about 1 ½ pounds, but anywhere from 1 to 2 pounds total should be fine.

chicken simmering in enchilada sauce.

3. In a medium saucepan, mix one 15 oz. can of tomato sauce, 1 tablespoon chili powder, 1 teaspoon paprika, 1 teaspoon onion powder, ½ teaspoon garlic powder, ½ teaspoon cumin, 1 teaspoon salt, ½ teaspoon pepper. Add the chicken and bring to a boil over medium-high heat—cover and decrease to simmer until the chicken is 165°—about 20 minutes.

shredded chicken in three piles.

4. Remove to cutting board and shred. Divide into three equal piles.

tow tortilla in the dasserole dish.

5. Prep an approximately 9X6 baking pan with PAM. Spoon 2 tablespoons of the sauce over the bottom of the baking pan—layer two 6-inch corn tortillas over the sauce.

adding shredded cheese on the layer.

6. Add ⅓ of the chicken. Then ⅓ of the sauce (about ⅔ cup). Then ⅔ cup shredded cheese. Repeat this layering twice more.

cooked chicken casserole.

7. Bake until a golden brown top - about 20 minutes.

For more details, keep reading. See the Recipe Card below for complete instructions and to print.

Other Tex-Mex and Low-Fat Recipes to Try

Try some other easy Tex-Mex recipes. Start with this excellent Taco Casserole, then move on to Sour Cream Chicken Enchiladas or classic rolled ChickenEnchiladaCasserole. Check out a few crock pot recipes with Chicken Enchilada Casserole, Southwest ChickenCasserole, or Fiesta Chicken.

For some great full-flavor low-fat recipes, try Healthier Carrot Cake, Healthier Low-Fat Sausage Gravy and Biscuits, or make some Homemade Low Calorie Dog Treats.

🐓How to Use Rotisserie Chicken

You can use precooked chicken. If you're aiming for low calories, use chicken breasts. You need about 3 cups, which will be approximately 1 ½ pounds.

For the precooked chicken, you only need to simmer the sauce for about 10 minutes before assembly. The nutrition will change since all the rotisserie chicken is not breast meat.

How to serve

Top with the usual Tex-Mex condiments. Common are chopped tomatoes, sliced green onions, sour cream, sliced black olives, shredded lettuce, or cilantro. 

Side dishes of refried beans, Mexican Rice, or tortilla chips with salsa are excellent compliments.

❄️Storage

Good refrigerated for 3-4 days. It should also freeze well when sealed well for 3-4 months.

❓FAQs

Can I use canned enchilada sauce?

You can use canned enchilada sauce, but you will suffer significantly in taste. This recipe uses my Homemade Enchilada Sauce, which is as easy as it is tasty.

If you use canned sauce and raw chicken, use it for cooking the chicken like the recipe. If you use it with rotisserie chicken, start at assembly.

How to keep the tortillas from getting soggy?

Some tortillas seem to get soggier than others in a casserole. If you find this is a problem, you can briefly fry the tortillas for a few seconds in hot oil on each side. This works for both flour and corn tortillas—but it will add a bit of oil and change the nutrition.

Is this casserole gluten-free?

Yes, it should be with the corn tortillas. But like everything, read all the labels of anything you use.

🖊️Nutrition notes

  • Corn tortillas will save about 2.5 grams of fat and 40 calories per serving.
  • Lower-fat cheese saves about 4 gms of fat and 40 calories per serving. But please do not use non-fat cheese, which will not melt the same.
  • The complete nutrition summary is in the recipe card.
Blue ribbon divider used for visual effect

This recipe is listed in these categories. See them for more similar recipes.

101's Best Recipes, Casserole Recipes, Healthy Recipes, Low Carb/Keto Recipes, Low Fat Recipes, Mexican Recipes

Have you tried this recipe, or have a question? Join the community discussion in the comments.

📖The Recipe Card

Chicken enchilada casserole on an orange plate.
Print Recipe Add to Collection Go to Collections
4.84 from 6 votes

Healthy Chicken Enchilada Casserole—Easy and Quick

Healthy chicken enchilada casserole is quick and easy to make. Featuring homemade enchilada sauce and fresh chicken, it is done in 60 minutes.
Prep Time40 minutes mins
Cook Time20 minutes mins
Total Time1 hour hr
Course: Main Course
Cuisine: Mexican
Keyword: Chicken Enchilada Casserole, Healthy Casserole, Low-Fat Casserole
Servings: 6
Calories: 189.5kcal
Author: Dan Mikesell AKA DrDan

Ingredients

  • 2 skinless boneless chicken breasts
  • 15 oz tomato sauce
  • 1 tablespoon chili powder
  • 1 teaspoon paprika
  • 1 teaspoon onion powder
  • ½ teaspoon garlic powder
  • ½ teaspoon cumin
  • 1 teaspoon salt
  • ½ teaspoon pepper
  • 6 corn tortillas 6 inch
  • 2 cups cheese Lower fat suggested
US Customary - Convert to Metric

Instructions

  • Preheat the oven to 350° convection or 375° conventional.
    raw chicken with enchilada casserole ingredients
  • Trim two skinless boneless chicken breasts and cut them into three pieces each. These vary a lot in size. Aim for about 1 ½ pounds, but anywhere from 1 to 2 pounds total should be fine.
    trimmed and cut up chicken breasts on a black board
  • In a medium saucepan, mix one 15 oz. can of tomato sauce, 1 tablespoon chili powder, 1 teaspoon paprika, 1 teaspoon onion powder, ½ teaspoon garlic powder, ½ teaspoon cumin, 1 teaspoon salt, ½ teaspoon pepper. Add the chicken and bring to a boil over medium-high heat—cover and decrease to simmer until the chicken is 165°—about 20 minutes.
    chicken simmering in enchilada sauce
  • Remove to cutting board and shred. Divide into three equal piles.
    shredded chicken in three piles
  • Prep an approximately 9X6 baking pan with PAM. Spoon 2 tablespoons of the sauce over the bottom of the baking pan—layer two 6-inch corn tortillas over the sauce.
    tow tortilla in the dasserole dish
  • Add ⅓ of the chicken. Then ⅓ of the sauce (about ⅔ cup). Then ⅔ cup shredded cheese. Repeat this layering twice more.
    adding shredded cheese on the layer
  • Bake until a golden brown top - about 20 minutes.
    cooked chicken casserole

Notes

Pro Tips

  1. Easy to double in size using a standard large casserole dish or cake pan.
  2. You need anywhere from 1-2 pounds of chicken, depending on how much meat you want.
  3. I call for fresh skinless boneless chicken breasts, but thighs will work.
  4. You can use precooked chicken. You will need about 3 cups. Don’t add it to the sauce, and cut the simmering of the sauce down to 10 minutes.
  5. You could use canned sauce, but please don’t do that.
  6. You can add some drained cooked beans, corn, or green chiles.
  7. You can use flour tortillas if you want, but this will increase the fat and calories slightly. Also, it will no longer be gluten-free.
  8. Use a lower-fat version of cheddar or Mexican blend shredded cheese.
  9. Will be good refrigerated for 3-4 days or frozen for 3-4 months.

Nutrition

Calories: 189.5kcal | Carbohydrates: 17.5g | Protein: 19.8g | Fat: 4.8g | Saturated Fat: 2g | Polyunsaturated Fat: 0.8g | Monounsaturated Fat: 1.4g | Trans Fat: 0.01g | Cholesterol: 32mg | Sodium: 838.4mg | Potassium: 468.2mg | Fiber: 3.4g | Sugar: 3.1g | Vitamin A: 959.2IU | Vitamin C: 5.5mg | Calcium: 198.2mg | Iron: 1.8mg

The inspiration by Easy Chicken Enchilada Casserole from Jo Cooks. I adapted the recipe to my tastes and made it a little healthier at the same time.

Originally Published February 3, 2015. Updated with expanded options, refreshed photos, and a table of contents to help navigation.

dogs helping in the kitchen.

BBQ Dry Rub for Ribs, Pork, Beef, and More

Spice for 8311 BBQ Rub

The best BBQ Dry Rub recipes will enhance the meats' taste and complement the sauce's flavors. This easy-to-adjust homemade rub recipe has classic BBQ flavors.

This BBQ rub uses the classic 8:3:1:1 ratio of spices, giving you unlimited choices for your customized rub. Easy to adjust to pair with your barbecue sauce with only minor adjustments to the recipe.

Ingredients

Brown sugar
Kosher salt
Black pepper
Spices—chili powder, onion powder, garlic powder
Common substitutes—white pepper, cayenne pepper, crushed red pepper, thyme, coriander, cumin, oregano, thyme, rosemary, sage, and mustard powder.

Spice for 8311 BBQ Rub.
[feast_advanced_jump_to]
Blue ribbon divider used for visual effect

This recipe is all about ratios of various spices to sugar and salt. So you can quickly produce your own "signature dry rub." It stores well for six months, so make a large batch at the beginning of grill season.

With the brown sugar, it works great for low and slow cooking forming a fantastic bark on the gas grill with grilling baby back ribs but also pork butt on the grill and smoked beef brisket on the grill. I also use it with pork butt in the oven.

👨‍🍳How to Make This Dry Rub (8:3:1:1)

  1. This dry rub recipe is about the ratio of 8:3:1:1 of the ingredients. There are 8 parts of sugar, 3 parts of salt, and 2 parts (the 1:1) of various other spices, with no more than half of this last part being a single seasoning.
  2. The "8" is brown sugar—usually dark brown sugar, which has more flavor due to more molasses.
  3. The "3" is salt. But all salt is not equal. Most people will use Morton Kosher salt, but I prefer Diamond Crystal, which has less sodium per teaspoon. Here are the ratios of various salts: 1 teaspoon table salt = 1 ¼ teaspoon Morton kosher salt = 2 teaspoons Diamond Crystal kosher salt
  4. That last part (1:1) can be a little tricky. Those "1"s can be divided. The first "1" is usually all chili powder and sometimes smoked paprika. This "1" may be divided using a 50/50 split of chili powder and paprika or bring other spices into this part.
  5. The second "1" is usually 1 third each of black pepper, garlic powder, and onion powder. And those thirds may be divided again if desired. This is usually where you would customize to make your "signature rub."
  6. The other spices used in the last parts of the combination may be almost anything. Common additions are onion powder, garlic powder, black pepper,  white pepper, cayenne pepper, crushed red pepper, thyme, coriander, cumin, oregano, thyme, rosemary, sage, and mustard powder.
  7. The recipe card is set for 1 cup of rub, enough for two racks of ribs.

How to use BBQ dry rub on Ribs?

  • Remove the membrane from the back of the ribs to increase the penetration of the dry rub.
  • Use about ½ cup of rub for each rack of ribs, including baby back ribs or St. Louis ribs.
  • The rub can just be applied and cooked in about 15 minutes. But a few hours before cooking is suggested. Refrigerate and wrap in plastic wrap if over one hour to prevent drying.
  • 24 hours is the maximum time for the rub. The salt may break down the meat and affect the texture.
ribs with rub on black board.

Other uses for this BBQ dry rub

The perfect rub for Oven Pork Butt, BBQ Boneless Pork Ribs, Oven Baked Baby Back Ribs, and Smoked Brisket. And try it out on Grilled Chicken Breasts or How to Grill Pork Chops on a Gas Grill.

To use on chicken or turkey, decrease the sugar by half.

❄️Storage of dry rub

Like most spices, keep it in a cool, dark place like a panty. Do not freeze or refrigerate since the moisture in the sugar may come out and ruin the rub.

Try not to use a much larger container than needed. It should be airtight, and dark or opaque is preferred.

The time limit is up to 6 months stored in an airtight container, so I make up a larger batch at the start of grill season. BBQ rub is at its absolute best for the first 2-3 months, so don't overdo it.

❓FAQs

How do you choose what spices to use in the dry rub?

One suggestion is if you have a BBQ sauce that you plan to use, the major spice component of that sauce should be in the rub.

Obviously, your taste should drive the flavors you include.

Why make your own dry rub?

There are many reasons to avoid commercial rubs.
•Freshness
•You will know what is in it.
•They are usually mostly salt and a few preservatives. The spicing seems to be very light. And they are way too expensive for salt.
•They can not be tailored to your needs or taste. You can go heavier on spices you love.
•You get to make your mark on your creation.

Can I apply a base liquid before adding the rub?

Yes. While the rub does not need a base, many people like to coat the meat with yellow mustard. Other liquids used are vinegar if you are doing Carolina-style BBQ.

I will also use a base of a good quality liquid smoke if I'm using it in an oven or crock pot BBQ recipe.

Can I use this rub on chicken or turkey?

Yes, but the sugar is relatively high for that. You will not be cooking them long enough to form the crusty bark on the other suggested meats.

To use on poultry, cut the sugar in half or eliminate it completely.

📖Memphis BBQ Recipes

Memphis Dry Rub

Memphis BBQ Sauce Recipe

The Best BBQ Pork Tenderloin - Memphis Style

Marlowe's Memphis Dry Rub

Black Magic Seasoning

↑Jump to Table of Contents

📖The Recipe Card

Spice for 8311 BBQ Rub
Print Recipe Add to Collection Go to Collections

BBQ Dry Rub for Ribs, Pork, Beef, and More

The best BBQ Dry Rub recipes will enhance the meats' taste and complement the sauce's flavors. This easy-to-adjust homemade rub recipe has classic BBQ flavors.
Prep Time5 minutes mins
Total Time5 minutes mins
Course: Rubs and Sauces
Cuisine: American, BBQ
Keyword: BBQ dry rub for ribs, Dry rub for ribs, Dry Rub ratio
Servings: 1 cup
Calories: 462.3kcal
Author: Dan Mikesell AKA DrDan

Ingredients

  • ½ cup brown sugar cut in half for chicken and turkey
  • 3 tablespoons kosher salt Diamond Crystal preferred
  • 1 tablespoon chili powder
  • 1 teaspoon black pepper
  • 1 teaspoon onion powder
  • 1 teaspoon garlic powder
US Customary - Convert to Metric

Instructions

  • Mix well.
    mixing 8311 dry rub in small bowl
  • Store in an airtight container.

How to use on ribs

  • Remove the membrane from the back of the ribs to increase the penetration of the dry rub.
    removing the membrane from the ribs
  • Use about ½ cup of rub for each rack of ribs, including baby back ribs or St. Louis ribs.
    dry rub applied to baby back ribs
  • The rub can just be applied and cooked in about 15 minutes. But a few hours before cooking is suggested. Refrigerate and wrap in plastic wrap if over one hour to prevent drying. 24 hours is the maximum time for the rub. The salt may break down the meat and affect the texture.
    dry rubbed ribs on a black board

Notes

Pro Tips

  1. Excellent as written for pork butt, ribs, and brisket. The recipe card is set for 1 cup, enough for two racks of ribs. Adjust to amount in the serving section of the card.
  2. To use on chicken or turkey, decrease the sugar by half.
  3. This dry rub recipe is all about the ratio of 8:3:1:1 of the ingredients. There are 8 parts of sugar, 3 parts of salt, and 2 parts (the 1:1) of various other spices, with no more than half of this last part being a single seasoning.
  4. The "8" is brown sugar—usually dark brown sugar, which has more flavor due to more molasses.
  5. The "3" is salt. But all salt is not equal. Most people will use Morton Kosher salt, but I prefer Diamond Crystal which has less sodium per teaspoon. Here are the ratios of various salts: 1 teaspoon table salt = 1 ¼ teaspoon Morton kosher salt = 2 teaspoons Diamond Crystal kosher salt.
  6. That last part (1:1) can be a little tricky. Those "1"s can be divided. The first "1" is usually all chili powder and sometimes smoked paprika. This "1" may be divided using a 50/50 split of chili powder and paprika or bring other spices into this part.
  7. The second "1" is usually 1 third each of black pepper, garlic powder, and onion powder. And those thirds may be divided again if desired. This is usually where you would customize to make your "signature rub."
  8. The other spices used in the last parts of the combination may be almost anything. Common additions are onion powder, garlic powder, black pepper,  white pepper, cayenne pepper, crushed red pepper, thyme, coriander, cumin, oregano, thyme, rosemary, sage, and mustard powder.
  9. Storage should be in a smaller airtight container in a cool and dark space, but not in a refrigerator or freezer.

Nutrition

Calories: 462.3kcal | Carbohydrates: 116.9g | Protein: 2.1g | Fat: 1.3g | Saturated Fat: 0.2g | Polyunsaturated Fat: 0.7g | Monounsaturated Fat: 0.3g | Sodium: 11328mg | Potassium: 386.7mg | Fiber: 3.9g | Sugar: 107.5g | Vitamin A: 2382.9IU | Vitamin C: 0.6mg | Calcium: 143.5mg | Iron: 2.7mg

Editor's Note: Originally published July 21, 2010. Updated with expanded options, refreshed photos, and a table of contents to help navigation.

time for dog play in spring.

Easiest French Fries on the Stovetop

French Fries on white plate

Homemade French fries have never been so easy. Make crispy fries on your stovetop with one-step frying, no soaking raw fries, no checking oil temp, and no double frying.

Ingredients

Yukon Gold potatoes preferred
Oil—(peanut, canola, or other vegetable with high smoking level)
Coarse salt

French fries on a white plate.
[feast_advanced_jump_to]
Blue ribbon divider used for visual effect

Featured Comments
Chip: "These turned out amazing!! Thank you, thank you!!"
Alexis: "Made tonight! Absolutely delicious! Thanks for the great recipe!"

This is the ultimate easy French fry recipe. It just works. Cut the potatoes into fries with no soaking or rinsing needed. Then start with cold oil—no need to monitor the oil temperature and no double frying the fries.

It has about ⅓ less oil absorption than traditional fries so is healthier, and you can reuse the oil multiple times.

Try some other potato recipes like Convection Oven French Fries with raw or frozen French fries, Grilled French Fries, Bacon American Fries Roasted Baby Potatoes. or Crispy Smashed Potatoes.

👨‍🍳How to make French fries on the stovetop

  1. Trim the potatoes into ⅜ inch fries—Yukon Gold preferred. Do not soak in water or rinse.
  2. Place in cold oil. Cover the fries entirely with oil.
  3. Turn the heat to high, and do not cover the pan.
  4. When the oil reaches a hard boil, cook on high for 15 more minutes without touching.
  5. Stir well, scraping the bottom for any stuck material or fries.
  6. Continue to cook, occasionally stirring until golden brown—about 5 to 10 minutes.
  7. Remove from oil, drain on paper towels, and salt to taste.

This is a summary of the steps and ingredients. See the recipe card or the step-by-step photo instructions below for complete instructions.

How to serve

The perfect side dish for Grilled Hamburgers, Grilling Pork Tenderloin, or Grilling Chicken Breasts. But really, it works for most meals.

Storage and reheating

Store leftovers sealed airtight and refrigerated for 3-4 days. I don't suggest freezing cooked French fries.

Reheat at 350° in an air fryer or in an oven with a light spray of PAM cooking spray for 5-7 minutes.

How to reuse the oil

There are several variables when deciding on reusing frying oil. A lot to do with what the oil was used to fry, the type of oil, and the temperature used.

I assume you are using the oil repeated in this same "clean" recipe. There is no set number of times you can reuse the oil, but probably 3-4 times and maybe up to 8-10 times. You may need to add fresh oil occasionally.

To reuse the oil in this recipe, after cooling, filter it through a fine mesh strainer, then store it in a sealed container (like the original bottle) in a cool dark place like the refrigerator. When you want to use it for this recipe, set it at room temperature for a few hours to speed up the first step of cooking.

Discard the oil when it becomes dark, foamy when heated, or rancid-smelling.

How to dispose of old used cooking oil?

You may be able to recycle it through a recycling program or food supply companies. Google or a few phone calls should be able to find a solution.

You can NOT recycle it with used automotive oil.

As a last result, put cooled oil in a sealed container, and throw it in the trash.

❓FAQs

Can I use Russet potatoes?

I have used Russet potatoes, and it worked. But Russets are not as creamy and do not brown as well. Acceptable but use the Yukon Gold or other lower-starch potatoes if you can.

What oil to use for frying French fries?

I prefer a high-temperature oil like peanut oil for all deep frying, but mixed vegetable, corn, or canola oil can be substituted.

📋About the recipe technique and why it works

The original idea came from famed chef Joël Robuchon so credit where credit is due. When I first saw Christopher Kimball present this on a morning show, it was obviously a "me" type recipe. It was simple and logical. American Test Kitchen-Easier French Fries (subscription required.)

Lower starch potatoes like Yukon Gold are suggested.

Why does this recipe work?

By starting in cold oil, the potato's interior has time to cook and get to the temperature before the outside begins to crisp. It is like a one-step-only double frying of French fries. And since most of the oil absorption happens between the double frying of fries, they are lower in fat by ⅓.

Blue ribbon divider used for visual effect
↑Jump to Table of Contents

This recipe is listed in these categories. See them for more similar recipes.

Potato Recipes, Side Dish Recipes

Have you tried this recipe, or have a question? Join the community discussion in the comments.

Step-by-Step Photo Instructions

three Yukon Gold potatoes on a scale.

Start with about 1 ½ pounds of Yukon Gold potatoes. About three medium or two large.

Yukon Gold potato on a manodlin.

Clean and cut potatoes into ⅜ inch fries. Very easy with a  mandolin or use a sharp chef's knife: no need to peel or soak in water after cutting.

raw fries in oil in Dutch oven.

Add fries to a Dutch oven or another large pan. Cover the fries with the oil.

boiling oil in Dutch oven.

Place over high heat, and do not cover the pan. When it reaches a hard boil (about 5 minutes), cook for an additional 15 minutes without touching it; after 15 minutes, using tongs or a wooden spoon, stir and scrape the bottom to release any stuck fries and to break apart any clumped fries.

scooping fries out of oil.

Continue to cook for another 5 to 10 minutes until golden brown, stirring occasionally. Place into a large bowl lined with multiple paper towels to drain. Salt to taste.

French Fries on white plate.

📖The Recipe Card

French Fries on white plate
Print Recipe Add to Collection Go to Collections
5 from 4 votes

Easiest French Fries on the Stovetop

Homemade French fries have never been so easy. Make crispy fries on your stovetop with one-step frying, no soaking raw fries, no checking oil temp, and no double frying.
Prep Time5 minutes mins
Cook Time25 minutes mins
Total Time30 minutes mins
Course: Vegetable
Cuisine: American
Keyword: French fries, Stovetop French Fries
Servings: 4
Calories: 258kcal
Author: Dan Mikesell AKA DrDan

Ingredients

  • 1 ½ lb Yukon Gold potatoes about 3 medium or 2 large
  • about 4 cups oil (peanut, canola or other vegetable with high smoking level). Just enough to cover.
  • salt to taste
US Customary - Convert to Metric

Instructions

  • Start with about 1 ½ pounds of Yukon Gold potatoes. About three medium or two large.
    three Yukon Gold potatoes on a scale
  • Clean and cut potatoes into ⅜ inch fries. Very easy with a  mandolin or use a sharp chef's knife: no need to peel or soak in water after cutting.
    Yukon Gold potato on a manodlin
  • Add fries to a Dutch oven or another large pan. Cover the fries with the oil.
    raw fries in oil in Dutch oven
  • Place over high heat and do not cover the pan. When it reaches a hard boil (about 5 minutes), cook for an additional 15 minutes without touching it; after 15 minutes, using tongs or a wooden spoon, stir and scrape the bottom to release any stuck fries and to break apart any clumped fries.
    scooping fries out of oil
  • Continue to cook for another 5 to 10 minutes until golden brown, stirring occasionally. Place into a large bowl lined with multiple paper towels to drain. Salt to taste.
    French Fries on white plate

Notes

Pro Tips

  1. Yukon Gold potatoes work better than Russets.
  2. Scale to the amount you want. You can double this recipe, but more than that will not work well due to the mass of potatoes.
  3. You can make fries or wedges but avoid very thin—less than ⅜ inches wide due to burning.
  4. Use a higher-temperature oil like peanut, vegetable blend, corn, or canola.
  5. No need to rinse the cut fries in cold water. The starch helps in the browning.
  6. Keep the lid off the pan to let moisture out.
  7. Salt after removing from the oil.
  8. You can reuse the oil as discussed in the post.
  9. I don’t recommend frozen potatoes for this recipe.

Nutrition

Calories: 258kcal | Carbohydrates: 31g | Protein: 4g | Fat: 14g | Saturated Fat: 1g | Sodium: 590mg | Potassium: 709mg | Fiber: 2g | Sugar: 1g | Vitamin C: 10mg | Calcium: 22mg | Iron: 1mg

Editor's Note: Originally Published August 6, 2010. Updated with expanded options, refreshed photos, and a table of contents to help navigation.

Molly in spring flowers.

Crispy Baked Bone-In Chicken Breasts

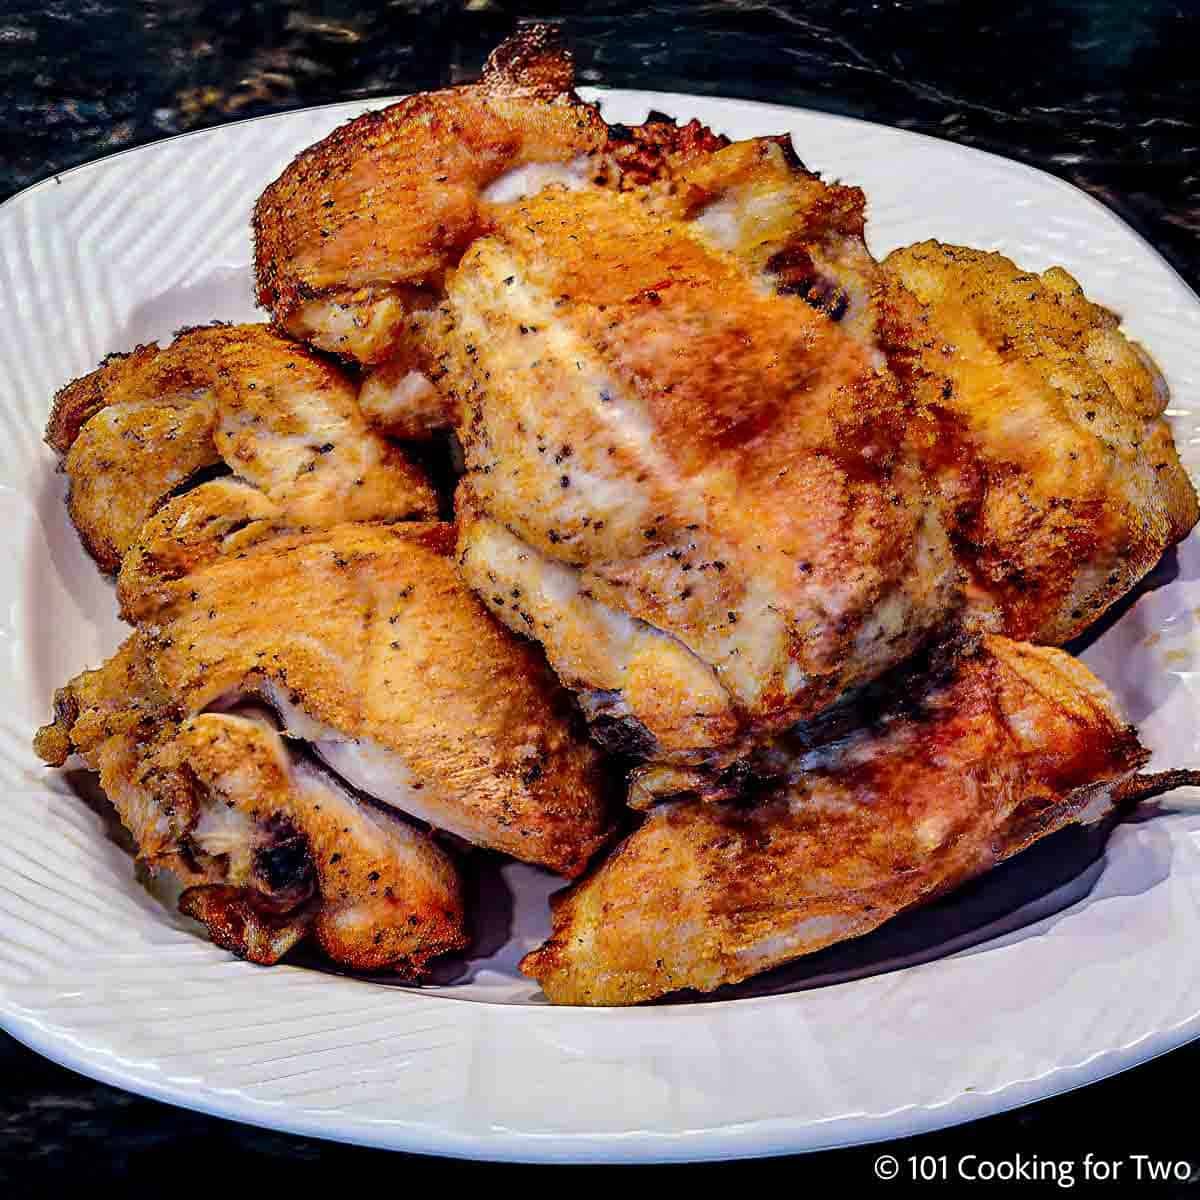
Pile of cooked bone-in chicken breasts.

This easy recipe for crispy baked bone-in chicken breasts (split chicken breasts) uses simple seasoning and high oven heat. Proper trimming helps them cook evenly while keeping the meat tender and the skin crispy.

⏱️ How Long to bake bone-in chicken breasts?

Bake until the thickest part reaches 165°F:

  • 425°F (400°F convection): 35–40 minutes
  • 400°F (375°F convection): 40–45 minutes
  • Lower temperatures take longer and produce less crispy skin.
Baked split chicken breasts bone-in crispy.
[feast_advanced_jump_to]

quote mark
Featured Comment by JJ:
⭐⭐⭐⭐⭐
"So delicious, crispy, fast, easy. This one is immediately in my top 3 chicken recipes…"

🤔 TL;DR — Recipe Summary

What: Crispy baked bone-in chicken breasts with simple seasoning and tender meat.

Why: High oven heat gives you crispy skin while keeping this economical cut tender.

How: Trim for even cooking, season, and bake until the thickest part reaches 165°F.

🐓 Ingredients

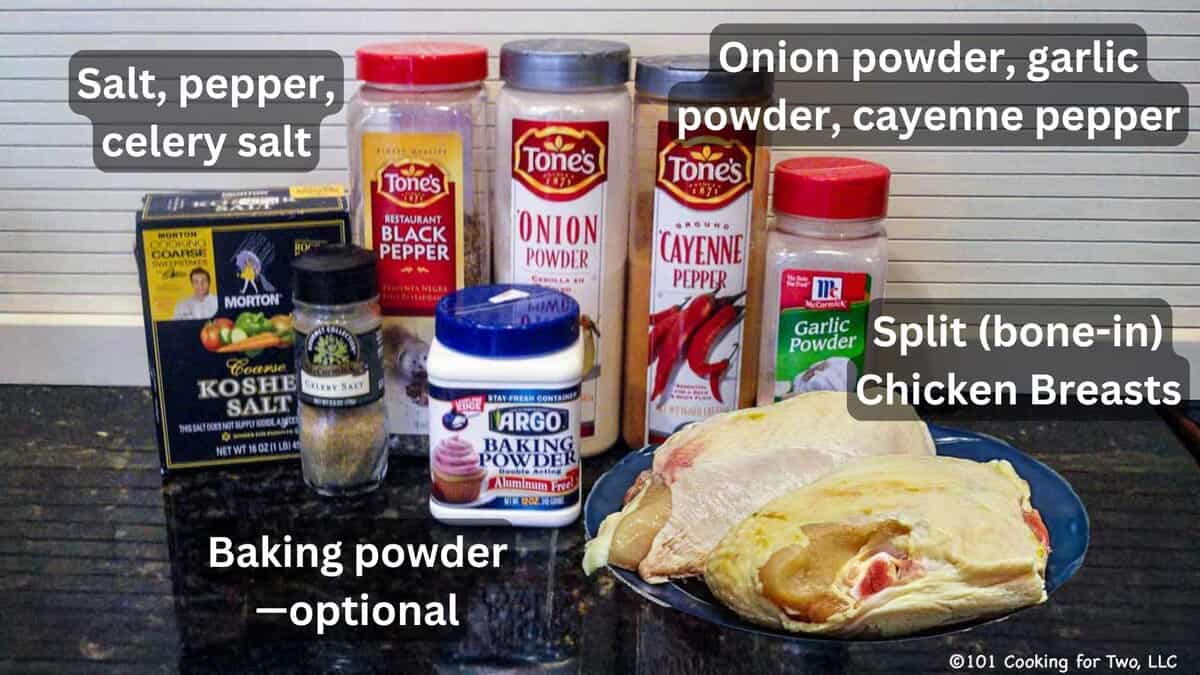
Split chicken breasts with seasoning—labeled.
  • Bone-in chicken breasts: Also called split chicken breasts. Choose skin-on breasts of similar size for more even cooking.
  • Seasoning: Use your favorite seasoning blend or keep it simple with salt, pepper, and garlic powder.
  • Baking powder: Optional, but helps dry the skin for extra crispiness. Use aluminum-free baking powder to avoid an off taste.

👨‍🍳 Quick Overview: How to Bake Bone-in Chicken Breasts

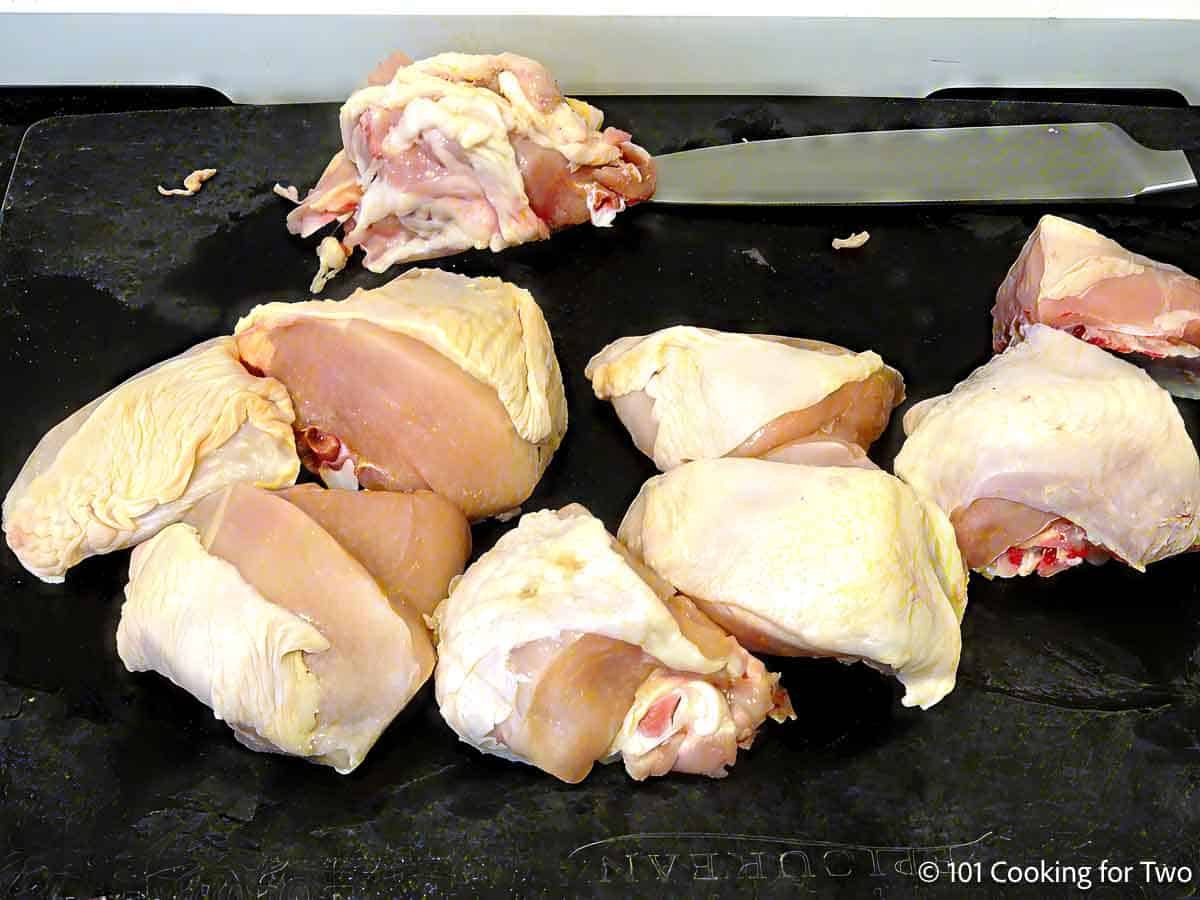
1. Trim the chicken: Pat dry, remove excess fat and the rib section, and cut each breast into 2–3 smaller pieces for even cooking.

Cutting split chicken breasts into pieces.

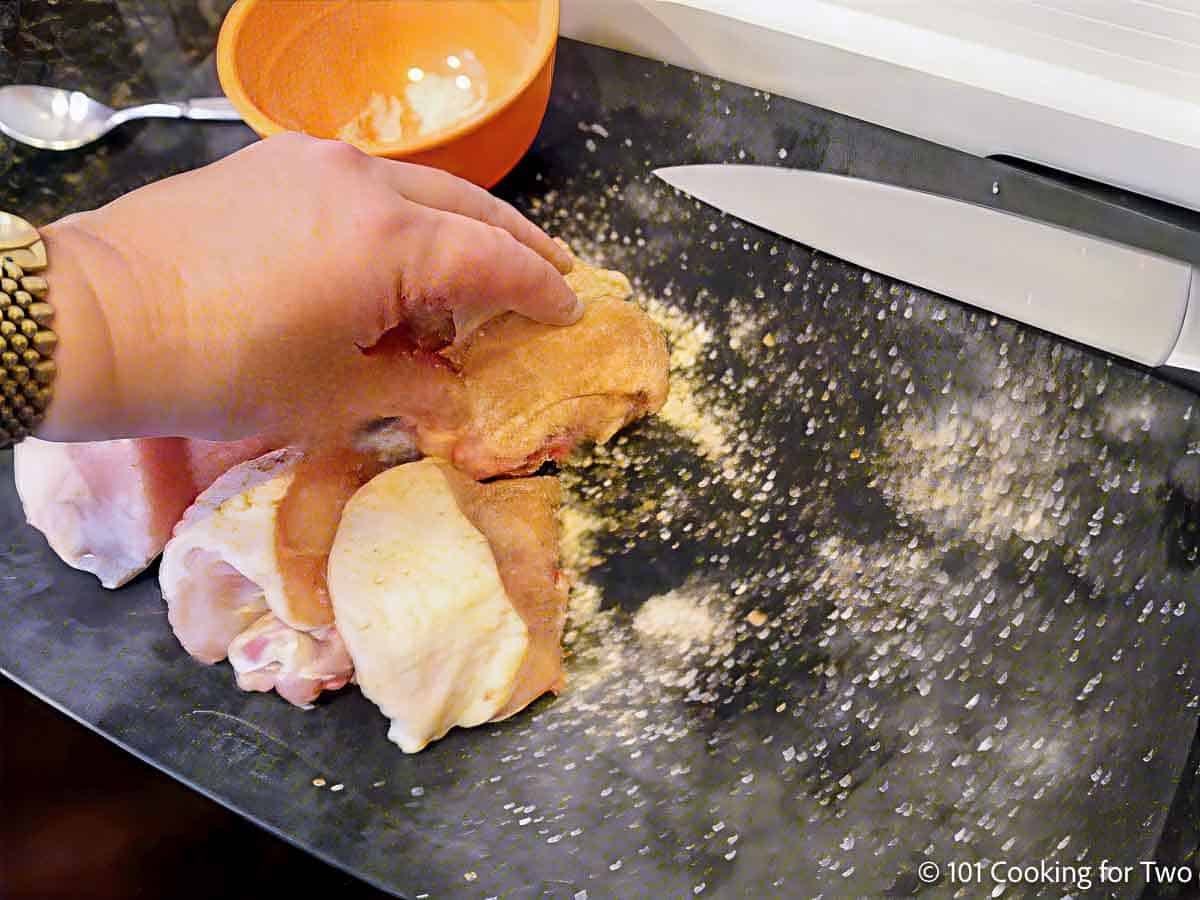
2. Season well: Mix the seasonings (and optional baking powder) and coat all sides generously.

Seasoning the chicken by hand.

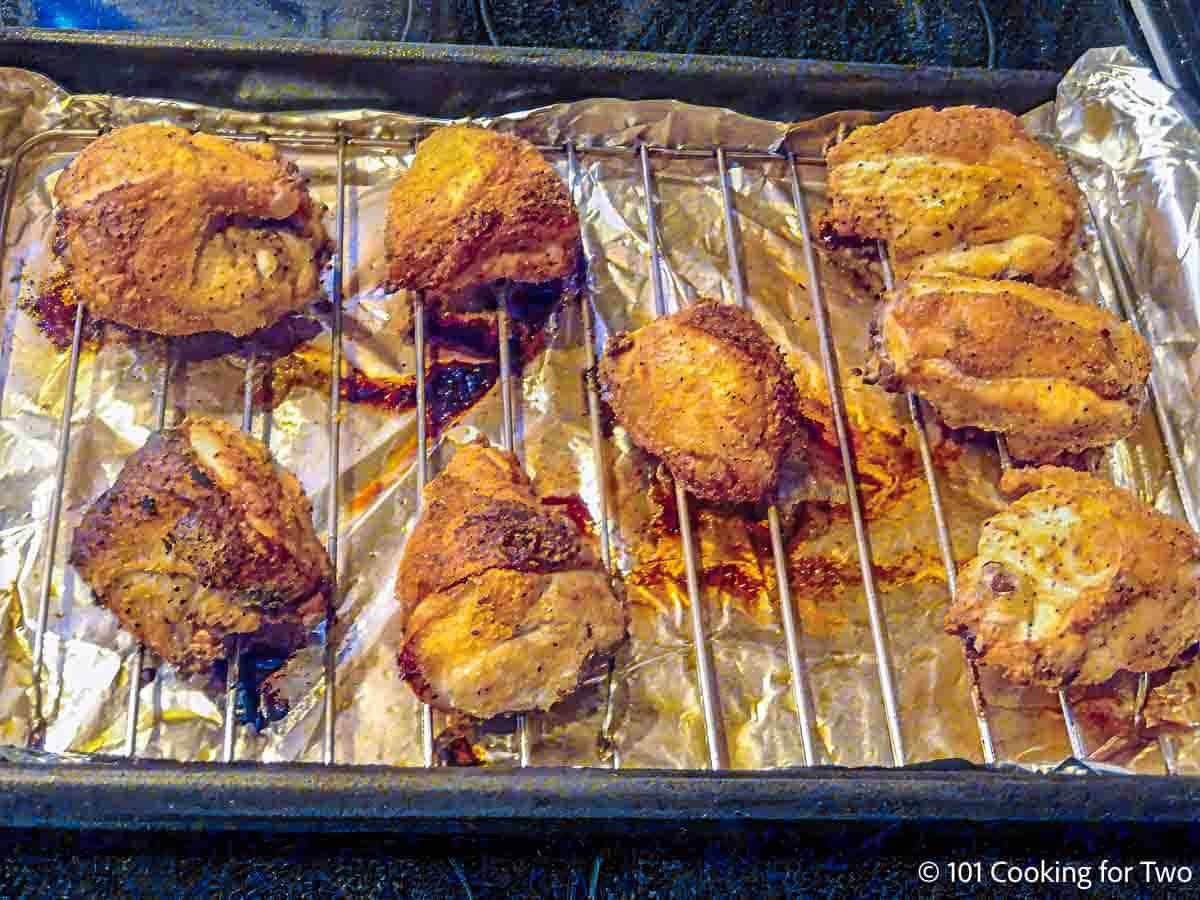
3. Bake on a baking tray in a 425°F (400°F convection) oven to 165°F—about 35–40 minutes.

Cooked chicken on the tray.

📌 For complete step-by-step instructions, scroll down to the printable recipe card or keep reading for tips, cooking times, and serving ideas.

⏰ How Long To Bake Split Chicken Breasts (Bone-In)

Cooking time depends on your oven temperature and the size and thickness of the chicken breast pieces—good trimming helps. Always cook to a final internal temperature of 165°F in the thickest part.

  • 425°F (400°F convection): 35–40 minutes
  • 400°F (375°F convection): 40–45 minutes
  • 375°F conventional: 45–50 minutes

Lower oven temperatures will take longer and usually produce less crispy skin.

Convection tip: Convection ovens cook more evenly and help crisp the skin. Reduce the conventional oven temperature by about 25°F when using convection.

✔️ Tips for Perfect Results

  • Trim for even cooking: Remove excess fat and the rib section, then cut large breasts into 2–3 pieces of similar size and thickness.
  • Dry the skin: Pat the chicken dry before seasoning. Optional baking powder helps make the skin extra crispy.
  • Use a rack if available: It improves airflow and helps the chicken cook and brown evenly.
  • Preheat fully: A fully preheated oven helps the skin crisp and the chicken cook evenly.

🍽️ Serving Suggestions

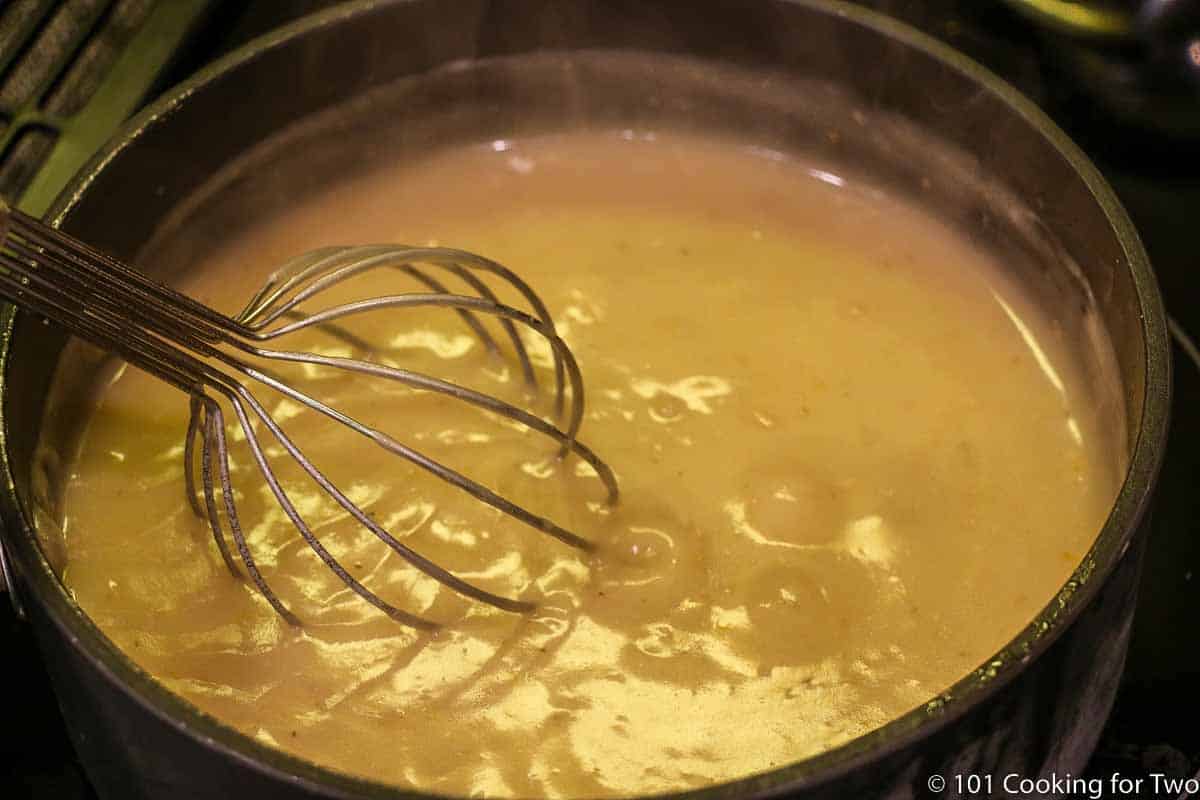
Serve with: Roasted potatoes, rice, or a simple vegetable side all work well. For a comfort-food dinner, add chicken gravy made from the pan drippings (see How to Make Gravy with Flour).

❄️ Storing Leftovers

  • Refrigerate: Store leftovers airtight for 3–4 days.
  • Freeze: Freeze for up to 3 months.
  • Reheat: Reheat in the oven or air fryer when possible to help restore the crispy skin. The microwave works but softens the skin.

📖 More Bone-In Chicken Breast Recipes

  • Grilled Split Chicken Breasts
  • Baked BBQ Split Chicken
  • Baked Mayonnaise Split Chicken

❓FAQs

What are bone-in chicken breasts, anyway?

Bone-in chicken breasts are also called split chicken breasts. They usually have the skin attached and include part of the breastbone and ribs. Trimming the rib section and cutting large breasts into smaller pieces helps them cook more evenly.

Do I need a rack to bake split chicken breasts?

No, but it helps. A rack keeps the bottom from getting soggy and promotes even crisping. If you don’t have one, coat the tray well with cooking spray or oil to help prevent sticking.

Why use baking powder?

It draws moisture from the skin, helping it crisp in the oven. Even a short rest with the rub improves results. Use aluminum-free baking powder to avoid any off flavors. You’ll still get good chicken without it—just not quite as crispy.

Why do we no longer rinse off chicken?

Rinsing spreads bacteria and doesn’t help crisp the skin. Just pat the chicken dry with paper towels before seasoning. See Chicken... To Rinse or Not To Rinse? for a detailed discussion.

📖The Recipe Card

Pile of cooked bone-in chicken breasts.
Print Recipe Add to Collection Go to Collections
4.95 from 18 votes

Crispy Baked Bone-In Chicken Breasts

Baked bone-in chicken breasts (split chicken breasts) with tender meat and crispy skin. An easy step-by-step recipe with oven temperatures and cooking times.
Prep Time10 minutes mins
Cook Time35 minutes mins
Total Time45 minutes mins
Course: Main Course
Cuisine: American
Keyword: Bone-in Chicken Breasts, how long to bake bone-in chicken breasts, Split Chicken Breast
Servings: 6 servings
Calories: 159kcal
Author: Dan Mikesell AKA DrDan

Ingredients

  • 3 bone-in chicken breasts (split) Scale to what you need
  • 1 teaspoon garlic powder
  • ½ teaspoon onion powder
  • ½ teaspoon kosher salt
  • ¼ teaspoon black pepper
  • ¼ teaspoon cayenne pepper optional
  • ⅓ teaspoon celery salt optional
  • 1 teaspoon baking powder optional Aluminum-free
US Customary - Convert to Metric

Instructions

  • Preheat oven to 400°F convection or 425°F conventional oven.
    Split chicken breasts with seasoning—labeled.

Preparing the chicken

  • Pat the chicken dry, trim off excess fat, and remove the rib area.
    Cuttting ribs off split chicken breasts.
  • Cut normal-size breasts in half and very large breasts into thirds
    Cutting split chicken breasts into pieces.
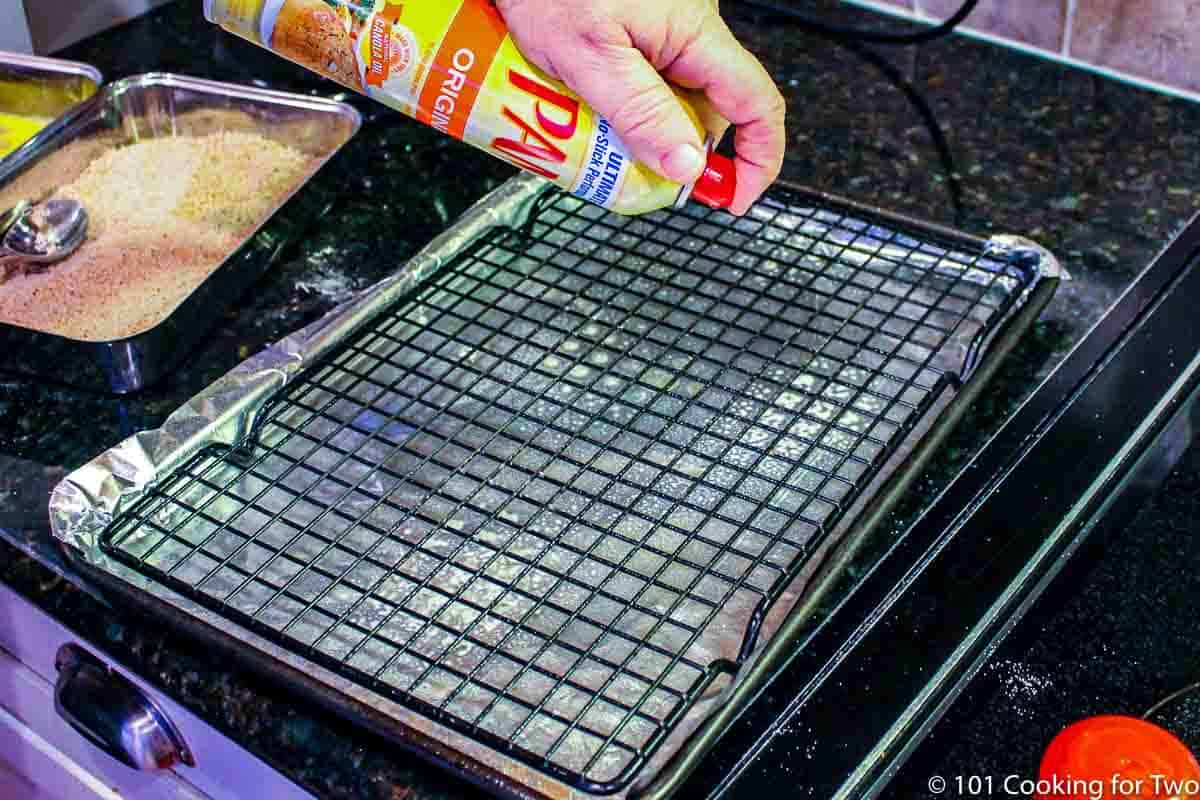
  • Prepare a baking sheet with aluminum foil and a baking rack—coat with PAM cooking spray.
    spraying a rack on baking sheet with PAM

Seasoning the chicken

  • Combine spices and baking powder (if using) in a small bowl. Sprinkle and rub on all surfaces, but you may not need all of the spice mixture; just season to your taste.
    Seasoning the chicken by hand.

Baking the chicken

  • Place on a rack skin side up with larger pieces in the corners—and thinner edges to the center. If you used baking powder and have time, let it set for 30 minutes to help dry the skin.
    Seasoned ra.w chicken pieces on a baking tray
  • Bake to an internal temperature of 165°F for about 35 minutes, depending on your oven and the thickness of the chicken. Rest for 5–10 minutes before serving.
    Cooked chicken on the tray.

Notes

Pro Tips:

  1. Scale to the amount you need. A serving is about 4–5 oz.
  2. Proper trimming matters. Smaller, similar-size pieces cook more evenly and are easier to serve.
  3. Season to taste. Celery salt and cayenne pepper are optional.
  4. A baking rack is helpful but not required. Keep thicker pieces toward the outside of the baking tray.
  5. Always cook to 165°F in the thickest part. Use an instant-read thermometer; don't cook by time alone.

Nutrition

Calories: 159kcal | Carbohydrates: 1g | Protein: 19g | Fat: 8g | Saturated Fat: 2g | Cholesterol: 58mg | Sodium: 498mg | Potassium: 205mg | Fiber: 1g | Sugar: 1g | Vitamin A: 144IU | Calcium: 59mg | Iron: 1mg

Editor's Note: Originally Published May 25, 2011. Updated with expanded information and refreshed photos.

Molly looking good.

Old Fashioned Pot Roast with Gravy

pot roast on plate with potatoes and gravy

Have Old Fashioned Pot Roast with Gravy using this easy recipe we have cooked for decades—the ultimate comfort food in the oven or crock pot with fall-apart tender beef roast and roasted potatoes and vegetables.

🐄Ingredients

Beef—chuck roast or similar
Vegetables—carrots, potatoes
Aromatic—onion (optional), garlic
Pantry ingredients—ketchup, salt, pepper
For gravy—beef broth, all-purpose flour, salt

Yankee pot roast on plate with potatoes and gravy.
[feast_advanced_jump_to]
Blue ribbon divider used for visual effect

Featured Comment from Dea:
"Oh My Gosh!!!!!! If there was a way to give this 10 stars I would…Upon taking a first bite, my husband raved on and on about it, declaring it good enough for fine dining!"

Pot Roast with Gravy is the ultimate in old-fashioned, classic comfort food that grandma would make. An old-fashioned Sunday dinner classic pot roast with great leftovers.

The tender meat comes from a cheap cut of beef due to the long cooking time that melts the connective tissue. A variety of vegetables and liquids can be added. And if root vegetables are used, it is called a Yankee Pot Roast.

This classic recipe makes perfect pot roast using these easy step-by-step photo instructions.

Check out some other comfort food recipes to enjoy. Start with Beef Tips and Gravy, my wife's famous Old Fashioned Meatloaf, Oven Fried Chicken with Gravy, Crock Pot Pork Loin Roast, and American Goulash.

👨‍🍳How to Make Old Fashioned Pot Roast in the Oven

  1. Place a 3-4 pounds chuck roast seasoned with salt and pepper in a Dutch oven or roasting pan with a reasonably tight lid and big enough to add the root vegetables later.
  2. Cook for 2-3 hours.
  3. While cooking, prepare root vegetables—usually potatoes and carrots.
  4. Mix ketchup into any liquid in the pan and cover the top of the meat with garlic.
  5. Add the prepared vegetables to the roaster, cover, and roast until the potatoes are soft—about 1 ½ to 2 hours.
  6. Move the cooked roast and root vegetables to dishes and cover with foil.
  7. Make gravy.

This is a summary of the steps and ingredients. See the recipe card or the step-by-step photo instructions below for complete instructions.

🥣How to Make Pot Roast Gravy

Pot roast gravy is, in many ways, the reason to make pot roast. So we must get it right—thick with great flavor.

  1. Use any liquid drainage in the pan or the crock pot.
  2. Add additional beef broth to get to the volume of gravy you want. For oven baked, remove the meat and vegetables and use the roasting pan. For the crock pot version, pour the liquid into a large saucepan.
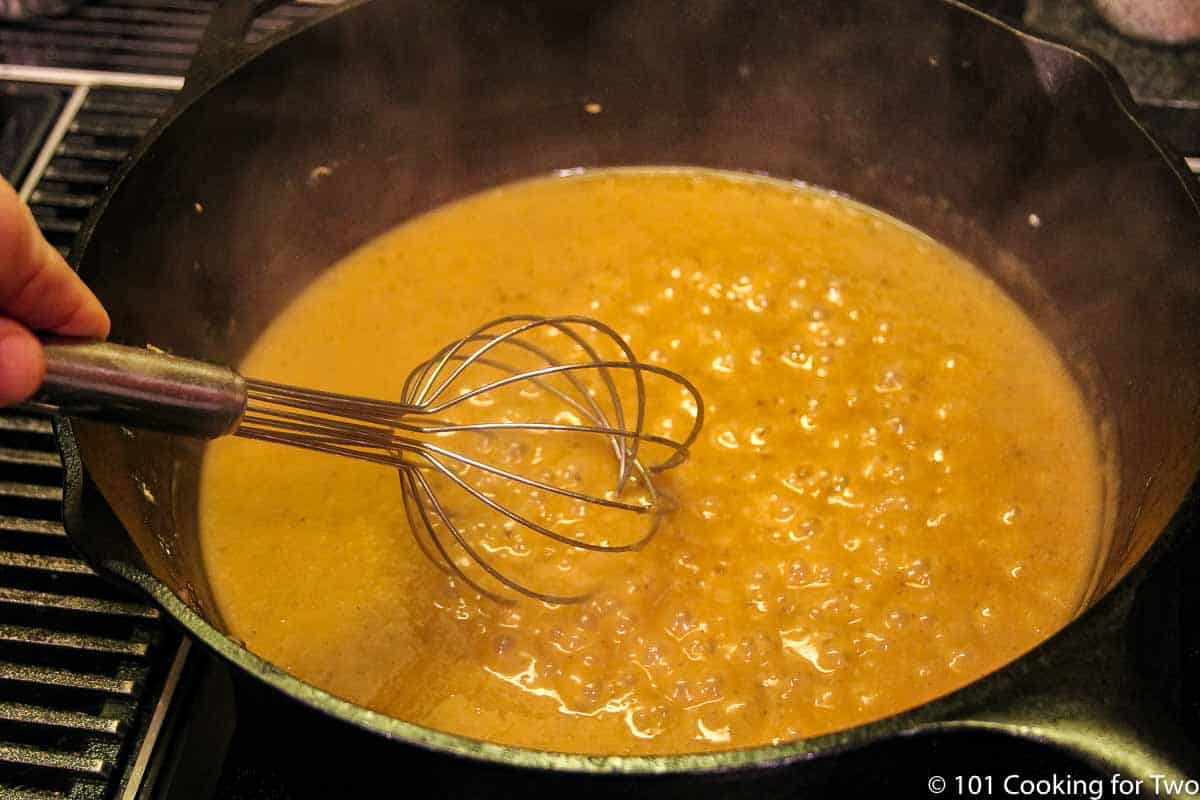
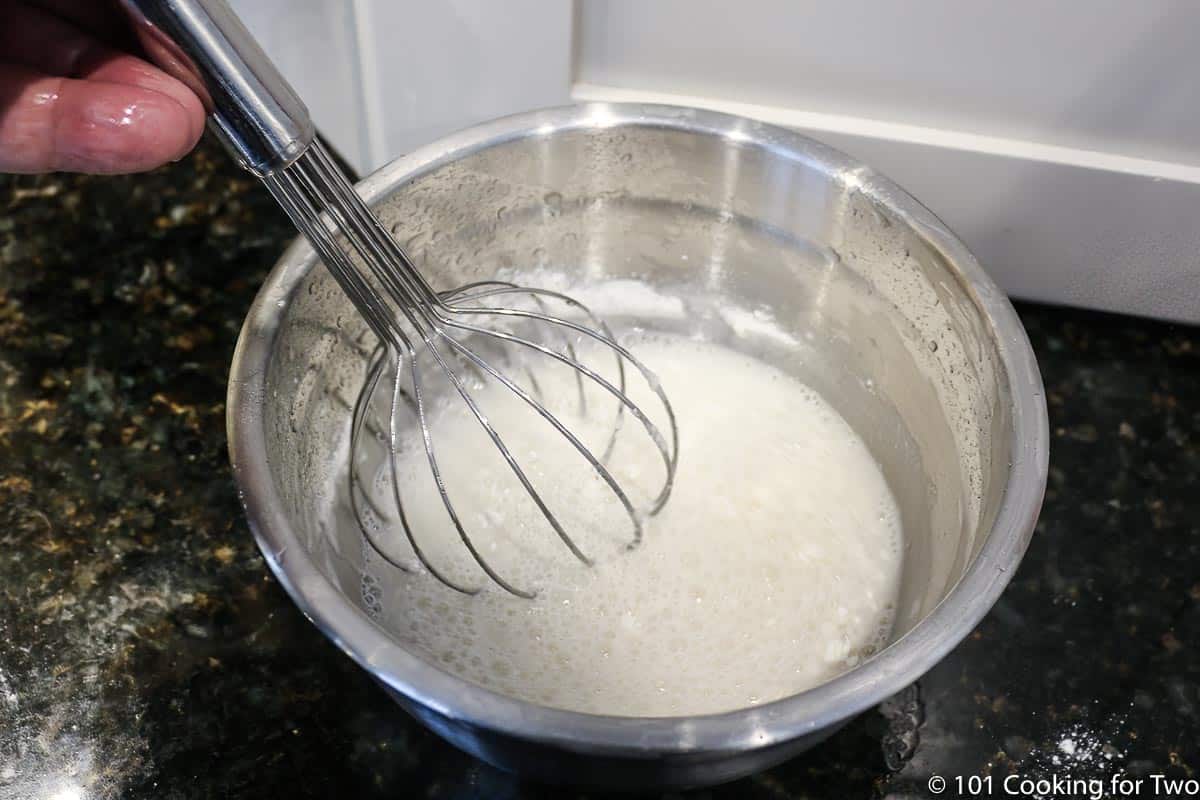
  3. Mix a slurry of flour and water or broth. You need 2 tablespoons of flour and ¼ cup of cold water or broth for each cup of gravy you are making. But mix a little extra, just in case you need it. Whisk or shake until smooth before using.
  4. Bring the drainage and broth mixture to a medium boil over medium-high heat.
  5. Slowly whisk but ¾ of the flour slurry into the boiling liquid. Adjust the heat to a light boil.
  6. Continue to whisk. Add more slurry every few minutes until you reach the thickness you want—taste test for salt.

Tips, options, and variations

Beef roast—use a well-marbled chuck roast. But there are other choices. Top or bottom round are leaner and will need to be cut into slices but are still tender.

Onion—optional and can dominate the flavor. So if you use them, go light.

Seasoning—Garlic, ketchup, salt, and pepper. Other flavors can be added with sprigs of rosemary or thyme. Other fresh herbs can also be added.

Optional ingredients—The beefy taste can be enhanced with a cup of dry red wine or 1-2 tablespoons of Worcestershire sauce.

♨️How to Make Old Fashioned Pot Roast in a Crock Pot

This is an easy conversion to a crockpot. The ingredients are the same.

  1. Sear the chuck roast for 2-3 minutes per side with a couple of teaspoons of oil over medium-high heat in a skillet.
  2. Prepare all veggies and place them in the bottom of a 6-quart or larger crockpot. Add the ketchup and 14 oz of beef broth. Place the roast on the vegetables and cover with garlic. Cover the crock pot and cook on low for 6-8 hours—the potatoes should be over 200° and the roast over 180°.
  3. When the potatoes and meat are fork-tender, remove them and tent them with foil to keep warm.
  4. Make the flour slurry.
  5. Pour all liquid into a large saucepan. Add more beef broth if needed for volume and bring it to a boil. Then proceed per these instructions to add the slurry and simmer to thicken.

⬇️Making a Smaller Pot Roast

If you want a "pot roast for two recipe", I suggest making four servings. This blog is "cooking for two," but that does not mean only two servings. This will take about 4 hours, give or take a bit, which is too long to spend on two servings. You want the leftovers.

Assume about ½ pound or a bit more of meat per serving - it will cook down some. The vegetable amount should then be adjusted to the serving number for the meat weight. I suggest a medium carrot and ½ large russet potato per serving.

And finally, the gravy volume is about ½ cup or more per serving. I briefly cover making gravy in the instructions, but please see How To Make Gravy at Home if you want more details.

How to serve pot roast

With the roasted vegetables and gravy, pot roast is mostly a complete meat. You may enjoy a green salad or a nice Basic White Stand Mixer Bread to round out the meal.

Store and reheat leftovers

To store leftovers, sealed airtight in a container; leftovers are good refrigerated for 4 days. To freeze, store airtight for 3-4 months.

To reheat, add the meat to all the gravy and veggies and warm up on the stovetop. It may need water since the gravy flour will absorb more moisture when stored.

❓FAQs

How to make gravy for a crock pot recipe?

Making gravy in a crock pot is not easy; it rarely ends well. It just doesn't get hot enough for most flour methods. So we will make gravy "with" a crockpot meal but not "in" the crockpot.

You can make a roux, add it to the crockpot, and turn the heat up with a fair amount of success. That takes time. But moving the fluid out of the crock pot to a stovetop pan works much better and is more reliable. See How To Make Gravy at Home for details on gravy making.

What is a Yankee Pot Roast?

Pot roast is generally a tougher cut of beef cooked with liquid. If root vegetables are added, which I think is mandatory, it is officially a "Yankee Pot Roast."

Blue ribbon divider used for visual effect
↑Jump to Table of Contents

This recipe is listed in these categories. See them for more similar recipes.

101's Best Recipes, Beef Recipes, Comfort Food Recipes

Have you tried this recipe, or have a question? Join the community discussion in the comments.

Step-by-Step Photo Instructions

chuck roast in a roasting pan.

Start with a nice 3-pound chuck roast and trim the roast of any large areas of solid fat. Lightly salt and pepper and place in a large roasting pan or Dutch oven. Cover with the lid. Place in 325° oven for 1 ½ to 2 hours. (longer if frozen).

adding ketchup to roaster with cooked crock pot.

While cooking, prepare the root vegetables—usually, Russet potatoes are peeled and cut into chunks, and carrots are peeled and cut into pieces or slices, or you can use baby carrots. After 1 ½ to 2 hours, remove from the oven, add ½ cup ketchup to the liquid in the pan, and mix well. Then cover the top of the meat with crushed or minced garlic.

raw potatoes and carrots spread over the cooked roast.

Add your vegetables and lightly salt and pepper. Increase oven temp to 350°. Replace the lid and roast for another 1 ½ to 2 hours until the potatoes are soft.

cooked pot roast and roasted carrots and potatos removed from roaster.

Remove meat and veggies from the pan—tent with foil while making gravy.

can of beef broth with shaker.

Make one cup of gravy (or a bit more) for each pound of meat. Use any liquid drainage in the pan or the crock pot. Add additional beef broth to get to the volume of gravy you want. Mix a slurry of flour and water or broth. You need 2 tablespoons of flour and ¼ cup of cold water or broth for each cup of gravy you are making—but mix a little extra, just in case you need it. Whisk or shake until smooth before using.

making gravy in roaster.

Place the roaster over a stove burner(s) on medium-high heat—use two burners if you can. Bring the drainage and broth mixture to a medium boil over medium-high heat. Slowly whisk but ¾ of the flour slurry into the boiling liquid. Adjust the heat to a light boil. Continue to whisk. Add more slurry every few minutes until you reach the thickness you want—taste test for salt.

See How To Make Gravy at Home for more information on making gravy.

old fashioned Yankee pot roast on white plate -wide view.

📖The Recipe Card

pot roast on plate with potatoes and gravy
Print Recipe Add to Collection Go to Collections
5 from 1 vote

Old Fashioned Pot Roast with Gravy

Have fall-apart tender Old Fashioned Pot Roast with Gravy using this easy recipe we have made for over 40 years—the ultimate comfort food in the oven or crock pot.
Prep Time10 minutes mins
Cook Time3 hours hrs
Total Time3 hours hrs 10 minutes mins
Course: Main Course
Cuisine: American
Keyword: Easy Pot Roast, Pot Roast, Pot Roast with Gravy
Servings: 6
Calories: 514kcal
Author: Dan Mikesell AKA DrDan

Ingredients

  • 3 lb chuck roast
  • ½ cup ketchup
  • 3 potatoes large russet
  • 3-4 carrots
  • 1 onion medium optional
  • 2-4 cloves garlic
  • ½ teaspoon salt to taste
  • ¼ teaspoon pepper to taste
US Customary - Convert to Metric

Instructions

  • Start with a 3-pound chuck roast and trim the roast of any large areas of solid fat. Lightly salt and pepper and place in a large roasting pan or dutch oven. Cover with the lid. Place in 325° oven for 1 ½ to 2 hours. (longer if frozen).
    chuck roast in a roasting pan
  • While cooking, prepare the root vegetables—usually Russet potatoes are peeled and cut into chunks, and carrots are peeled and cut into pieces or slices, or you can use baby carrots. After 1 ½ to 2 hours, remove from the oven, add ½ cup ketchup to the liquid in the pan and mix well. Then cover the top of the meat with crushed or minced garlic.
    adding ketchup to roaster with cooked crock pot
  • Add your vegetables and lightly salt and pepper. Increase oven temp to 350°. Replace the lid and roast for another 1 ½ to 2 hours until the potatoes are soft.
    raw potatoes and carrots spread over the cooked roast
  • Remove meat and veggies from the pan—tent with foil while making gravy.
    cooked pot roast and roasted carrots and potatos removed from roaster
  • Make one cup of gravy (or a bit more) for each pound of meat. Use any liquid drainage in the pan or the crock pot. Add additional beef broth to get to the volume of gravy you want. Mix a slurry of flour and water or broth. You need 2 tablespoons of flour and ¼ cup of cold water or broth for each cup of gravy you are making—but mix a little extra, just in case you need it. Whisk or shake until smooth before using.
    can of beef broth with shaker
  • Place the roaster over a stove burner(s) on medium-high heat—use two burners if you can. Bring the drainage and broth mixture to a medium boil over medium-high heat. Slowly whisk but ¾ of the flour slurry into the boiling liquid. Adjust the heat to a light boil. Continue to whisk. Add more slurry every few minutes until you reach the thickness you want—taste test for salt.
    making gravy in roaster_

Notes

Pro Tips

  1. I set the size of this recipe to 6 servings that use a 3-pound chuck roast. Adjust to what you need, but I don’t suggest under 4 servings. Assume ½ pound of meat, ½ large potato, 1 medium carrot, and ½+ cup of gravy per serving.
  2. Chuck roast, bone-in or boneless, is suggested, but you may use other cuts. Leaner cuts may not be as fall-apart tender but still tender.
  3. Different potatoes may be used.
  4. Do not cut your carrots too thin.
  5. We usually skip the onions. It can dominate the taste. If you use them, be careful of the amount.
  6. The exact cooking times are a bit loose due to so many variables. So check for tenderness before stopping and watch, so you don’t overcook for your taste. We like this approach overdone.
  7. Good refrigerated for 3-4 days. To reheat, add the meat cut up a bit to all the gravy and veggies and warm up on the stovetop. It may need a bit of water.
  8. Good frozen for 3-4 months. Make it up like I suggest to reheat but then freeze.
  9. See How To Make Gravy at Home for more details on gravy making at home.
  10. Nutrition includes all listed ingredients: meat, potatoes, carrots, onion, and gravy.

Crock Pot Instructions

This is an easy conversion to a crockpot. The ingredients are the same.
1) Brown the chuck roast for 2-3 minutes per side with a couple of teaspoons of oil over medium-high heat in a skillet.
2) Prepare all veggies and place them in the bottom of a 6-quart or larger crockpot. Add the ketchup and 14 oz of beef broth. Place the roast on the vegetables and cover with garlic. Cover and cook on low for 6-8 hours—the potatoes should be over 200° and the roast over 180°.
3) When the potatoes and meat are fork-tender, Remove them and tent to keep warm.
4) Make the flour slurry.
5) Pour all liquid into a large saucepan. Add more beef broth if needed for volume and bring it to a boil. Then proceed per these instructions to add the slurry and thicken.

Nutrition

Calories: 514kcal | Carbohydrates: 24g | Protein: 47g | Fat: 26g | Saturated Fat: 11g | Cholesterol: 156mg | Sodium: 592mg | Potassium: 1380mg | Fiber: 4g | Sugar: 7g | Vitamin A: 5227IU | Vitamin C: 16mg | Calcium: 90mg | Iron: 8mg

Editors Note: Originally Published February 15, 2011. Updated with expanded options, refreshed photos, and a table of contents to help navigation.

Lilly and Molly with purple puppy.

Healthy Biscuits and Gravy

Healthy biscuits and gravy on a white plate.

A healthy biscuits and gravy recipe—comfort food with 90% less fat than traditional biscuits and gravy.

Start with healthy sausage gravy made with turkey sausage in a homemade white gravy, seasoned as you like. Serve over low-fat biscuits made with yogurt.

Healthy biscuits and gravy on a white plate.
[feast_advanced_jump_to]

quote mark
Featured Comment by Karen:
⭐⭐⭐⭐⭐
"This is an awesome recipe! My overweight husband loves biscuits and gravy, and when I make this for him, he doesn't even realize that it's a low-fat, lower-calorie recipe."

📝 TL;DR — Recipe Summary

  • What: Healthy biscuits and gravy with homemade low-fat biscuits and creamy turkey sausage gravy.
  • Why: Classic comfort food with 90% less fat, ready in about 30 minutes.
  • How: Make the biscuits with non-fat yogurt. Then make the healthy sausage gravy with turkey breakfast sausage, skim milk, and a simple flour slurry.

📋 Nutrition Snapshot

Traditional biscuits and gravy usually run 600–900+ calories and about 30 grams of fat per serving. This lighter version comes in at about 216 calories, 3 grams of fat, and 477 mg of sodium—over 60% fewer calories and 90% less fat than the traditional version.

🥣 Ingredients

Turkey sausage with biscuits and gravy ingredients.

Low-Fat Biscuits

  • All-purpose flour, baking powder, baking soda, and salt
  • Non-fat yogurt – adds moisture. Regular non-fat yogurt works best; if using thicker Greek yogurt, add a splash of milk as needed.

Healthy Sausage Gravy

  • Turkey breakfast sausage – provides classic sausage flavor while keeping the gravy low in fat.
  • Skim milk – makes the creamy gravy base without added fat.
  • Seasoning salt and black pepper – season to taste.

✅ Pro Tip: You can use self-rising flour in place of the flour, baking powder, baking soda, and salt. Just skip those extra ingredients.

👨‍🍳 Quick Overview: Healthy Biscuits and Gravy

Make low-fat biscuits

Stir together flour, salt, baking powder, and baking soda; fold in non-fat yogurt until just combined.

Mix the biscuit dough with non-fat yogurt in a bowl.

Form drop biscuits on a baking pan. Bake at 425°F until golden brown – about 12 minutes.

Browned low-fat biscuits on a white plate.

Make healthy sausage gravy

Brown turkey breakfast sausage in a non-stick or cast-iron skillet.

Browning turkey breakfast sausage in a skillet.

Whisk flour with skim milk. Slowly add the slurry to the sausage over medium heat, stirring continuously until thickened.

Pouring milk-flour slurry into cooked sausage.

Add seasoning salt and pepper. Simmer another 5–10 minutes.

Stirring low-fat sausage gravy as it thickens.

Split biscuits and ladle the gravy over the top.

Plate of biscuits topped with gravy.

👇 Scroll down for the printable recipe card and complete step-by-step photo instructions, or keep reading for tips and discussion.

🖊️ Low-Fat Biscuits

These fluffy, low-fat biscuits use non-fat yogurt instead of added fat, contributing less than 1 gram of fat to the final dish. Regular non-fat yogurt works best; Greek yogurt may need a splash of milk. See my Low-Fat Biscuits Recipe for more tips and options.

🖊️ Healthy Sausage Gravy

The secret to this healthy sausage gravy is turkey breakfast sausage and a simple skim milk-and-flour slurry instead of a butter-and-flour roux. The slurry makes a creamy low-fat sausage gravy without added fat. See How To Make Gravy at Home for more about this method.

Turkey breakfast sausage usually browns without added oil, although fat content varies by brand. Use seasoned breakfast sausage rather than plain ground turkey—the sausage seasoning provides much of the classic gravy flavor.

This healthier sausage gravy is slightly less rich than a traditional roux-based gravy but still creamy and delicious.

📚 More Low-Fat Recipes

Some of my other favorite low-fat recipes include Healthier Carrot Cake, Healthy Chicken Enchilada Casserole, Healthy Blueberry Scones, and Healthy White Chicken Chili.

❄️ Storage of Leftovers

  • Refrigerate: Store the gravy in an airtight container for up to 3 days. Keep the biscuits separately at room temperature in an airtight container or bag.
  • Freeze: Freeze the biscuits and gravy separately in airtight containers for up to 3 months.
  • Reheat: Gently reheat the gravy on the stovetop or in the microwave, adding a little skim milk if needed to thin it.

❓FAQs

How many calories are in biscuits and gravy?

With this low-fat recipe, a serving of two biscuit halves with ⅓ cup of gravy has about 216 calories, 3 grams of fat, and 477 mg of sodium—more than 60% fewer calories and 90% less fat than a traditional version.

Can I make the biscuits with Greek yogurt?

Yes. Non-fat Greek yogurt works, but it is thicker and may need a splash of milk to loosen the dough.

📖The Recipe Card

Healthy biscuit and gravy on a white plate.
Print Recipe Add to Collection Go to Collections
5 from 4 votes

Healthy Biscuits and Gravy (Low-Fat Sausage Gravy)

Easy healthier sausage gravy made with turkey sausage over fluffy low-fat yogurt biscuits—classic biscuits and gravy with 90% less fat.
Prep Time5 minutes mins
Cook Time20 minutes mins
Total Time25 minutes mins
Course: Breakfast
Cuisine: American
Keyword: Biscuits and Gravy, Healthy Biscuits and Gravy, Low-Fat Biscuits and Gravy
Servings: 8
Calories: 216kcal
Author: Dan Mikesell AKA DrDan

Ingredients

Low-Fat Biscuits

  • 2 cups all-purpose flour
  • 1 tablespoon baking powder (aluminum-free preferred)
  • ½ teaspoon baking soda
  • ½ teaspoon salt
  • 1¼ cups non-fat yogurt

Healthy Sausage Gravy

  • ½ pound turkey breakfast sausage
  • 2 cups skim (non-fat) milk
  • ¼ cup all-purpose flour
  • 1 teaspoon seasoning salt I used Lawry's
  • ½ teaspoon pepper or to taste
US Customary - Convert to Metric

Instructions

  • Preheat the oven to 400° convection or 425° conventional.
    Turkey breakfast sausage with biscuit and gravy ingredients.
  • In a bowl, combine 2 cups of flour, 1 tablespoon of baking powder, ½ teaspoon of baking soda, and ½ teaspoon of salt. Mix well. Fold in 1¼ cups non-fat yogurt until the dry ingredients are just incorporated.
    Mix the yogurt into the flour mixture.
  • Make eight drop biscuits on a PAM-sprayed baking pan.
    Raw drop biscuits on a baking sheet.
  • Bake until golden brown—about 12 minutes.
    Browned low-fat biscuits on a white plate.
  • While the biscuits are baking, brown ½ pound of turkey breakfast sausage in a non-stick skillet.
    Browning turkey breakfast sausage in a non-stick pan.
  • Whisk together ¼ cup flour and 2 cups skim milk. Slowly add the milk-flour slurry to the sausage over medium heat, stirring continuously.
    adding flour slurry to browned meat in skillet
  • When the gravy starts to thicken, add 1 teaspoon of seasoning salt and ½ teaspoon of pepper, or to taste. Simmer another 5–10 minutes.
    Stirring sausage gravy in the skillet.
  • Split the biscuits and ladle the gravy over the top.
    Healthy biscuits and gravy on a plate.

Notes

Pro Tips

  1. Use skim (non-fat) milk and yogurt, and the leanest turkey breakfast sausage possible.
Exact nutrition varies by the brands used.
Greek yogurt works but gives more tang and may need a splash of milk since it’s thicker.
Use aluminum-free baking powder to prevent a metallic aftertaste.
Store biscuits and gravy separately. Refrigerate gravy for up to 3 days; keep biscuits airtight at room temperature for 3 days. Both may be frozen for up to 3 months.
 

Nutrition

Calories: 216kcal | Carbohydrates: 34g | Protein: 13g | Fat: 3g | Saturated Fat: 1g | Trans Fat: 1g | Cholesterol: 23mg | Sodium: 477mg | Potassium: 458mg | Fiber: 1g | Sugar: 6g | Vitamin A: 150IU | Vitamin C: 1mg | Calcium: 227mg | Iron: 2mg

Originally Published March 1, 2014. Updated with expanded options, refreshed photos, and organization.

8 week old Molly checking on her sister
Molly checking on her sister.

Pulled Pork Loin in the Oven

shredded pork loin on bun

Cook pulled pork loin in the oven with a simple braising method for tender BBQ sandwiches. The pork loin shreds easily after slow oven cooking and stays moist with a little of the flavorful braising liquid.

Leaner than pork butt, it's perfect for BBQ sandwiches, tacos, nachos, rice bowls, and more. It also scales easily from a family dinner to feeding a large crowd.

❓ Quick Answer: Can I Make Pulled Pork from Pork Loin?

Yes. Pork loin makes excellent pulled pork in the oven or a crock pot.

  • It is much leaner than pork butt, so it is healthier.
  • Braise it in seasoned broth, then shred it with some of the braising liquid to keep it moist.

If you'd rather use a slow cooker, see my Crock Pot Pulled Pork Loin.

shredded pork loin on bun.
[feast_advanced_jump_to]

quote mark
Featured Comment by Jackie:
⭐⭐⭐⭐⭐
"This recipe worked great! Hubby ate it with just the braising liquid, but the kids and I added BBQ sauce and ate on buns. It was so delicious, and I'll definitely keep this recipe for repeats! Thanks!!"

🤔 TL;DR – Recipe Summary

What: Make tender BBQ pulled pork from pork loin in the oven with a simple braising method.

Why: A leaner alternative to pork butt that shreds easily for juicy BBQ sandwiches. Easy to scale from a family dinner to a large crowd.

How: Braise sliced pork loin in seasoned broth until fork tender, shred it, then mix in some of the braising liquid before serving with your favorite BBQ sauce.

🐖 Ingredients

Beef broth with chili powder and onion-labeled.
  • Pork loin: Use a boneless center-cut pork loin, not pork tenderloin. Trim any excess fat. Remove the silver skin now if you wish, or simply discard it while shredding.
  • Broth: Beef broth adds the richest flavor, but chicken or vegetable broth also works well for the braising liquid.
  • Onion: Chopped onion adds flavor to the braising liquid as the pork cooks.
  • Seasoning: Chili powder and salt season the pork and braising liquid without overpowering the BBQ flavor.
  • Liquid smoke (optional): Use only a good-quality brand made with smoke and water. It adds a subtle smoked flavor without a smoker.
  • For serving: Pile the shredded pork on hamburger buns with your favorite BBQ sauce. It's also great in tacos, nachos, rice bowls, and baked potatoes.

👨‍🍳 Quick Overview: Pulled Pork Loin in the Oven

1. Trim excess fat from a boneless center-cut pork loin. Remove the silver skin now or discard it while shredding. Cut into 1½-inch slices across the grain.

Trimmed pork loin on a board.

2. Mix the braising liquid in the baking pan, add the pork slices, and seal tightly with foil.

slices of pork loin in a cake pan with braising fluid.

3. Bake in a 300° oven (no preheating needed) for 2½ hours, until 185°+ and fork-tender. Reserve the braising liquid and transfer the pork to a plate.

cooked pork loin in braising fluid.

4. When cool enough to handle but still warm, shred with forks or by hand. Discard any remaining fat or silver skin.

hand shredding pork loin.

5. Mix some of the braising liquid into the shredded pork. Serve immediately, or refrigerate overnight, tightly covered, for the best flavor. Save the remaining braising liquid for reheating.

pouring braising fluid into shredded pork loin.

For more details, keep reading. See the Recipe Card below for complete instructions and to print.

⏲️ How Long to Cook Pork Loin in the Oven for Pulled Pork

The cooking time in a 300° oven is 2½ to 3 hours. The thickness of the pork loin slices, the pan, and the oven will affect the time.

The pork loin is ready to shred when it reaches 185°F or higher and is fork-tender, meaning a fork slides in and out easily without moving the meat. While pork is safe to eat at 145°F, it shreds much more easily when cooked to a higher temperature.

💡 Tips for the Best Pulled Pork Loin

  • Use a Dutch oven or any oven-safe pan with a tight-fitting lid. A baking or roasting pan sealed tightly with foil also works well, especially when cooking larger batches.
  • Whole pork loins usually weigh 5 to 6 pounds, but you don't need to cook the whole loin. Cut off a few 1-inch pork chops for another meal and use the rest for this recipe.
  • Don't discard the braising liquid. Mix some into the shredded pork to keep it moist, then save the rest for reheating leftovers.
  • If the pork doesn't shred easily, chop it into bite-size pieces and refrigerate it overnight in the braising liquid. If needed, reheat it with BBQ sauce, which can help tenderize the meat.
  • For a Mexican version, skip the liquid smoke and add 2 teaspoons of cumin. The shredded pork is great for tacos, burritos, rice bowls, and more.

🍴 Serving Pulled Pork Loin

Serve the shredded pork on hamburger buns with your favorite BBQ sauce and toppings. For parties, keep it warm in a crock pot on the Keep Warm or Low setting. My homemade BBQ sauce is always a favorite.

Round out the meal with classic BBQ sides like baked beans, potato salad, coleslaw, potato chips, or macaroni salad.

🔥 How to Reheat Pulled Pork Loin

For the best results, spread the shredded pork on a sheet pan and sprinkle lightly with water, broth, reserved braising liquid, or apple juice. Cover tightly with foil and reheat at 250°–300°F until hot, about 45 minutes for a large batch.

To keep the pork warm for serving, reduce the oven temperature or transfer it to a crock pot on the Keep Warm or Low setting.

A microwave works for a quick sandwich-sized portion but may change the texture, so the oven is recommended whenever possible.

❄️ How to Store Pulled Pork Loin

Store leftover pulled pork loin in an airtight container in the refrigerator for up to 4 days or freeze for up to 4 months.

For the best flavor and moisture, store the pork with some of the reserved braising liquid. Thaw frozen pork overnight in the refrigerator before reheating.

👨‍🍳 Related Recipes

Want a hands-off version? Try my Crock Pot Pulled Pork Loin recipe using the same lean cut of pork.

If you're feeding a crowd, you may also enjoy Chicken for a Crowd, Oven Baked BBQ Beef Brisket, and Pork Butt in the Oven.

❓ FAQs

How much pulled pork loin should I make per person?

Plan on about ¼ pound of pulled pork per sandwich. If pulled pork is the main dish, most adults will eat one to two sandwiches.

Should I add BBQ sauce before reheating?

Usually, no. Reheat the pork with some of the reserved braising liquid instead, then let everyone add their favorite BBQ sauce when serving. If the pork seems a little tough after shredding, reheating it with BBQ sauce can help tenderize it.

Can I use pork tenderloin instead of pork loin?

No. Pork tenderloin is much smaller, leaner, and cooks much faster than pork loin. This recipe is developed specifically for boneless center-cut pork loin, which stays moist and shreds well after slow oven braising.

What is "good quality" liquid smoke?

Choose a liquid smoke with only smoke and water in the ingredient list—no added chemicals or flavorings. I use Wright's brand.

📖The Recipe Card

Pulled pork loin on a bun with BBQ sauce.
Print Recipe Add to Collection Go to Collections
4.67 from 3 votes

Pulled Pork Loin in the Oven

Make tender BBQ pulled pork from pork loin in the oven with a simple braising method. The pork loin shreds easily for juicy BBQ sandwiches or feeding a crowd.
Prep Time10 minutes mins
Cook Time2 hours hrs 30 minutes mins
Total Time2 hours hrs 40 minutes mins
Course: Main Course
Cuisine: American
Keyword: pork loin pulled pork oven, pulled pork loin, shredded pork loin oven
Servings: 20 servings
Calories: 159kcal
Author: Dan Mikesell AKA DrDan

Ingredients

  • 5 pounds pork loin Center cut
  • 1 onion large chopped
  • 28 oz beef broth two cans or one large box
  • 4 tablespoons chili powder
  • 1 teaspoon table salt
  • 2 teaspoons liquid smoke

Serving

  • Hamburger buns
  • BBQ sauce
US Customary - Convert to Metric

Instructions

  • Trim excess fat from the pork loin. Remove the silver skin now if desired, or discard it while shredding. Cut the pork loin across the grain into about 1½-inch slices.
    Trimmed pork loin on a board.
  • Use a Dutch oven or another oven-safe pan with a tight-fitting lid. A baking or roasting pan sealed tightly with foil also works well.
    Beef broth with chili powder and onion-labeled.
  • Add the chopped onion, beef broth, chili powder, salt, and optional liquid smoke to the pan. Mix well, then add the pork loin slices. The liquid should almost cover the pork; add a little water if needed.
    Place slices of pork loin in the braising fluid.
  • Cover tightly and place in a 300°F oven. No preheating is needed. Cook for about 2½ to 3 hours, until the pork reaches at least 185°F and is fork-tender.
    Seal the baking pan with foil.
  • Transfer the pork to a plate and reserve all the braising liquid. Let the pork cool until it is comfortable to handle but still warm.
    Pork loin is ready to shred.
  • Shred the pork with two forks or by hand. Discard any remaining fat or silver skin.
    Shredding pork loin by hand in a bowl.
  • Mix about 1 cup of the braising liquid into the shredded pork. Add more as needed to keep it moist. Serve immediately or refrigerate overnight in a tightly covered container for the best flavor. Save the remaining braising liquid for reheating.
    Adding braising fluid to the pulled pork.

Notes

Pro Tips:

  • This recipe is easy to cut down or scale up. If you do not need the entire pork loin, cut the unused portion into 1-inch pork chops for another meal.
  • The braising liquid should almost cover the pork slices, so it may not scale in exactly the same proportion as the meat.
  • Beef broth gives the richest flavor, but chicken or vegetable broth may be used.
  • Save all the braising liquid. Add some to the shredded pork after cooking and reserve the rest for reheating.
  • This is an excellent make-ahead recipe and is often even better the next day.
  • For large groups, plan on about ¼ pound of pork per sandwich.
  • Refrigerate leftovers for up to 4 days or freeze for up to 4 months.
  • For a Mexican variation, omit the liquid smoke and add 2 teaspoons of cumin.

Nutrition

Calories: 159kcal | Carbohydrates: 1g | Protein: 26g | Fat: 5g | Saturated Fat: 1g | Cholesterol: 71mg | Sodium: 272mg | Potassium: 543mg | Fiber: 1g | Sugar: 1g | Vitamin A: 475IU | Vitamin C: 0.4mg | Calcium: 12mg | Iron: 0.9mg

Editor's Note: Originally Published August 18, 2011. Updated with expanded options, refreshed photos, and a table of contents to help navigation.

Dogs with purple puppy toy.

Blueberry Crisp with Fresh or Frozen Berries (Any Size)

berry crisp on a fork

This easy blueberry crisp has a buttery oat topping over fresh or frozen berries. Just toss the berries with sugar and cornstarch, add the topping, and bake until golden and bubbling. Ready in about 40 minutes.

Make it your way—as a small batch for two or scale it up for family and friends. Use blueberries, a berry mixture, or your favorite berry.

blueberry crisp on fork.
[feast_advanced_jump_to]

quote mark
Featured Comment by Andrea S.:
⭐⭐⭐⭐⭐
"This recipe is the best! I did add strawberries and blueberries together and it turned out fabulous! This recipe is definitely a keeper!"

⚡ TL;DR—Recipe Summary

What it is: This easy blueberry crisp works with any fresh or frozen berries and scales from two servings to a family-size dessert.

Why you’ll love it: Quick prep, simple ingredients, buttery oat topping, and that golden-bubbly finish in about 40 minutes.

How to make it: Toss berries with sugar and cornstarch, add oat-butter topping, and bake until golden and bubbly.

Jump to the Recipe Card or continue to read for details and options.

🫐 Ingredients

  • Blueberries – You can substitute raspberries, blackberries, chopped strawberries, or a berry mixture. Fresh or frozen both work well. Don’t thaw frozen berries; use 50% more cornstarch to thicken the extra juice.
  • Sugar – A mix of white and brown sugar balances sweetness and adds depth.
  • Cornstarch – Thickens the berry filling, especially important with frozen fruit.
  • Rolled oats – Not quick oats. These give the topping its classic crisp texture.
  • Pantry staples – Flour, cinnamon, salt, and butter for that golden, buttery crumble.

👨‍🍳 Quick Overview: How to Make Blueberry Crisp

1. Prepare the berries: Toss the berries with sugar, cornstarch, and salt, then transfer to the baking dish.

adding coating to berries.

✅ Pro Tip: Adjust sugar to taste based on the berries’ sweetness. Use 50% more cornstarch with frozen berries to help thicken extra juice.

2. Make the topping: Cut butter into flour, rolled oats, brown sugar, and cinnamon. Spread over the berries.

adding topping to bowls.

3. Bake: Place on a tray in a 375°F oven for 25–30 minutes, until the topping is golden and the filling is bubbling at the edges.

two bowls with cooked berry crisp.

👇 Scroll down for the printable recipe card and step-by-step photo instructions—or keep reading for pro tips and variations.

↕️ How to Scale the Recipe (For Two—or More)

This recipe is written for two but designed to easily scale from one serving to 6–8 servings.

  • For one: Use half a batch in a 10–12 oz ramekin or small oven-safe dish.
  • For two (default): Two 8–12 oz ramekins or one 6-inch round baking dish.
  • For four or more: Double or triple the recipe to fit your crowd.
    • For 4 servings: Use four ramekins, an 8-inch round, or an 8x8 baking dish.
    • For 6–8 servings: Use a 9x13 casserole or similar.

⏱ Baking Note: Larger pans may need 5–10 extra minutes. Bake until the topping is golden and the filling is bubbling at the edges.

📏 Scaling Tip: Adjust the ingredient list in the recipe card—the instructions stay the same. It’s an easy recipe to size up or down.

🍯 Blueberry Crisp Topping Options

Gluten-free: Replace the all-purpose flour with almond or oat flour and use certified gluten-free oats.

Without oats: Make a simple streusel topping with 4 tablespoons brown sugar, 3 tablespoons flour, ¼ teaspoon cinnamon, and 2 tablespoons cold butter. Cut the butter into the dry ingredients until crumbly.


🤔 Make Ahead, Storage, and Reheating

You can prepare the crisp up to a day ahead. Refrigerate the filling and topping separately, then add the topping just before baking. If starting cold, allow a few extra minutes of baking time.

Storage: Refrigerate leftovers for 3–4 days or freeze for up to 3 months. Cool completely before freezing and wrap tightly.

Reheating: For the best texture, reheat in the oven. The microwave works for individual servings when you’re in a hurry.

😊 Easy Dessert Recipes

Need another easy dessert? Try one of these reader favorites:

  • Crock Pot Apple Cobbler
  • Easy Apple Cake
  • Strawberry Pie with Jello
  • Easy Berry Crumble

❓ FAQs

What is the difference between cobblers, crumbles, and crisps?

• Cobblers have a biscuit or cake topping.
• Crisps usually include oats; crumbles don’t.
• This one’s technically a crisp—but people often use the names interchangeably.

Why is my crisp watery?

Two common reasons:
1. It needs time to cool. Let it rest for about 10 minutes after baking so the filling can thicken.

2. Frozen berries release more liquid. Don’t thaw them, and use 50% more cornstarch than with fresh berries.

What can I substitute for blueberries?

You can use raspberries, blackberries, chopped strawberries, or a berry blend.

If your berries are tart, add a little more sugar before baking.

Can I make blueberry crisp with frozen blueberries?

Yes. Use frozen blueberries directly from the freezer without thawing. Since frozen berries release more juice, use 50% more cornstarch to help the filling thicken.

📖The Recipe Card

berry crisp on a fork
Print Recipe Add to Collection Go to Collections
5 from 8 votes

Blueberry Crisp with Fresh or Frozen Berries

A small-batch blueberry crisp made with any fresh or frozen berries. Bakes in ramekins or a small dish with a buttery oat topping. Quick, flexible, and easy to make gluten-free.
Prep Time15 minutes mins
Cook Time25 minutes mins
Total Time40 minutes mins
Course: Dessert
Cuisine: American
Keyword: berry crisp recipe, berry crisp with frozen berries, mixed berry crisp, small batch berry crisp
Servings: 2 servings
Calories: 654kcal
Author: Dan Mikesell AKA DrDan

Ingredients

  • 2 cups berries fresh or frozen
  • ¼ cup white sugar (adjust for sweetness of berries)
  • 2 teaspoons corn starch (Increase by 50% if frozen berries)
  • ⅛ teaspoon kosher salt
  • ½ cup all-purpose flour
  • ⅓ cup rolled oats not quick
  • ¼ cup brown sugar
  • ¼ teaspoon cinnamon
  • 4 tablespoons butter
US Customary - Convert to Metric

Instructions

Prepare the Berries

  • Preheat oven to 375°F. Wash your fresh or frozen mixed berries (no need to thaw frozen). Blueberries, blackberries, cut-up strawberries, raspberries, or any mixture should be fine.
    rinsing berries
  • Taste your fruit first. You will need to adjust the sugar if it is very sweet or tart. Combine ¼ cup white sugar (depending on sweetness), 2 teaspoons cornstarch, and ⅛ teaspoon kosher salt.
    If using frozen berries, increase the cornstarch by 50%.
    sugar and ingedints for sauce with small bowl
  • Toss berries gently with the sugar mixture.
    adding coating to berries
  • Divide the berries into two bowls 10 to 12 oz size. Or use a single 6-inch round baking dish.
    adding berries to bowl

Mix the Topping

  • Combine ½ cup all-purpose flour, ⅓ cup rolled oats (not quick), ¼ cup brown sugar, and ¼ teaspoon cinnamon.
    chopped butter with oats for topping
  • Chop 4 tablespoons of firm butter into small pieces and "cut" into the topping mix until the crumble is formed.
    cutting butter into topping
  • Divide the topping over the bowl(s). Place on a baking tray to catch any boilover.
    adding topping to bowls

Bake

  • Bake until the top is golden brown and bubbling around the edges. It takes about 25 to 30 minutes. Frozen berries may take a few minutes more. Cool on a rack for about 10 minutes and serve.
    two bowls with cooked berry crisp

Notes

Pro Tips

  1. You can use almost any berries. If large, they should be cut up a bit. If frozen, simply increase the cornstarch.
  2. Use two 10-12 oz ramekins to bake. A double recipe will fit a 6X9 baking dish. For more options and tips on scaling this recipe, please refer to the post.
  3. The topping has oats and gluten. Gluten-free and non-oat toppings are in the post.
  4. Try to serve it with ice cream.
 

Nutrition

Calories: 654kcal | Carbohydrates: 106g | Protein: 6g | Fat: 25g | Saturated Fat: 15g | Cholesterol: 60mg | Sodium: 356mg | Potassium: 203mg | Fiber: 7g | Sugar: 65g | Vitamin A: 771IU | Vitamin C: 4mg | Calcium: 49mg | Iron: 2mg

This is a modification of a 2014 America’s Test Kitchen recipe published in  “The Complete Cooking For Two Cookbook.”

Originally Published July 24, 2012. Updated with expanded options and discussion. Photos were refreshed, and a table of contents was added.

dogs running in snow.

Banana Cake with Walnuts

banana nut cake on fork

Delicious Banana Cake is moist and tender, bursting with the flavor of bananas and the crunch of walnuts. Take it up a level with the simple cream cheese frosting. It's easy to make in less than an hour with these step-by-step photo instructions.

🍌Ingredients

  • Bananas—Three, as ripe as possible
  • Flour—Use all-purpose (AP) flour. Optional—Sifted or run through a large fine mesh strainer.
  • Buttermilk—Fresh or dry buttermilk will work. Substitute with ⅔ cup of milk and 2 teaspoons of lemon juice or vinegar—set for 5-10 minutes before use.
  • Baking Powder—Use aluminum-free
  • Walnuts—chopped. Skip or other nuts like pecans or almonds may be used.
  • Other Pantry Ingredients—Salt, eggs, baking soda, white sugar, and powdered sugar.
  • Butter—Room temperature for frosting
  • Cream Cheese—Room temperature
  • Vanilla Extract—Try to use real not imitation, vanilla extract
banana nut cake on fork.
Blue ribbon divider used for visual effect
[feast_advanced_jump_to]

Featured comment from Patty C:
"Made this tonight…I have to rate this one a solid 5! Thanks Dr D!"

Banana nut cake is super moist, tender, and delicious. An easy-to-make recipe in less than an hour without special ingredients. It is an excellent solution to the "what to do with overripe banana" issue.

The perfect cake for when you need to "take a dish" or the family is coming for dinner. Or adjust to a "for two" half size or make a layer cake. Add the easy optional cream cheese frosting for a touch of decadent goodness.

This is a family recipe from a family friend (thanks, Janet). I have learned to accept gifts of this type.

Check out some other recipes for those leftover bananas. Start with a classic Betty Crocker Banana Bread, but don't miss the Banana Pancake, Banana Nut Cookies, or some great Banana Nut Muffins.

👨‍🍳How to Make Banana Cake

  1. With a stand or hand mixer, cream butter, and sugar, then blend in eggs.
  2. Combine flour, salt, baking powder, baking soda, and mash 3 over-ripe bananas.
  3. Combine half the flour mixture, some buttermilk, and the mashed bananas into the creamed butter mixture. After mixing, add the remainder of the ingredients and combine thoroughly.
  4. Fold in the chopped walnuts.
  5. Pour the batter into a prepared pan and spread evenly. Bake for about 40 minutes until a toothpick comes out clean.

Cream Cheese Frosting (optional)

  1. Rest the cream cheese and butter at room temperature to soften.
  2. With a mixer, combine cream cheese, butter, and vanilla.
  3. Slowly add powdered sugar while continuing to beat.
  4. Frost the cake when cooled. Sprinkle some nuts on top.

This is a summary of the steps and ingredients. See the recipe card or the step-by-step photo instructions below for complete instructions.

⬇️How to make this a "for two" friendly recipe

This is a recipe for a regular 9X13-inch cake pan. And it won't disappoint.

But this is "cooking for two," and this is an easy recipe to cut in half. You will need to use a 9-inch round or 8-inch square cake pan. The baking time will decrease to about 30 minutes, but use the toothpick test.

It also makes an excellent layer cake with two round 9-inch pans and the optional cream cheese frosting.

❄️Storage

Without the frosting, this can be stored at room temperature for 3-4 days, tightly covered. With the frosting, it should be refrigerated.

It will also freeze well for several months with or without the frosting.

❓FAQs

What does sifting flour do?

When we sift flour, it breaks down any clumps and provides a fluffier result. It also helps mix other ingredients throughout the flour. It will improve the texture a bit. If you don't have an old-school flour sifter, you can get about the same effect using a large fine-mesh strainer.

Can you freeze bananas?

If you don’t have time for over-ripe bananas now, peel and freeze for a few months until you are ready to bake bread, cake, or muffins.

Why do bananas turn brown?

As bananas ripen, enzymes convert some of the starch to sugar. This makes for great sweet banana bread, muffins, or even cakes.

Do cakes with cream cheese frosting need to be refrigerated?

Yes, due to the cream cheese.

Blue ribbon divider used for visual effect
↑Jump to Table of Contents

This recipe is listed in these categories. See them for more similar recipes.

Dessert Recipes

Have you tried this recipe, or have a question? Join the community discussion in the comments.

Step-by-Step Photo Instructions

bananas and cake ingredients.

Preheat oven to 350°.

flour shifter over bowl.

In a large bowl, mix 2 ½ cups AP flour with 1 teaspoon salt, 1 ½ teaspoon baking powder, and 1 ½ teaspoon baking soda. Optional: Sift together, or you can use a large strainer or skip the sifting and just mix the dry ingredients. Set aside.

mashing 3 bananas in white bowl.

Mash 3 bananas (riper is better). Set aside.

butter and sugar in stand mixer.

Combine ⅔ cup butter and 1 ⅓ cup sugar—cream with a stand mixer or hand mixer.

adding banana to mixer.

With the mixer continuing to run, add two eggs. Add ½ of the flour mixture. ⅓ cup buttermilk. And the mashed bananas. Continue to beat until incorporated.

Add the remainder of the flour mixture and ⅓ cup more buttermilk. Add ¾ cup chopped walnuts and fold in well.

coating pan with flour.

Prep a 9 by 13 baking pan with a thin coat of butter and a light flour coat.

adding batter to pan.

Pour the batter into the pan and spread evenly.

toothpick coming out clean.

Bake for about 40 minutes until a toothpick comes out clean.

banana nut cake on plate.

Optional Cream Cheese Frosting

beating cream cheese with sugar in a glass bowl with an electric mixer.

The cream cheese and the butter should rest at room temperature for 30 to 60 minutes to soften.

Mix 8 oz of cream cheese, 8 tablespoons of butter (one stick), and 2 teaspoons of vanilla with a mixer. Slowly add 3 cups of powdered sugar while continuing to beat. You may need more powdered sugar or 1-2 teaspoons of milk to get your desired texture.

📖The Recipe Card

banana nut cake on fork
Print Recipe Add to Collection Go to Collections
5 from 2 votes

Banana Cake with Walnuts

Delicious banana cake is moist and tender, bursting with the flavor of bananas and the crunch of walnuts. Take it up a level with the simple cream cheese frosting. It's easy to make in less than an hour with these step-by-step photo instructions.
Prep Time15 minutes mins
Cook Time40 minutes mins
Total Time55 minutes mins
Course: Dessert
Cuisine: American
Keyword: Banana Cake, Banana Nut Cake
Servings: 12 servings
Calories: 631kcal
Author: Dan Mikesell AKA DrDan

Ingredients

  • 2 ½ cup AP flour
  • 1 ½ teaspoon baking powder aluminum-free
  • 1 ½ teaspoon baking soda
  • 1 teaspoon salt
  • ⅔ cup butter
  • 1 ⅓ cup sugar
  • 2 eggs
  • ⅔ cup buttermilk
  • 3 over-ripe bananas mashed
  • ¾ cup chopped walnuts

Optional Cream Cheese Frosting

  • 8 oz cream cheese
  • 8 tablespoon butter one stick
  • 2 teaspoons vanilla
  • 3 cups powdered sugar
  • a bit more powder sugar or some milk to get the right texture
US Customary - Convert to Metric

Instructions

  • Preheat oven to 350°.
    bananas with eggs and other ingredients for banana cake
  • In a large bowl, mix 2 ½ cups AP flour with 1 teaspoon salt, 1 ½ teaspoon baking powder, and 1 ½ teaspoon baking soda. Optional: Sift together, or you can use a large strainer or skip the sifting and just mix the dry ingredients together. Set aside.
    flour in a sifter over a bowl
  • Mash 3 bananas (riper is better). Set aside.
    mashing bananas with a fork in a white bowl
  • Combine ⅔ cup butter and 1 ⅓ cup sugar—cream with a stand mixer or hand mixer.
    butter and sugar in stand mixer bowl
  • With the mixer continuing to run: Add two eggs. Add ½ of the flour mixture. ⅓ cup buttermilk. And the mashed bananas. Continue to beat until incorporated.
    Add the remainder of the flour mixture and ⅓ cup more buttermilk.  Add ¾ cup chopped walnuts and fold in well.
    adding mashed bananas to batter in mixer
  • Prep a 9 by 13 baking pan with a thin coat of butter and a light flour coat.
    coating cake pan with flour
  • Pour the batter into the pan and spread evenly.
    pouring batter into cake pan
  • Bake for about 40 minutes until a toothpick comes out clean.
    toothpick coming out clean

Optional Cream Cheese Frosting

  • The cream cheese and the butter should rest at room temperature for 30 to 60 minutes to soften.
    Mix 8 oz of cream cheese, 8 tablespoons of butter (one stick), and 2 teaspoons of vanilla with a mixer. Slowly add 3 cups of powdered sugar while continuing to beat. You may need more powdered sugar or 1-2 teaspoons of milk to get your desired texture.
    mixing cream cheese filling with mixer
  • Frost cake when cooled. Sprinkle some nuts on top.

Notes

Pro Tips

  1. This is a 9X13 cake pan recipe.
  2. It is easily cut in half for a 9-inch round or 8-inch square pan. It will take about 30 minutes to bake but use the toothpick test.
  3. Sifting the flour is optional but suggested.
  4. You can make a substitute for buttermilk with ⅔ cups of milk and 2 teaspoons of vinegar or lemon juice. Let it sit for 5 minutes before proceeding.
  5. The cream cheese frosting is optional but recommended.
  6. Without the frosting, this can be stored at room temperature for 3-4 days, tightly covered. With the frosting, it should be refrigerated for up to 4 days. It will also freeze well for several months.
  7. The serving size is 1/12 of a 9X13 pan - about 3X3 size (a big piece.)
  8. Nutrition includes optional cream cheese frosting.

Nutrition

Calories: 631kcal | Carbohydrates: 87g | Protein: 7g | Fat: 30g | Saturated Fat: 16g | Cholesterol: 97mg | Sodium: 575mg | Potassium: 270mg | Fiber: 2g | Sugar: 62g | Vitamin A: 883IU | Vitamin C: 3mg | Calcium: 77mg | Iron: 2mg

Originally Published, June 7, 2013. Updated with expanded options and discussion along with refreshed photos and table of contents.

dogs with purple puppy.

Chicken Vegetable Soup in a Crock Pot (Easy Healthy Recipe)

A ladle full of chicken vegetable soup in a crock pot.

Chicken Vegetable Soup in a Crock Pot is an easy addition to any healthy diet—naturally low in calories, fat, and sodium—but it still tastes like real comfort food. No noodles needed.

A few minutes of prep makes this an easy dump-and-go soup with tender chicken and plenty of vegetables. It works in any size crock pot—from a 2-quart mini to a full-size—and easily scales from 2 to 8 servings.

A ladle full of chicken vegetable soup in a crock pot.
[feast_advanced_jump_to]

quote mark
Featured Comment by Melinda:
"I make this all the time. It is the best as is…. All around the recipe is amazing. I love the flavors, and you can mix it up to keep it from feeling like the same old thing in the house."

📝 TL;DR — Recipe Summary

What: Easy chicken vegetable soup made in a crock pot with tender chicken, vegetables, and low-sodium broth.
Why: Healthy, low-calorie, low-sodium, and made without noodles.
How: Add the chicken, vegetables, broth, and seasonings. Cook on LOW for 7–8 hours or HIGH for 3–4 hours.

🐓 Ingredients

raw chicken breasts and soup ingredients.

🐓 Chicken — breasts, thighs, or precooked rotisserie chicken
🥕 Vegetables — carrots, celery, onion, and frozen corn
🧄 Garlic
🧂 Seasoning — oregano, thyme, salt, and pepper
🍲 Broth — low-sodium chicken broth

👨‍🍳 Quick Overview: Chicken Vegetable Soup in a Crock Pot

1. Trim and cut the chicken into 1-inch cubes.

Cutting chicken breasts into 1-inch cubes.

2. Chop the carrots, celery, onion, and mince the garlic.

Chopped vegetables for chicken vegetable soup.

3. Add the chicken, vegetables, broth, and seasonings to the crock pot.

Pouring raw chicken into the crock pot of soup.

4. Cook on LOW for 7–8 hours or HIGH for 3–4 hours.

A ladle full of chicken vegetable soup in a slow cooker.

See the recipe card for the full printable recipe. Keep reading for ingredient options, mini crock pot sizing, and how to scale it.

🐓 Chicken, Vegetable & Broth Options

  • Chicken: Use boneless breasts or thighs. For precooked rotisserie chicken or leftover turkey, use 2½–3 cups per pound of raw chicken. Add it when the vegetables are tender, heat through, and serve.
  • Vegetables: Carrots, celery, onion, and corn are standard. Green beans, diced tomatoes, or small-cut potatoes also work. Peas may be added near the end of cooking.
  • Broth: Use low-sodium or no-salt-added chicken broth. Soup base or bouillon can boost the chicken flavor.
  • Seasoning: Oregano and thyme are standard; Italian seasoning is an easy substitute.

♨️ Chicken Vegetable Soup for 2 or More: Crock Pot Sizes & Scaling

This recipe makes about 11–12 cups of soup (8 servings) and scales easily for 2, 4, or 8 servings.

  • Quarter recipe (2 servings): Fits in a 2-quart mini crock pot, but watch carefully—small amounts may cook faster.
  • Half recipe (4 servings): Fits comfortably in a 2-quart mini crock pot or larger and is perfect for two with leftovers.
  • Full recipe (8 servings): Use a 4-quart or larger crock pot.

Smaller amounts in a large crock pot may cook faster and can burn around the edges, so check early.

👉 To scale, adjust the number of servings in the recipe card. Use the amounts shown in the ingredient list; the instructions will not auto-scale.

🥣 More Chicken Crock Pot Recipes

  • Slow Cooker Chicken Noodle Soup
  • Slow Cooker Chicken Stew
  • Chicken Parmesan Soup
  • Healthy White Chicken Chili

❄️ Storage

  • Refrigerate in an airtight container for up to 4 days.
  • Freeze in an airtight freezer-safe container for up to 4 months.
  • Reheat gently on the stovetop or in the microwave. Thaw frozen soup overnight in the refrigerator first.

❓ FAQs

Can I use frozen vegetables?

Yes. Most frozen vegetables can be added at the beginning with the other ingredients. Add peas near the end of cooking.

Is chicken vegetable soup healthy?

Yes. This chicken vegetable soup is naturally low in calories and fat and uses low-sodium broth. With lean chicken breasts and plenty of vegetables, a serving has about 130 calories, 2 grams of fat, and 335 mg of sodium. Exact nutritional values will vary with ingredient choices.

Can I use frozen chicken in a crock pot?

No. For food safety, chicken must start from fresh or fully thawed. Crock pots heat slowly, and frozen chicken can stay too long in the “danger zone,” increasing the risk of bacteria. Always thaw chicken first.

Can I add pasta or noodles to chicken vegetable soup?

Yes. Cook pasta or noodles until al dente, then stir them in at the end to keep the texture good.

📖The Recipe Card

A ladle full of chicken vegetable soup in a crock pot.
Print Recipe Add to Collection Go to Collections
4 from 1 vote

Chicken Vegetable Soup in a Crock Pot (Healthy & Easy)

An easy, healthy chicken vegetable soup made in a crock pot with tender chicken, classic vegetables, and low-sodium broth. This low-calorie soup is perfect for an easy dinner, meal prep, or leftovers.
Prep Time15 minutes mins
Cook Time8 hours hrs
Total Time8 hours hrs 15 minutes mins
Course: Soup
Cuisine: American
Keyword: Chicken Vegetable Soup in a Crcok Pot, Crock Pot Chicken Vegetable Soup, Slow Cooker Chicken Vegetable Soup
Servings: 8 servings
Calories: 129.1kcal
Author: Dan Mikesell AKA DrDan

Ingredients

  • 2 skinless boneless chicken breasts (about 1–1½ pounds total)
  • 6 cups low-sodium chicken broth
  • 1 pound frozen corn
  • 1 onion medium diced
  • 4 cloves garlic minced
  • 2 carrots peeled and diced
  • 2 ribs celery chopped
  • ½ teaspoon salt add more to taste
  • ½ teaspoon pepper
  • 1 teaspoon oregano optional
  • ½ teaspoon thyme optional

Optional ingredients

  • 1 bay leaf
  • 1½ teaspoons chicken soup base or 2 bouillon cubes
  • 2 cups frozen green beans
  • 1 large russet potato peeled and diced
  • 1 cup frozen peas Add when the vegetables are tender.
  • 1 can diced tomatoes Replaces an equal amount of broth—may need more salt and pepper.
US Customary - Convert to Metric

Instructions

  • Trim and cut two medium skinless boneless chicken breasts into 1-inch cubes.
    cutting chicken breasts into cubes on a black board
  • Chop 2 peeled carrots, two ribs of celery, and one medium onion.
    chopped vegetables on a black board
  • Add the chicken, carrots, celery, onion, garlic, frozen corn, broth, salt, pepper, and optional oregano and thyme to the crock pot. Stir well.
    pouring raw chicken into crock pot of soup
  • Cook on LOW for 7–8 hours or on HIGH for 3–4 hours. Taste during the last hour and adjust seasoning. Add chicken soup base or bouillon if you want a stronger chicken flavor.
    A ladle full of chicken vegetable soup in a slow cooker.

Notes

Pro Tips

This soup is naturally low-fat, low-calorie, and low-sodium when made with chicken breasts and low-sodium broth.
Chicken soup base or bouillon is optional but adds extra chicken flavor.
Change the vegetables and seasonings to your taste. See the post for options.
As written, the recipe makes about 11–12 cups (8 servings) and needs a 4-quart or larger crock pot.
For 2 or 4 servings, adjust the serving number in the recipe card. Either fits in a 2-quart mini crock pot. Only the ingredient amounts scale automatically.
Storage: Refrigerate for 3–4 days or freeze for up to 4 months.
 

Nutrition

Calories: 129.1kcal | Carbohydrates: 19g | Protein: 11.4g | Fat: 2.2g | Saturated Fat: 0.5g | Polyunsaturated Fat: 0.6g | Monounsaturated Fat: 0.8g | Trans Fat: 0.004g | Cholesterol: 18.1mg | Sodium: 334.6mg | Potassium: 506.9mg | Fiber: 2.6g | Sugar: 1.7g | Vitamin A: 2615.4IU | Vitamin C: 7.3mg | Calcium: 30.5mg | Iron: 1.1mg

Editor Note: This recipe was first published on October 14, 2012. Updated with expanded options and refreshed photos.

Molly and Lilly with pink puppy.

Inspired by a Food.com recipe.

Sautéed Green Beans with Almonds

green beans with almonds on a white plate

Sautéed Green Beans is a fast, easy skillet stovetop recipe with fresh green beans, butter, garlic, and toasted almonds for a delicious and eloquent side dish in only 20 minutes.

Perfect green beans every time with no blanching. Just follow the step-by-step photo instructions.

🥣Ingredients

Fresh green beans
Almonds—slivers or slices if you want
Garlic—fresh crushed or minced
Lemon juice—optional
Other ingredients—butter, extra-virgin olive oil, salt, and pepper.

green beans with almonds on a white plate.
[feast_advanced_jump_to]
Blue ribbon divider used for visual effect

Featured comment from James
"Totally addictive. I've made them 3 times in 3 days since finding your recipe."

Tender and delicious fresh green beans with garlic and toasted almonds is a near-perfect side dish everybody will love for both everyday family meals and fancy holiday gatherings.

No need to blanch your beans in boiling water; this one-pan sautéed recipe is so easy that it will be your everyday go-to green bean recipe.

We like to use this recipe with seared and baked steak recipes like Pan Seared New York Strip Steak or Pan Seared Filet Mignon.

If this easy recipe is not what you need, check out my other green bean recipes like Baked Green Beans with Bacon, Parmesan Green Beans, or Green Bean Casserole.

👨‍🍳How to Sautee Green Beans

  1. Rinse and trim fresh green beans.
  2. Toast almond slivers in a large skillet with butter. Remove from pan.
  3. Add olive oil to the pan and saute the green beans with salt and pepper over medium heat until there is some browning—about 5 minutes.
  4. Add water to the pan and cover for 2 minutes.
  5. Remove the lid and increase heat to high to cook off the water—about 1 minute.
  6. Add butter and crushed garlic and cook until lightly brown—about 2-3 minutes.
  7. Remove to a serving bowl and toss with the almonds.

This is a summary of the steps and ingredients. See the recipe card or the step-by-step photo instructions below for complete instructions.

✔️Variations

  • Spice it up by adding some paprika or other spices. Or add bacon—everything is better with bacon.
  • The original recipe added lemon just to the almonds after cooking. Add a teaspoon of juice if you want that taste, but I found it distracting. It is an option in the directions.
  • Change out the almonds for pecans or walnuts.
  • Add some Feta or Parmesan cheese. Go crazy with blue cheese. Use your imagination.

👨‍🍳How to Pick Out the Best Fresh Green Beans

Of course, fresh off the vine is the best or from the farmer's market. Use the store produce department if you must.

  1. The color—you want a nice vibrant green
  2. The skin of the beans should be smooth without swelling seeds, showing a more mature bean with a starchier pod. Avoid beans that are large or thick.
  3. The beans should have good firmness, no wrinkles, and not a lot of bad spots.
  4. In season, do a test “snap.”

While reasonable fresh vegetables are available year-round, the peak season is June through September, and local fresh will be best.

What to do with leftover green beans

These are much better freshly cooked, but if you have leftovers, store them in an airtight container and refrigerate for 3 days or freeze them for 3 months.

Reheat on the stovetop with a lid with a bit of water. Or briefly microwave.

❓FAQs

Can I use frozen green beans in this recipe?

No, this recipe is specifically for fresh beans. I do not recommend it for frozen beans. If you are looking for a great recipe for frozen, please check out Baked Bacon Green Beans.

How can I add more flavor to green beans?

In addition to the garlic and butter already in this recipe, seasoning salt, onion or onion powder, or thyme.

Blue ribbon divider used for visual effect
↑Jump to Table of Contents

This recipe is listed in these categories. See them for more similar recipes.

Side Dish Recipes

Have you tried this recipe, or have a question? Join the community discussion in the comments.

Step-by-Step Photo Instructions

fresh grean beans with almonds and butter.

Start with about 1 pound of green beans. Rinse and trim the ends off the beans. Slice into 2-inch pieces if you want.

browing almond slivers in a pan.

Over medium-high heat, toast ¼ cup of almond slivers or slices in a tablespoon of butter until browning—about 2-3 minutes. Optional-Coat with 1 teaspoon of lemon juice after toasting.

pouring trimmed beans into pan.

Remove almonds and add 1 teaspoon olive oil to the pan and heat over medium heat until hot, then add the trimmed beans. Add ½ teaspoon salt and ¼ teaspoon pepper. Saute until you get some spots of brown, about 5 minutes.

adding water to a pan with green beans.

Add ¼ cup water and cover. Cook for about 2 minutes, but stop while the beans are still bright green and crisp. Remove the lid and increase the heat to high—Cook off the water for about 1 minute.

cooking green beans in skillet with garlic.

Add 1 tablespoon of butter and three cloves of crushed or minced garlic. Cook until lightly brown and starting to wrinkle. It takes about 2-3 minutes.

sauteed green beans with almonds in a white bowl.

Remove to a serving bowl and toss with the almonds.

📖The Recipe Card

green beans with almonds on a white plate
Print Recipe Add to Collection Go to Collections
4 from 1 vote

Sautéed Green Beans with Almonds

Sautéed Green Beans is a fast, easy skillet stovetop recipe with fresh green beans, butter, garlic, and toasted almonds for a delicious and eloquent side dish in only 20 minutes.
Prep Time5 minutes mins
Cook Time15 minutes mins
Total Time20 minutes mins
Course: Vegetable
Cuisine: American
Keyword: Green Beans, Green Beans with Almonds, Stovetop Green Beans
Servings: 4 servings.
Calories: 113kcal
Author: Dan Mikesell AKA DrDan

Ingredients

  • 1 pound green beans cleaned and trimmed
  • ¼ cup almonds slivers or slices
  • 2 tablespoon butter divided
  • 1 teaspoon olive oil
  • ½ teaspoon kosher salt
  • ¼ teaspoon pepper
  • ¼ cup water
  • 3 cloves garlic crushed or minced
  • 1 teaspoon lemon juice Optional
US Customary - Convert to Metric

Instructions

  • Start with about 1 pound of green beans. Rinse and trim the ends off the beans. Slice into 2-inch pieces if you want.
    fresh grean beans with almonds and butter
  • Over medium-high heat, toast ¼ cup of almonds slivers or slices in a tablespoon of butter until browning—about 2-3 minutes. Optional-Coat with 1 teaspoon of lemon juice after toasting.
    browing almond slivers in a pan
  • Remove almonds and add 1 teaspoon olive oil to the pan and heat over medium heat until hot, then add the trimmed beans. Add ½ teaspoon salt and ¼ teaspoon pepper. Saute until getting some spots of brown, about 5 minutes.
    pouring trimmed beans into pan
  • Add ¼ cup water and cover. Cook for about 2 minutes but stop while the beans are still bright green and crisp. Remove the lid and increase the heat to high—Cook off the water for about 1 minute.
    adding water to a pan with green beans
  • Add 1 tablespoon of butter and three cloves of crushed or minced garlic. Cook until lightly brown and starting to wrinkle. It takes about 2-3 minutes.
    cooking green beans in skillet with garlic
  • Remove to a serving bowl and toss with the almonds.
    sauted green beans with almonds in a white bowl

Notes

Pro Tips:

  1. The fresher the beans, the better. See the discussion in the post for tips on buying the best beans.
  2. Do not use frozen beans for this recipe.
  3. If you decrease the size of the recipe, use the same amount of water to do the steaming step.
  4. Add some cooked bacon or other things to your taste. ¼ teaspoon of smoked paprika is a good addition. Other options are in the post.

Nutrition

Calories: 113kcal | Carbohydrates: 10g | Protein: 4g | Fat: 8g | Saturated Fat: 2g | Polyunsaturated Fat: 1g | Monounsaturated Fat: 4g | Cholesterol: 8mg | Sodium: 308mg | Potassium: 300mg | Fiber: 5g | Sugar: 2g | Vitamin A: 1000IU | Vitamin C: 26.4mg | Calcium: 70mg | Iron: 1.6mg

Originally Published April 4, 2014. Updated with expanded options, refreshed photos, and a table of contents to help navigation.

Lilly dog head shot with toy.

Adapted from Cooks Illustrated (subscription required).

Pan Seared Oven Baked Chicken Breasts

cooked seared chicken breast on a white plate

An easy 30-minute recipe starting with searing the chicken breasts on the stovetop, then oven-baked to a final temperature of 165° for a great tasting, moist, and tender weeknight dinner.

a close up picture of a cooked chicken breast on a white plate

[feast_advanced_jump_to]

Blue ribbon divider used for visual effect

Introduction

This is how we cooked for many years. We had a freezer in the garage fridge for meat only. I would take out a couple of chicken breasts, a pork tenderloin, and some steaks, let them thaw in the refrigerator for a few days and work our way through them.

I would get home late from work. But we want a nice dinner on a short timeline. I spend 5-10 minutes of preparation time and usually finish in the oven as I'm unwinding, and in 15-20 minutes, dinner was ready.

Faster than ordering pizza and so much better, healthier, and cheaper if you're cheap.

👨‍🍳How to make this recipe

  1. Preheat the oven to 375° convection or 400° conventional.
  2. Trim and pat dry the chicken. If the chicken breast is over ¾ inches thick, flatten it with a meat mallet or the bottom of a heavy pan.
  3. Heat oil in an oven-safe pan (cast iron preferred) over medium-high heat.
  4. Sprinkle lightly with salt and pepper or the seasoning of your choice.
  5. When the oil is hot and shimmering, carefully lay the chicken breasts in the hot pan. Brown both sides for 3-4 minutes each—to almost the color you want when eating.
  6. Bake for 15-20 minutes until an internal temperature of 165°. The thinner breast will be for 15 minutes, and the bigger ones for about 20 minutes.
  7. Let rest for 5 minutes before serving.

⏰Oven baking time

In an oven temperature of 375° convection or 400° conventional, the most common size breasts (10-12 oz.) will take about 15 minutes after a nice medium searing. A larger breast will be about 5 minutes more. A small breast may take as little as 10 minutes in the oven.

Variability is related to the thickness of the chicken breasts and a bit by the amount of searing. Always cook to a final internal temperature of 165° and never by time alone. Times are provided to help you plan only.

You can use a different oven temperature if you are cooking something else since you are cooking to a final internal temperature. It will take a bit longer or shorter, depending on your adjustments.

Also, let the chicken rest for 5 minutes before cutting to reabsorb the fluid in the meat from the cooking process.

🐓Ingredients

The Chicken

This is a skinless boneless chicken breast recipe. It is not for skin-on or bone-in breasts. You can use skinless chicken thighs, but I suggest a finish temperature of 180°+, although 165° is safe.

If you are doing more than one breast, try to use breasts of about the same sizes and thickness. If the breasts you use vary in thickness, you should flatten the thicker ones to ¾ inches with a meat mallet or heavy pan.

This cooking method should not be used for chicken that is still frozen. The outside will be overcooked and chewy before you get the thickest part of the breast to the safe temperature of 165°.

🧂The Seasoning

Just a coarse salt and pepper will do, but we like our homemade All Purpose Seasoning - 7:2:1 and 7:2:2 and keep it on the stovetop. It adds garlic, which is required in our household.

Season to your taste, but I don't suggest anything with sugars since they might burn with the searing.

❓FAQs

Why sear a chicken breast before baking?

Searing will create a Maillard reaction caused by heating proteins and carbohydrates. It leads to browning and new flavors. It is different from caramelization since caramelization involves only carbohydrates.

One of the secrets of this recipe is the searing. You get a nice Maillard reaction (the searing/browning) to add lots of flavors you get no other way.

Get them close to the final color you like during the searing before you move on to the oven-roasting step. Just baking them in the oven will not get you there/

Why use a cast iron pan for seared than oven-baked recipes?

Cast iron can quickly go from the stovetop to the oven safely. It excels at even heat distribution without hot spots, it is cheap and relatively non-stick—a near-perfect pan for this sort of recipe.

I use a 10-inch cast iron skillet for two breasts for this recipe. A 12-inch skillet will work for up to 4 chicken breasts.

If you don't have cast iron or another pan that is safe to go from the stovetop to the oven, you can use a different pan for the stovetop, then transfer the chicken to a preheated oven-safe pan to finish cooking.

👨‍🍳Food Safety Tips

For safety, use an instant-read thermometer in the thickest part of the chicken to be sure the internal temperature reaches the safe temperature of 165° and never cook by time.

Chicken should not be rinsed for food safety. It will splatter germs over your kitchen. For more details, please see Chicken- To Rinse or Not To Rinse? .

📖Chicken Breast Recipes

How to Bake Chicken Breasts in a Convection Oven

Baked Chicken with Mayonnaise

How to Grill Chicken Breasts on a Gas Grill

Blue ribbon divider used for visual effect
↑Jump to Table of Contents

This recipe is listed in these categories. See them for more similar recipes.

101's Best Recipes, 30-Minute Dinner Recipes, Chicken Breast Recipes, Chicken Recipes

Have you tried this recipe, or have a question? Join the community discussion in the comments.

Step-by-Step Photo Instructions

trim and pat dry chicken breasts

Preheat the oven to 375° convection or 400° conventional. Trim and pat dry the chicken with paper towels. If the chicken breast is over ¾ inches thick, flatten it with a meat mallet or the bottom of a heavy pan.

seasoning chicken to taste

Sprinkle lightly with salt and pepper or the seasoning of your choice.

placing chicken breast into cast iron skillet

Put an oven-safe pan (cast iron preferred) over medium-high heat with a teaspoon of oil or some butter. When the oil is hot and shimmering, carefully lay the chicken breast in the hot pan. Brown both sides for 3-4 minutes each.

seared chicken breasts in black skillet

Get them to be almost the color you want when eating. So, sear, flip, sear, and a final flip into the oven.

moving seared chicken to the oven

Bake for 15-20 minutes until an internal temperature of 165°. The thinner breast will be for 15 minutes, and the bigger breasts for about 20 minutes.

seard chicken after baking

Let rest for 5 minutes before serving. Done in less than 30 minutes, and you spent most of the time setting and unwinding. Not bad, not bad at all.

↑Jump to Table of Contents

📖The Recipe Card

cooked seared chicken breast on a white plate
Print Recipe Add to Collection Go to Collections
4.76 from 25 votes

Pan Seared Oven Baked Chicken Breasts

An easy 30-minute recipe starting with searing the chicken breasts on the stovetop, then oven-baked to a final temperature of 165° for a great tasting, moist, and tender weeknight dinner.
Prep Time10 minutes mins
Cook Time20 minutes mins
Total Time30 minutes mins
Course: Main Course
Cuisine: American
Keyword: Baked Chicken, Chicken Breast Recipe, Seared Chicken Breasts
Servings: 2 servings
Calories: 220kcal
Author: Dan Mikesell AKA DrDan

Ingredients

  • 2 skinless boneless chicken breasts about 10 oz each well timed
  • 1 teaspoon oil
  • Salt and pepper to taste OR 7:2:1
US Customary - Convert to Metric

Instructions

  • Preheat the oven to 375° convection or 400° conventional. Trim and pat dry the chicken with paper towels. If the chicken breast is over ¾ inches thick, flatten it with a meat mallet or the bottom of a heavy pan.
    trim and pat dry chicken breasts.
  • Sprinkle lightly with salt and pepper or the seasoning of your choice.
    seasoning chicken to taste
  • Put an oven-safe pan (cast iron preferred) over medium-high heat with a teaspoon of oil or some butter. When the oil is hot and shimmering, carefully lay the chicken breast in the hot pan. Brown both sides for 3-4 minutes each.
    placing chicken breast into cast iron skillet
  • Get them to be almost the color you want when eating. So, sear, flip, sear, and a final flip into the oven.
    seared chicken breasts in black skillet
  • Bake for 15-20 minutes until an internal temperature of 165°. The thinner breast will be for 15 minutes, and the bigger breasts for about 20 minutes.
    seard chicken after baking
  • Let rest for 5 minutes before serving. Done in less than 30 minutes.
    cooked seared chicken breast on a white plate

Video

Notes

Pro Tips:

  1. Do not try with still frozen chicken.
  2. Try to use breasts of about the same size and thicken. If over ¾ inch thick, flatten them with a meat mallet or the bottom of a heavy pan.
  3. Season as you want, but I suggest nothing with sugar that may burn. We use All Purpose Seasoning - 7:2:1 and 7:2:2.
  4. Start searing with a preheated pan, not cold. The oil should be shimmering. You may need more oil if you don't use well-seasoned cast iron or non-stick skillet. Butter will work but if you have smoking, turn the heat down a bit.
  5. Sear in the pan to approximately the final color you want.
  6. First, sear with the smooth side up, then flip, sear, then one final flip as it goes into the oven.
  7. The oven time can vary by size and thickness. Usually, 15-20 minutes, but you must check for the final internal temperature of 165°. Thinner breasts may take as little as 10 minutes.
  8. Rest for 5 minutes after cooking before cutting.

Nutrition

Calories: 220kcal | Protein: 48g | Fat: 4g | Saturated Fat: 0.3g | Polyunsaturated Fat: 0.3g | Monounsaturated Fat: 2g | Cholesterol: 140mg | Sodium: 710mg

Editor's Note: Originally Published August 28, 2011. Updated with expanded options, refreshed photos, and a table of contents to help navigation.

Dogs 3 mo with Kong 4

How to Make Gravy with Flour (Easy Roux or Slurry Method)

pouring gravy on turkey and potatoes

Learn how to make gravy with all-purpose flour using the beginner-friendly slurry method or classic roux. Make homemade brown gravy with drippings, broth, or water — or use the same techniques to thicken liquids for soups, stews, and more.

⏱️ Quick Answer: Ratio of All-Purpose Flour to Liquid for Gravy

  • Slurry Method (Easiest for Beginners): 2 tablespoons all-purpose flour for each 1 cup of liquid — fat or drippings optional.
  • Roux Method (Classic Gravy): 2 tablespoons all-purpose flour and 2 tablespoons fat for each 1 cup of liquid — the fat may come from drippings or butter.
pouring gravy on turkey and potatoes
[feast_advanced_jump_to]

⚡ TL;DR—Recipe Summary

  • What: Homemade gravy made with all-purpose flour and your choice of drippings, broth, stock, or water with bouillon.
  • Two methods: Use an easy flour slurry for the most beginner-friendly method or a classic roux for deeper flavor.
  • Ratio: Use 2 tablespoons flour per cup of liquid. For a roux, also use 2 tablespoons fat.
  • How: Whisk well, simmer until thickened, then adjust the consistency and seasoning to taste. About 10 minutes for simple homemade gravy.

🥣 Ingredients You’ll Need

The ingredients are simple and few. Both the slurry and roux methods use flour and some type of liquid. Add a little fat to make a classic roux, and you have it.

  • Flour: Plain all-purpose flour is suggested, but Wondra or whole wheat flour may also be used. Alternative thickeners and flours are discussed in the Alternate Gravy Thickeners section below.
  • Fat (for roux): Butter, pan drippings, or oil. Not needed if using the slurry method, but may be present.
  • Liquid: Broth, stock, or pan drippings. For brown gravy, use drippings if you have them, but beef or chicken broth adds flavor, and even milk or water with bouillon will work.
  • Seasoning: Salt and pepper at minimum. Boost with bouillon, Worcestershire, soy sauce, herbs, or spices if needed.

✌️ The Two Methods: Slurry and Roux

Here’s a quick comparison to help you choose:

Slurry vs. Roux at a Glance

Slurry MethodRoux Method
How it worksMix flour with cool liquid, then whisk into boiling liquidCook flour in fat, then whisk in liquid
Ingredients (per 1 cup gravy)2 tablespoons flour and 1 cup broth/drippings2 tablespoons fat, 2 tablespoons flour, 1 cup broth/drippings
Fat requiredNoYes
Skill level2/10 (easy)4/10 (moderate)
AdvantageFast, flexible, easy to thin or thickenClassic flavor, less “raw flour” taste
DisadvantageSome notice a flour taste if undercookedMore steps, easier for beginners to burn or lump

✅ Pro Tip: If you’re new to making gravy, start with the slurry method. It’s faster, more forgiving, and easier to fix if it’s too thin or thick.


👨‍🍳 Slurry Method — How to Make Gravy with Flour the Easiest Way

Key Ratio: For every 1 cup of gravy, use 1 cup of liquid (broth, drippings, stock, or water with bouillon or gravy base) and 2 tablespoons of flour.

Equipment: A wide stovetop pan, a whisk or slotted spoon for stirring, and a small bowl, shaker, or jar with a lid for mixing the slurry.

💡 Tip: Read through all the steps before starting — you’ll need to whisk while you pour, and you won’t have time to read once things get moving.


Step 1 of 4 Slurry Method — Mixing the slurry

  • Measure 2 tablespoons of all-purpose flour for each cup of gravy you plan to make.
  • Add about the same amount of cool liquid (2 tablespoons water or broth per 2 tablespoons flour).
  • Whisk or shake until completely smooth with no lumps.
  • Make about 50% more slurry than you think you’ll need so you can adjust thickness later.
adding broth to flour in shaker

Step 2 of 4 Slurry Method — Heat the liquid

  • Add your base liquid — drippings, broth, stock, or water with bouillon — to a wide pan. Do not add the slurry yet, just the liquid you’ll be thickening.
  • If using drippings, keep fat to no more than 2 tablespoons per cup of gravy; skim off any extra.
  • Bring to a rolling boil over medium-high heat. Use two burners if the pan spans them.
adding broth to a fry pan

Step 3 of 4 Slurry Method — Mixing in the slurry

  • Take the slurry you mixed earlier (flour + cool liquid).
  • While the base liquid is at a rolling boil, begin pouring the slurry in a thin stream. Pour slowly over 2–3 minutes, not all at once.
  • Whisk vigorously the entire time to keep it smooth.
  • As the gravy thickens, lower the heat to a gentle simmer.
  • Stop adding slurry when you’re just shy of your desired thickness — it will thicken a bit more in the next step.
adding slurry while whisking

Step 4 of 4 Slurry Method — Simmer, adjust, and season

  • Keep the gravy simmering and whisk for 2–3 minutes to cook out the raw flour taste.
  • Adjust if needed: add more slurry (the extra you set aside) to thicken, or whisk in broth/water to thin.
  • Taste and season with salt, pepper, and optional flavor boosters like bouillon, Worcestershire, or herbs.
  • Remove from heat and serve hot.
thickening gravy in pan with whisk

👨‍🍳 Roux Method — How to Make Gravy with Flour the Classic Way

Key Ratio: For every 1 cup of gravy, use 1 cup of liquid, 2 tablespoons of fat, and 2 tablespoons of flour.

Equipment: A wide stovetop pan, a whisk or slotted spoon for stirring, and measuring spoons for the fat and flour.

💡 Tip: Stay close to the stove — a lighter roux thickens more, but a darker roux has deeper flavor and less thickening power. It can go from perfect to burnt in seconds.


Step 1 of 4 Roux Method — Heat the fat

  • Measure 2 tablespoons of fat per cup of gravy (butter, oil, or skimmed drippings).
  • Add to a wide pan and heat over medium until hot but not smoking.

✅ Pro Tip: If you’re comfortable in the kitchen, you can estimate the fat amount. But always measure the flour—too much or too little flour will throw off the consistency.

melted butter in a large frying pan

Step 2 of 4 Roux Method — Cook the roux

  • Sprinkle in 2 tablespoons all-purpose flour per cup of gravy, whisking constantly to make a smooth paste.
  • Keep whisking and cook the roux for 3–5 minutes until lightly browned.
  • The more it browns, the deeper the flavor (and the darker the gravy), but don’t burn it.

✅ Pro Tip: If the roux smells burnt, toss it and start over. Burnt roux will ruin the flavor, and there’s no fixing it.

adding flour to fat in black pan

Step 3 of 4 Roux Method — Add the liquid

  • Slowly pour in most of your liquid (broth, stock, or water with bouillon) while whisking continuously.
  • Add it in a steady stream over 1–2 minutes, not all at once.
  • Save a little of the liquid to adjust the thickness later.
pouring broth into pan with roux

Step 4 of 4 Roux Method — Simmer, adjust, and season

  • Lower the heat to a gentle simmer and whisk for 2–3 minutes to fully blend and cook out the flour taste.
  • Adjust consistency: whisk in more liquid to thin, or cook slightly longer to thicken.
  • Taste and season with salt, pepper, and optional boosters (bouillon, Worcestershire, herbs). Serve hot.

✅ Pro Tip: If you add too much liquid and the gravy is too thin, rescue it with a small flour slurry (see the slurry method).

mixing boiling gravy with whisk

🥣 Alternate Gravy Thickeners

Not every gravy has to start with all-purpose flour. Try these alternate wheat flours or gluten-free starches for different textures, flavors, and dietary needs.


🌾 Other Wheat Flours

  • Wondra flour – a precooked, finely milled flour that dissolves instantly and almost never clumps. Great for last-minute gravy fixes.
  • Whole wheat flour – works fine but adds a nutty flavor and darker color.

👉 Alternate flours, like almond, coconut, or other grain-free types, are generally low in starch and don’t thicken well. Best avoided unless you’ve tested them before.


🌽 Cornstarch (Gluten-Free)

Cornstarch has about twice the thickening power of flour, so use 1 tablespoon per cup of liquid instead of 2 tablespoons flour.

  • Mix with cold water first to make a smooth slurry.
  • Slowly whisk into hot liquid until thickened.

👍 Best for: clear, glossy gravies or Asian-style sauces. Also good for long cooking, like crock pots.
⚠️ Watch out: refrigerated cornstarch gravy can gel — still safe to eat, just a texture issue.


🌿 Arrowroot (Gluten-Free)

Arrowroot powder is another starch-based thickener.

  • Use about 2½ teaspoons per cup of liquid.
  • Always make a slurry with cold water and add it near the end of cooking.

👍 Best for: delicate gravies and sauces that will be frozen later.
⚠️ Avoid: combining with dairy — it can turn slimy.

🍖 How to Make Brown Gravy With or Without Drippings

Brown gravy is made from meat drippings or broth—beef, pork, chicken, or any other roast—thickened with flour using either the slurry or roux method.

If you don’t have drippings, you can still make homemade brown gravy with broth or even water with bouillon for flavor. The flour adds body and richness, while seasonings build depth.

You can enhance flavor with onions, mushrooms, herbs, or spices, or keep it simple for everyday meals. Brown gravy can even be made vegetarian using vegetable broth or a meatless gravy base.

👉 Common myth: All brown gravy is beef gravy. Not true!
All beef gravy is brown gravy, but not all brown gravy is beef. The darker the meat (or broth), the deeper the gravy color.


🧊 Make Ahead, Leftovers, & Storage

Gravy is easy to make ahead of time or save leftovers for later. Flour-based gravies made with the slurry or roux method will reheat well, but cornstarch gravies tend to break down and lose texture.

Make Ahead:
Prepare the gravy as usual, cool it, and store covered in the refrigerator for up to 4–5 days. It will thicken as it cools, so whisk in a little broth or water when reheating to restore the right consistency.

Freeze:
Gravy made with flour freezes for 3–4 months. Let it cool completely, then store in airtight containers or freezer bags. Thaw overnight in the refrigerator and reheat slowly, whisking to smooth it out.

Reheat Tip:
Always reheat over low to medium heat, whisking frequently. If it thickens too much, just add a splash of liquid until it looks right again.

Leftover Idea:
Use extra gravy over mashed potatoes, meatloaf, pork chops, or open-faced sandwiches—it’s too good to waste.

📌 Recipes Featuring Gravy

  • How to Roast Turkey Breast the Easy Way
  • Beef Tips and Gravy
  • Healthier Sausage Gravy and Biscuits
  • Pan Fried Pork Chops with Gravy
  • 30-Minute Chicken Fried Steak with Gravy

❓ Troubleshooting Gravy

Why is my gravy lumpy?

Lumps form when flour clumps early in the process. With the slurry method, this happens if you try to mix flour into hot liquid or add the slurry before the base is boiling.

With the roux method, lumps usually mean you didn’t whisk continuously or added liquid too fast.

If it happens, run the gravy through a fine strainer — and whisk better next time.

My gravy has no taste; what can I do?

Boost flavor with a soup base or bouillon product (my go-to when I don’t have drippings). A splash of Worcestershire or soy sauce works wonders, too. Don’t forget herbs and spices like thyme, sage, or rosemary.

Why did my gravy separate or get greasy?

Separation happens when there’s too much fat in the drippings or not enough flour to bind it. Skim off extra fat before adding the flour, or whisk in a bit more slurry if it separates later.

Overheating can also cause it — once your gravy thickens, reduce the heat to a gentle simmer and keep whisking until smooth again.

What are white gravy and sausage gravy for biscuits?

White gravy uses milk as the primary liquid — think chicken fried steak with creamy pan gravy. I often use leftover seasoned flour from the coating, plus pan drippings for flavor.

Sausage gravy starts the same way, adding cooked breakfast sausage before whisking in flour and milk. I usually use the slurry method and season with salt and pepper.

Both start with drippings, so they technically qualify as brown gravies, too.

📖The Recipe Card

pouring gravy on turkey and potatoes
Print Recipe Add to Collection Go to Collections
5 from 3 votes

Homemade Gravy with Flour

Learn how to make homemade gravy with all-purpose flour using two simple methods—a classic roux or an easy slurry. Use drippings, broth, water, or other liquids.
Prep Time2 minutes mins
Cook Time10 minutes mins
Total Time12 minutes mins
Course: Sauce, Side Dish
Cuisine: American
Keyword: gravy from scratch, homemade gravy recipe, How to make Gravy
Servings: 4
Calories: 46.2kcal
Author: Dan Mikesell AKA DrDan

Ingredients

  • Liquid from the cooking if available
  • Extra broth if needed
  • all-purpose flour
  • salt and pepper to taste
  • extra fat oil or butter if needed for the roux

Instructions

The Slurry Method of Making Gravy

  • Key ratio: For every 1 cup of gravy, use 1 cup liquid (broth, drippings, stock, or water with bouillon/gravy base) and 2 tablespoons of all-purpose flour.
    Equipment: A wide stovetop pan, a whisk or slotted spoon for stirring, and a small bowl with a whisk, dressing shaker, or jar with a lid.
    💡 Tip: Read through the steps first—you’ll need to whisk while you pour.
  • Measure 2 tablespoons all-purpose flour for each cup of gravy you plan to make.
    Add about the same amount of cool liquid (2 tablespoons water or broth per 2 tablespoons flour).
    Whisk or shake until completely smooth with no lumps.
    Make about 50% more slurry than you think you’ll need so you can adjust the thickness later.
    adding broth to shaker with flour
  • Add your base liquid — drippings, broth, stock, or water with bouillon — to a wide pan. Do not add the slurry yet, just the liquid you’ll be thickening.
    If using drippings, keep fat to no more than 2 tablespoons per cup of gravy; skim off any extra.
    Bring to a rolling boil over medium-high heat. Use two burners if the pan spans them.
    adding broth to a fry pan
  • While the base liquid is at a rolling boil, begin pouring the slurry in a thin stream. Pour slowly over 2–3 minutes, not all at once
    Whisk vigorously the entire time to keep it smooth.
    As the gravy thickens, lower the heat to a gentle simmer.
    Stop adding slurry when you’re just shy of your desired thickness — it will thicken a bit more in the next step.
    adding flour mixture to pan with liquid and whisk
  • Keep the gravy simmering and whisk for 2–3 minutes to cook out the raw flour taste.
    Adjust if needed: add more slurry (the extra you set aside) to thicken, or whisk in broth/water to thin.
    Taste and season with salt, pepper, and optional flavor boosters like bouillon, Worcestershire, or herbs.
    Remove from heat and serve hot.
    whisking gravy to thicken

The Roux Method of Making Gravy

  • Key ratio: For every 1 cup of gravy, use 1 cup of liquid, 2 tablespoons of fat, and 2 tablespoons of all-purpose flour.
    Equipment: A wide stovetop pan, a whisk or slotted spoon for stirring, and measuring spoons for the fat and flour.
    💡 Tip: A lighter roux thickens more; a darker roux gives more flavor but less thickening power.
  • Measure 2 tablespoons of fat per cup of gravy (butter, oil, or skimmed drippings).
    Add to a wide pan and heat over medium until hot but not smoking.
    melted butter in a large frying pan
  • Sprinkle in 2 tablespoons all-purpose flour per cup of gravy, whisking constantly to make a smooth paste.
    Keep whisking and cook the roux for 3–5 minutes until lightly browned.
    The longer you cook, the darker and more flavorful the roux—but it will thicken less. Stop before it scorches.
    adding flour to fat in black pan
  • Slowly pour in most of your liquid (broth, stock, or water with bouillon) while whisking continuously.
    Add it in a steady stream over 1–2 minutes, not all at once.
    Save a little of the liquid to adjust the thickness later.
    pouring broth into pan with roux
  • Lower the heat to a gentle simmer and whisk for 2–3 minutes to fully blend and cook out the flour taste.
    Adjust consistency: whisk in more liquid to thin, or cook slightly longer to thicken.
    Taste and season with salt, pepper, and optional boosters (bouillon, Worcestershire, herbs). Serve hot.
    mixing boiling gravy with whisk

Notes

Pro Tips:

1. Gravy can be stored in the refrigerator for 4–5 days or frozen for 3–4 months.
2. General ratio: 2 tablespoons of flour per cup of liquid for both methods. For the roux method, also add 2 tablespoons of fat.
3. If pan drippings have a lot of fat, skim to no more than 2 tablespoons per cup of gravy.
4. Use two burners if your pan is large.
5. Alternative thickeners and tips are discussed in the post.

Nutrition

Calories: 46.2kcal | Carbohydrates: 7.1g | Protein: 3.1g | Fat: 0.8g | Saturated Fat: 0.2g | Polyunsaturated Fat: 0.2g | Monounsaturated Fat: 0.3g | Sodium: 35.5mg | Potassium: 109.5mg | Fiber: 0.2g | Sugar: 0.2g | Calcium: 5.8mg | Iron: 0.6mg

Originally published February 15, 2011. Updated with expanded options, refreshed photos, and a table of contents to help navigation.

Molly and Lilly running in a row

How to Cook Bacon in a Convection Oven

pile of cooked bacon on a white plate

Cooking bacon in a convection oven is an easy way to get crispy bacon that is evenly cooked in about 20 minutes. The circulating hot air promotes even browning with no flipping and less mess.

The method is flexible for different bacon thicknesses and temperatures. A regular oven may also be used.

🤔 Quick Answer: How Long to Cook Bacon in a Convection Oven

  • Temperature: 400°F convection; 425°F for a regular oven
  • Time: About 20 minutes, depending on bacon thickness
  • Done: When the bacon is evenly browned and reaches your preferred crispiness
pile of cooked bacon on a white plate
[feast_advanced_jump_to]

quote mark
Featured Comment by Rosalina:
⭐⭐⭐⭐⭐
"This is, hands down, the best way to cook bacon. Thanks for sharing a really helpful post on how to bake bacon the right way!"

TL;DR — Recipe Summary

What: Crispy bacon cooked in a convection oven in about 20 minutes, with a regular oven as an option.

Why: Convection circulates hot air for more even cooking and browning. It’s easy, mess-free, with no flipping or rack needed.

How: Arrange the bacon on a foil-lined sheet pan and cook at 400°F convection until evenly browned and as crispy as you like.

🥓 Bacon and Equipment

heavy duty foil and raw bacon.
  • Bacon – any style or thickness
  • Rimmed sheet pan – catches the grease safely
  • Heavy-duty foil – easy cleanup
  • Optional: parchment paper – helps prevent sticking

👨‍🍳 Quick Overview: How to Cook Bacon in a Convection Oven

1. Prep the Pan: Line a rimmed baking sheet with heavy-duty foil.

Foil-lined sheet pan for easy cleanup after cooking bacon.

✅ Pro Tip: If your bacon is thin, sugar-cured, or tends to stick, place parchment paper on top of the foil.

2. Arrange the Bacon: Lay bacon strips close together but not overlapping.

raw bacon on foil covered tray.

3. Cook: Cook at 400°F convection for about 20 minutes. Time varies with bacon thickness. Remove when evenly browned and as crispy as you like.

Crispy oven-baked bacon on a tray.

4. Drain on paper towels and blot off extra fat.

cooked bacon on white plate.

👇 Scroll down for the printable recipe card and complete step-by-step photo instructions—or keep reading for tips and FAQs.

⏰ How Long to Cook Bacon in the Oven

Cook medium-thick bacon for 18 to 22 minutes at 400°F convection (425°F regular) for most situations.

  • Thickness: Thinner bacon cooks faster; thick-cut takes longer.
  • Oven temperature flexibility: Anywhere from 350°F to 425°F works. Lower temperatures cook more gently and render fat slowly; higher temperatures brown faster and need closer watching near the end.
  • Oven type matters: Convection circulates hot air for even, crisp results in less time. Regular ovens may take a few minutes longer—especially if the rack sits lower.
  • Cold oven start: You can skip preheating. Place the pan in a cold oven, set the temperature, and add 2–3 extra minutes to the total cook time. Results are nearly identical.
  • When is it done? The fat has mostly rendered and the bacon is the color and crispiness you like.

✅ Pro Tip: If you prefer extra-crispy bacon, leave it in for another minute or two—but check often near the end, since it can go from perfect to overdone quickly.

💡 Pro Tips for Perfect Bacon

  • Convection cooks faster and crispier. If you have the option, use it for the most even browning.
  • Use heavy-duty foil for easier cleanup.
  • Add parchment on top of the foil if your bacon tends to stick—especially with thin or sugar-cured types.
  • No rack needed. Bacon renders perfectly right on the pan, and cleanup is simpler.
  • Watch near the end. Bacon goes from perfect to overdone quickly—check early the first time you try a new brand or thickness.
  • Drain on paper towels to remove excess fat and keep the crisp texture.

❓ FAQs

Why cook bacon in a convection oven?

Convection circulates hot air around the bacon for more even cooking and browning. A regular oven still does a good job, but convection is my preferred method for consistently crispy bacon.

Do I need to flip the bacon?

Nope. The oven cooks both sides evenly—no flipping needed.

Do I need a rack?

No. The bacon cooks fine right on the foil. Add parchment on top if your bacon tends to stick.

How should I save the bacon grease?

Strain and store it in a glass container in the fridge for 3–6 months. It’s great for eggs, roasted veggies, or anything that needs a bacon boost. Unstrained grease spoils quickly because of food particles, so always strain before storing.

👨‍🍳 Other Breakfast Recipes

  • How to Cook Sausage in the Oven
  • Baked Blueberry Pancakes
  • Small Cinnamon Coffee Cake
  • Small French Toast Casserole

❄️ Storage of Cooked Bacon Leftovers

  • Store cooked bacon in an airtight container in the fridge for 4–5 days, or freeze for up to one month.
  • Reheat in the microwave for 5–7 seconds per slice, wrapped in a paper towel, until hot and slightly crisp.
  • Cooked bacon can also be frozen for up to a month, per the USDA

📖The Recipe Card

pile of cooked bacon on a white plate
Print Recipe Add to Collection Go to Collections
4.50 from 10 votes

Convection Oven Bacon (Crispy & Easy)

Cook crispy bacon in a convection oven in about 20 minutes. This easy, mess-free method cooks bacon evenly with no flipping. A regular oven may also be used.
Prep Time3 minutes mins
Cook Time20 minutes mins
Total Time23 minutes mins
Course: Breakfast
Cuisine: American
Keyword: bacon in oven, convection oven bacon, how to cook bacon in the oven
Servings: 5 2 slice servings
Calories: 60kcal
Author: Dan Mikesell AKA DrDan

Ingredients

  • about ½ pound 8–10 slices of bacon thick-cut preferred but others work
  • aluminum foil to cover tray
  • parchment paper if needed
US Customary - Convert to Metric

Instructions

  • Preheat the oven to 400°F (convection bake) or 425°F (conventional). Line an 18-inch × 13-inch rimmed sheet pan with aluminum foil.
    heavy duty foil and raw bacon
  • Place bacon close together but not touching—8 to 10 slices (about ½ pound) will usually fit.
    raw bacon on foil covered tray
  • Bake until browned and crispy, about 18–22 minutes. Time will vary depending on thickness and your preferred doneness. Thinner bacon cooks faster; thick-cut may need a few extra minutes—check early.
    cooked bacon on foil covered tray
  • Drain on paper towels and pat off any excess fat.
    cooked bacon on white plate

Notes

Pro Tips:

Notes / Pro Tips (streamlined with convection mention)

  1. A half-pound of bacon (8–10 slices) will usually fit a standard 18×13-inch sheet pan.
  2. Bake at 400°F convection or 425°F regular. Convection crisps a little faster, but either way works. Temps from 350°–425°F are fine—just adjust the time.
  3. Thin bacon cooks quickly; very thick bacon can take longer. Always stop at your perfect crispiness.
  4. Sugary or thin bacon tend to stick—use parchment if needed.
  5. No rack or flipping required.
  6. Cooking two pans at once? Use convection if available, rotate pans front to back and top to bottom halfway through for even cooking.
  • Store cooked bacon in the fridge 4–5 days or freeze for about a month. Reheat in the microwave under a paper towel for 5-7 seconds per slice.

Nutrition

Calories: 60kcal | Carbohydrates: 1g | Protein: 4g | Fat: 5g | Saturated Fat: 2g | Cholesterol: 13mg | Sodium: 220mg | Potassium: 65mg | Iron: 1mg

Editor's Note: Originally published October 8, 2011, it was updated with expanded options, refreshed photos, and a table of contents to help navigation.

Lilly running hard in snow.

Parmesan Roasted Cauliflower

Parmesan Roasted Cauliflower on tray browned

This caramelized Parmesan roasted cauliflower recipe will become your favorite way to cook cauliflower. Using fresh or frozen, it makes a great hot baked side dish.

Parmesan Roasted Cauliflower on tray browned

[feast_advanced_jump_to]

Blue ribbon divider used for visual effect

Introduction

Roasted cauliflower pairs perfectly with almost any meal. It comes together quickly with these easy-to-follow step-by-step photo instructions for a perfect dish every time.

An exception side dish that will have you eating your veggies. A great addition to a keto or almost any other diet. Even the kids will love it.

Inspired by an Epicurious Recipe, but with few changes, clarifications, and we are good to go.

This is a relatively simple method. Clean the vegetable, give a nice coating of oil and some seasoning, roast in a high oven, and stir occasionally. Add a little Parmesan near the end.

👨‍🍳How to make this recipe

  • Preheat oven to 400° convection or 425° conventional.
  • Wash and trim one head of fresh cauliflower into pieces no more than 1-inch in diameter. Optional: Chop medium onion into "peddles." Add to the cauliflower in a large mixing bowl.
  • In a small bowl, olive oil, garlic powder, kosher salt, onion powder (skip if using the fresh onion), and pepper. Add the oil mixture to the cauliflower and mix.
  • Prep a large-rimmed baking tray with a heavy coat of oil or PAM. Add the cauliflower.
  • Bake for 35-40 minutes but stir every 15 - 20 minutes.
  • Sprinkle with ½ cup shredded parmesan cheese (fresh preferred) and bake another 10-12 minutes.

❄️Using frozen cauliflower

Although I highly recommend fresh, frozen cauliflower can be used in this recipe with a few simple adjustments.

First, it did come in 1-pound bags, but now it is mostly 12-oz bags. A medium head of fresh cauliflower will yield 1 ½ to 2 pounds. So use one bag for a half recipe and 2 bags for a full recipe.

Second, do not thaw. Start with it still frozen.

Third, don’t skimp on the oil. And you might want to use straight vegetable oil to prevent smoking instead of olive oil.

Forth, cook 25 higher and convection is highly recommended.

📖Side Dish Recipes

Cheesy Cauliflower Casserole

Mashed Cauliflower

Green Beans with Bacon

Baked Parmesan Asparagus

Blue ribbon divider used for visual effect
↑Jump to Table of Contents

This recipe is listed in these categories. See them for more similar recipes.

101's Best Recipes, Low Carb/Keto Recipes, Side Dish Recipes

Have you tried this recipe, or have a question? Join the community discussion in the comments.

Step-by-Step Photo Instructions

Head of cauliflower with Parmesan and seasoning

Preheat oven to 400° convection or 425° conventional.

trimming a head of cauliflower on black board

Wash and trim one head of fresh cauliflower. Trim into pieces no more than 1-inch diameter.

adding oil to cheese and spices in small bowl

In a small bowl, combine 4 tablespoons of olive oil, 1 tablespoon garlic powder, 2 teaspoons kosher salt, 1 teaspoon onion powder (skip if using the fresh onion), and one teaspoon pepper.

chop an onion into strips on black board

Optional: Chop medium onion into "peddles." Add to the cauliflower in a large mixing bowl.

pouring coating over cauliflower

Add oil mixture to the bowl and mix.

add cauliflower to tray

Prep a large rimmed baking tray with a heavy coat of PAM. Add the cauliflower.

stur cauliflower on tray

Bake for 35-40 minutes but stir every 15 - 20 minutes.

Cauliflower on tray sprinkled with cheese

Sprinkle with ½ cup shredded parmesan cheese (fresh preferred) and bake another 10-12 minutes.

roasted cauliflower on spoon
↑Jump to Table of Contents

📖The Recipe Card

Parmesan Roasted Cauliflower from 101 Cooking for Two
Print Recipe Add to Collection Go to Collections
5 from 1 vote

Parmesan Roasted Cauliflower

This caramelized Parmesan roasted cauliflower recipe will become your favorite way to cook cauliflower. Using fresh or frozen, it makes a great hot baked side dish.
Prep Time10 minutes mins
Cook Time50 minutes mins
Total Time1 hour hr
Course: Vegetable
Cuisine: American
Keyword: Parmesan Cauliflower, Roasted Cauliflower
Servings: 6
Calories: 153kcal
Author: Dan Mikesell AKA DrDan

Ingredients

  • 1 head cauliflower fresh
  • 1 onion medium, optional
  • 4 tablespoons olive oil
  • 1 tablespoon garlic powder
  • 2 teaspoons kosher salt
  • 1 teaspoon onion powder Omit if using the onion
  • 1 teaspoon pepper
  • ½ cup Parmesan cheese shredded fresh preferred
US Customary - Convert to Metric

Instructions

  • Preheat oven to 400° convection or 425° conventional.
  • Wash and trim one head of fresh cauliflower. Trim into pieces no more than 1-inch diameter.
  • In a small bowl, combine 4 tablespoons of olive oil, 1 tablespoon garlic powder, 2 teaspoons kosher salt, 1 teaspoon onion powder (skip if using the fresh onion), and one teaspoon pepper.
  • Optional: Chop medium onion into "peddles." Add to the cauliflower in a large mixing bowl. 
  • Add oil mixture to the bowl and mix.
  • Prep a large rimmed baking tray with a heavy coat of PAM. Add the cauliflower.
  • Bake for 35-40 minutes but stir every 15 - 20 minutes.
  • Sprinkle with ½ cup shredded parmesan cheese (fresh preferred) and bake another 10-12 minutes.

Notes

Tips:

  1. A medium to large head of cauliflower will produce 1 ½ to 2 pounds of florets.
  2. You can use frozen cauliflower. It usually comes in 12 oz bags now.
    -do not thaw.
    -increase the temperature of the oven by 25° and use a different oil.
    -don’t skip on the oil.

Nutrition

Calories: 153kcal | Carbohydrates: 8g | Protein: 5g | Fat: 12g | Saturated Fat: 3g | Cholesterol: 6mg | Sodium: 939mg | Potassium: 337mg | Fiber: 2g | Sugar: 3g | Vitamin A: 65IU | Vitamin C: 48mg | Calcium: 124mg | Iron: 1mg

Originally Published February 20, 2016. Updated with expanded options, refreshed photos, and a table of contents to help navigation.

Molly waking up Lilly 6 wks

Today's dog photos are a "blast from the past" 2014. Ain't they cute.

Grilled Chicken Marinade with Lemon, Garlic, and Butter

cooked chicken breasts on a blue plate

The best chicken marinade is yours with only 5 ingredients and 10 minutes. With the great tastes of lemon, garlic, butter, and spices, this easy chicken marinade is perfect for chicken breasts but works great with chicken tenders or any skin-on chicken like drumsticks or thighs.

cooked chicken breasts on a blue plate

[feast_advanced_jump_to]

Blue ribbon divider used for visual effect

Introduction

Let's all agree that chicken can be relatively tasteless, and a marinade is a perfect solution to this lack of flavor and some tenderizing. And marinating, if you plan right, will not add much time.

This chicken marinade recipe was our standard for grilled chicken breasts when the kids were young. The components are always in the house, so there is little thinking ahead.

We have used this recipe for about 45 years, and it remains one of our favorites. It is the perfect easy summer dinner, served with sides of veggies, like corn on the cob and grilled baby potatoes.

Just an FYI, marinate is a verb meaning the action, while marinade is the noun referring to the liquid.

🥣How to make this chicken marinade recipe

  1. Add the butter cut into chunks in a non-reactive saucepan over medium heat.
  2. Add all other ingredients.
  3. Bring to a boil.
  4. Remove from heat and move ¼ of the marinade to a small bowl to be used during cooking.
  5. Allow cooling for 10 minutes before adding chicken.

🍋Ingredients

The ingredients are not fancy. Yes, you could use freshly squeezed lemon and crushed garlic, but that makes for too much work for this summer laid-back summer recipe.

  • Lemon Juice- 6 tablespoons of juice or the juice of 3 medium lemons.
  • Butter - use real butter with or without salt.
  • Garlic - 6-8 garlic cloves crushed, 2 tablespoons of crushed or minced garlic, or ¾ teaspoons of garlic powder
  • Seasoning Salt and Pepper - Loweys or other seasoning salt and a little black pepper.

👨‍🍳How to cook marinated chicken

Once your chicken is marinated, it is time to cook it—generally, that will be on a grill. It is not that hard, but see the recipe list below if you need more details on specific details.

  1. Prepare the marinade per instructions and reserve a small amount to brush on during grilling. Be sure to let it cool some before adding the chicken.
  2. This marinade works great on any chicken—like drumsticks, thighs, or tenders. We use it for skinless boneless chicken breasts. Pick breasts of about the same size. Do not brine due to the salt in the marinade. Cooking instructions for other than skinless boneless chicken breasts can be found in the "Reference Posts" below.
  3. If the chicken breasts are over ¾ inch thick, they should be thinned with a meat mallet or heavy pan to help even out the cooking times.
  4. Marinade for 20-30 minutes—maximum of 3 hours.
  5. Preheat the grill to a grill surface temperature of about 450°. Clean and oil well.
  6. Place the chicken over direct heat. Flip every 5 minutes. After the first two flips, brush with the reserved marinade with every flip. Grill to 165° internal temperature—18-22 minutes usually.
  7. Instead of the grill, you can bake in an oven to 400° convection or 425° conventional for about 25 minutes to 165°.

📋Reference Posts

How to Grill Chicken Breasts

Grilled Chicken Thighs

Quick & Easy Grilled Chicken Tenders on a Gas Grill

Roasting Chicken Breasts in the Convection Oven

Guide to Grill Temperature on a Gas Grill

Chicken... To Rinse or Not To Rinse?

❓FAQs

Can I use a charcoal grill for cooking the marinated chicken?

Yes, but you need to be very careful about surface temperature. And, of course, times will vary. On most charcoal grills, you will need to adjust the venting.

What does "bloom" garlic mean?

To "bloom" garlic, you just cook it separately for a brief time. Just get some butter or other liquid bubbling and add the garlic for 30-60 seconds. It is not to "cook" or brown the garlic, but it brings out the flavor a lot more and makes it less "raw". I will almost always do it on stovetop recipes that use raw garlic; in crockpot recipes, I don't bother.

Can I reuse the marinade?

No. Once it is used, the marinade should be considered contaminated and discarded. If you want to brush on some of the marinade during cooking, you must reserve a small amount before marinating the chicken.

How long can I marinate the chicken in the marinade?

As little as 15 minutes gives excellent flavor, but 30 minutes to 3 hours is preferred. If over 1 hour, please refrigerate for food safety.

Over 3 hours is not recommended because the acid in the lemon juice may damage the chicken. You should not marinate overnight.

Can I add other flavors to the marinade?

Sure, other chicken marinade recipes use things like thyme, rosemary, other herbs, and spices for various flavors. Some soy sauce and brown sugar will add different flavors.

If you use fresh lemons, adding some lemon zest is always good. If you don't have fresh garlic, use ¾ teaspoon garlic powder.

You can use extra virgin olive oil instead of the butter and vinegar for the lemon juice, but I don't recommend either—what can beat lemon, garlic, and butter?

Blue ribbon divider used for visual effect
↑Jump to Table of Contents

This recipe is listed in these categories. See them for more similar recipes.

Chicken Breast Recipes, Chicken Recipes, Grill Recipes, Sauces, Rubs, and Seasonings Recipes

Have you tried this recipe, or have a question? Join the community discussion in the comments.

Step-by-Step Photo Instructions

garlic with butter lemon juice and seasonings

Simple pantry ingredients.

adding seasoning salt to other ingredients in sauce pan

In a medium-size non-reactive saucepan, melt 6 tablespoons of butter over medium heat. Add 2 tablespoons (about 6-8 cloves) minced or crushed garlic and bloom for 1 minute. Add 6 tablespoons lemon juice, 1 tablespoon Lowrey's (or other) seasoning salt, and ½ teaspoon black pepper.  Whisk together and simmer over low heat for 2 minutes. Remove from heat and allow to cool for 5-10 minutes.

moving part of the marinade to a bowl for later

Remove 2-3 tablespoons and reserve for later brushing during grilling.

Using Chicken Marinade

I have included instructions for skinless boneless chicken breasts. This amount of marinade works well for 2 to 4 breasts depending on size. Other chicken like drumsticks, thighs, or tenders also will work well with this marinade, but cooking instructions will be different—links in the post.

flattening thick chicken breast in a plastic bag with a meat mallet

Trim the skinless chicken breast and pat dry with paper towels. If the chicken is over ¾ inches thick, flatten some with a meat mallet in a zip-top bag to avoid splatter.

two chicken breasts in pan with marinade

Add chicken breast, stir well, and ensure the breasts are coated with the marinade. Marinade for 30 minutes to 3 hours, but as little as 15 minutes will give good results. A one-gallon zip-top bag also works well for marinading. If marinading longer than 1 hour, please refrigerate for food safety.

clean and oil grill crates

Preheat the grill for 10 minutes on medium-high heat for a surface temperature of about 450°. Clean well and oil grill grate well.

placing marinated chicken breasts on grill

Place the marinated chicken over direct heat with the lid closed for 5 minutes per side.

brushing chicken breast with reserved marinade

After the first two flips, brush with the reserved marinade after each flip until you run out of marinade. Continue to cook until the internal temp of 165° is measured with a meat thermometer—about 18-22 minutes.

cooked chicken breasts on blue plate next to grill

Let rest for 5 minutes before serving.

↑Jump to Table of Contents

📖The Recipe Card

cooked chicken breasts on a blue plate
Print Recipe Add to Collection Go to Collections
4.50 from 2 votes

Grilled Chicken Marinade with Lemon, Garlic, and Butter

The best chicken marinade is yours with only 5 ingredients and 10 minutes. With the great tastes of lemon, garlic, butter, and spices, this easy chicken marinade is perfect for chicken breasts but works great with chicken tenders or any skin-on chicken like drumsticks or thighs.
Prep Time10 minutes mins
Cook Time20 minutes mins
Total Time40 minutes mins
Course: Main Course
Cuisine: American
Keyword: Chicken Marinade, Grilled Chicken Marinade, Marinade
Servings: 4 servings
Calories: 167.3kcal
Author: Dan Mikesell AKA DrDan

Ingredients

Marinade

  • 6 tablespoons butter ¾ stick
  • 6 tablespoons ReaLemon juice juice of 3 medium lemons
  • 2 tablespoons minced garlic or 6-8 cloves crushed garlic
  • 1 tablespoon Lowrey Seasoning salt
  • ½ teaspoon black pepper

Chicken

  • Skinless boneless breasts or use drumsticks, thighs, or tenders. This marinade works fine on skin.
US Customary - Convert to Metric

Instructions

  • Simple pantry ingredients.
    garlic with butter lemon juice and seasonings
  • In a medium-size non-reactive saucepan, melt 6 tablespoons of butter over medium heat. Add 2 tablespoons (about 6-8 cloves) minced or crushed garlic and bloom for 1 minute. Add 6 tablespoons lemon juice, 1 tablespoon Lowrey's (or other) seasoning salt, and ½ teaspoon black pepper.  Whisk together and simmer over low heat for 2 minutes. Remove from heat and allow to cool for 5-10 minutes.
    adding seasoning salt to other ingredients in sauce pan
  • Remove 2-3 tablespoons and reserve for later brushing during grilling.
    moving part of the marinade to a bowl for later

Using Chicken Marinade

  • I have included instructions for skinless boneless chicken breasts. This amount of marinade works well for 2 to 4 breasts depending on size. Other chicken like drumsticks, thighs, or tenders also will work well with this marinade, but cooking instructions will be different—links in the post.
  • Trim the skinless chicken breast and pat dry with paper towels. If the chicken is over ¾ inches thick, flatten some with a meat mallet in a zip-top bag to avoid splatter.
    Flattening thick chicken breast in a plastic bag with a meat mallet.
  • Add chicken breast to marinade, stir well, and ensure the breasts are coated with the marinade. Marinade for 30 minutes to 3 hours, but as little as 15 minutes will give good results. A one-gallon zip-top bag also works well for marinading. If marinading longer than 1 hour, please refrigerate for food safety.
    two chicken breasts in pan with marinade
  • Preheat the grill for 10 minutes on medium-high heat for a surface temperature of about 450°. Clean well and oil grill grate well.
    clean and oil grill crates
  • Place the marinated chicken over direct heat with the lid closed for 5 minutes per side.
    placing marinated chicken breasts on grill
  • After the first two flips, brush with the reserved marinade after each flip until you run out of marinade. Continue to cook until the internal temp of 165° is measured with a meat thermometer—about 18-22 minutes.
    brushing chicken breast with reserved marinade
  • Let rest for 5 minutes before serving.
    cooked chicken breasts on blue plate next to grill

Notes

Pro Tips

  1. Use for almost any chicken, but cooking instructions for the chicken will vary. I have included only instructions for skinless boneless breasts. Drumsticks, thighs, or chicken tenders are other good choices—links in the post for cooking instructions.
  2. To "bloom" garlic, you just cook it separately for a brief time. Just get the butter bubbling and add the garlic for 30-60 seconds. It is not to "cook" the garlic, but it brings out the flavor a lot more and makes it less "raw". I will almost always do it on stovetop recipes that use raw garlic; in crockpot recipes, I don't bother.
  3. Let the marinade cool before adding the chicken.
  4. You can use the marinade for basting the chicken while cooking, but to do this, you must reserve some before adding the chicken to the marinade for safety.
  5. No brining is allowed here. There is lots of salt in the marinade already.
  6. Cooking on the grill or baking in the oven.
  7. Leftovers are wonderful on salad.
  8. Nutrition is calculated for marinade only. Most experts estimate that less than 10% of marinade is absorbed, so this is way overstated. But if you are on a restricted sodium diet, decreasing the seasoning salt or using a salt-free substitute is wise.

Nutrition

Calories: 167.3kcal | Carbohydrates: 4.2g | Protein: 0.8g | Fat: 17.1g | Saturated Fat: 10.8g | Polyunsaturated Fat: 0.7g | Monounsaturated Fat: 4.4g | Trans Fat: 0.7g | Cholesterol: 45.1mg | Sodium: 1140mg | Potassium: 61.6mg | Fiber: 0.3g | Sugar: 0.7g | Vitamin A: 528.2IU | Vitamin C: 11mg | Calcium: 21.1mg | Iron: 0.2mg

Originally Published May 20, 2010. Updated with expanded options, reshot photos on July 31, 2022, and a table of contents to help navigation.

Dogs playing in the yard
Hoggy needs some chicken
This is Hoggy, who was visiting dog the day this recipe was originally published.

Waldorf Chicken Salad

Waldorf chicken salad with fruit on white plate

Waldorf Chicken Salad is the perfect brunch recipe—delicious, eloquent, and easy to make with tender chunks of chicken, apples, grapes, nuts, and celery in a creamy dressing. It is super easy to make and will impress everybody.

Ingredients

Cooked chicken
Apple
Celery
Grapes
Pantry ingredients—lemon juice, mayonnaise, salt, pepper, red onion (optional)
Chipped nuts —Walnuts, almonds, or pecans

Waldorf chicken salad with fruit on white plate.
[feast_advanced_jump_to]
Blue ribbon divider used for visual effect

Featured Comment from Cody:
"5 stars. First things first. EXCELLENT Recipe!!!!… I've probably made it ten times, and it was great every time…

Waldorf Chicken Salad is savory and sweet while being a great combination of flavors and texture. Leftover chicken can become a simple classic meal. It is a cold chicken salad recipe with grapes, nuts, and apples.

I always think of it as a fancy "brunch" recipe, but it is an excellent dish for many uses. Served on a bed of greens, in a sandwich or warp—it's a perfect brunch, homemade light lunch, picnic, or easy dinner.

👨‍🍳How to Make Waldorf Chicken Salad—Step-by-Step

Diced chicken with nuts and fruit for Waldorf chicken salad.

1. You need about 2 cups of cooked chicken. Rotisserie or other leftover chicken works well, or bake a large breast.

walnuts in a frying pan.

2. Chop ½ cup of walnuts; almonds or pecans will work. To increase crunchiness, toast the nuts over medium heat in a small nonstick pan for 4-5 minutes.

diced apple on a white board.

3. Clean, core, and chop one firm apple. Do not peel.

diced celery on a white board.

4. Clean and trim one rib of celery. Dice into relatively small pieces.

red grapes cut in half a white board.

5. Clean and cut in half 1 cup of red seedless grapes. Optional: ½ cup finely chopped red onion (about ½ medium-sized onion).

mixing fruit and vegtables with chicken.

6. Combine the apple, celery, and grapes in a large mixing bowl. Sprinkle with 1 tablespoon lemon juice and mix well to coat.

mixing all ingredients together for Waldorf chicken salad.

7. Add onion, nuts, and ½ cup of mayonnaise—salt and pepper to taste (about ¼ teaspoon salt and ⅛ teaspoon pepper). Mix well, cover, and refrigerate for at least one hour to allow all ingredients to cool and blend flavors.

Waldorf chicken salad with fruit on white plate—Wide view.

8. Serve on a plate, in a wrap or a pita, on crackers, on a salad, or in a sandwich.

For more details, keep reading. See the Recipe Card below for complete instructions and to print.

Ingredients variations and options

Chicken

You want about two cups of diced or shredded cooked chicken. Leftover rotisserie chicken should be fine.

You can cook the chicken however you want, but keep it moist. If you have a couple of small or one large raw skinless boneless chicken breasts, trim and bake them for about 35-40 minutes in a 350° oven to an internal temperature of 165°.

Apples

Much seems to be made of what apple to use for this or that. I believe it is more a matter of individual taste. So probably the apples you have is fine.

I think a firmer apple and tarter is the best choice here. So, if you are buying apples just for this recipe, good choices are Ida Red, Fuji, Honeycrisp, Gala, or Granny Smith apples.

Nuts

While the original Waldorf salad did not have nuts, they are standard now. Chopped walnuts, pecans, or almonds are also commonly used.

Toasting the nuts does add a lot of extra taste, and I highly recommend it, but it is optional.

Dressing

Mayonnaise is the most common dressing, but Greek yogurt and sour cream are occasionally used. You can make it your own with a combination. I like to use light mayonnaise.

One commenter has suggested mayonnaise with olive oil will give the best results.

Other Ingredients

Celery is a must for the crunch it provides.

Grapes, like celery, are a mandatory ingredient and provide sweetness to the other savory elements. Use seedless red grapes, but green grapes are fine. Some people will substitute raisins or dried cherries for the grapes. A few versions will use cranberries.

Lemon juice is added to keep the apple from turning brown and will add a bit of taste.

I like a bit of red onion, but it is an optional ingredient.

Other Easy Brunch Recipes

I always think of Waldorf salad as a fancy brunch version of my Basic Chicken Salad Recipe. Here are a few others to try: Southwest Chipotle Chicken Salad, Simple Spinach Salad, Caprese Pasta Salad, and Broccoli Salad with Bacon.

How to serve Waldorf Chicken Salad?

Waldorf chicken salad should be served very cold to bring out the crunchiness. Serve it on a bed of Romaine or leaf lettuce, in a wrap or sandwich, or straight up on a plate or in a small bowl.

Recommended side dishes are a fresh fruit salad or a garden salad.

How to store Waldorf Chicken Salad?

Leftover Waldorf salad can be stored in airtight containers in the refrigerator for 2-3 days. It will not freeze well.

❓FAQs

Why is it recommended to refrigerate for at least one hour before serving?

That hour does two things: it will allow the flavors to come together and improve the crunchiness when served cold.

Why is the lemon juice added?

The fresh apple needs a splash of lemon juice to prevent browning when exposed to air.

What is Waldorf Salad?

Waldorf salad was created at New York City's Waldorf-Astoria Hotel in 1896 by Oscar Tschirky, the maître d'hôtel. The original recipe contained only apples, celery, and mayonnaise. Chopped walnuts later became part of the dish.

Chicken is the most common add-in, making this salad a main dish-worthy brunch classic, fancy light lunch, or easy family dinner. But there are numerous variations.

This recipe is listed in these categories. See them for more similar recipes.

Chicken Breast Recipes, Chicken Recipes, Salad Recipes

Have you tried this recipe, or have a question? Join the community discussion in the comments.

📖The Recipe Card

Waldorf chicken salad with fruit on white plate
Print Recipe Add to Collection Go to Collections
5 from 1 vote

Waldorf Chicken Salad

Waldorf Chicken Salad is the perfect brunch recipe—delicious, eloquent, and easy to make with tender chunks of chicken, apples, grapes, nuts, and celery in a creamy dressing. Super easy to make and will impress everybody.
Prep Time20 minutes mins
Cooling Time1 hour hr
Total Time1 hour hr 20 minutes mins
Course: Main Course
Cuisine: American
Keyword: Brunch Recipe, Chicken Salad, Waldorf Chicken Salad
Servings: 4 large servings
Calories: 331.1kcal
Author: Dan Mikesell AKA DrDan

Ingredients

  • 2 cups diced chicken
  • 1 firm apple
  • 1 rib celery
  • 1 cup grapes
  • 1 tablespoon lemon juice
  • ½ cup chipped nuts Walnuts, almonds, or pecans. Toasting is optional.
  • ½ cup red onion finely chopped Optional. About ½ medium size onion
  • ½ cup mayonnaise low-fat suggested
  • salt and pepper to taste
US Customary - Convert to Metric

Instructions

  • You need about 2 cups of cooked chicken. Rotisserie or other leftover chicken works well, or bake a large breast.
    Diced chicken with nuts and fruit for Waldorf chicken salad
  • Chop ½ cup of walnuts, but almonds or pecans will work. Optional: toast them over medium heat in a small nonstick pan for 4-5 minutes to increase crunchiness.
    walnuts in a frying pan
  • Clean, core, and chop one firm apple. Do not peel.
    diced apple on a white board
  • Clean and trim one rib of celery. Dice into relatively small pieces.
    diced celery on a white board
  • Clean and cut in half 1 cup of red seedless grapes. Optional: ½ cup finely chopped red onion (about ½ medium-sized onion).
    red grapes cut in half a white board
  • Combine apple, celery, and grapes in a large mixing bowl. Sprinkle with 1 tablespoon lemon juice and mix well to coat.
    mixing fruit and vegtables with chicken
  • Add onion, nuts, and ½ cup of mayonnaise—salt and pepper to taste (about ¼ teaspoon salt and ⅛ teaspoon pepper). Mix well, cover, and refrigerate for at least one hour to allow all ingredients to cool and blend flavors.
    mixing all ingredients together for Waldorf chicken salad
  • Serve on a plate, in a wrap or a pita, on crackers, on a salad, or in a sandwich.
    Waldorf chicken salad with fruit on white plate—Wide view

Notes

Pro Tips

  1. This is an easy recipe to scale to your ingredients and needs.
  2. You need about 2 cups of cubed or shredded chicken. So leftover or rotisserie chicken works well. Or you can bake a couple of small or a large skinless chicken breast at 375° for about 35 minutes until an internal temperature of 165°.
  3. Walnuts are the classic nut used, but pecans or almonds work fine. Toast the nuts a bit to add flavor if you have time.
  4. Use a firm apple or just the apple you like. I suggest Granny Smith or Ida Red as good choices.
  5. Lemon juice is used to prevent the browning of the apple.
  6. Good refrigerated for 3-4 days. Not a good candidate for freezing.

Nutrition

Calories: 331.1kcal | Carbohydrates: 18.3g | Protein: 20.3g | Fat: 20.6g | Saturated Fat: 3.2g | Polyunsaturated Fat: 11.6g | Monounsaturated Fat: 4.5g | Trans Fat: 0.01g | Cholesterol: 57mg | Sodium: 438.9mg | Potassium: 384.2mg | Fiber: 2.6g | Sugar: 12.2g | Vitamin A: 145.8IU | Vitamin C: 5.3mg | Calcium: 35.2mg | Iron: 1.5mg

Editor's Note: Originally Published June 30, 2010. Updated with expanded options, refreshed photos, and a table of contents to help navigation.

Lilly dogs setting by flower.

Grilled Pineapple Slices with Brown Sugar Cinnamon Glaze

close up of Grilled Pineacpple with grill marks on a blue plate

Glazed Grilled Pineapple Slices are an easy, delicious summer side dish. With a buttery caramelized brown sugar glaze, it's ready in 15 minutes.

🍍Ingredients

Pineapple—fresh
Butter
Brown sugar
Cinnamon

close up of Grilled Pineacpple with grill marks on a blue plate.
[feast_advanced_jump_to]
Blue ribbon divider used for visual effect

Featured comment from Sue:
"Fantastic!! Easy to make and delicious. Had some plain and some with a little scoop of vanilla bean Halo ice cream."

Grilled pineapple will go with almost any meal; even the leftovers are great. Great taste with the caramelized brown sugar and butter. Even the pineapple hater will love it, and you will get great results even if you skip the glaze.

Grilling fruit will bring out all the hidden flavor and sweetness; pineapple is no exception. Making pineapple spears or rings and a few pantry ingredients is simple.

👨‍🍳How to Grill Pineapple—Step-by-Step Photo Instructions

fresh pineapple with glaze ingredients.

1. Start with a "cored" pineapple to save time and work. But trimming a whole fresh pineapple works well.

clean and oil grill crates.

2. Be sure to clean and oil the grill grate well. Works well on a gas or charcoal grill.

mixing glaze in white bowl.

3. Mix melted butter, brown sugar, and cinnamon.

pineapple cut into rings.

4. Cut the pineapple into rings about ¾ inches. You can use pineapple spears instead if you wish.

dipping pineapple into the glaze.

5. Dip into the glaze covering all sides and place directly on the grill.

placing pineapple rings on the grill grates.

6. Flip in 3-4 minutes. Total grill time of 6-8 minutes.

grilled pineapple on blue plate wide view.

7. Serve hot as a side dish or with vanilla ice cream for dessert.

Closeup of grilled pineapple on a blue plate.

For more details, keep reading. See the Recipe Card below for complete instructions and to print.

🥣Making the pineapple glaze

The glaze is just melted butter with some brown sugar and cinnamon. Melt the butter and mix the other ingredients.

You can substitute honey for brown sugar using 2 teaspoons of honey to replace 1 tablespoon of brown sugar.

Related Recipes

Once you try the grilled pineapple, check out these other great grilled side dishes. Grilled Peaches will go with ice cream, just like the pineapple. Or grilled vegetables like Grilled Stuffed Tomatoes: Italian Style or Grilled Carrots with Honey Glazed will help round out the meal. And Grilled Biscuits are always a big hit.

How to serve grilled pineapple

Grilled pineapple is the perfect side dish on your gas grill for grilled chicken breasts, grilled pork loin chops, or grilled New York strip steaks—serve it on the side or top of a grilled burger. Also, it makes an outstanding dessert when topped with a scoop of vanilla ice cream.

How to store leftover grilled pineapple

Store in the refrigerator after being grilled for 3-4 days. Serve cold or warm briefly in the microwave or on a well-oiled grill.

❓FAQs

Can I grill canned pineapple?

Not a good idea. It is thinner and softer, so it will tend to fall apart on the grill before you get the caramelized glaze.

Can I use honey in place of brown sugar?

Yes, honey is a little sweeter, so for the one tablespoon of brown sugar, use ⅔ of that, which is two teaspoons of honey.

Can I make glazed pineapple without an outdoor grill?

Yes, place it under a broiler and flip it as needed. Or, if you have an inside electric grill or griddle, it will work. On the stovetop, use a grill pan over medium heat.

🍍How to Pick a Fresh Pineapple

Let's talk pineapple first. You can pick up whole fresh pineapple or buy a precut cored, which is much easier. I don't recommend canned pineapple since the slices are thin.

  1. The pineapple’s top (the crown) should be vibrant with no wilted, brown, loose, or falling-out leaves.
  2. Feel the fruit for firm skin with a slight give; you don’t want fruit that feels spongy or has soft spots. It should also be heavy.
  3. Smell the bottom of the pineapple, which is the sweetest spot on the fruit and should smell fragrant,
  4. The color should be vibrant, with some yellow-gold color around the eyes and the base of the fruit. A ripe pineapple can be green, but you can't tell, so avoid green pineapples. There should usually be more yellow than green, with no white or brown coloring.
  5. The “eyes” of the pineapple are the roundish skin segments that cover the pineapple. The larger, the better, they should be mold-free, and flatter is better. They get bigger and flatter with ripening.

How to store a fresh pineapple

Generally, you will keep a fresh pineapple at room temperature for a few days. You can extend that by refrigerating it in a perforated plastic bag.

Once prepared, the pineapple will store well for 2-3 days.

How to cut a pineapple

  1. Cut off the crown and bottom.
  2. Stand the pineapple up and cut away the peel off in strips, deep enough to remove the eyes.
  3. If making rings, use a corer to remove the core. For spears, you can core first or time after cutting spears.

📖The Recipe Card

close up of Grilled Pineacpple with grill marks on a blue plate
Print Recipe Add to Collection Go to Collections
4.50 from 2 votes

Grilled Pineapple Slices with Brown Sugar Cinnamon Glaze

Glazed grilled pineapple slices are an easy delicious summer side dish. With a buttery caramelized brown sugar glaze, it also makes a great dessert when combined with ice cream—Ready in less than 15 minutes.
Prep Time5 minutes mins
Cook Time8 minutes mins
Total Time13 minutes mins
Course: Dessert
Cuisine: American
Keyword: Grilled Dessert, Grilled Pineapple
Servings: 6 slices
Calories: 113kcal
Author: Dan Mikesell AKA DrDan

Ingredients

  • 1 fresh pineapple
  • 4 tablespoons butter
  • 1 tablespoon brown sugar
  • 1 teaspoon cinnamon
US Customary - Convert to Metric

Instructions

  • Preheat grill on high. If grilling something else, a lower temperature. Be sure to clean and oil the grill grate well. Works well on a gas or charcoal grill.
    clean and oil grill crates
  • In a bowl with a relatively flat bottom, melt 4 tablespoons of butter in a microwave. About 25 seconds should do it. Mix in 1 tablespoon brown sugar and 1 teaspoon cinnamon.
    mixing glaze in whte bowl
  • Cut the pineapple into rings about ¾ inches. You can use pineapple spears instead if you wish.
    pineapple cut into rings
  • Dip into the glaze covering all sides and place directly on the grill.
    dipping pineapple into the glaze
  • Flip in 3-4 minutes. Total grill time 6-8 minutes.
    placing pineapple rings on the grill grates
  • Serve hot as a side dish or with vanilla ice cream for dessert.
    grilled pineapple on blue plate

Notes

Pro Tips

  1. Be sure the grill is well-cleaned and oiled.
  2. You can substitute honey for brown sugar. 2 teaspoons of honey will equal 1 tablespoon of brown sugar.
  3. Your time on the grill will vary by the surface temperature. About 3 minutes per side on high, a few more minutes if medium.
  4. You can use rings about ¾ inches thick or wedges.
  5. You may use a grill pan if you want or just on the grates. Either way, a good coat of oil is needed.
  6. Cook until changing color and nice grill marks.

Nutrition

Calories: 113kcal | Carbohydrates: 21g | Protein: 1g | Fat: 4g | Saturated Fat: 2g | Cholesterol: 10mg | Sodium: 35mg | Potassium: 164mg | Fiber: 2g | Sugar: 16g | Vitamin A: 204IU | Vitamin C: 72mg | Calcium: 20mg | Iron: 1mg

Originally Published July 28, 2017. Updated with expanded options, refreshed photos, and a table of contents to help navigation.

Molly and Lilly Dogs smiling with flower bandanas.

Dogs In Spring Flowers

Lilly and Molly in Flowers 2022

Welcome to the annual dogs in spring post, and it happens to be Mother's Day. The flowers are blooming, and the weather is finally good. So it is time for one of my favorite posts. I do love pictures of dogs with flowers.

Lilly and Molly in Flowers 2022
[feast_advanced_jump_to]
Blue ribbon divider used for visual effect

Dogs in Spring Flowers 2022

It took two photoshoots today to get enough good pictures. Mostly that is on me. I forgot the treats on the first trip into the yard.

Over the years, it has been a problem with sitting still long enough for an image, but the magic seems to be mini pretzels. Seach good dogs this year.

Lilly in Flowers 2022
Lilly being good.
Molly with in flowers 2022
Molly tolerates the situation.
Lilly and Molly running
Free at last.
Lilly and Molly smiling
We were soooo good for the pictures.

2021 Dogs in Spring Flowers

Molly and Lilly dogs setting by flower
Molly dog setting by flower
Molly setting in flowers.
Lilly dogs setting by flower
Lilly setting in flowers.
time for dog play in spring 2 2021
Playtime is here.
time for dog play in spring 2021
That was a good run.

2020 Dogs in Spring Flowers

Molly and Lilly in spring flowers 2020
Molly and Lilly in Spring Flowers 2020
Molly Spring Flowers 2020
Molly in spring flowers 2020
Lilly Spring Flowers 2020
Picture time is over - dogs in spring 2020

2019 Dogs in Spring Flowers

Dogs setting in flowers
Dogs not really into pictures today
The girls were not really into the picture thing today.
Molly and Lilly running in the yard
All they wanted was to play.
Molly setting after a run
Molly after running.
Lilly dog after running
Lilly after a good run.
Molly dog setting in flowers
Lilly dog setting in flowers

2018 Dogs in Spring Flowers

image of Lilly and Molly dogs setting next to flowers

Before we get to more dog pictures, we had a guest appearance at the pond in our backyard. Say Hi to Mr. Bald Eagle. This is the first eagle we have seen on our pond.

Mr. Bald Eagle in bare trees spring 2018
Mr. Bald Eagle

Eagles are becoming more common in our areas. But our pond, which was teaming with fish, suffered a deep freeze a few years ago, killing all the fish.  While a few small fish are slowly coming back, it will take years to recover. Hopefully, Mr. Eagle is a good sign.

image of molly dog sniffing flowers spring 2018
Molly in Flowers 2018
lilly dog smiling next to flowers spring 2018
Lilly in Flowers 2018
image of lilly and molly dogs running in yard spring 2018

2017 Dogs in Spring Flowers

Dogs in Spring with Lilly and Molly smiling.
Lilly dog having a good sniff of flowers spring 2017
Lilly is having a good sniff
Molly dog Sniffing flowers spring 2017
Molly Sniffing
Lilly dog running in green grass 2017
Fast dog Lilly.

There is nothing like a good run in the spring. And our paws aren't even getting muddy.

Molly dog running in green yard spring 2017
Molly running

2016 Dogs in Spring Flowers

Molly and Lilly dogs posing with flowers in Spring 2016
Molly dog sniffing flowers spring 2016
Lilly dog sniffing flowers spring 2016

2015 Dogs in Spring Flowers

Molly and Lilly dogs sniffing flowers in spring 2015
Molly and Lilly in flowers 2015
Lilly dog sniffing flowers in spring 2015
Lilly in flowers 2015
Molly dog sniffing flowers spring 2015
Molly in flowers 2015

2014 Dogs in Spring Flowers - we were babies

Lilly and Molly dogs as puppies smelling flowers spring 2014
Time to smell or eat the flowers
Molly dog with flowers 2014
Baby Molly in flowers 2014
Lilly dog with flowers 2014
Baby Lilly in flowers 2014

Jake - The Original Dog in Flowers - 2012

This is Jake, who died of cancer in 2013. He is adored and missed. He loved going into the flowers and setting. But usually ran away if a picture was coming.

Jake dog setting in flowers
Our beloved Jake is enjoying spring flowers
Jake with a ball
Jake with his much-loved ball.

Check Out Other Great Dog Things

Homemade Low Calorie Dog Treats

Dogs in Leaves

Dogs in Snow - Just for Fun

Have a great spring.
DrDan

↑Jump to Table of Contents

Editor’s note: Since this is an annual post of pictures, I re-edit the text and add new photos yearly. Originally published on April 17, 2017.

Easy Homemade Pizza Dough

making out pizza dough

Make this fast and easy Homemade Pizza Dough recipe with only 5 ingredients—perfect for a 13X9 sheet pan or a thinner crust 16-inch round pizza.

Have dinner on the table in under an hour. Make a small batch or for a crowd. An economical, adaptable pizza dough that can be made ahead and may be used for thick or thin-crust pizzas.

Ingredients

Flour—usually all-purpose flour
Yeast—rapid or quick yeast
Sugar
Salt
Olive oil 

making out pizza dough.
[feast_advanced_jump_to]
Blue ribbon divider used for visual effect

Featured comment from Kris:
"5 stars. Nice and crisp when cooked and held up to way too many toppings that my husband chopped for me. We really enjoyed. Best pizza I've ever made! Thanks so much."

I have used this easy pizza dough recipe for over 50 years. It may have evolved slightly, but the basic recipe is the same. A few simple steps are all that is needed: five ingredients and mix them by hand.

If you don't want yeast pizza dough, try Bisquick® Pizza Dough, which uses baking powder. Other pizza choices are French Bread Pizza, Crock Pot Pizza, or Tortilla Pizza.

👨‍🍳How to Make Homemade Pizza Dough—Step by Step

flour with yeast and dough ingredients.

Ingredients most of us have on hand.

mixing yeast into warm water with oil.

1. In a large mixing bowl, combine 2 cups of warm water (about 100°-110°) with 1 tablespoon of olive oil, 1 teaspoon of sugar, and one packet ( 2 ¼ teaspoons) of rapid/instant rising yeast. Mix well. Let sit a few minutes until foaming some, then add 1 teaspoon salt.

adding flour to the yeast liquid.

2. Add 4 cups of AP flour. Mix well with a spatula or wooden spoon. Finish with a bit of hand kneading to get all the flour incorporated for a few minutes in the bowl.

hand kneeding dough in a large bowl.

3. Add a little more flour or water to make it relatively light and still a little sticky or too firm. Usually, you won't need to add anything. Lightly coat the dough and the bowl with a bit of oil.

dough rising in the bowl.

4. Cover with a towel or plastic wrap in a warm place until double in size — about 30 minutes.

making out pizza dough on a sheet pan.

5. This recipe makes enough pizza dough for a 13X9 sheet pan or a 12-inch round pizza pan with a moderately thick crust.

slice of homemade pizza on a white plate.

Keep reading for more details about ingredients and the next steps in making pizza. See the Recipe Card below for complete dough instructions and to print.

🥣Ingredient Notes

Flour:

Good old-fashioned all-purpose (AP) flour is my favorite for pizza dough because it gives a little rougher texture that enhances the pizza.

Bread flour works fine—the crust is a little crispier and finer in texture, but it is a good choice if you have it in the pantry. Or there is special pizza flour with a finer grind that will be very smooth.

I sometimes make partial whole wheat pizza using 25% whole wheat flour with honey instead of sugar, but more than 25% needs some special treatment. This is not a gluten-free recipe; gluten-free flour may work, but I'm not testing them.

Yeast:

All baking dry yeast is the same organism (Saccharomyces cerevisiae). Old-fashioned active dry yeast is processed differently and has less live yeast, so it will work slower. I suggest quick or instant yeast, which works faster.

Add the yeast to the water to be sure it is evenly distributed. And you should "proof" yeast by letting it sit for a few minutes to form some bubbles to "prove" that it is good.

The amount of yeast in a packet is about 2 ¼ teaspoons. I usually use bulk yeast and a light tablespoon (3 teaspoons minus a little) as the same thing.

Other ingredients for flavoring:

You can add extra flavor to the pizza dough with ¼ teaspoon garlic powder or other seasonings, like basil or oregano.

Keep it Warm!

You must "keep it warm." Here are a few tips.

  1. "Preheat" your bowl with hot water.
  2. Use water of 100°-110° in the dough.
  3. Do NOT put the bowl on a stone-type countertop. Put a wooden cutting board between it and the counter if that is where you want it to let it rise.
  4. Cover with a heavy towel or plastic wrap.
  5. Don't keep checking it. It will take about 30 minutes to double in size.
  6. If the house is cool, preheat your oven to its lowest setting, turn it off, and use it as your warm spot to raise the dough.

❄️Making Pizza Dough Ahead

Let the dough rise, then punch down and form a flattened ball. Give it a light coat of olive oil, then seal it tightly with plastic wrap. Good refrigerated for  1-2 days or frozen for 2-3 months. To thaw the frozen pizza dough, leave it overnight in the refrigerator.

Once thawed or just refrigerated, let the dough sit at room temperature for about 30-60 minutes, then make the dough out on the pan. Spreading cold dough is almost impossible. I like to let the dough start rising before making the pizza.

🍕Tips for Making Your Pizza

This recipe makes enough pizza dough for a 13X9 sheet pan or a 12-inch round pizza pan with a moderately thick crust. It will also make a thinner 16-inch round. You can also make two 9 to 10 inch round pizzas with medium crusts or two 12-inch pizzas with thinner crusts.

If using a pan, use a generous splash of olive oil and spread by hand. If using a pizza stone or grill, spread the dough with a rolling pin on a floured surface or pizza peel. You can use cornmeal instead of flour. If you don't have a pizza peel, use a baking sheet without a rim to transfer the pizza to the hot pizza stone.

You can also make mini pizzas, any size you want—watch the color when cooking.

Pizza Sauce

Please DO NOT use a jar or canned pizza sauce. Mine is much better.

My suggested sauce: One 6 oz can of tomato paste and 6 oz water. Add ½ teaspoon salt, ½ teaspoon pepper, 1 clove of garlic, about half a small chopped onion, and 1 teaspoon oregano—a pinch (¼ teaspoon) of crushed red pepper for a touch of heat.

The tomato paste gives a touch of sweetness and a deeper tomato taste than tomato sauce.

Toppings

Make a plain cheese pizza, a vegan veggie pizza, a pepperoni pizza, or any type you want.

I suggest about one pound of browned Italian sausage, a chopped ½ green pepper, and 4 oz of pepperoni, topped with 3-4 cups of mozzarella cheese. I like to toss a bit more pepperoni on the cheese before baking.

For a change of pace, try my White Pizza with chicken.

How to Bake Pizza in the Oven

Most of us don't have a high-temperature pizza oven, so use a preheated 400° convection oven or 425° conventional. Other oven temperatures may be used, but the cooking time will vary. If you cook a very thick pizza, a lower temperature is better. Very high temps for crispy, thin-crust pizzas.

The cooking time will vary by the thickness, amount, and types of toppings. It may be as low as 15 minutes, but my loaded pizza takes 20-25 minutes to brown nicely.

🎈Large Groups and Pizza Parties

This is an excellent recipe for a large-scale pizza party or group. The pizzas are large, and the dough is easy to make or make ahead.

So just multiply the ingredients as a starting point. I usually start with 2 cups of flour per cup of liquid.

One last thing to know: a pound of flour is about 3 ⅓ cups of flour.

❓FAQs

Can I freeze a homemade pizza before cooking it?

Yes. You can make out the dough on a pan, bake for 5 minutes, then let it cool and freeze. If you want, go ahead with the sauce, toppings, and cheese before freezing.

You can also freeze the dough after rising, punch it down, and form it into flattened balls after a light coat of oil and a tight wrap of plastic wrap.

Should I poke holes in the pizza crust before baking?

Some recommend small fork puncture holes to prevent air bubbles under the crust. I don't bother with it. I have only seen a few bubbles over the years. If you elect to do this, do it like a pie crust.

What is the best way to reheat pizza?

The oven is, by far, the best way to reheat leftover pizza. And a pizza stone is preferred.

Put the leftovers on a cold pizza stone, give it a very light sprinkle of water on any crusty edge, then put it into a 350° oven without a cover.

Blue ribbon divider used for visual effect

This recipe is listed in these categories. See them for more similar recipes.

101's Best Recipes, Italian Recipes, Pizza Recipes

Have you tried this recipe, or have a question? Join the community discussion in the comments.

📖The Recipe Card

making out pizza dough
Print Recipe Add to Collection Go to Collections
5 from 1 vote

Easy Homemade Pizza Dough

Make this fast and easy Homemade Pizza Dough recipe with only 5 ingredients—perfect for a 13X9 sheet pan or a thinner crust 16-inch round pizza.
Prep Time50 minutes mins
Cook Time25 minutes mins
Total Time1 hour hr 15 minutes mins
Course: Main Course
Cuisine: Italian
Keyword: Homemade Pizza, pizza dough
Servings: 12
Calories: 163.3kcal
Author: Dan Mikesell AKA DrDan

Ingredients

  • 2 cups water 100°-105°
  • 4 cups AP flour
  • 1 pack rapid or quick yeast
  • 1 teaspoon sugar
  • 1 teaspoon salt
  • 1 tablespoon Olive oil olive oil preferred
  • addition olive oil—for the dough, bowl, and pan.
US Customary - Convert to Metric

Instructions

  • In a large mixing bowl, combine 2 cups of warm water (about 100°-110°) with 1 tablespoon of olive oil, 1 teaspoon of sugar, and one packet ( 2 ¼ teaspoons) of rapid/instant rising yeast. Mix well. Let sit a few minutes until foaming some, then add 1 teaspoon salt.
    mixing yeast into warm water with oil
  • Add 4 cups of AP flour. Mix well with a spatula or wooden spoon. Finish with a bit of hand kneading to get all the flour incorporated for a few minutes in the bowl.
    adding flour to the yeast liquid
  • Add a little more flour or water to make it relatively light and still a little sticky or too firm. Usually, you won't need to add anything. Lightly coat the dough and the bowl with a bit of oil.
    hand kneeding dough in a large bowl
  • Cover with a towel or plastic wrap in a warm place until double in size — about 30 minutes.
    dough rising in the bowl
  • Use it to make your favorite homemade pizza. This recipe makes enough pizza dough for a 13X9 sheet pan or a 12-inch round pizza pan with a moderately thick crust.
    cooked pizza on a sheet pan

Notes

Pro Tips:

  1. This recipe makes enough pizza dough for a 13X9 sheet pan or a 12-inch round pizza pan with a moderately thick crust. It is will also make a thinner 16-inch round. You can also make two 9-10 inch round pizzas with medium crust or two 12-inch pizzas with thin crusts.
  2. This is a great recipe to feed a large group or have a pizza party. Make the dough ahead or at the time it is needed. Start with 2 cups of flour per cup of liquid and add more as needed. And also know that 1 pound of flour is 3 ⅓ cups of flour.
  3. There is nothing really exact in this recipe. It will work as long as you are close. Just get the mixing texture right.
  4. Use AP flour. Bread flour can be used but will change the texture a bit.
  5. Non-wheat flours are probably not a good idea in this recipe.
  6. A package of yeast is 2 ¼ teaspoons. I use bulk yeast and generally use a "light" tablespoon.
  7. I like to "proof" my yeast.
  8. Use the sauce and toppings of your choice.
  9. I hate to say oven temperature doesn't matter, but I have cooked this with oven temperatures of 350° to 450° all with good results. I prefer higher temperatures a bit, but if you want that thicker crust, I don't like 450.
  10. You can make it ahead by letting it rise once, form into a flattened ball and give it a light coat of oil and seal it tight. Good refrigerated for 1-2 days or frozen for 2-3 months. To thaw the frozen dough, just overnight in the refrigerator. Once thawed or just refrigerated, let the dough sit at room temperature for about 30-60 minutes then make the dough out on the pan.
  11. Nutrition is calculated on the crust only.

Nutrition

Calories: 163.3kcal | Carbohydrates: 32.1g | Protein: 4.3g | Fat: 1.6g | Saturated Fat: 0.2g | Polyunsaturated Fat: 0.3g | Monounsaturated Fat: 0.9g | Sodium: 196.6mg | Potassium: 44.6mg | Fiber: 1.1g | Sugar: 0.4g | Calcium: 7.6mg | Iron: 1.9mg

Editor's Note: Originally published September 14, 2011, but used since the mid-1960s, updated with expanded discussion, new photos, and a table of contents.

Molly and Lilly dressed for the game.

Crispy Homemade French Fries in the Oven

golden French fries in a bowl

These crispy homemade French fries are easy to make in the oven with fresh-cut Russet potatoes. Soak and dry the fries before baking at high temperature for a crisp outside with a tender center.

For the crispiest results, bake them on a rack in a convection oven. The circulating hot air crisps all sides, so there’s no flipping.

🤔 How do I make crispy homemade French fries in the oven?

For the crispiest fries:

  • Potatoes: Use Russet potatoes, cut evenly, soak, and dry well.
  • Oven: Use a convection oven.
  • Baking: Bake in a single layer on a rack.
pile of golden French Fries
[feast_advanced_jump_to]

quote mark
Featured Comment by Linda:
⭐⭐⭐⭐⭐
"Dan, you da man! This is a brilliant recipe. I've made these fries four times and see no reason to use another."

📝 TL;DR — Recipe Summary

What: Crispy homemade French fries baked from fresh-cut Russet potatoes.

Why: A rack and convection give the fries a crisp exterior without flipping.

How: Cut, soak, dry, season, and bake until golden and crisp.

🥔 Ingredients

potatoes with salt and oil
  • Potatoes: Russet potatoes are best for crispy homemade fries. Yukon Golds work but are creamier and less crisp.
  • Oil: Vegetable or olive oil.
  • Salt: Kosher or sea salt. Other seasonings may be added.

👨‍🍳 Quick Overview: How to Bake Crispy French Fries

1. Fresh-cut fries: Scrub and peel Russet potatoes. Cut into ¼- to ⅜-inch fries.

cutting potatoes with a mandolin B

2. Soak in cold water for 20–30 minutes to remove excess starch, rinse, and dry thoroughly. Coat lightly with oil.

adding cut french fries to water

3. Arrange fries on the rack in a single layer. Sprinkle with coarse salt.

raw French fries on rack with salt

4. Bake at 425°F convection until golden brown, about 30 minutes. Season again while hot.

baked fries on a rack

👇 Scroll down for the printable recipe card and complete step-by-step photo instructions—or keep reading for tips.

🤔 Tips for Baked Homemade French Fries

♨️ Baking Tips: 

  • Always fully preheat the oven.
  • Convection at 425°F gives the crispiest results. No convection? Use 425°F–450°F and flip halfway through—it may take longer.
  • Use a rack on a baking sheet for airflow around the fries. No rack? Use parchment paper and flip halfway through.
  • Cook in a single layer for even browning.

🥔 Potato tips:

  • Russets: Make the crispiest fries but should be peeled.
  • Yukon Golds: Creamier but less crisp and may be left unpeeled.
  • Cutting: A mandoline works well, but follow its safety instructions.
  • Soaking: Soak fresh-cut potatoes to remove surface starch, then dry completely to prevent steaming.
  • Frozen fries: Do not thaw. Transfer directly from the freezer to the rack, season, and bake.

🧂 Seasoning Ideas

Salt is all you need, but other seasonings work well.

  • Spices: Try paprika, garlic powder, chili powder, cayenne, Cajun seasoning, or ranch dressing mix.
  • Finishing: Add Parmesan or chopped herbs like parsley or chives while the fries are hot.

❄️ Leftover French Fries: Storage and Reheating

Storage: Refrigerate leftover fries in an airtight container for up to 3 days.

🔁 How to Reheat French Fries: For crispy leftover fries, skip the microwave.

  • Air fryer: Reheat at 375°F for 3–5 minutes.
  • Oven: Reheat in a single layer at 400°F for 5–8 minutes. A rack helps restore crispness.

❓ FAQs

Can I use sweet potatoes?

Not with this method. Sweet potatoes need a different approach to crisp up in the oven.

Should I thaw frozen fries before baking?

No. Bake frozen fries straight from the freezer—do not thaw.

📖 Crispy Potato Recipes

  • Easiest Homemade French Fries — Stovetop fries starting with cold oil.
  • Grilled French Fries — An easy alternative for grilling.
  • Crispy Smashed Potatoes — An easy crispy potato side.

📖The Recipe Card

golden French fries in a bowl
Print Recipe Add to Collection Go to Collections
4.84 from 6 votes

Crispy Homemade French Fries in the Oven

Make crispy homemade French fries from fresh-cut Russet potatoes using a rack and convection oven. An easy method for golden, crunchy fries with no flipping.
Prep Time30 minutes mins
Cook Time30 minutes mins
Total Time1 hour hr
Course: Potato, Potatoes
Cuisine: American
Keyword: Crispy baked French fries, Homemade Crispy French Fries in the Oven
Servings: 4 servings
Calories: 115kcal
Author: Dan Mikesell AKA DrDan

Ingredients

Potatoes

  • 2 russet potatoes about 1 pound
  • 1 teaspoon coarse salt to taste
  • 1 tablespoon oil
US Customary - Convert to Metric

Instructions

Preheat the oven and prep the tray

  • Preheat oven to 425° convection.
    potatoes with salt and oil
  • Line a baking sheet with foil and place a rack on top. Spray the rack with PAM cooking spray.
    Prepare a tray with a rack, foil, and cooking spray.

Prep fresh-cut fries

  • Scrub the potatoes. If using Russets, peel first. Cut into ¼–⅜ inch fries. A mandoline works well—just follow safety directions.
    cutting potatoes with a mandolin B
  • Soak in cold water for 20–30 minutes to remove surface starch.
    adding cut french fries to water
  • Rinse several times, then dry thoroughly with paper towels.
    drying French fries with paper towels

Coat with oil

  • Dry the bowl, return the fries, and toss with 1 tablespoon of oil.
    coating French fries with oil

Arrange and season

  • Arrange fries on the prepared rack in a single layer. They can touch slightly, but don’t overlap. Sprinkle lightly with coarse salt.
    raw French fries on rack with salt

Bake until crispy

  • Bake for about 30 minutes or until golden brown and crisp. Season again while hot.
    baked fries on a rack

Notes

Pro Tips

  • Russet potatoes work best; Yukon Golds are creamier but less crisp.
  • Soak cut potatoes for 20–30 minutes and dry thoroughly.
  • Frozen fries may be substituted; do not thaw. Start at the oiling step.
  • Without a rack or convection, flip halfway through and expect slightly softer fries.
  • Two large potatoes fill a half-sheet pan and serve four.

Nutrition

Serving: 3ounces | Calories: 115kcal | Carbohydrates: 19g | Protein: 2g | Fat: 4g | Saturated Fat: 1g | Sodium: 587mg | Potassium: 444mg | Fiber: 1g | Sugar: 1g | Vitamin C: 6mg | Calcium: 14mg | Iron: 1mg

Editors Note: Originally Published: September 23, 2012. Updated with expanded options, refreshed photos, and a table of contents to help navigation.
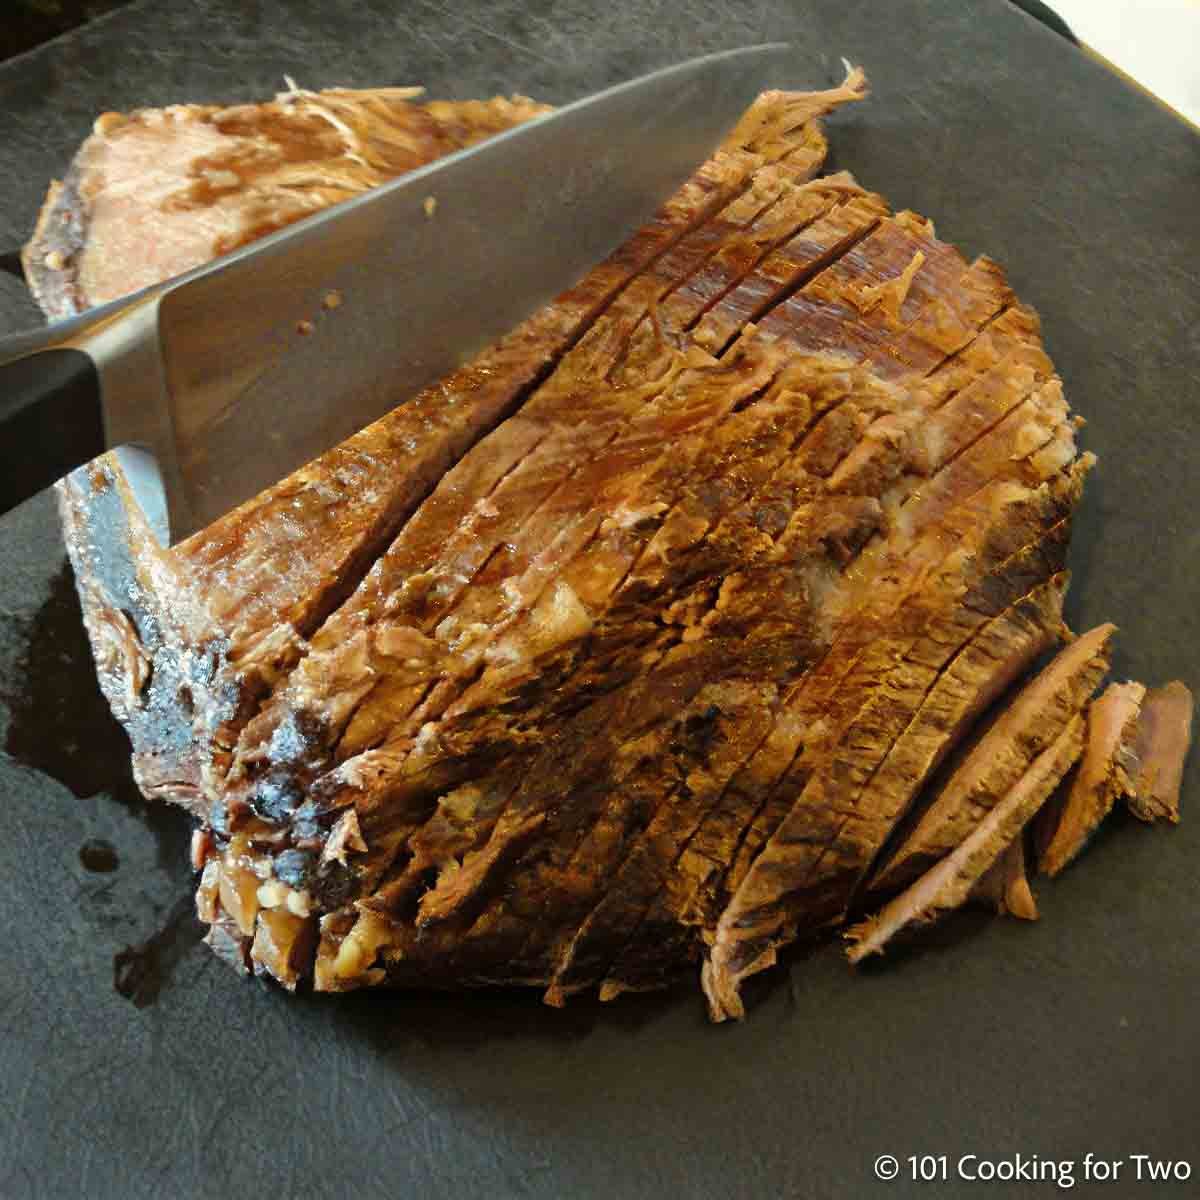
Molly Dog and Lilly Dog Playing in the yard

Easiest Oven Roasted Whole Chicken

A piece of roasted chicken on a fork.

Anyone can bake a moist and tender whole chicken with the crispiest skin with only a few steps. This simple roast chicken recipe is the perfect healthy comfort food you can easily make at home. Based on an American Test Kitchen technique, I have simplified, added troubleshooting tips, expanded options, and added gravy.

🐓Ingredients

Whole chicken—about 4 lb.
Butter—or oil
Salt and Pepper—to taste. Or the seasoning of your choice.
Optional Gravy—All-purpose flour, chicken broth, salt

A piece of roasted chicken on a fork.
[feast_advanced_jump_to]

This is very close to that "ideal" recipe of just throwing something in the oven and having it come out with great taste and moisture, with crispy skin.

Based on an American Test Kitchen recipe, I took the technique, expanded the details, simplified it, and added troubleshooting tips. And, of course, a super-easy, quick gravy—everybody loves gravy.

👨‍🍳How to Oven-Roast a Whole Chicken—Step-by-Step Photo Instructions

spraying a cast iron skillet with PAM

1. Spray a 12-inch oven-safe pan (cast iron preferred) with PAM. Place in the oven and preheat to 425° convection or 450° conventional.

whole chicken prepared for cooking with tied legs

2. Pat dry a whole chicken, tie legs together with kitchen string, and tuck wings under.

rubbing butter onto a whole chicken

3. Coat the surface of the chicken with a good brush of oil or a tablespoon of butter. Butter will tend to smoke more.

seasoning a raw whole chicken

4. Season the chicken with salt and pepper to taste. I'm using some of my 7:2:1 All-Purpose Seasoning, but you can season it any way you want.

moving the whole chicken to the pan

5. Transfer the chicken to your preheated pan. Let it roast until the breast temperature is 120° and the thigh is 135°. Depending on the chicken size and your oven, this will take about 30 minutes.

whole roasted chicken cooked in skillet wide view

6. Turn OFF the oven and let it sit in the hot oven until breast temp is 165° and thigh is 175°+, about 30 minutes. Remove and tent for 5-10 minutes.

Making gravy

Whisking flour into liquid.

1. Whisk flour into cold water.

adding broth to cast iron skillet

2. Use the baking pan with all the drainage and add chicken broth. Bring to a boil and scrape anything off the bottom of the pan.

whisking gravy in cast iron skillet

3. Slowly add most of the water/flour mixture while continuously stirring. Add more in a few minutes if needed. Add salt.

Chicken with gravy on a white plate.

4. Serve with the roasted chicken.

For more details, keep reading. See the Recipe Card below for complete instructions and to print.

⏰How long to bake a whole chicken

A 4-pound whole chicken will take about 1 hour to cook. It takes about 25 minutes to reach 120° when the oven is turned off, and another 30 minutes to finish cooking to 165°.

According to the USDA, chicken needs to reach 165° for safety. For texture, dark meat is better at 180°-185°, and breast meat is good at 165°. You are cooking to a final internal temperature, never by time alone. So, you must use an instant-read thermometer.

⏰Approxiate Cooking Time by Weight

Cooking time varies by your oven and the weight and thickness of the chicken.

WeightApproximate
Oven On Time
(to 120°)
Approximate
Oven Off Time
Approximate
Total Cooking Time
(to 165°)
3-3 ½ lbs about 25 minutesabout 25 minutesabout 50 minutes
4-4 ½ lbsabout 30 minutesabout 30 minutesabout 60 minutes
5 lbs35-40 minutesabout 35 minutesabout 70+ minutes
Remember to cook to a final internal temperature of 165°.

😊Make it right every time

A 3-pound chicken will be 3-4 servings, while a 4-pound chicken will be 4-6. A serving of whole chicken will need ½ to 1 pound of chicken once cooked, and account for waste.

Tie the chicken legs together with kitchen twine and tuck the chicken wing tips under the ribs. This will help them cook more, even with the chicken's body.

Be sure to pat dry with paper towels to get crispier skin. Give the chicken a good vegetable or olive oil brush for crisp skin. A light coat of butter is more traditional, which is fine.

Any roasting pan will work well, but I suggest a large cast-iron skillet, which will retain and distribute heat evenly.

I'm making the gravy using a slurry method. For a more detailed discussion, please see How to Make Gravy at Home.

🧂Seasoning options

I like to keep things simple with just a sprinkle of coarse salt and black pepper. My wife is a garlic hound, so we use our All-Purpose Seasoning—7:2:1 and 7:2:2. Many people like rosemary, thyme, other spices, or fresh herbs. Spice mixes like lemon pepper or Cajun spices are also excellent choices.

My Spicy Option: Do you want more taste, more like a tasty rotisserie chicken? Kick it up several notches with a spicy rub. Mix this spicy rub after applying the oil or butter. 4 teaspoons kosher salt, 1 teaspoon each of pepper, garlic powder, onion powder, thyme, and sugar. Then add 2 teaspoons paprika and ½ teaspoon cayenne pepper (optional).

👍The traditional method

If you want to roast the chicken straight-up without this technique, start with a 400° oven for about 20 minutes and then turn down to 350° for about another 40 minutes to reach 165°.

📖Whole Chicken Recipes

Check out other whole chicken recipes, such as Grilled Whole Chicken, Grilled Flattened Chicken, or Alabama BBQ Chicken with White BBQ Sauce.

🍽️Serving Suggestions

Roast chicken is a good companion for baked rice or roasted baby potatoes. Fresh salad and other common vegetables, such as Roasted Asparagus with Garlic and Parmesan or Microwave Corn on the Cob, are also good complements.

We like Sauvignon Blanc or Chardonnay as wine pairings with chicken or turkey, but a red wine like Pinot Noir also works well.

🤔Troubleshooting

If the chicken is not reaching the final temperature, turn the oven to 350° to finish cooking to 165°.

If the oven smokes, switch out the butter for a high-temperature oil like canola oil. Use a baking dish with higher edges to prevent splatter. Be sure the oven is clean and not smoking from previous splatter.

Some ovens leak heat from the seals or poor insulation. Instead of turning the oven off, turn it down to 200°

Also, frequently checking will cause the heat to be lost rapidly. Use a remote thermometer and keep the door closed. Only check once, about 5 minutes before it should be done.

❄️What to do with leftovers

Leftovers may be stored in an airtight container and refrigerated for 4 days or frozen for 4 months. You can also use them for chicken salad, chicken soup, or chicken chili.

❓FAQs

Should I cover the chicken with foil?

No, we are aiming for crispy skin.

Should I wash raw chicken

We do not routinely wash raw chicken due to water splatter. For more information, see Chicken... To Rinse or Not to Rinse?

📖The Recipe Card

A piece of roasted chicken on a fork.
Print Recipe Add to Collection Go to Collections
4.34 from 3 votes

Easiest Oven Roasted Whole Chicken

Anyone can bake a moist and tender whole chicken with the crispiest skin with only a few steps. This simple roast chicken recipe is the perfect healthy comfort food you can easily make at home. Based on an American Test Kitchen technique, I have simplified, added troubleshooting tips, expanded options, and added gravy.
Prep Time10 minutes mins
Cook Time1 hour hr 5 minutes mins
Total Time1 hour hr 15 minutes mins
Course: Main Course
Cuisine: American
Keyword: Baked Whole Chicken, Oven Roasted Whole Chicken, Whole chicken in a convection oven
Servings: 6
Calories: 290kcal
Author: Dan Mikesell AKA DrDan

Ingredients

  • 1 whole chicken about 4 lb.
  • 1 tablespoon butter Or oil
  • Salt and Pepper to taste. Or seasoning of your choice.

Optional Gravy - this is for 2 cups. Double if having potatoes and gravy

  • ¼ cup AP flour
  • 2 cups chicken broth
  • to taste salt
US Customary - Convert to Metric

Instructions

  • Spray a 12-inch oven-safe pan (cast iron is preferred) with PAM. Place the pan in the oven and preheat to 425° convection or 450° conventional.
    spraying a cast iron skillet with PAM
  • Pat dry a whole chicken, tie legs together with kitchen string, and tuck wings under the body.
    whole chicken prepared for cooking with tied legs
  • Coat the surface of the chicken with a good brush of oil or a tablespoon of butter. Butter will tend to smoke more.
    rubbing butter onto a whole chicken
  • Season the chicken with salt and pepper to taste. You can season any way you want.
    seasoning a raw whole chicken
  • Transfer the chicken to the preheated pan. Let it roast until the breast temperature is 120° and the thigh is 135°. Depending on the size of the chicken and your oven, this will take about 30 minutes.
    moving the whole chicken to the pan
  • Turn off the oven and let the chicken sit in the hot oven until its breast temperature is 165° and its thigh temperature is 175°+, about 30 minutes. Move the chicken to a plate and pour any liquid in the cavity into the pan. Allow the chicken to rest for 5-10 minutes before serving.
    whole roasted chicken cooked in skillet wide view
  • Move the chicken to a plate and pour any liquid in the chicken cavity into the pan for gravy.

Optional Gravy Instructions

  • Combine flour with a cup of cold water. You need 2 tablespoons of flour for every cup of gravy you make. You can use a bowl and whisk to combine the flour and water, or I like to use a Tupperware shaker.
    Whisking flour into liquid.
  • Move the pan to the stovetop and add the chicken stock or broth to the juices in the pan. Over medium-high heat, bring to a boil and scrape anything off the bottom of the pan.
    adding broth to cast iron skillet
  • Slowly add most of the water/flour mixture while continuously stirring. In about 2-3 minutes, the mixture will thicken. If it is not thick enough, add more flour mixture and continue to stir. Continue this until the desired thickness. Add salt to taste.
    whisking gravy in cast iron skillet

Notes

Pro Tips

  1. The times will vary by size, thickness, and oven. Please cook by temperature and not by time. Times are provided for timing purposes only.
  2. Season to your taste. We usually use All Purpose Seasoning - 7:2:1 and 7:2:2.
  3. Crispy skin depends on drying the skin well with a paper towel before starting.
  4. Most people will use butter to coat the chicken, but the oil may give crisper skin and less smoke.
  5. The gravy is optional. 2 cups are enough for just the chicken, but you will want 4 cups if doing mashed potatoes with gravy.
  6. The spicy option is provided in the discussion
  7. Gravy is not included in nutrition.
  8. Oven issues, smoking ovens, and troubleshooting are provided in the post. Please check there first.


Nutrition

Calories: 290kcal | Carbohydrates: 1g | Protein: 24g | Fat: 21g | Saturated Fat: 7g | Cholesterol: 100mg | Sodium: 493mg | Potassium: 240mg | Sugar: 1g | Vitamin A: 236IU | Vitamin C: 2mg | Calcium: 14mg | Iron: 1mg

Editor's Note: Originally Published October 22, 2011. Refreshed with expanded and clarified instructions and updated photos.

Molly running in the green grass.

Easy Taco Casserole

taco casserole on plate

This easy Taco Casserole recipe is packed with full-flavor taco meat in a tomato sauce, tons of cheese, and black beans in layers of tortillas.

piece of casserole topped with tomato and onion
[feast_advanced_jump_to]
Blue ribbon divider used for visual effect

Taco casserole is Mexican comfort food at its best — a wonderful taco-like southwest casserole that is easy enough to be a weeknight recipe. Others might call it Taco Bake or Tortilla Taco Casserole. A great recipe to make ahead in the fridge for a few days or as a freezer meal.

This recipe had its original inspiration from several Mexican Lasagna recipes that used dry lasagna pasta and relied on fluid to cook the pasta. But this is more of a taco meat version of my popular Healthier Chicken Enchilada Casserole in 60 Minutes and has only a slight relationship to the inspiration recipes.

The great taste of this recipe depends on my Taco Meat Recipe, which is also the base for Taco Chili.

👨‍🍳How to Make this Taco Casserole

  1. Preheat the oven to 350° conventional.
  2. Chop one small onion. In a large skillet over medium-high heat, brown 1 pound of ground beef with the onion. Add crushed garlic near end of browning and drain when done.
  3. Add tomato sauce, spices, and drained black beans.
  4. Make 3 layers of cut tortillas, meat mixture, and cheese. Use double cheese on the top layer.
  5. Bake until golden brown with an internal temperature of 165°—about 30-35 minutes.

🌮Ingredients

The Meat

Ground beef with an 80/20 fat content is the most common, and there is a point where excess fat can be drained to work. But lower fat ground beef is also acceptable.

There is lots of taste in this casserole, and ground turkey or ground chicken will work fine and only have a minor effect on the flavor.

One pound of ground meat is enough but if you like a meaty casserole as we do, use 1 ½ pounds of meat.

The Tortillas

Flour tortillas hold up better than corn tortillas, but corn will still work. Choose a size that works best when cut in half to fit in your baking dish.

Corn chips are frequently suggested, but most are thin and get soggy, and fall apart.

The Seasoning and the Sauce

This recipe combines the seasoning of the meat and the sauce using my Spicy Taco Meat and Homemade Enchilada Sauce as a model with some adjustments.

The seasoning and tomato sauce is added to make a spicy beef mixture used in the casserole. Those ingredients will simmer in the casserole, so there is no need to simmer separately.

You can make separate taco meat and enchilada sauce like my linked recipes. Or even substitute a commercial taco seasoning with enchilada sauce if you want.

The Cheese

My preferred choices are a good quality cheddar cheese, Monterey Jack cheese, or a Taco cheese blend of some type.

❓FAQs

What size of baking dish to use?

This smaller recipe is for a 6X9 or 7X10 baking dish. It also fits nicely in an 8X8 or 9X9 baking dish.

A double recipe fits nicely in a 9 by 13 full-size casserole dish, the same as a cake pan.

How to serve taco casserole.

Top with the usual taco condiments. Common are chopped tomatoes, sliced green onions, sour cream, sliced black olives, shredded lettuce, or cilantro.

Side dishes of refried beans, Mexican Rice, or tortilla chips with salsa are excellent compliments.

Can taco casserole be made ahead and baked later?

Yes, seal tightly and refrigerate for two days.

To freeze before cooking, seal tightly with plastic wrap and foil for up to 3 months. Thaw overnight in the refrigerator and remove the plastic wrap before cooking.

Baking cold out of the refrigerator will take longer, so cook to 165° and not by color only.

How to store baked taco casserole.

Refrigerate for up to 4 days and freeze for up to 3 months. If frozen, thaw overnight in the refrigerator before reheating.

📖Tex-Mex Recipes

Easy Chicken Enchilada Casserole in 60 Minutes

Easy Mexican Rice and Chicken

Easy Sour Cream Chicken Enchiladas

Crock Pot Chicken Enchilada Casserole

Spicy Taco Meat

Homemade Enchilada Sauce

Blue ribbon divider used for visual effect
↑Jump to Table of Contents

This recipe is listed in these categories. See them for more similar recipes.

Casserole Recipes, Mexican Recipes

Have you tried this recipe, or have a question? Join the community discussion in the comments.

Step-by-Step Photo Instructions

raw burger with tortillas and casserole ingredients
Oops. I am missing the shredded cheese.

Preheat the oven to 350° conventional.

adding chopped onion to burger in a fry pan

Chop one small onion. In a large skillet over medium-high heat, brown 1 pound of ground beef with the onion. Near the end of cooking, add 2-3 cloves of crushed garlic and cook additional 1-2 minutes—drain any fat.

pouring tomato sauce into pan with cooked ground meat

Add 3 tablespoon chili powder, ½ teaspoon ground cumin, ½ teaspoon salt, ½ teaspoon black pepper. Stir in a 4 oz can of green chilis, 15 oz tomato sauce, and 14 oz can of low sodium black beans drained and rinsed. Add optional 1 cup frozen corn. Mix well.

cutting a stack of flour tortillas on black board

Cut six 6-inch flour tortillas in half.

layering half tortillas into casserole dish

Prep an approximately 6X9 baking pan with cooking spray. Start by covering the bottom of the pan with four tortilla halves with the straight cut edges to the sides and ends of the pan.

sprinkling shredded cheese over layer of meat

Add ⅓ of the meat mixture—about 2 cups and sprinkle with ½ cup of shredded cheese.

casserole topped with cheese ready for oven

Repeat layering with tortilla, filling, and cheese twice more, but use the remaining cheese—1 cup on the final layer.

piece of casserole on spatula

Bake in the preheated oven at 350° for 30 to 35 minutes until nicely brown and an internal temperature of 165°. Serve with the topping of your choice.

fork full of tortilla taco casserole
↑Jump to Table of Contents

📖The Recipe Card

taco casserole on plate
Print Recipe Add to Collection Go to Collections
4.75 from 4 votes

Easy Taco Casserole

This easy taco casserole recipe is packed with full flavor taco meat in a tomato sauce, tons of cheese, and black beans in layers of tortillas. So good and so simple.
Prep Time20 minutes mins
Cook Time30 minutes mins
Total Time50 minutes mins
Course: Main Course
Cuisine: Mexican
Keyword: Easy Taco Casserole, Taco Casserole, Tortilla Taco Casserole
Servings: 6
Calories: 438kcal
Author: Dan Mikesell AKA DrDan

Ingredients

  • 1 pound ground beef may use up to 1 ½ pound
  • 1 small onion chopped
  • 2-3 cloves garlic crushed
  • 15 oz black beans drained and rinsed
  • 1 cup frozen corn optional
  • 15 oz tomato sauce
  • 4 oz green chilis
  • 3 tablespoons chili powder
  • ½ teaspoon salt
  • ½ teaspoon pepper
  • ½ teaspoon cumin
  • 6 flour tortillas
  • 2 cups shredded cheese of choice
US Customary - Convert to Metric

Instructions

  • Preheat the oven to 350° conventional.
    raw burger with tortillas and casserole ingredients
  • Chop one small onion. In a large skillet over medium-high heat, brown 1 pound of ground beef with the onion. Near the end of cooking, add 2-3 cloves of crushed garlic and cook additional 1-2 minutes—drain any fat.
    adding onion to burger in pan
  • Add 3 tablespoon chili powder, ½ teaspoon ground cumin, ½ teaspoon salt, ½ teaspoon black pepper. Stir in a 4 oz can of green chilis, 15 oz tomato sauce, and 14 oz can of low sodium black beans drained and rinsed. Add optional 1 cup frozen corn. Mix well.
    pouring tomato sauce into pan with cooked ground meat
  • Cut six 6-inch flour tortillas in half.
    cutting a stack of flour tortillas on black board
  • Prep an approximately 6X9 baking pan with cooking spray. Start by covering the bottom of the pan with four tortilla halves with the straight cut edges to the sides and ends of the pan.
    layering half tortillas into casserole dish
  • Add ⅓ of the meat mixture—about 2 cups and sprinkle with ½ cup of shredded cheese.
    sprinkling shredded cheese over layer of meat
  • Repeat layering with tortilla, filling, and cheese twice more, but use the remaining cheese—1 cup on the final layer.
    casserole topped with cheese ready for oven
  • Bake in the preheated oven at 350° for 30 to 35 minutes until nicely brown and an internal temperature of 165°. Serve with the topping of your choice.
    fork full of tortilla taco casserole
  • Serve with topping of your choice.

Notes


Pro Tips

  1. You may use up to 1 ½ pounds of ground meat.
  2. Ground turkey should be fine in this recipe.
  3. Many would make this recipe with taco seasoning and enchilada sauce. You will like mine better. 
  4. After cooking,  good refrigerated for 2 days after cooking and frozen for 3-4 months. 
  5. May be frozen before cooking for 3 months or refrigerated for 2 days.
  6. Easy to double and use a full-size casserole or cake pan.
 

Nutrition

Calories: 438kcal | Carbohydrates: 26g | Protein: 27g | Fat: 27g | Saturated Fat: 14g | Polyunsaturated Fat: 0.3g | Monounsaturated Fat: 0.4g | Trans Fat: 0.03g | Cholesterol: 87mg | Sodium: 978mg | Potassium: 567mg | Fiber: 7g | Sugar: 4g | Vitamin A: 2300IU | Vitamin C: 19.8mg | Calcium: 630mg | Iron: 3.4mg

Editor's Note: Originally published on December 3, 2017. Updated with expanded options, refreshed photos, and a table of contents to help navigation.

Dogs with Bunnies

Skinny Cajun Chicken Alfredo

Cajun Chicken Alfrado on linguini.

Skinny Cajun Chicken Alfredo is a low-fat, healthier version of your much-loved Italian classic. With creamy sauce, bold Cajun flavor, and tender chicken served over pasta, this adaptation of a classic Italian entree will become a star in your healthy diet.

Make it spicy, or make it classic skinny chicken Alfredo without the Cajun touch.

Ingredients

Chicken breasts
Pasta—linguine suggested
Dairy—milk, butter, Parmesan cheese
Garlic—crushed or powder
Pantry ingredients—olive oil, AP flour, kosher salt, black pepper
Cajun spicing—paprika, cayenne pepper, onion powder, or use commercial Cajun spice mix

Cajun Chicken Alfrado on linguini.
[feast_advanced_jump_to]
Blue ribbon divider used for visual effect

A full-fat Alfredo recipe uses heavy cream cooked to reduce the volume and thicken the sauce, then Parmesan is added. Commonly, butter and garlic are also included.

Most standard Alfredo sauce recipes have about 60 grams of fat per serving. But this healthier chicken Alfredo recipe is 15 grams per serving.

👨‍🍳How to Make Cajun Chicken Alfredo—Step-by-Step

spices for chicken alfredo.

1. Start with the spices. 1 teaspoon kosher salt, ½ teaspoon black pepper, and ½ teaspoon of garlic powder if not using fresh garlic. For cajun, add ½ teaspoon onion powder, ¾ teaspoon paprika, and cayenne pepper to taste—usually ¼ to ½ teaspoon.

raw chicken cut into small cubes.

2. Trim two medium-sized (or one large) skinless boneless chicken breasts. Cut into ½ to ¾ inch cubes.

adding spices to cooking chicken.

3. Heat 1 tablespoon olive oil in a large frypan over medium-high heat until shimmering. Add chicken and sprinkle with ½ of the spice mixture. Cook until browning and cooked throw and reaches 165°.—about 10 minutes. Then remove from heat and set aside in the same pan. It has some spices stuck to the bottom that we will use later.

fettuccine with a pasta pot.

4. Start cooking ½ pound of pasta while cooking the chicken. Cook according to package directions and drain.

whisking flour into liquid in a small bowl.

5. Whisk ¼ cup AP flour into 1 cup of cold milk until smooth. You may whisk in a bowl or use a Tupperware gravy shaker.

melting butter in sauce pan.

6. Add 1 tablespoon butter to a saucepan over medium heat. When bubbling, add 2 garlic cloves and cook for about one minute.

adding milk to saucepan with whisk.

7. Slowly add the milk/flour mixture while continuously whisking. Add one more cup of milk and ½ cup of grated Parmesan cheese—fresh preferred. Add the remaining seasoning. Increase heat to medium-high while still whisking. Bring to a medium boil. In about 5-7 minutes, the mixture will thicken.

stirring chcken with alfrado sauce in pan.

8. After thickening, remove from heat and add the cooked chicken to the pan. Stir well, getting all the spices off the bottom of the pan. Serve over the pasta.

For more details, keep reading. See the Recipe Card below for complete instructions and to print.

Variations and options

  • Use a commercial Cajun seasoning if you want, but hold the other salt until the end and only add it if needed. Most commercial versions will have salt.
  • Increase or decrease the cayenne pepper to adjust the spiciness. Or make a classic lower-fat healthy chicken Alfredo by eliminating the Cajun spices.
  • To keep the recipe low-fat, you will need to use chicken breast and skim milk, but you can use higher-fat ingredients if that is not your goal.
  • Chicken thighs may be used for the breast. Rotisserie chicken is covered in the FAQ section below.
  • You can use different dairy, like whole milk, half & half, or heavy cream. Alternatives like soy or almond milk will also work. You could replace the cow-based Parmensan with a goat alternative like Romano cheese, but the taste will differ.
  • If you need gluten-free, use cornstarch for thickening instead of flour and gluten-free pasta. Use 2 tablespoons in a small amount of water, make a smooth slurry, and add to thicken.

Other Italian and low-fat recipes to try

Don't miss these other Italian casserole recipes Baked Chicken Spaghetti, Baked Pasta and Sausage, Cheesy Chicken Pasta Bake, and Creamy Smoked Sausage Pasta.

For low-fat comfort food, try Healthy Chicken Enchilada Casserole, Cheesy Cauliflower Casserole, Skinny Cajun Chicken Alfredo, and Healthier Sausage Gravy and Biscuits. Don't forget Fido, try some Low-Fat Homemade Dog Treats.

Storing leftovers

Store leftovers sealed in an airtight container and refrigerate for 4 days or freeze for 4 months.

❓FAQs

Can I use rotisserie chicken?

Yes, add the shredded pre-cooked chicken after the sauce is thickened. Then simmer over lower heat for 2-3 minutes to warm.

1 pound of raw chicken is about 3 cups of shredded pre-cooked chicken.

Can I add vegetables to chicken Alfredo?

Yes, but any added vegetables must be cooked and added to the sauce when thick. Broccoli florets are an excellent choice, but use any veggies you like.

You could leave the chicken out entirely if you wish to make it just a healthier vegetable Alfredo.

🥣Why is this skinny Alfredo sauce healthier?

This Alfredo sauce, lower in fat, is similar to Bechamel's French white sauce but uses a slurry method with flour instead of a classic roux that requires more fat.

For dairy, non-fat skim milk is used to replace heavy cream. You could use chicken broth, soy milk, or almond milk.

For more information on roux vs. slurry thickening methods, please see How to Make Gravy from Scratch.

Blue ribbon divider used for visual effect

This recipe is listed in these categories. See them for more similar recipes.

30-Minute Dinner Recipes, Healthy Recipes, Italian Recipes, Low Fat Recipes, Pasta Recipes

Have you tried this recipe, or have a question? Join the community discussion in the comments.

📖The Recipe Card

Cajun Chicken Alfrado on linguini.
Print Recipe Add to Collection Go to Collections
3 from 1 vote

Skinny Cajun Chicken Alfredo

Skinny Cajun Chicken Alfredo is a low-fat, healthier version of your much-loved Italian classic. With creamy sauce, bold Cajun flavor, and tender chicken served over pasta, this adaptation of a classic Italian entree will become a star in your healthy diet.
Prep Time10 minutes mins
Cook Time20 minutes mins
Total Time30 minutes mins
Course: Main Course
Cuisine: Italian
Keyword: Cajun Alfredo, Chicken Alfredo, Low Fat Alfredo
Servings: 4
Calories: 456.7kcal
Author: Dan Mikesell AKA DrDan

Ingredients

  • 2 skinless boneless chicken breasts about 1 pound of chicken
  • 1 tablespoon olive oil
  • 1 teaspoon kosher salt
  • ½ teaspoon black pepper
  • ½ teaspoon garlic powder if not using fresh garlic
  • ½ pound linguine
  • 1 tablespoon butter
  • 2 cloves garlic minced
  • ¼ cup AP flour
  • 2 cups nonfat milk
  • ½ cup Parmesan cheese grated

Optional spiced for a Cajun-like taste.

  • ¾ teaspoon paprika
  • ¾ teaspoon onion powder
  • ¼-1/2 teaspoon cayenne adjust to taste
US Customary - Convert to Metric

Instructions

  • Start with the spices. 1 teaspoon kosher salt, ½ teaspoon black pepper, and ½ teaspoon of garlic powder if not using fresh garlic. For cajun, add ½ teaspoon onion powder, ¾ teaspoon paprika, and cayenne pepper to taste—usually ¼ to ½ teaspoon.
    spices for chicken alfredo
  • Trim two medium-sized (or one large) skinless boneless chicken breasts. Cut into ½ to ¾ inch cubes.
    trimming chicken breasts on a white board
  • Heat 1 tablespoon olive oil in a large frypan over medium-high heat until shimmering. Add chicken and sprinkle with ½ of the spice mixture. Cook until browning and cooked throw and reaches 165°.—about 10 minutes. Then remove from heat and set aside in the same pan. It has some spices stuck to the bottom that we will use later.
    sprinkling spices over browning chicken in fry pan
  • Start cooking ½ pound of pasta while cooking the chicken. Cook according to package directions and drain.
    fettuccine with a pasta pot
  • Whisk ¼ cup AP flour into 1 cup of cold milk until smooth. You may whisk in a bowl or use a Tupperware gravy shaker.
    whisking flour into liquid in a small bowl
  • Add 1 tablespoon butter to a saucepan over medium heat. When bubbling, add 2 garlic cloves and cook for about one minute.
    cooking garlic in butter in a sauce pan
  • Slowly add the milk/flour mixture while continuously whisking. Add one more cup of milk and ½ cup of grated Parmesan cheese—fresh preferred. Add the remaining seasoning. Increase heat to medium-high while still whisking. Bring to a medium boil. In about 5-7 minutes, the mixture will thicken.
    Add milk to the saucepan with a whisk.
  • After thickening, remove from heat and add the cooked chicken to the pan. Stir well, getting all the spices off the bottom of the pan. Serve over the pasta.
    chicken alfredo sauce in a sauce pan

Notes

Pro Tips:

  1. You need about 1 pound of chicken. I used breasts, but thighs would be fine.
  2. You may use Cajun spice mix to replace the spices. Adjust the salt if you do since most mixes have salt.
  3. Adjust the cayenne pepper to your taste. With ½ teaspoon, the heat level is about 4/10. 
  4. You can skip the Cajun spices and make a skinny version of chicken Alfredo.
  5. Skip the chicken and load it with precooked veggies if you want.
  6. You can decrease the salt some if you want.
  7. Freshly grated good Parmesan cheese is a must for great taste.
  8. Good refrigerated for 4 days and frozen for 4 months.

Nutrition

Calories: 456.7kcal | Carbohydrates: 56.2g | Protein: 29.2g | Fat: 12.2g | Saturated Fat: 4.9g | Polyunsaturated Fat: 1.2g | Monounsaturated Fat: 4.8g | Trans Fat: 0.1g | Cholesterol: 55.9mg | Sodium: 924.6mg | Potassium: 589.5mg | Fiber: 2.4g | Sugar: 7.9g | Vitamin A: 690.2IU | Vitamin C: 1.3mg | Calcium: 333.4mg | Iron: 1.6mg

Editor's Note: Originally published July 22, 2011. Updated with expanded options, refreshed photos, and a table of contents to help navigation.

Lilly running hard in snow.

Homemade Enchilada Sauce - Tomato Based

Homemade Enchilada Sauce in sauce pan

The best homemade tomato-based red enchilada sauce only needs about 5 minutes of prep time and a short simmer to get all the great tastes to come together. You will never buy canned enchilada sauce again.

Homemade Enchilada Sauce in sauce pan

[feast_advanced_jump_to]

Blue ribbon divider used for visual effect

Introduction

We all hate canned enchilada sauce, and the powder mix is worse. I have never met anybody who thought they were even adequate. You must make it yourself for a great taste and avoid that tin can taste.

I'm using my tiny Mexican paperback cookbook I found in southern California. But it was a little bland, so I upped the spicing to make it just right. I also simplified the method.

Time to move your enchiladas from good to great.

👨‍🍳How to make this recipe

  1. Start with a nonreactive pan due to the acid in the tomatoes. This usually means a non-stick pan. Otherwise, some of the metal comes into the sauce and affects the taste.
  2. Cook the onion in oil for about 5 minutes until clearing but add the garlic near the end of cooking.
  3. Add all other ingredients, bring to a light boil, then turn down to simmer. It is best to simmer with a lid on the pan since the sauce will splatter some. Due to the spattering when simmering, remove the pan from the heat, then stir, then cover before placing back on the heat.
  4. A ten-minute simmer is enough if the sauce is cooked more, like a baked enchilada casserole. Otherwise, simmer for about 30 minutes.

🍅Ingredients

Tomato

Not all enchilada sauce will have a tomato component, but it is required for my "gringo" tastes. If you are looking for a non-tomato sauce, you will need another recipe.

I suggest a name-brand tomato sauce. Quality does matter here, and I use Hunt's®️. For a sweeter taste, use tomato paste diluted with equal water.

Aromatic vegetables

Aromatic vegetables deliver deep flavors, primarily when crushed or cooked. I suggest fresh garlic and onions, but garlic powder and onion powder could be used.

Resist the temptation to use too much onion just to use it up. It will dominate the taste. Less is more in this case.

A diced jalapeno or another pepper can add extra heat and taste.

Spices

Chili powder is the majority of the flavor. But cumin and oregano add to the Mexican flavor. Plus the usual salt and black pepper.

This is relatively mild but with lots of taste. You can add some heat with a diced jalapeno pepper or a dash of cayenne pepper.

❓FAQs

Can I thicken the sauce?

Yes. Some enchilada sauce recipes will use thickens. I don't feel it is needed.

If you want a thicker sauce, cook the onion, then remove it from the pan. Add three tablespoons of vegetable oil over medium heat, then sprinkle with four tablespoons of all-purpose flour and whisk with the oil. Cook for a few minutes while continuously whisking until browning a little. Then proceed to add all the ingredients, including the cooked onion.

This moves the sauce from gluten-free to containing gluten. To thicken and stay gluten-free, use a gluten-free flour substitute.

How to use homemade enchilada sauce?

The usual use is for enchilada or enchilada casseroles. But it also will find its way into soups or even chili.

What can be substituted for enchilada sauce?

There is no good substitute, but salsa can usually be used if you must. There are many common components, and it will usually work in a casserole. I would do this long before using the canned sauce.

How to refrigerate and freeze homemade enchilada sauce.

To store homemade enchilada sauce in the fridge, seal airtight for 3-4 days. There are no preservatives, so no longer.

It can be stored in the freezer for 3-4 months. A good tip is to freeze ice cube trays and then seal them tightly in a freezer bag.

📖Enchilada Recipes

Healthier Chicken Enchilada Casserole in 60 Minutes

Crock Pot Chicken Enchilada Casserole

Excellent Chicken Enchilada Casserole

Sour Cream Chicken Enchiladas

Blue ribbon divider used for visual effect
↑Jump to Table of Contents

This recipe is listed in these categories. See them for more similar recipes.

Mexican Recipes, Sauces, Rubs, and Seasonings Recipes

Have you tried this recipe, or have a question? Join the community discussion in the comments.

Step-by-Step Photo Instructions

cooking onion in a sauce pan

Add 1 tablespoon of oil to the medium-size saucepan over medium-high heat. Add ½ cup minced onion ( about 1 small to medium) and saute until transparent — about 5 minutes. Add the crushed or minced garlic for the last minute.

enchilada sauce cooking in a black pan

Add tomato sauce and spices. Mix well and simmer over medium-low heat. It is best to put a lid on the saucepan since it will tend to splatter. Remove from heat to stir.

pouring red enchilada sauce over chicken enchiladas

Simmer for at least 10 minutes if used in a casserole or 30 minutes otherwise.

↑Jump to Table of Contents

📖The Recipe Card

Homemade Enchilada Sauce in sauce pan
Print Recipe Add to Collection Go to Collections
5 from 1 vote

Homemade Enchilada Sauce - Tomato Based

The best homemade tomato-based red enchilada sauce only needs about 5 minutes of prep time and a short simmer to get all the great tastes to come together. You will never buy canned enchilada sauce again.
Prep Time5 minutes mins
Cook Time30 minutes mins
Total Time35 minutes mins
Course: Sauce
Cuisine: Mexican
Keyword: Enchilada Sauce
Servings: 4 cups
Calories: 142.2kcal
Author: Dan Mikesell AKA DrDan

Ingredients

  • 32 oz tomato sauce
  • ½ cup onion minced about 1 small to medium
  • 2 tablespoons oil
  • 2 tablespoons chili powder
  • 2 teaspoons paprika
  • 1 teaspoon salt
  • ½ teaspoon ground cumin
  • ½ teaspoon oregano
  • 2 cloves garlic
US Customary - Convert to Metric

Instructions

  • ½ cup minced onion ( about 1 small to medium) and saute until transparent — about 5 minutes. Add the crushed or minced garlic for the last minute.
    cooking onion in a sauce pan
  • Add tomato sauce and spices. Mix well and simmer over medium-low heat. It is best to put a lid on the saucepan since it will tend to splatter. Remove from heat to stir.
    enchilada sauce cooking in a black pan
  • Simmer for at least 10 minutes if being used in a casserole or 30 minutes otherwise.
    pouring red enchilada sauce over chicken enchiladas

Notes

Pro Tips

  1. Use a good brand-name tomato sauce. I like Hunts.
  2. Do not use more onion—it will dominate the sauce.
  3. Use a non-reactive pan with a lid. Usually, that means non-stick.
  4. Good refrigerated for 3-4 days and may be frozen for 3-4 months.
  5. This is high in sodium. The sauce is just part of a larger dish, so it is usually fine but cutting the salt in half is fine if you are concerned. People can always add a sprinkle of salt at serving.

Nutrition

Serving: 1cups | Calories: 142.2kcal | Carbohydrates: 17.4g | Protein: 4.1g | Fat: 8.2g | Saturated Fat: 0.7g | Polyunsaturated Fat: 2.5g | Monounsaturated Fat: 4.7g | Trans Fat: 0.1g | Sodium: 1837.6mg | Potassium: 894.5mg | Fiber: 5.7g | Sugar: 10.9g | Vitamin A: 2668.5IU | Vitamin C: 17.9mg | Calcium: 59mg | Iron: 3.5mg

Editor's Note: Originally published February 1, 2010. Updated with expanded options, refreshed photos, and a table of contents to help navigation.

Molly tongue

Ham and Vegetable Soup with a Ham Bone

ham bone vegetable soup on spoon

Not sure what to do with that leftover ham bone? This easy ham soup recipe turns it into a rich broth loaded with tender vegetables instead of beans.

Make it in a crock pot or on the stovetop for an easy, hearty soup that's perfect after a holiday ham.

🤔 Why use a ham bone for soup?

  • Makes the broth: The ham bone can create its own broth as it cooks with the vegetables, or add rich ham flavor to another broth.
  • Provides the meat: A meaty ham bone can provide 2–4 cups of ham, plenty for the soup.
  • Easy prep: Just trim large chunks of fat and rinse off any sugary coating.
Ham and vegetable soup on a spoon.
[feast_advanced_jump_to]

quote mark
Featured Comment by Sandra:
"Just finished eating this delicious soup, and the only thing we altered to the recipe was we added 1½ cup of chopped ham (only because we had the leftover ham). We definitely will make this again whenever we have a ham bone. Great recipe!!"

📝 TL;DR — Recipe Summary

What: Hearty ham and vegetable soup with potatoes, carrots, celery, tomatoes, and a meaty ham bone.

Why: An easy, delicious way to use a leftover ham bone after a holiday meal.

How: Cook everything together until the vegetables are tender, then remove the bone, shred the ham, and return it to the soup.

🐖 Ingredients

Hambone with vegetables and soup ingredients—labeled.
  • Ham bone: Use a meaty ham bone; add extra diced ham if needed.
  • Vegetables: Carrots, celery, onion, potatoes, and diced tomatoes. Kidney beans are optional.
  • Broth: Low-sodium chicken broth or water.
  • Seasoning: Garlic powder and pepper, with bay leaf or crushed red pepper optional. Add salt only if needed.

👨‍🍳 Quick Overview: Ham and Vegetable Soup

1. Prepare the ham bone by rinsing off any sugary glaze and removing large pieces of fat.

Rinsing a ham bone under running water.

2. Peel and trim the potatoes and carrots. Chop the onion and celery. Rinse the beans if using.

Chopped potatoes, carrots, celery, and onion on a cutting board.

3. Combine the ham bone and all ingredients in a large crock pot or Dutch oven. Cook on LOW for 8 hours in the crock pot or simmer covered for about 3 hours in a Dutch oven.

Adding a ham bone to a pot filled with vegetables and broth.

4. About ¾ of the way through cooking, remove the ham bone, strip off the meat, and return the shredded ham to the pot.

Pulling cooked ham off the bone with a fork.

5. Finish cooking until the vegetables are tender. Serve immediately, or refrigerate overnight and scrape off any solidified fat before reheating.

A ladle lifts a serving of ham and vegetable soup.

For more details, keep reading. See the Recipe Card below for complete instructions and to print.

🐖 Ham & Ham Bone Options

Meaty ham bone: You want about 2–4 cups of ham for the soup. If your bone is short on meat, add diced leftover ham or ham steak.

Glazed ham: Scrape or trim off as much sugary coating as practical, rinse the bone well, and remove large pockets of fat.

Ham hocks: They add excellent ham flavor but usually don't provide enough meat. Add extra diced ham as needed.

No ham bone? Use 2–4 cups of diced ham and chicken broth instead of relying on the bone to make the broth.

🥣 Broth, Vegetables, and Seasoning Options

Broth: Use low-sodium chicken broth, or water if using a ham bone. For stronger flavor, add a little chicken or ham bouillon near the end.

Vegetables: Carrots, celery, onion, potatoes, and diced tomatoes are the base. Low-sodium, rinsed kidney, black, or white beans are optional. Frozen corn or green beans can go in at the start; add frozen peas near the end.

Seasoning: Garlic powder and pepper are enough, with bay leaf or crushed red pepper optional. Add salt only at the end—the ham and broth may provide plenty.

❄️ Storage

  • Refrigerate: Store for 3–4 days. If desired, refrigerate overnight and remove any solidified fat before reheating.
  • Freeze: Freeze in meal-size portions for 3–4 months, leaving room for expansion.
  • Reheat: Thaw frozen soup overnight in the refrigerator, then reheat gently on the stovetop or in the microwave.

🐖 Ham Soup Recipes

More ways to use a leftover ham bone:

  • Crock Pot Ham and Bean Soup — Classic, hearty, and economical with dry white beans.
  • Puerto Rican Chuletón Soup (Christmas Ham Bone Soup) — A holiday-style soup with vegetables, spices, and tender shredded ham.

❓ FAQs

How can I reduce the sodium in ham soup?

Use low-sodium broth and beans, rinse canned beans, and add salt only at the end if needed. You can also use water instead of broth when cooking with a ham bone.

📖The Recipe Card

Ham and vegetable soup on a spoon.
Print Recipe Add to Collection Go to Collections
4.50 from 2 votes

Ham and Vegetable Soup with a Ham Bone

A hearty ham and vegetable soup made with a meaty ham bone, tender vegetables, and rich broth. Easy to make in a crock pot or on the stovetop.
Prep Time10 minutes mins
Cook Time8 hours hrs
Total Time8 hours hrs 10 minutes mins
Course: Soup
Cuisine: American
Keyword: ham and vegetable soup, ham soup recipe, ham vegetable soup, Hambone soup
Servings: 8 servings
Calories: 233kcal
Author: Dan Mikesell AKA DrDan

Ingredients

  • 1 ham bone with meat
  • 2 carrots diced
  • 2 ribs celery chopped
  • 1 medium onion chopped
  • 2 medium Russet potatoes cubed
  • 14 oz diced tomatoes
  • 48 oz water or low-sodium chicken broth
  • 14 oz light kidney beans (optional) drained and rinsed
  • 1 bay leaf (optional)
  • 1 teaspoon black pepper
  • ½ teaspoon garlic powder
  • ¼ teaspoon crushed red pepper (optional)
  • salt ONLY IF NEEDED AT THE END
US Customary - Convert to Metric

Instructions

  • Rinse the ham bone under running water to remove any sugary glaze and trim off any large pieces of fat.
    Rinsing a hambone under running water.
  • Peel and cube 2 medium Russet potatoes. Dice 2 carrots, chop 2 ribs celery, and chop 1 medium onion.
    Prepared veggies on a black board.
  • Rinse one 14-oz can of low-sodium light kidney beans if using.
    Rinsing red beans under running water.
  • In a large crock pot or Dutch oven, add 6 cups (48 oz) water or low-sodium chicken broth, 1 can (14 oz) diced tomatoes, 1 teaspoon black pepper, ½ teaspoon garlic powder, ¼ teaspoon crushed red pepper (optional), and 1 bay leaf (optional). Add the prepared vegetables and optional beans; stir well.
    Mixing ingredients in the crock pot.
  • Place the ham bone into the pot. Cook on LOW for 8 hours in a crock pot or simmer covered for 2½–3 hours in a Dutch oven.
    Adding the ham bone to the soup.
  • About ¾ of the way through cooking, remove the ham bone, strip off the meat, and return the meat to the pot.
    Shredding ham off the bone.
  • Continue cooking until the vegetables are tender. Serve immediately, or refrigerate overnight and skim off solidified fat.
    Ham and vegetable soup in a ladle.

Video

Notes

Pro Tips

  • A meaty ham bone should provide about 2–4 cups of ham. Add diced ham if needed.
  • Scrape and rinse off any sugary glaze and trim large pieces of fat.
  • Use low-sodium broth and beans. Add salt only at the end, if needed.
  • If the broth needs more flavor, add a little chicken or ham bouillon.
  • Refrigerating overnight makes excess fat easy to remove.
  • No ham bone? Use 2–4 cups diced ham and chicken broth.

Nutrition

Calories: 233kcal | Carbohydrates: 22.3g | Protein: 15.9g | Fat: 9.2g | Saturated Fat: 3.2g | Polyunsaturated Fat: 1.2g | Monounsaturated Fat: 4.2g | Cholesterol: 32.5mg | Sodium: 786.6mg | Potassium: 696.1mg | Fiber: 4.7g | Sugar: 3.9g | Vitamin A: 2671.3IU | Vitamin C: 10.3mg | Calcium: 59.1mg | Iron: 2.2mg

Originally Published April 13, 2013. Updated with expanded options and refreshed photos.

Dogs in the snow.

This recipe is featured in What to Do With Leftover Ham.

Sheet Pan Baked Apple Pork Chops with Vegetables

apple pork chops on a gray plate with carrots and potatoes

Baked apple pork chops have a lot to recommend them. They are delicious, easy to prepare, and quick for a weeknight dinner. This sheet pan recipe includes roasted carrots and potatoes to round out your meal. The whole family will love this tasty recipe.

🐖Ingredients

Pork chops
Apples
Vegetables—red potatoes, baby carrots
Pantry—garlic, butter, olive oil, kosher salt, black pepper, brown sugar

apple pork chops on a gray plate with carrots and potatoes.
[feast_advanced_jump_to]
Blue ribbon divider used for visual effect

It is still fall and football season, and I bought too many apples—it's time to use up a few apples. I only used two apples, plus the one I ate while cooking. So, three apples, which didn't dent the supply much.

I love sheet pan meals. I think it is because I'm too lazy to think of side dishes. They are usually quick and easy. Add in delicious, and they have me hooked.

👨‍🍳How to Make Sheet Pan Baked Apple Pork Chops—Step-by-Step

pork chops with apples and seasoning.

1. Preheat the oven to 400° convection or 425° conventional.

trimming pork chops on a black board.

2. Trim the chips, leaving only ¼ inch of fat. Cut the fat rim at 1-inch intervals to prevent cupping during cooking.

Spray baking tray with PAM.

3. Prep a smaller sheet pan with a heavy coat of PAM.

trimmed red potatoes on a white board.

4. Clean ¾ pound small potatoes and cut them into pieces no more than 1-inch size. Rinse 1 cup of baby carrots (about ½ pound). In a large bowl, mix the potatoes and carrots with 1 tablespoon olive oil, ½ teaspoon Kosher salt, 2-3 cloves crushed garlic, and ¼ teaspoon pepper.

brushing pork chops with melted butter.

5. Melt 2 tablespoons of butter in a small bowl in the microwave (about 20 sec). Coat both sides of pork with melted butter and sprinkle with kosher salt and pepper.

pealed apples being cut up on white board

6. Peel and cut up 2 medium apples of your choice. Cut each apple into ⅛ wedges, then cut those in half to make cube-like shapes.

pouring butter into bowl with apple and spices.

7. Add 2 tablespoons of brown sugar and the remainder of the butter. Stir until evenly coated.

pouring coated apple onto tray with carrots and potatoes.

8. Add the carrots and potatoes around the edge of the sheet pan. Spread the apples over the middle of the sheet pan.

pork chops on top of apples and vegetables ready for the oven.

9. Top the apples with the chops. Bake for 25-30 minutes. Bake to an internal temperature of 145°-155° on the pork chops with soft potatoes, and carrots.

cooked pork chops on top of apples and vegetables cooked.

10. Use the broiler for a few minutes to add more browning if you wish.

For more details, keep reading. See the Recipe Card below for complete instructions and to print.

Options and variations

Pork Chops—A center cut ¾ to 1 inch with bone or boneless chops should be fine for this recipe.

Apples choices—A lot seems to be made of what apple to use for this or that. I believe it is more a matter of individual taste. If you buy apples to make this recipe, I suggest Gala, Granny Smith, Braeburn, Ida Red, or Honey Crisp. But generally, the apples you have are fine other than Red Delicious or Macintosh.

Potatoes—you want to use a thin-skinned potato in this recipe, not russet potatoes. Usually, red potatoes or Yukon gold would be good choices. The potatoes need to be cut small, no more than 1 inch at any point, to help speed up cooking time.

Choice of Vegetables

The cooking time for vegetables will vary by the type of vegetable. Root vegetables, like potatoes and carrots, are a good choice for this recipe since cooking time matches closely with the pork.

The carrots need to be cut relatively small to cook thoroughly. "Baby carrots" are about the right size and work nicely. I prefer using whole carrots cut into smaller pieces.

Onions can have about the same cooking time but may dominate the taste and not the best with the apple taste profile we are looking to achieve.

Softer vegetables like green beans, asparagus, summer squash, or bell peppers can be added about halfway through cooking if you want.

Other firmer vegetables like broccoli, cauliflower, or Brussels sprouts will take longer than the softer vegetables and can be added about 10 minutes into cooking.

Pork Chop and Sheet Pan Recipes

Fire up the slow cooker for crock pot pork chops or Crock Pot Apple Pork Chops. or use the grill for Grilled Apricot-Glazed Pork Chops or Grilled Pork Loin Chops.

For inside chops, try Pan Seared Oven Roasted Pork Chops, Pan Fried Pork Chops with Gravy, or a personal favorite of mine, Breaded Pork Chops in the Oven.

For other Sheet Pan Recipes, try Roasted Pork Tenderloin with Potatoes, Sheet Pan Chicken Fajitas, and Sheet Pan Chicken Breasts with Vegetables.

Serving

This makes a complete meal, but there is always room for dessert. Try some classics like Small Batch Apple Crisp, Crumble Blueberry Pie, or Apple Crumble Pie.

Storage of leftovers

Store leftovers sealed tightly in the refrigerator for 4 days. Or this makes an easy freezer meal sealed airtight for 4 months.

❓FAQs

Should you brine your pork chops?

Today's pork is much leaner than in previous years and tends to dry out during cooking and brine if you have time. It will improve the moisture and texture.

How to brine.

A standard pork brine is 1 cup of water with 1 tablespoon of table salt. If using a different salt, you should adjust accordingly. You may add other things like sugar (usually equal to salt) or other herbs—brine for 30 minutes to 2 hours.

Blue ribbon divider used for visual effect

This recipe is listed in these categories. See them for more similar recipes.

Pork Chop and Loin Recipes

Have you tried this recipe, or have a question? Join the community discussion in the comments.

📖The Recipe Card

apple pork chops on a gray plate with carrots and potatoes
Print Recipe Add to Collection Go to Collections

Sheet Pan Baked Apple Pork Chops with Vegetables

Sheet pan baked apple pork chops have a lot to recommend them. They are delicious, easy to prepare, and quick enough for a weeknight dinner. This sheet pan recipe includes roasted carrots and potatoes to round out your meal. The whole family will love this tasty recipe.
Prep Time15 minutes mins
Cook Time30 minutes mins
Total Time45 minutes mins
Course: Main Course
Cuisine: American
Keyword: Apple Pork Chops, Pork Chops, Sheet Pan Pork Chops
Servings: 2
Calories: 731kcal
Author: Dan Mikesell AKA DrDan

Ingredients

  • 2 pork chops
  • ¾ pound red potatoes
  • ½ pound baby carrots
  • 2 medium apples
  • 2 tablespoons butter
  • 1 tablespoon olive oil
  • ½ teaspoon kosher salt
  • ¼ teaspoon pepper
  • 2-3 cloves garlic crushed or minced
  • 2 tablespoons brown sugar
US Customary - Convert to Metric

Instructions

  • Preheat oven to 400° convection or 425° conventional.
    pork chops with apples and seasoning
  • Prep a smaller sheet pan with a heavy coat of PAM.
    Spray baking tray with PAM
  • Trim the chips leaving only ¼ inch of fat. Cut the fat rim at 1-inch intervals to prevent cupping during cooking.
    Trimming pork chops on a black board.
  • Clean ¾ pound small potatoes and cut them into pieces no more than 1-inch size. Rinse 1 cup of baby carrots (about ½ pound). In a large bowl, mix the potatoes and carrots with 1 tablespoon olive oil, ½ teaspoon Kosher salt, 2-3 cloves crushed garlic, and ¼ teaspoon pepper
    trimmed red potatoes on a white board
  • Melt 2 tablespoons butter in a small bowl in the microwave (about 20 sec). Coat both sides of pork chops with melted butter and then a sprinkle of kosher salt and pepper.
    brushing pork chops with melted butter
  • Peel and cut up 2 medium apples of your choice. Cut each apple into ⅛ wedges, then cut those in half to make cube-like shapes.
    pealed apples being cut up on white board
  • Place the apples into a small bowl and add 2 tablespoons of brown sugar and the remainder of the butter. Stir until evenly coated.
    pouring butter into bowl with apple and spices
  • Add the carrots and potatoes around the edge of the sheet pan. Spread the apples over the middle of the sheet pan.
    pouring coated apple onto tray with carrots and potatoes
  • Top the apples with the pork. Bake for 25-30 minutes to an internal temperature of 145°-155° on the pork chops and soft potatoes and carrots.
    pork chops on top of apples and vegetables ready for the oven
  • You may want to use the broiler for a few minutes to add more browning if you wish.
    cooked pork chops on top of apples and vegetables cooked

Notes

Pro Tips:

  1. Use a 9X13 inch quarter sheet pan or a similar size baking pan. For a double or triple size recipe, use a half size sheet pan that is 13X18.
  2. The chops should be ¾ to 1 inch thick. Either bone-in or boneless is fine.
  3. The apples can be of your choice— I suggest Gala, Honey Crisp, or Granny Smith.
  4. The potatoes should be a thin skin type so red potatoes or Yukon Gold would be good choices. Not russet.
  5. The dish is done when the pork chops are about 150°, and the potatoes are fork-tender (195°+).
  6. You can add a few minutes under the broiler if needed to add browning.
  7. Pork tends to dry so a brine of 1 cup of water with 1 tablespoon of table salt for an hour would be good if you have time. Add a tablespoon of sugar to it also. Rinse well when done and do not add more salt.
  8. Leftovers can be stored airtight in the refrigerator for 3-4 days or frozen for 3-4 months.

Nutrition

Calories: 731kcal | Carbohydrates: 70g | Protein: 54g | Fat: 27g | Saturated Fat: 10g | Polyunsaturated Fat: 1g | Monounsaturated Fat: 9g | Trans Fat: 0.2g | Cholesterol: 148mg | Sodium: 1050mg | Potassium: 1499mg | Fiber: 8g | Sugar: 34g | Vitamin A: 15950IU | Vitamin C: 29.7mg | Calcium: 80mg | Iron: 4.3mg

Originally Published November 4, 2018. Updated with refreshed images and expansion of options and discussion.

dogs running in the leaves.

Double Crust Chicken Pot Pie Recipe

Whole chicken pot pie.

This easy double crust chicken pot pie recipe is classic comfort food made simple. Two refrigerated pie crusts, tender chicken, vegetables, and a homemade creamy gravy make a delicious, golden-brown pot pie without canned soup.

It's a semi-homemade family favorite that's easy to adapt with rotisserie chicken, frozen vegetables, or leftover turkey.

Whole chicken pot pie.
[feast_advanced_jump_to]

📝 TL;DR — Recipe Summary

What: A classic double crust chicken pot pie with tender chicken, vegetables, and a creamy homemade gravy.

Why: Refrigerated pie crusts and frozen vegetables make this semi-homemade comfort food easy without canned soup.

How: Make the chicken and vegetable filling on the stovetop, assemble between two crusts, and bake at 400°F until golden brown.

🥧 Ingredients

  • Chicken: Use raw boneless, skinless chicken breasts or thighs. For a shortcut, substitute precooked rotisserie chicken or leftover turkey.
  • Pie crusts: Use two premade refrigerated pie crusts—one for the bottom and one for the top.
  • Vegetables: Use fresh or frozen vegetables, usually carrots, peas, and potatoes.
  • Homemade gravy: Chicken broth, milk, flour, and salt and pepper to taste.

👨‍🍳 Quick Overview: Double Crust Chicken Pot Pie

1. Cut raw chicken into small pieces and prepare the onion and vegetables.

raw chicken cut into small cubes

2. Cook the chicken with the onion until the chicken reaches 165°F internally. If using precooked chicken, cook the onion separately.

Cooking raw chicken with onion in a black pan.

3. Make the gravy: Mix the milk and flour into a smooth slurry. Bring the chicken broth to a boil, then slowly whisk in the slurry. Add salt and pepper, and cook until thickened.

pouring flour mixture into broth with whisk

4. Stir the chicken and vegetables into the gravy. Simmer for about 5 minutes, or until carrots and potatoes are nearly tender.

cooking chicken with carrots and peas in gravy

5. Assemble the pie: Line a 9-inch pie pan with the first crust, add the filling, and cover with the second crust. Pinch the edges together to seal and cut vents in the top.

covering the filling with the second crust

6. Bake at 400°F for about 40 minutes, until the crust is golden brown. Protect the edges with foil about halfway through baking. Let the pie rest for at least 10 minutes before cutting.

protecting the edge of a chicken pot pie with foil

👇 Keep reading for more tips, or see the recipe card below for the complete printable recipe.

📝 Tips and Variations

  • Chicken or turkey: Use 1 to 1½ pounds of boneless, skinless chicken breasts or thighs. For a shortcut, substitute 3–4 cups of precooked rotisserie chicken or leftover turkey. Cook the onion separately, then add the meat to the gravy with the vegetables.
  • Vegetables: Use about 2 cups total of fresh or frozen vegetables. Peas, carrots, potatoes, celery, and mushrooms are all good choices. Cut fresh carrots into ¼-inch slices and potatoes into small cubes so they cook through.
  • Pie crust: Refrigerated pie crusts are easiest—just follow the package instructions. Homemade crust works, too.
  • Gravy thickness: Add the milk-and-flour slurry gradually until the gravy is slightly thicker than you want for serving. Thin with a little chicken broth, or add more slurry to thicken.
  • Seasonings: Salt and pepper are enough for a classic pot pie. Add poultry seasoning, thyme, rosemary, or garlic powder for more flavor.

🕒 Make-Ahead Chicken Pot Pie

Prepare the chicken, vegetables, and gravy ahead of time. Cool the filling, then cover and refrigerate for up to 24 hours.

When ready to cook, assemble the pie with the refrigerated crusts and bake as directed. Allow a few extra minutes if the filling is cold.

❄️ Storage and Reheating

  • Refrigerate: Store leftover chicken pot pie covered or in an airtight container for 3–4 days.
  • Freeze: Wrap individual portions tightly and freeze for up to 3 months. Thaw overnight in the refrigerator.
  • Reheat: Warm in a 350°F oven until heated through. Cover loosely with foil if the crust browns too much. Reheat leftovers to 165°F.

📝 Related Comfort Food Recipes

  • Easy Turkey Tetrazzini
  • Classic Tuna Noodle Casserole with Parmesan Topping
  • Cheesy Chicken, Broccoli and Rice Casserole

❓FAQs

Can I make chicken pot pie in a cast-iron skillet?

Yes. A 9- or 10-inch oven-safe cast-iron skillet works well, but a standard 9-inch pie pan is easier for fitting refrigerated pie crusts.

How do I prevent a soggy bottom crust?

Place the pie on a preheated baking sheet to help the bottom crust cook and brown. Be sure the gravy is thick before assembling the pie.

Do I need to protect the edges of the pie crust?

Usually. If the edges brown too quickly, cover them with strips of aluminum foil or a pie shield about halfway through baking.

Can I use frozen vegetables without thawing them?

Yes. Add frozen vegetables directly to the gravy and simmer until heated through before assembling the pie. Cut any large pieces smaller if needed.

📖The Recipe Card

Whole chicken pot pie.
Print Recipe Add to Collection Go to Collections
4 from 1 vote

Double Crust Chicken Pot Pie Recipe

This easy double crust chicken pot pie combines tender chicken, vegetables, and homemade gravy between two refrigerated pie crusts. A delicious semi-homemade comfort food dinner without canned soup.
Prep Time20 minutes mins
Cook Time40 minutes mins
Total Time1 hour hr
Course: Main Course
Cuisine: American
Keyword: chicken pot pie, Turkey Pot Pie
Servings: 6 servings
Calories: 503.3kcal
Author: Dan Mikesell AKA DrDan

Ingredients

  • 2 refrigerated pie crusts
  • 1-1½ pounds boneless, skinless chicken breasts or thighs
  • 2 teaspoons olive or vegetable oil
  • 1 small onion chopped
  • 2 cups various vegetables, fresh or frozen (see below) may use more
  • 14 oz chicken broth
  • ½ cup flour
  • ½ cup milk
  • ½ teaspoon salt
  • ¼ teaspoon pepper

Possible Vegetable to Use— usually carrots and peas, sometime potato or others

  • 2 medium carrots peeled and cut into ¼ inch slices
  • 1 cup frozen peas
  • 1 potato-diced small (<½ inch) optional
  • ½-1 cup sliced mushrooms optional
  • 1 rib diced celery optional

Optional ingredients/substitutess

  • 3-4 cups Precooked chicken or turkey: replace the raw chicken
  • 1 egg egg wash: egg whipped and brushed on the top crust optional
  • 1-1½ teaspoons poultry seasoning optional
US Customary - Convert to Metric

Instructions

  • Prepare: Preheat the oven to 400°F. Dice the onion, cut raw chicken into ½- to ¾-inch pieces, and prepare the vegetables. Cut potatoes into cubes smaller than ½ inch.
    trimmed chicken on red board
  • Cook the chicken: Heat 2 teaspoons of oil in a large skillet over medium-high heat. Cook the chicken and onion until the chicken reaches 165°F internally. Transfer the chicken to a bowl, leaving any liquid in the skillet. A few bits of onion are OK to leave.
    cooking raw chickenh with onion in a black pan
  • Make the slurry: Whisk ½ cup milk with ½ cup flour until smooth, with no lumps.
    Mix flour with broth.
  • Make the gravy: Add 14 ounces of chicken broth to the skillet and bring to a boil. Reduce to a gentle boil and slowly whisk in the slurry, salt, and pepper. Cook for 2–3 minutes, until thickened. Add more slurry if needed, or thin with a little broth
    pouring flour mixture into broth with whisk
  • Add the filling: Return the chicken to the skillet and add about 2 cups of vegetables. Simmer for about 5 minutes, until the vegetables are nearly tender. Potatoes may need additional cooking.
    cooking chicken with carrots and peas in gravy
  • Assemble: Line a 9-inch pie pan with the first refrigerated crust, following the package instructions. Add the filling and cover with the second crust. Seal the edges and cut several steam vents in the top. Brush with beaten egg if desired.
    covering the filling with the second crust
  • Bake: Bake at 400°F for about 40 minutes, until the crust is golden brown and the filling is bubbling. Cover the crust edges with foil or a pie shield about halfway through if they are browning too quickly.
    protecting the edge of a chicken pot pie with foil
  • Rest: Let the pie rest for at least 10 minutes before slicing and serving.
    whole browned chicken pot pie

Notes

Pro Tips

  1. Chicken or turkey: Use 1 to 1½ pounds of raw boneless, skinless chicken breasts or thighs, or substitute 3–4 cups of precooked chicken or turkey. With precooked meat, sauté the onion separately and add the meat with the vegetables.
  2. Vegetables: Use about 2 cups or more of your favorites. Frozen mixed vegetables work well. Cut fresh carrots into ¼-inch slices and potatoes into cubes smaller than ½ inch. Cook potatoes until nearly tender before assembling the pie.
  3. Gravy: Add the flour-and-milk slurry gradually until the gravy is thick. For thicker gravy, whisk additional flour and cold milk together until smooth, then add more slurry. Never add dry flour directly to hot gravy. Thin with chicken broth if needed.
  4. Pie crusts: Follow the package instructions for refrigerated pie crusts. Homemade crusts also work.
  5. Seasoning: Salt and pepper make a mild, classic pot pie. Add poultry seasoning, thyme, or rosemary for more flavor.
  6. Storage: Refrigerate leftovers for 3–4 days or freeze for up to 3 months. Reheat to 165°F.

Nutrition

Calories: 503.3kcal | Carbohydrates: 47.2g | Protein: 32.9g | Fat: 20.1g | Saturated Fat: 5.7g | Polyunsaturated Fat: 3.4g | Monounsaturated Fat: 8.3g | Trans Fat: 0.02g | Cholesterol: 73.2mg | Sodium: 614.8mg | Potassium: 733.2mg | Fiber: 4.5g | Sugar: 1.9g | Vitamin A: 3157.7IU | Vitamin C: 9mg | Calcium: 67.5mg | Iron: 3.1mg

Originally published May 10, 2012. Updated with simplified instructions, convenient ingredient options, and new photos.

Lilly and Molly dogs in the snow

Easy Baked Chicken Tenders

chicken tenders on white plate

Easy baked chicken tenders are a healthy 30-minute dinner the whole family, especially the kids, will love. With a golden brown seasoned Panko bread crumb coating, no frying is required for delicious chicken fingers.

chicken tenders on white plate

[feast_advanced_jump_to]

Blue ribbon divider used for visual effect

Introduction

Chicken tenders are now a standard meal for many kids and adults. But fast food is fried, and the meat is of dubious origin — time to take control of your diet with this healthy substitute.

This baked chicken tender recipe uses just standard pantry ingredients. Trim your tenders, mix some Panko bread crumbs with a few simple spices and bake until golden brown. It is that easy and only takes about 30 minutes.

👨‍🍳How to make this recipe

  1. Preheat the oven and prepare a baking tray with a rack.
  2. Remove the tendon and pat dry the chicken tenders.
  3. Coat the dry tenders first with flour, then an egg wash, then the coating mixture of breadcrumbs and spices.
  4. Give them a light spray of pam
  5. Allow the coating to "set up" for at least 5 minutes before baking.
  6. Cook to 165° internal temperature—about 15 to 18 minutes.

🐓Ingredients

Chicken Tenders

Chicken tenders refer to the tenderloin of the chicken located on the underside of the breast. It is that narrow part that will sometimes separate when eating breast meat. It is the chicken equivalent of the beef tenderloin or the pork tenderloin. It is a muscle that does very little work, so it is always tender.

While they may refer to tenders, the terms chicken strips and chicken fingers could refer to any strip of chicken—usually cut from breast meat.

There are usually 4-5 chicken tenders per pound.

Substitute strips of chicken breasts

You can easily cut strips of chicken breast of about the same size and ½ inch thick. Cut them as much as possible across the strain of the meat, or they may be stringy and not very tender.

Strips cut from a chicken breast will be less tender than tenderloins and cheaper.

In this or any other recipe on this site that says chicken tenders, strips of chicken can be easily substituted. And when I say tenders, you can always use strips.

Other Ingredients

  • Bread Crumbs - Panko style is suggested but regular breadcrumbs will work. Just plain flavor is fine but flavored versions will also work.
  • Parmesan Cheese - optional but suggested
  • Spices - paprika and garlic powder with salt and pepper are enough. A touch of heat with cayenne pepper is fine if no kids are involved.
  • Flour and egg

❓FAQs

How to help the coating to stick to baked chicken tenders?

1) Dry well before starting. Use a paper towel.
2) Shake off the excess after flour and egg base coats.
3) After fully coated, let rest for about 5 minutes before proceeding to help the coating stick better.
4) After coated, handle with a fork, not your fingers or tongs.

How to prevent the breading from being dry?

Baked breaded meats, like chicken or pork chops, can easily have a dry texture caused by the oven heat drying out the breading.

To help decrease this problem, give the top of your tenders a quick spray of PAM cooking spray.

Do I have to use a wire rack for baking chicken tenders?

Yes, if you want a nice bottom coating of the tenders. Otherwise, instead of crispy, the bottom may be soggy.

If you skip the wire rack, use foil with a heavy spray of PAM. Flip the tenders halfway through cooking with a fork.

How long to bake chicken tenders?

It will take about 15 to 18 minutes in a 400° convection or 425° conventional oven. A convection oven is preferred to get air circulation under the rack.

You can cook at 350° or 375°, but they will tend to dry more. The time will b a few minutes longer usually but cook to 165° internal temperature.

If the tenders are variable sizes, place the bigger ones towards the outside of the rack. Also, point the thick part of the tender to the outside.

The endpoint of cooking is an internal temperature of 165°. You may need to remove the smaller ones before the bigger ones.

Are baked chicken tenders healthy?

They are much lower in fat and calories than the fried version, so they are healthy in that sense.

You can use two egg whites instead of one whole egg to lower the fat even more.

🍽️Serving and Leftovers

Serving

Dipping sauces are part of the fun of chicken tenders. Some popular ones are honey mustard, ketchup, BBQ sauce, Ranch dressing, flavored mayo, and sweet chili sauce.

Leftovers

The texture of the coating will never be as good as fresh-cooked, but leftover tenders should be stored in an airtight container refrigerated for 3 to 4 days. They can be frozen for 2 to 3 months.

📖Kid-Friendly Chicken Recipes

Oven Baked Chicken Drumsticks

Healthy Baked Chicken Nuggets

Grilled Chicken Tenders

Pan Fried Chicken Tenders

Blue ribbon divider used for visual effect
↑Jump to Table of Contents

This recipe is listed in these categories. See them for more similar recipes.

30-Minute Dinner Recipes, Appetizer and Party Recipes, Chicken Breast Recipes, Chicken Recipes, Healthy Recipes, Low Fat Recipes

Have you tried this recipe, or have a question? Join the community discussion in the comments.

Step-by-Step Photo Instructions

chicken tenders and coating ingredients

Preheat the oven to 400° convection or 425° conventional.

spray tray with rack with PAM

Prep a baking tray by lining it with aluminum foil, fit it with a rack and spray it with PAM.

trimming tendon off chicken tender

Trim 1 ½ to 2 pounds of chicken tenders. Or trim and slice 2 skinless boneless chicken breasts into ½ inch thick strips.

drying chicken tenders on paper towel

Pat dry the chicken tenders. DO NOT SKIP THIS STEP.

setting up a dredge line

Create a dredge line with three shallow dishes:
Tray #1: ¼ cup flour
Tray #2: one egg whisked with 1 tablespoon of water.
Tray #3: ¼ cup flour, ½ cup Panko breadcrumbs, 1 teaspoon paprika, ½ teaspoon garlic powder, ½ teaspoon each salt and pepper. Optionally add ¼ teaspoon cayenne pepper (adjust for taste) and ¼ cup of Parmesan cheese.

dipping chicken tender in flour

Roll the chicken in tray one and shake dry.

dipping chicken tender in the egg

Dip in the egg wash and shake off excess.

dipping chicken tender in the tray with the coating

Roll in the final tray.

coated raw chicken tenders on a rack_

Place on the prepared tray. Give the coated tenders a light spray of PAM. If you have time, let them sit for 5 minutes before baking. The coating will stick better.

pile of chicken tenders on a white plate wide

Cook until golden brown and an internal temperature of 165° in the thickest part—15 to 18 minutes usually.

↑Jump to Table of Contents

📖The Recipe Card

chicken tenders on white plate
Print Recipe Add to Collection Go to Collections

Easy Baked Chicken Tenders

Easy baked chicken tenders are a healthy 30-minute dinner the whole family, especially the kids, will love. With a golden brown seasoned Panko bread crumb coating, no frying is required for delicious chicken fingers.
Prep Time15 minutes mins
Cook Time15 minutes mins
Total Time30 minutes mins
Course: Main Course
Cuisine: American
Keyword: Baked Chicken Tenders, Chicken Strips, Chicken Tenders
Servings: 10 tenders
Calories: 104.5kcal
Author: Dan Mikesell AKA DrDan

Ingredients

  • 1½ to 2 pounds Chicken tenders Or skinless breasts cut into strips
  • 1 egg Or 2 egg whites
  • ½ cup AP flour divided
  • ¼ cup Panko bread crumbs
  • ½ teaspoon paprika
  • ½ teaspoon garlic powder
  • ½ teaspoon salt
  • ½ teaspoon pepper
  • ¼ teaspoon cayenne Optional
  • ¼ cup Parmesan cheese-grated or shredded Optional
  • PAM

Instructions

  • Preheat oven to 400° convection or 425° conventional.
    chicken tenders and coating ingredients
  • Prep a baking tray by lining with aluminum foil, fit with a rack and spray with PAM.
    spray tray with rack with PAM
  • Trim 1 ½ to 2 pounds of chicken tenders. Or trim and slice 2 skinless boneless chicken breasts into ½ inch thick strips.
    trimming tendon off chicken tender
  • Pat dry the chicken tenders. DO NOT SKIP THIS STEP.
    drying chicken tenders on paper towel
  • Create a dredge line with three shallow dishes:
    Tray #1: ¼ cup flour
    Tray #2: one egg whisked with 1 tablespoon of water.
    Tray #3: ¼ cup flour, ½ cup Panko breadcrumbs, 1 teaspoon paprika, ½ teaspoon garlic powder, ½ teaspoon each salt and pepper. Optionally add ¼ teaspoon cayenne pepper (adjust for taste). Also, ¼ cup grated or Parmesan cheese is optional.
    setting up a dredge line
  • Roll the chicken in tray one with the flour and shake dry.
    dipping chicken tender in flour
  • Dip in the egg wash and shake off excess.
    dipping chicken tender in the egg
  • Roll in the final tray of topping but do not shake off excess.
    dipping chicken tender in the tray with the coating
  • Place on the prepared tray. Give the coated tenders a light spray of PAM. If you have time, let them sit for 5 minutes before baking. The coating will stick better.
    coated raw chicken tenders on a rack_
  • Cook until golden brown and an internal temperature of 165° in the thickest part—15 to 18 minutes usually.
    pile of chicken tenders on a white plate wide

Notes

Pro Tips

  1. I like to use a rack for cooking these, and you will not need to flip them. Without the rack, you will need to flip halfway through with a fork.
  2. I like to use chicken tenders, but you can use cut strips of chicken breasts.
  3. Be sure to pat dry the chicken before starting.
  4. There are usually 4-5 chicken tenders per pound.
  5. If you rest the chicken after coating but before baking for 5-10 minutes, the coating will stick better.
  6. This will usually take about 15-18 minutes but will vary some by the thickness of the chicken and your oven. The endpoint of cooking is 165° in the thickest part of the chicken.
  7. It is best to put the biggest tenders on the outside of the rack and point the thickest part of the tenders to the outside of the rack.
  8. To speed up the prep, you can use a seasoning salt (2 teaspoons) for the main spices. Just add the pepper.
  9. Cayenne pepper is optional. One-fourth teaspoon will get you a 5/10 heat, and a half teaspoon will be 8/10. Please don't add it if this is for kids.
  10. The coating can be a little dry. I gave the tenders a light spray with PAM just before baking.
  11. Store leftovers sealed airtight and refrigerated for 3-4 days and they can freeze for 2-3 months. But breading is always better fresh.

Nutrition

Calories: 104.5kcal | Carbohydrates: 4.97g | Protein: 15.77g | Fat: 1.91g | Saturated Fat: 0.41g | Cholesterol: 43.55mg | Sodium: 189.99mg | Potassium: 265.9mg | Fiber: 0.25g | Sugar: 0.15g | Vitamin A: 90.47IU | Vitamin C: 0.82mg | Calcium: 5.6mg | Iron: 0.56mg

Originally published February 4, 2012. Updated with expanded options, refreshed photos, and a table of contents to help navigation.
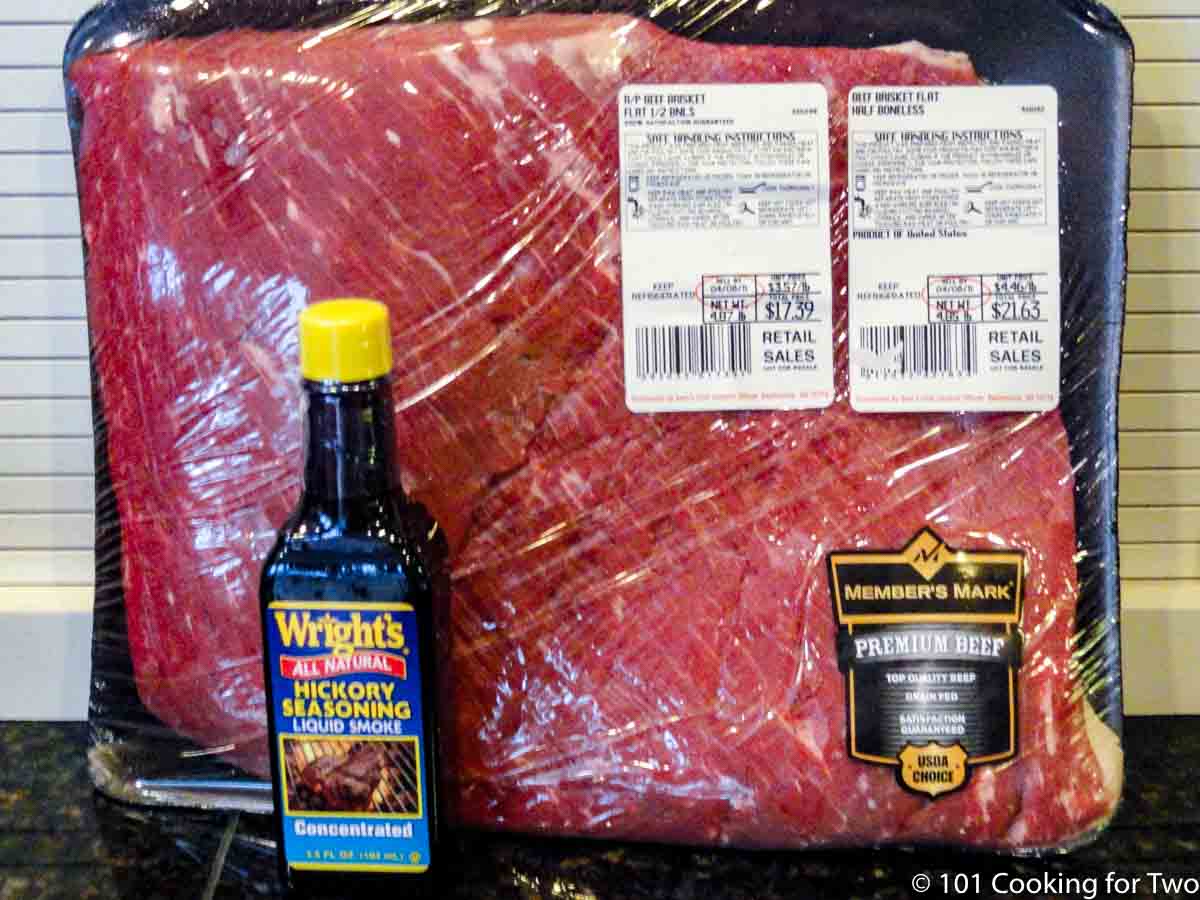
Dogs in Leaves 2017 #6

Easy Sour Cream Chicken Enchiladas

Bite of sour cream chicken enchilada on a fork.

Easy sour cream chicken enchiladas are filled with tender chicken and cheese, then covered with a simple homemade sour cream sauce, more cheese, and baked until golden.

A scalable recipe—make the full 8-serving recipe for the family or a smaller half recipe, perfect for two with leftovers.

Bite of sour cream chicken enchilada on a fork.
[feast_advanced_jump_to]

quote mark
Featured Comment by Judy:
⭐⭐⭐⭐⭐
"It's awesome. Fairly quick and easy and tastes great! Where's the margaritas??"

🤔 TL;DR — Recipe Summary

What: An easy sour cream chicken enchiladas recipe with chicken and cheese, topped with homemade sour cream sauce and more cheese.

Why: A simple, scalable recipe—make a full batch or a half batch for two with leftovers.

How: Cook the chicken and onion, roll with cheese in tortillas, cover with sour cream sauce, and bake about 20 minutes.

🐓 Ingredients

raw chicken with enchilada ingredients
  • Chicken — breast meat, diced or shredded; rotisserie works too.
  • Tortillas — flour, 8-inch size rolls best.
  • Cheese — Monterey Jack for smooth melt; Pepper Jack for spice.
  • Sour Cream — adds the signature creamy flavor to the sauce.
  • Onion — diced and cooked with the chicken.
  • Green Chiles — canned, mild or hot, stirred into the sauce.
  • Pantry Staples — butter, flour, chicken broth, oil, salt, pepper.

👨‍🍳 Quick Overview: How to Make Sour Cream Chicken Enchiladas

1. Dice the chicken and onion, then sauté until the chicken is cooked through.

cooking chicken with onion in black pan

2. Add chicken and cheese to the tortillas, roll tightly, and place seam-side down in a greased baking dish.

rolling chicken mixture and cheese in tortilla

3. Make a roux with butter and flour, whisk in broth, and cook until thickened. Remove from heat and stir in the sour cream and green chiles.

adding sour cream to sauce

4. Pour the sauce over the rolled tortillas and top with more cheese.

pouring sour cream sauce over the dish of enchiladas

5. Bake for 20 minutes at 400°F (or 375°F convection) until golden, bubbly, and 165°F inside.

browned enchilada casserole

👇 Scroll down for the printable recipe card and complete step-by-step photo instructions—or keep reading for tips and serving ideas.

💡 Tips & Variations

  • Cheese swap — Pepper Jack adds a little spice.
  • Spice boost — add some cumin, chili powder, or extra green chiles to the sour cream sauce for a deeper, Tex-Mex flavor.
  • Tortillas — flour holds up best, but corn works if briefly fried to prevent soggy rolls.
  • Precooked chicken — Rotisserie or leftover chicken may be used. Shred the meat, then sauté the onion until it starts to clear. Add the chicken just long enough to warm through before rolling. About 1 pound of raw chicken equals roughly 3 cups of shredded cooked chicken.

↕️ Scaling the Recipe Size

This recipe makes 8 servings in a 9×13 baking dish. For a smaller meal, make a half recipe in an 8×8 dish for 4 servings—perfect for two with leftovers.

  • Half recipe: Use half of all ingredients. Bake at the same temperature, but check a few minutes early.
  • Scaling the ingredients: In the recipe card, change the number of servings. Use the amounts in the ingredient list; the instructions do not adjust.

🍽️ Serving

Serve sour cream chicken enchiladas with guacamole and toppings like chopped lettuce, diced tomatoes, or salsa. For a larger meal, add Mexican rice or refried beans.

❄️ Make Ahead and Storage

  • Make ahead: Roll the enchiladas and refrigerate covered. Make the sauce separately and refrigerate, then warm it before assembling and baking.
  • Refrigerate: Store cooked leftovers covered for 2–3 days.
  • Freeze: Freeze cooked or uncooked enchiladas, tightly wrapped, for 3–4 months.

❓ FAQs

Can I use lower-fat cheese or sour cream?

Yes, but full-fat sour cream and cheese give the creamiest texture and best flavor.

Why do my tortillas get soggy?

Tortillas absorb sauce as they bake. Warm them before rolling, or briefly fry them in a lightly oiled skillet to help prevent soggy enchiladas.

Can I make sour cream chicken enchiladas with cream of chicken soup?

Some recipes use canned soup, but this recipe uses a simple homemade sour cream sauce instead.

📖 More Mexican Chicken Recipes

  • Healthier Chicken Enchilada Casserole in 60 Minutes
  • Crock Pot Chicken Enchiladas
  • Chicken Fajita Quesadillas
  • Crockpot Chicken Fajitas

📖The Recipe Card

Bite of sour cream chicken enchilada on a fork.
Print Recipe Add to Collection Go to Collections
4.73 from 11 votes

Easy Sour Cream Chicken Enchiladas

Easy sour cream chicken enchiladas with chicken and cheese rolled in tortillas and covered with a simple homemade sour cream sauce.
Prep Time25 minutes mins
Cook Time20 minutes mins
Total Time45 minutes mins
Course: Main Course
Cuisine: Mexican
Keyword: easy chicken enchiladas, enchilada casserole recipe, sour cream chicken enchiladas
Servings: 8 servings
Calories: 615kcal
Author: Dan Mikesell AKA DrDan

Ingredients

  • 1½ lb chicken breast diced or shredded
  • 1 onion medium
  • 1 tablespoon vegetable oil
  • 8 flour tortillas 8 inch each
  • 2 cups Monterey Jack cheese shredded
  • ¼ cup butter
  • ¼ cup flour
  • 1 can 15 oz. chicken broth
  • 1 cup sour cream
  • 4 ounce chopped green chilis
  • salt and pepper to taste
US Customary - Convert to Metric

Instructions

  • Preheat oven to 400°F (375° convection).
    raw chicken with enchilada ingredients
  • Trim and dice about 1½ pounds of skinless, boneless chicken breast into pieces about ½ inch or smaller. Dice one medium onion.
    cutting up chicken on black board
  • Add one tablespoon oil to a large frypan over medium-high heat, and when hot, add chicken and onion together. Cook until the chicken is cooked through, about 5 minutes.
    cooking chicken with onion in black pan
  • Spray a 9×13 baking dish with cooking spray. Microwave 8 tortillas for 15–20 seconds to soften. Add about ¼ cup chicken mixture and 2 tablespoons cheese to each tortilla. Roll tightly and place seam-side down in the baking dish.
    chicken and cheese on the tortilla to the side
  • Roll the short end over the filling tightly. Place them seam-side down in the baking pan. Repeat until done.
    rolling chicken mixture and cheese in tortilla
  • Melt ¼ cup butter in a medium saucepan over medium heat. Whisk in ¼ cup flour and cook for a few minutes. Add 15 ounces chicken broth, whisking continuously until thickened. Season with salt and pepper.
    adding broth into the roux
  • Remove from heat and stir in 1 cup sour cream and 4 ounces chopped green chiles.
    adding sour cream to sauce
  • Pour the sauce over the enchiladas and top with the remaining 1 cup Monterey Jack cheese.
    pouring sour cream sauce over the dish of enchiladas
  • Bake until golden and bubbling, about 20 minutes. Check that the center reaches 165°F; if needed, cover with foil and continue baking until it does.
    browned enchilada casserole

Notes

Pro Tips

Use 1–2 pounds of diced or shredded chicken; 1½ pounds is preferred. Precooked or rotisserie chicken also works.
The tortillas will be much more flexible if warmed slightly in the microwave.
The base recipe is mild, so feel free to spice it up — see post for options.
I like the Monterey Jack cheese here, but use what you want.
After cooking, store refrigerated for 2–3 days or frozen for 3–4 months. Can be frozen uncooked for 3–4 months. To refrigerate uncooked, assemble the enchiladas but add the sauce and cheese just before cooking.
See the full post for detailed tips, photos, and scaling options.

Nutrition

Calories: 615kcal | Carbohydrates: 30g | Protein: 46g | Fat: 33g | Saturated Fat: 15g | Polyunsaturated Fat: 4g | Monounsaturated Fat: 7g | Cholesterol: 160mg | Sodium: 1178mg | Potassium: 390mg | Fiber: 2g | Sugar: 3g | Vitamin A: 900IU | Vitamin C: 8.3mg | Calcium: 270mg | Iron: 3.4mg

Based on a Food.com Simple Sour Cream Enchiladas recipe.

Originally published April 6, 2014. Updated for more options and clarifications.

Lilly and Molly dogs playing in yard with green grass

Old Fashioned Pumpkin Bread

sliced pumpkin bread on wooden board

This easy Old Fashioned Pumpkin Bread is soft, moist, and delicious with great pumpkin spice flavors. It is the perfect fall treat the whole family will enjoy.

Cook like grandma with this simple recipe using pantry ingredients. Options are provided to make it your own.

🎃Ingredients

Pumpkin Puree
Pumpkin pie spice—or use cinnamon, nutmeg, ginger, cloves
Dry pantry ingredients—all-purpose flour, sugar, baking powder, baking soda, salt
Wet ingredients—eggs, butter, vegetable oil, water
Optional ingredients—chopped nuts (walnuts or pecans), raisins, or chocolate chips

sliced pumpkin bread on wooden board.
[feast_advanced_jump_to]
Blue ribbon divider used for visual effect

Featured Comment from Jeff: "5 stars. Another perfect recipe."

Easy pumpkin bread is soft, moist, and delicious with all those fantastic fall pumpkin spice flavors. Great for breakfast, brunch, or a snack.

👨‍🍳How to Make Pumpkin Bread—Step by Step

pumpkin puree with quick bread ingredients.

Preheat oven to 350°.

loaf pan coated with butter and flour.

Prep the loaf pan with a heavy coat of PAM cooking spray or use the more traditional light coat of butter and then coat it with flour.

dry ingredients with whisk in white bowl.

Mix dry ingredients of 1 ¾ cups flour, 1 ¼ cups sugar, 1 teaspoon baking powder, ½ teaspoon baking soda, ½ teaspoon salt, and  2 teaspoons of the pumpkin spice mix. If you don't have pumpkin spice mix, use 1 teaspoon ground cinnamon, ½ teaspoon ground nutmeg, ¼ teaspoon ground ginger, and ¼ teaspoon ground cloves.

beating pumpkin and egg in white bowl.

In a large bowl, mix wet ingredients by hand or with a mixer of 2 eggs, ⅓ cup of milk or water, ⅓ cup vegetable oil, and 1 cup of pumpkin puree. Then stir in 3 tablespoons of melted butter.

breating the pumpkin mixture into the dry in a white bowl.

Mix the dry flour ingredients with the wet ingredients. Optionally add 1 cup of chopped nuts, ½ cup of raisins, or ⅔ cup of chocolate chips.

pour batter into loaf pan coated with flour.

Pour the batter into the prepared pan.

smooth batter in the loaf pan.

Smooth the batter in the loaf pan. Optional—give the top a light sprinkle of white sugar.

loaf of pumpkin bread on wire rack.

Bake for about 1 hour until a toothpick comes out clean or the internal temperature is 200° to 205°. Cool on a rack for 20 minutes before cutting.

For more details, keep reading. See the Recipe Card below for complete instructions and to print.

When is pumpkin bread done?

The old-fashioned toothpick test of inserting a toothpick in the center, and when it comes out clean, it is done.

But if you have no toothpick or don't entirely trust that, cook to an internal temperature of 200° to 205° in the thickest center of the loaf.

Topping options

There is no topping in the old Libby recipe, and most do not use any. I like a sprinkle of white sugar that will melt during baking and give a little sweet crunch.

If you want to take it up a notch, add a glaze. Mix a glaze of 1 cup of powdered sugar, ½ teaspoon vanilla, and two tablespoons of milk. Pour over the top of the loaf when almost cooled. If you use the glaze, the bread should be stored in a refrigerator.

Related recipes you will like.

Don't miss these other tasty quick bread recipes, like Old Fashioned Banana Bread, Apple Pie Bread, Beer Bread, and Cinnamon Swirl Bread.

For the dogs, try Homemade Low Calorie Dog Treats made with pumpkin.

Or, for other fall recipes, try Old Fashioned Popcorn Balls, Easy Apple Crumble Pie. and Easy Old Fashioned Apple Crisp.

Variations

The original recipe had 1 ½ cups of sugar and was overly sweet. I decreased it to 1 ¼ cups, which seems much better—your choice. You may substitute brown sugar for part of the white sugar.

You can make your own pumpkin puree, but the commercial version has more flavor and is a little sweeter.

Oil will make the bread tender, but I wanted some butter taste, so I swapped out some of the oil for butter. I also changed the water for milk.

Nutmeg was added in addition to the pumpkin spice in the original recipe. I skipped the extra nutmeg and increased the pumpkin spice to compensate for both simplification and taste.

If you don't have pumpkin spice mix, use 1 teaspoon cinnamon, ½ teaspoon nutmeg, ¼ teaspoon dry ginger, and ¼ teaspoon ground cloves.

Additional Enhancements—I suggest chopped nuts (walnuts or pecans) and raisins. Other common additions are coconut, chocolate chips, dried cherries, or cranberries.

⬇️How to make this pumpkin bread for two

This recipe makes a standard-size loaf, which is about 12 servings, depending on the size of the servings—more than some smaller households will want to make.

Mini loaves can be made in standard 3 by 5 ¾ inch mini loaf pans, which are ⅓ of the size and make 4 servings. Or make three and freeze two for later or give them as gifts.

  1. Use the recipe card and adjust the number of servings from 12 to 4.
  2. Use the amount of ingredients in the ingredient list, not the instructions—those do not adjust.
  3. Cooking time will be 25 to 30 minutes—use the toothpick test.

Storing leftover pumpkin bread

The bread can be stored at room temperature in an airtight container for 2-3 days. If refrigerated, you may store it for 7 days.

To freeze leftovers, wrap tightly in several layers and freeze for 3 months.

❓FAQs

What size loaf pan to use?

There are many sizes of loaf pans. "Standard" loaf pan size is 8-½ x 4-½ x 2-½ inches. You have what you have in size, so use that size.

A smaller pan will take longer to cook due to its thickness, and a larger pan is faster due to the loaf being thinner. As always, do not cook by time alone. Ovens differ—Cook to an endpoint, not time.

Do I need a mixer to make pumpkin bread?

No, you can easily mix this by hand, but a small hand mixer helps a lot. If you do this by hand, soften the butter slightly and get it fully incorporated with the other "wet" ingredients with a whisk.

Blue ribbon divider used for visual effect

This recipe is listed in these categories. See them for more similar recipes.

Bread Recipes, Breakfast Recipes

Have you tried this recipe, or have a question? Join the community discussion in the comments.

📖The Recipe Card

sliced pumpkin bread on wooden board
Print Recipe Add to Collection Go to Collections
4.65 from 14 votes

Old Fashioned Pumpkin Bread

This easy Old Fashioned Pumpkin Bread is soft, moist, and delicious with great pumpkin spice flavors. It is the perfect fall treat the whole family will enjoy.
Prep Time15 minutes mins
Cook Time1 hour hr
Total Time1 hour hr 15 minutes mins
Course: Bread
Cuisine: American
Keyword: Libby pumpkin bread recipe, old fashioned pumpkin bread recipe, pumpkin bread recipe
Servings: 12 slices
Calories: 216.5kcal
Author: Dan Mikesell AKA DrDan

Ingredients

  • 1 ¾ cups flour
  • 1 ¼ cups sugar
  • 1 teaspoon baking powder
  • ½ teaspoon baking soda
  • ½ teaspoon salt
  • 2 egg
  • ⅓ cup milk or water
  • ⅓ cup vegetable oil
  • 3 tablespoons butter softened
  • 1 cup pumpkin puree
  • 2 teaspoon pumpkin spice seasoning buy or used ingredients below

home made pumpkin spice mix if needed

  • 1 teaspoon cinnamon
  • ½ teaspoon nutmeg
  • ¼ teaspoon dry ginger
  • ¼ teaspoon ground cloves

Optional Additions

  • 1 cup chopped nuts optional
  • ½ cup raisins optional
  • ⅔ cup chocolate chips optional
US Customary - Convert to Metric

Instructions

  • Preheat oven to 350°.
    pumpkin with quick bread ingredients.
  • Prep the loaf pan with a heavy coat of PAM cooking spray or use the more traditional light coat of butter and then coat it with flour.
    loaf pan coated with butter and flour
  • Mix dry ingredients of 1 ¾ cups flour, 1 ¼ cups sugar, 1 teaspoons baking powder, ½ teaspoon baking soda, ½ teaspoon salt, and  2 teaspoons of the pumpkin spice mix. If you don't have pumpkin spice mix, use 1 teaspoon ground cinnamon, ½ teaspoon ground nutmeg, ¼ teaspoon ground ginger, and ¼ teaspoon ground cloves.
    dry ingredients with whisk in white bowl
  • In a large bowl, mix wet ingredients by hand or with a mixer of 2 eggs, ⅓ cup of milk or water, ⅓ cup vegetable oil, and 1 cup of pumpkin puree. Then stir in 3 tablespoons melted butter.
    beating pumpkin and egg in white bowl
  • Mix the dry flour ingredients into the wet ingredients. Optionally add 1 cup of chopped nuts, ½ cup of raisins, or ⅔ cup of chocolate chips.
    breating the pumpkin mixture into the dry in a white bowl
  • Spread the batter into the prepared pan. Optional—give the top a light sprinkle of white sugar.
    pour batter into loaf pan coated with flour
  • Bake for about 1 hour until a toothpick comes out clean or the internal temperature is 200° to 205°. Cool on a rack for 20 minutes before cutting.
    loaf of pumpkin bread on wire rack

Notes

Pro Tips

  1. Never use baking powder with aluminum.
  2. There are many sizes of loaf pans. A small pan may take longer to cook due to the thickness, and a larger pan faster due to the loaf being thinner.
  3. You may substitute pumpkin spice seasoning with 1 teaspoon of cinnamon, ½ teaspoon of nutmeg, ¼ teaspoon of dry ginger, and ¼ teaspoon of ground cloves.
  4. Check for the endpoint with a toothpick. You insert it into the center of the loaf, and it should come out clean. But if you have no toothpick or don't entirely trust that, cook to an internal temperature of 200° to 205° in the thickest center of the loaf.
  5. A light sprinkle of sugar just before going into the oven is a nice little touch.
  6. I like nuts in mine, but I have included options for raisins or chocolate chips if you want.
  7. Good at room temperature for about 3 days if sealed air-tight or refrigerate for 7 days. You can also freeze for 3-4 months.
  8. If you want to take it up a notch, add a glaze. Mix a glaze of 1 cup of powdered sugar, ½ teaspoon vanilla, and two tablespoons of milk. Pour over the top of the loaf when almost cooled. If you use the glaze, the bread should be stored in a refrigerator.

Nutrition

Calories: 216.5kcal | Carbohydrates: 26.3g | Protein: 4.7g | Fat: 11.8g | Saturated Fat: 2.7g | Polyunsaturated Fat: 0.3g | Monounsaturated Fat: 1g | Trans Fat: 0.1g | Cholesterol: 34.8mg | Sodium: 177.1mg | Potassium: 89.3mg | Fiber: 2.4g | Sugar: 22.1g | Vitamin A: 3305.4IU | Vitamin C: 0.9mg | Calcium: 61.5mg | Iron: 1.1mg

Based on Libby's pumpkin bread but with a few adpations from other recipes.

Editor's Note: Originally Published November 7, 2014. Updated with expanded options, refreshed photos, and a table of contents to help navigation.
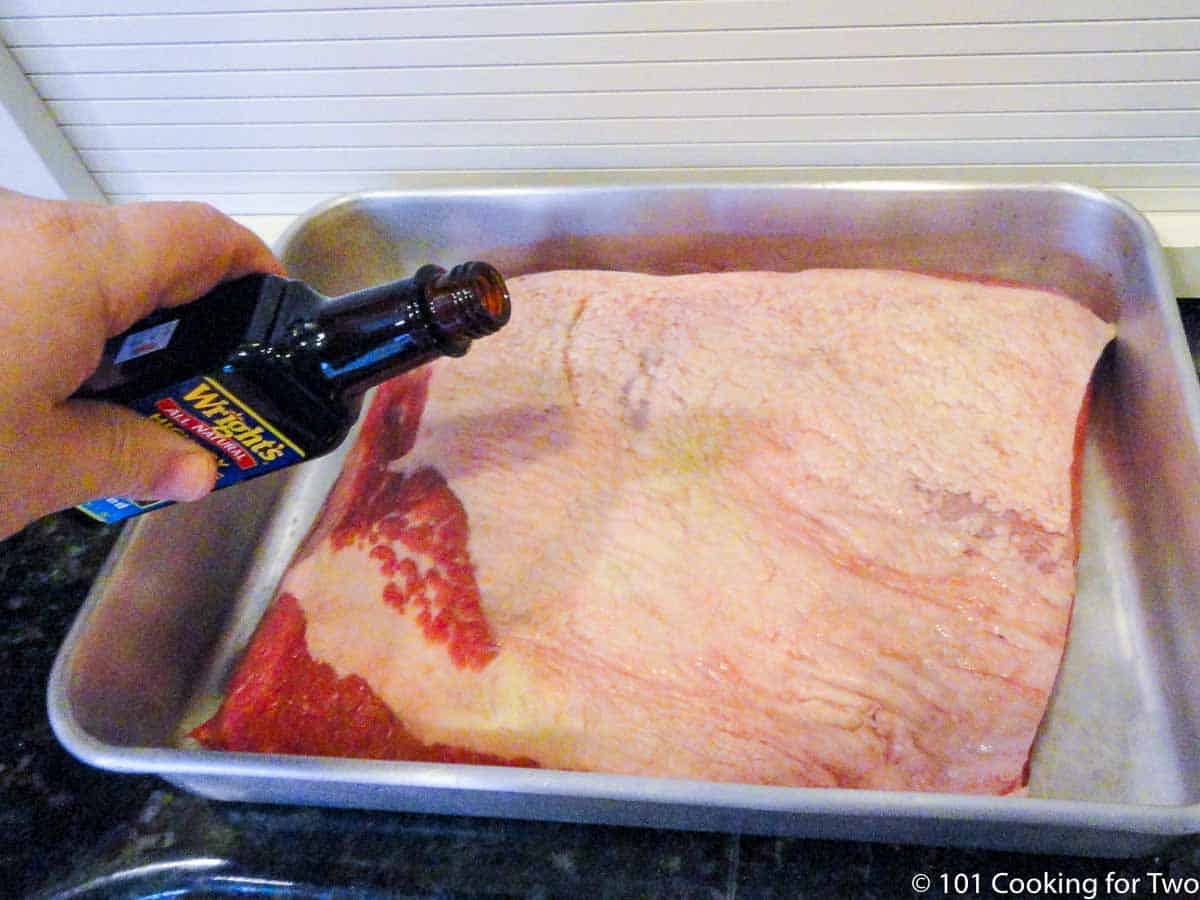
Molly and Lilly in leaves.

How To Set Up Your Gas Grill for Smoking and Low and Slow Cooking

image of a smoking gas grill

Learn how to set up your gas grill for great low and slow cooking with smoking. A useful technique you need to master your gas grill, along with troubleshooting tips. Now updated with expanded troubleshooting tips.

[feast_advanced_jump_to]
a smoking gas grill.
Blue ribbon divider used for visual effect

I initially wrote this for my How to Grill Baby Back Ribs, but now publish it separately so I can refer to it for other recipes. While I use a Weber Summit that is very hot and versatile, I have generalized the instructions.

Let's talk about your grill. You must know your grill. If you can get or have the instructions for your grill from the manufacturer, follow those instructions.

For some recipe suggestions for beginners, please see Beginner's Guide to Grilling on a Gas Grill.

a large gas grill.

🌡️Grill Temperature

You are going to need to experiment a little with your grill setup. You need to know how to get a steady low grill surface temperature in an area reserved for indirect heat.

If you are a beginner, please check A Beginners Guide to Grill Temperature on a Gas Grill, where I give a more complete discussion of grill temperature, which is basic for any successful grilling.

Also, be sure you have enough gas. I have natural gas, so I'm good. If you are not so lucky, have a second tank.

I used grill surface thermometers for years. They only cost about $10 and will last most of the grilling season until you can't read it anymore. Get one from Amazon, Home Depot, or Lowes. I now use a fancy Thermoworks remote monitor.

ribs on grill with thermometer.

For me, I have four main burners that run front to back. If I only turn one burner on high, the grill surface temperature in the indirect (not over the burner that is turned on) is right at 225.

With the two outside burners at medium, I have a steady 250. Turning on the smoker side burner kicks the temperature up about 50 degrees while on.

So how do I know these things? I played with it. If you have 2 or 3 burners, start with one burner on high and see what you get in the indirect area. Some grills will have vents, and you can experiment with them too.

If you have one burner, you're going to set a large pan on top of your grates and cover it with a rack of some type. Do not put any weight on top of your burners directly with the rack and meat. Ever..

So now you have played with your grill enough to know it. Doesn't it feel good already?

ribs over aluminum drain pan.
A thin aluminum cake pan under the grill racks.

🛒Shopping

Note: All links below are affiliate links, meaning I make a small profit from your purchases. Your price is not affected by this commission. We are a participant in the Amazon Services LLC Associates Program. As an Amazon associate, I earn from qualifying purchases.

These are examples of what I recommend. There are many other great options.

Recommended Thermometers

Image for Maverick xr-50 remote thermometer from Maverick

Maverick XR-50 4 Probe Remote Thermometer

Maverick Adrenaline Barbecue Company XR-50 Extended Range Digital Remote Wireless 4 Probe. Highly Rated.
Shop at Amazon
Red Thermapen One

Thermapen™ One from Thermoworks™

My personal favorite cooking tool. It will make your a better cook today. More expensive but will last for years.
Shop at Amazon
CDN Grill Surface Thermometer

CDN Grill Surface Thermometer

Cheap and reliable—I still one mine.
Shop at Amazon
Thermopop by Thermoworks

Thermopop™ by Thermoworks™

Super fast and accurate, you can have the quality of Thermoworks on a budget. Highly recommended for the casual cook.
Shop at Amazon

Smoking products

Gates BBQ Sauce

Gates BBQ Sauce

My favorite sauce for over 40 years.
Shop at Amazon
Western Wood Chips

Smoking Wood Chips

Shop at Amazon
Grill Pro Smoke Box

Cast Iron Smoker Box

Shop at Amazon

Troubleshooting Grill Time Issues

"I thought I had it right, but it didn't work." So what went wrong???

There are a number of things that are possible—most likely a combo of some or all.

1 - The most common seems to be that the thermometer was just wrong. I have had a number of people with this issue. Was it reading 250° but really was 180°? You will never get to 200° that way.

Check it against another thermometer if you can. If not available, most ovens are fairly accurate so pop it into an oven and check it against a variety of temps.

2 - Thermometer misplacement. You need to measure the temperature in the location of the meat. 250° over a lit burner may be under 200° in the indirect area of the grill. REMINDER: the grill hood thermometer is NEVER right for the surface temperature.

3 - Every time the hood is open, the temperature envelope around the food is disrupted. It may take up to an hour to recover to the temperature you want.

So when you think you cooked at 250° for 5 hours, you may have really only cooked at that temp for a few hours if you checked the meat several times.

So remote monitoring becomes very useful. Now I do both meat and surface temperature remote probes. Before that, I compensated with just knowledge of my grill. Knowing that setting my burners at X will give me a steady-state temperature of Y then keeping my hands off for hours.

4 - If your choice of temperature is at the very low end of the "low and slow range" leaving yourself no room for error. I use 250° with a target range of 250°-275°.

5 - Did "the stall" get you??? Don't know. It is more of an issue with larger briskets. And the wrapping needs to be very tight to avoid any air gaps for the evaporation to be prevented. For a detailed discussion of "the stall" and the "Texas Crunch," go to Grilled Brisket.

What to do now?

Obviously, fix the problem for the next time, but now you have an eight-pound brisket not cooked and people coming.

Never stop under the suggested internal temperature. It is not cooked and you won't be happy there.

Don't panic. You can always just toss it on a tray in a 275°-300° oven to finish if you need to. So simple.

Drip Pans

Things you cook indirectly usually are full of fat and can make a mess of your grill.

Usually, you will just place a thin disposable aluminum pan under the grates on the indirect side.

If there is no room between the grill grates and lava rocks or flavor bars for a thin aluminum pan, then you will put the pan on top of the grates in the indirect area with a rack or grate on top of that. NEVER PUT ANYTHING DIRECTLY ON THE BURNERS.

notch in pan under grill grate.
Look closely and you will find a notch in the pan to keep the weight of the rack and off the "flavor bars" below.

I needed to notch the pan a little to get it to fit. Do NOT allow the pan to support the grill rack and put pressure on the things below. This would be dangerous.

Mine is on top of burner guards called flavor bars. You may have lava rocks or something similar. Usually, you should add water to the drip pan for added moisture in the grill. NEVER PUT ANYTHING DIRECTLY ON THE BURNERS.

Again, if you can get the instructions for your grill from the manufacturer, follow those instructions. Let's be careful and safe here.

wood chips in smoker box.
Smokin'

🔥Smoke

You want to smoke, right? If you're lucky, your grill has built-in a smoke box like I do. If not, you have a couple of choices.

If you just want to try it once, you can make a pouch of heavy-duty aluminum foil with some holes and place it on a burner on high until it starts to smoke, and then turn it back down.

If you are going to do this more than once or twice, pick up a cast-iron smoker box (again, Home Depot, Lowe's, or Amazon) for about $15. I had the same one for 20 years.

Everybody has a favorite wood for smoking. I almost always use hickory and occasionally apple.

Traditionally, many suggest soaking wood chips. Most experts have now stopped this as an unnecessary step. Also, since the surface is moist, the moisture will evaporate before anything else happens and just delay everything.

Some will still argue that soaked wood chips will smoke longer and, if not soaked, may catch on fire. I have not had a problem with this unless I'm smoking at a high temperature.

Troubleshooting Smoke

For wood chips to smoke, they need to get over 570° really. So, get them close to a high-heat burner to get them started. Then, turn it down, and it will keep going from there.

Cast iron smoker boxes work by retaining the heat and controlling the airflow. You don't want flames since the smoke from flames is different (not in a good way). Foil pouches can also be used with some air holes. You can not use an open tray,

So when you know the settings you need for the stable temp you want. Get that first, then place the meat away from where your smokebox (or pouch) will go and turn that burner up until it smokes then turn it back down.

Bigger chunks of wood will produce much longer smoke so you don't need to keep adding to it.

The wood burns

This is not good. The smoke produced by burning wood is different and has an unpleasant taste. It is almost always produced by too much oxygen getting to the wood—so an adjustment is called for in your method.

Happy Smokin'

DrDan

↑Jump to Table of Contents

Editors Note: Originally published July 28, 2014, and updated with expanded options, refreshed photos, and a table of contents to help navigation.

Dogs on the deck.

Baked Blueberry Pancake Recipe

Baked Blueberry Pancakes on a gray plate

This baked blueberry pancake gives you warm homemade pancakes without standing at the stove flipping batch after batch.

Add fresh or frozen blueberries, bake it in the oven for about 25 minutes, and make anything from a small skillet batch for two to a 9×13 pan for the family.

Pouring syrup on a slice of baked blueberry pancake.
[feast_advanced_jump_to]

quote mark
Featured Comment by Laurie:
⭐⭐⭐⭐⭐
"Delicious! Couldn't decide what to have for supper, not in the mood to cook a big meal. I saw this recipe and knew it was just what I wanted. "

🧾 TL;DR – Recipe Summary

What: One baked blueberry pancake with fresh or frozen berries.

Why: No flipping, ready in about 25 minutes, and easy to scale.

How: Pour a simple homemade batter into a buttered pan, add blueberries, and bake in the oven at 375°F until golden.

🫐 Ingredients

Blueberries and pancake ingredients.
  • Blueberries — fresh or frozen
  • Wet ingredients — milk, butter, and egg
  • Dry ingredients — all-purpose flour, sugar, baking powder, and salt
  • For serving — butter, maple syrup, or powdered sugar

👨‍🍳 Quick Overview: How to Bake a Blueberry Pancake in the Oven

1. Preheat the oven and pan to 375°F. Carefully butter the hot pan.

Melting butter in a preheated skillet.

2. Mix the batter ingredients until just combined — don’t overmix.

Pouring wet ingredients into dry ingredients.

3. Pour the batter into the buttered pan, then sprinkle evenly with blueberries and sugar.

Sprinkling blueberries on top of pancake batter before baking in the oven.

4. Bake until lightly browned and a toothpick comes out clean, about 25 minutes.

Top with a sprinkle of powdered sugar.

✅ Pro Tip: If the pancake is baked through but pale on top, broil for 1–2 minutes while watching closely.

👇 Scroll down for the printable recipe card for complete instructions. Or keep reading for pro tips with pan and recipe size options.

🤔 Blueberry and Baking Tips

  • Fresh or frozen blueberries work. Do not thaw frozen berries. Make sure the berries are dry before adding them to the batter.
  • To reduce sinking: Lightly dust the dry blueberries with a little flour before adding them. Shake off any excess. This is optional, especially since the berries are scattered over the batter rather than mixed into it.
  • Other fruit: Substitute raspberries, sliced bananas, or another relatively dry fruit. Avoid very wet canned fruit unless it is drained and dried well.

📏 Pan Sizes and Scaling

Choose the serving amount in the recipe card, then match it to an appropriate pan:

  • 2 servings—½ recipe: 6-inch round pan or 8½ × 4½-inch loaf pan
  • 4 servings—full recipe: 10-inch skillet, 9-inch round pan, 8 × 8 pan, or 6 × 9 baking dish
  • 6 servings—1½ recipes: 12-inch skillet or 9 × 13 pan
  • 8 servings—double recipe: 9 × 13 pan or a similar-size casserole dish

The serving adjustment on the recipe card changes ingredient amounts only—not the instructions or baking time. Begin checking at about 25 minutes; thicker batches may take longer.

For two: We usually make the full recipe for two generous servings.

❓ FAQs

Can I use pancake mix instead of homemade batter?

You can, but be aware that pancake mixes vary in thickness and leavening, so the baked texture may be flat or rubbery. The simple homemade batter gives more reliable results.

How should I store leftover baked blueberry pancake?

Refrigerate leftovers in an airtight container for 2–3 days or freeze for up to one month. Thaw frozen pieces before reheating them in the microwave or oven.

🍽️ Easy Breakfast Recipes

Serve this baked blueberry pancake with oven-baked sausage patties or my baked bacon.

  • Carrot Cake Pancakes – baked like this one, no flipping
  • Oven Baked Banana Pancakes — banana bread meets pancakes

📖The Recipe Card

Baked Blueberry Pancakes on a gray plate
Print Recipe Add to Collection Go to Collections
5 from 13 votes

Baked Blueberry Pancake (Easy Oven Recipe)

Make a baked blueberry pancake with homemade batter and fresh or frozen berries. It bakes all at once in the oven and scales from a small skillet batch to a 9×13 pan.
Prep Time15 minutes mins
Cook Time25 minutes mins
Total Time40 minutes mins
Course: Breakfast
Cuisine: American
Keyword: baked blueberry pancakes, Blueberry pancakes in the oven, oven baked blueberry pancakes
Servings: 4
Calories: 312kcal
Author: Dan Mikesell AKA DrDan

Ingredients

Wet

  • ¾ cup milk
  • 1 egg
  • 2 tablespoons butter melted

Dry

  • 1 cup all-purpose flour
  • 3 tablespoons sugar
  • 2 teaspoons baking powder
  • ½ teaspoon Kosher salt

Other

  • 1 tablespoon butter for pan
  • ¾ cup blueberries fresh, rinsed and dried, or frozen without thawing
  • 2 teaspoons sugar

Serving

  • powdered sugar optional
  • butter
  • maple syrup
US Customary - Convert to Metric

Instructions

Preheat oven and prep the pan

  • Preheat the oven to 375°F with a rack one level above the center. If using a heavy pan, such as a cast-iron skillet, preheat it in the oven.
    blueberries and pancake ingredients.
  • Coat a 10-inch cast-iron skillet, 9-inch round pan, 8×8 baking pan, or 6×9 baking dish with 1 tablespoon of butter, covering the bottom and sides.
    melting butter in preheated skillet

Mix the batter

  • Whisk together the milk, egg, and melted butter in one bowl.
    whisking wet ingredients in a white bowl
  • Mix the flour, sugar, baking powder, and coarse salt in a separate bowl. Add the wet ingredients and stir just until combined. Do not overmix.
    pouring wet ingredients into dry ingredients

Assemble in the pan.

  • Pour the batter into the buttered pan. Sprinkle evenly with the blueberries, then with 2 teaspoons of sugar.
    adding blueberries to the top of the batter

Bake and serve

  • Bake for about 25 minutes, until lightly browned and a toothpick comes out clean. If baked through but pale on top, broil for 1–2 minutes while watching closely.
    checking for don with a toothpick
  • Cool for a few minutes. Serve warm with optional powdered sugar, butter, or maple syrup.
    top with a sprinkle of powdered sugar.

Notes

Pro Tip

  1. Nutrition is calculated using ¼ of the recipe as one serving. We usually serve ½ of the recipe per person.
  2. See the full post for pan sizes and scaling options.
  3. When scaling, round any fractional egg amount up to the next whole egg.
  4. Refrigerate leftovers in an airtight container for 2–3 days or freeze for up to one month. Thaw before reheating in the microwave or oven.

Nutrition

Calories: 312kcal | Carbohydrates: 51g | Protein: 7g | Fat: 10g | Saturated Fat: 6g | Polyunsaturated Fat: 1g | Monounsaturated Fat: 3g | Cholesterol: 77mg | Sodium: 541mg | Potassium: 152mg | Fiber: 2g | Sugar: 26g | Vitamin A: 400IU | Calcium: 220mg | Iron: 1.6mg

Originally published February 9, 2015. Updated with expanded pan-size options, streamlined instructions, and improved organization.

Molly dog in charge.
Lilly dog bored with life.

Old Fashioned Blueberry Cobbler

blueberry cobbler on a fork

This easy, old-fashioned blueberry cobbler is made from scratch and adapted from the 1972 Betty Crocker Cookbook. It's made with fresh or frozen blueberries and a buttery golden biscuit topping—no mixes needed.

Blueberry Cobbler on a fork.
[feast_advanced_jump_to]

quote mark
Featured Comment by Ginni:
⭐⭐⭐⭐⭐
"Excellent recipe. I used cream in place of milk. A perfect 5! Thank you 😊"

❤️ Why You’ll Love This Recipe

  • Easy to make – Stir, top, bake. That’s it.
  • Old fashioned and from scratch – Inspired by a 1972 Betty Crocker classic.
  • Fresh or frozen blueberries – Whatever you’ve got on hand.
  • Half batch friendly – The perfect blueberry cobbler for two, with just enough leftovers for tomorrow.
  • Cozy and crowd-pleasing – Even better with a scoop of vanilla.

🫐 Ingredients

blueberries and cobbler ingredients.

Filling

  • Blueberries – Fresh or frozen. Rinse and pick over for stems.
  • Sugar – Adjust depending on the sweetness of your berries.
  • Lemon juice – Adds brightness.
  • Cornstarch – Thickens the filling as it cooks.

Sweet Biscuit Topping

  • All-purpose flour – Base for the topping.
  • Sugar – Light sweetness for the top.
  • Baking powder – Aluminum-free preferred.
  • Salt – Balances sweetness.
  • Butter – Cold, for biscuit texture.
  • Milk – Just enough to bring it together.

👨‍🍳 Quick Overview: How to Make Old Fashioned Blueberry Cobbler

It’s the kind of easy, from-scratch dessert Grandma would’ve pulled from the oven on a summer afternoon.

1. Prepare the filling

Preheat oven to 400°F.

Combine sugar, cornstarch, lemon juice, and blueberries.

pouring blueberrins into sauce pan with sugar.

Stir constantly over medium-high heat until the mixture thickens and starts to bubble, then cook one more minute.

cooked berries with thick sauce in pan.

✅ Pro Tip: If your berries are tart, add up to ¼ cup more sugar to balance.

Pour the filling into a 9x13 baking dish or a 2½ quart casserole.

pouring filling into a baking dish.

2. Make the sweet biscuit topping

Mix all-purpose flour, sugar, baking powder, and salt. Then cut in cold butter until crumbly. Add the milk and stir just until combined—don’t overmix.

cutting the butter into the topping.

3. Add topping and bake

Drop 6–8 large spoonfuls of dough over the berry filling.

topping on the filling in baking dish.

Bake for about 25 minutes, until the topping is golden brown and the filling is bubbling.
Let it rest for a few minutes before serving.

Blueberry cobbler with golden biscuit topping.

👇 Scroll down for the complete step-by-step recipe card and printable instructions.

✔️ Tips for the Best Blueberry Cobbler

  • Fresh or frozen both work — rinse and pick over stems. If frozen, don’t thaw first.
  • Taste your berries — if they’re tart or bland, add up to ¼ cup more sugar.
  • Choose the right pan — a 9×13 is standard, but any dish that gives the filling room to bubble works.
  • Guard against drips — if using a shallow dish, put a sheet pan on the rack below.
  • Topping tweaks — butter replaces the original shortening, plus a touch more sugar for flavor. Expect a looser dough that spreads as it bakes.
  • Best served warm with ice cream — classic for a reason.

👥 How to Make Blueberry Cobbler for Two

Want a smaller batch? A half recipe makes the perfect blueberry cobbler for two with leftovers.

  • Half recipe (serves 4 with leftovers): Bake in a 6×9 casserole or 8-inch round dish. Bake time will be a little shorter; remove when the topping is golden and the filling is bubbling.
  • Quarter recipe (serves 2): Use a 5×5 or 6-inch round dish, or ramekins. Two large ramekins will work; if yours are smaller, plan on filling three.

✅ Pro Tip: Quarter-batch ramekins bake faster — start checking around 18–20 minutes.

🫐 More Blueberry Recipes

If you’ve got more berries to use, try one of these simple favorites:

  • Blueberry Crumble Pie
  • Baked Blueberry Pancakes
  • Blueberry Cream Cheese Bars
  • Whole Wheat Blueberry Muffins
  • Blueberry Cream Cheese Coffee Cake

❄️ Storage & Reheating

  • Refrigerate leftovers for up to 5 days—best within 3.
  • Freeze after baking and cooling. Wrap tightly and freeze for up to 1 month. (The topping will soften some.)
  • Reheat in the microwave or cover and warm in a 350° oven for 15–20 minutes.

❓ FAQs

What is the difference between cobblers, crumbles, and crisps?

Cobblers have a biscuit or cake-like topping. Crumbles and crisps are often used interchangeably, but crisps typically include oats, while crumbles do not.

Can I use frozen blueberries?

Yes. You don’t need to thaw them first — just rinse and pick out any stems. Add an extra spoonful of cornstarch if your berries are especially juicy.

Is this the same as Lazy Man’s cobbler?

No. “Lazy Man” cobblers usually use cake mix. This is a true from-scratch blueberry cobbler with a biscuit topping.

Can I make blueberry cobbler ahead of time?

You can mix the blueberry filling a few hours in advance, but make the biscuit topping right before baking. If it sits, the baking powder will lose its punch and the topping won’t rise properly.

📚 From the Betty Crocker Cookbook

This recipe is adapted from the 1972 Betty Crocker Cookbook, the same one behind my Old Fashioned Betty Crocker Banana Bread. I’ve kept it true to the original with just a few updates to the topping and instructions to make it small-batch friendly.

image of a falling apart cookbook 1972 Betty Crocker.
Well-loved and well-used—just like the recipes inside.

📖The Recipe Card

blueberry cobbler on a fork
Print Recipe Add to Collection Go to Collections

Old Fashioned Blueberry Cobbler (From Scratch)

An old fashioned blueberry cobbler made from scratch with fresh or frozen blueberries and a golden biscuit top. Inspired by the 1972 Betty Crocker Cookbook.
Prep Time20 minutes mins
Cook Time25 minutes mins
Total Time45 minutes mins
Course: Dessert
Cuisine: American
Keyword: Blueberry Cobbler, homemade blueberry cobbler, old fashioned blueberry cobbler
Servings: 8 servings
Calories: 228kcal
Author: Dan Mikesell AKA DrDan

Ingredients

Filling

  • 4 cups blueberries frozen or fresh. Rinsed and picked over.
  • ½ cup sugar (adjust to taste)
  • 1 tablespoon cornstarch
  • 1 teaspoon lemon juice

Topping

  • 1 cup all purpose flour
  • 2 tablespoons sugar
  • 1½ teaspoons baking powder aluminum-free
  • ½ teaspoon salt
  • 3 tablespoons butter
  • ½ cup milk
US Customary - Convert to Metric

Instructions

Prepare the filling

  • Preheat oven to 400°.
    blueberries and cobbler ingredients.
  • In a medium saucepan, combine ½ cup of sugar, 1 tablespoon of cornstarch, 1 teaspoon of lemon juice, and 4 cups of blueberries. Other berries can be used as well. Taste the berries—they vary in sweetness. You may need up to ¼ cup more sugar.
    pouring blueberrins into sauce pan with sugar.
  • Stir constantly over medium-high heat until the mixture boils and thickens, then cook one additional minute.
    cooked berries with thick sauce in pan.
  • Pour into a 9x13 baking dish or a 2½ quart casserole.
    pouring filling into a baking dish.

Make the sweet biscuit topping*

  • Make the topping by mixing 1 cup AP flour, 2 tablespoons sugar, 1½ teaspoons baking powder, and ½ teaspoon salt. Cut in 3 tablespoons of butter with a large fork or a pastry cutter until crumbly. Add ½ cup of milk and stir until combined—don’t overmix.
    cutting the butter into the topping.

Add topping and bake

  • Drop 6–8 large spoonfuls of dough over the hot berry filling.
    topping on the filling in baking dish.
  • Bake for about 25 minutes, or until the topping is golden brown. Let sit a few minutes before serving.
    Blueberry cobbler with golden biscuit topping.

Notes

Pro Tips

  • Easily halved—see the post for pan sizes and adjusted bake time.
  • Taste your berries. Add up to ¼ cup more sugar if they’re tart.
  • Rinse and pick over the berries to remove stems.
  • Works with fresh or frozen blueberries.
  • Use aluminum-free baking powder to avoid a metallic aftertaste.
  • The filling is already cooked—bake until the **topping** is golden brown.
  • Best eaten within 3 days but keeps up to 5 in the refrigerator.
  • Serve warm with vanilla ice cream—classic for a reason.

Nutrition

Calories: 228kcal | Carbohydrates: 44g | Protein: 3g | Fat: 5g | Saturated Fat: 3g | Polyunsaturated Fat: 0.2g | Monounsaturated Fat: 1g | Cholesterol: 12mg | Sodium: 227mg | Potassium: 42mg | Fiber: 3g | Sugar: 27g | Vitamin A: 150IU | Calcium: 80mg | Iron: 0.9mg

Editor's Note: Originally Published March 22, 2014. Updated with expanded options, refreshed photos, and a table of contents to help navigation.
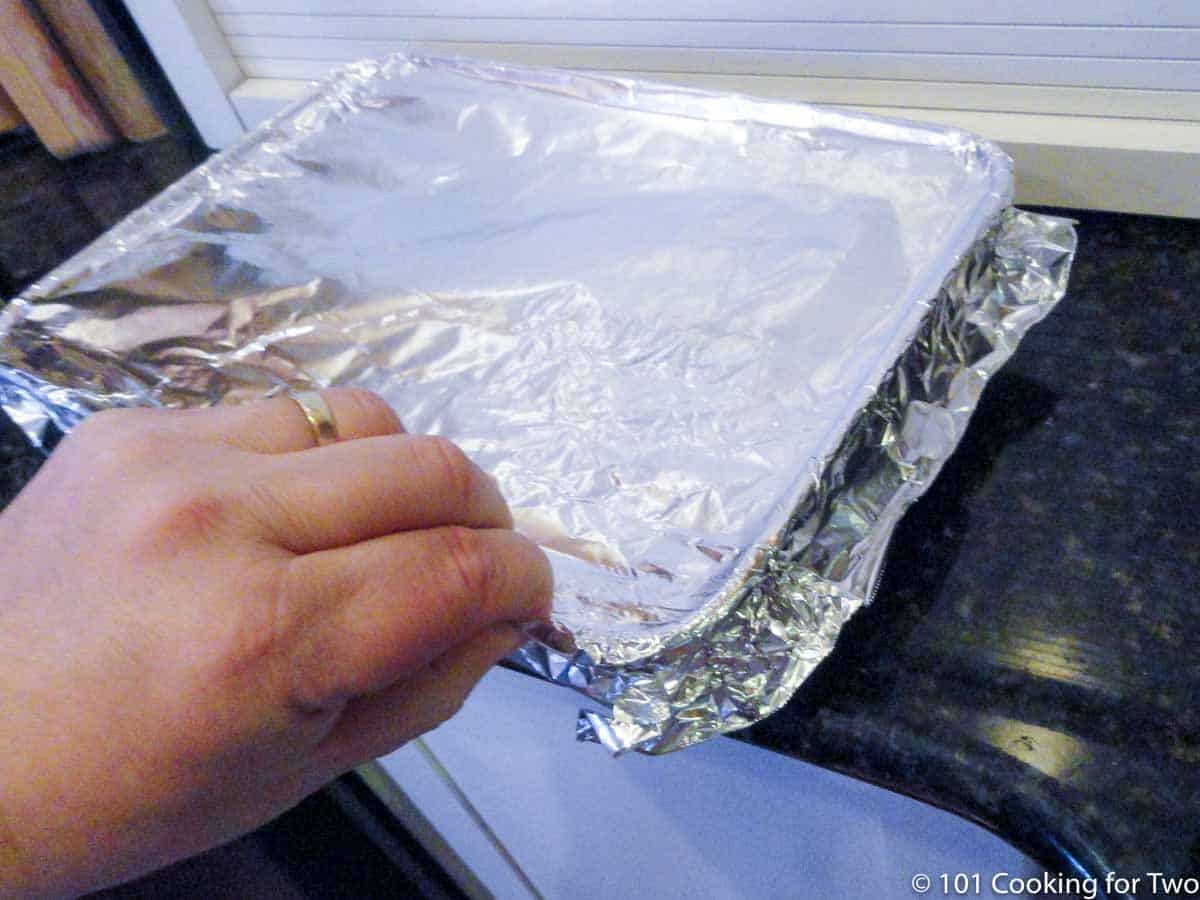
Lilly loss in the kitchen.

Lemon Chicken Marinade for Grilling – Juicy in 30 Minutes

Grilled lemon-marinated chicken breasts on a plate.

Juicy, flavorful grilled chicken is easy with this lemon chicken marinade recipe. Using just a few pantry staples, it packs lemon and garlic flavor into every bite—and it works in as little as 30 minutes. Perfect for beginner grillers who want a foolproof dinner with minimal fuss.

Grilled lemon-marinated chicken breasts on a plate.
[feast_advanced_jump_to]

quote mark
Featured Comment by Amanda:
⭐⭐⭐⭐⭐
"I made this tonight per instructions (I didn't get a chance to try the brining part) and I have to give the author some SERIOUS compliments! This is hands down the best chicken marinade I've ever tasted or used..."

👍Why This Lemon Chicken Marinade Works

  • Great lemon garlic flavor in just 30 minutes
  • Works for both grilling or baking
  • The acid helps tenderize the chicken without overdoing it
  • Simple ingredients that deliver big flavor
  • Naturally low-calorie, low-fat, and low-carb
Lemon garlic chicken marinade ingredients—labeled.

🍋 What you will need

Lemon garlic chicken marinade ingredients—labeled.
  • Olive oil—the base that carries flavor
  • Soy sauce—for depth and rich flavor
  • Lemon juice—for flavor and to tenderize
  • Garlic (minced or crushed)—a key flavor
  • Brown sugar—for sweetness and browning
  • Salt—only if not brining
  • Optional—Dijon mustard, red pepper flakes, oregano, thyme, Italian seasoning, hot sauce, etc.

👍Pro Tip—Be sure to customize it to your taste.

👨‍🍳Quick Overview: Lemon Chicken Marinade

1. Mix the marinade

Combining soy sauce, brown sugar, olive oil, crushed garlic, and lemon juice. Mix well. Add salt if you didn't brine.

Lemon garlic chicken marinade ingredients—labeled.

2. Preparing to chicken

Trim chicken breasts of any excess fat and thin to ¾ inch thick with a meat mallet or the bottom of a heavy pan—for safety, protect yourself with plastic wrap or a large ziplock bag.

Flattening thick chicken breast in a plastic bag with a meat mallet.

3. Marinate chicken

Add chicken to the marinade, remove extra air, and seal. Refrigerate for 30 minutes to 4 hours, but even as little as 20 minutes can add a lot of flavor. Remove breasts from the marinade; do not rinse off the marinade.

The meat is marinating in a zip lock.

4. Cooking chicken

Grill or bake acording to specific instructions below.

Grilled chicken breasts with lemon marinade on a gas grill.

👇For complete step-by-step instructions, scroll down to the printable recipe card or keep reading for tips, flavor options, and serving ideas.

🤔Pro Tip—Marinating Time: This marinade works in just 30 minutes, but even 20 minutes will give good flavor.

If you have extra time, let it soak for up to 4 hours to intensify the flavor.

🔥How to grill marinated chicken

  1. Clean and oil the grill grates. Preheat the grill to 450° surface temperature.
  2. Grill and flip every 5 minutes until the internal temperature reaches 165°—about 20 minutes. Rest for 5 minutes before serving.
  3. If you have questions about controlling your grill temperature, please check my Guide to Controlling Grill Temperature.
  4. For a more detailed discussion, please see How to Grill Chicken Breast on a Gas Grill.

How to Grill Chicken Breasts on a Gas Grill

Are you tired of dry, rubbery grilled chicken breasts? Learn to grill juicy and flavorful chicken breasts with this never-fail recipe, including pro tips on preparation, grilling temperature, timing, and seasoning.

grilled chicken breasts on a plate.

♨️How to oven-bake lemon chicken breasts

  1. Preheat the oven to 400° convection or 425° conventional.
  2. Place them in a shallow baking dish and bake until they reach an internal temperature of 165°F, about 25 minutes. Rest for 5 minutes before serving.
  3. More details at How to Bake Chicken Breasts in a Convection Oven.

How to Bake Chicken Breasts

The best way to bake chicken breasts. Your dinner will be ready in approximately 30 minutes and will be consistently healthy, moist, and tender. Quick and easy, with just a few secrets that any home cook can master.

baked chicken breast on a white plate

👨‍🍳Pro tips to cook lemon chicken right

Cooking time is always dependent on the exact temperature and on the thickness and size of the chicken.

Leaving the chicken in the marinade for more than 4 hours can break down the texture and make the chicken mushy.

Replace the brown sugar with honey for a special flavor.

Fresh lemon juice does bring more flavor, and you can then add some zest. A medium lemon typically yields about 2 to 3 tablespoons of juice.

Use skinless, boneless chicken breasts of approximately the same size and thickness. If thicker than ¾ inches, cover with plastic wrap and use a meat mallet or the bottom of a heavy pan to even the thickness.

Chicken thighs may be used, but they should be skinless; however, both bone-in and boneless options will work. While safe at 165°F, 180°F is a better final internal temperature for tenderness.

While you can marinate skin-on chicken, very little of the marinade will penetrate the skin to flavor the meat. I suggest marinades for skinless chicken.

🐓More easy chicken recipes

Check out some other flavorful chicken recipes, such as Garlic Lemon Butter Marinaded Grilled Chicken Breast, Grilled Buttermilk Chicken, Honey Glazed Grilled Chicken Breasts, or Italian Grilled Chicken Breasts.

🍽️Serving and leftovers

Serve these flavorful lemon garlic chicken breasts as the main course or in a sandwich or wrap. Sliced, it is also wonderful on a salad or in a rice bowl.

For some matching side dish recipes, try Stovetop French Fries, which can be made with either fresh or frozen fries, Simple Spinach Salad with bacon, or Grilled Mixed Vegetables.

Leftovers

Store leftovers refrigerated for 3-4 days or frozen for 3 months. Serve reheated, covered, in the oven, or sliced for use on salads or in wraps.

❓FAQs

How to brine chicken breasts.

Use two cups of water and one tablespoon of table salt for one to two hours. If you brine, rinse after brining. And skip the salt in the marinade.

How do marinades work?

Marinades combine oil, acid, herbs, and spices to tenderize and boost flavors. In my house, you also must add garlic.

Why should marinades not be reused?

For safety, once used, marinades should be considered contaminated and discarded or boiled before reused. If you want to brush the marinade on the meat during cooking, reserve a small amount ahead of time, or make a bit extra if necessary.

Can I use the marinade on other proteins?

Try it with shrimp, pork chops, or tenderloin.

📖The Recipe Card

Grilled lemon-marinated chicken breasts on a plate.
Print Recipe Add to Collection Go to Collections
5 from 4 votes

Easy Lemon Chicken Marinade for Grilling

This juicy, flavorful lemon chicken marinade comes together with a handful of pantry staples and works in just 30 minutes. Perfect for juicy grilled chicken breasts, even if you're short on time. Simple enough for beginners, delicious enough for everyone.
Prep Time10 minutes mins
Cook Time20 minutes mins
Total Time30 minutes mins
Course: Main Course
Cuisine: American
Keyword: lemon chicken marinade, lemon garlic chicken marinade, Marinated lemon chicken
Servings: 2 servings
Calories: 342.3kcal
Author: Dan Mikesell AKA DrDan

Ingredients

  • 2 skinless boneless chicken breasts well trimmed

Marinade

  • 4 tablespoons soy sauce low sodium preferred
  • 2 tablespoons brown sugar
  • 2 tablespoons olive oil
  • 2 tablespoons lemon juice
  • 2 cloves garlic crushed or minced
  • ½ teaspoon salt skip if you brine
US Customary - Convert to Metric

Instructions

  • Mix the marinade in a 1-gallon ziplock bag or a bowl, combining soy sauce, brown sugar, olive oil, crushed garlic, and lemon juice. Mix well. Add salt if you didn't brine.
    Lemon garlic chicken marinade ingredients—labeled.

Preparing to chicken to brine

  • Trim chicken breasts of any excess fat and thin to ¾ inch thick with a meat mallet or the bottom of a heavy pan—for safety, protect yourself with plastic wrap or a large ziplock bag.
    Flattening thick chicken breast in a plastic bag with a meat mallet.
  • Add chicken to the marinade, remove extra air, and seal. Refrigerate for 30 minutes to 4 hours, but even as little as 20 minutes can add a lot of flavor. Remove breasts from the marinade; do not rinse off the marinade.
    The meat is marinating in a zip lock.

Cooking—brief grilling and baking instructions

  • Grill at 450°F surface temperature with the lid closed. Flip every 5 minutes until the internal temperature reaches 165°—about 20 minutes most of the time, but check the temperature a few times early.
    Grilled chicken breasts with lemon marinade on a gas grill.
  • OR bake in a 425°F preheated oven. Place the chicken in a shallow baking dish and bake until it reaches an internal temperature of 165°F—about 20 to 25 minutes.
  • Always rest for 5 minutes off the heat before serving.

Notes

Pro Tips

  1. This is a marinade recipe, not a chicken recipe. The cooking instructions are brief. Refer to the recipe post for more comprehensive reference articles if you are unsure.
  2. Try to use chicken breasts of about the same size and thickness. Even them out some with a meat mallet if needed. Maximum thickness of ¾ of an inch.
  3. Both grill time and oven time can vary depending on the thickness of the chicken and the exact cooking temperature. So, check the internal temperature a bit earlier than you think.
  4. An internal temperature of 165 ° in the thickest part of the chicken is the minimum safe temperature.
  5. Once used, the marinade should be discarded or boiled before reuse. If you want to brush some on during cooking, reserve a small amount or make more as needed.
  6. Nutrition is calculated without brine, assuming 10% of the marinade is absorbed, and a 10-oz skinless, boneless chicken breast is used.

Nutrition

Calories: 342.3kcal | Carbohydrates: 1.5g | Protein: 60.5g | Fat: 8.8g | Saturated Fat: 1.8g | Polyunsaturated Fat: 1.3g | Monounsaturated Fat: 3.2g | Trans Fat: 0.04g | Cholesterol: 181.4mg | Sodium: 513.9mg | Potassium: 1063.3mg | Fiber: 0.03g | Sugar: 1.2g | Vitamin A: 85.1IU | Vitamin C: 4mg | Calcium: 23.4mg | Iron: 1.1mg
Jake with his much loved ball
Jake with his much loved ball.

Originally published April 17, 2010. Updated with expanded options, refreshed photos, and a table of contents to help navigation.
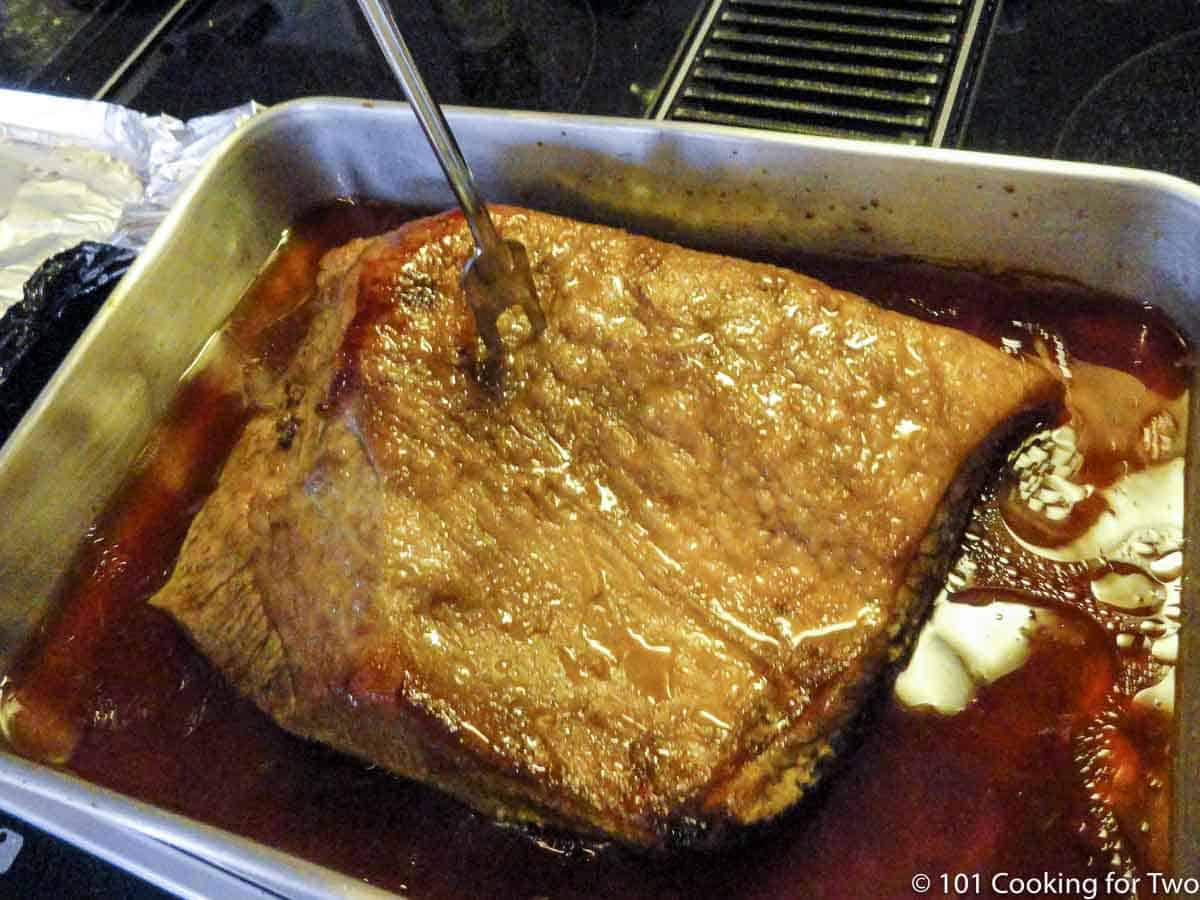
Blackened Chicken Breasts

two chicken breast on a white plate

Easy and delicious, this blackened chicken is wonderful on a salad, in a sandwich, or just straight up for dinner. Done in under 30 minutes on the grill or in the oven.

two chicken breast on a white plate
[feast_advanced_jump_to]
Blue ribbon divider used for visual effect

You can never have enough great chicken recipes. Kick it up some with these tasty blackened chicken breasts cooked on your grill or in the oven. Great taste is not far away.

And by making your seasoning, you can adjust the heat to your taste. Also, we can do a quick brine for moisture.

The original recipe was an oven-based recipe from allrecipes.com. I used the seasoning with some changes and converted it to grilling with my standard chicken breast recipe but I have included oven instructions, also.

How to Cook Blackened Chicken Breasts

  1. Clean and oil the grill grates. Preheat the grill to a surface temperature of about 450°
  2. Trim skinless boneless chicken breasts and brine if you wish.
  3. Mix a blackened seasoning of paprika, cayenne pepper, black pepper, cumin, thyme, and other spices. If you did brine the chicken, do not add salt.
  4. Apply a light coat of blackened seasoning to all sides of the chicken breasts.
  5. Grill over direct heat with the grill lid closed for 5 minutes, then flip every 5 minutes until internal temp is 165°. About 25-30 minutes. Alternate oven instructions are below.
  6. Lightly tent for 5 minutes before serving.

🐓Ingredients

Chicken Breasts

It is easier to cook chicken that is about the same size and thickness. So try to even it out when you pick your chicken.

If you get these really plump chicken breasts, flatten them a little with a meat mallet or the bottom of a pan. Aim for about ¾ inches at the thickest point.

using a mallet to thin chicken breasts

The Optional Brine: Like all grilled chicken breast, this can dry some if you're not careful. A simple brine of 2 cups water, 2 tablespoons table salt, and 2 tablespoons sugar for 20 to 60 minutes help keep them moist.

The recommended brine is relatively heavy in salt. According to Cooks Illustrated, this brine concentration is recommended for chicken for 30 minutes to 2 hours. I find the chicken gets saltier in over 1 hour, so I suggest 1-hour max with this mixture. Actually, 20 minutes will do a fairly good job of brining the chicken breasts.

While I no longer recommend rinsing chicken usually, you should always rinse carefully after brining it to eliminate the surface salt.

You can grill skinless boneless chicken breasts and keep them moist without the brine, but it requires attention—or use the oven option.

Related Recipes

For other blackened recipes, try Blackened Tilapia in the Oven or Grilled Blackened Tilapia.

Check out some other flavorful chicken breast recipes, like Italian Grilled Chicken Breasts, Grilled Buttermilk Chicken, Grilled Chicken Kabobs with Buttermilk Ranch Marinade, BBQ Chicken Breast, and Chipotle Chicken Salad.

👨‍🍳The Seasoning

Blackened and Cajun seasoning are similar, and many people use the terms interchangeably. It is generally accepted that Cajun is a bit spicier but since this is adjustable, use the term you like. Creole spice has more herbs.

The original seasoning needed a touch of garlic, and I added that. And a touch more salt.

The heat here is about 4/10, so adjust the cayenne to your taste.

I prefer white pepper but use black pepper if you want or don't have white pepper. The white pepper adds a very nice different taste.

If you brine the chicken, you must leave the salt out of the seasoning.

♨️Grill setup

Grill temperature is critical in keeping the chicken moist.  For any chicken, you can not "sock the heat to it." The outside will be burnt before the center is safe to eat.

I like to cook all chicken with a grill surface temperature of about 450°, give a take a little. This is medium on my current grill, which is a "hot" grill. It is medium-high on most gas grills.

Please see my guide to controlling your Grill Temperature and get it right. If you don't get this right, you will not be successful with this recipe.

♨️Oven instructions

Sometimes you just dinner to be super easy, then just pop the chicken in an oven.

About 25 minutes in a 375° convection or 400° conventional works well; give or take 5 minutes, depending on the thickness of the chicken and the oven.

I recommend a sheet pan covered with foil and preferably with a baking rack to keep the chicken out of the drainage. Don't forget a good spray of PAM. Cook to a final internal temperature of 165° in the thickest parts.

🥣Suggested Sauce

I liked the taste of the sauce from Alabama BBQ Chicken with White BBQ Sauce with the blackened chicken. A great mayonnaise-based sauce from Big Bob Gibson's of Alabama.

Serve with a cold side dish like Caprese Pasta Salad, Classic Macaroni Salad, or Broccoli Salad with Bacon and Raisins.

Blue ribbon divider used for visual effect
↑Jump to Table of Contents

This recipe is listed in these categories. See them for more similar recipes.

Chicken Breast Recipes, Chicken Recipes, Grill Recipes

Have you tried this recipe, or have a question? Join the community discussion in the comments.

Step-by-Step Photo Instructions

clean and oil grill crates

Clean and oil the grill. Preheat grill to a surface temperature of about 450°, which is medium-high on most grills. You must get the surface temperature correct.

trimmed chicken breasts on a red board

Trim breasts well. You can brine if you wish but then skip the salt in the rub.

spices for blacken seasoning

Mix rub: ½ teaspoon paprika, ¼ teaspoon cayenne pepper, ¼ teaspoon cumin, ¼ teaspoon thyme, ¼ teaspoon garlic powder, ⅛ teaspoon onion powder, ¼ teaspoon kosher salt, and ⅛ teaspoon white pepper. You may adjust the cayenne to taste and use black pepper if you want.

applying the seasoning to the chicken on a white board

Rub the dry mix on breast front and back. You only have 2 teaspoons so a light coat.

placing seasoned chicken breasts on the grill

Grill over direct heat with the grill lid closed for 5 minutes then flip every 5 minutes until internal temp is 165°. About 25-30 minutes.

blackened chicken breast on a white plate

Lightly tent for 5 minutes before serving.

↑Jump to Table of Contents

📖The Recipe Card

Grilled Blackened Chicken Breasts from 101 Cooking for Two
Print Recipe Add to Collection Go to Collections
4.53 from 21 votes

Blackened Chicken Breasts

Easy and delicious, this blackened chicken is wonderful on a salad, in a sandwich, or just straight up for dinner. Done in under 30 minutes on the grill or in the oven.
Prep Time10 minutes mins
Cook Time25 minutes mins
Total Time35 minutes mins
Course: Main Course
Cuisine: American
Keyword: Blackened Chicken, Blackened Chicken Breasts, Grilled Blackened Chicken
Servings: 2
Calories: 134kcal
Author: Dan Mikesell AKA DrDan

Ingredients

  • 2 skinless boneless chicken breasts

Blackening Seasoning-only makes 2 teaspoons

  • ½ teaspoon paprika
  • ¼ teaspoon cayenne pepper adjust to taste
  • ¼ teaspoon cumin
  • ¼ teaspoon thyme
  • ¼ teaspoon garlic powder
  • ⅛ teaspoon onion powder
  • ⅛ teaspoon white pepper use black pepper if you want
  • ¼ teaspoon kosher salt
US Customary - Convert to Metric

Instructions

  • Clean and oil the grill. Preheat grill to a surface temperature of about 450° which is medium-high on most grills. You must get the surface temperature correct.
    clean and oil grill crates
  • Trim breasts well. You can brine if you wish but then skip the salt in the rub. A simple brine of 2 cups water, 2 tablespoons table salt, and 2 tablespoons sugar for 20 to 60 minutes help keep them moist.
    trimmed chicken breasts on a red board
  • Mix rub ½ teaspoon paprika, ¼ teaspoon cayenne pepper, ¼ teaspoon cumin, ¼ teaspoon thyme, ¼ teaspoon garlic powder, ⅛ teaspoon onion powder, ¼ teaspoon kosher salt, and ⅛ teaspoon white pepper. You may adjust the cayenne to taste and use black pepper if you want.
    spices for blacken seasoning
  • Rub the dry mix on breast front and back. You only have 2 teaspoons so a light coat.
    applying the seasoning to the chicken on a white board
  • Grill over direct heat with the grill lid closed for 5 minutes then flip every 5 minutes until internal temp is 165°. About 25-30 minutes. Oven instructions in the recipe tips below.
    placing seasoned chicken breasts on the grill
  • Lightly tent for 5 minutes before serving.
    blackened chicken breast on a white plate

Notes

Pro Tips:

  1. Scale to your needs. This is cooking for two, so I have two chicken breasts.
  2. Like all grilled chicken breast, this can dry some if you're not careful. A simple brine of 2 cups water, 2 tablespoons table salt, and 2 tablespoons sugar for 20 to 60 minutes help keep them moist.
  3. If you brine, rinse the salt off carefully and add no salt in the seasoning.
  4. The seasoning only makes about 2 teaspoons, so only a light coating.
  5. Try to use chicken breasts that are about the same size and thickness. If you get those very thick breasts, use a meat mallet or bottom of a pan to flatten them out a little to about ¾ inches.
  6. The seasoning is about 4/10 hot. Adjust the cayenne to your taste.
  7. You can make extra seasoning and store airtight in a dark dry place for at least several months before it starts to loose flavor.
  8. Grill surface temperature is very important for cooking any chicken. Please use a grill surface thermometer to get a temperature of 450. See A Beginners Guide to Grill Temperature on a Gas Grill.
  9. The safe final temperature is 165°. Less is unsafe and more will start drying.
  10. Be sure to let the chicken rest for a few minutes before serving.

Oven Instructions

  1. About 25 minutes in a 375° convection or 400° conventional works well; give or take 5 minutes depending on the thickness of the chicken and the oven.
  2. I recommend a sheet pan covered with foil and preferably with a baking rack to keep the chicken out of the drainage. Don't forget a good spray of PAM. Cook to a final internal temperature of 165° in the thickest parts.

Nutrition

Serving: 1breast | Calories: 134kcal | Carbohydrates: 1g | Protein: 24g | Fat: 3g | Saturated Fat: 1g | Cholesterol: 72mg | Sodium: 423mg | Potassium: 418mg | Fiber: 1g | Sugar: 1g | Vitamin A: 385IU | Vitamin C: 1.3mg | Calcium: 6mg | Iron: 0.7mg

Originally published on August 9, 2010. Updated with expanded options, refreshed photos, and a table of contents to help navigation.
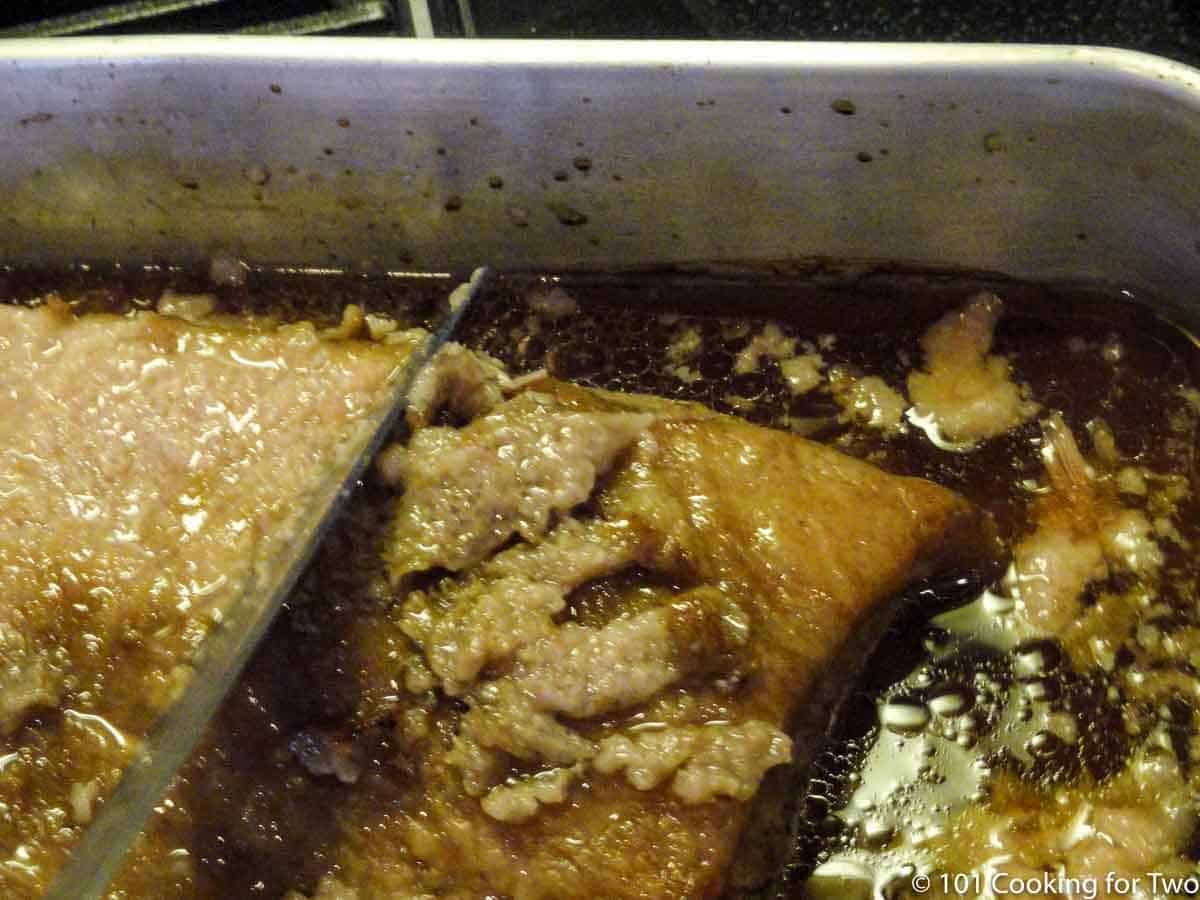
dogs at playing in the yard
  • « Previous Page
  • 1
  • …
  • 5
  • 6
  • 7
  • 8
  • 9
  • 10
  • Next Page »

DrDan imageHi, I'm DrDan.
Welcome to 101 Cooking for Two, the home of great everyday recipes with easy step-by-step photo instructions.
About DrDan

Top THANKSGIVING RECIPES

  • turkey slice with gravy on orange plate.
    How to Roast a Turkey Breast in the Oven
  • Cut ham with pineapple honey glaze on a white plate
    Small Ham in a Crock Pot (2–4 lb Boneless Ham)
  • slice of Ribeye Roast on a white plate
    Small Boneless Prime Rib (Ribeye) Roast
  • Sausage dressing on a white plate.
    Old Fashioned Sausage Dressing Recipe
  • A spoonful of green bean casserole.
    Green Bean Casserole Without Mushroom Soup
  • Sweet potato casserole on a white plate
    Old Fashioned Sweet Potato Casserole
SITES THAT I WORK WITH OR HAVE HAD RECIPES FEATURED OR REFERENCED.

Footer

BACK TO TOP
OF PAGE
Join the club
SUBSCRIBE TODAY

About

  • About DrDan and the Blog
  • Contact Me
  • Comment Policy
  • Guest Posts, Partnering, and Business Questions

Content

  • Food FAQ
  • Kitchen Reference Sheets
  • Recipes Featured in the Videos
  • Guide To Cooking for Two
  • Old Saved Recipes Collections

dogs by the pond

↑ back to top ↑a

Privacy Policy | Terms of Service | Contact

COPYRIGHT © 2010-2026 101 COOKING FOR TWO. ALL RIGHTS RESERVED | BASED ON FOODIE PRO THEME